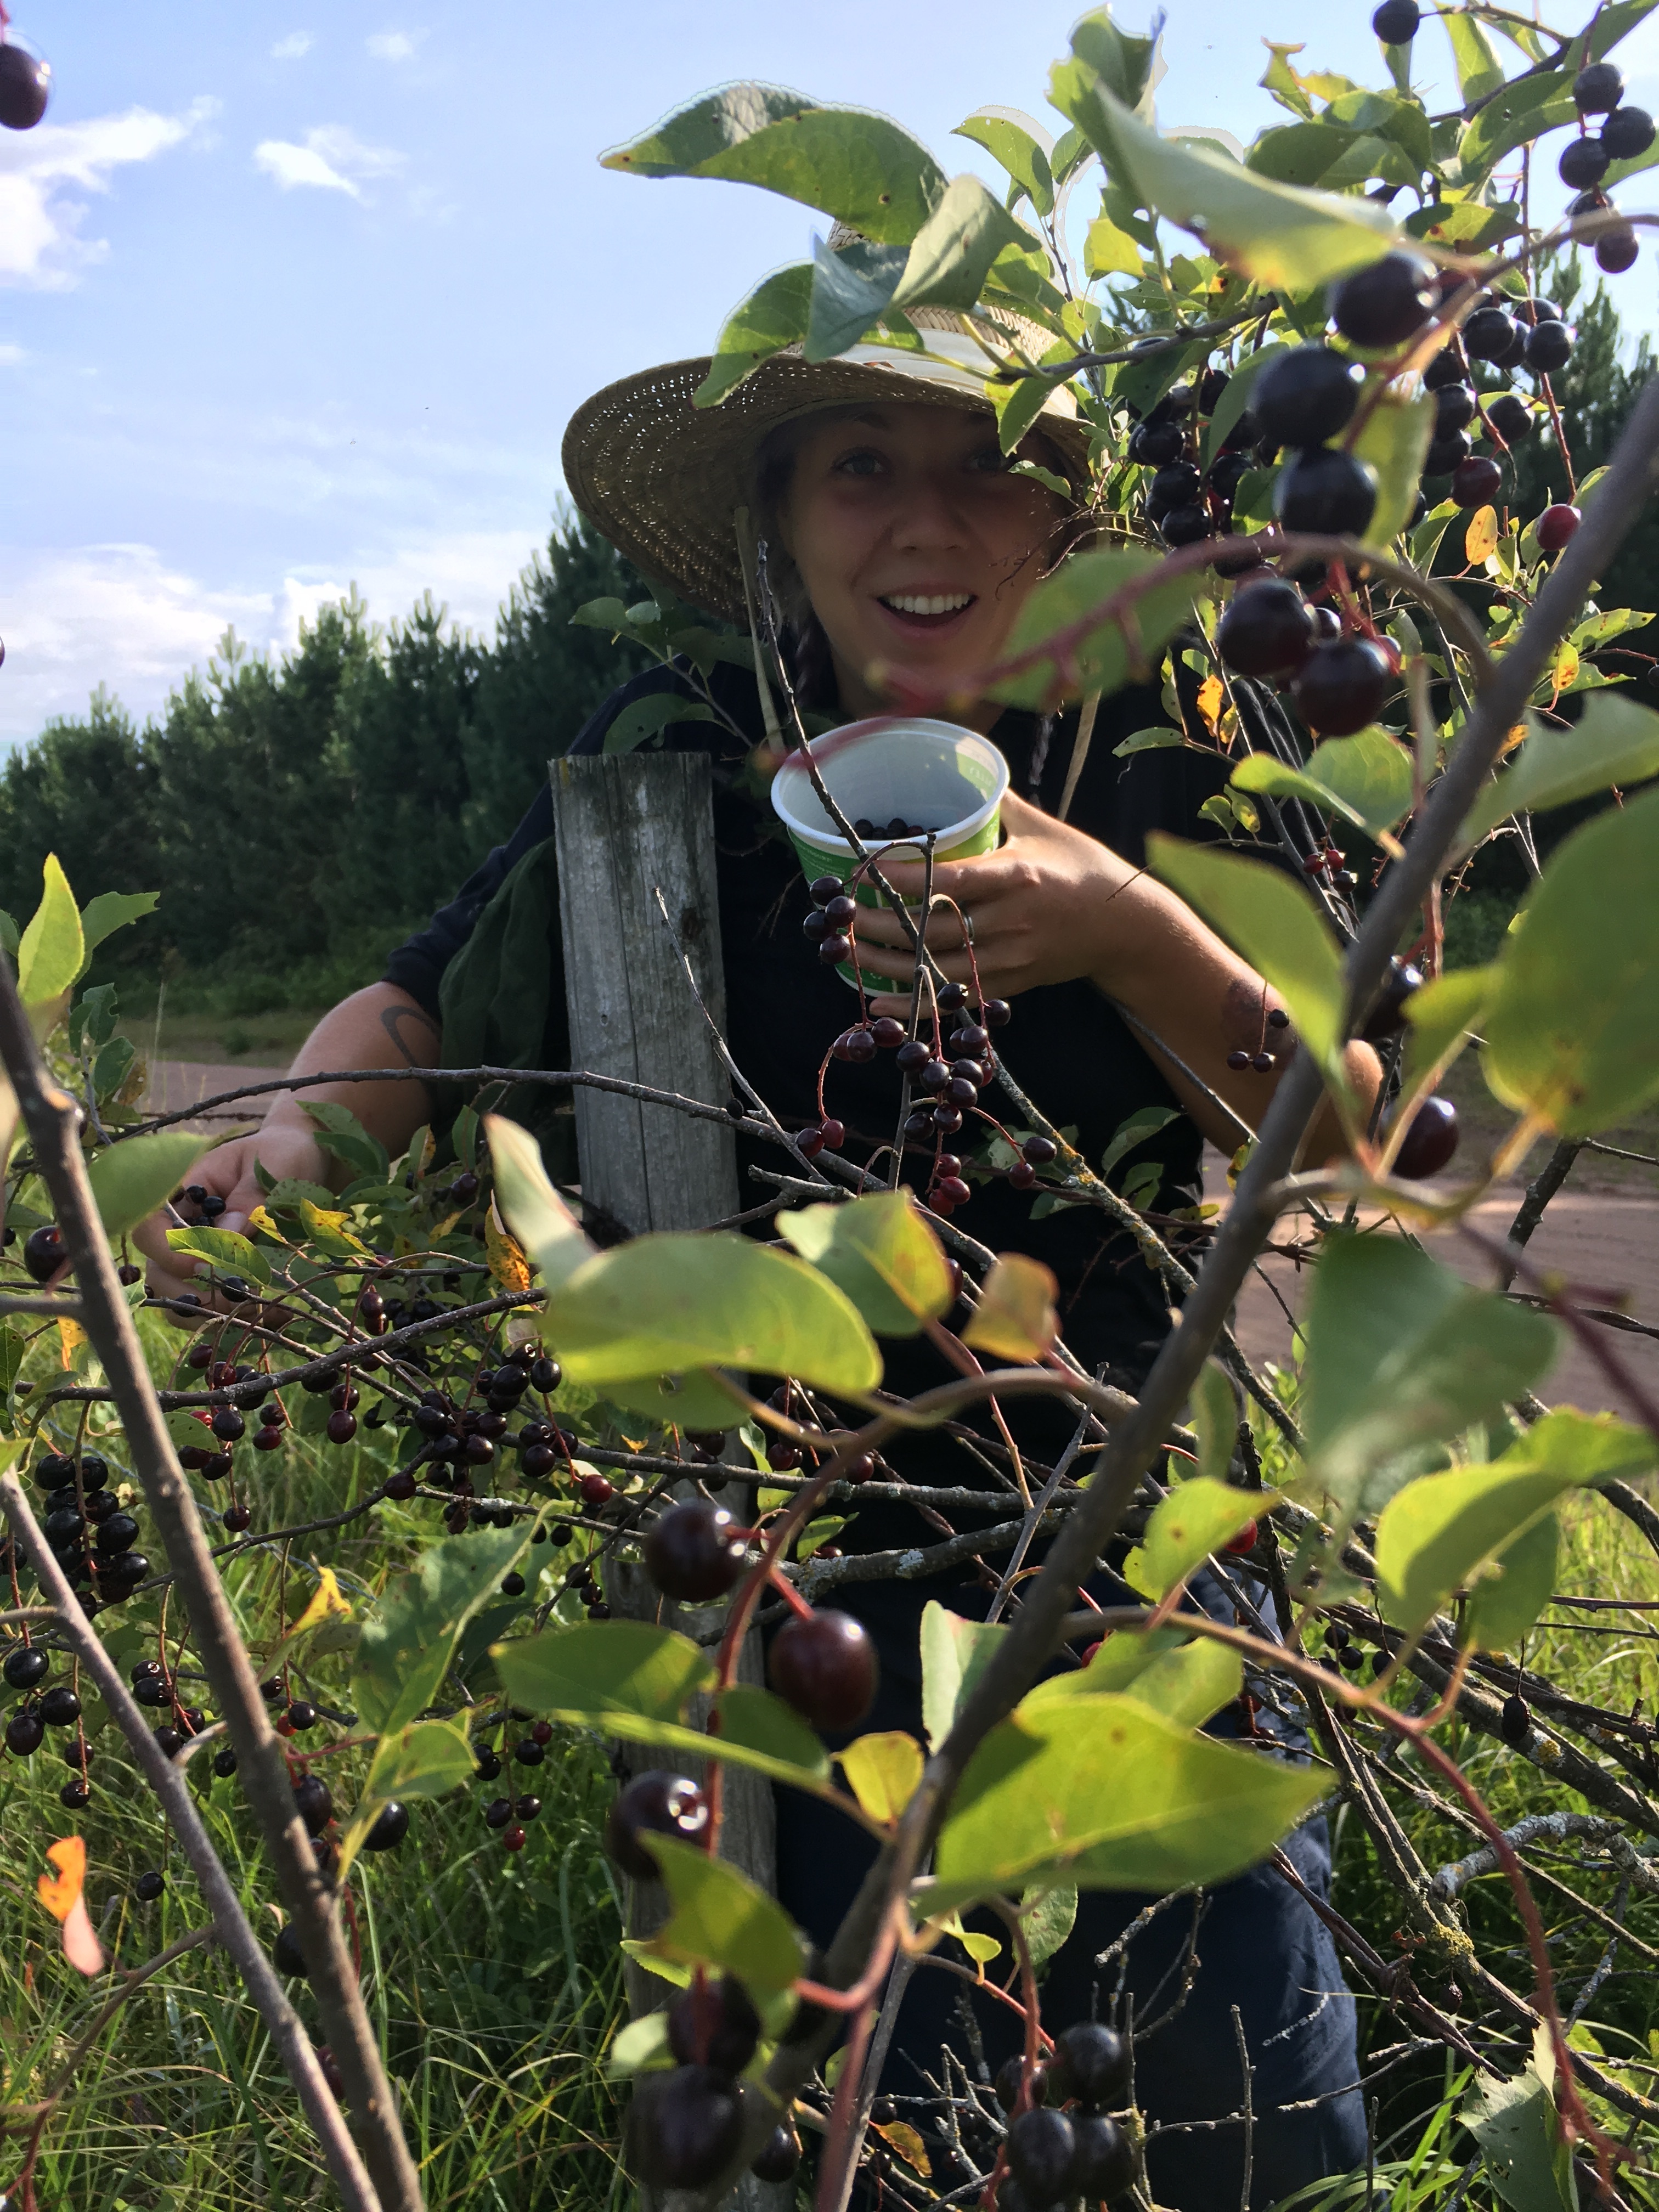
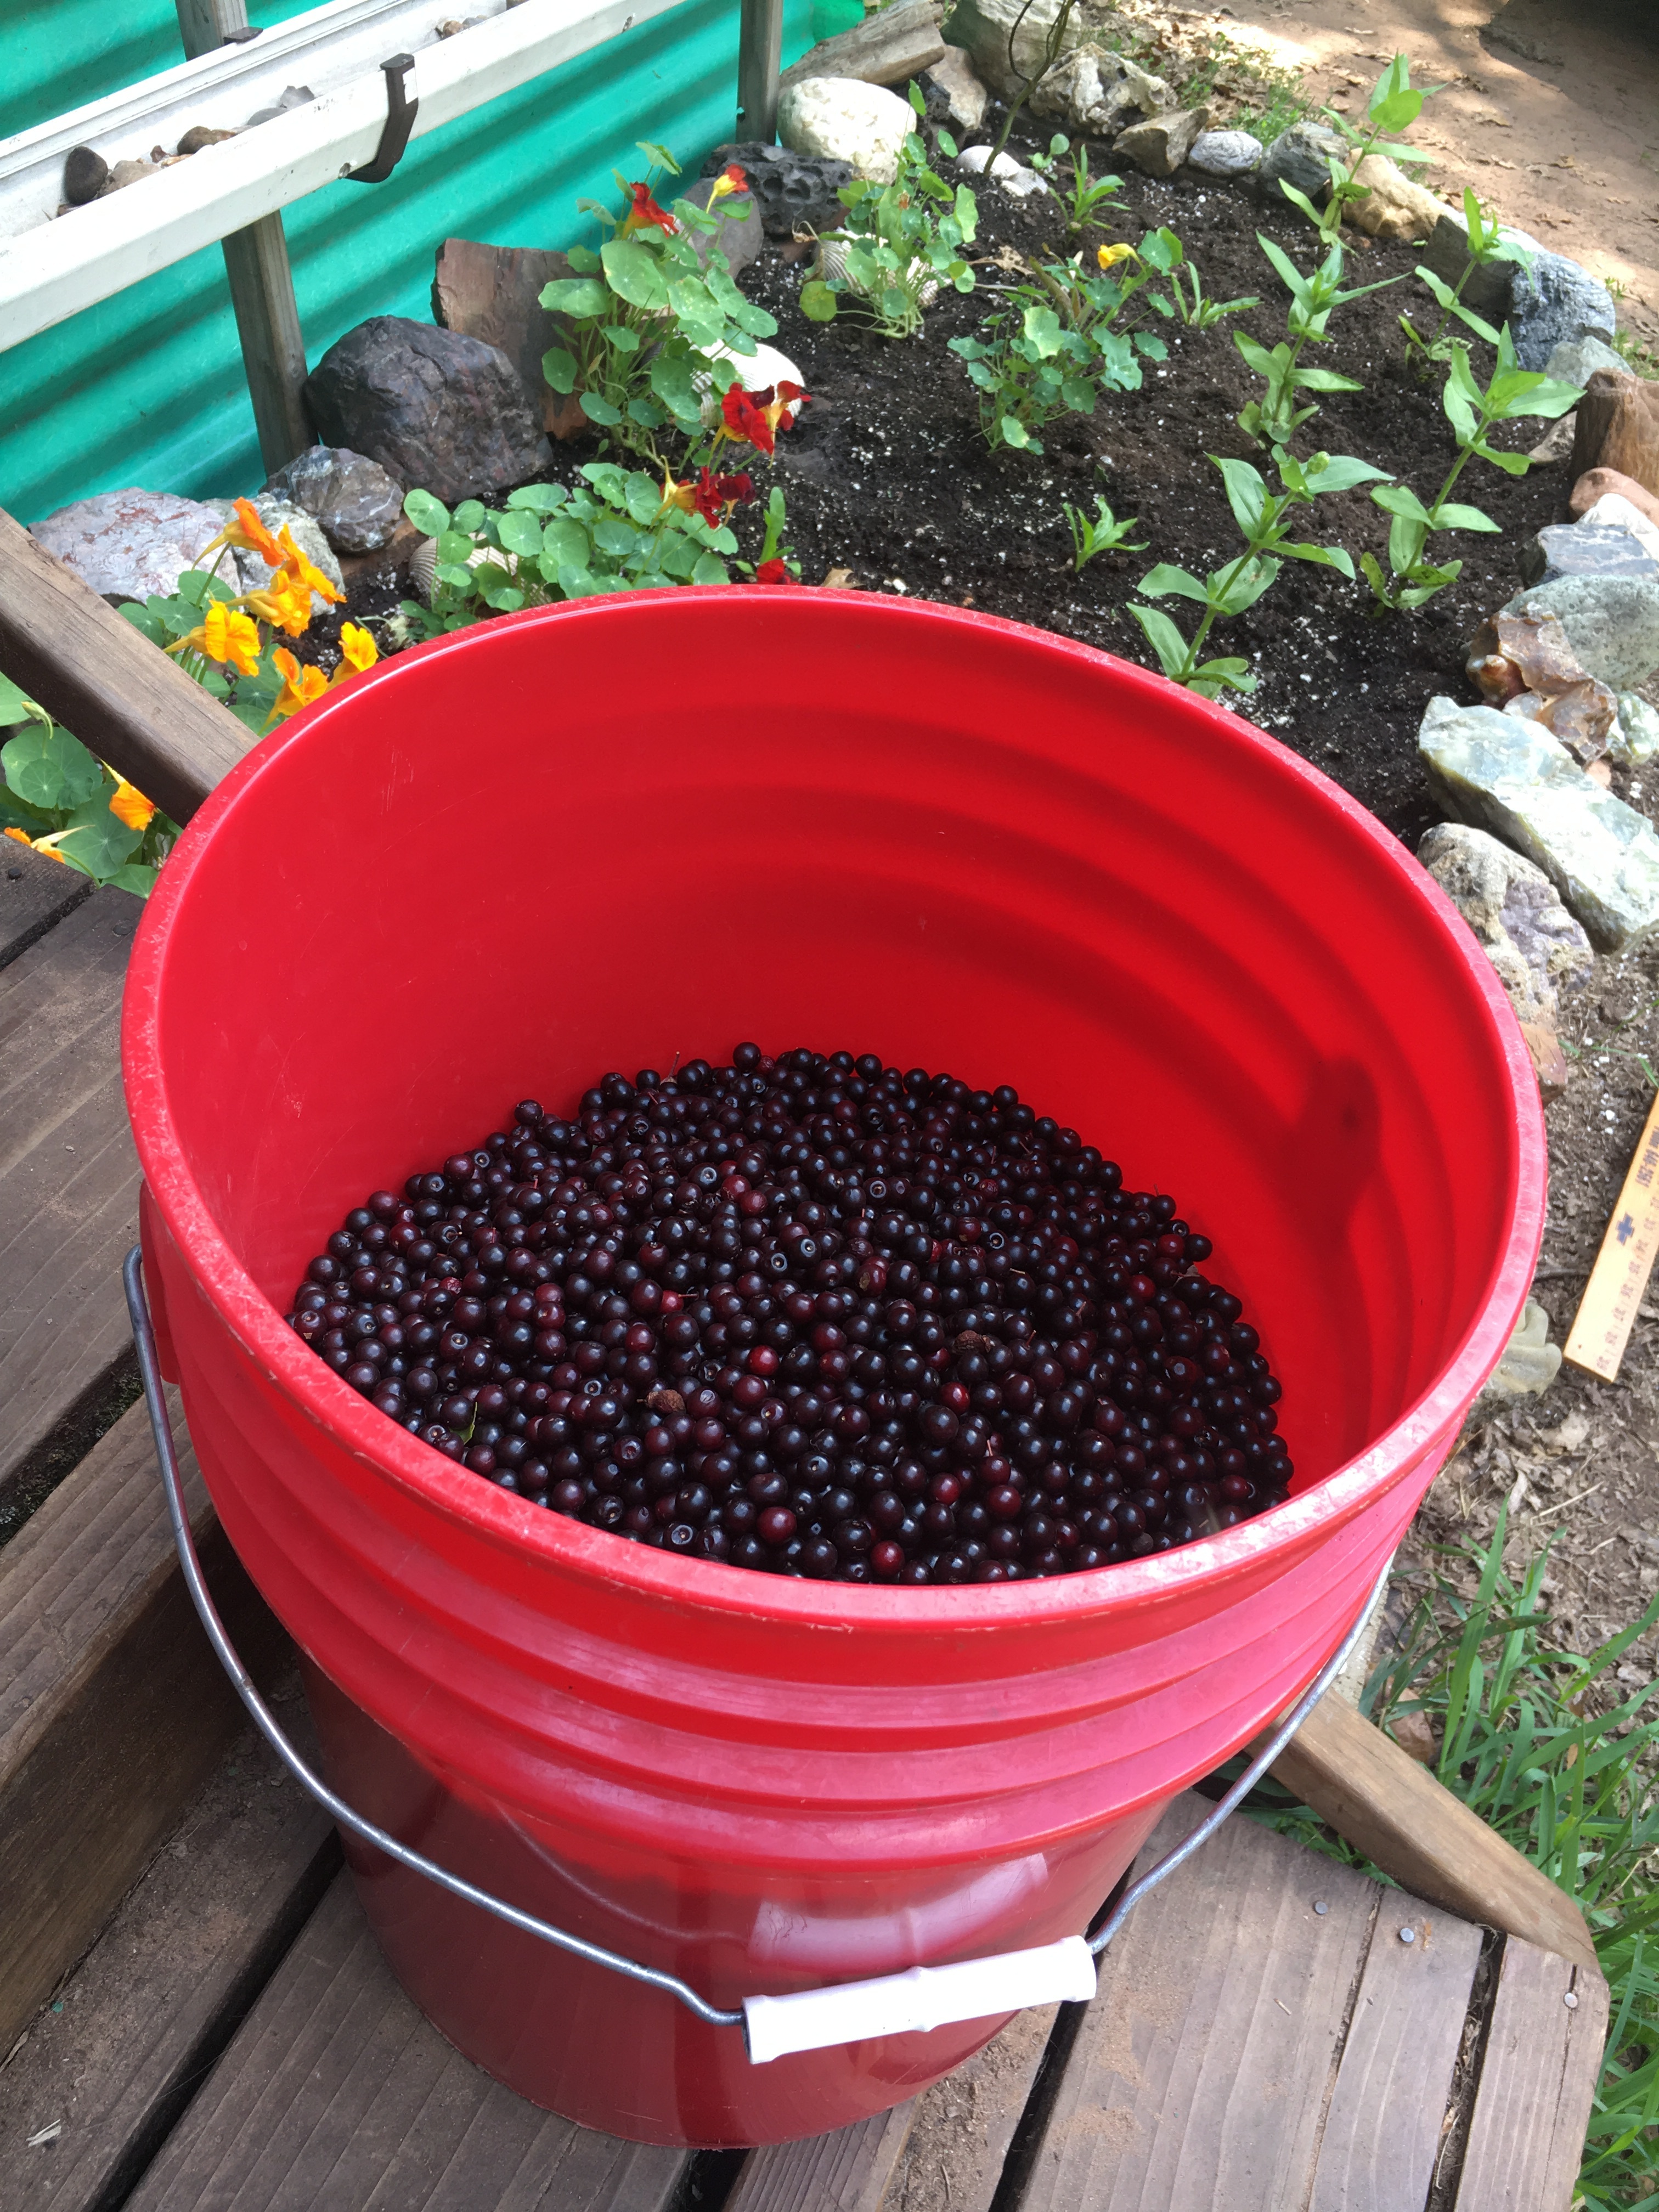
The wild chokecherries are putting out tons of fruit in the Barrens around the farm, so we’ve been busy foraging them by the bucketload, to make into chokecherry jelly, jam, and syrup – great for us to enjoy, and something we can sell well at the farmer’s market, to make some money even though our vegetable production is still rather impaired by the slow and complicated start of our growing season this year.
Seems like almost everyone who sees it has fond memories of picking as a kid, or the tart, delicious jelly that grandma loved to make. (If you want to buy a jar or three, let us know – we could deliver with your box!)
The foraging of these wild cherries has us delving deep into the logging roads and fire lanes through the scrubby, sandy wilds. Usually, this involves our All Wheel Drive Subaru – but on Saturday night, we ended up accidentally foraging in the minivan. Down the two track dirt roads, into the wild curves, dropping into the valley away from any GPS or phone service,
Kristin, WWOOFers Jeff and Madeline, Otis, Ace, and Widget all aboard as we got confused about what might lie ahead, and concerned we might be headed into a dead-end difficult to turn out of.
So we turned around and started back the way we’d come. It had been a wild ride, but doable. Of course, we’d had gravity on our side. And now, it was working against us – or perhaps, in favor of us having a memorable adventure. In short order, we were well and truly stuck, the van having excavated a pit around the front passenger tire, the van resting on a deep, soft bed of sand.
The sun was setting, we were miles from anything, with two dogs and a baby. Fortunately, when I hiked up the hill, I was able to get phone service – and even more fortunately, was able to get in touch with our amazing neighbor (and CSA Member!) Marcia, who came and rescued us, as we walked down the road in our mosquito netting, as Otis laughed and cooed and thought this novel experience was the most fun he’d had in days.
The next morning, Neighbor Dave – the other half of the Marquardt Search & Rescue Operation – came out with his truck and helped pull the van out of the sand pit it languished in – freeing it up for us to go out the next day and bring home another few gallons of wild cherries – this time, avoiding the treacherous hill.
Back home, the summer is coming on fully, The tomatoes are ripening, the weeds are much more subdued, the fall salad greens are happy in their trays, looking forward to being transplanted out into the garden.
tomato plants taller than us and still growing
The mosquitoes are still pretty active, although less than they were a few weeks back. Rodents continue to pillage the crops, although their depredations are less noticeable in this period of larger and more abundant production. Sounded like a couple of coyotes battled to the death in the woods next to us the other night, or maybe they were just making out, it’s hard to say.
No hay mulching was performed this week. And Otis is continuing to love life as a first-generation farm kid.
Week 8 Box – Stuffed with Summer
Mild Peppers (Bell & a variety I cant recall the name of just now)
an Eggplant
Tomatoes (Taxi, Damsel, Sun Gold, Black Cherry, and Cherry Bomb are the first varieties to ripen)
Parsley – chop it up into your vegetable sauté? We had it in lentil patties (kind of like flattened falafels) …
Broccoli or Okra – fate decreed you received the one you did. Unless you’ve told us you prefer one maybe.
Kale – A few leaves of 4 different varieties! (The holes munched here and there are how you know we don’t spray pesticides. :))
Cucumbers – Babies like to teethe on these, as shareholder’s spawn Aster demonstrates here:
Zucchinis – you know what to do.
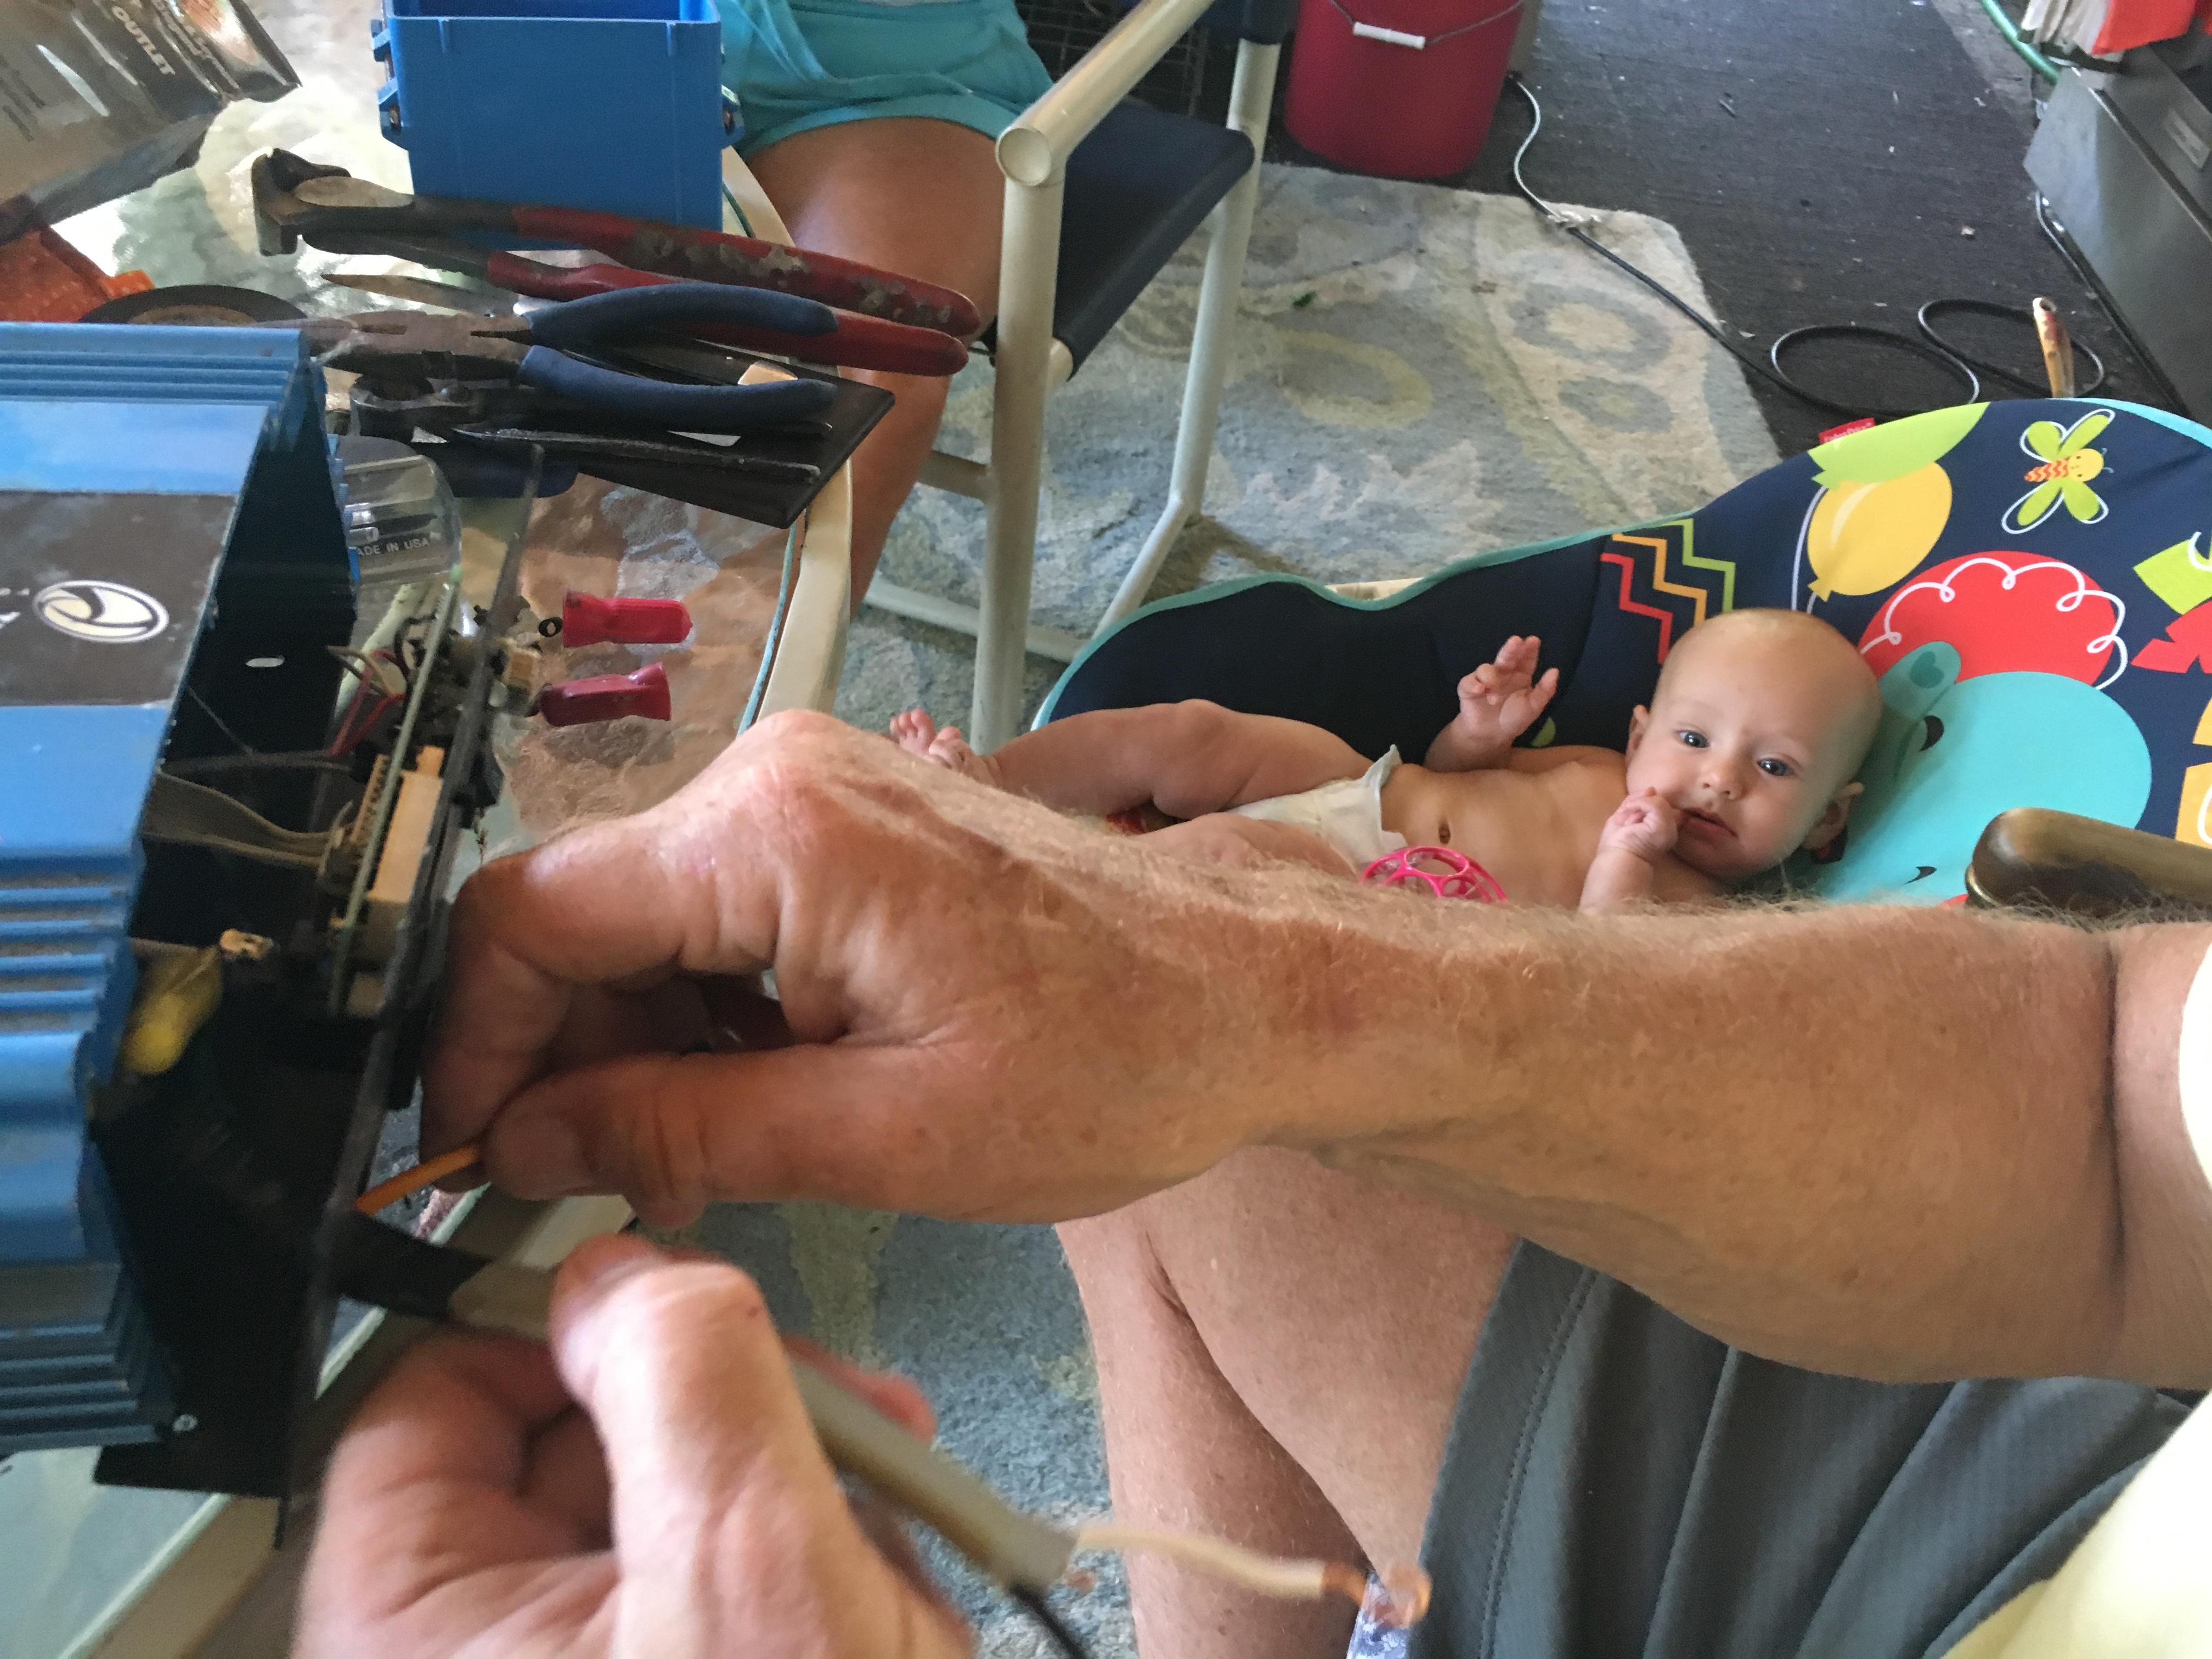
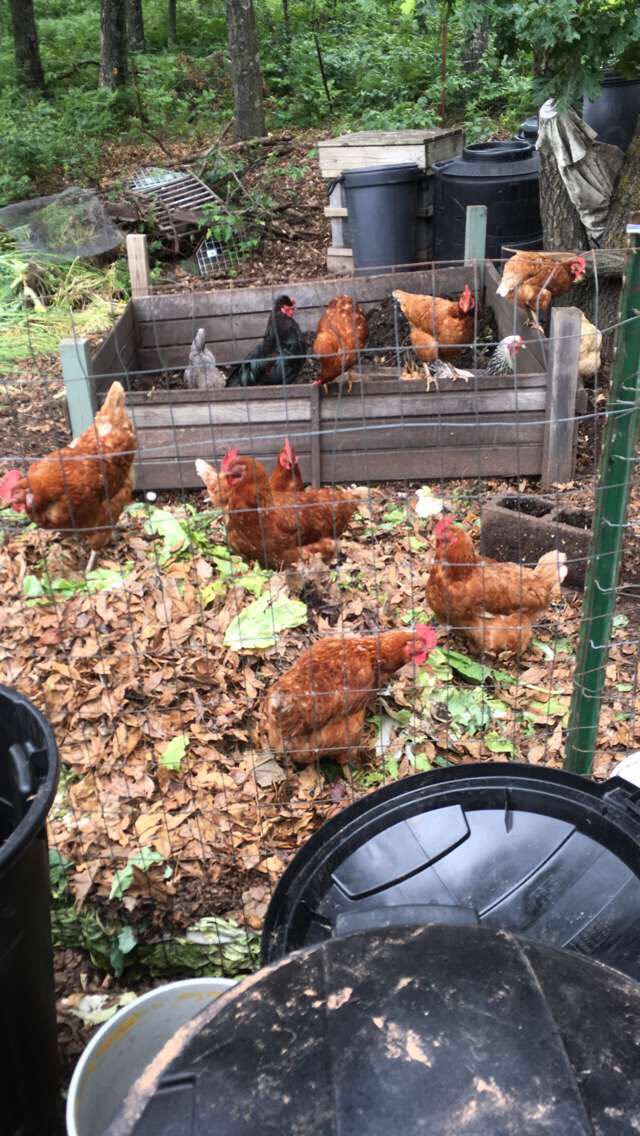
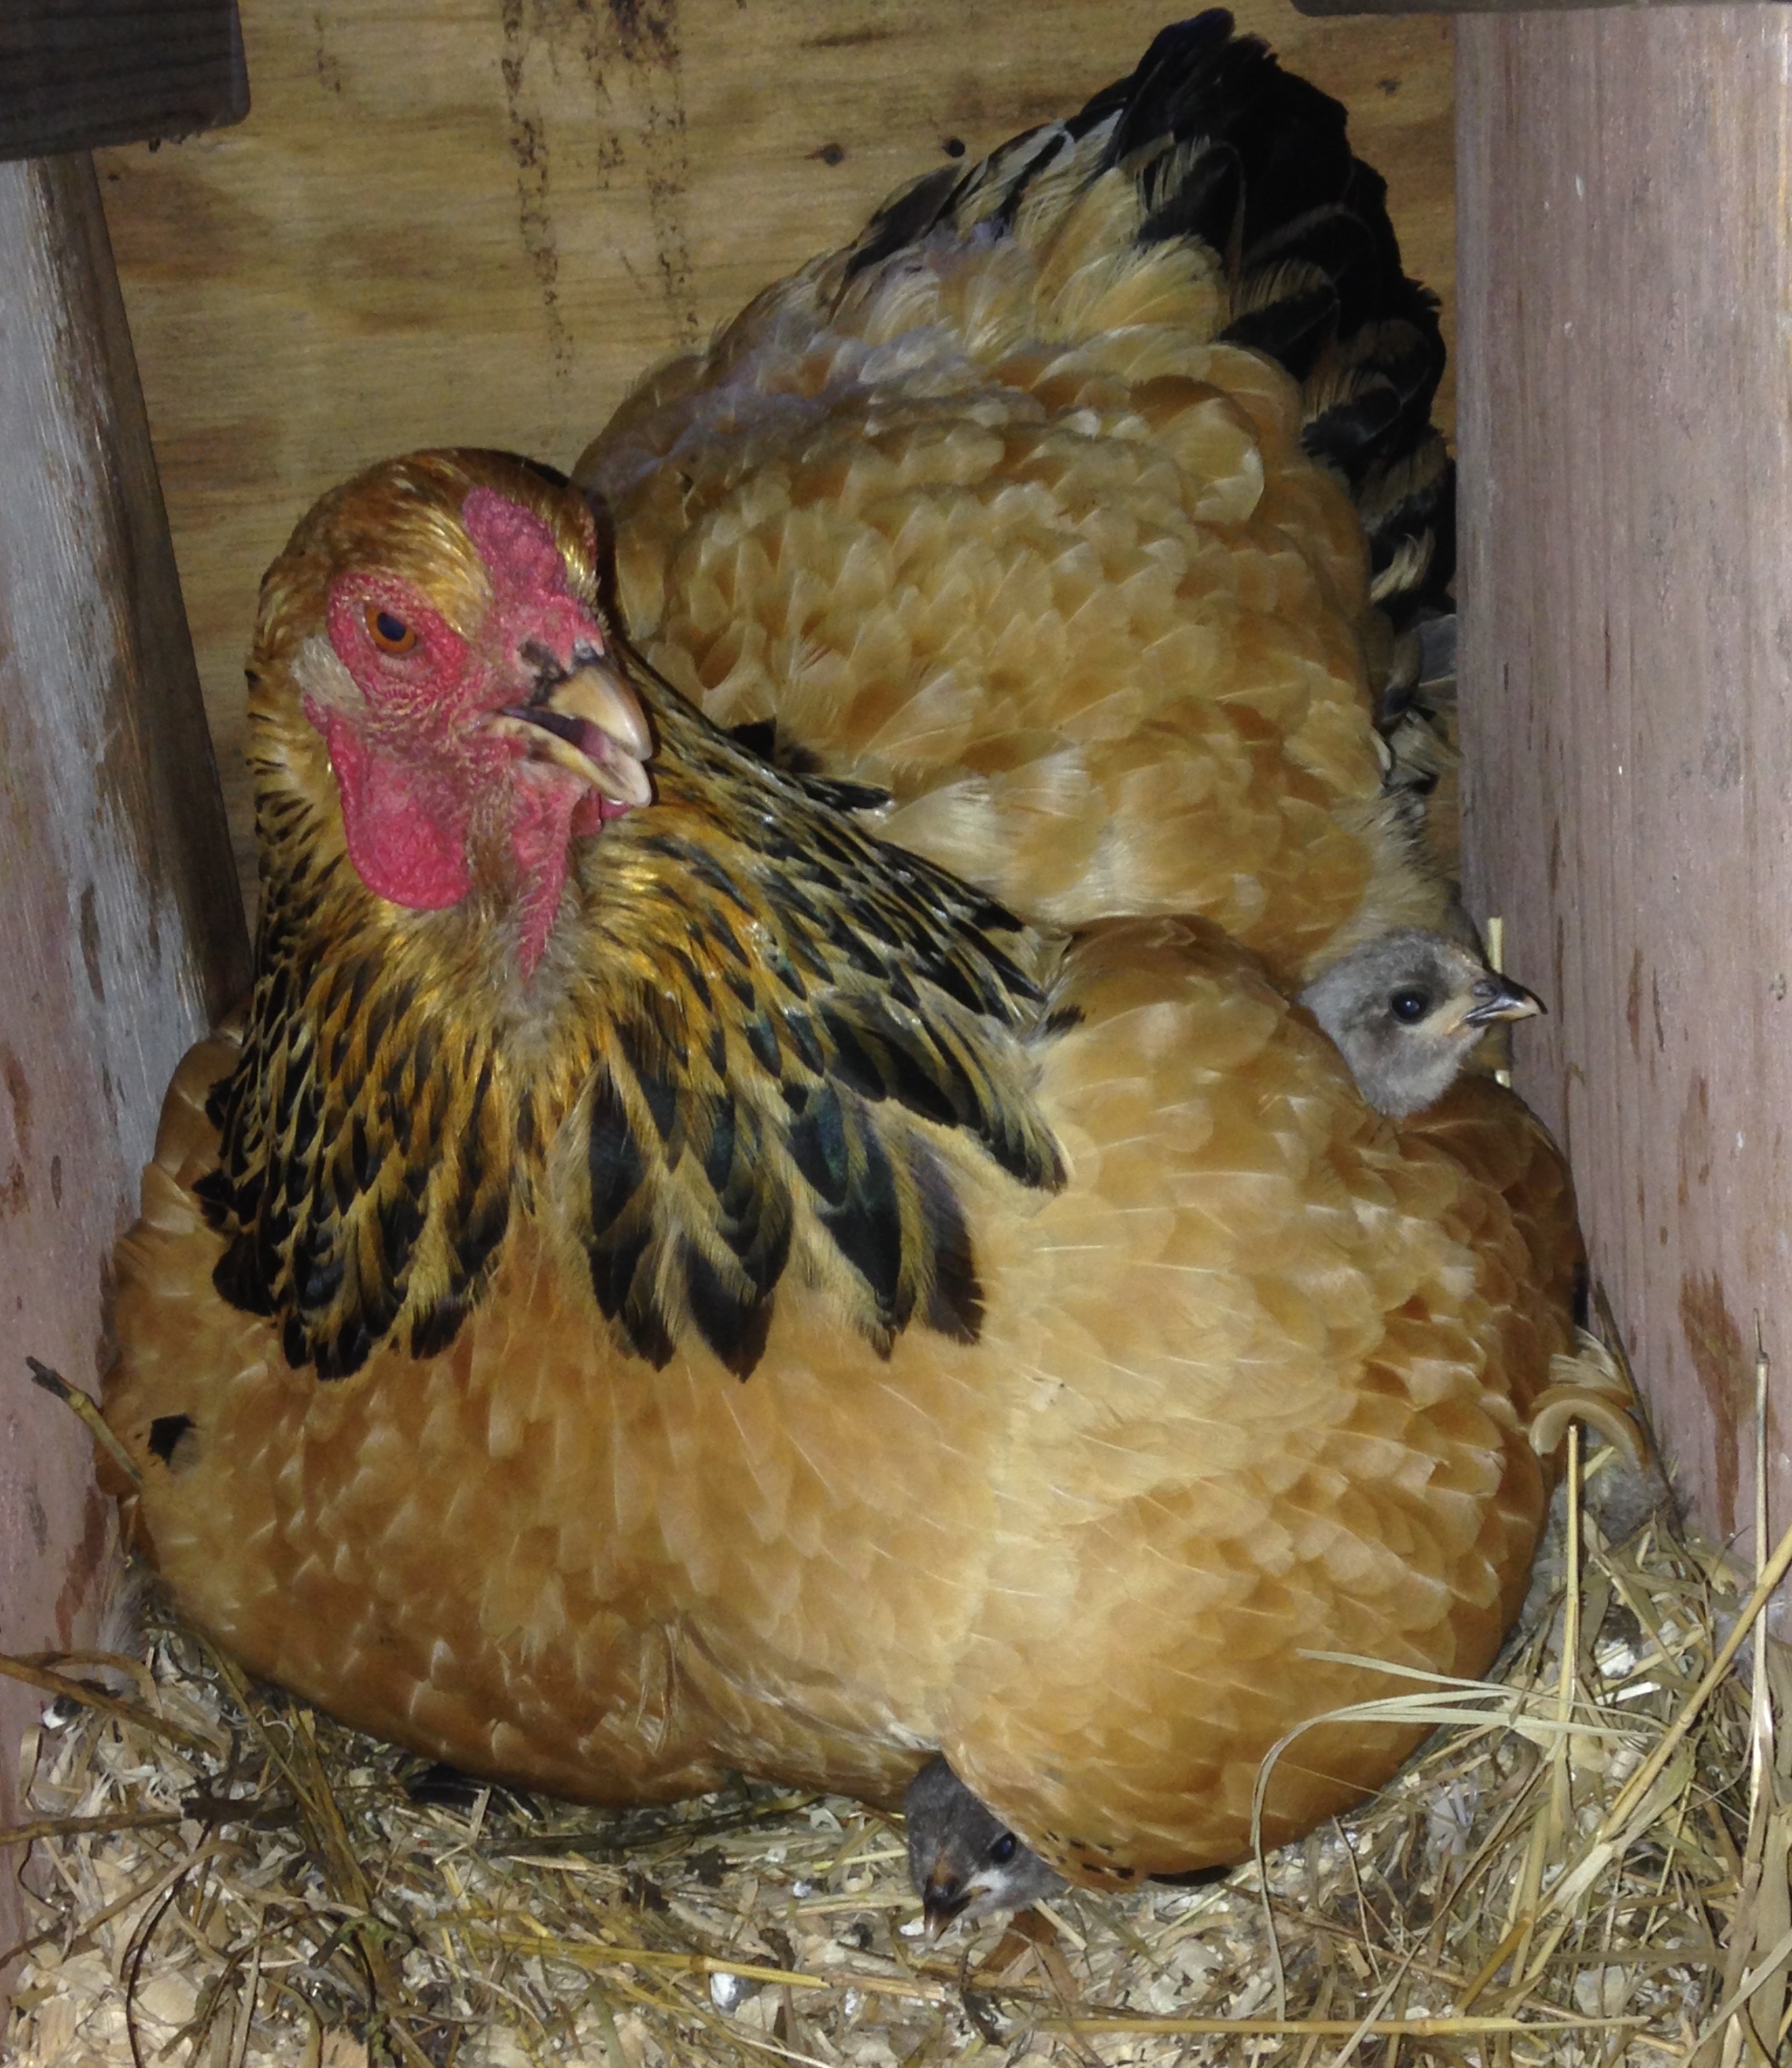
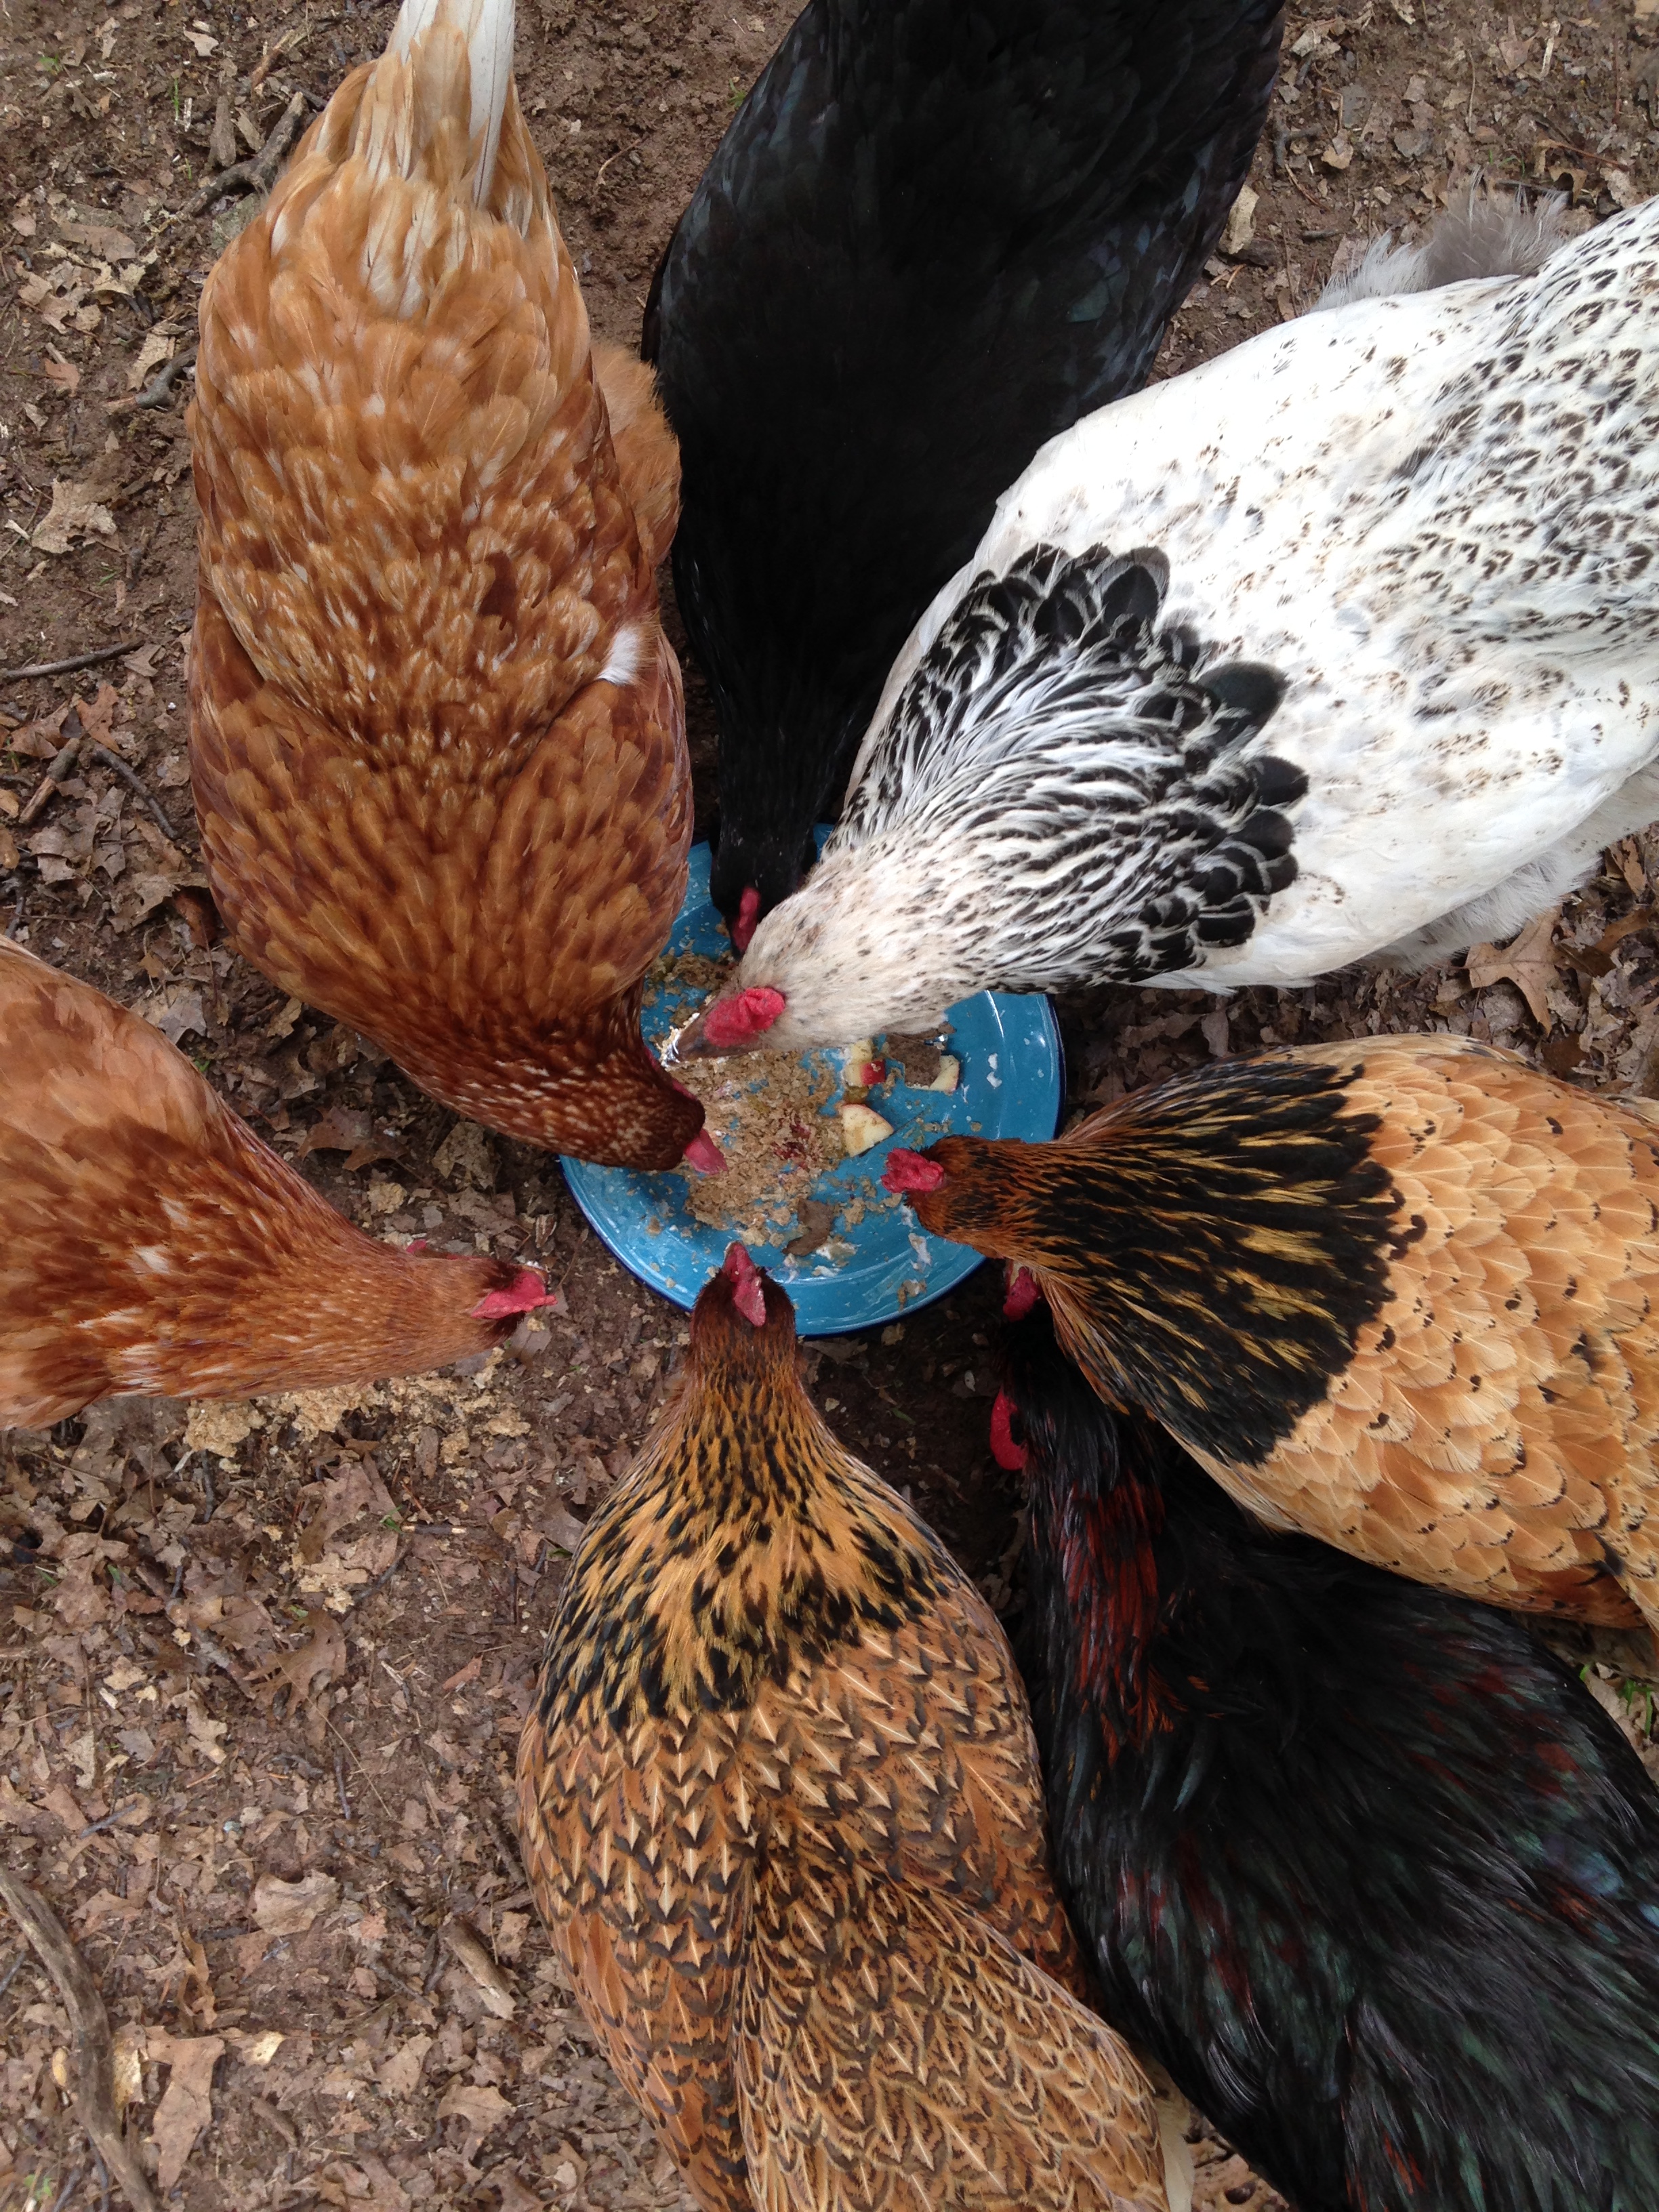
Otis watches Grandpa Ger repairing the defective outlet on our inverterfigured out why we were hardly getting any eggs …
and discovered a secret nest in the weeds atop the root cellar … meet the new mama of 4 new lil chicks
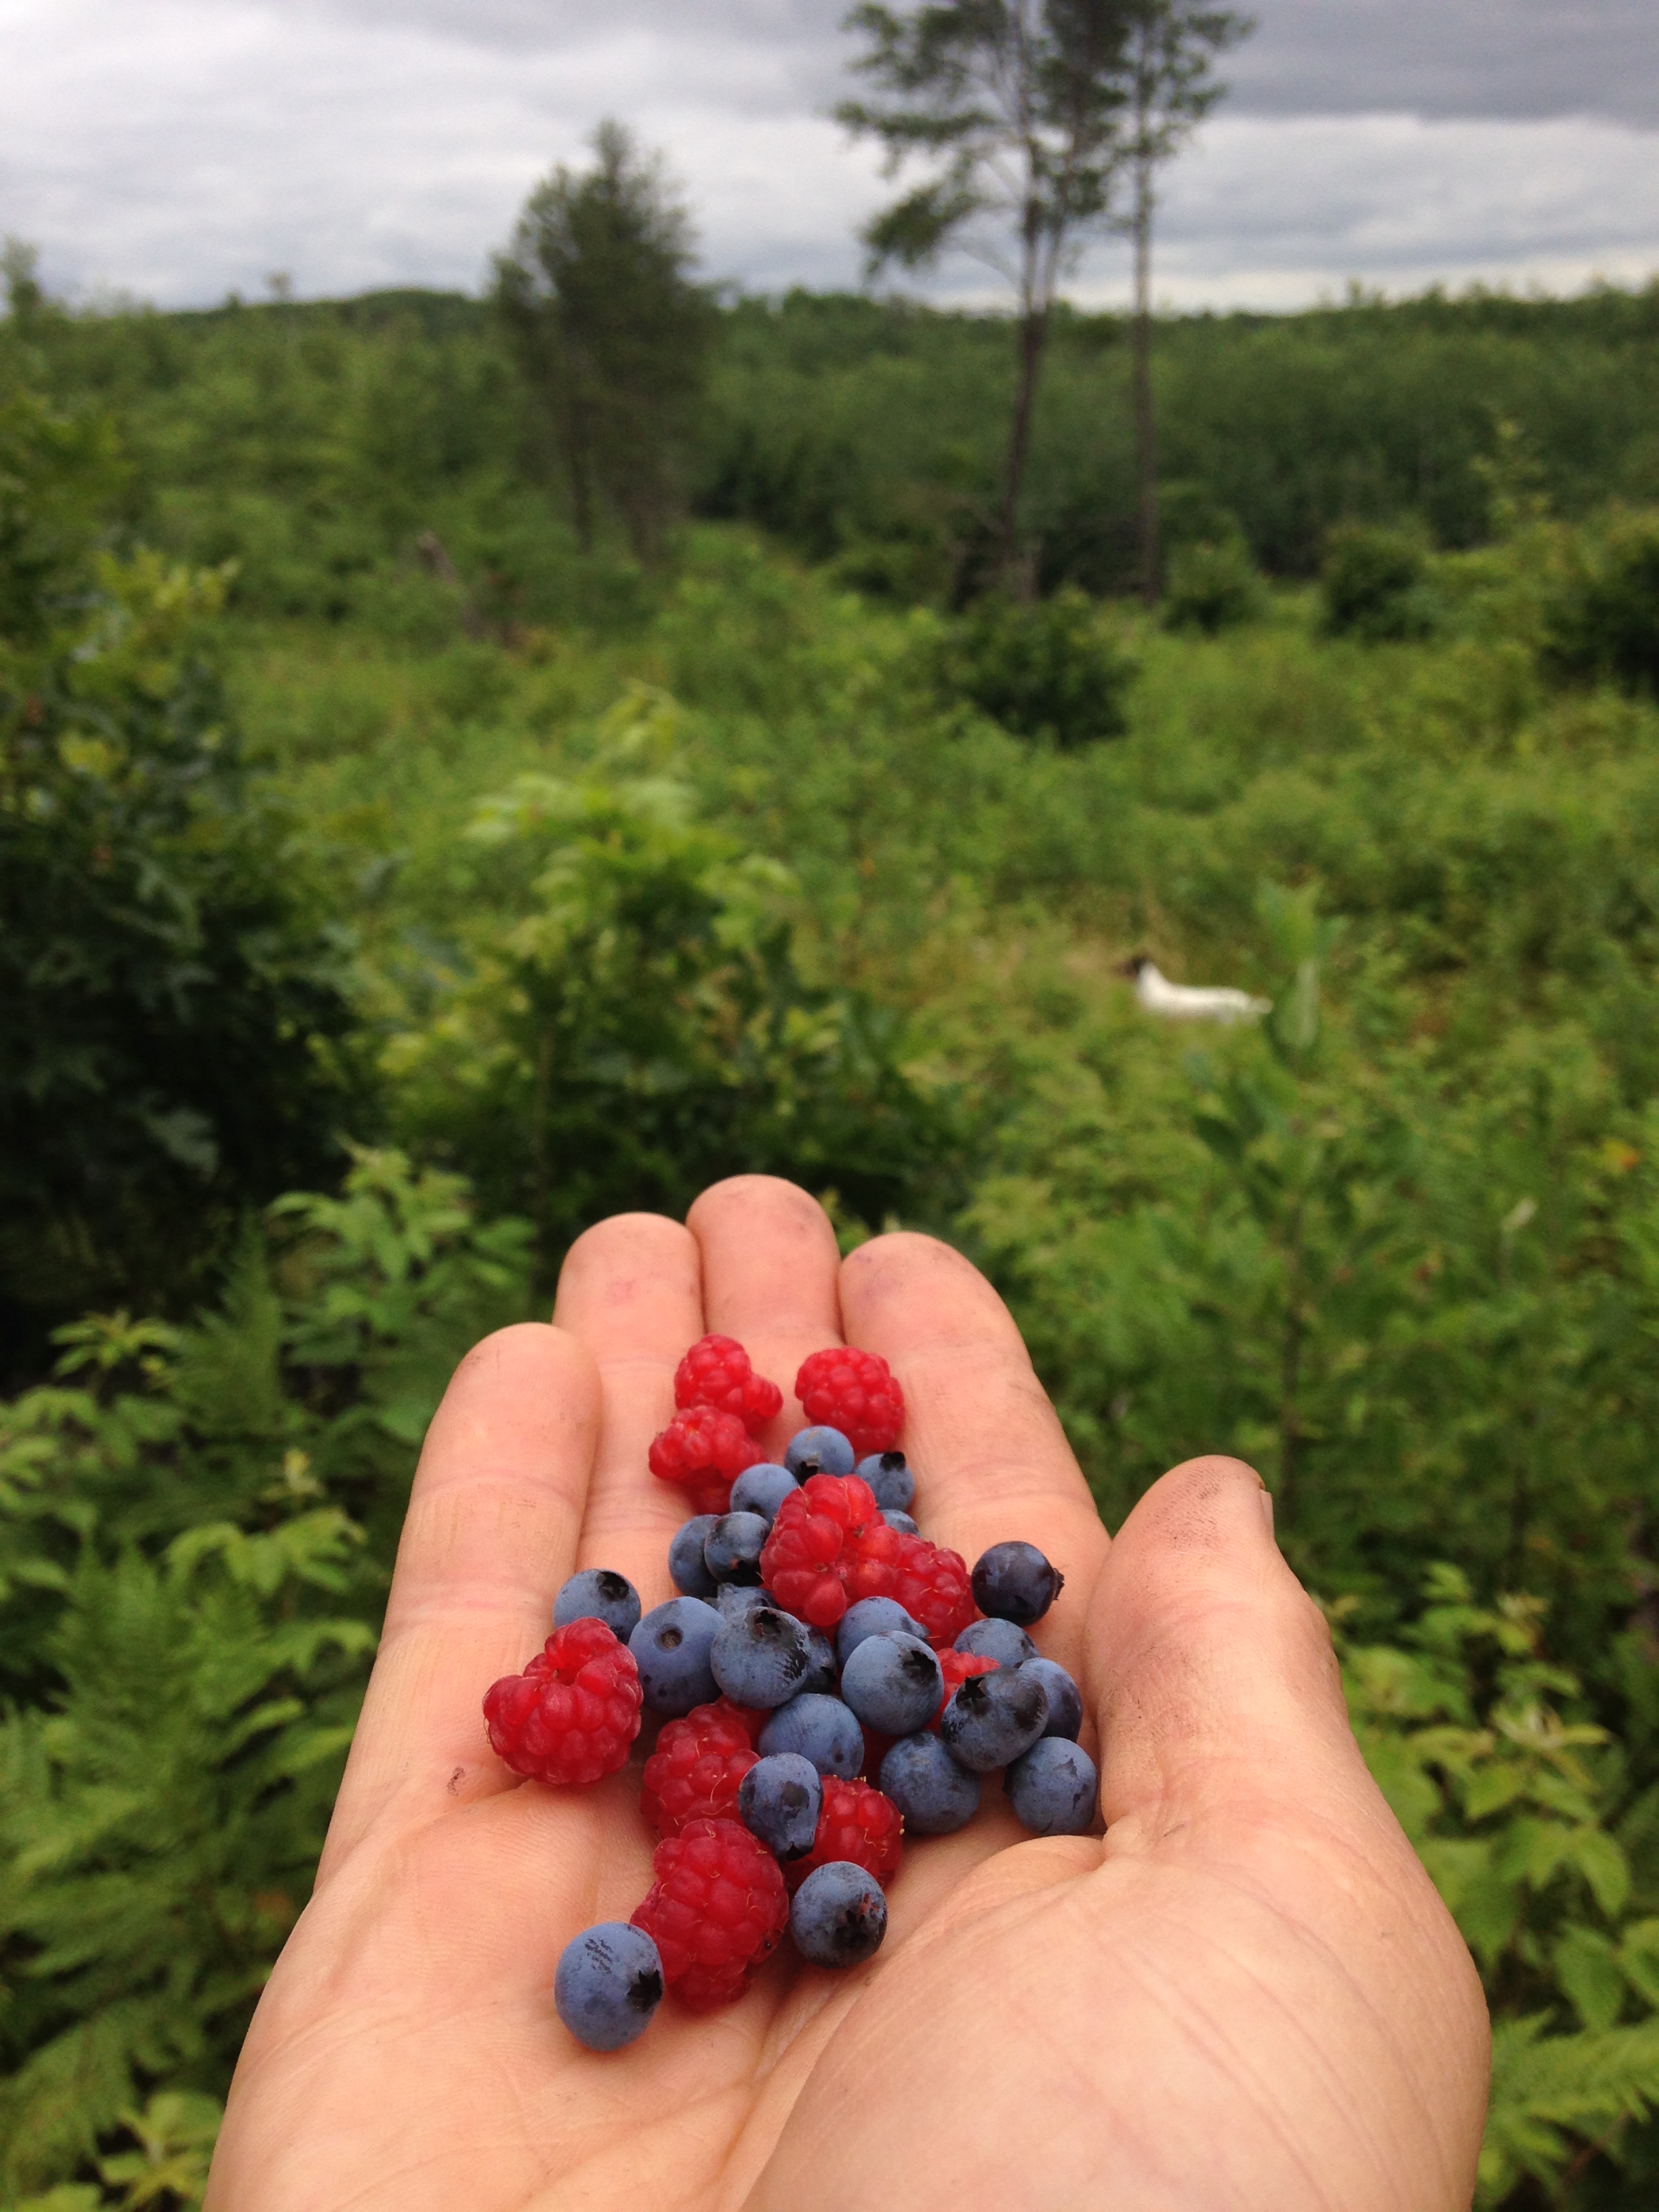
This week, we appreciated the delicious silver linings of the recent logging going on around our farm . While we loved the scrubby oak forest, and miss it … it’s damn hard not to enjoy a generous bribe of fresh wild fruit!
As we’d hoped/predicted in May, the severely-logged area adjacent to our land has erupted into edibility.
The fruit bushes which had been patiently plotting and biding their time down in the shadows of the tree canopy are seizing their moment in the sun, as we discovered late last week on a walk through the woods – when we realized we couldn’t even walk between the ripening raspberry bushes without squishing the abundant clusters of ripe blueberries growing beneath and around them.
Plus it’s sort of a return to it’s long-ago form – as our local historian explains, “The Indians called the Sterling Barrens “Mashkode” which we translate as “flower covered prairie.” It was mostly open when the first white settlers came with low brush including blueberries, raspberries, blackberries, cranberries, and all sorts of wild cherries, hazelnuts, and butternuts. It was still mostly open at the turn of the century, until fire control and tree planting started in the 20s and 30s.”
So I’m glad I refrained from wailing, ranting, and gnashing my teeth too much. Because I need those teeth for eating all these delicious berries.
In field news, the peas are fading, as the beans are rising up and threatening world domination.
The high tunnel tomatoes are flush with green globes that refuse to rush into reddening, there is just one brave pioneer eggplant in the field, seemingly unconcerned about the rising tides of zucchini and squash plants that seem poised to bury us all in their foliage.
Box #6
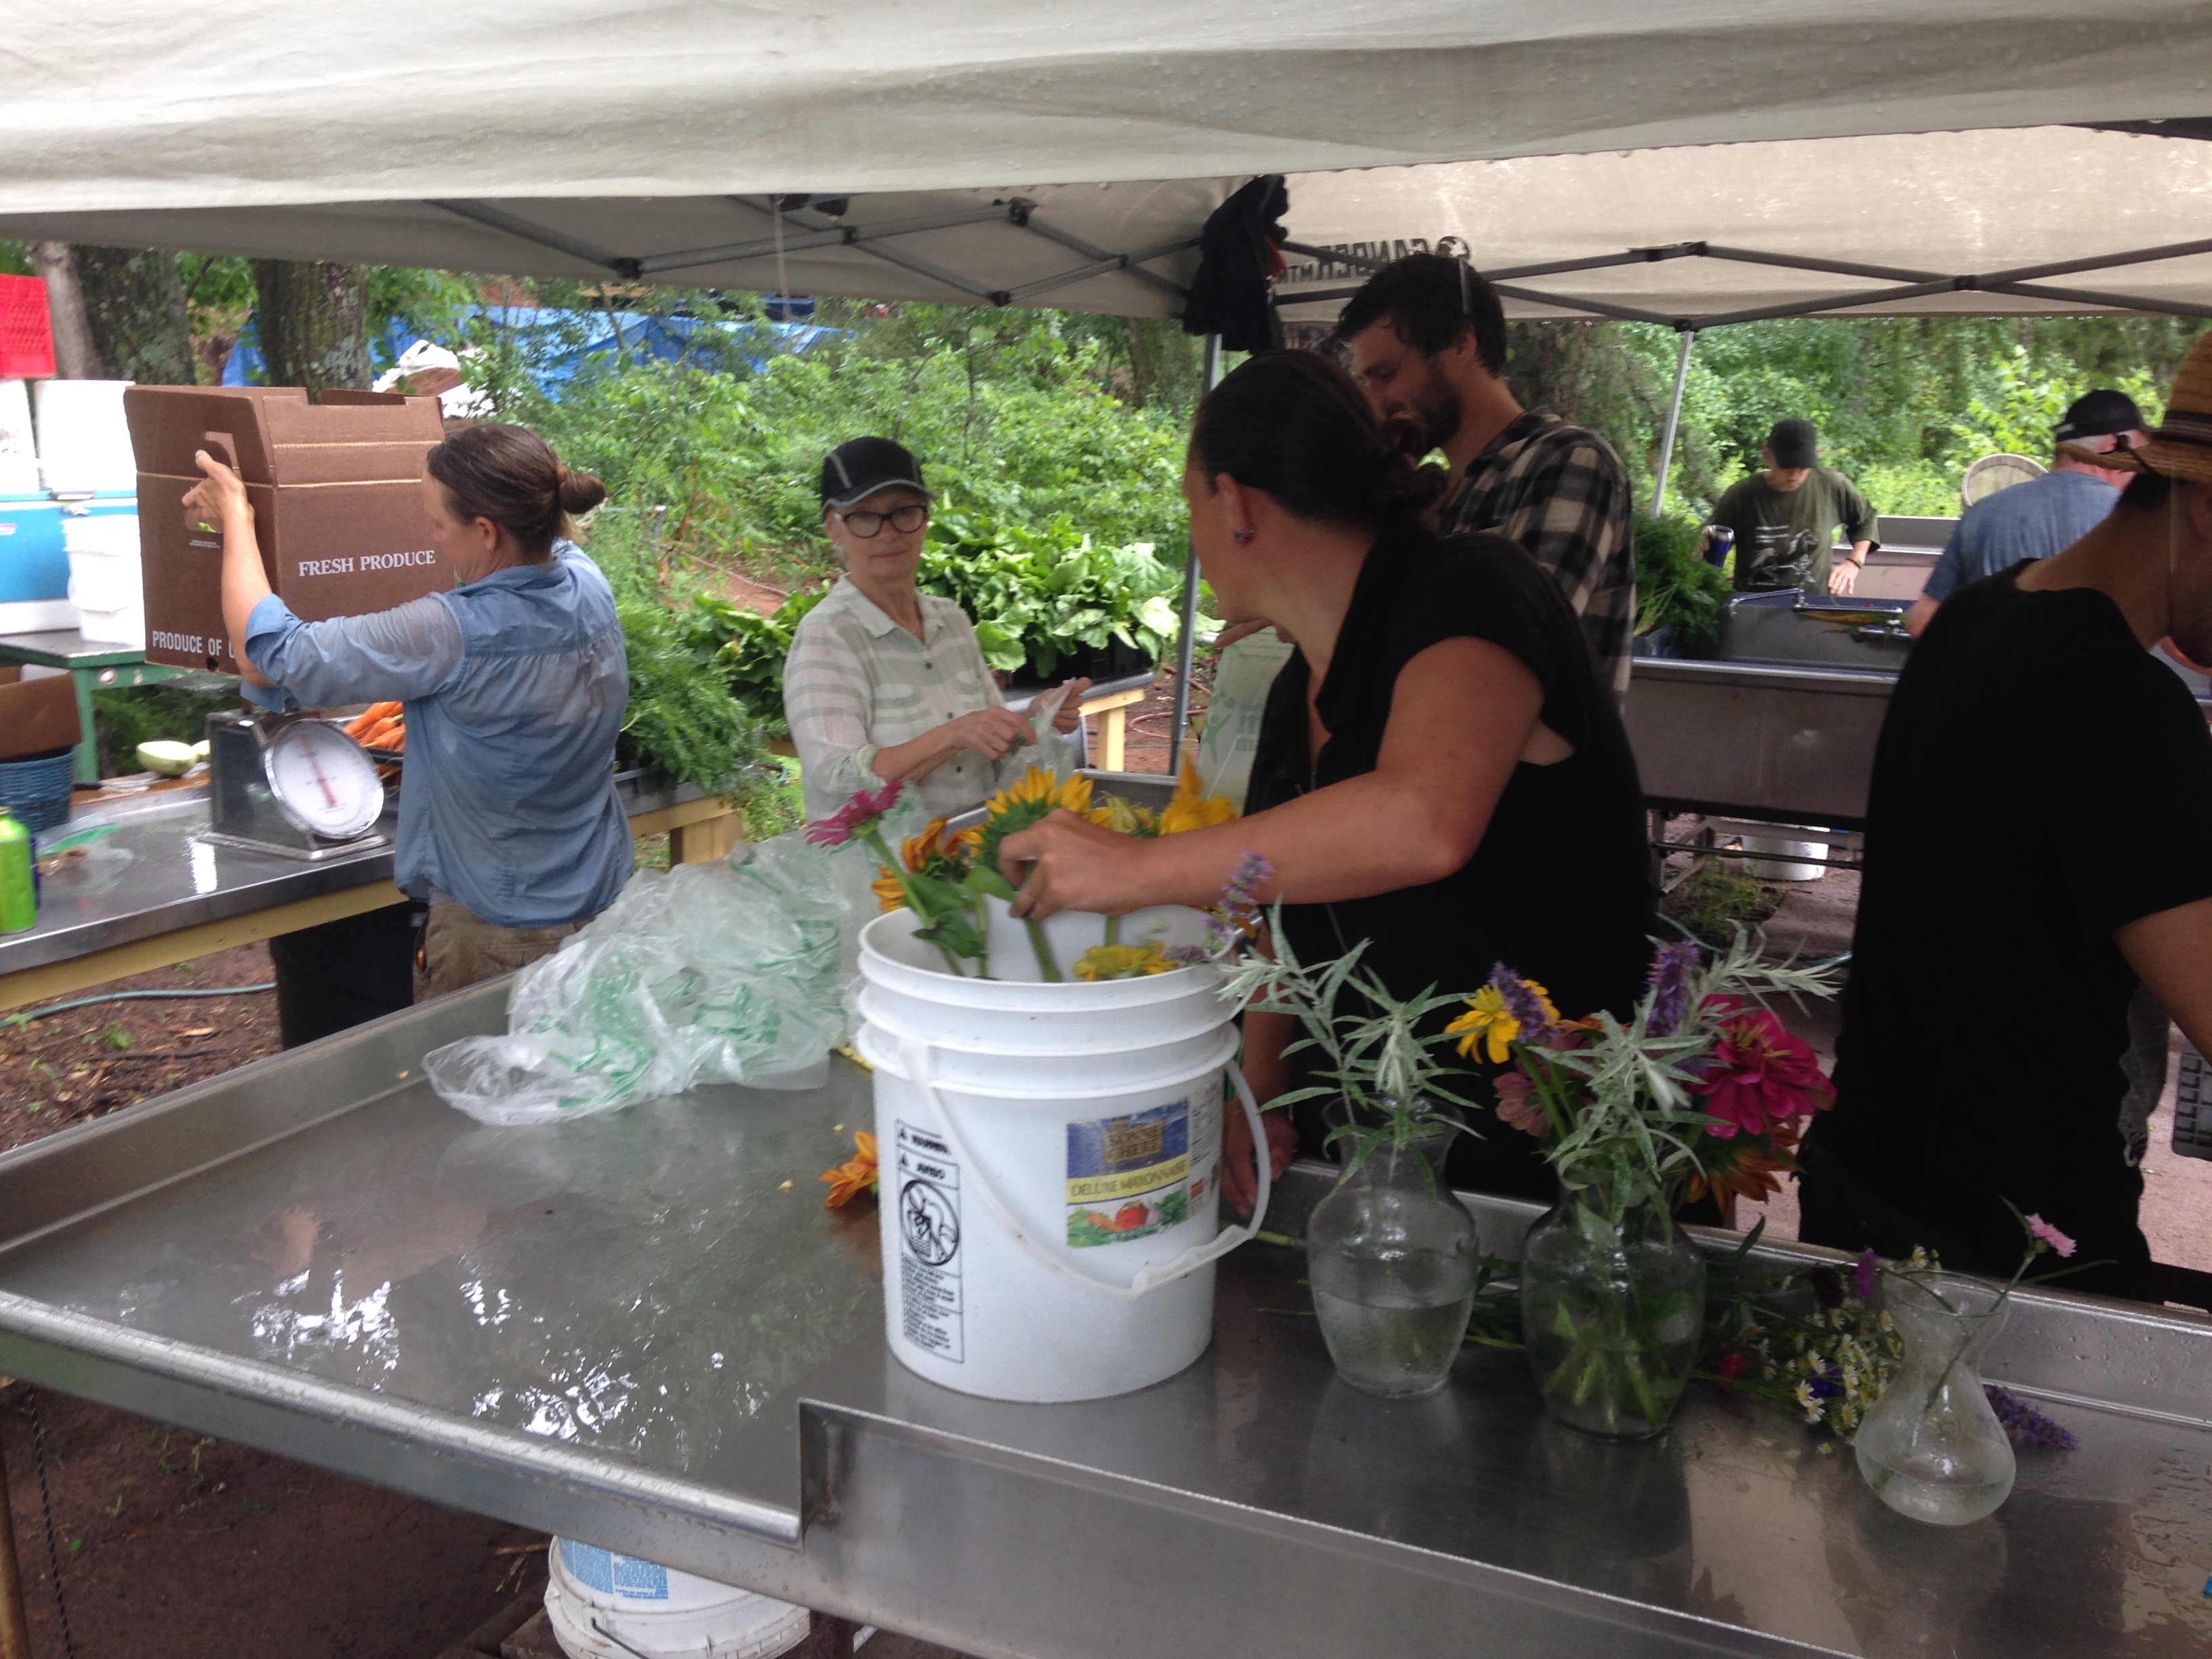
We hadn’t had a rainy harvest in awhile, so this was a refreshing morning! Plenty of rain, but the ominous thunder merely provided a soundtrack for a smooth harvest.
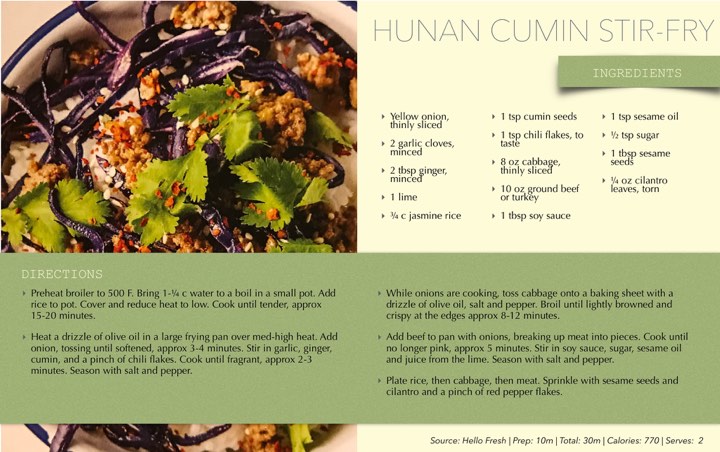
Red Cabbage – don’t be intimidated by the beautiful beast! Here are a couple of recipes recommended by your fellow CSA members:Melissa’s Recommendation: Deb’s Cabbage Slaw Recipe:
Dressing:

½ cup mayonnaise or olive oil (if allergic to eggs)
2 Tbsp. apple cider vinegar
1 Tbsp. honey
1 tsp. prepared mustard
1 garlic clove, minced
¾ Tbsp. poppy seeds
Juice of half a large lemon
Salt and pepper to taste
Whisk together dressing ingredients.

Slaw Ingredients:

2 small carrots thinly sliced
½ cup golden raisins
2 green onions thinly sliced (optional)
½ c. chopped pecans or peanuts
¾ of small to medium head of purple cabbage (approximately 3 pounds), thinly sliced

Directions:

Combine salad ingredients with dressing.
Cover and refrigerate for at least 1 hour.
a Bag o’ Beans(Green, Yellow and Purple varieties)
Broccoli in your bag o’ beans, because alliteration
Zucchini / Summer Squash
Garlic
Carrots
Beets (many varieties … Detroit Dark red, Chioggia, baby beets, golden … or secret mystery beets)
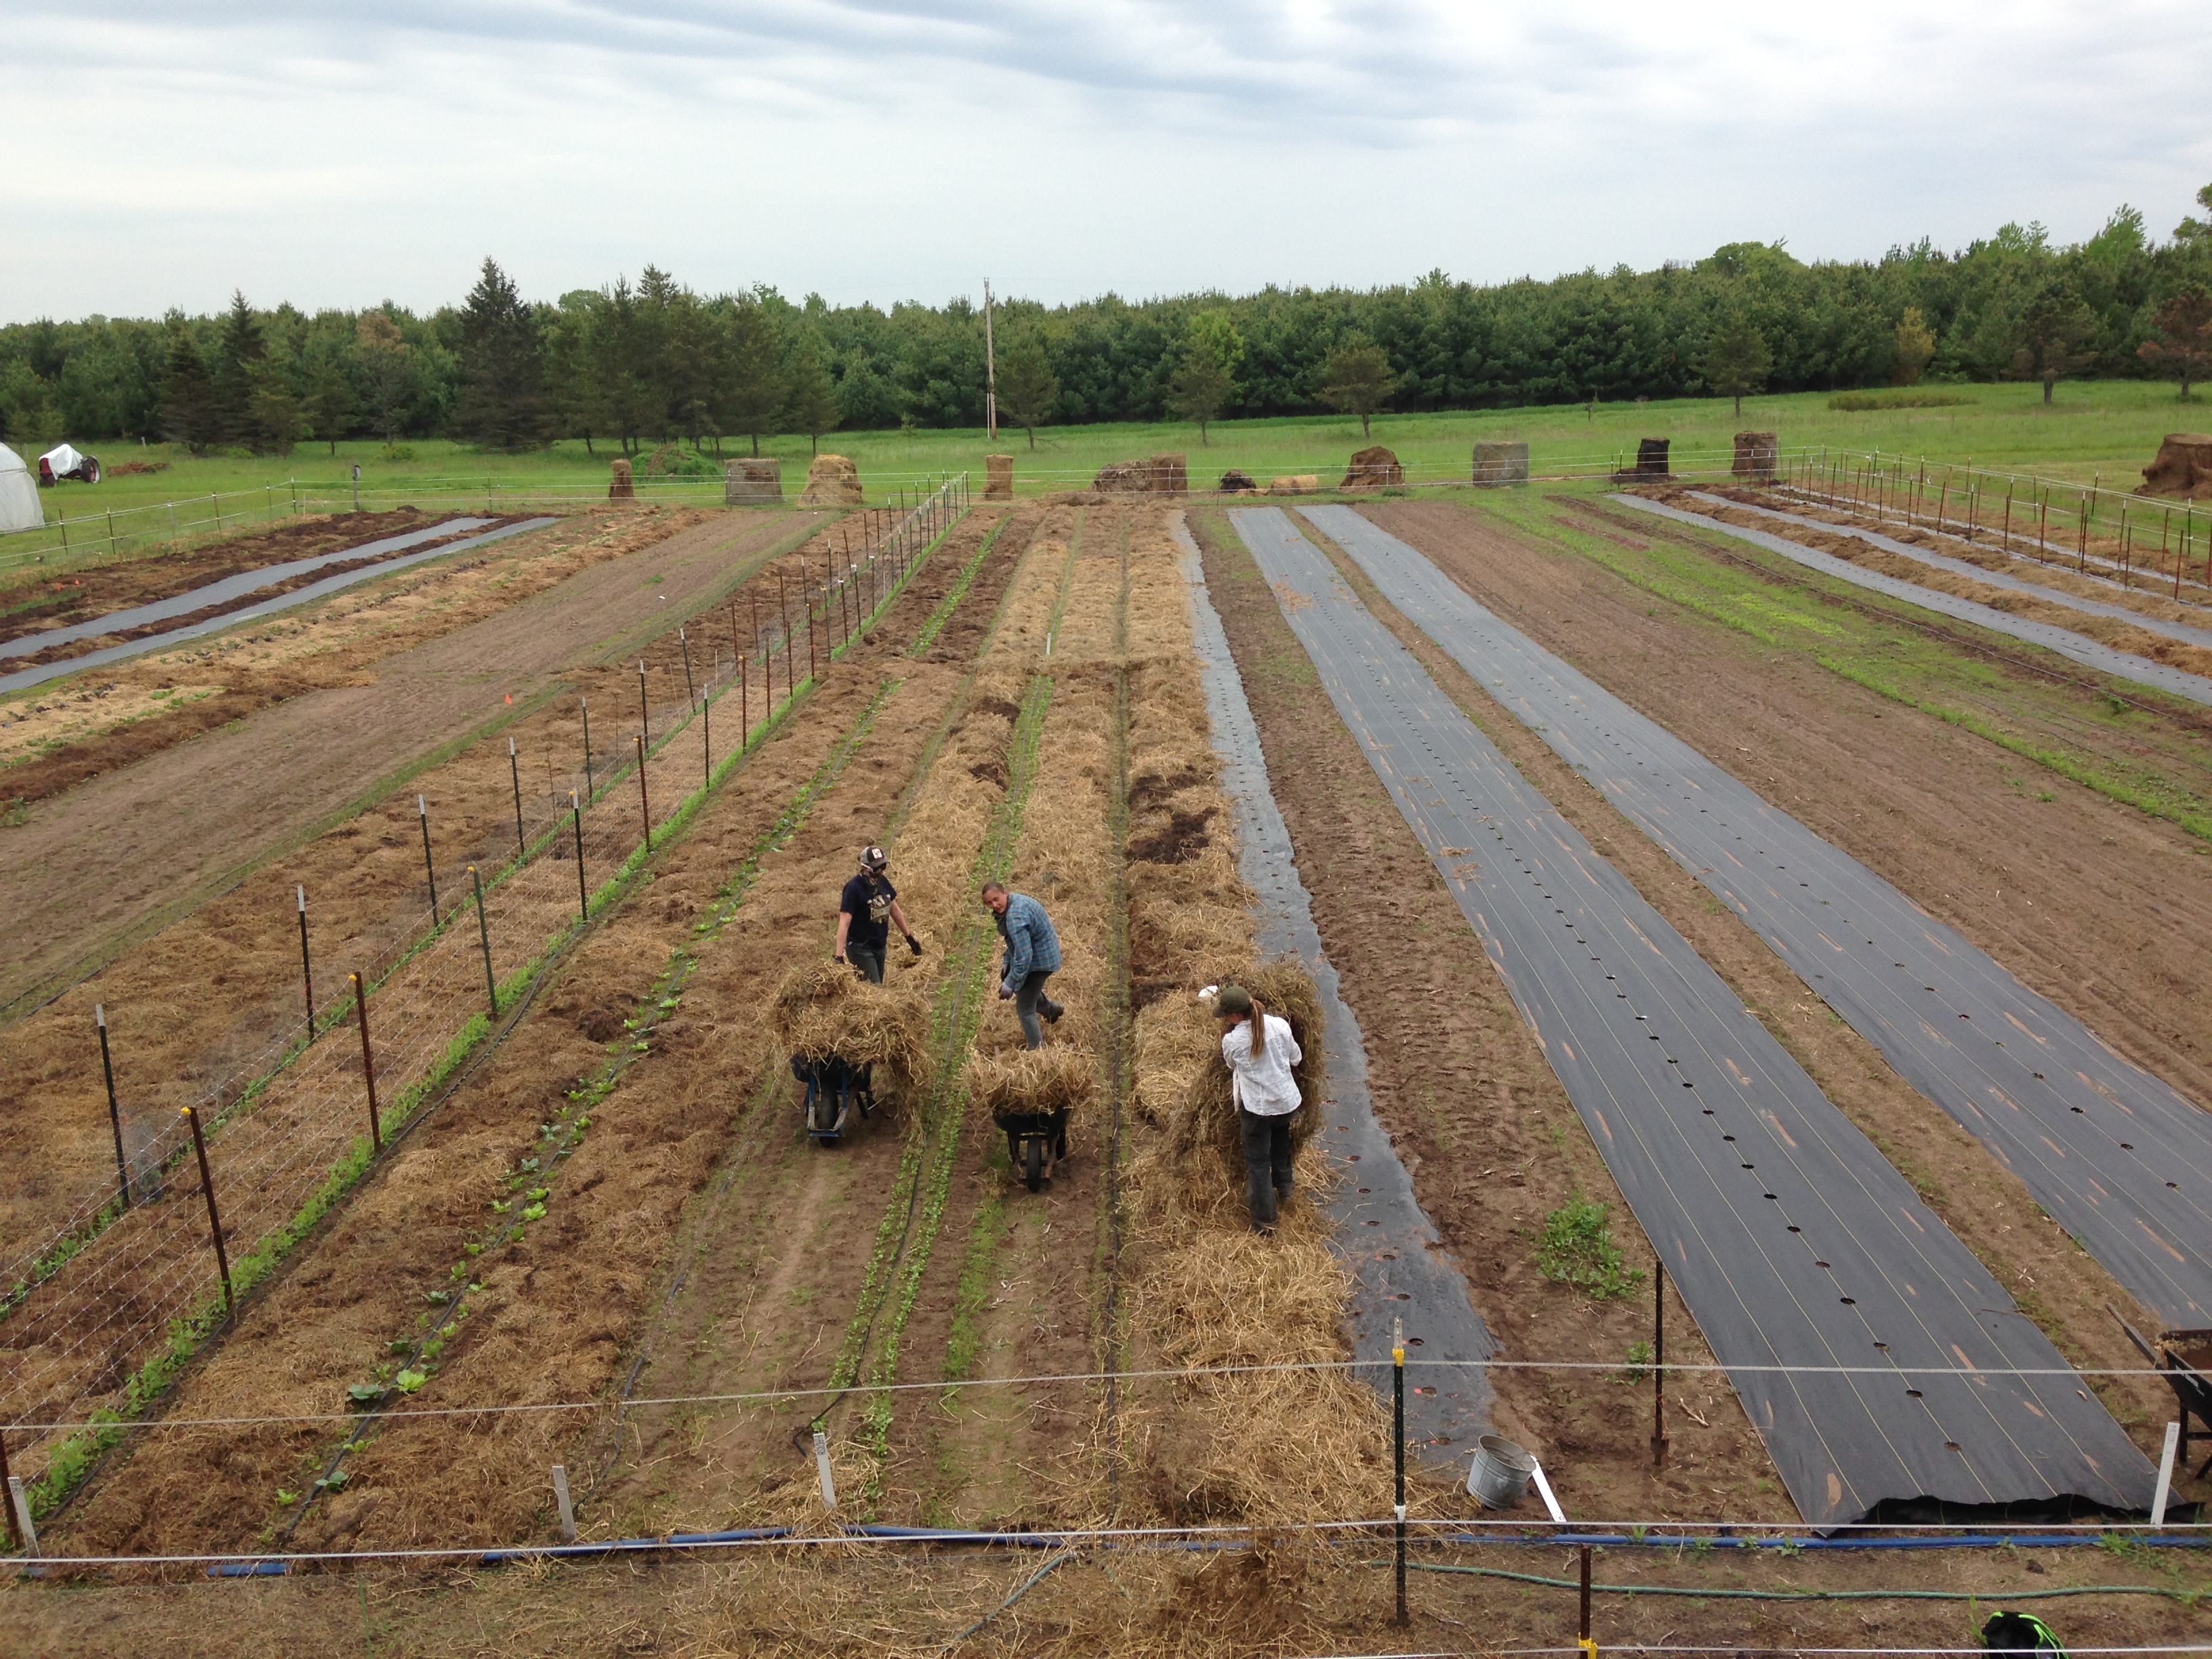
When I told WWOOFer Meg I was going to put up a blog post about recent weeks, she suggested it simply be the word “HAY!” It was tempting.
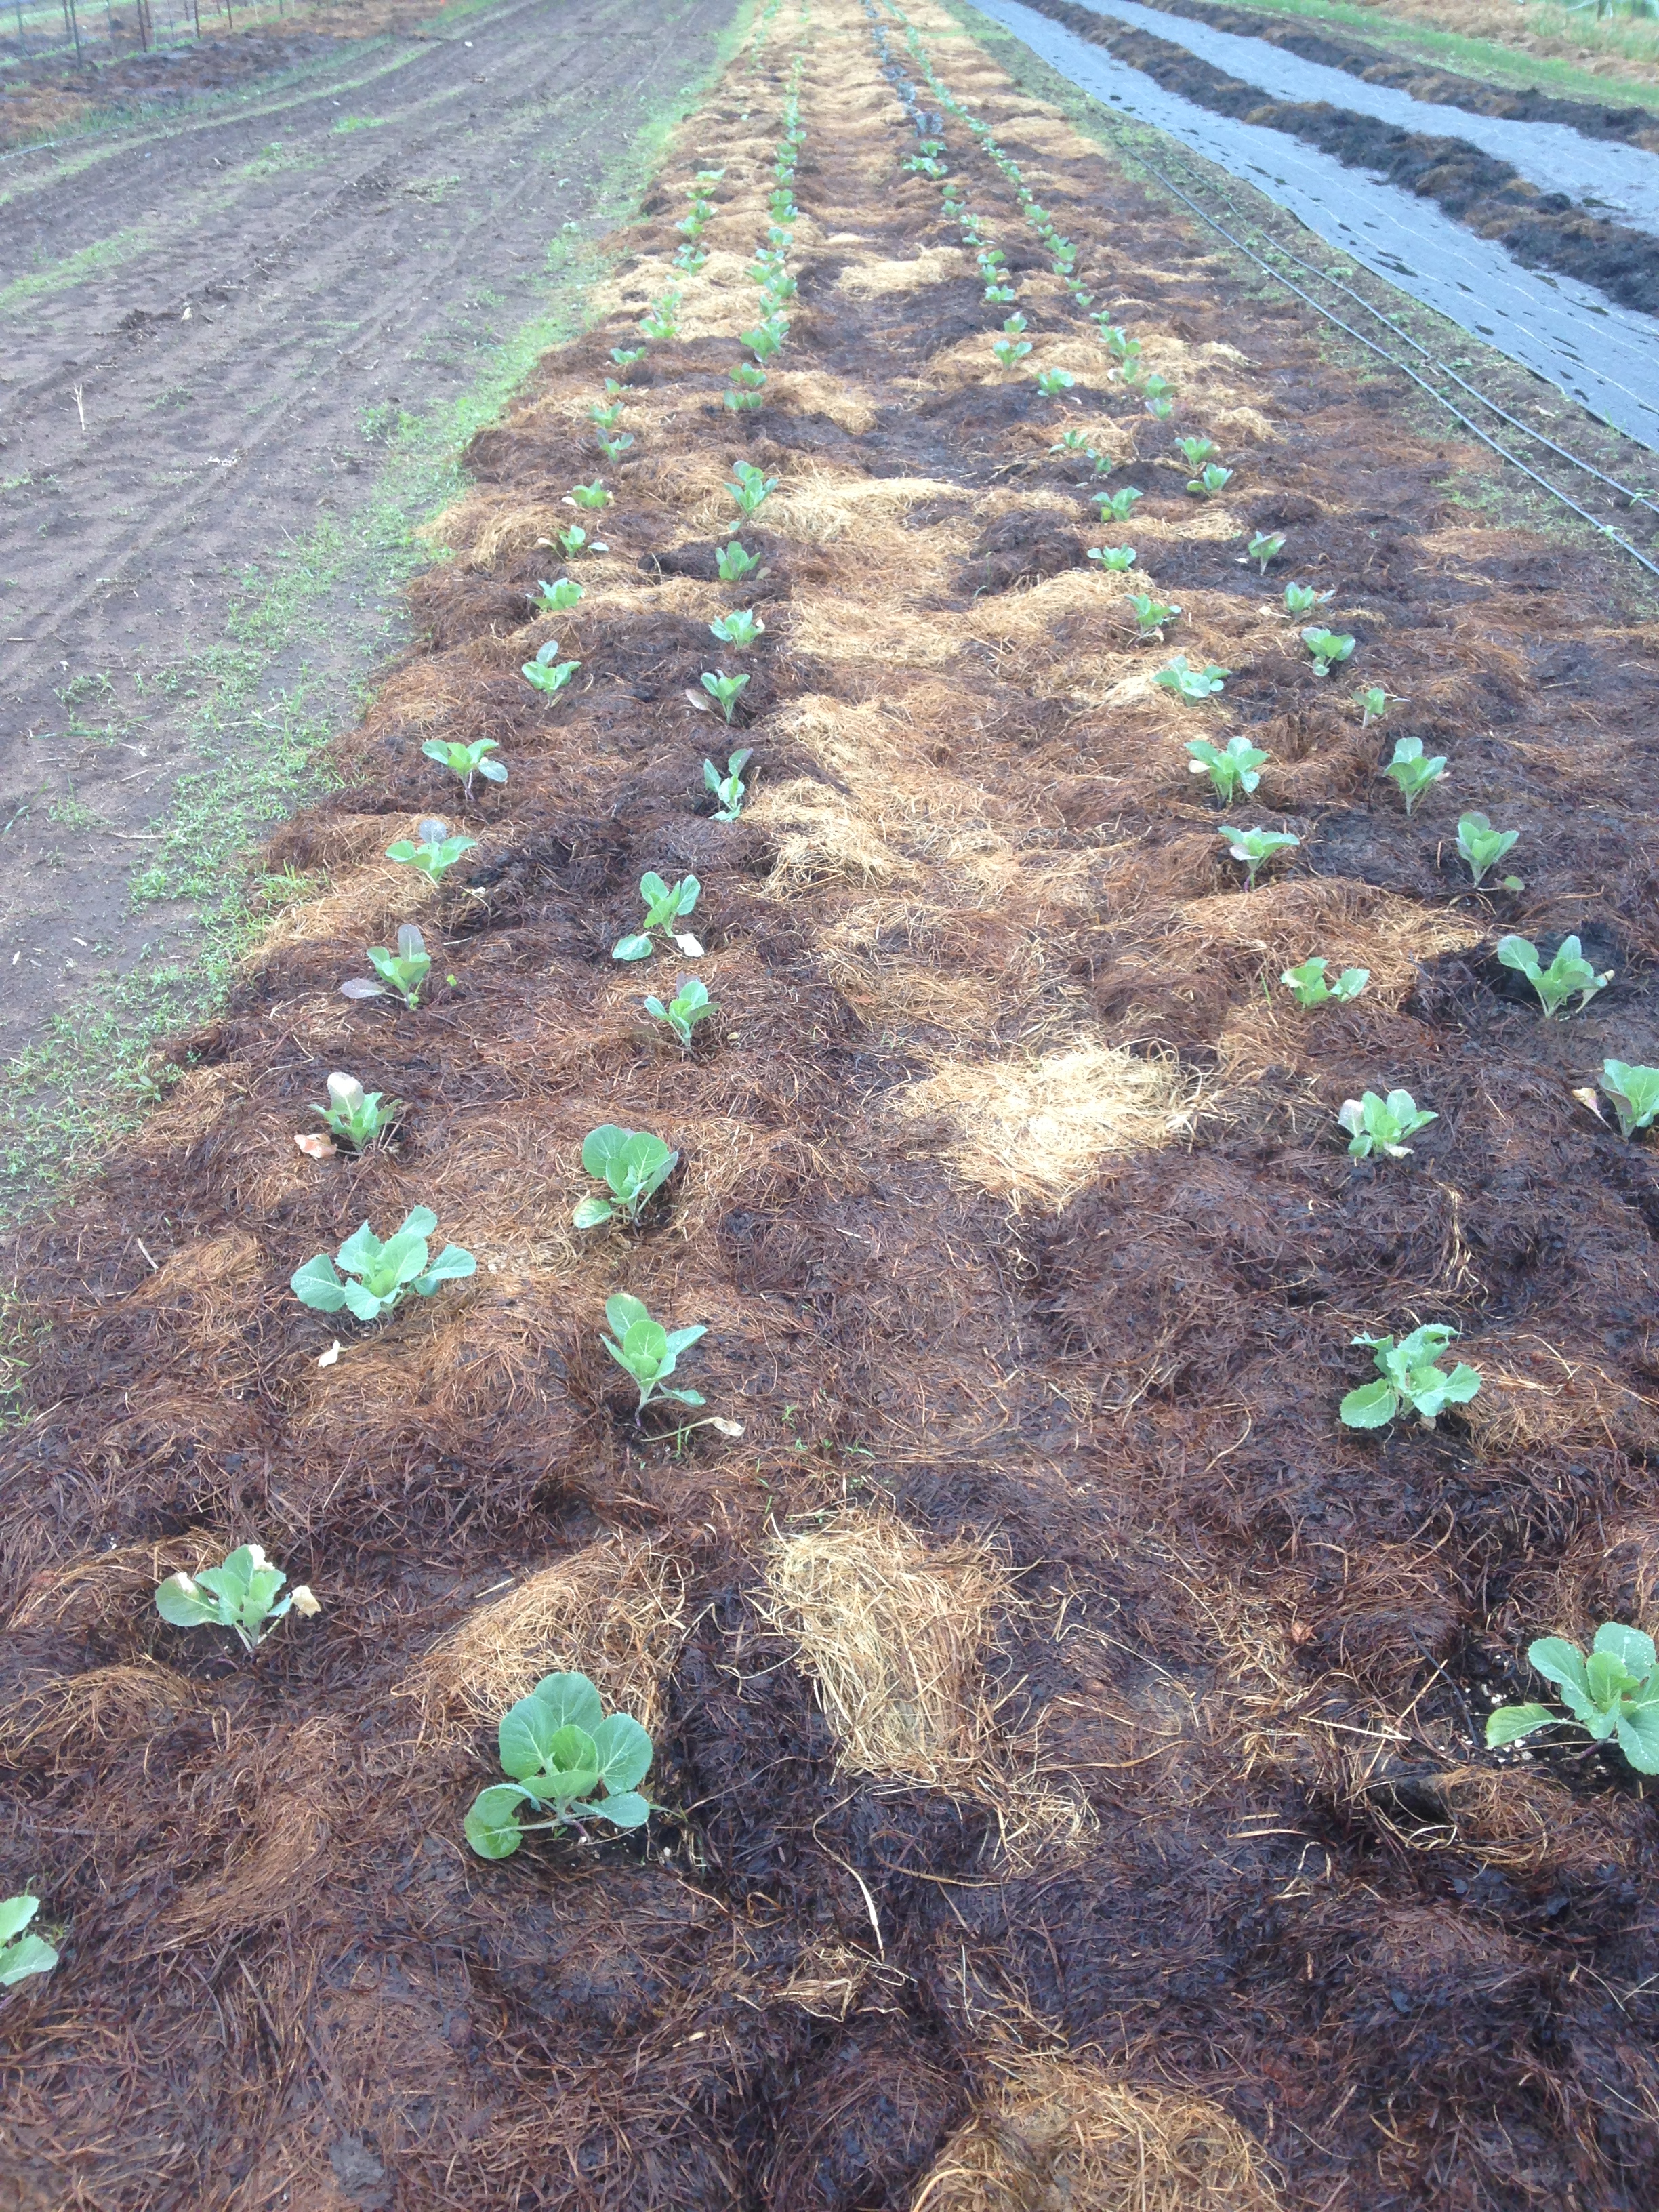
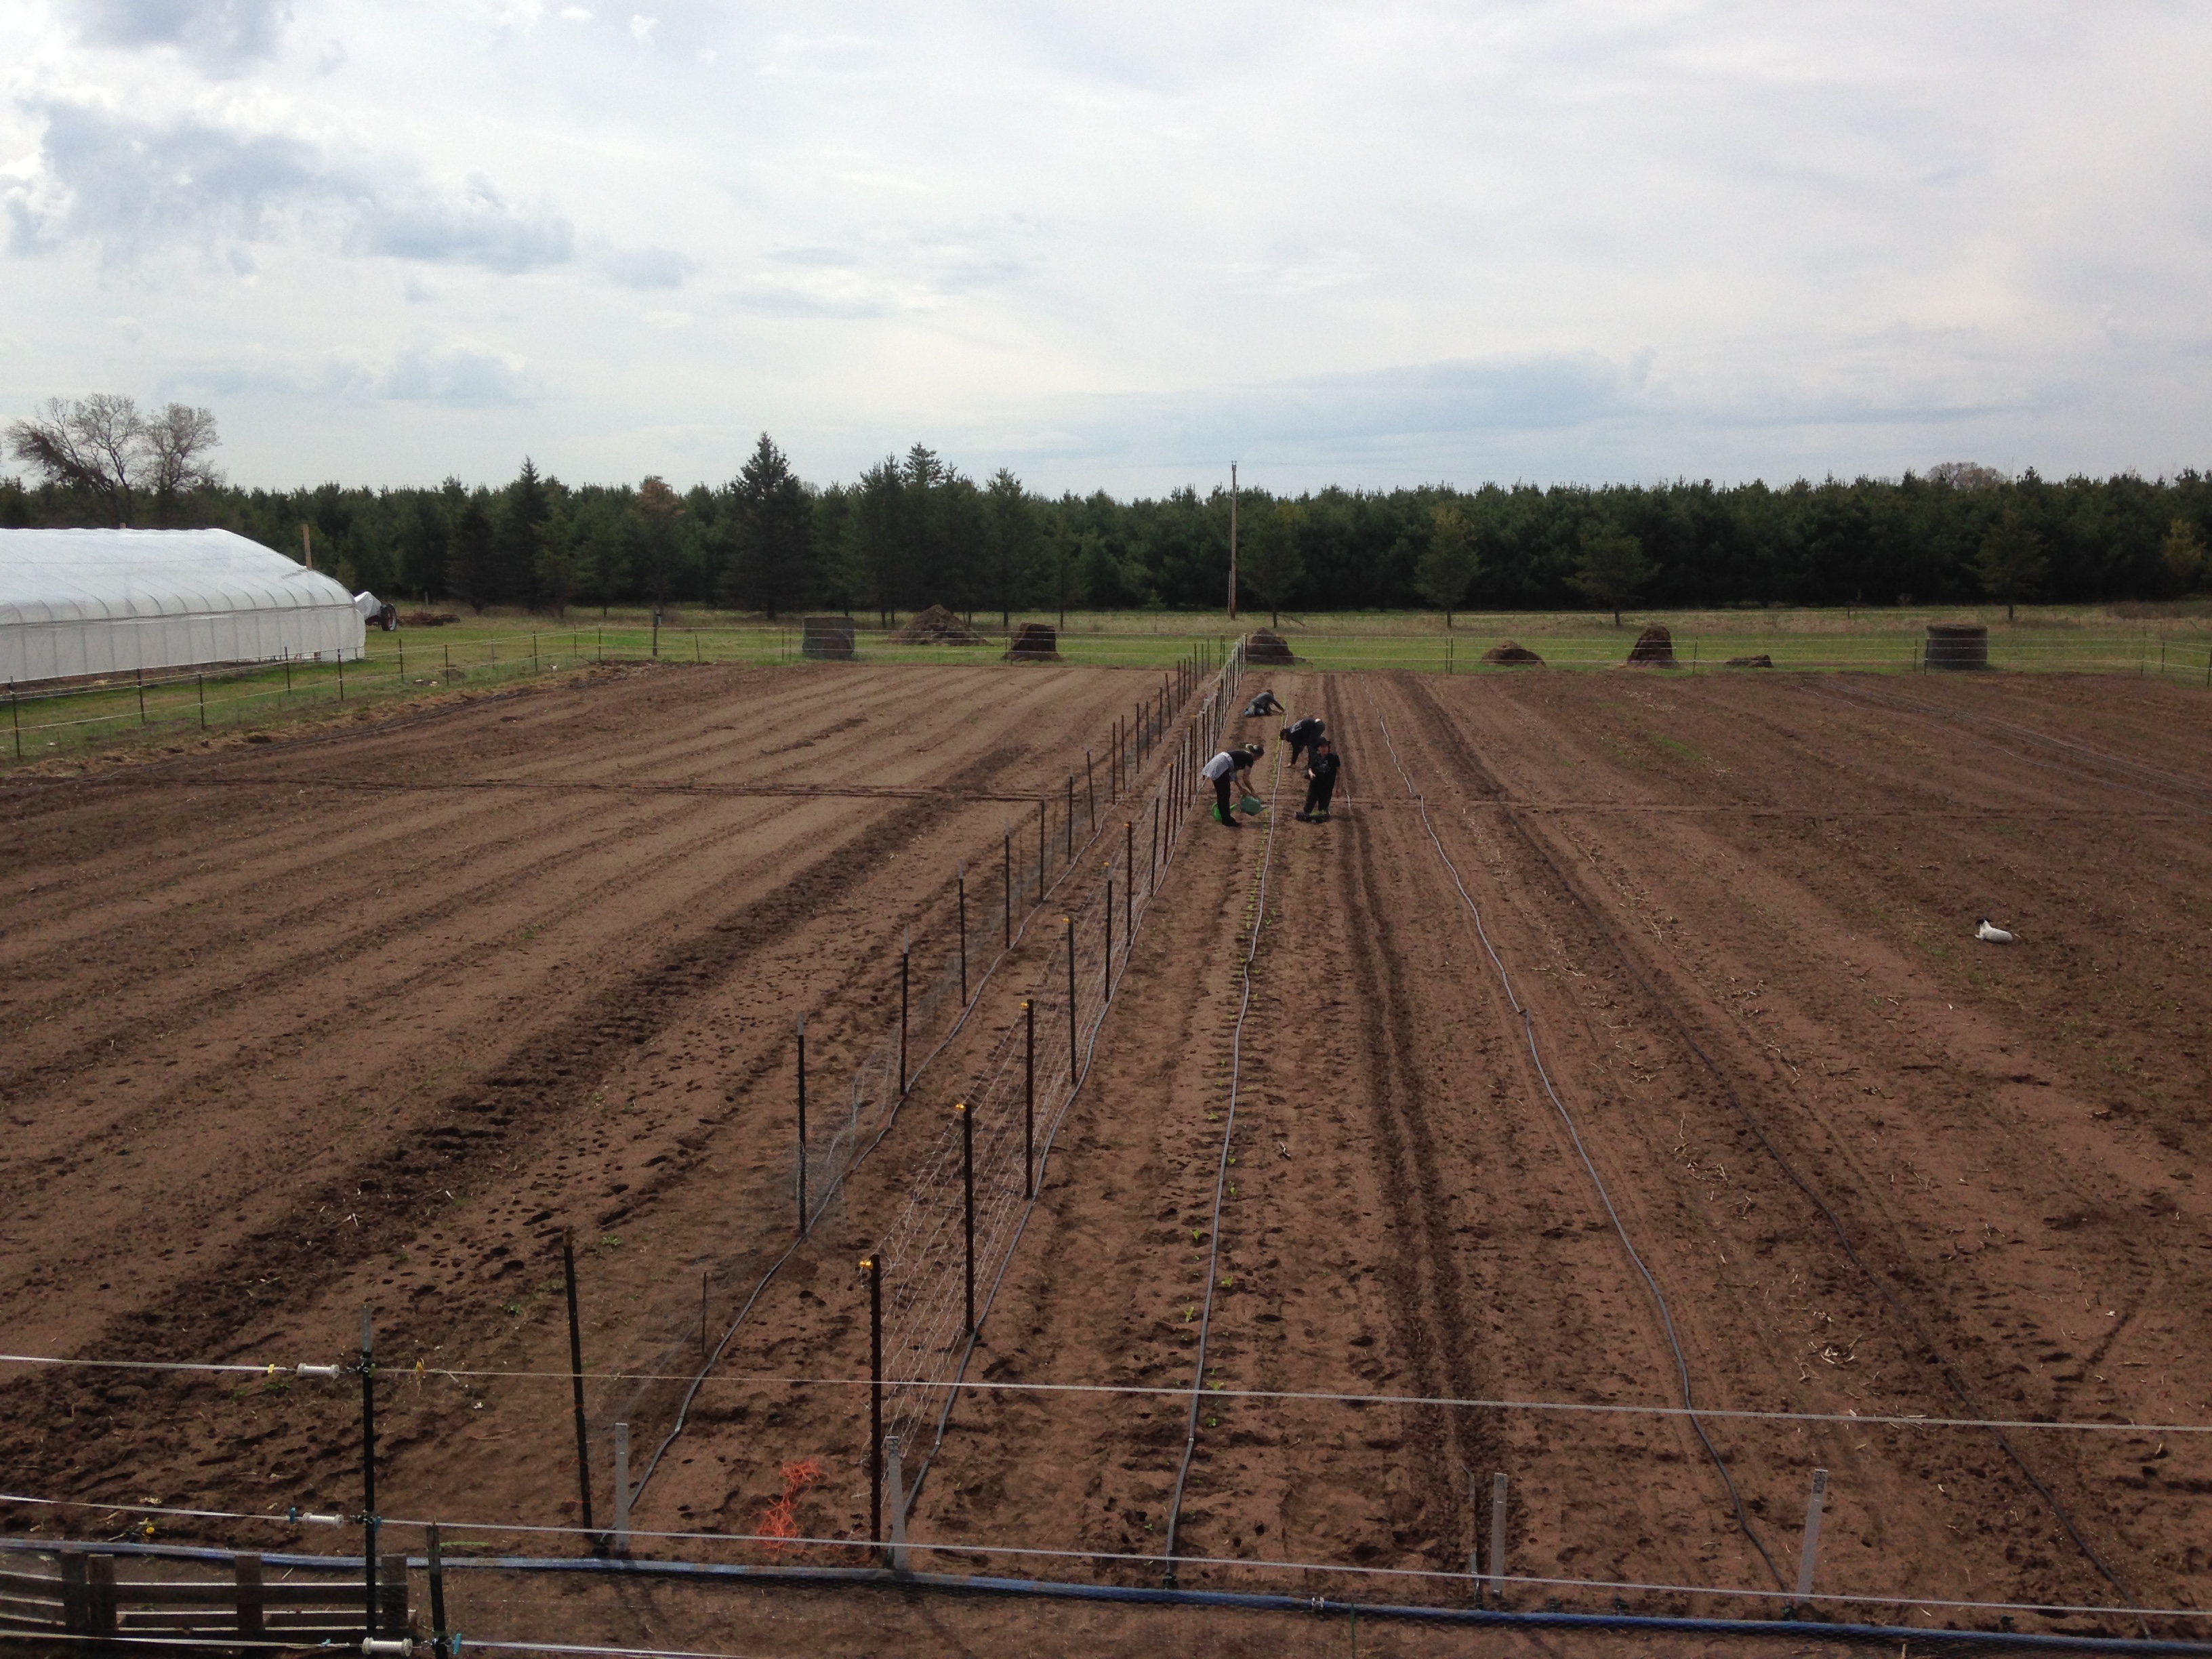
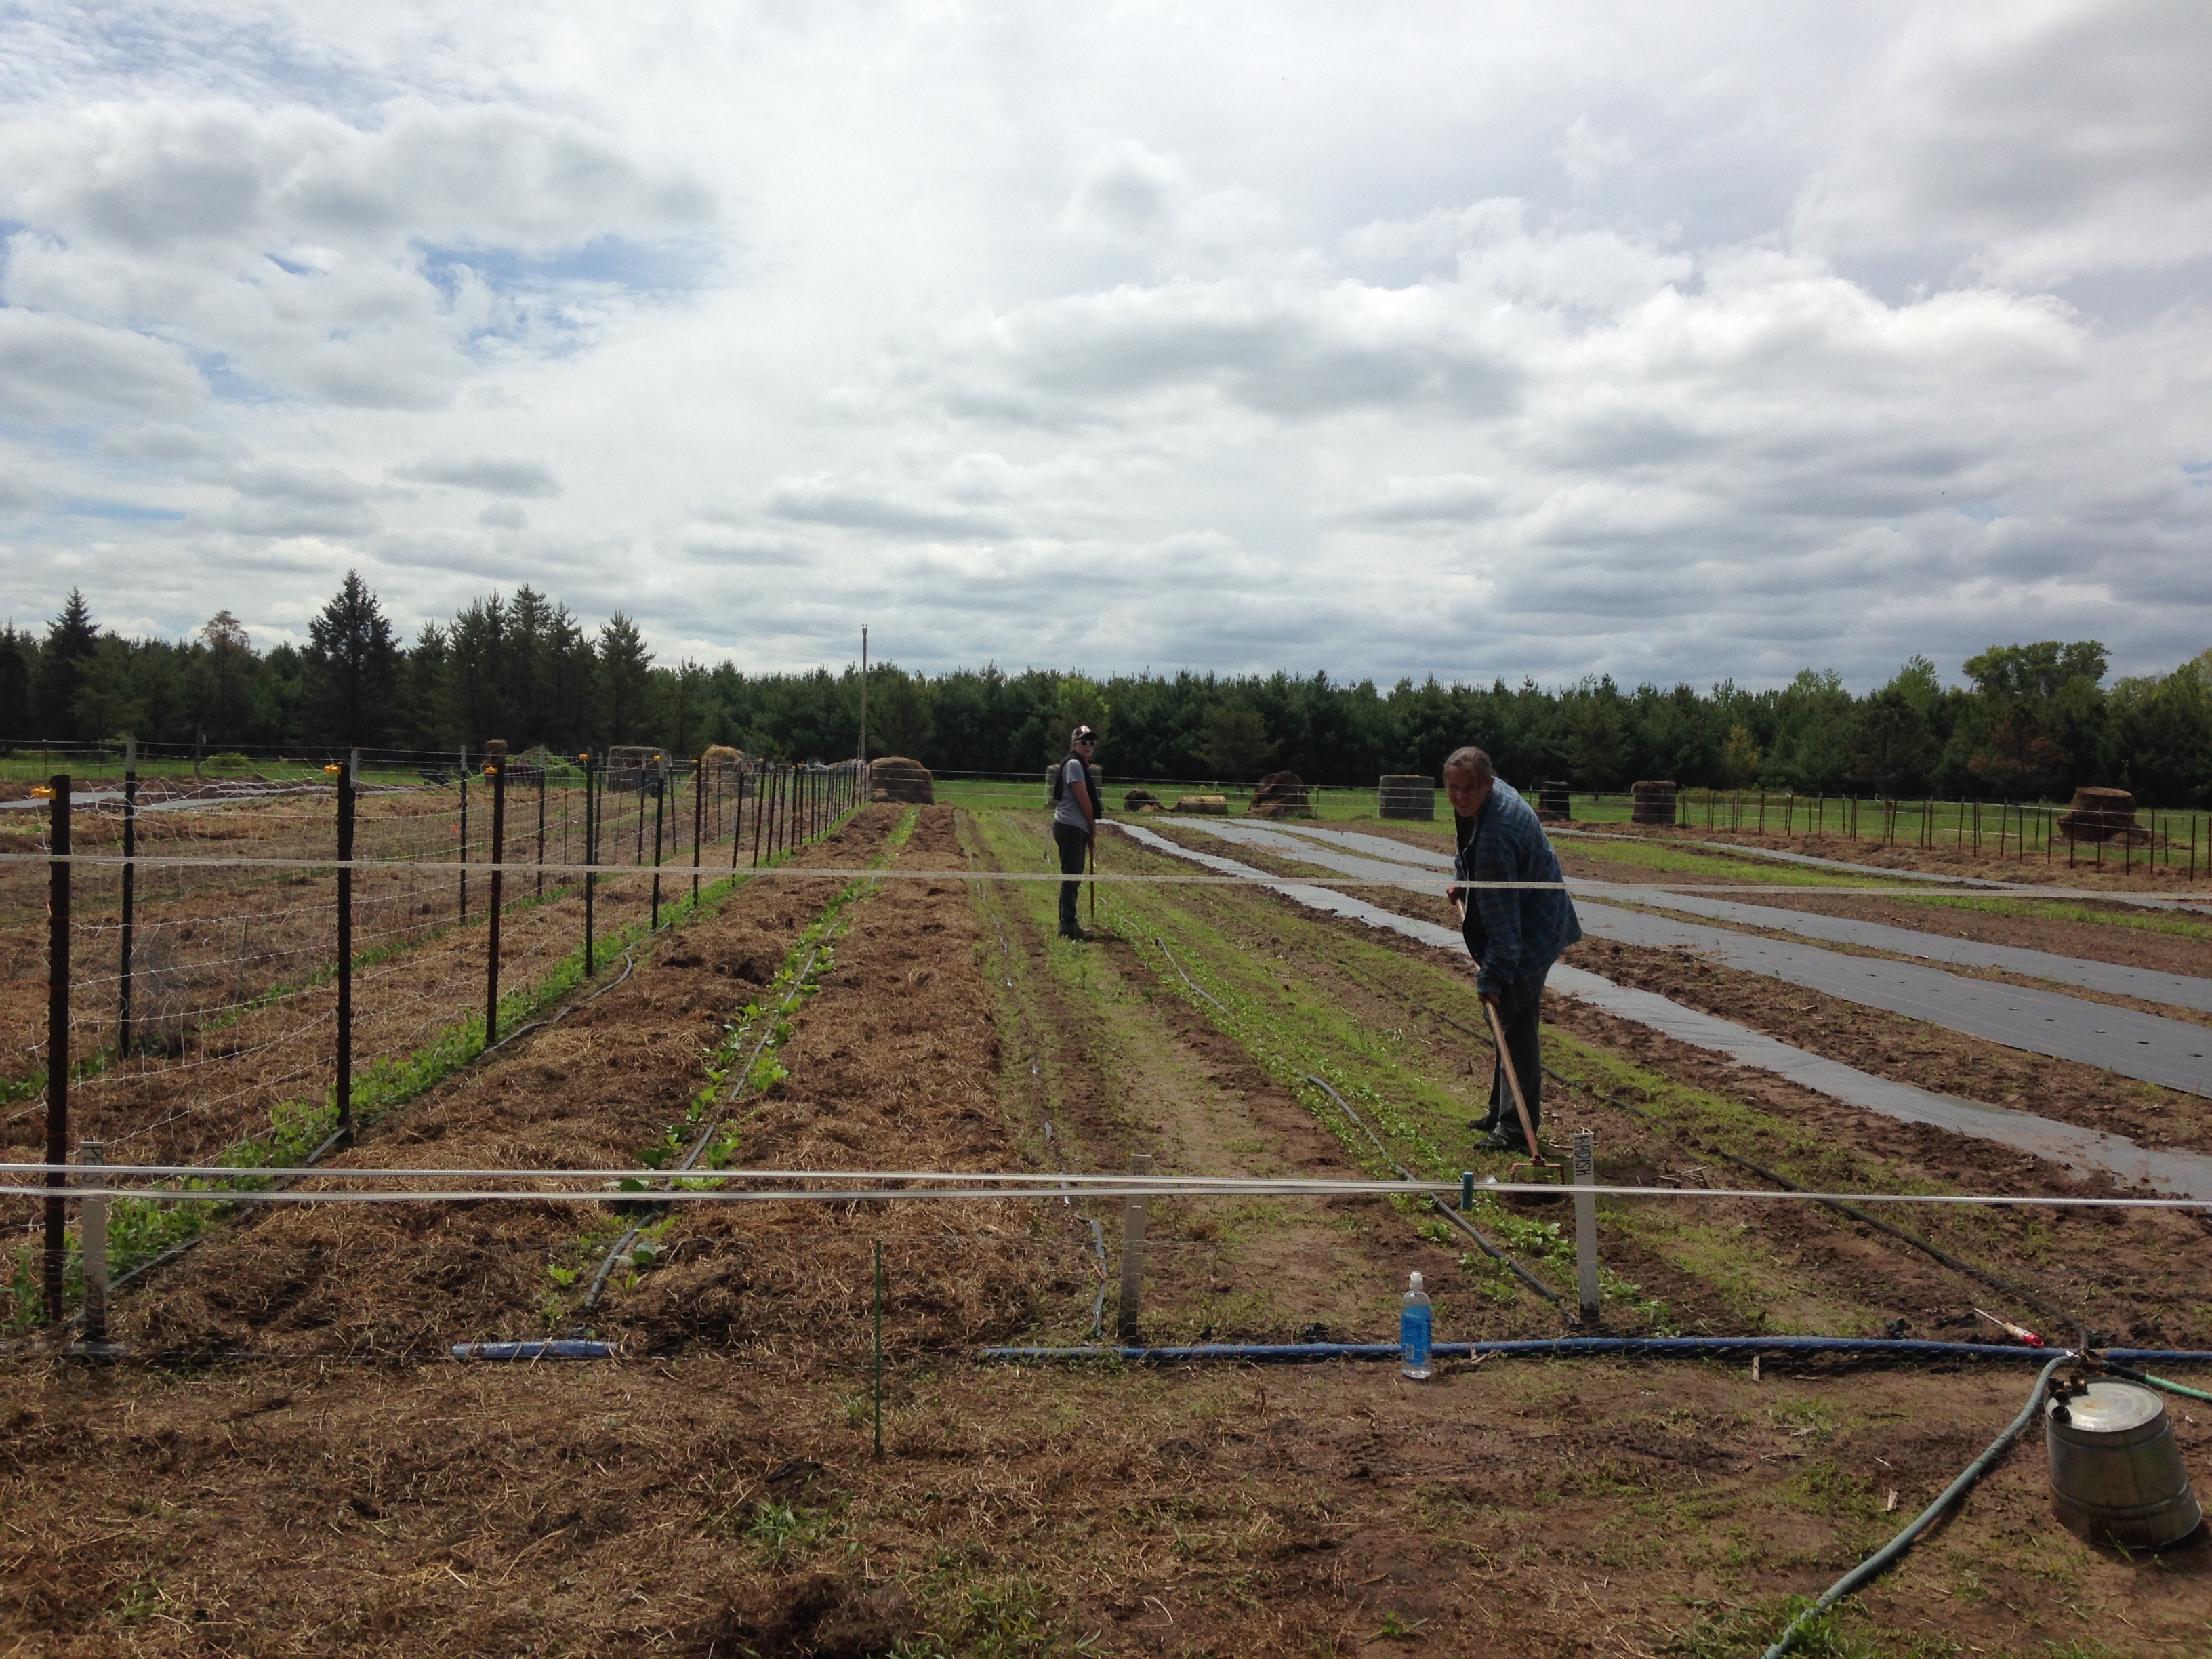
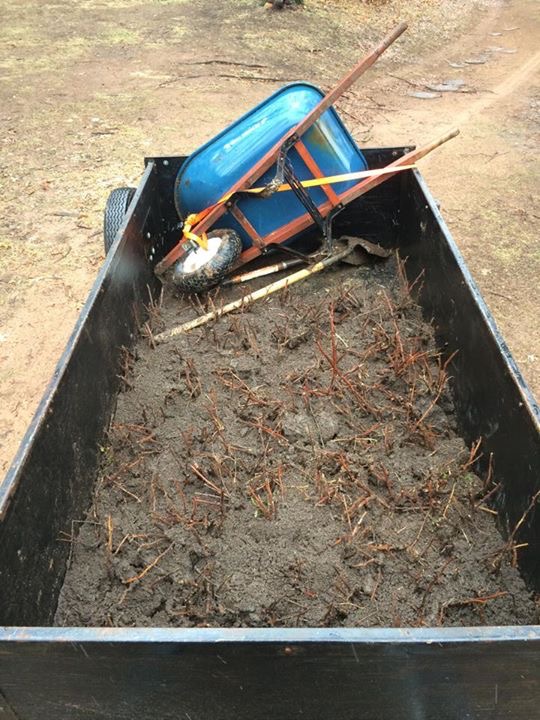
We’ve been busting out row after row of thick hay mulch, keeping the ravaging hordes of weeds suppressed while the crops get their feet under them; it holds moisture in the sandy soil, and eventually breaks down, adding nutrients and much needed organic matter for future crops. It’s not the most pleasant of tasks, especially for those of us with hay and mold allergies, but we’ve gotten some pretty good tactics down to make it easier; one person with a wheelbarrow per row to be mulched, doing relays back and forth, while one or two people rip up bales outside the field, and load up the wheelbarrows when they return, empty, to the fence.
This process has made things much more efficient, and since we’ve had a few WWOOFers helping, we’ve managed to get much more of the field under cover than previous years … which will mean happier crops and less weeding for the rest of the season.
tortoiseshell hay mulch
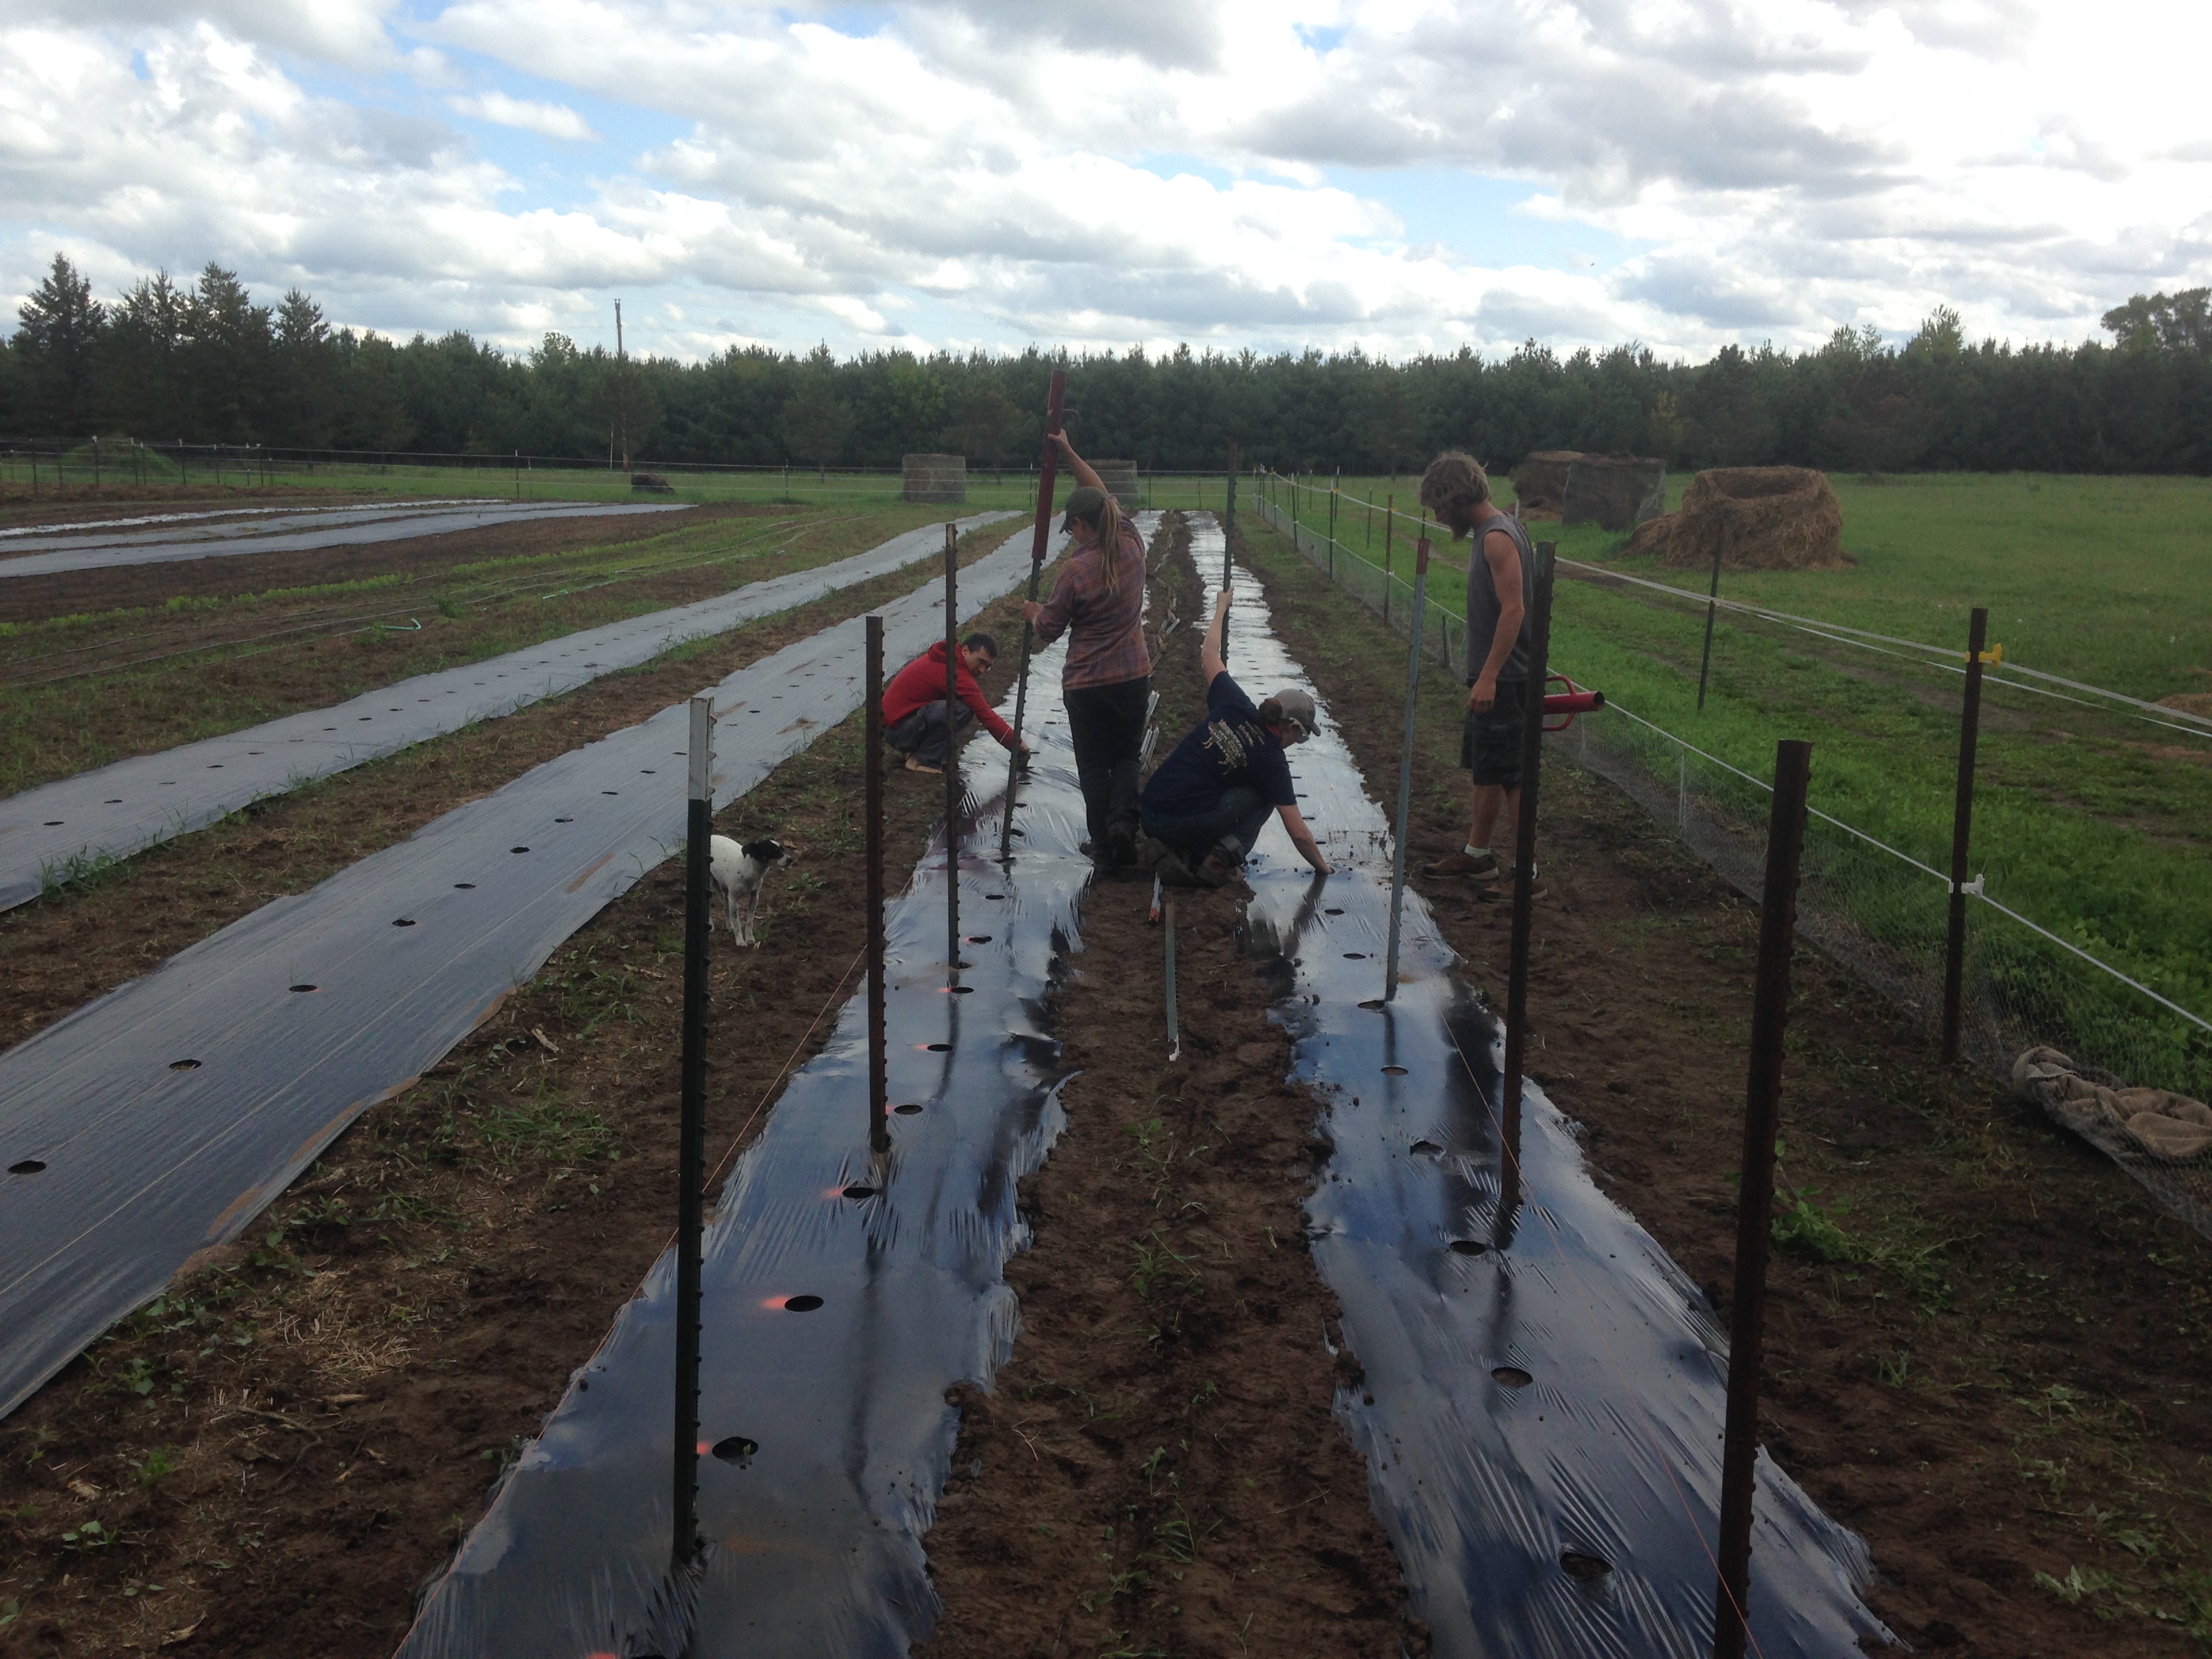
In a similar vein, we found a free silage tarp the exact dimensions of our high tunnel greenhouse, while scavenging for useful items at the annual “Trash Days” in Bloomington MN (where folks put all manner of unwanted piles out on the curb for scavengers like us to pick through, prior to it all heading to a landfill). Although it hadn’t been the plan, the dimensional match seemed too meant to be to ignore, so we transformed the high tunnel into a plastic bubble for heat-loving plants.
It’s amusing since neither of us really ever wanted to grow using plastic, but it’s hard to argue with luck and with results – and it’s certain that such a ground cover is ideal for the sandy, weedy soils we contend with here, as well as for heat-loving plants. (The plants are watered by both driplines connected to the well, and by soaker hoses gravity-fed by various rainwater collection tanks around the farm.)
sweeping the loose soil away from the sensitive tomato plants. Tomatoes are total Bubble Boys
And speaking of rain – we’re finally getting nice amounts, after a nearly month-long dry spell, where we were having to run the generator/well irrigation daily to keep the seeds and transplants alive in the field. We’d watched storm after storm split apart on the radar and pass around us, leaving us dry … but finally, we were blessed with three inches over the course of a few day rainy spell (an amount that would have been problematic in less well-drained soil), and since then it’s been a lovely syncopation of sunshine and rain, alternating daily or even hourly.
the crew unloading a trailerful of free woodchips
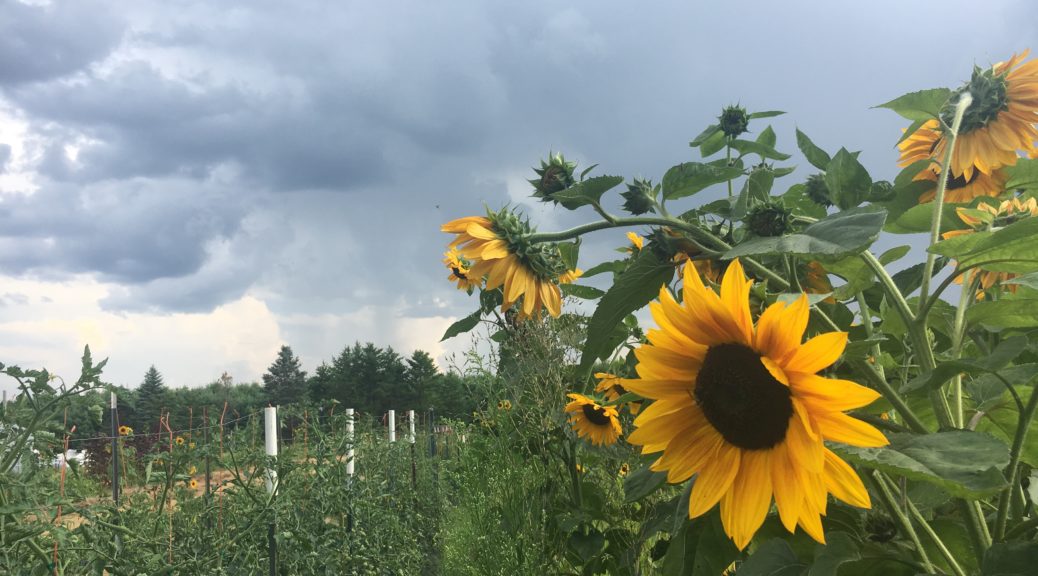
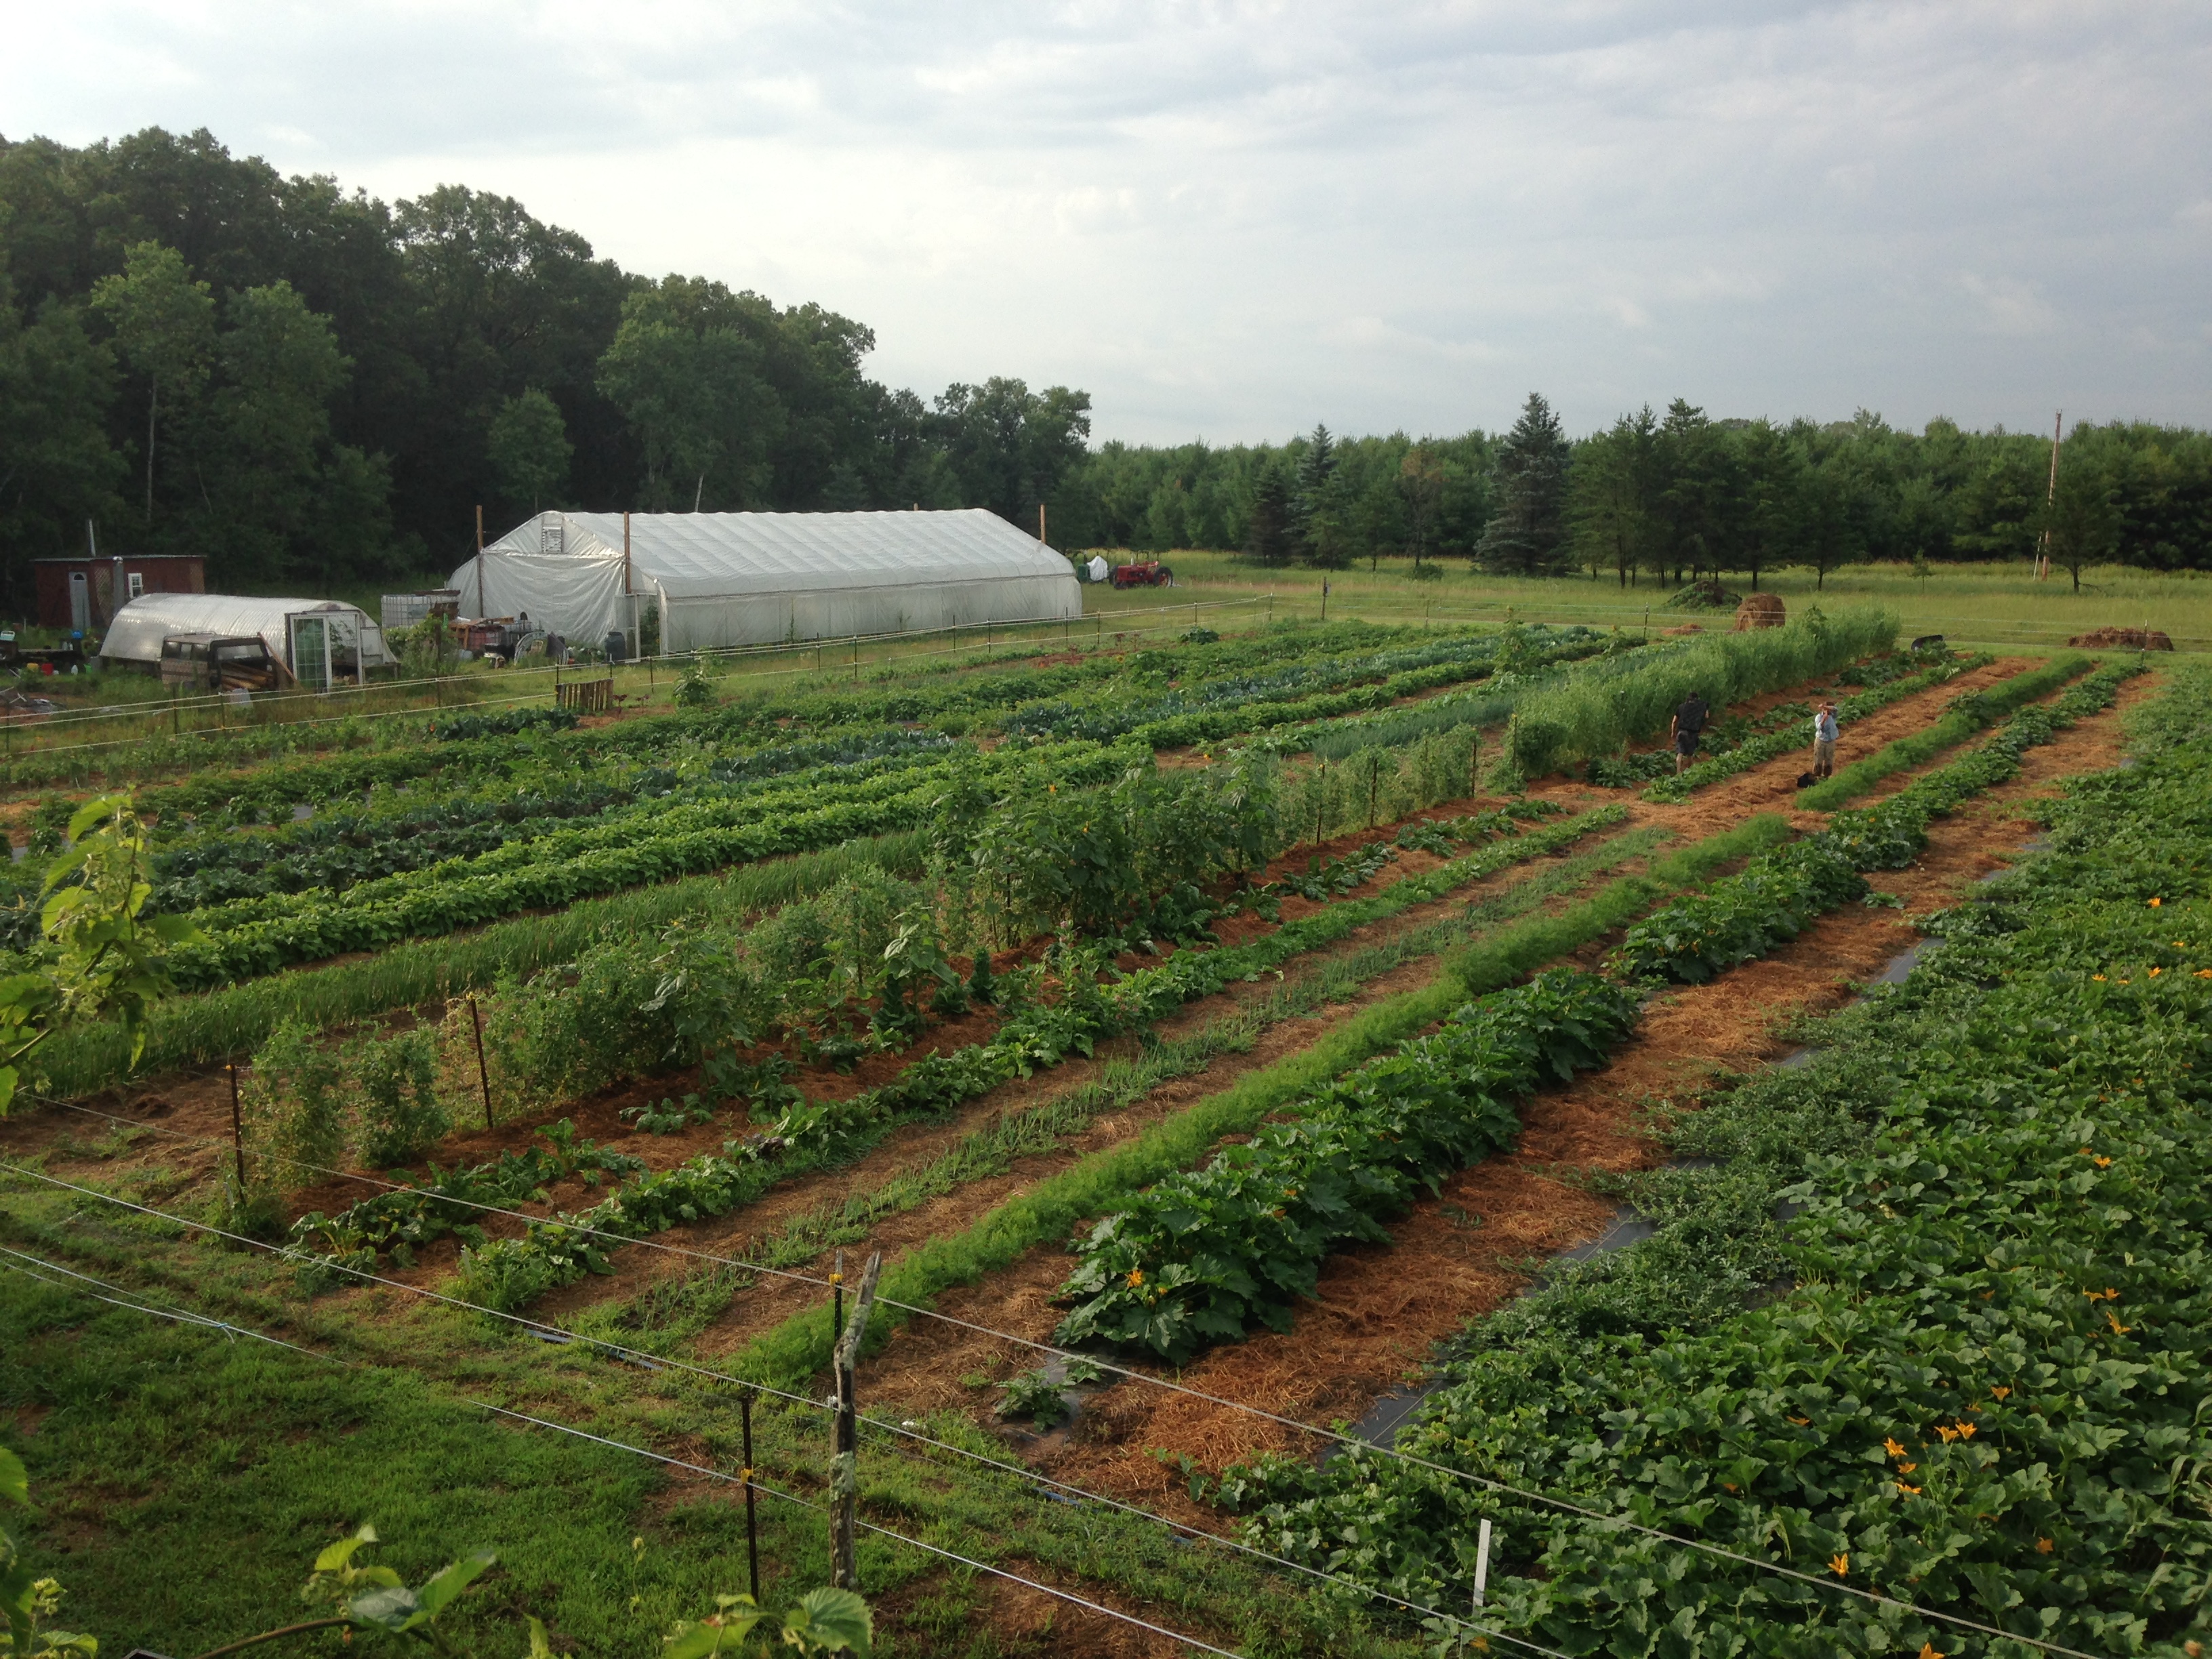
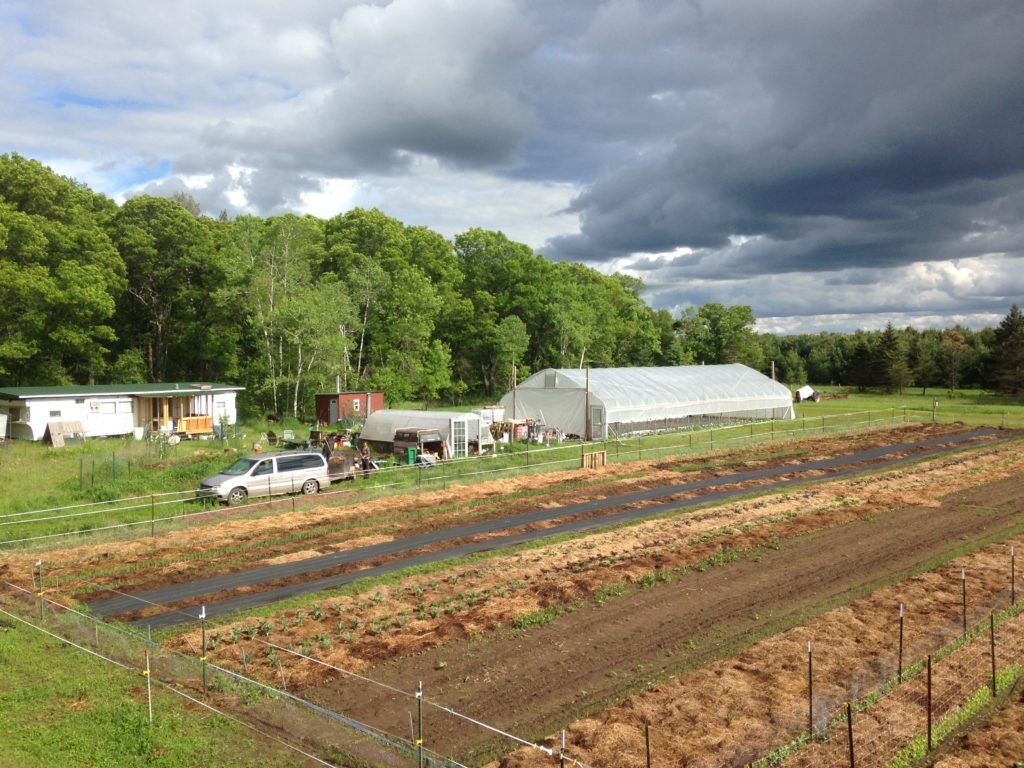
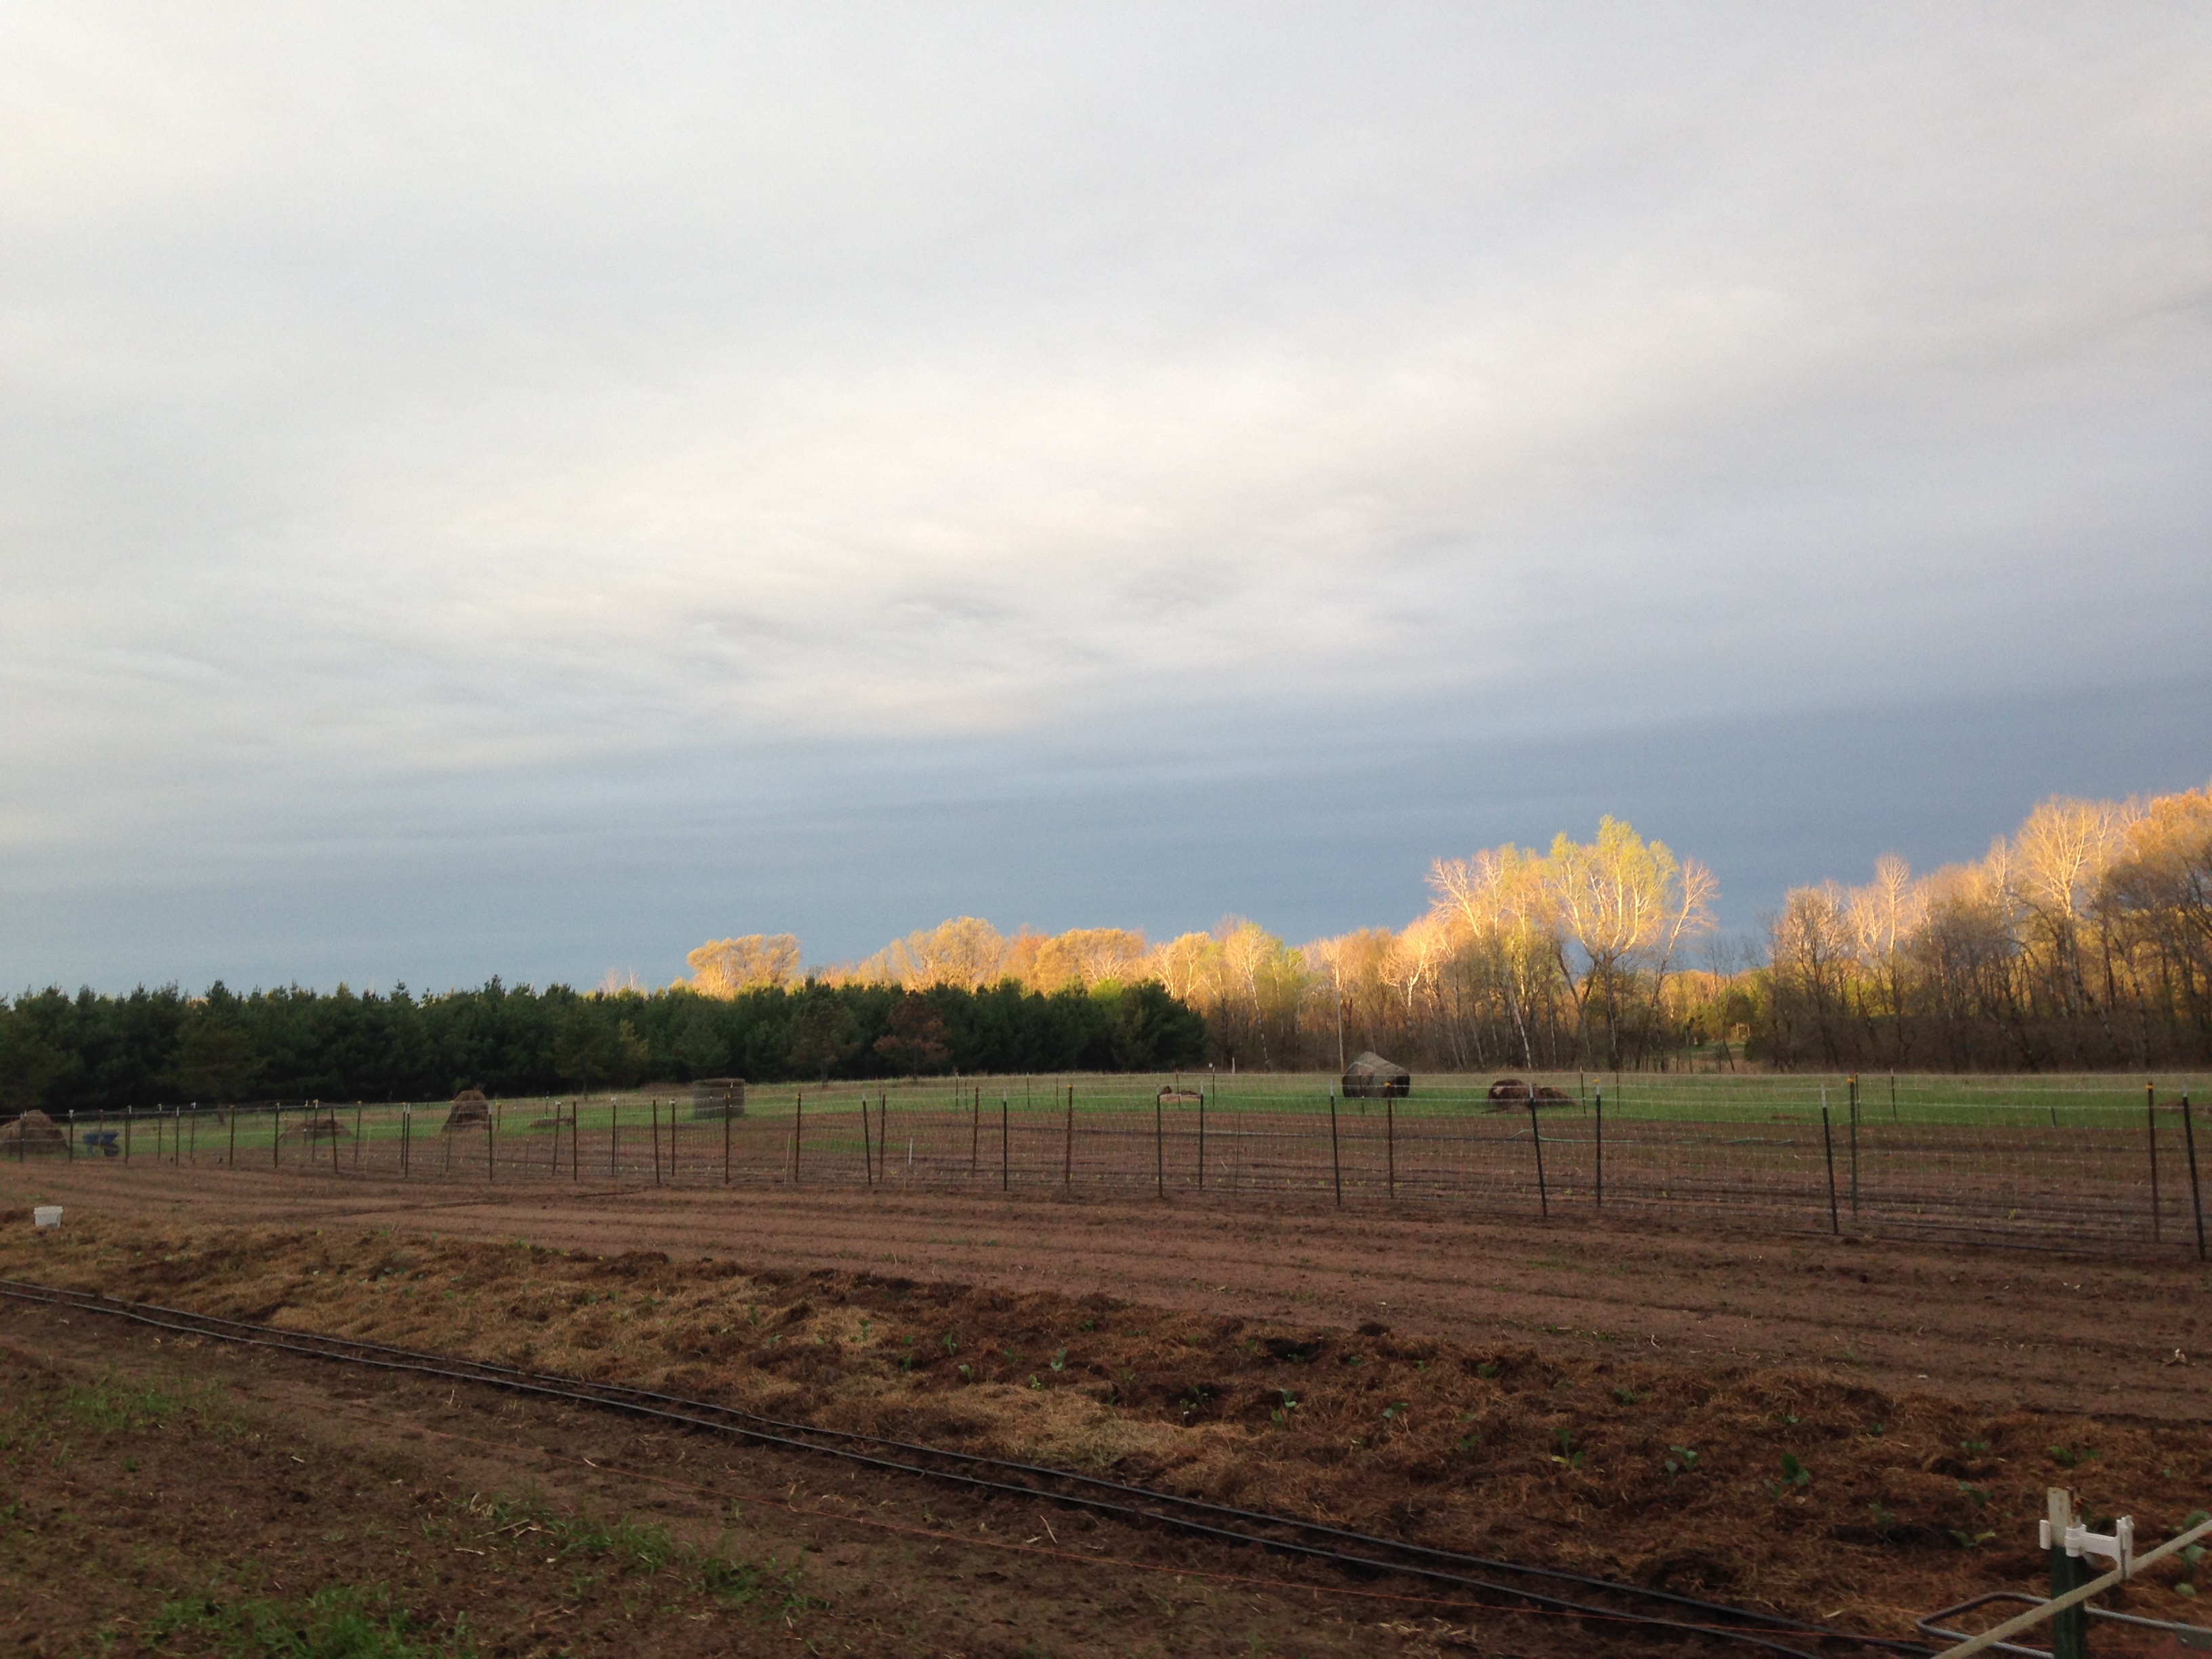
As I sit writing this on Monday morning, it’s going from full sun to downpour about every 10 minutes – the photo above is the sunny field with the next squall rolling in.
The crops love this rhythm, and are looking quite pleased with their lot in life.
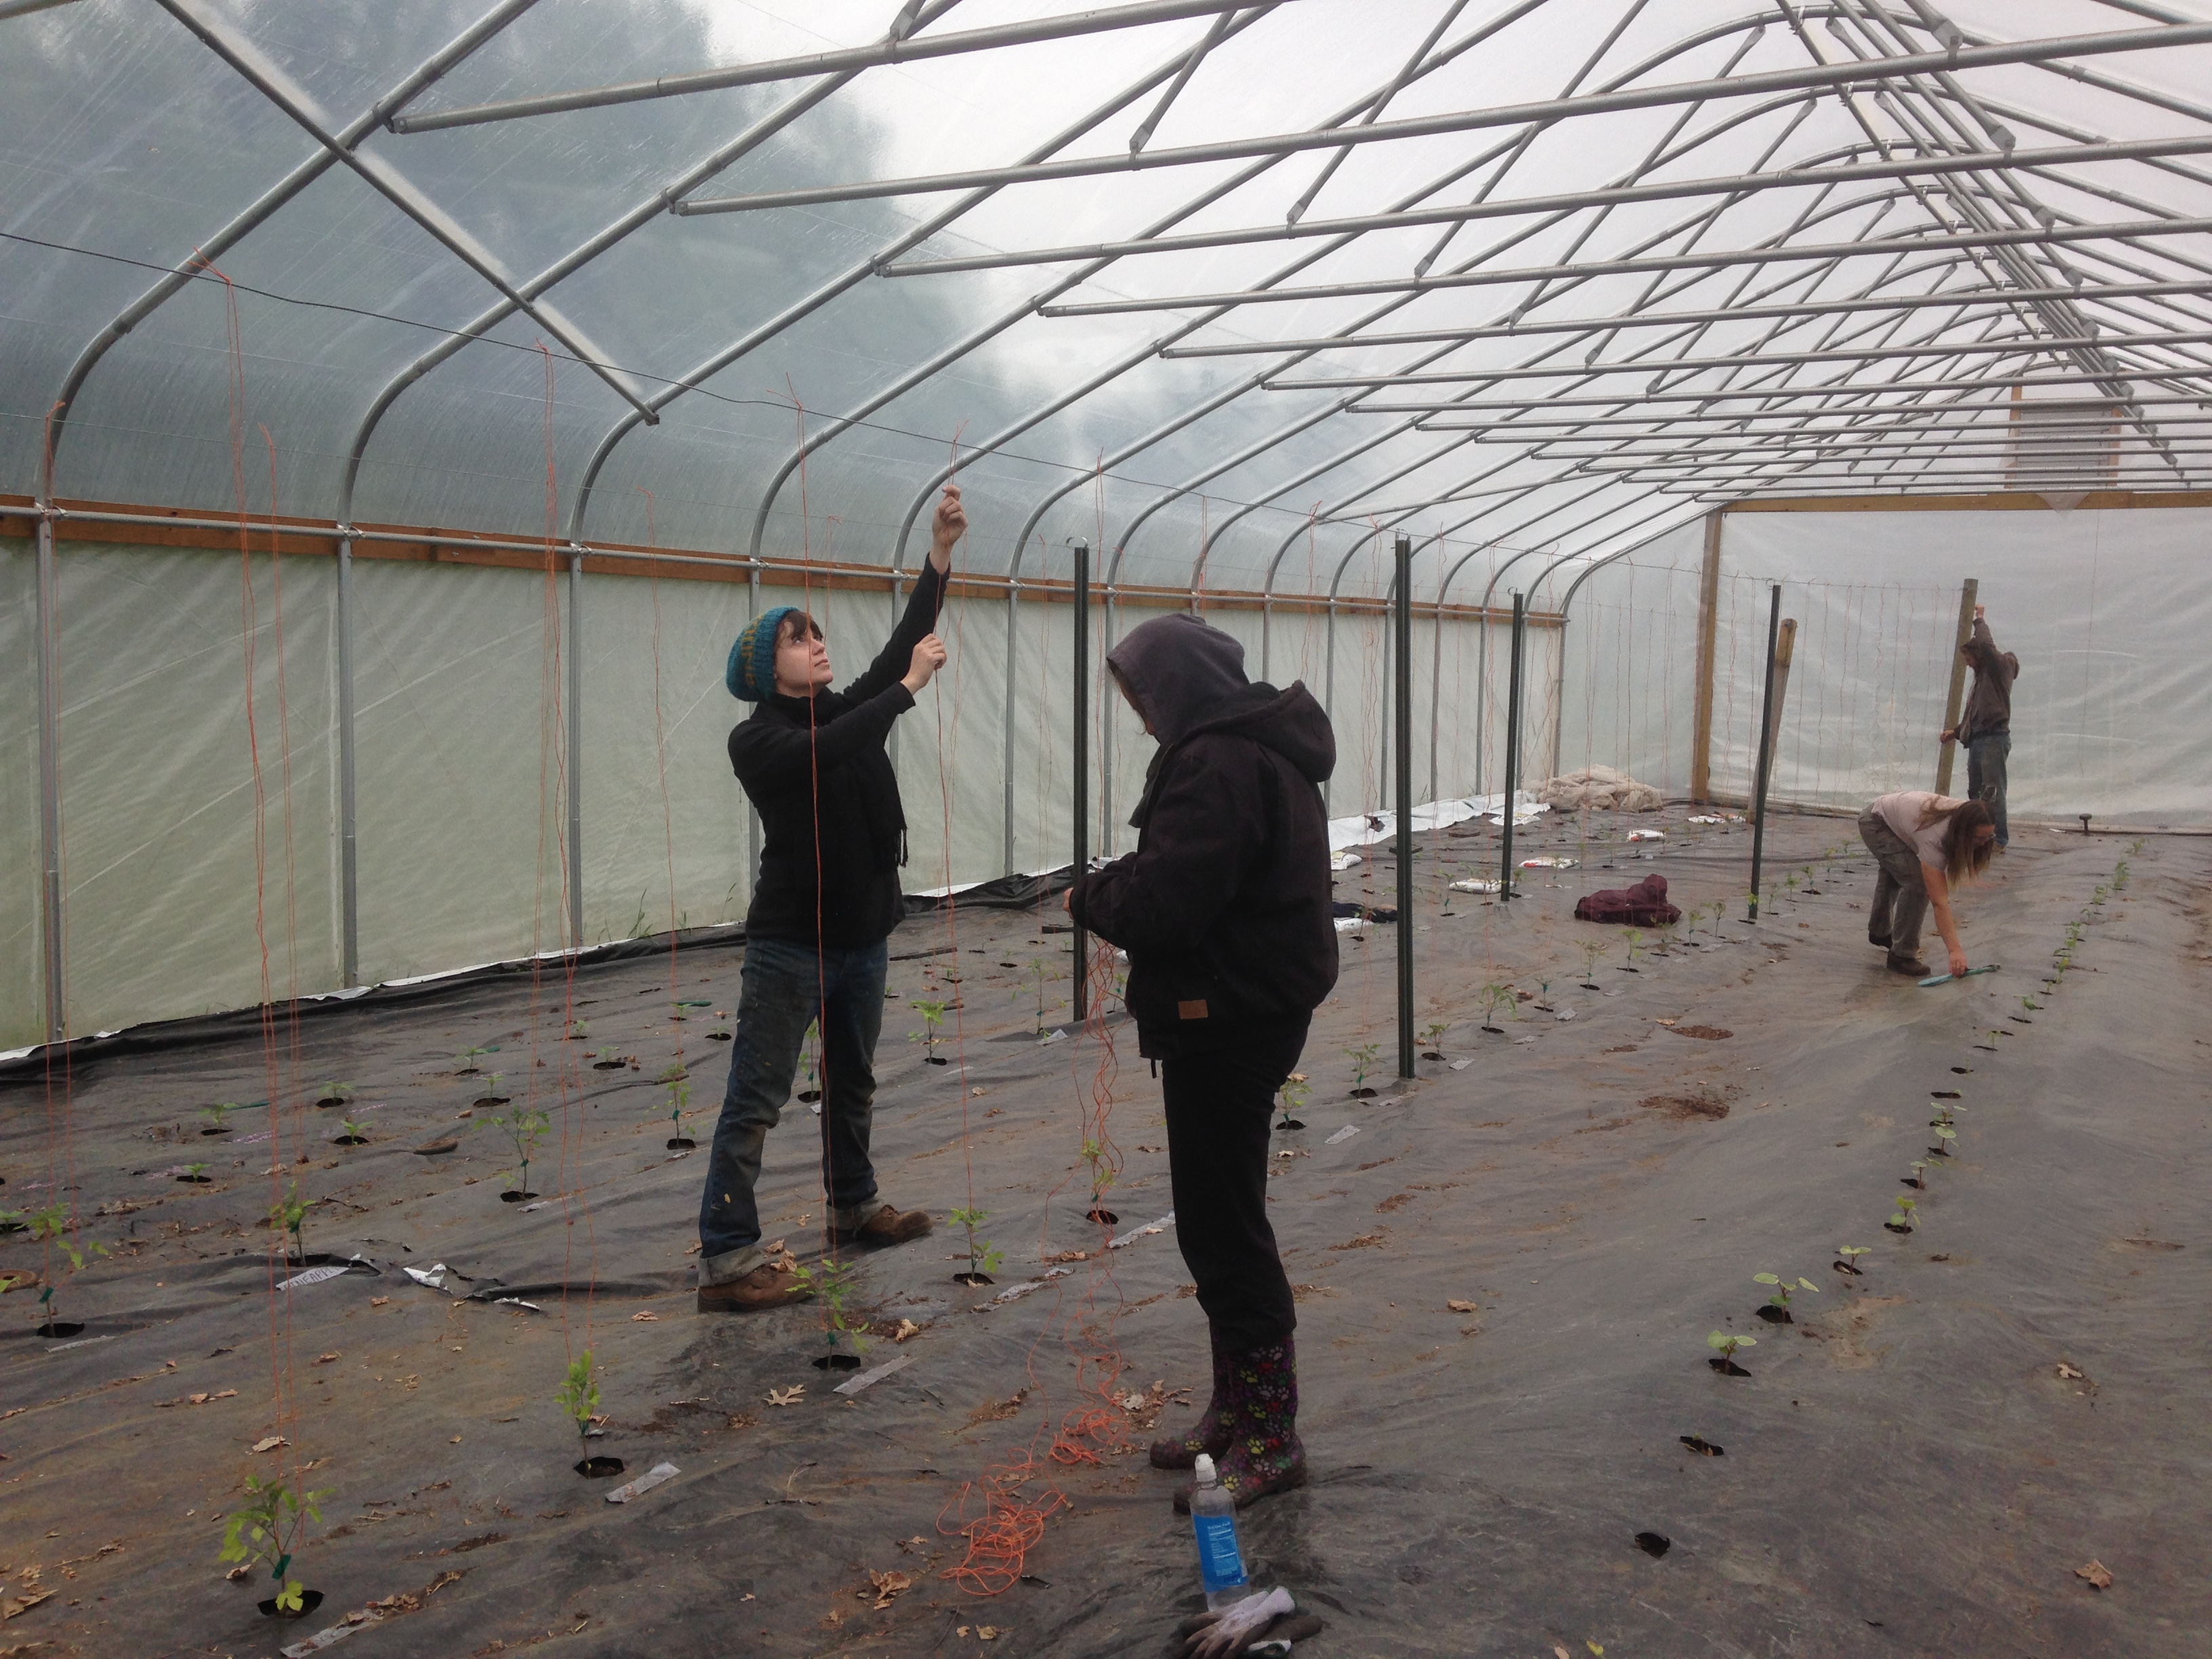
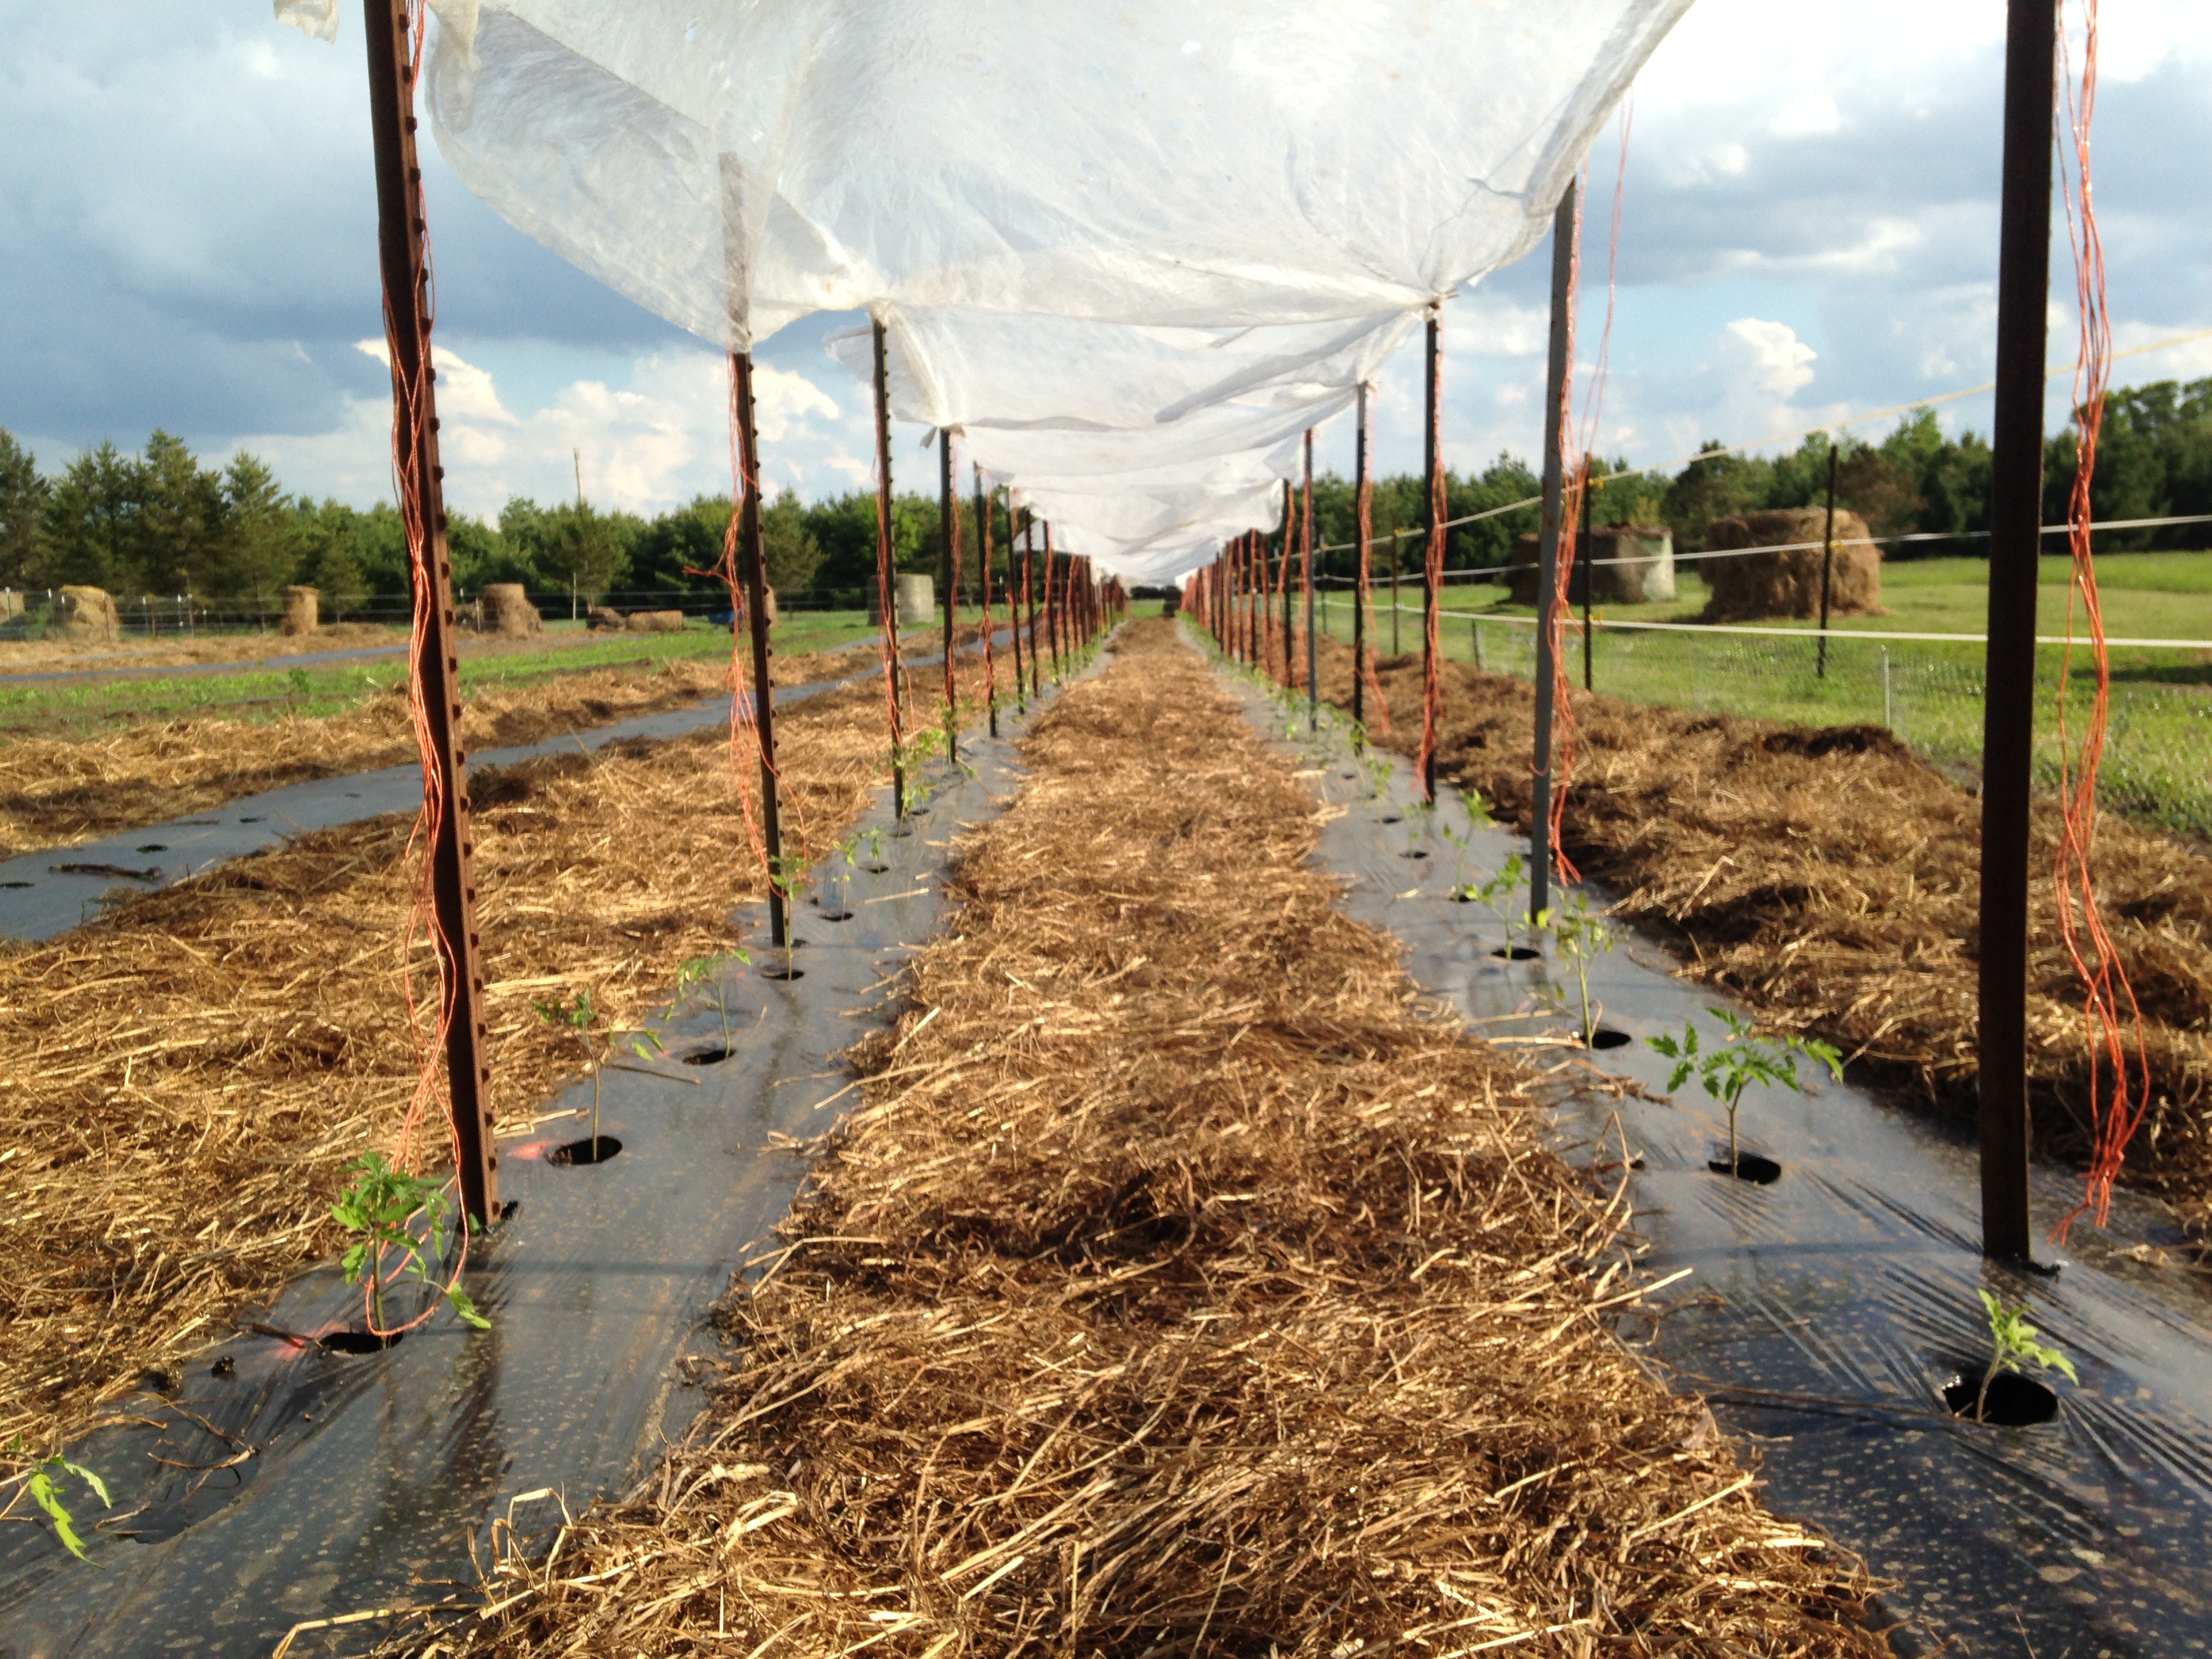
cloudy weather kept us from properly hardening-off the tomato plants to the sun – so of course as soon as we transplanted them out, the weather left the forecasted script and went full blazing sunshine … we spared the tomatoes from the strongest rays with suspended row cover fabric
The mulch has unfortunately provided habitat for our population of tunneling colonial vegetarian rodent-monsters (aka voles), however we have been heartened by the influx of snakes around the field this spring – the hugelkultur mound, for example, had been nicknamed the “Vole Hotel” last year, as it was clear they’d infested the spaces between the buried branches and logs. When we got to work this spring, we noticed the holes into the mound seemed larger, and feared it meant even MORE voles … soon enough, however, we saw the huge gopher snakes cruising in and out, basking atop the mount in the sun, breeding in the grass, and hopefully striking terror and population control into the resident rodents.
snake sex! We hope for many babies.
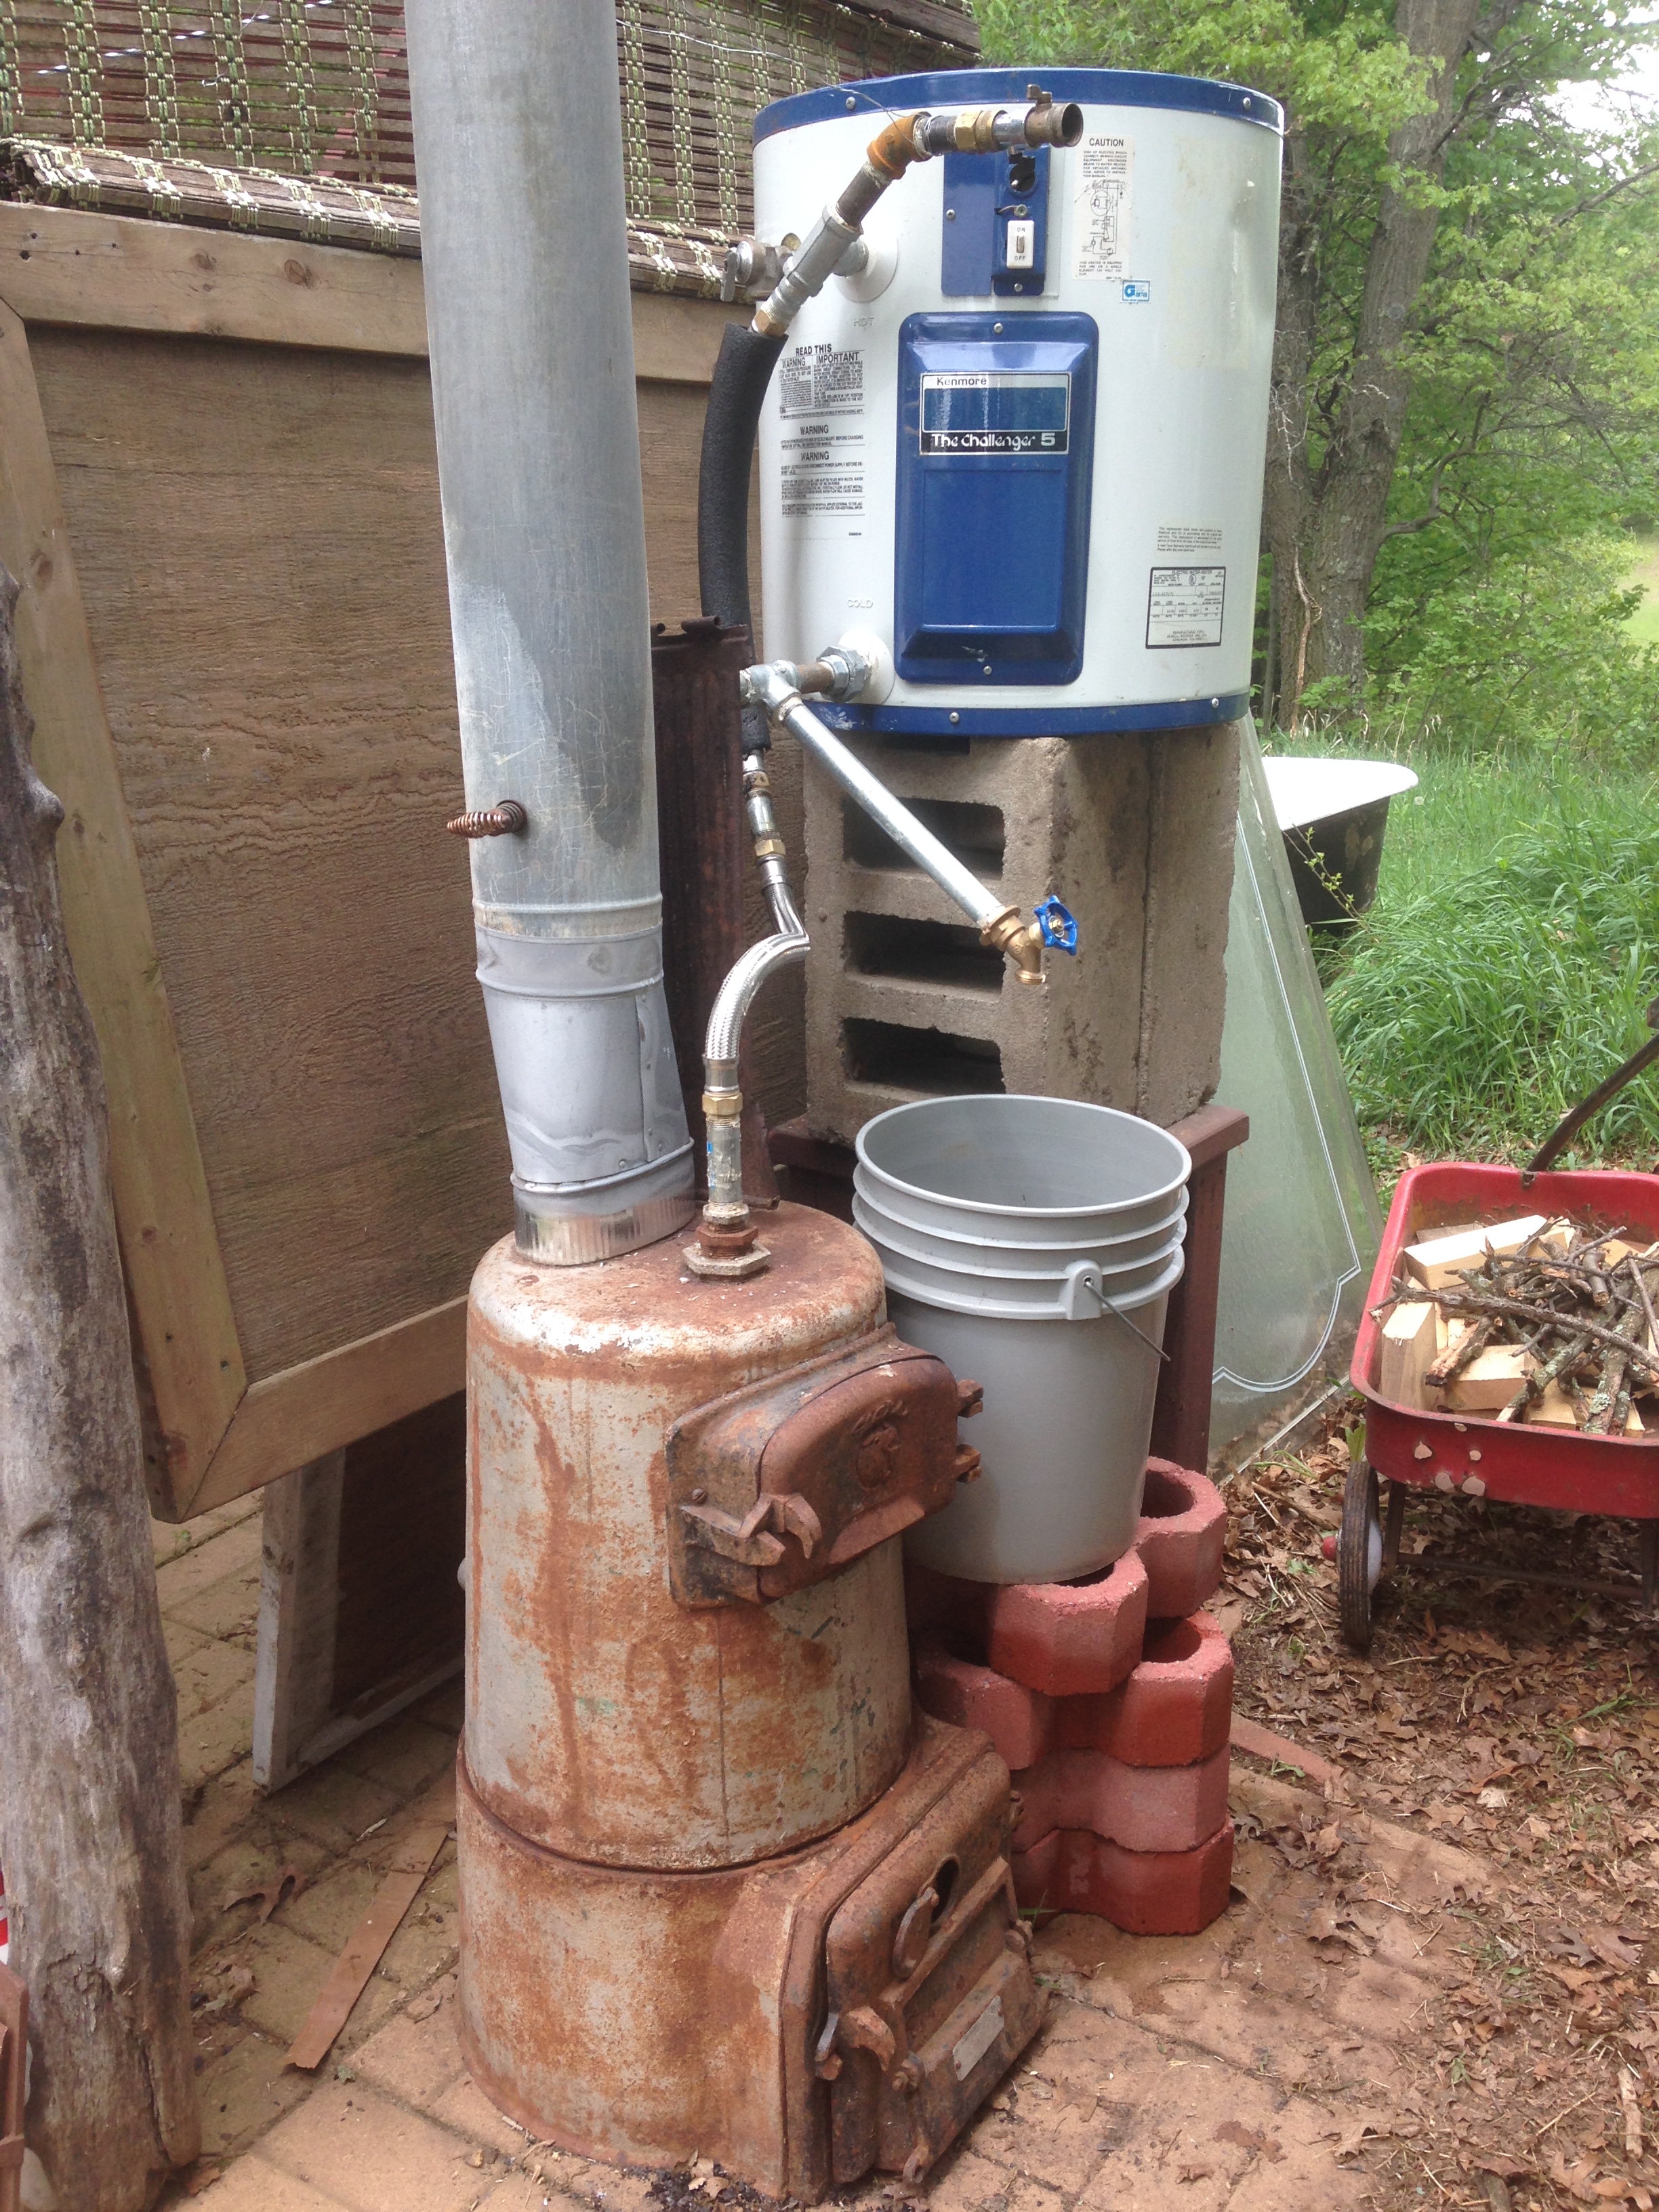
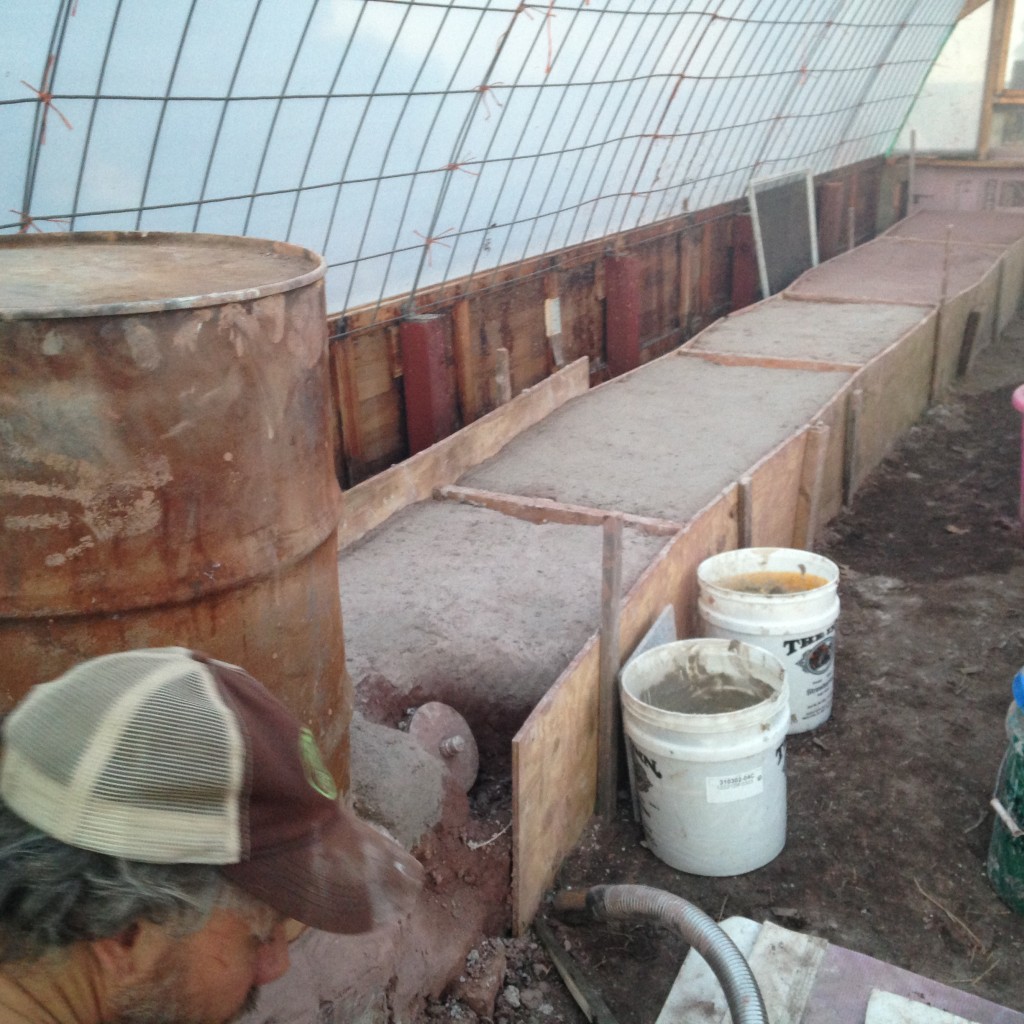
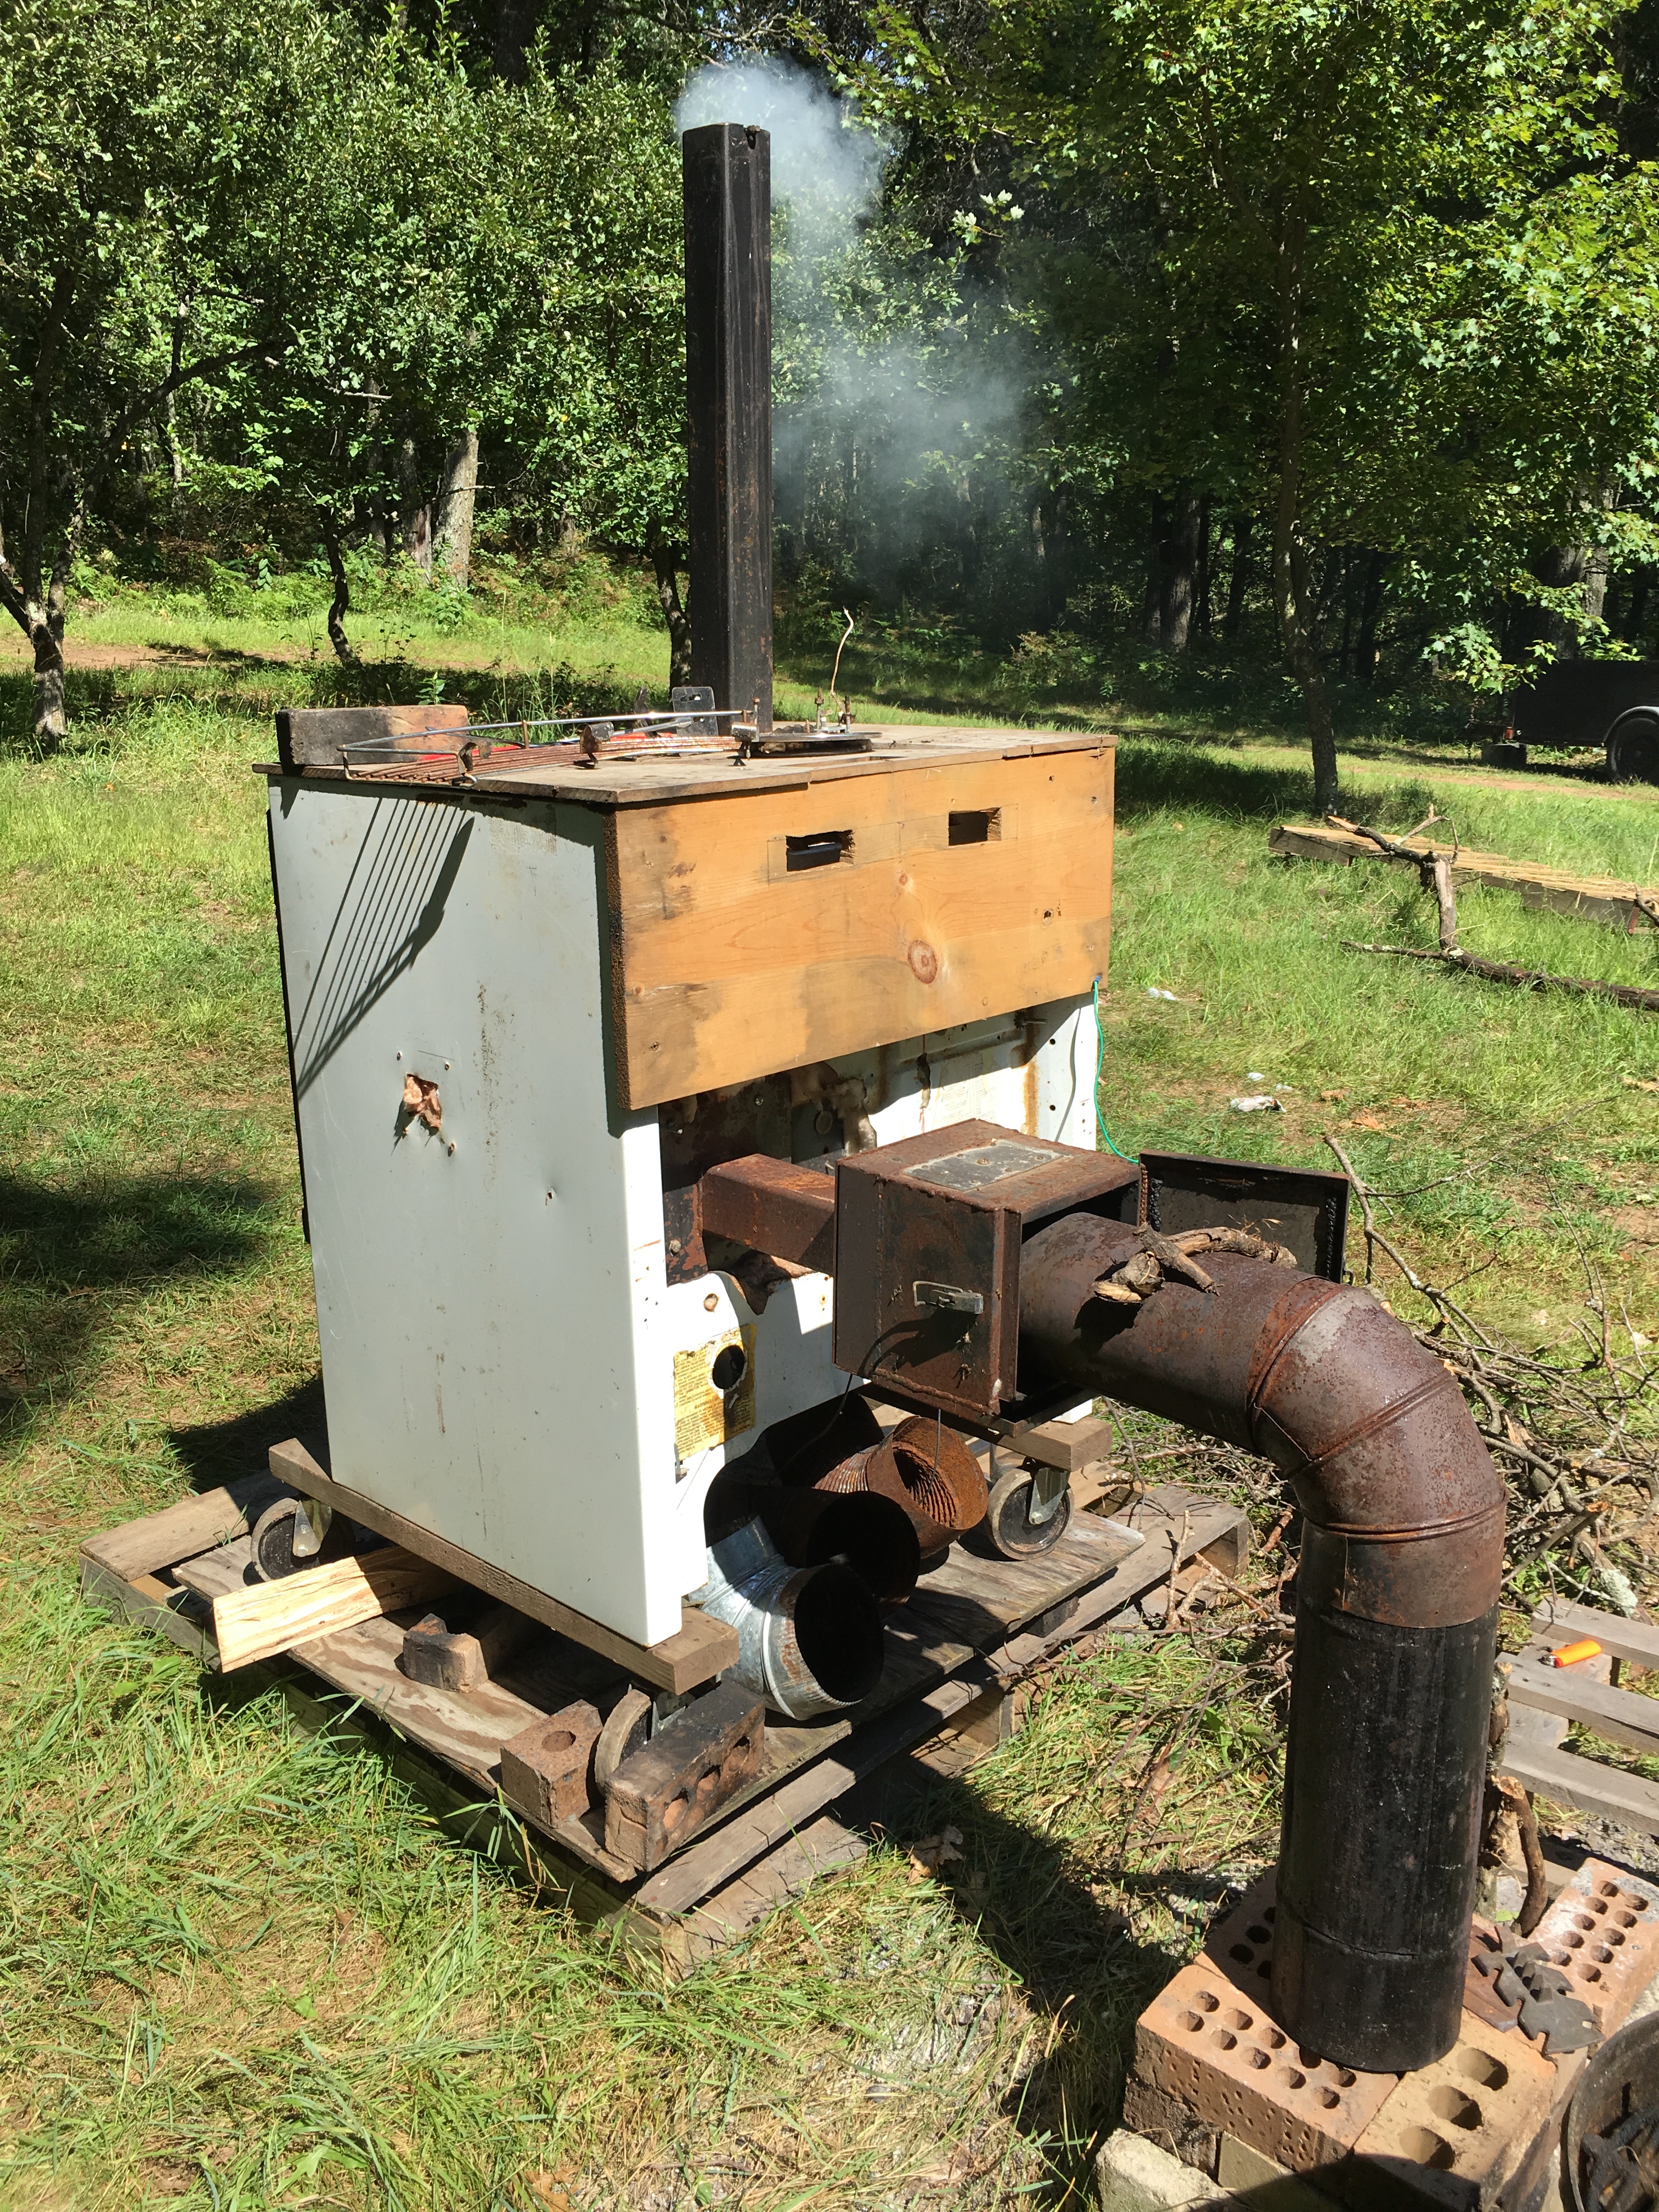
We’ve been reconnecting with our human network as well – spending plenty of time with our friends, supporters, and neighbors, the Marquardts, meeting up with local historian and author Russ Hanson (he gave us an old coal boiler that we’ve turned into a wood-fired water heater), and taking the poop pile from our new goat-mancer friends and CSA members at The Munch Bunch. And we’ll be starting to sell at the Saint Croix Falls Farmers’ Market in a week or two … a few weeks after the market begins, as usual.
the wood-fired water heater, ready to provide up to 20 gallons of hot water every day. Made from a 1930’s Sears “bucket-a-day” coal boiler and a modern Sears water heater tank. The fire and gravity work together to circulate the water without a pump.
(We simply don’t have enough growing this early in the season for our attendance to make sense, especially alongside those coming in from south of here. Heck, we even have a slower start than other farms in the same township as us – the local historian let us know that his growing season, up the hill, is a full month longer than ours is, due to the way cold air settles into the wide glacial Saint Croix River valley where we grow!)
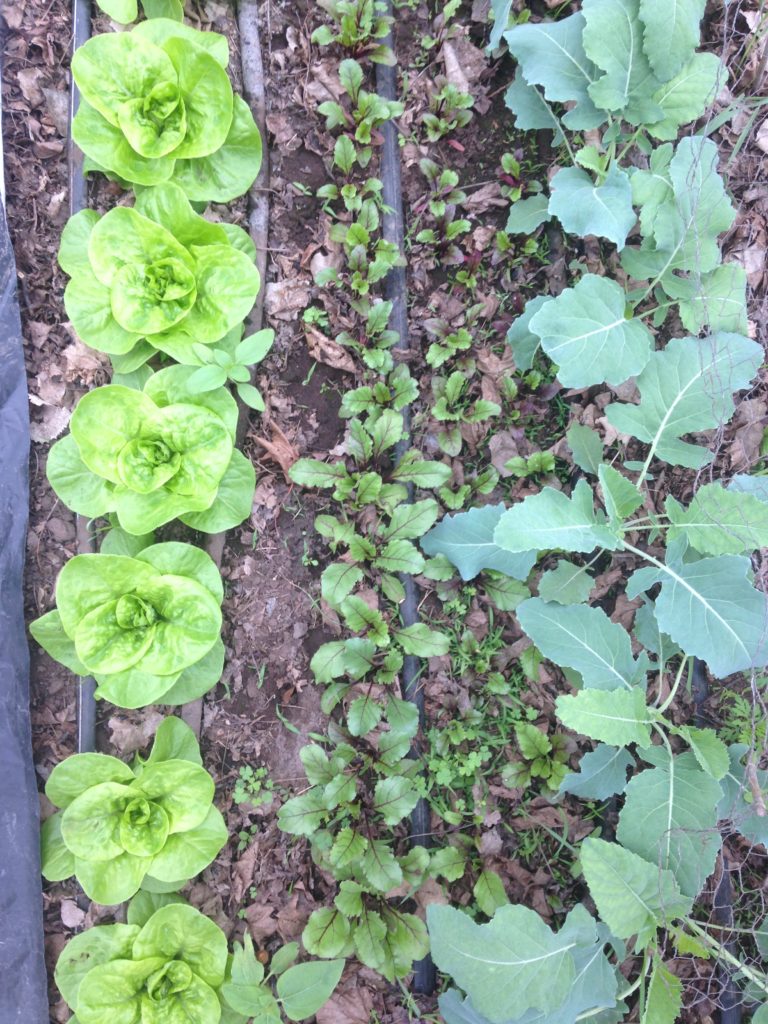
lettuce, beets, and kohlrabi
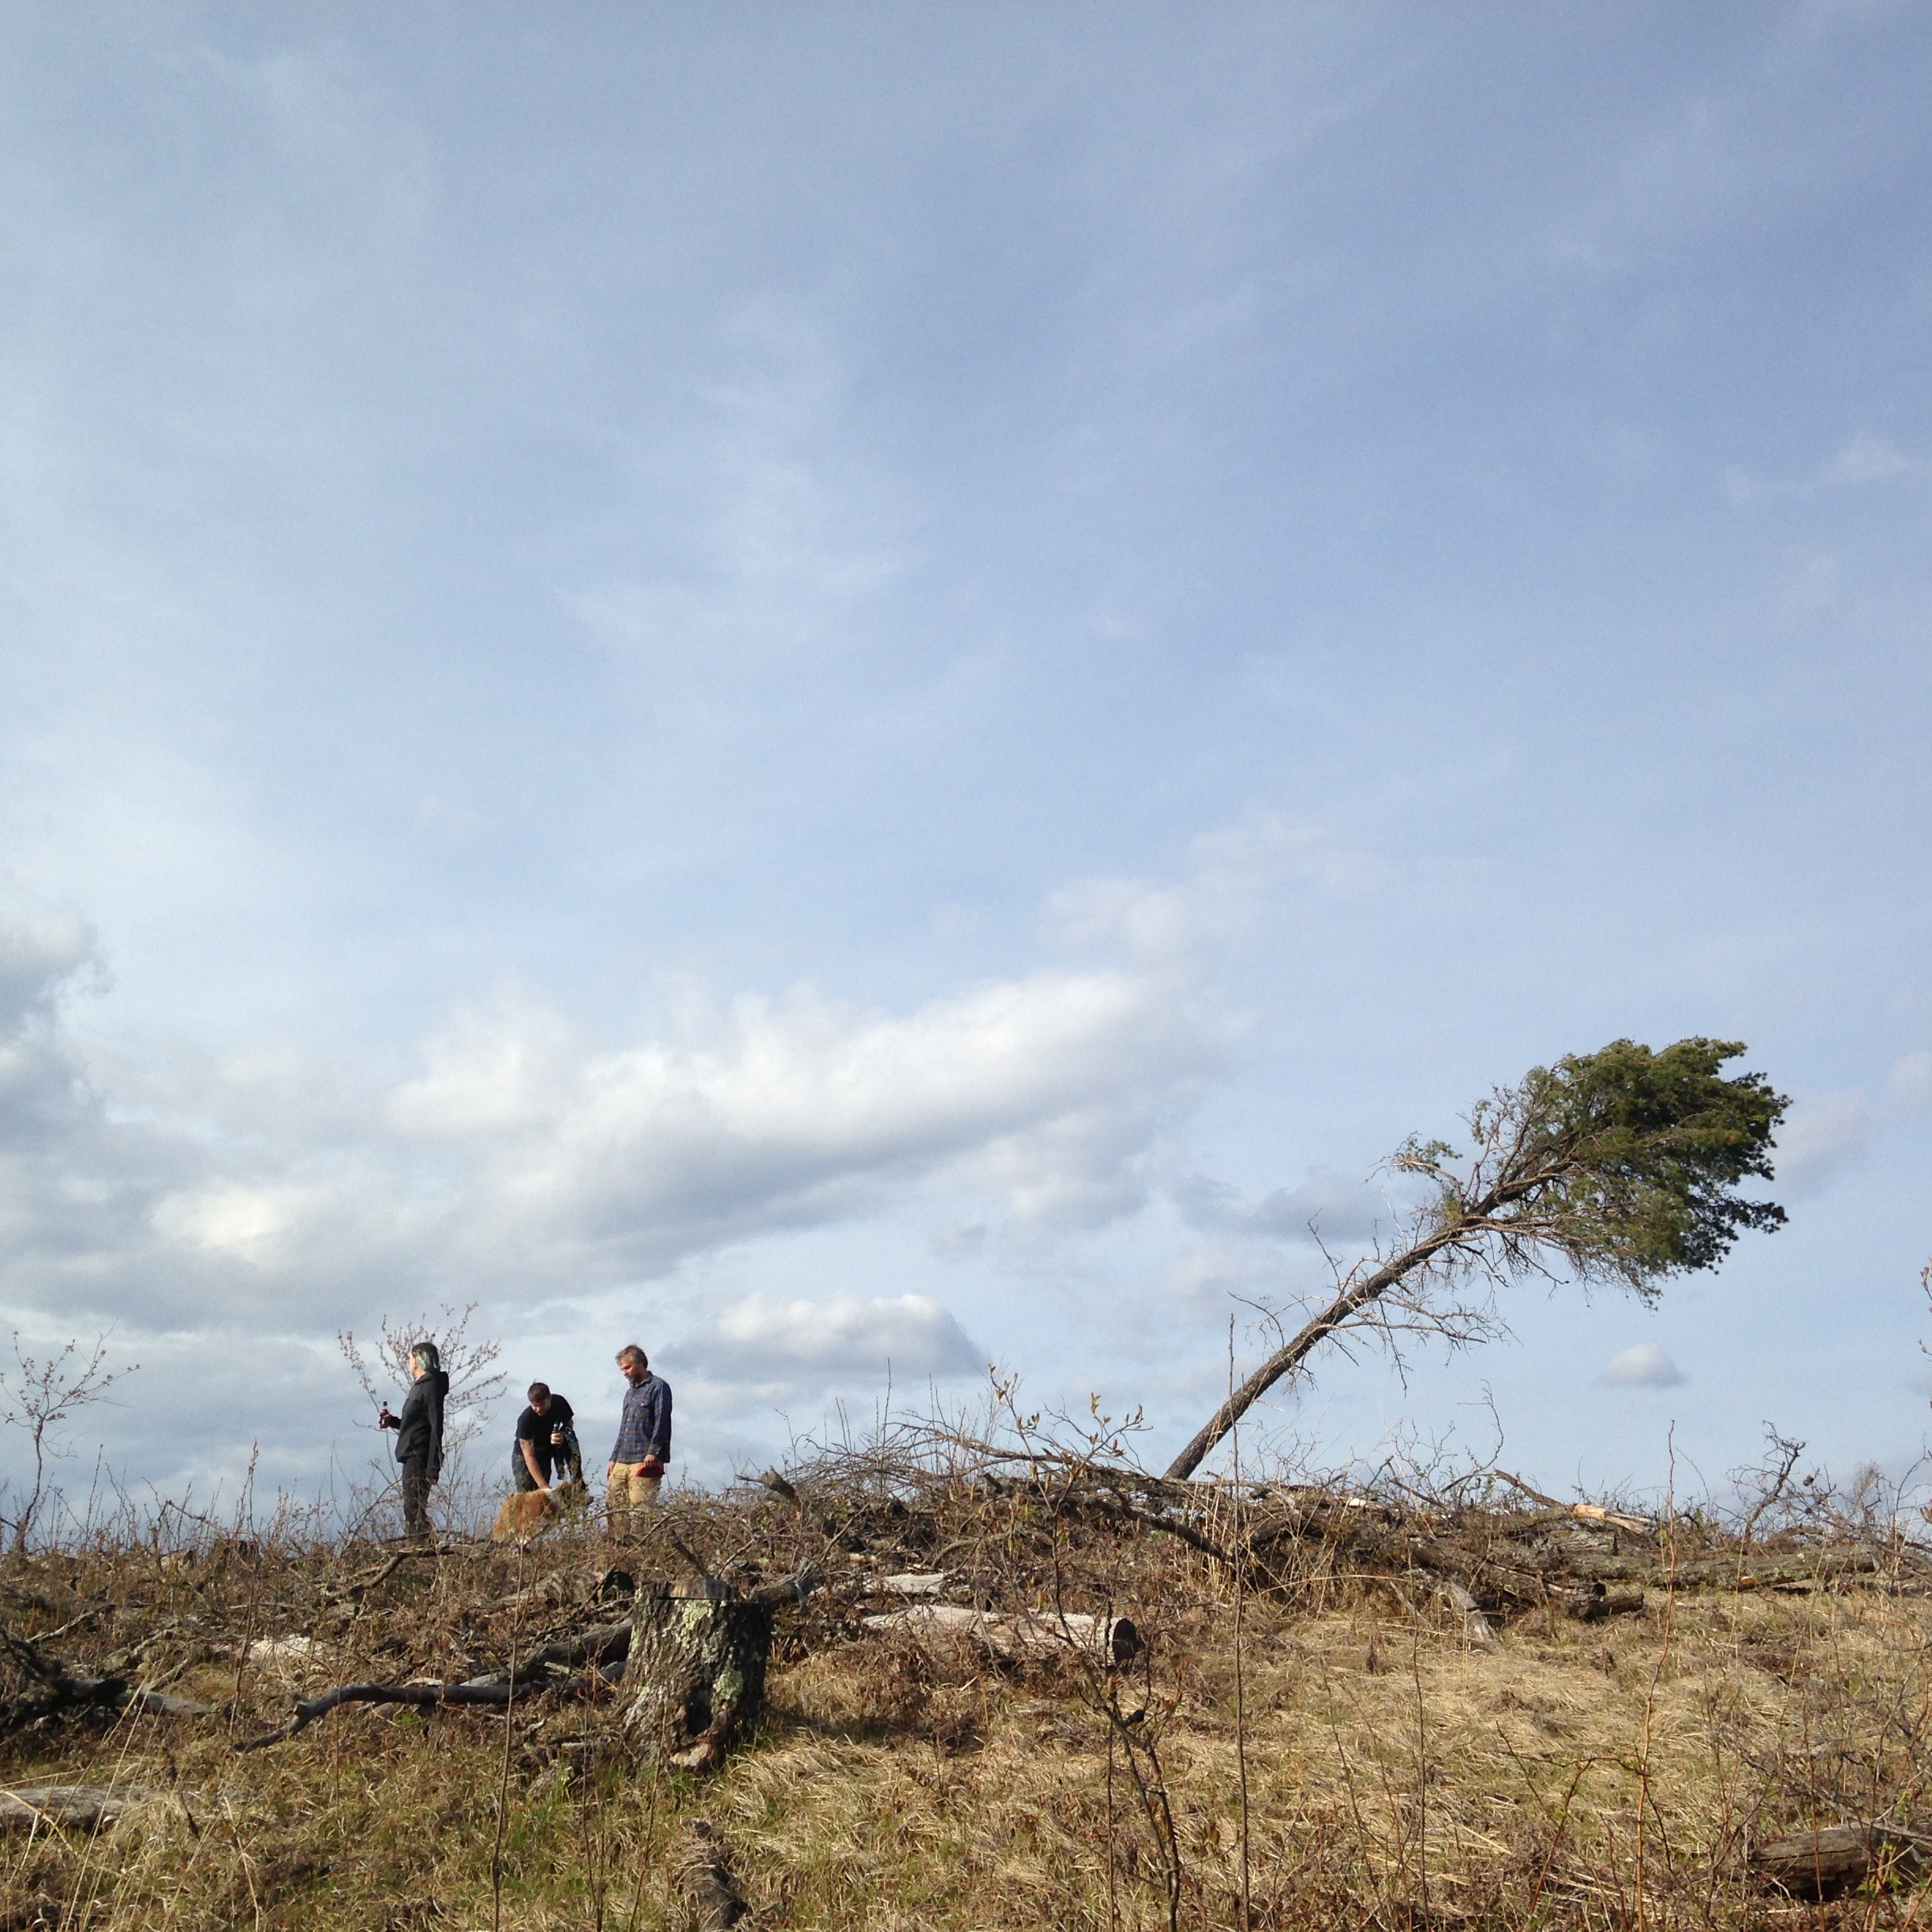
The biggest change afoot this spring is all around us, and it’s been a real test of our ability to “que sera, sera” with inevitable change – logging. Starting at 7 am, for weeks, we’ve been greeted by the sounds of the profit-driven logging machines devouring all the largest and oldest trees in the vicinity, and leaving arboreal carnage in their wake.
the north side of the farm has already been logged – you can probably guess where our property line is …
I could rant, here; there is much to be angry, sad, and disappointed by, seeing how callously these woods are turned into dollars for the Wisconsin General Fund … especially knowing that next year it will likely be the patch of woods right alongside our driveway that is razed.
the loggers “spare” a few token trees here and there, but they never fare well after having all their neighhbors removed and their roots run over repeatedly.
But I won’t rant. It’s one of those things that we cannot change, and must find peace with at minimum, and even better, silver linings. In this case, we will have ample access to the remnants the loggers leave behind, for use in our heating needs, and we expect that the suddenly-opened areas will allow understory fruit bushes to spring into productivity, producing wild raspberries, blackberries, and blueberries.
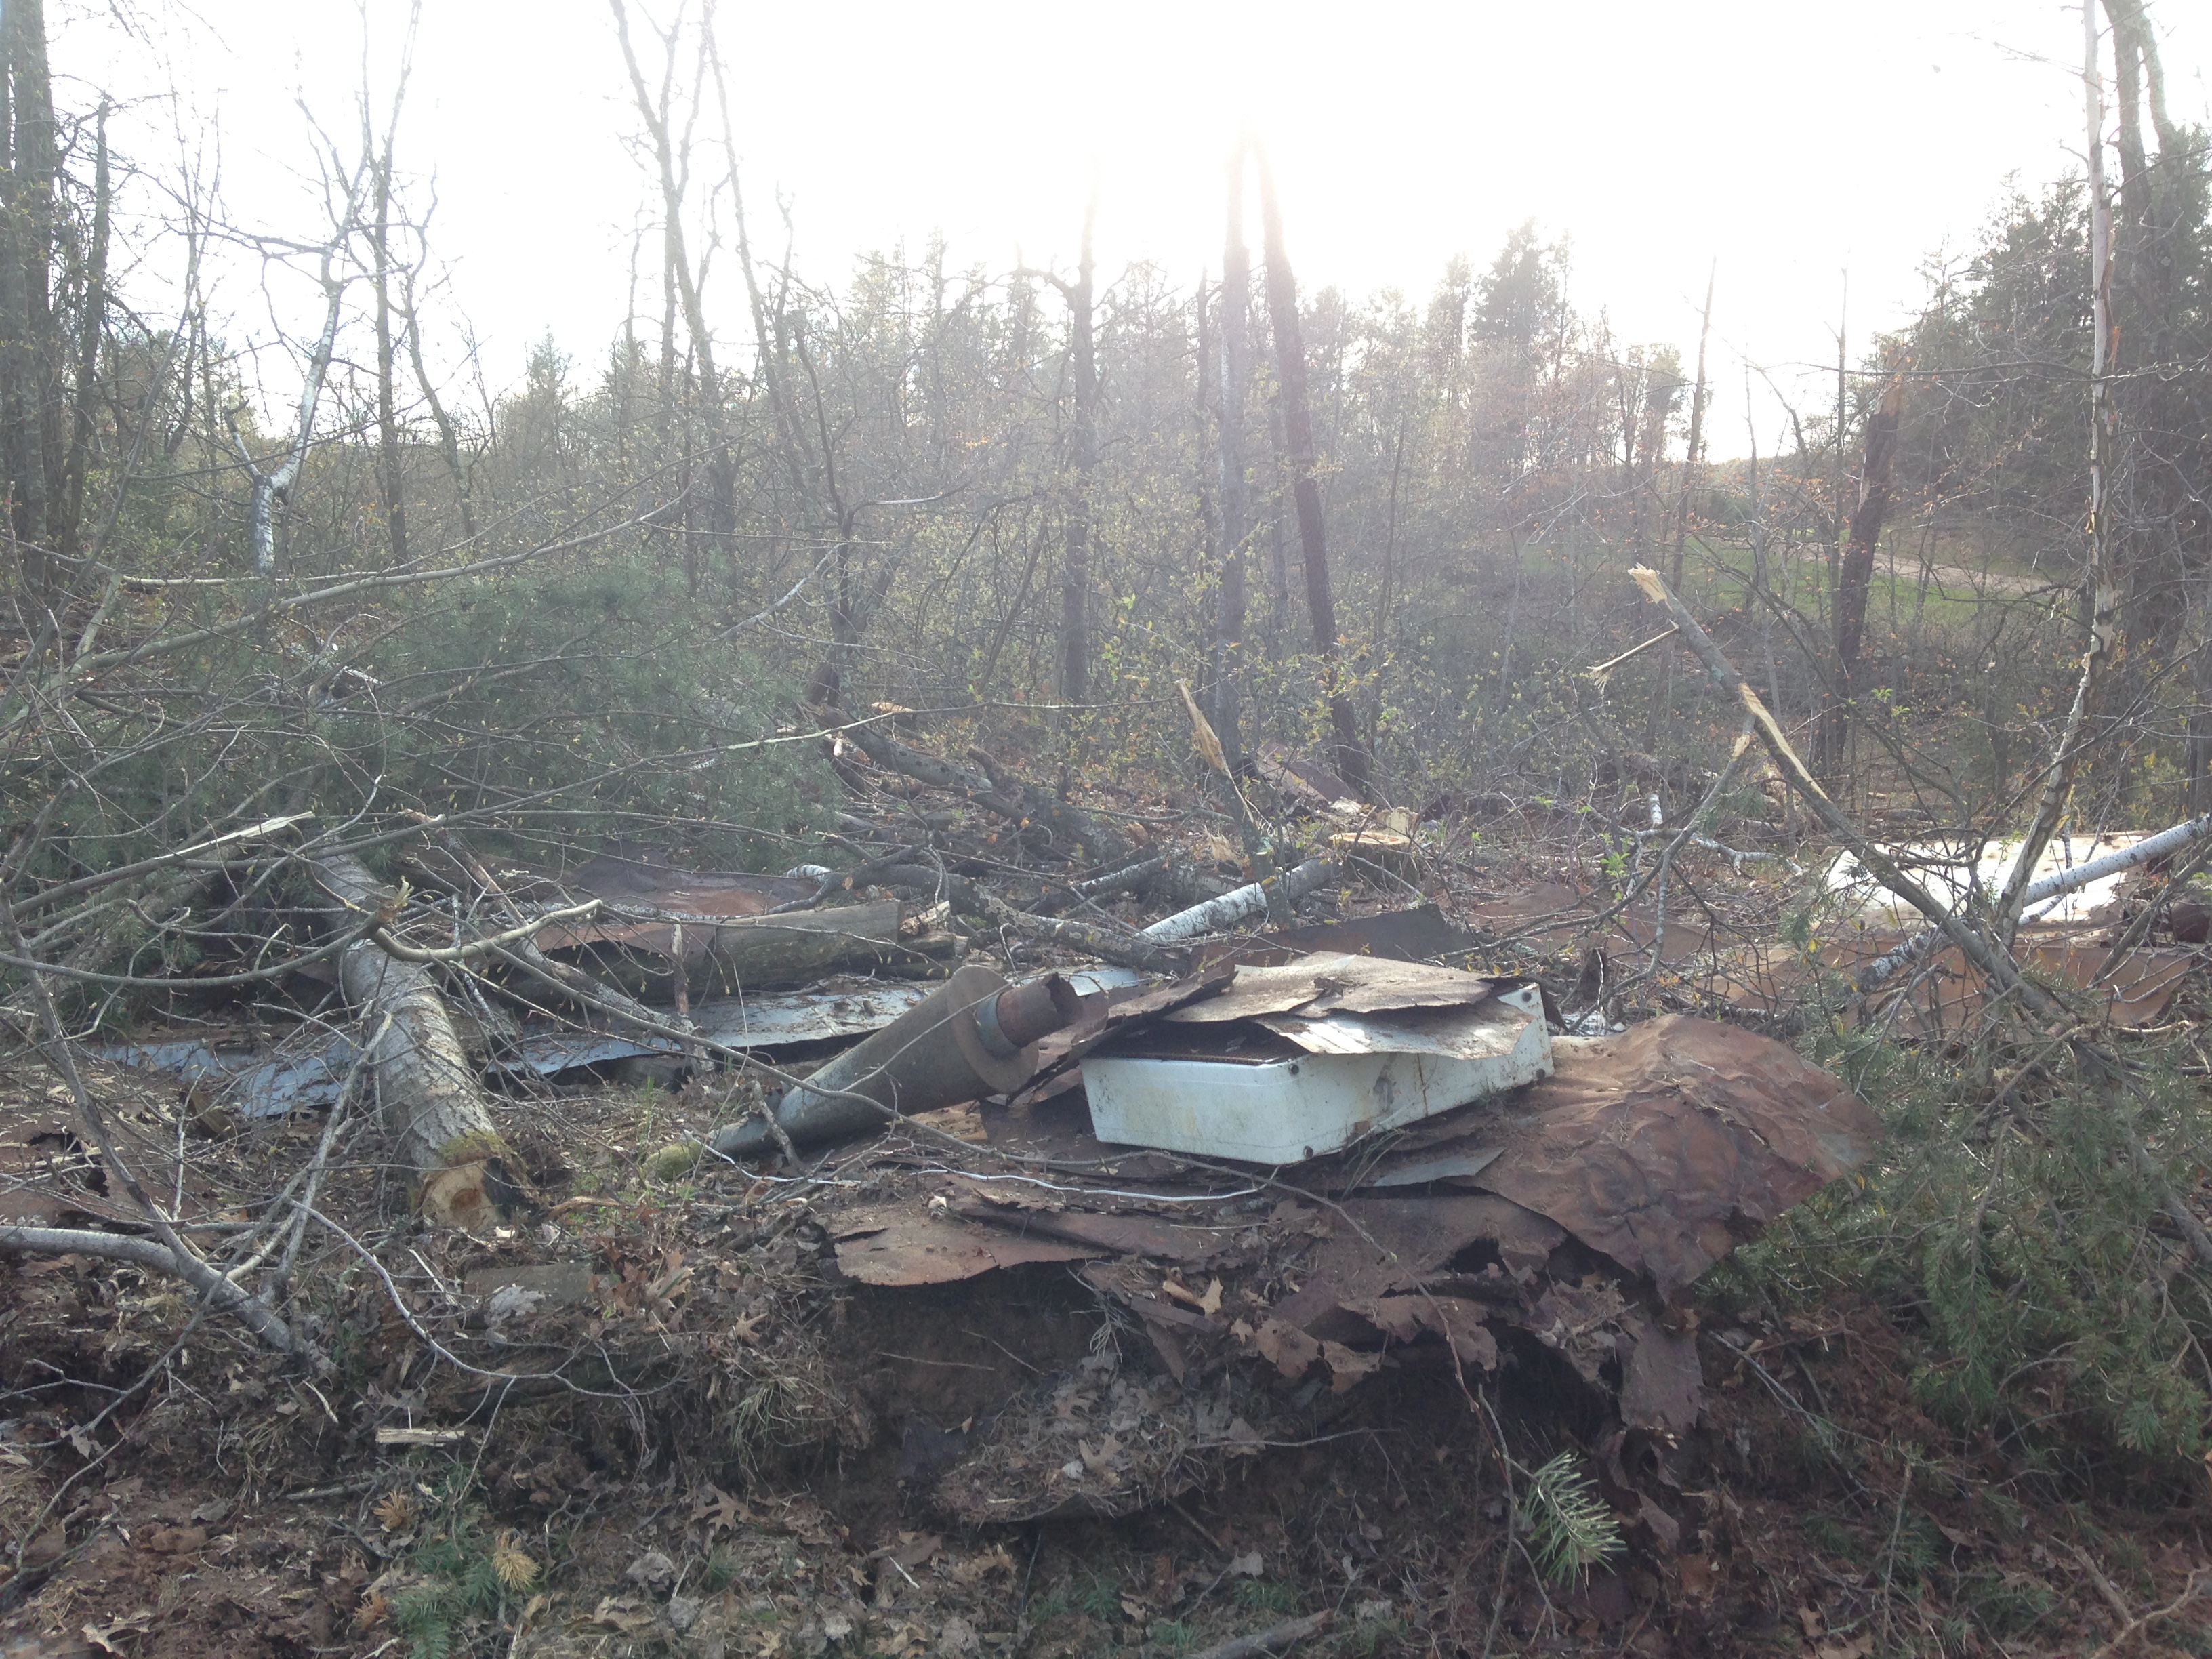
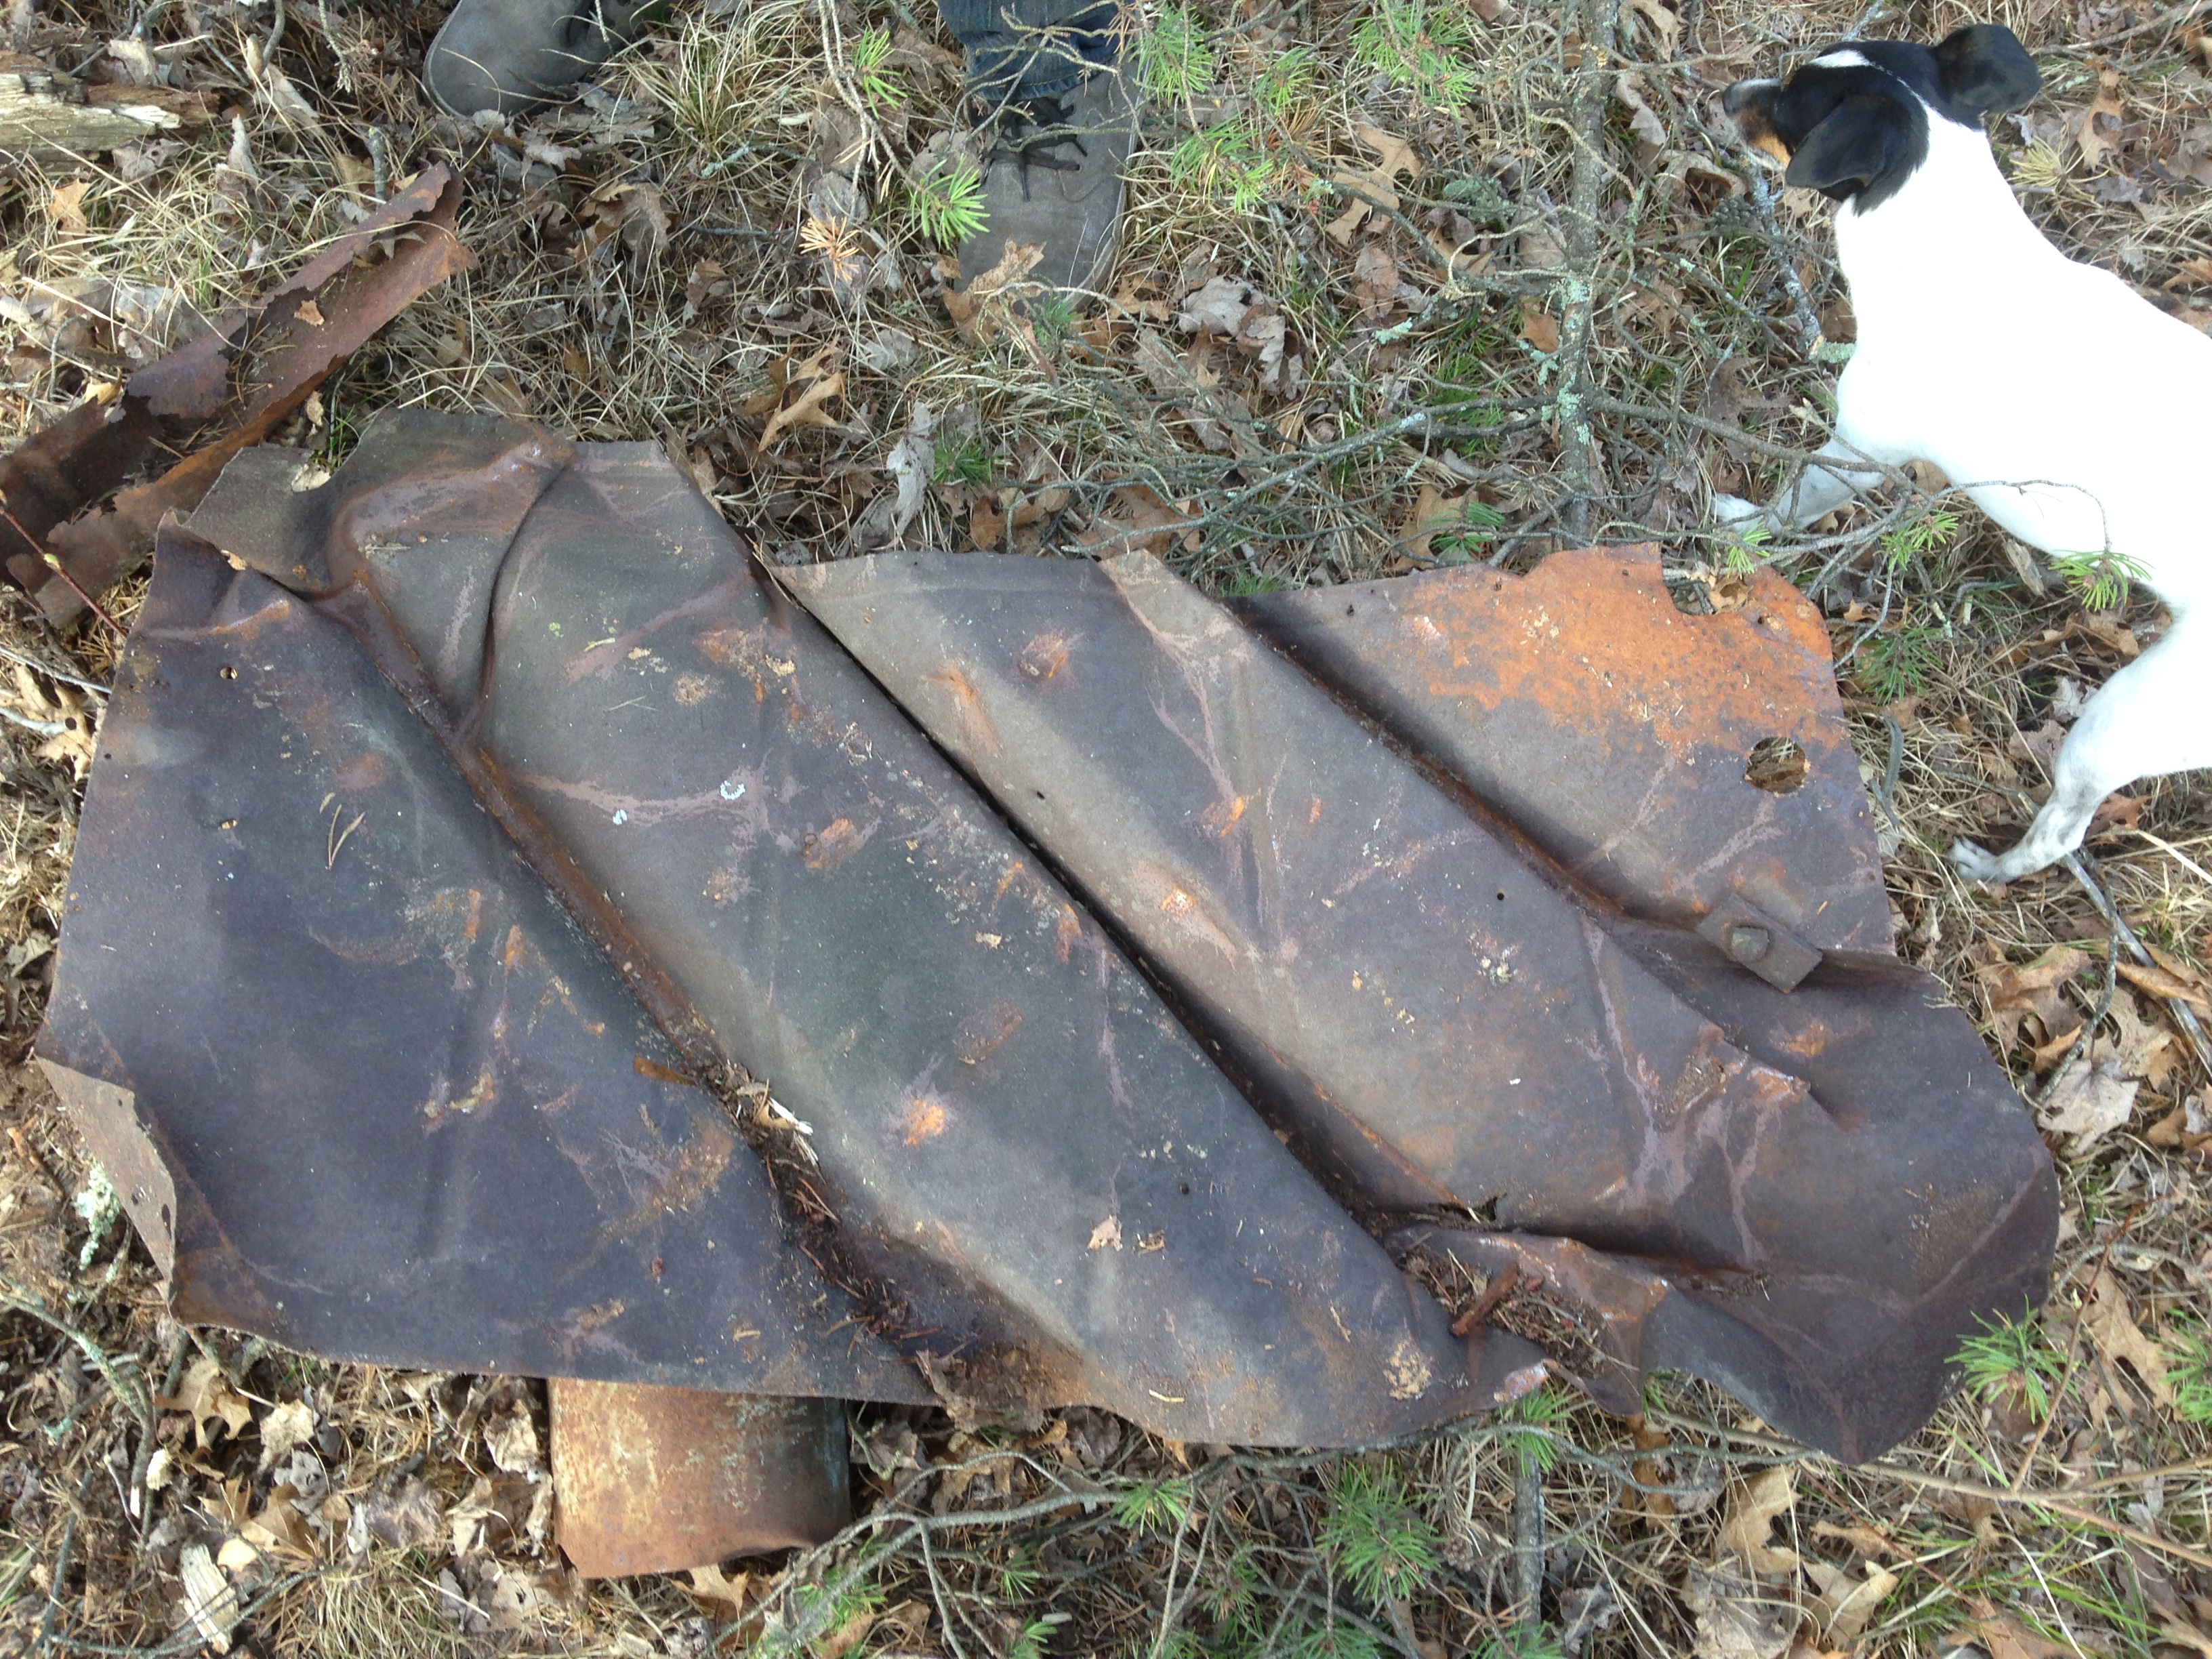
excavating the frosted ruins, ahead of the loggers
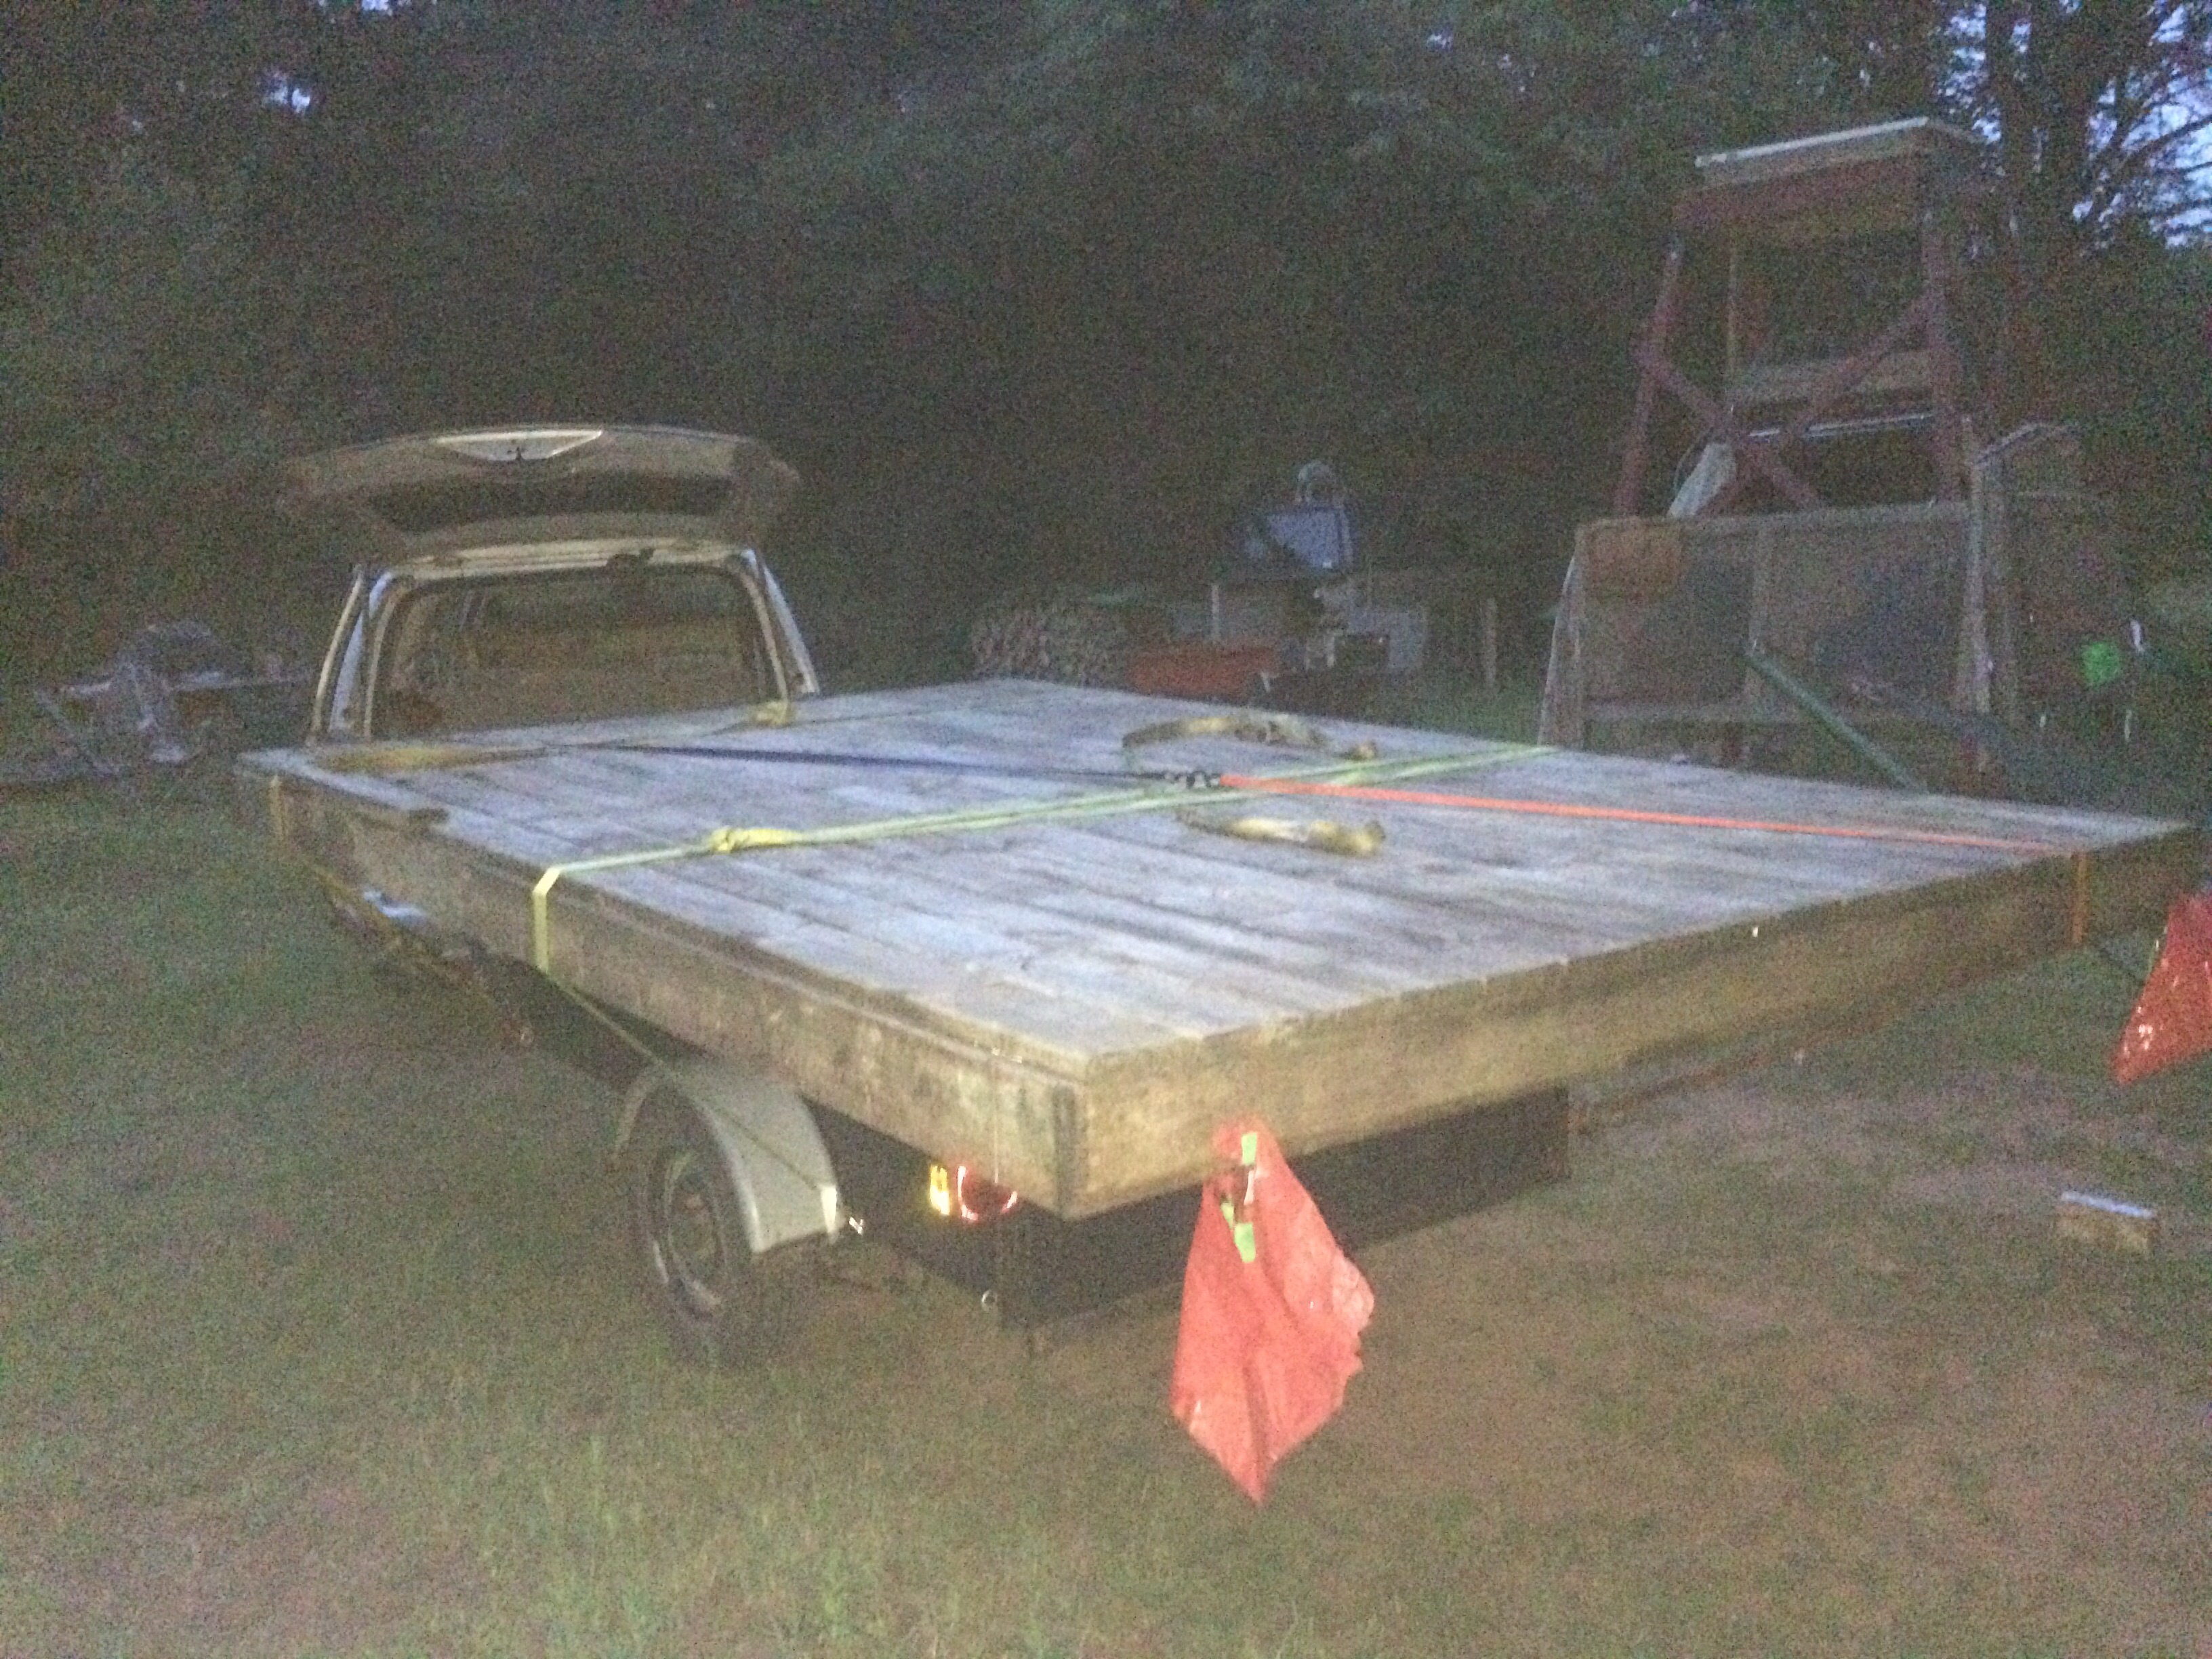
Another silver lining – although no one had told us, I had a hunch that the loggers were coming to the neighborhood – and launched a salvage expedition to recover the last of the old car body panels from the homestead ruins of “The Architect” … and just days later, the whole site was crushed by heavy machinery treads. Sad – but awesome that we salvaged the remains in the nick of time, to repurpose for future projects that have local historical roots, as well as powerful aesthetic appeal (to our eyes anyway!)
aftermath of the logging crewsWidget with a model-T body panel run over by a bulldozer
We’ve enjoyed feeling like we lived in a forest, but with the surrounding woods logged, we’ll be well-aware that we truly live in The Barrens, and we that we grow food in an area considered to be little more than a wasteland by many. Underappreciated, scruffy places on the outskirts of human civilization has long been our favored type of habitat, and that’s exactly where we are putting down our roots; deep tap roots that can draw sustenance from the most unpromising-looking sands.
No matter what, it’s going to be interesting, and interesting is our favorite thing.
So.
The first CSA box will be coming on June 6th … are you ready? We are!
See you soon,
Gabe & Kristin
morel capturedoyster mushrooms on a stick
HEY HAY MAY PICS
building the tomato trellises
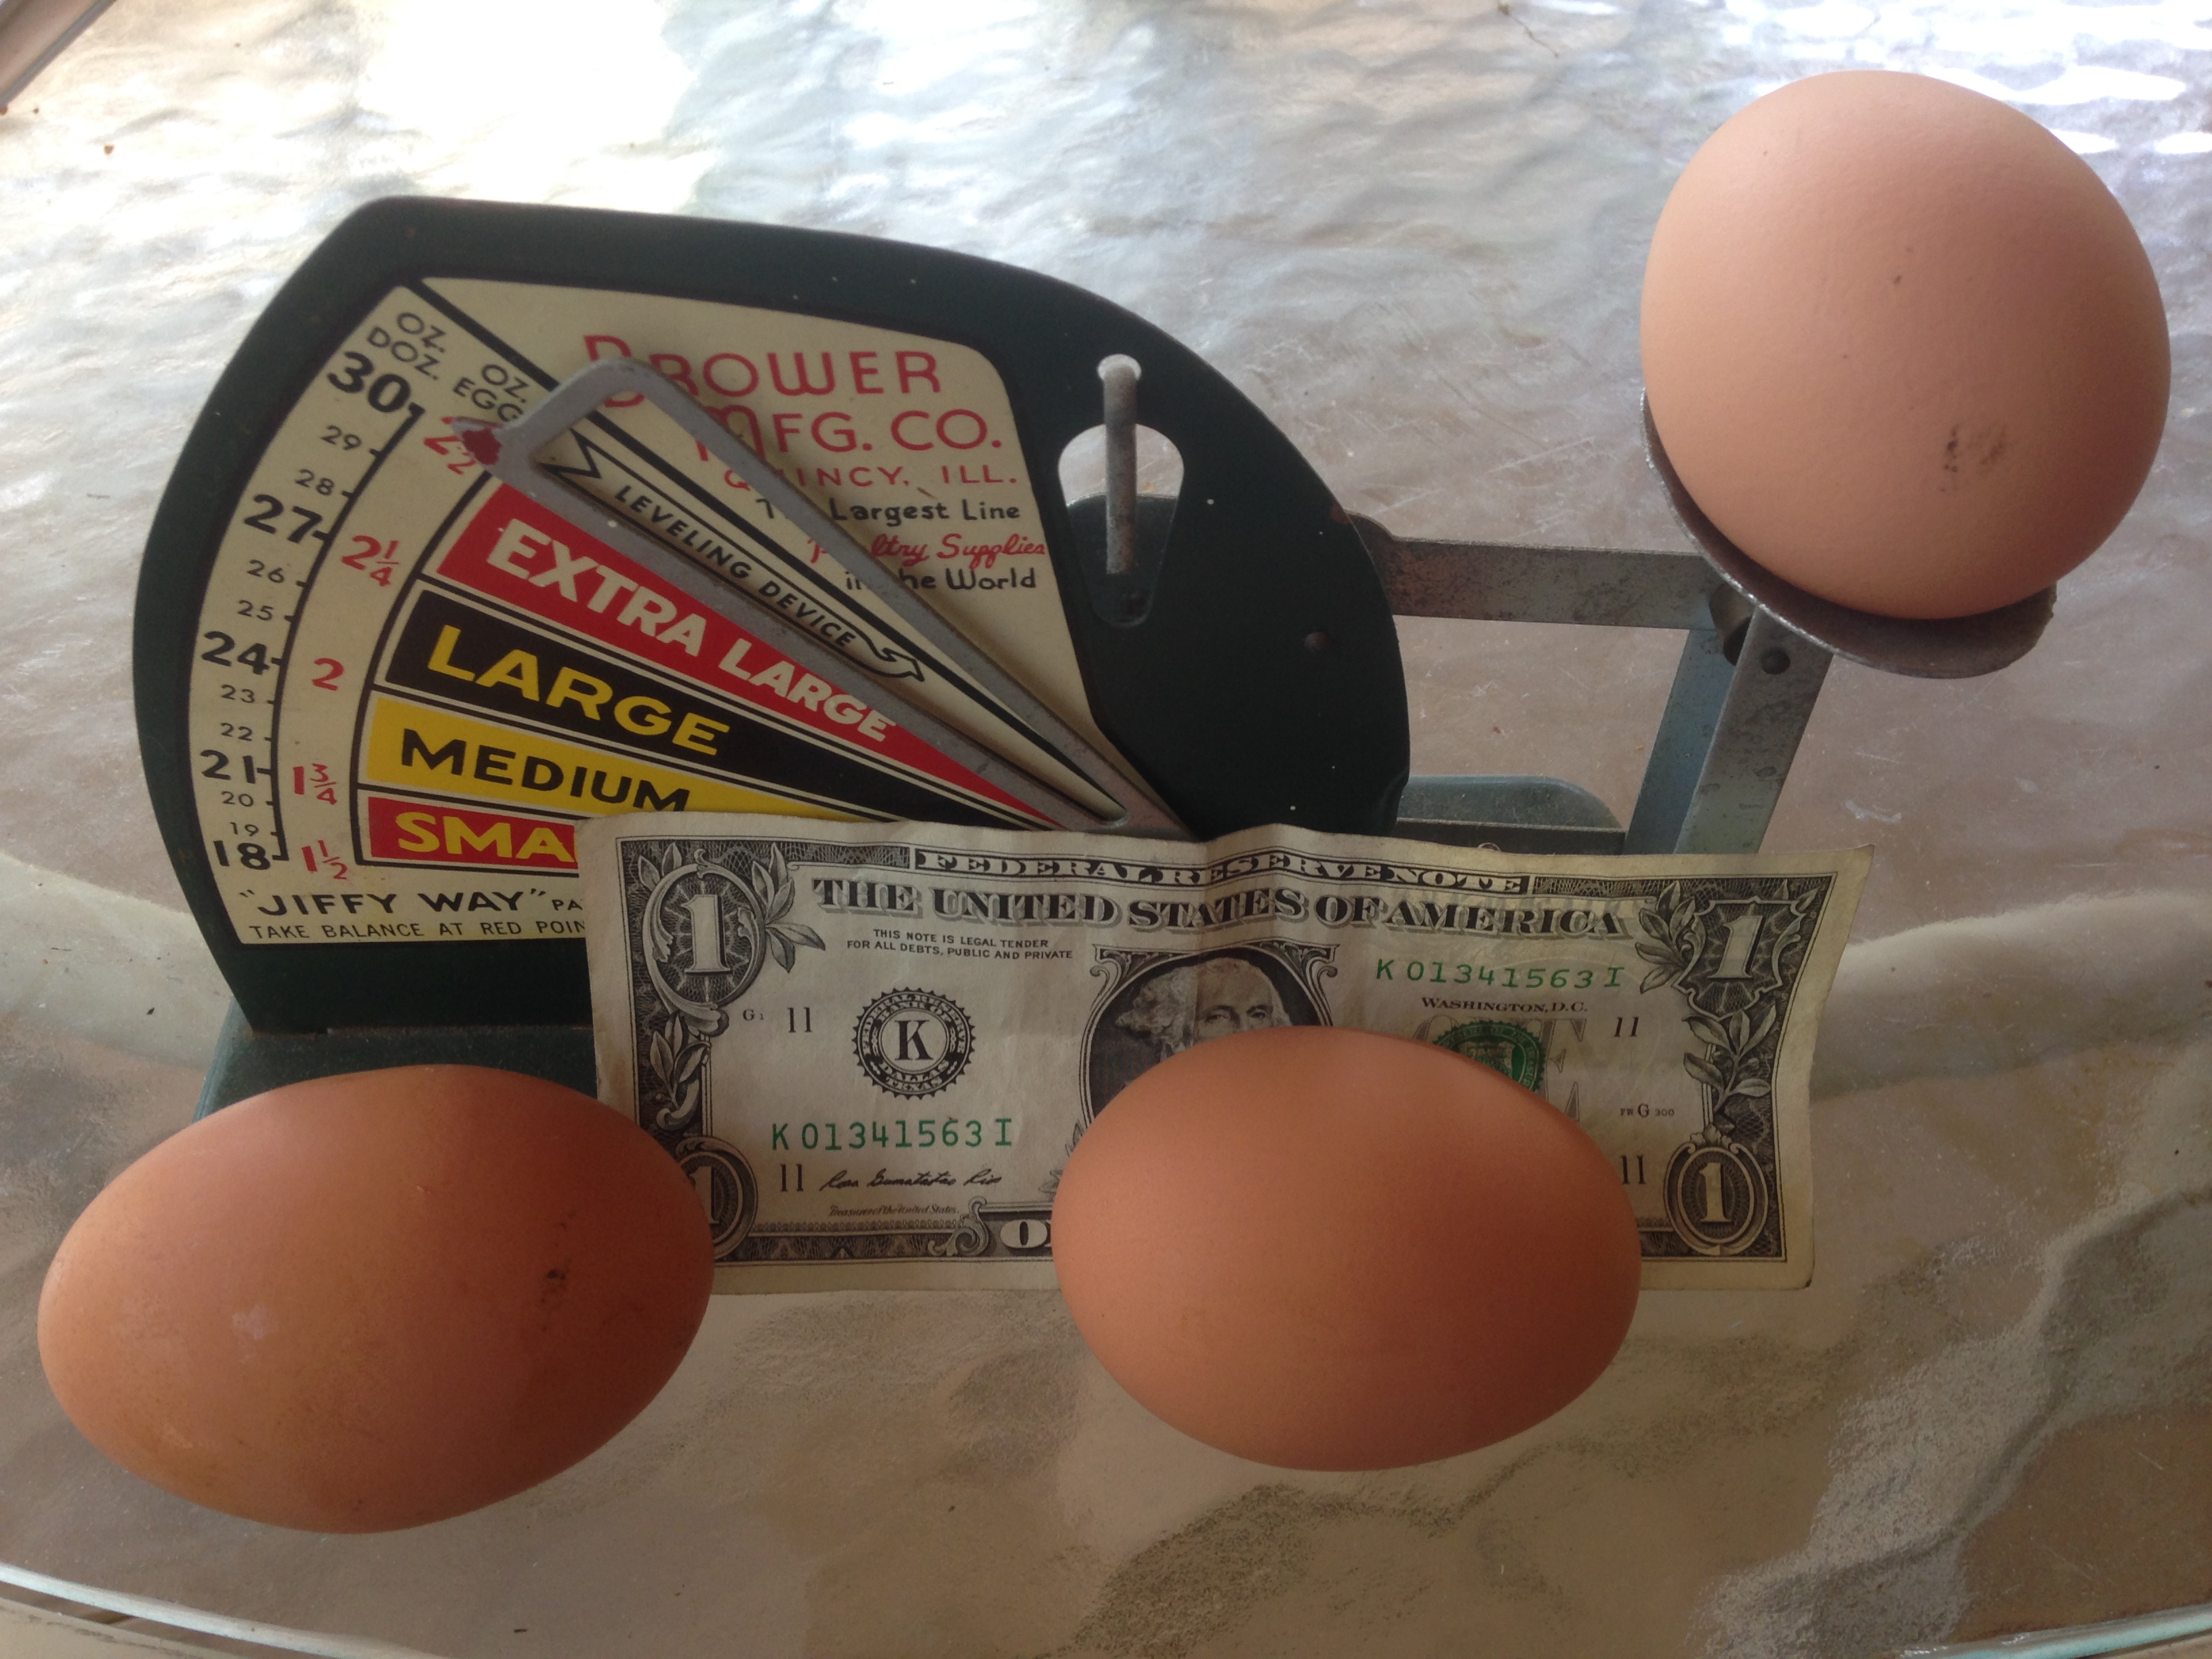
the monster on the left had two yolks
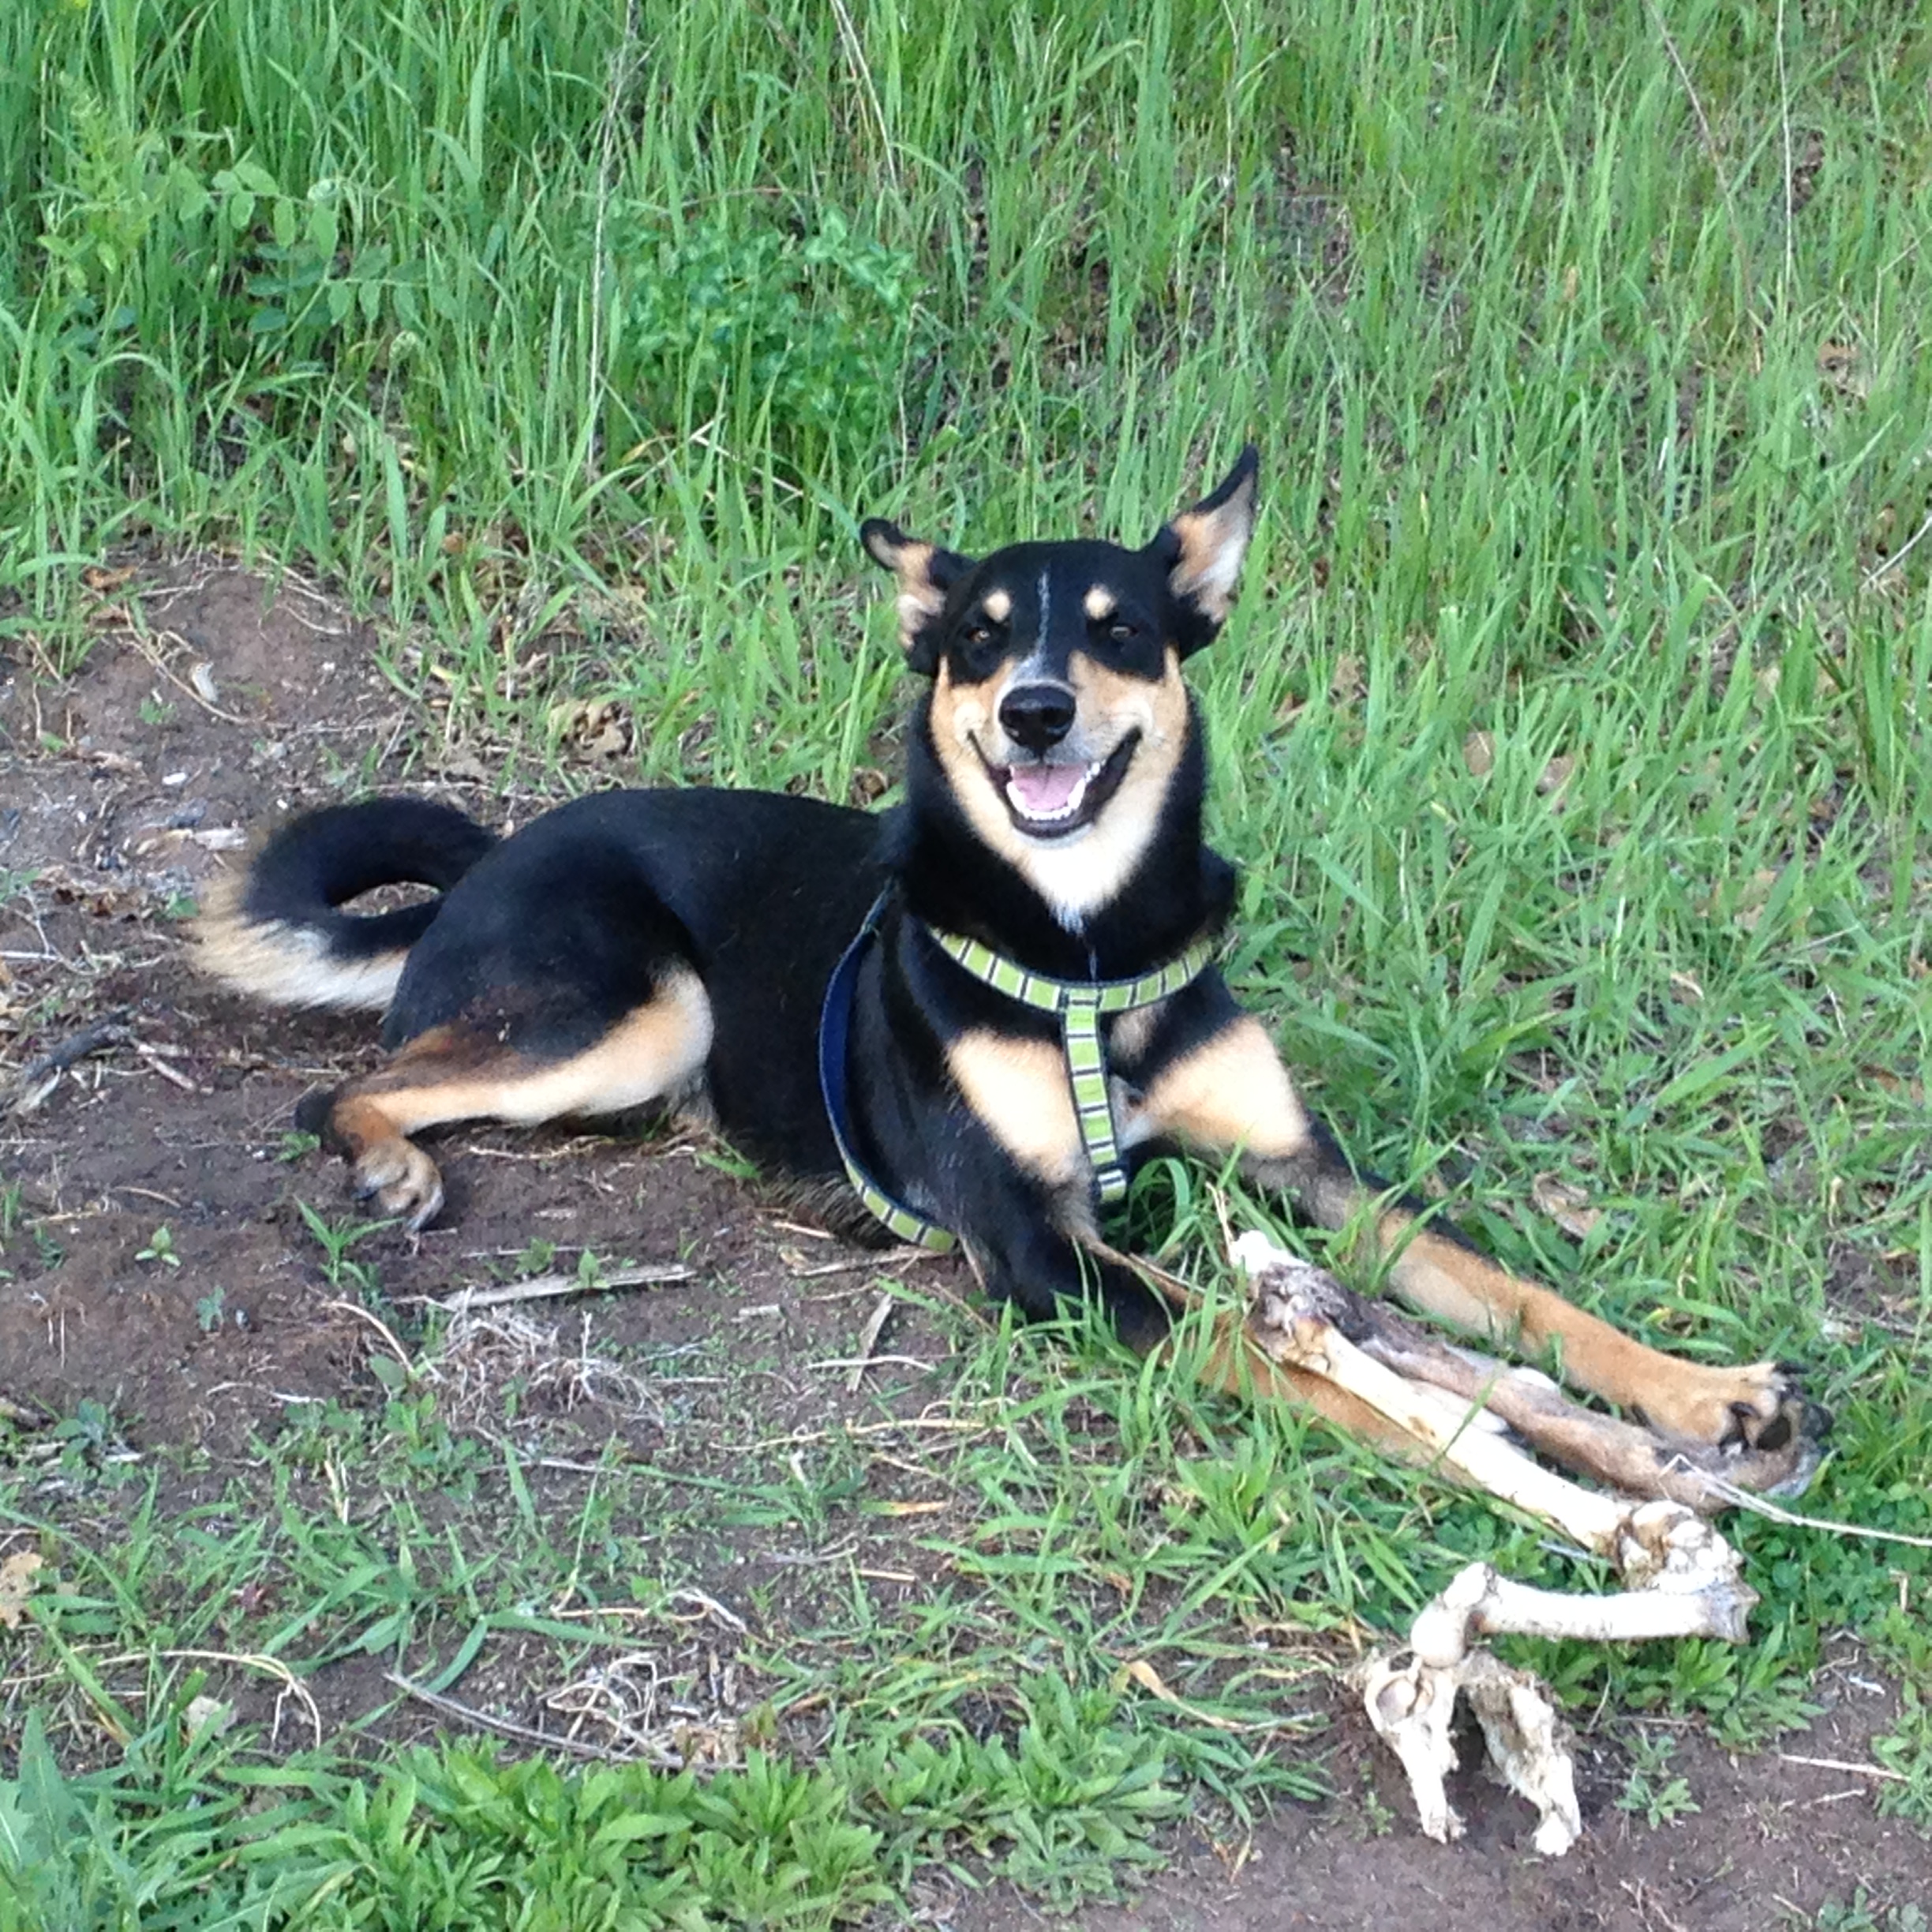
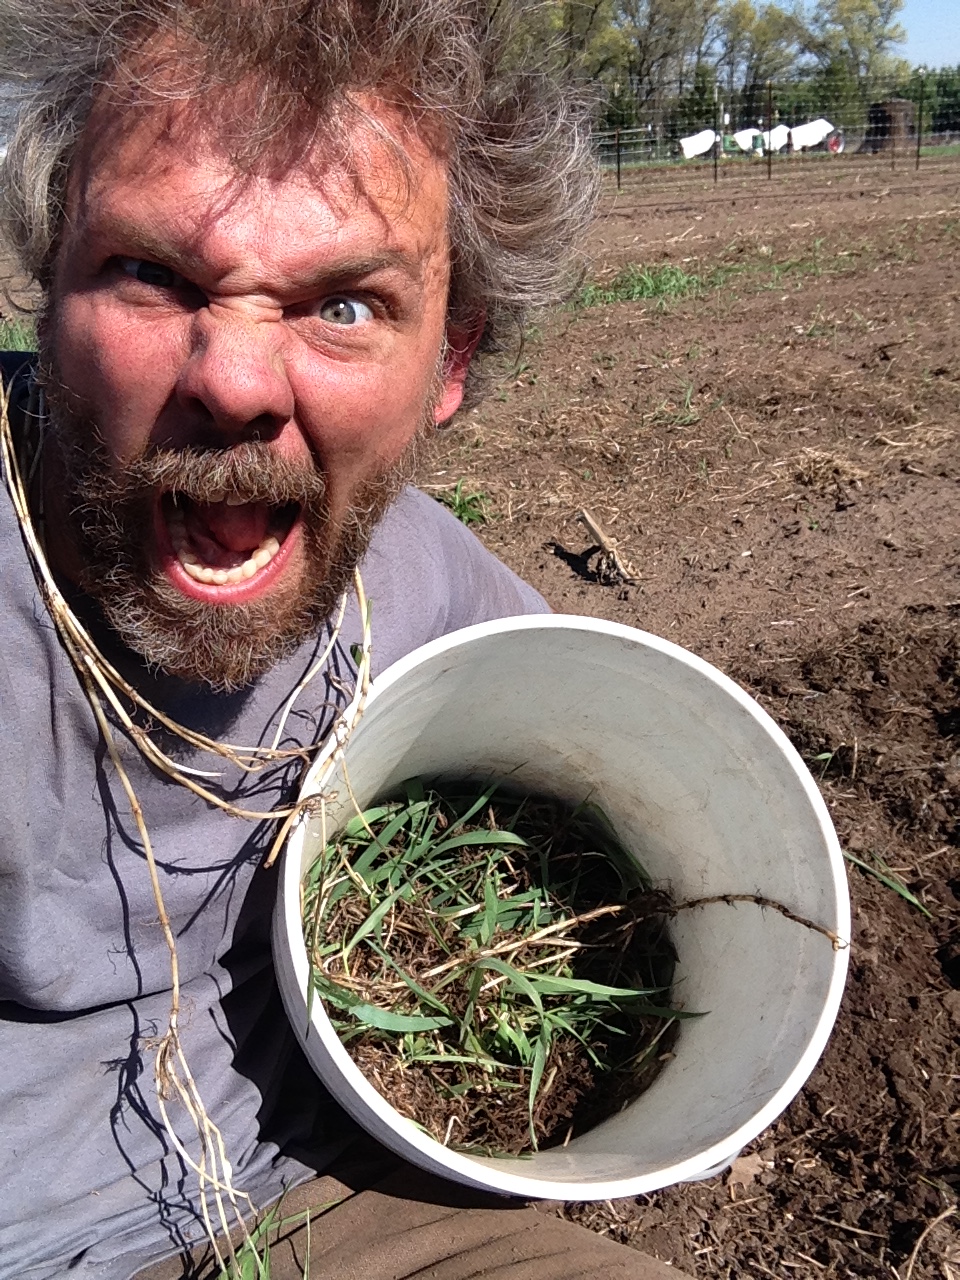
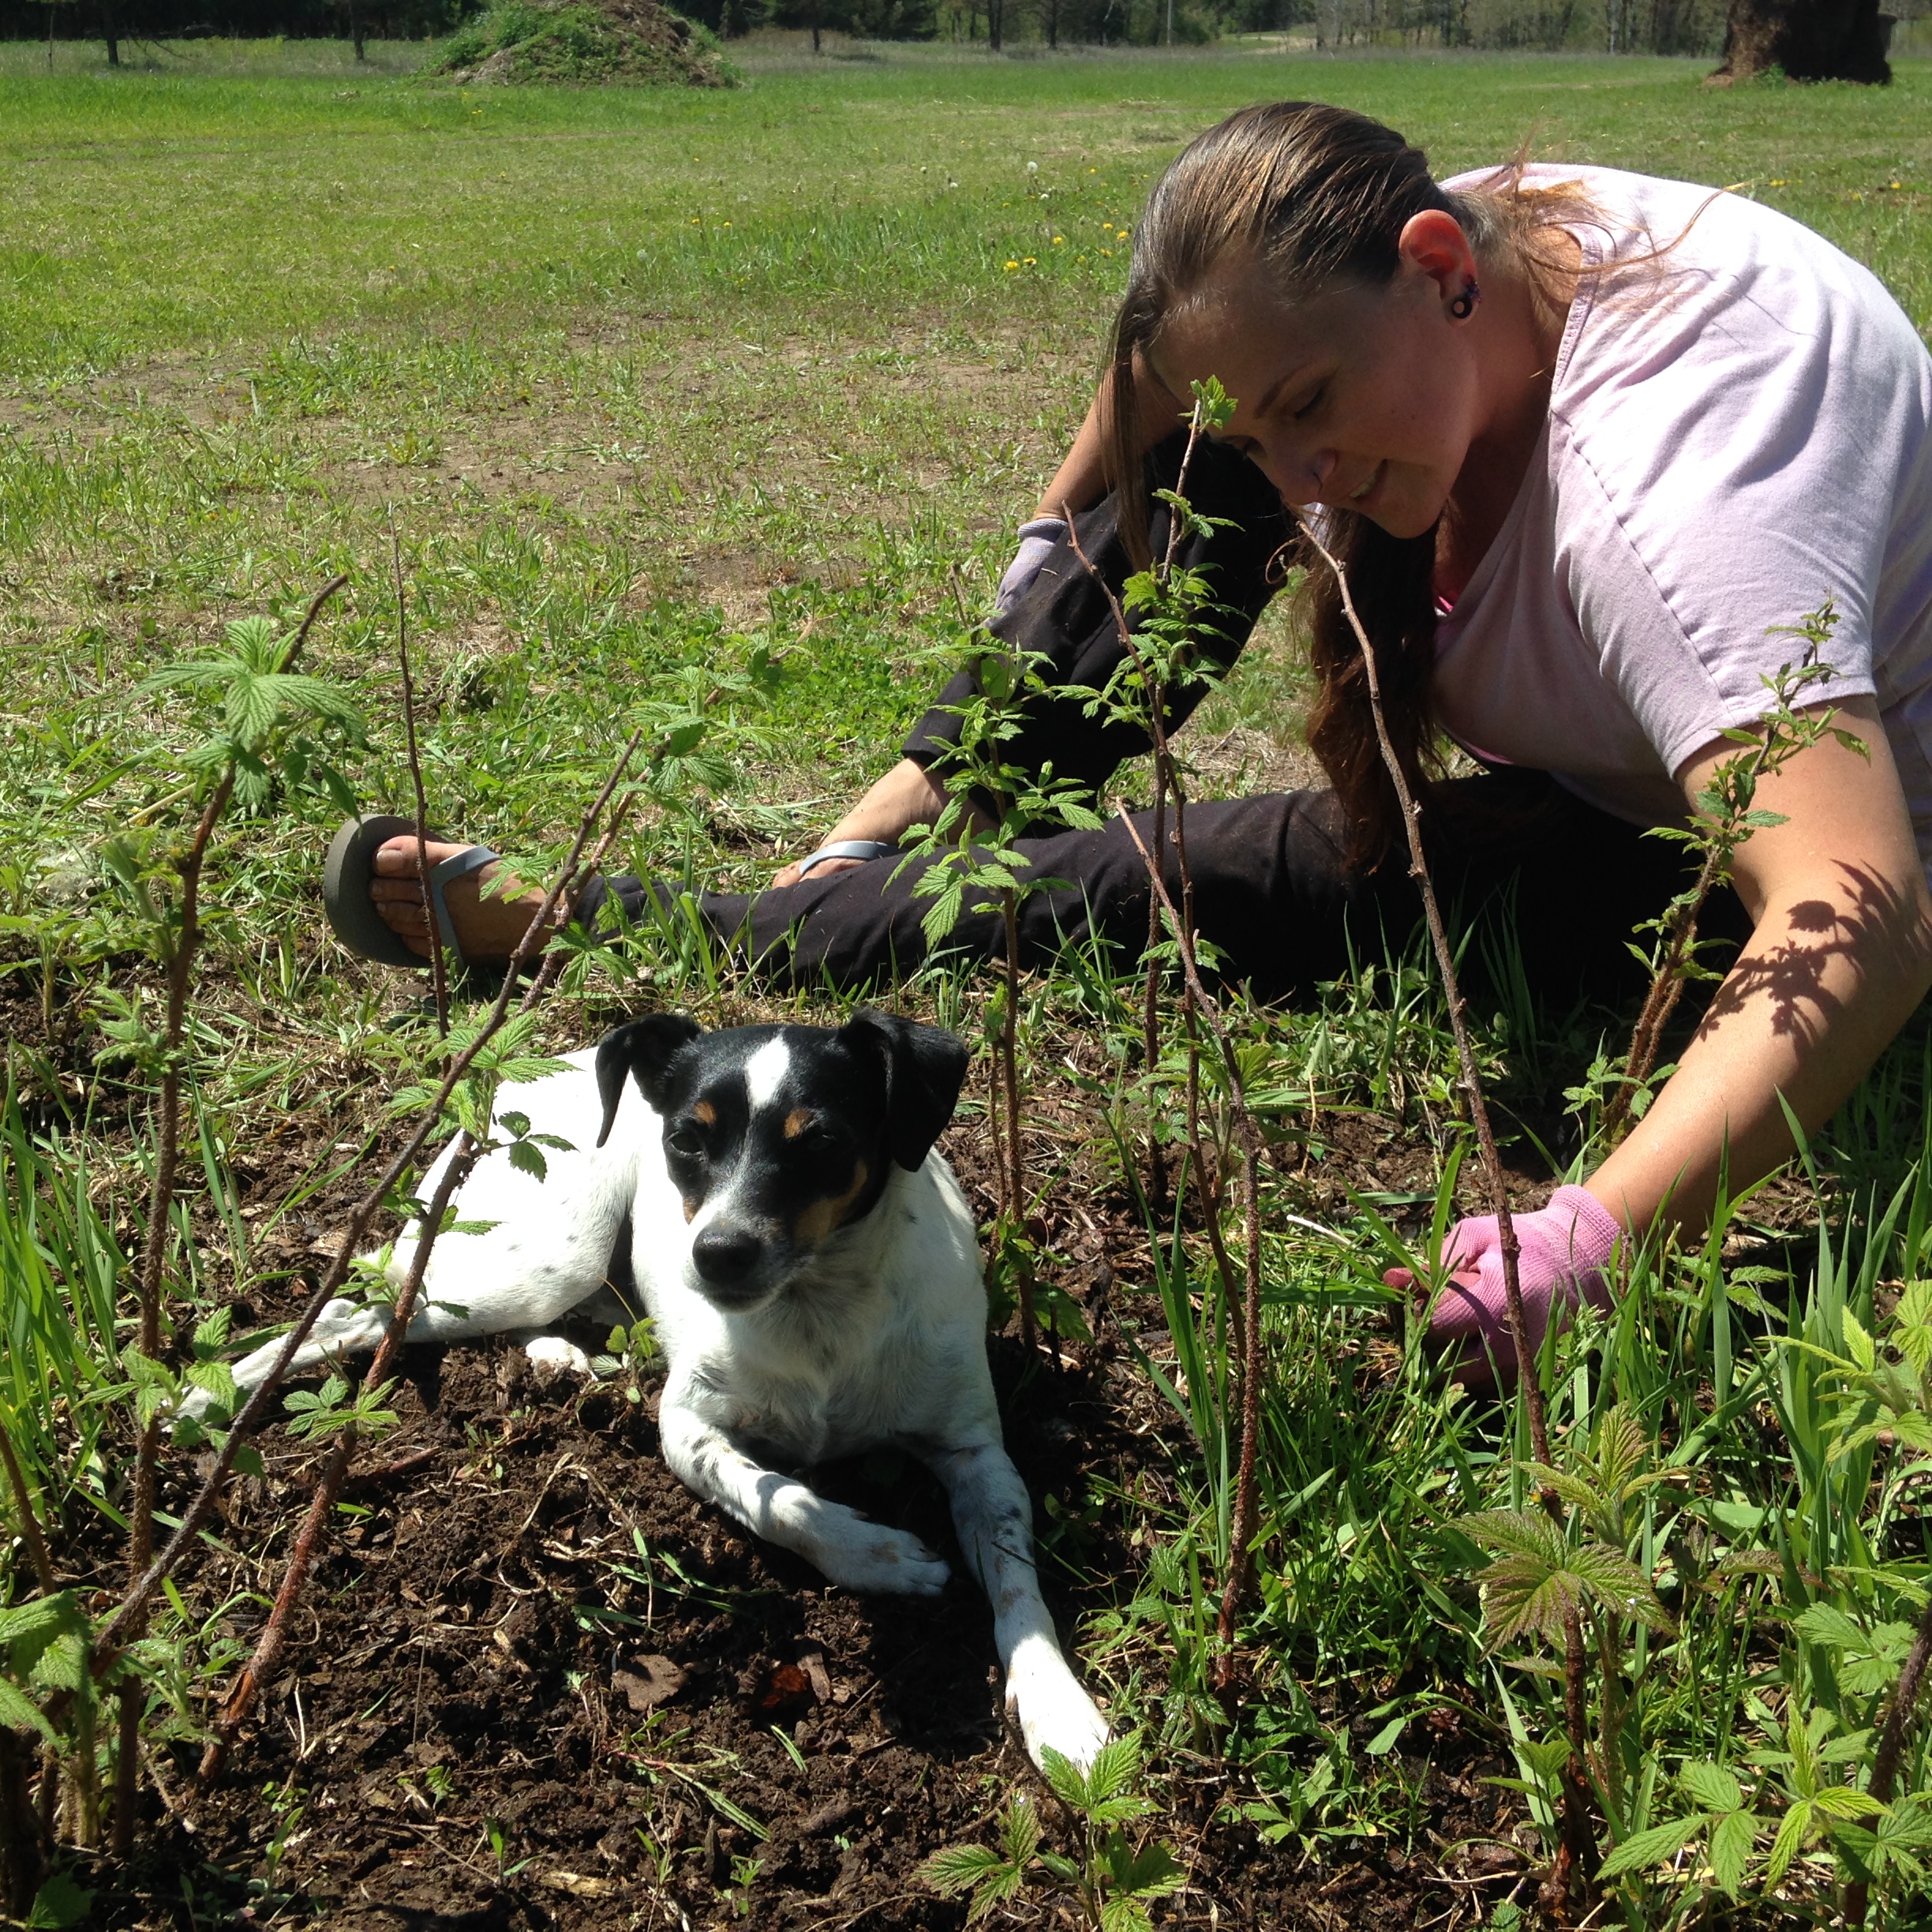
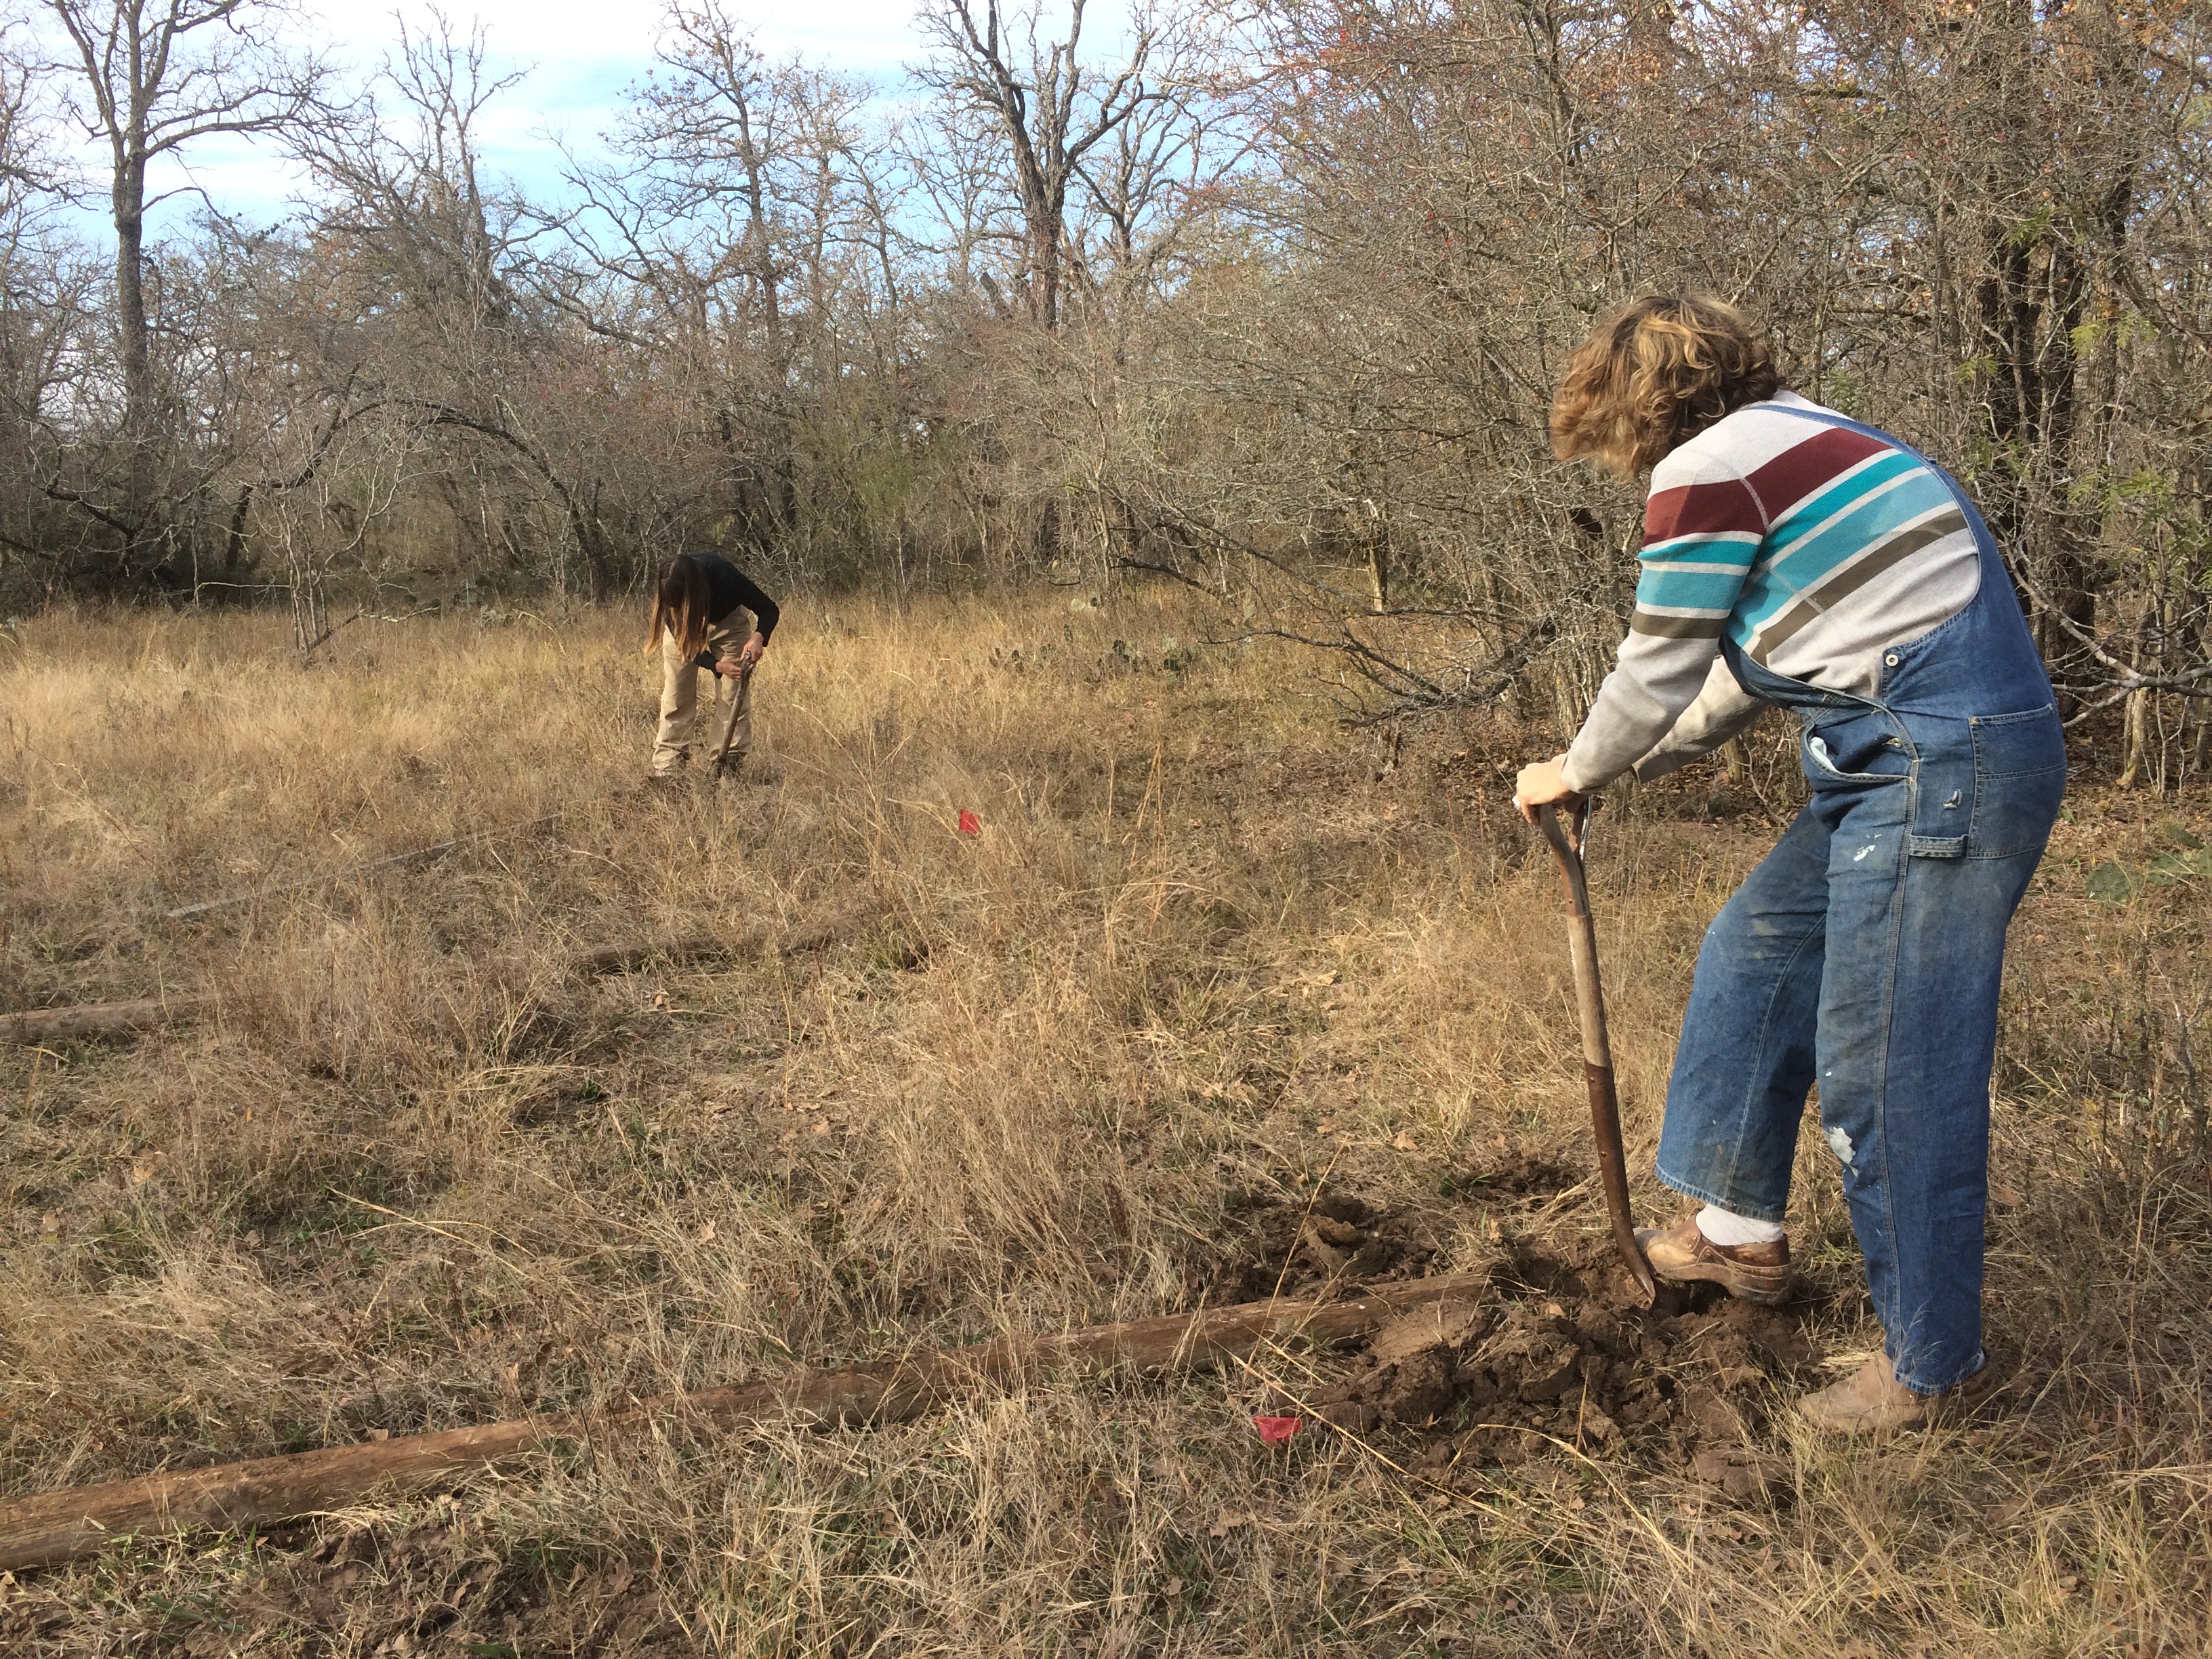
killing quack grass – first loosening the soil with a broadfork, and then carefully digging the extensive root systems out by hand.WWOOFer woofer Kingsbury likes to find and bring home pieces of deer … so pleased with himself!grapevines coming to lifewe took several bucketfuls of quack grass rhizomes out that day … the weed bloodlust was strong.Widget ‘helps’ weed the raspberry patchElden pots up pepper plants
a box turtle came to visit
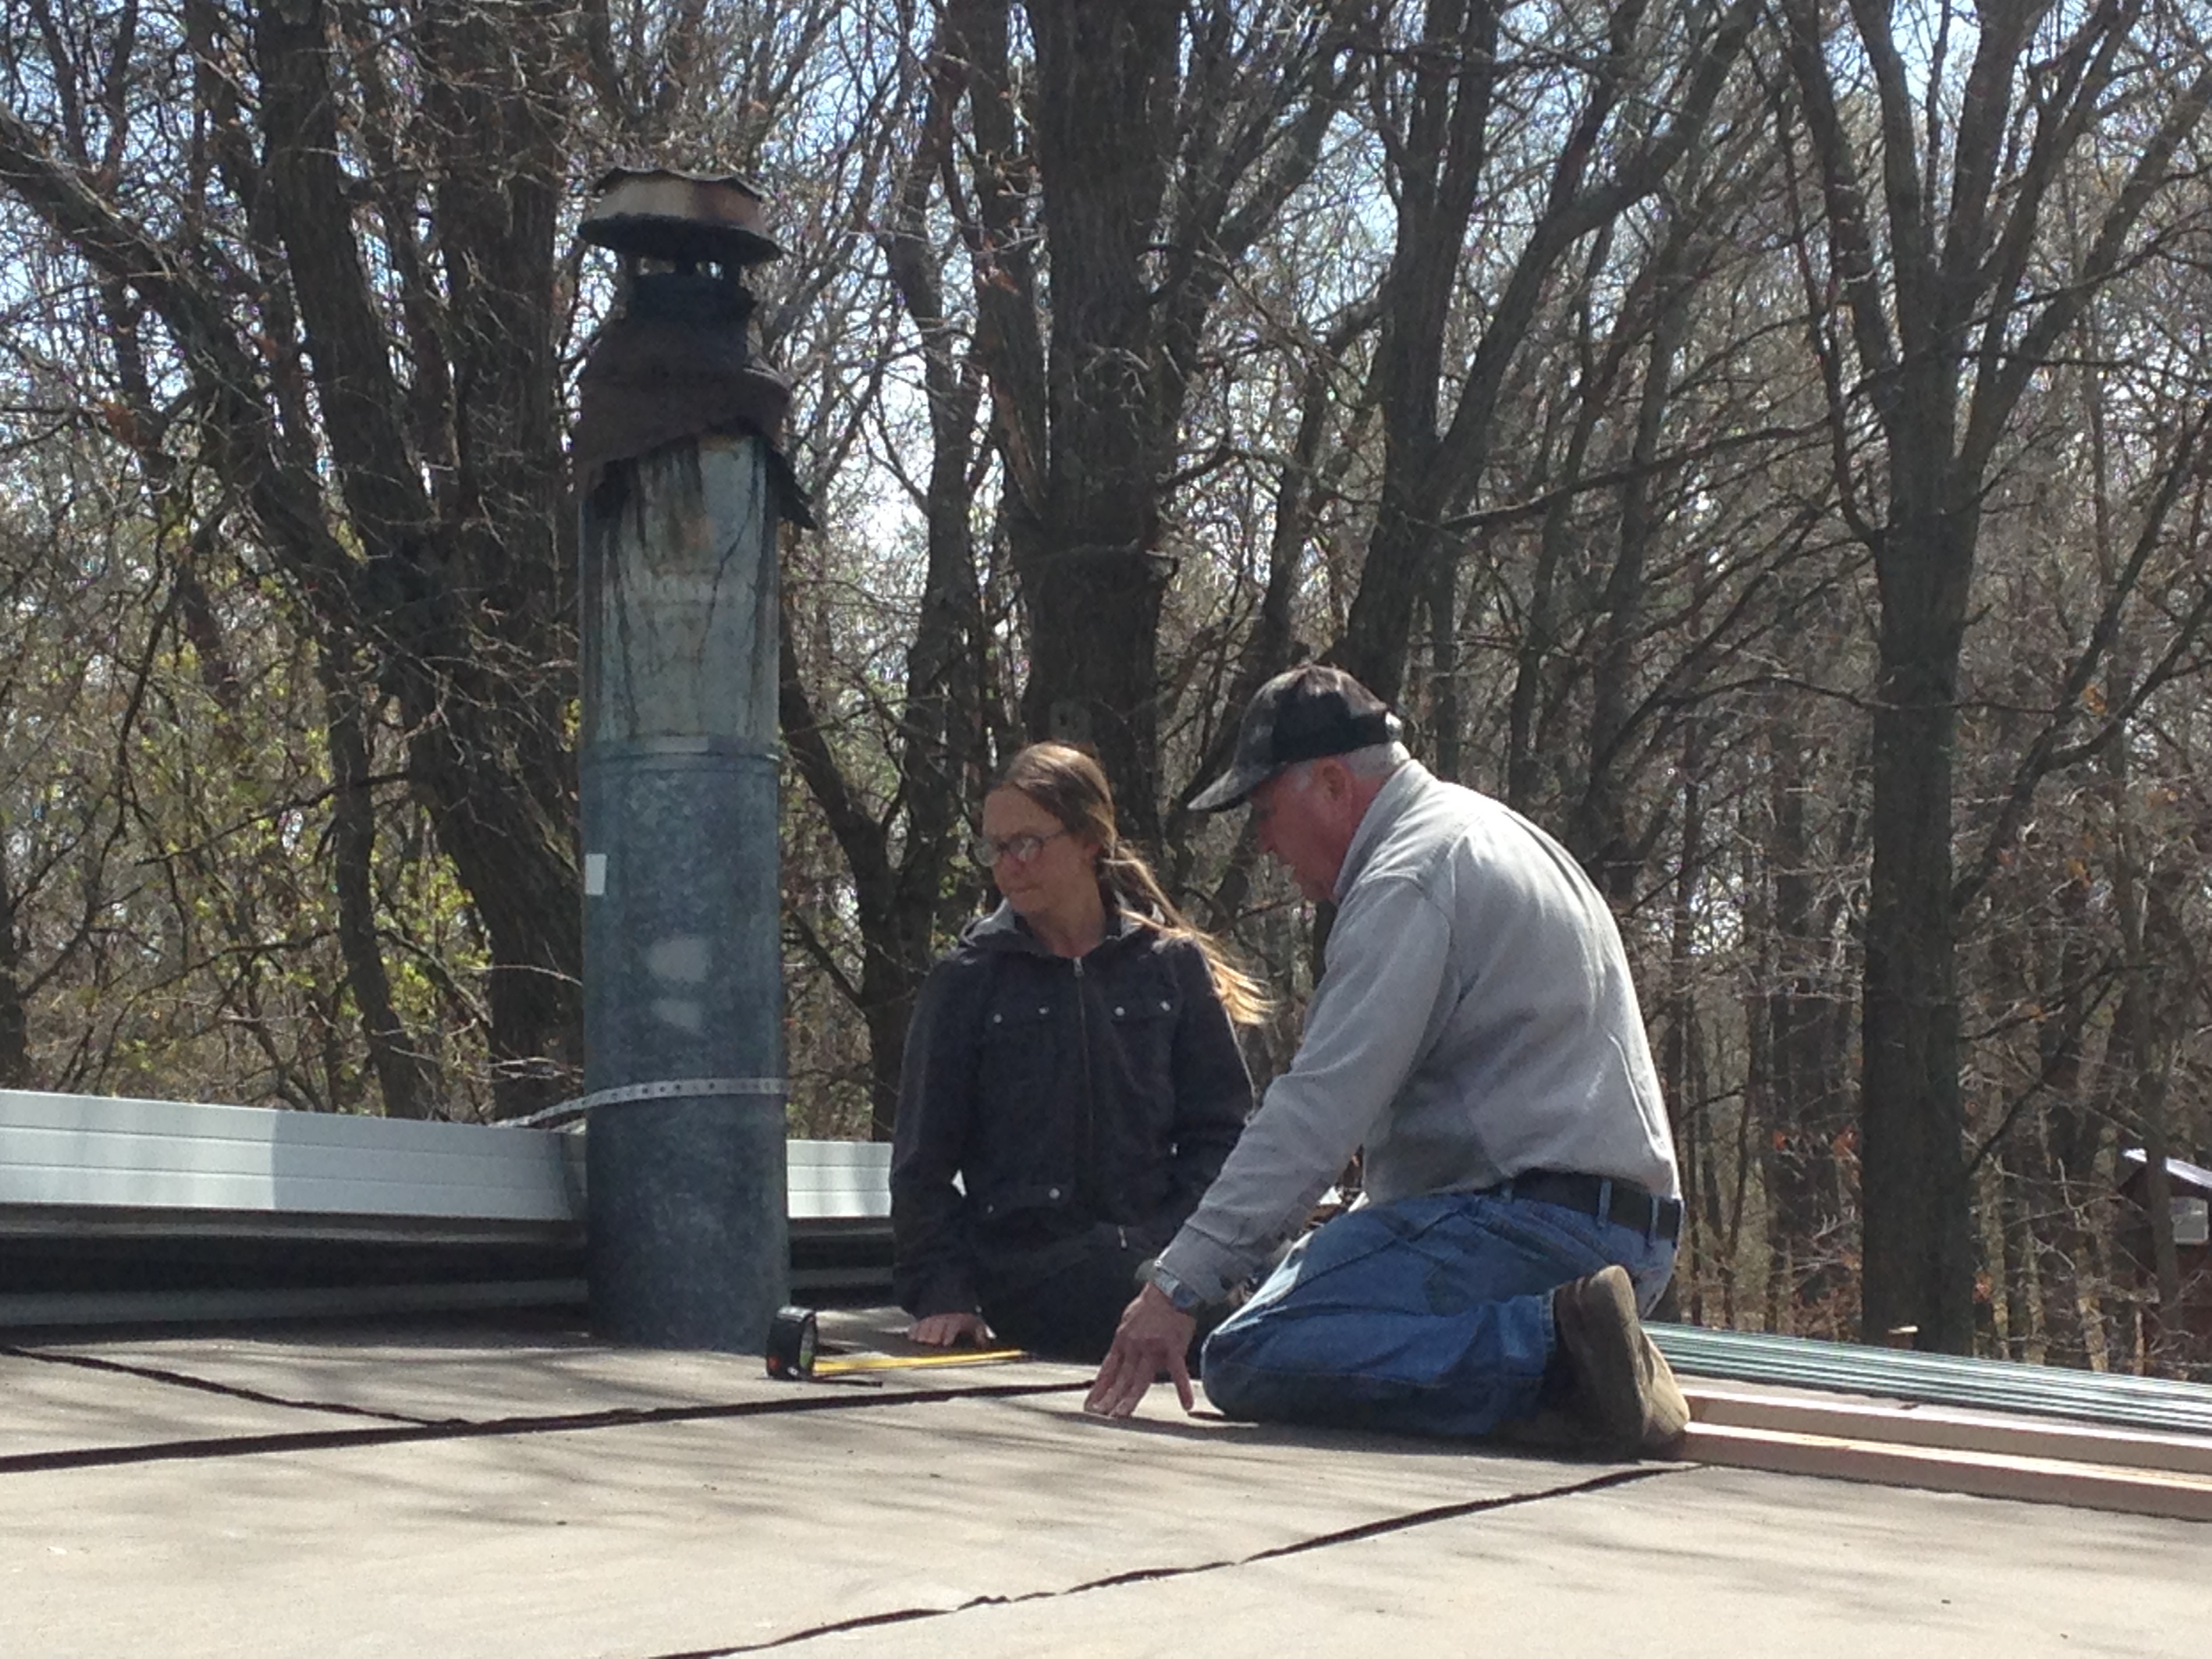
Kristin and her dad working on the screen porch roof
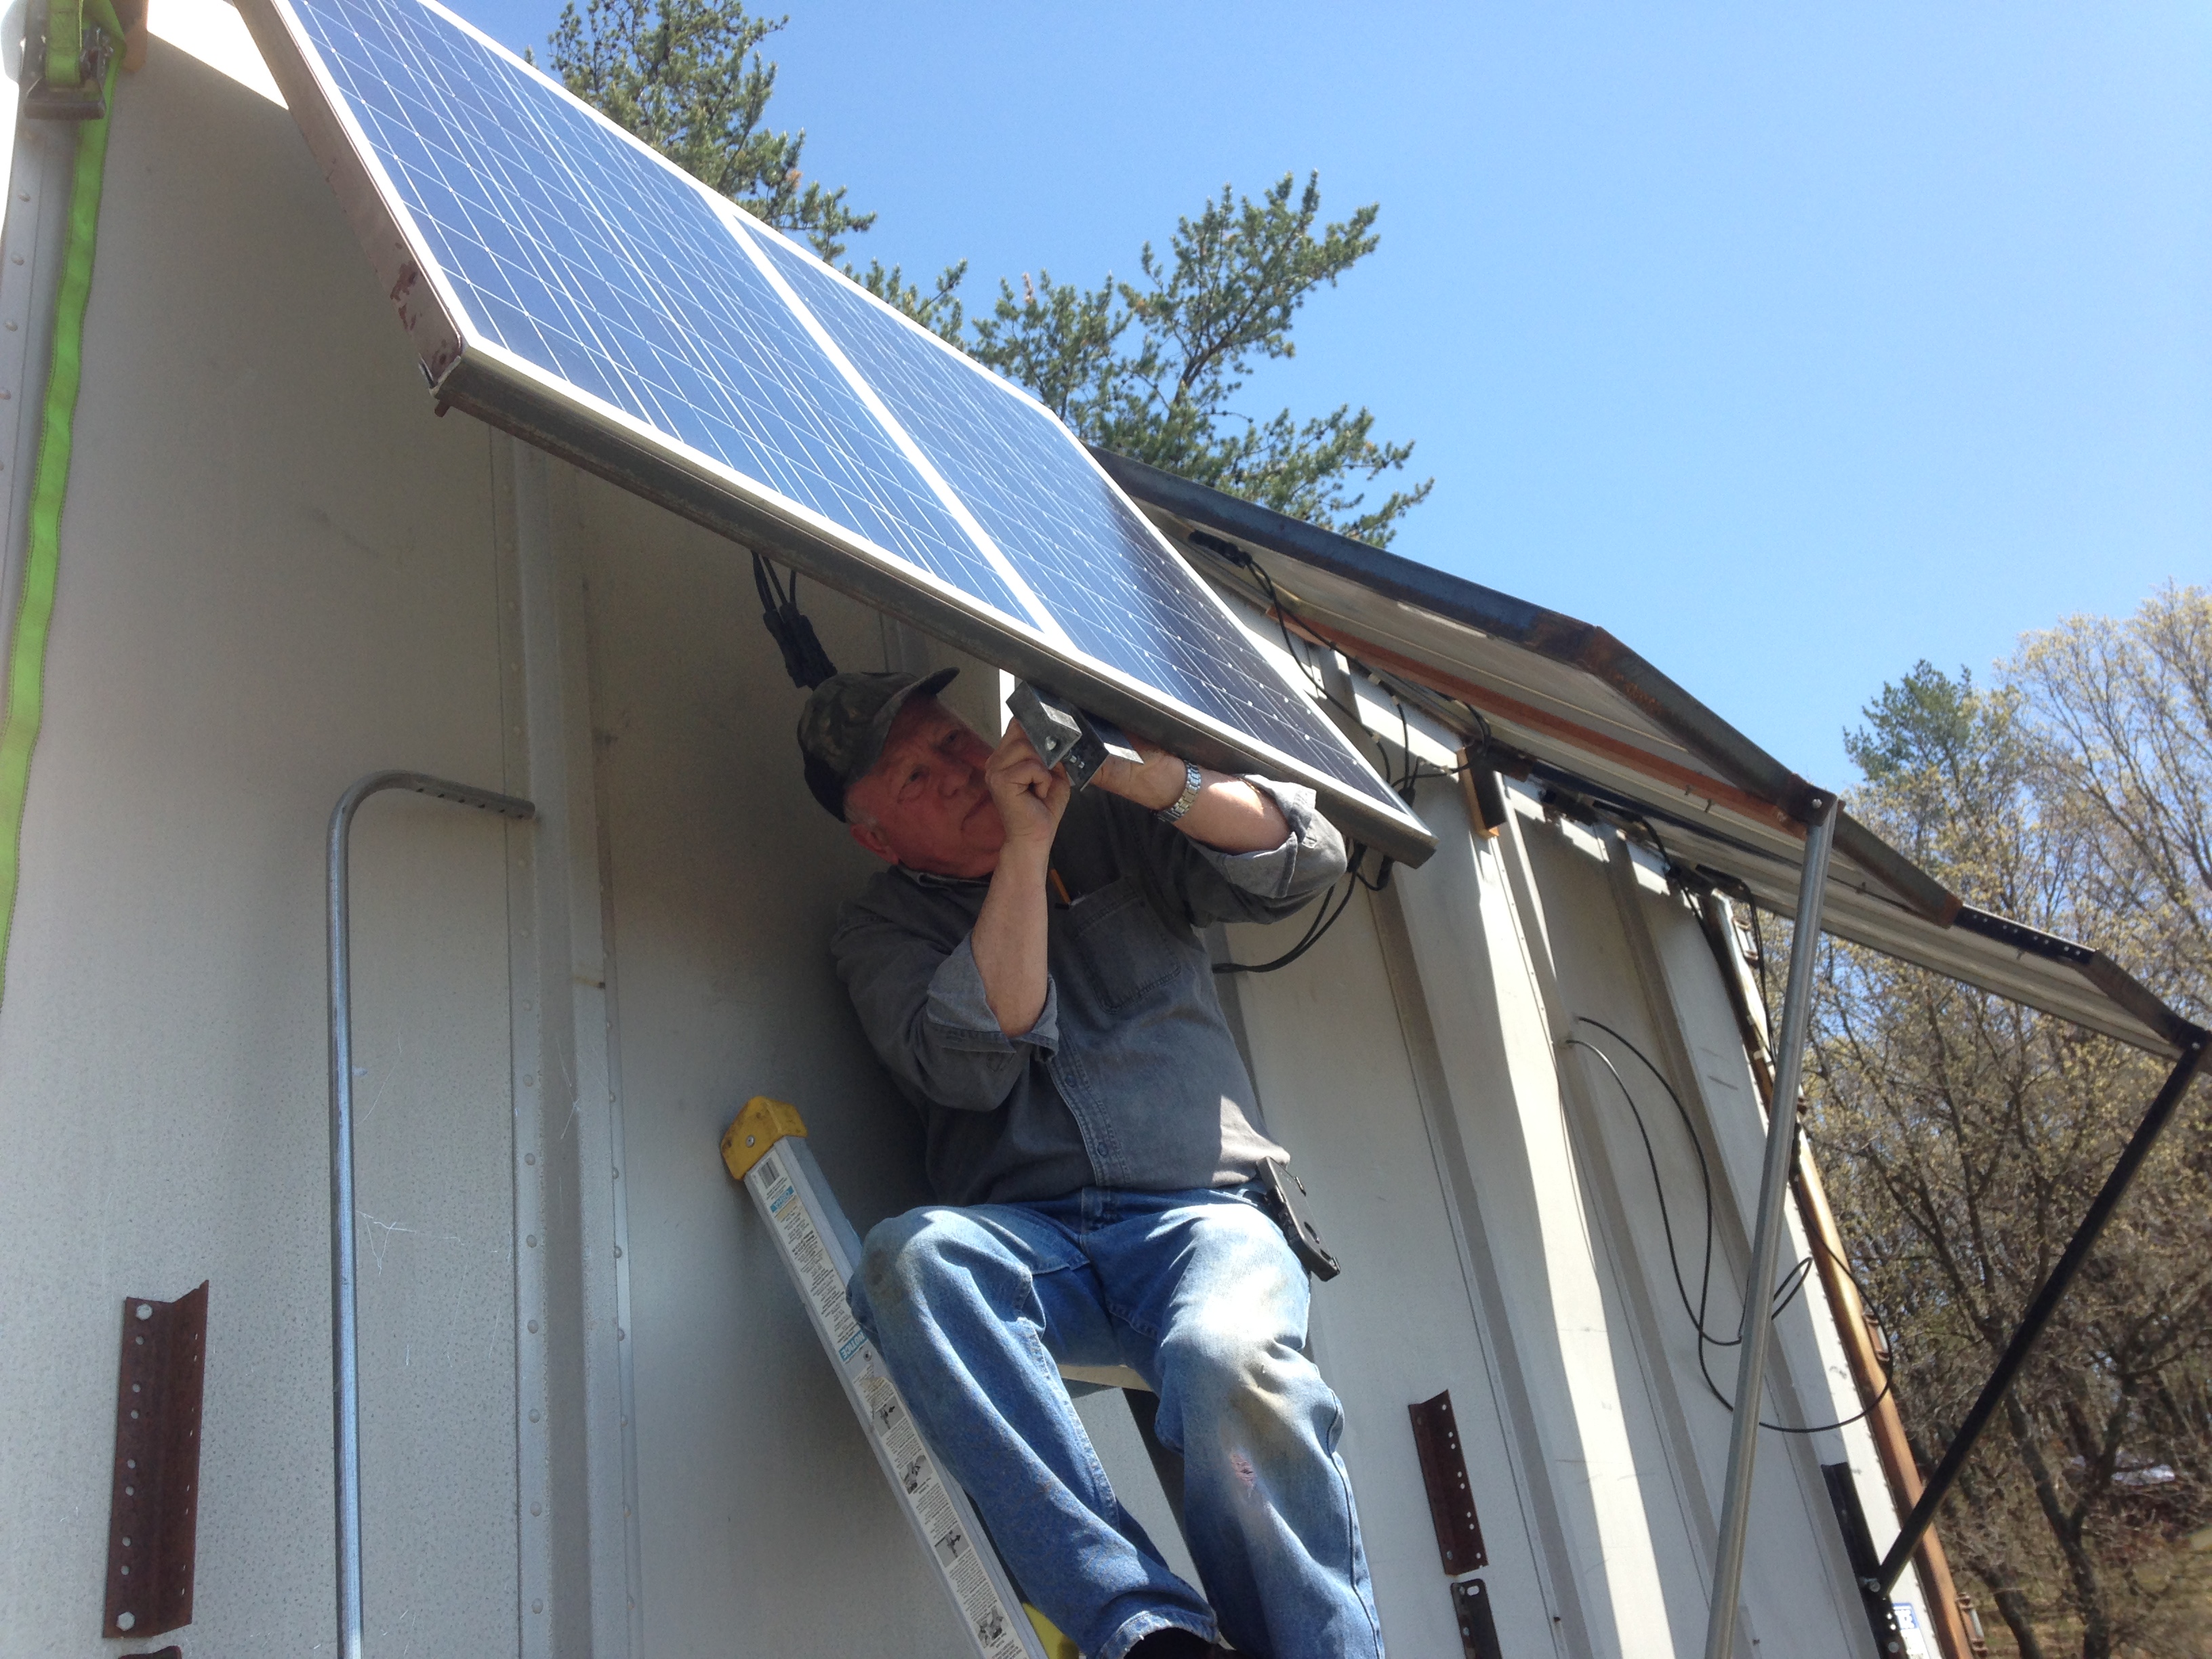
chive flowersJim helps install the new solar panelslaying irrigation linesbabiesthe eroding pipe of greenhouse heater’s booster fire makes for some beauty
And finally, let’s cap May off with a few good versions of our farm’s theme song!
(High Keys is my current favorite version. The Lords version is awesome for the band’s dancing lol)
When we left our civilized city career lives, we set a goal of spending as little money as we could, rather than focusing on ways to make more money. Toward this end, we remain disconnected from the utility grid, eat mostly our farm-grown food, and save money on toilet paper by using tree bark.
OK, that last part was a lie.
(Although we actually did look into, but reject, mullein leaf TP at one point!)
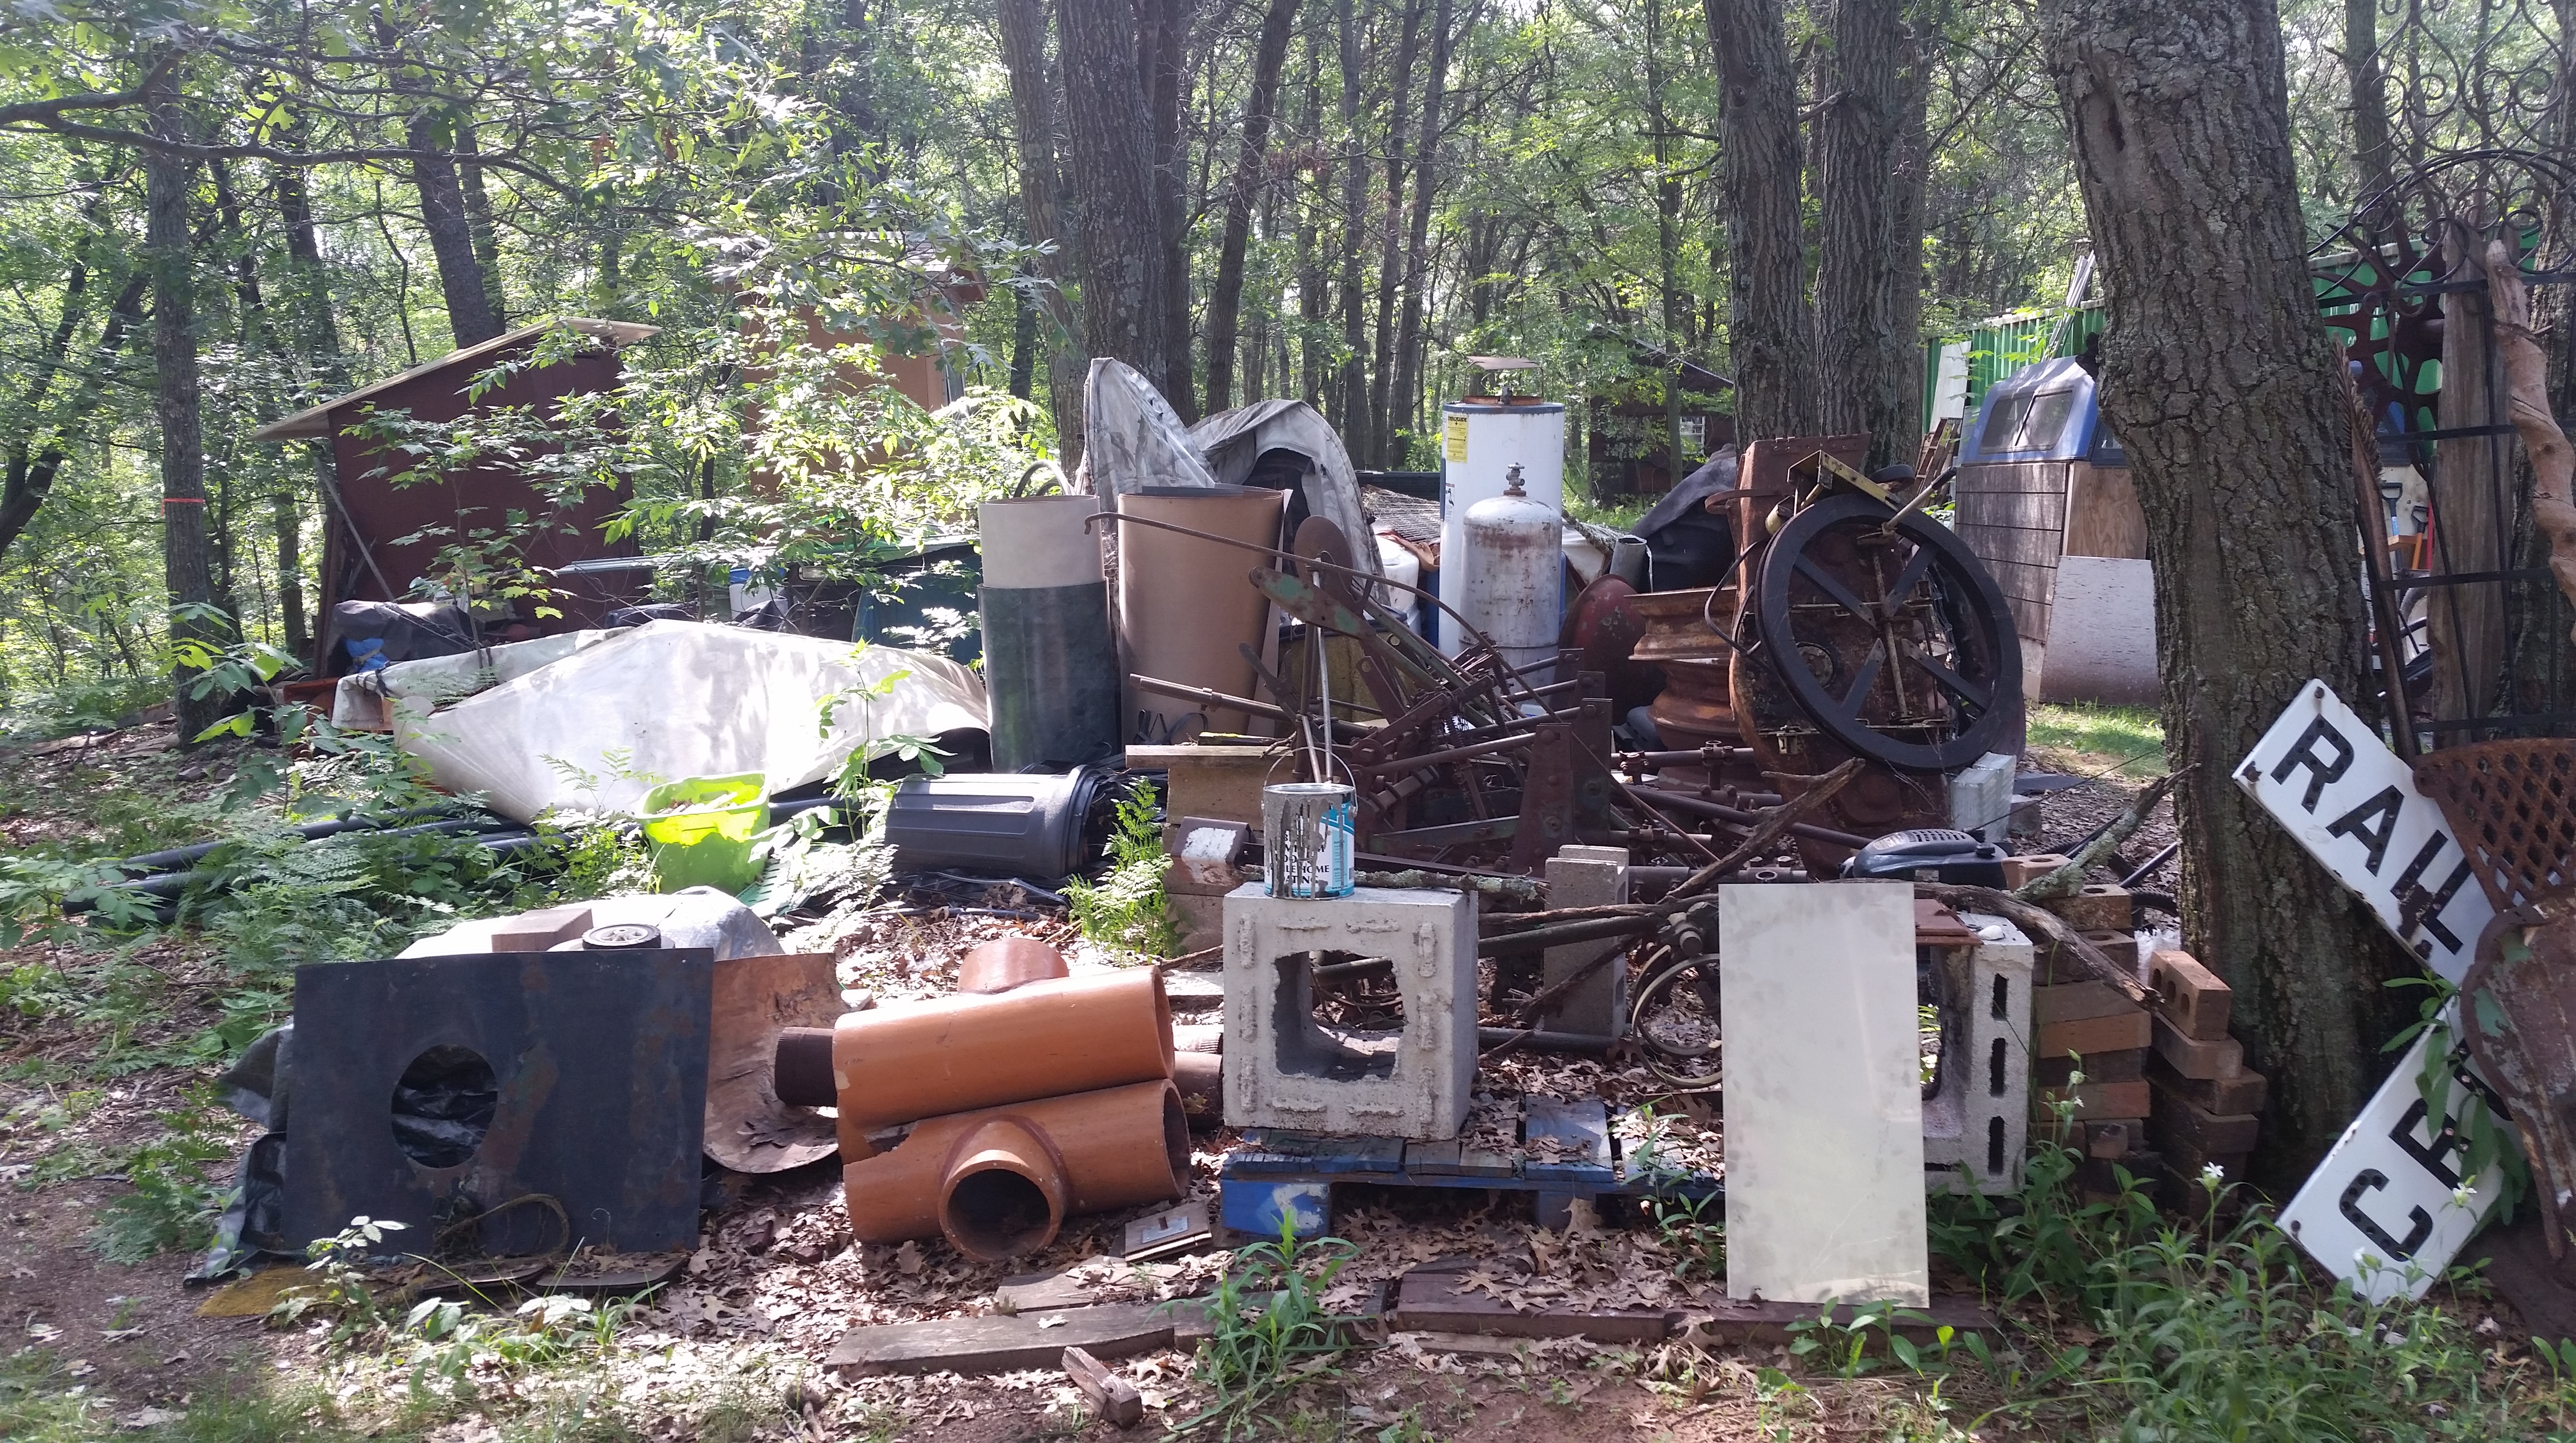
But generally, wherever we reasonably can, we avoid shopping and stores – rather than make a purchase, we first consider getting by without it, or re-purposing something we already have (which is why a well-stocked “junk pile” is crucial).
Pile de Junkque
We are blessed by our proximity to the Twin Cities, which seems to be one of the more active Craigslist urban areas in the country – and we’ve become pretty effective scavengers on it. As you may know, Craigslist has a “Free” section where people give things away. In many cities, this section is a ghost town populated primarily by unwanted kittens, scams, and people seeking freebies. But not Minneapolis.
If you’ve ever checked it out casually, you probably were not too impressed – lots of old TVs and couches, and if you did find something interesting and tried to make contact, it was already taken by someone else.
Perhaps, someone like us.
The trick to successful Free Craigslisting is vigilance and speed. Anything good will be quickly snatched up, so we check frequently for new posts, and respond to good ones immediately – including our phone number, names, when we can pick up, and maybe even why we want it.
When someone will be getting a ton of responses, you want to stand out from the pack – more than once we’ve been told we were selected from a bunch of emails because we’re an organic farm that wants to use the item – and not a metal scrapper just looking to melt it down for a couple bucks.
More than anything (other than maybe lucky), you need to be flexible – open to using something unexpected, and open to things coming when they come and not when you think they should. (And of course,you need a trailer or a truck to haul the larger items!)
Giving people farm tours at our end-of-season pizza party, I was constantly describing various features as coming to us “free off Craigslist” – which inspired me to try to put a list together, which led to this post.
Here are just some of the many Free Craigslist scores that we rely on at the farm:
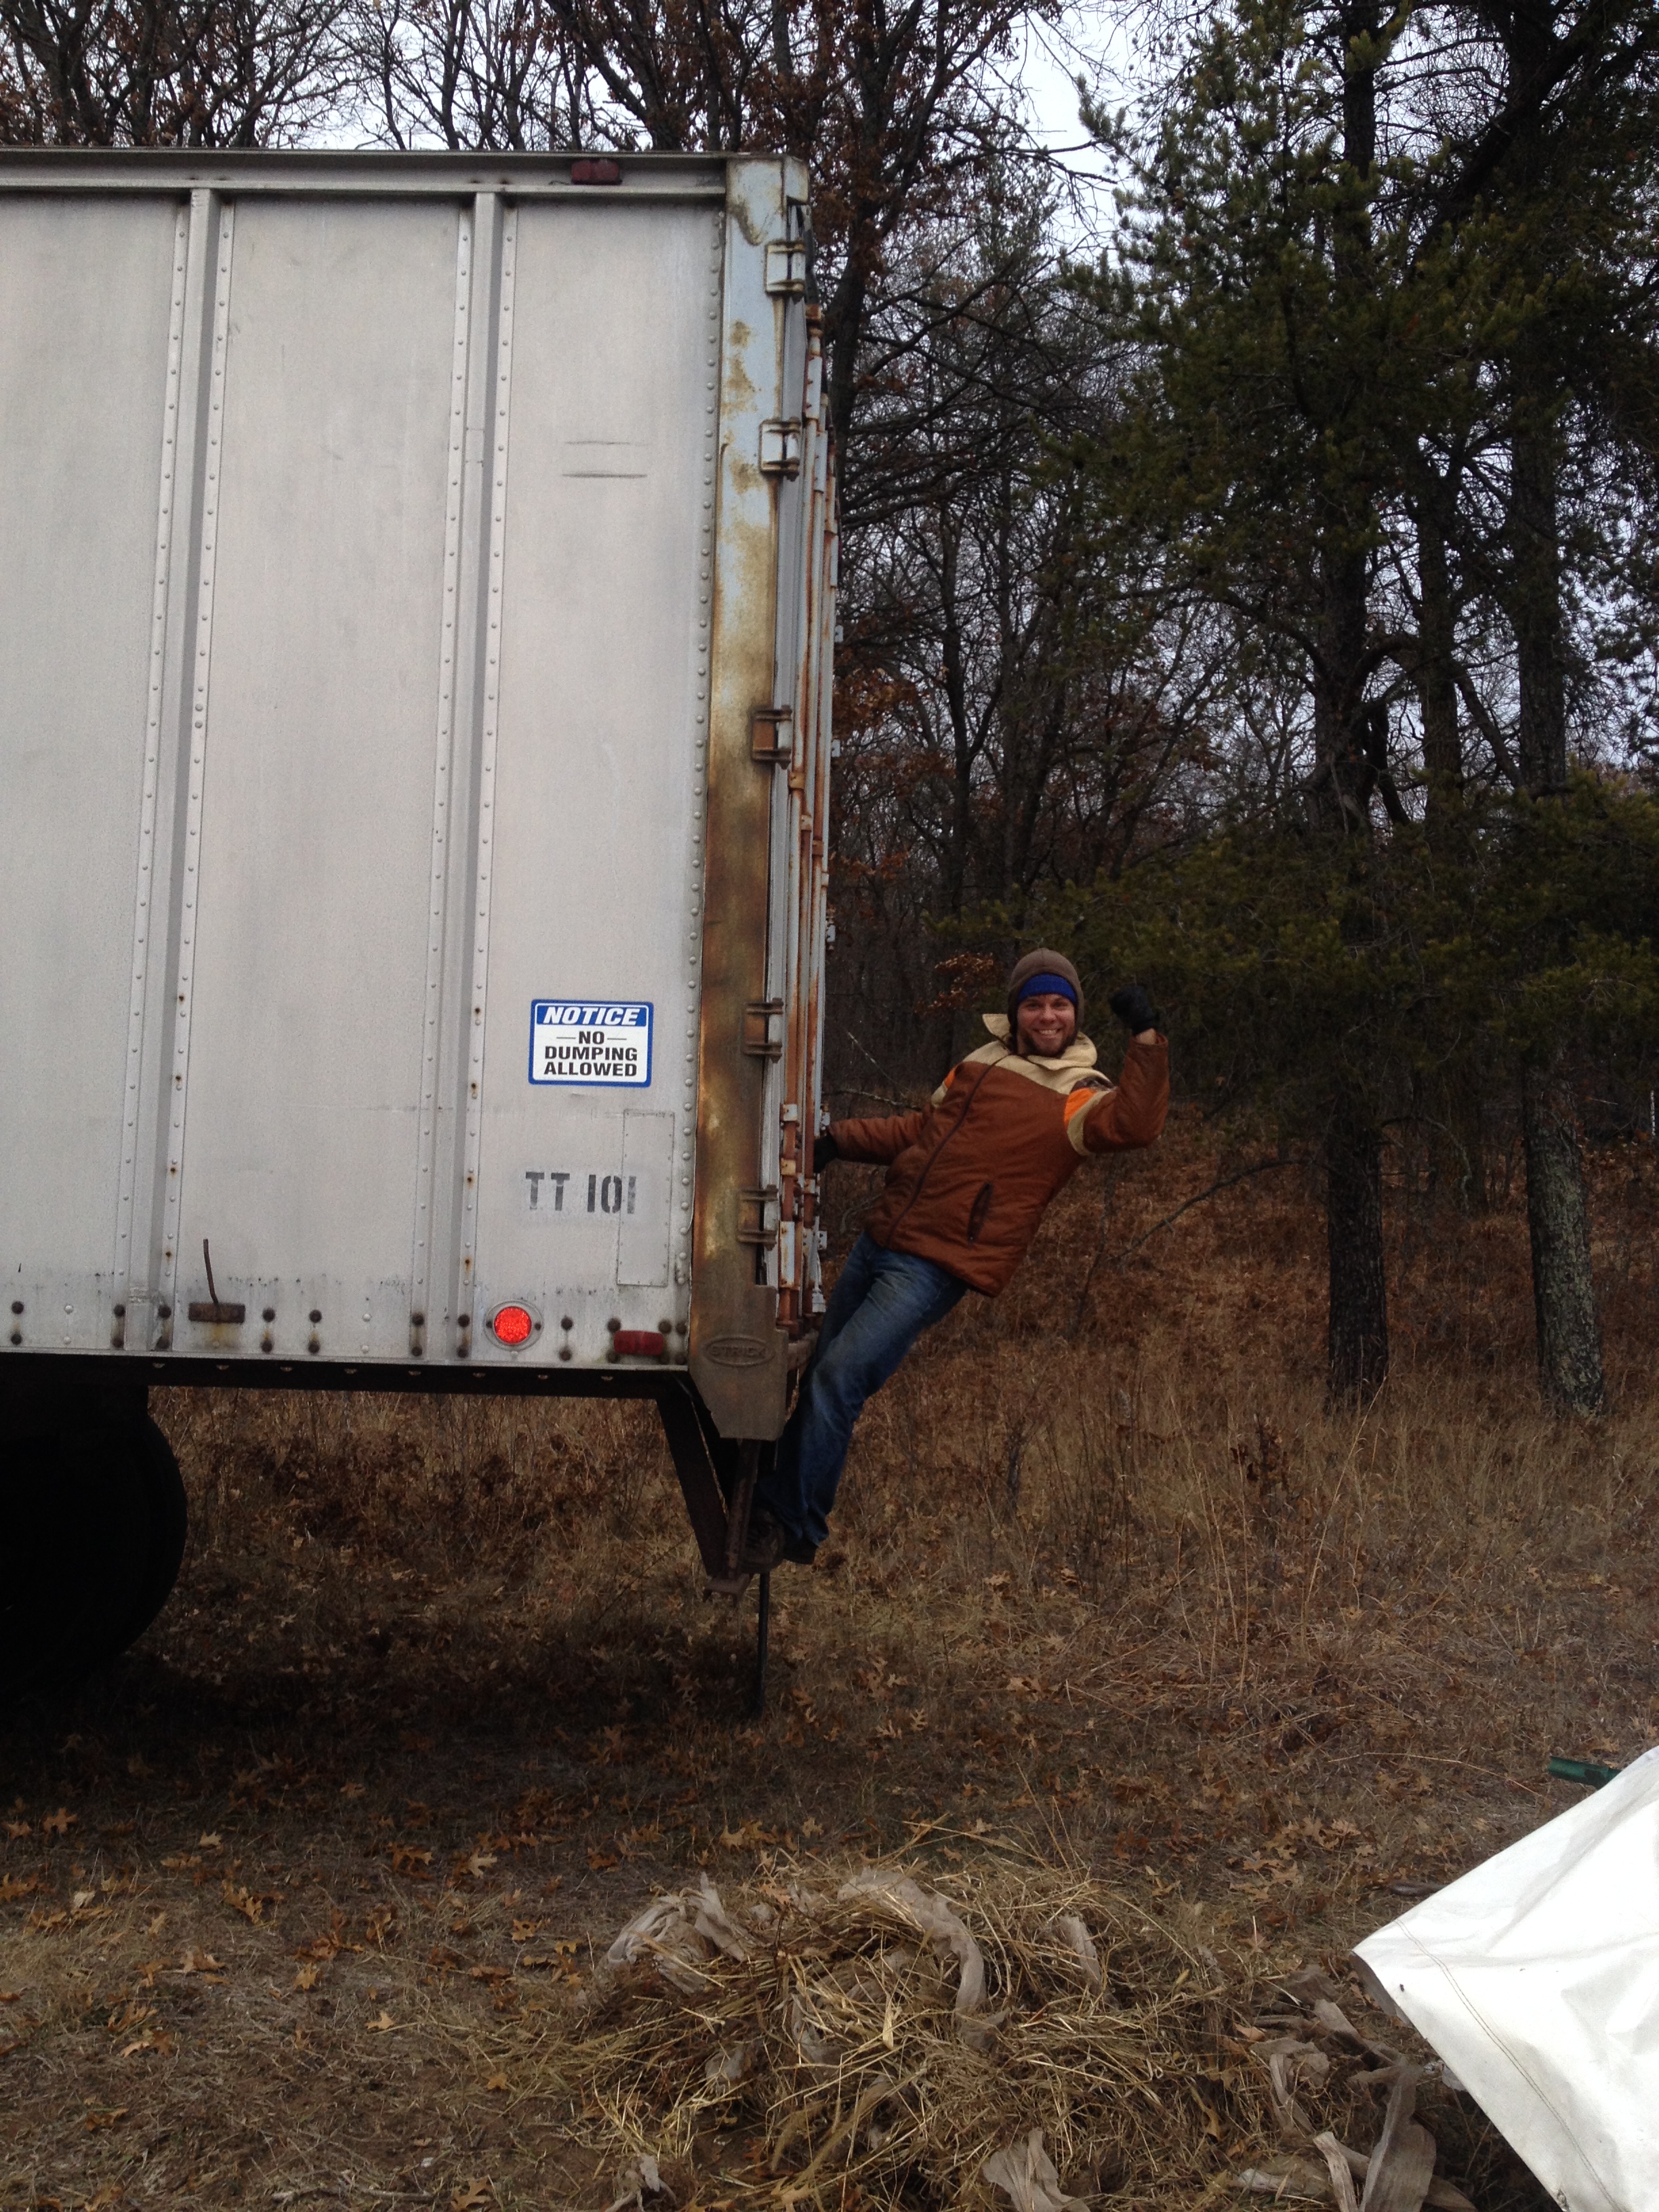
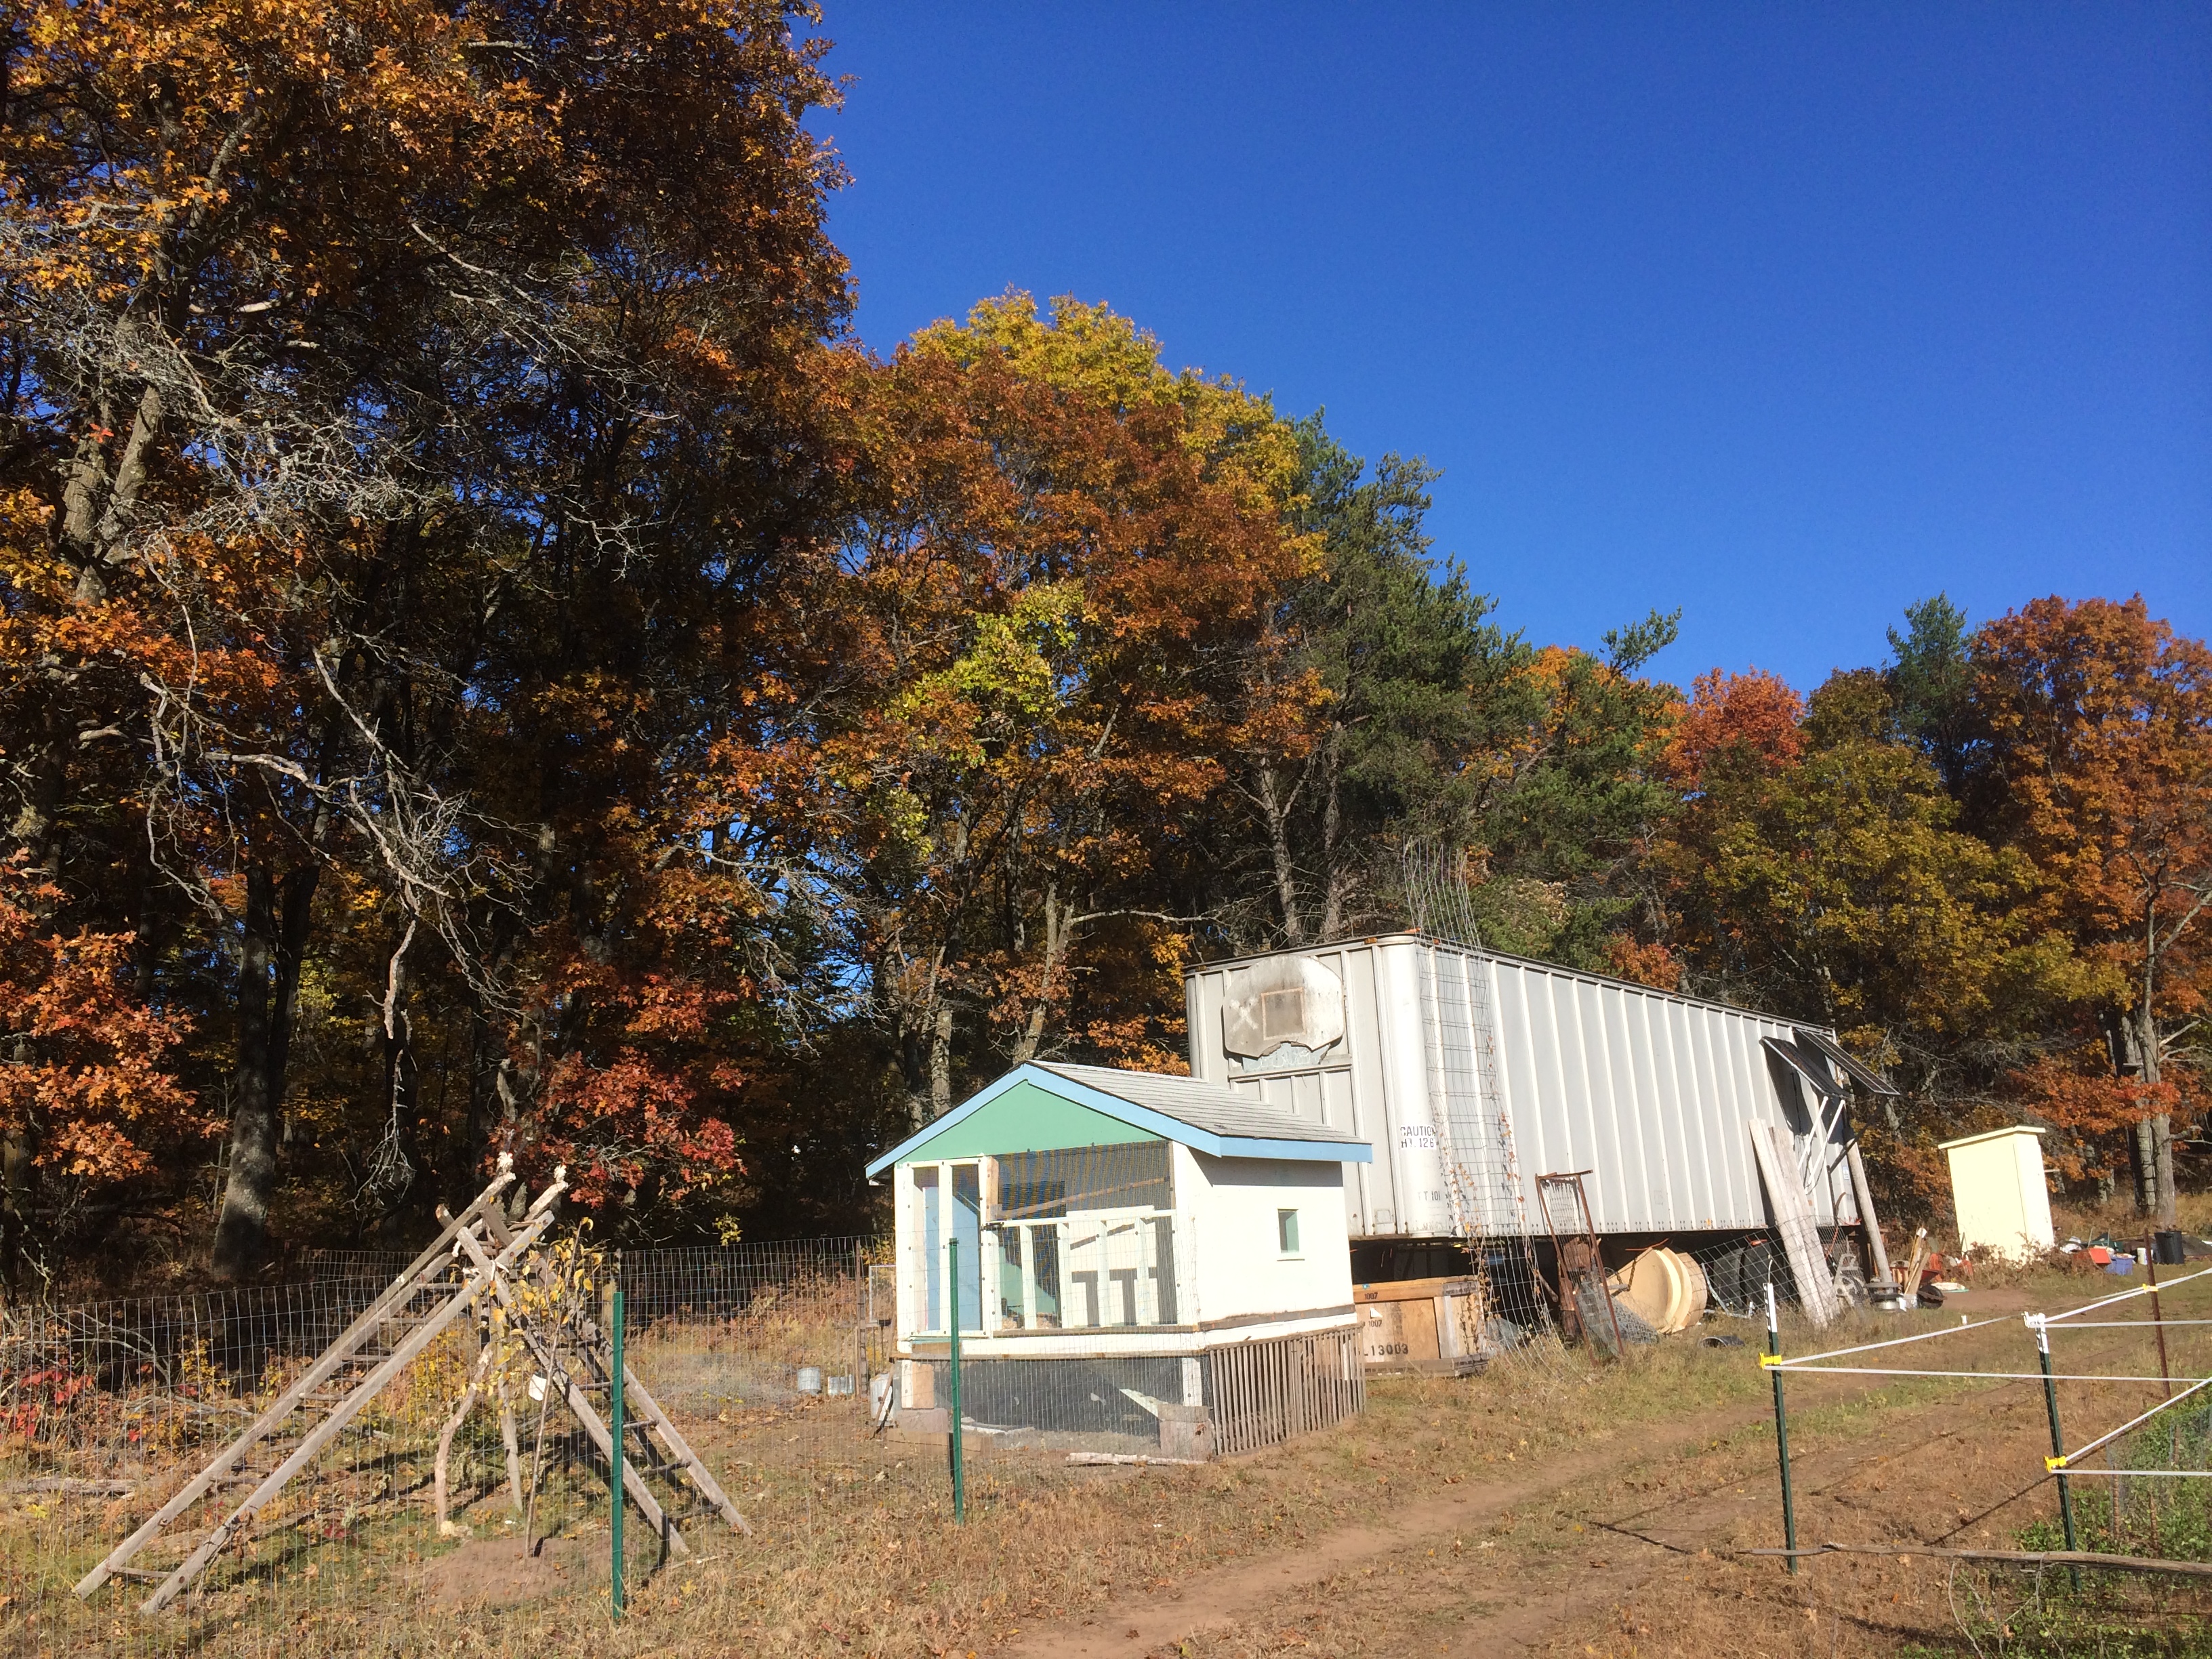
Semi truck (aka the Barn) the semi rolls into place
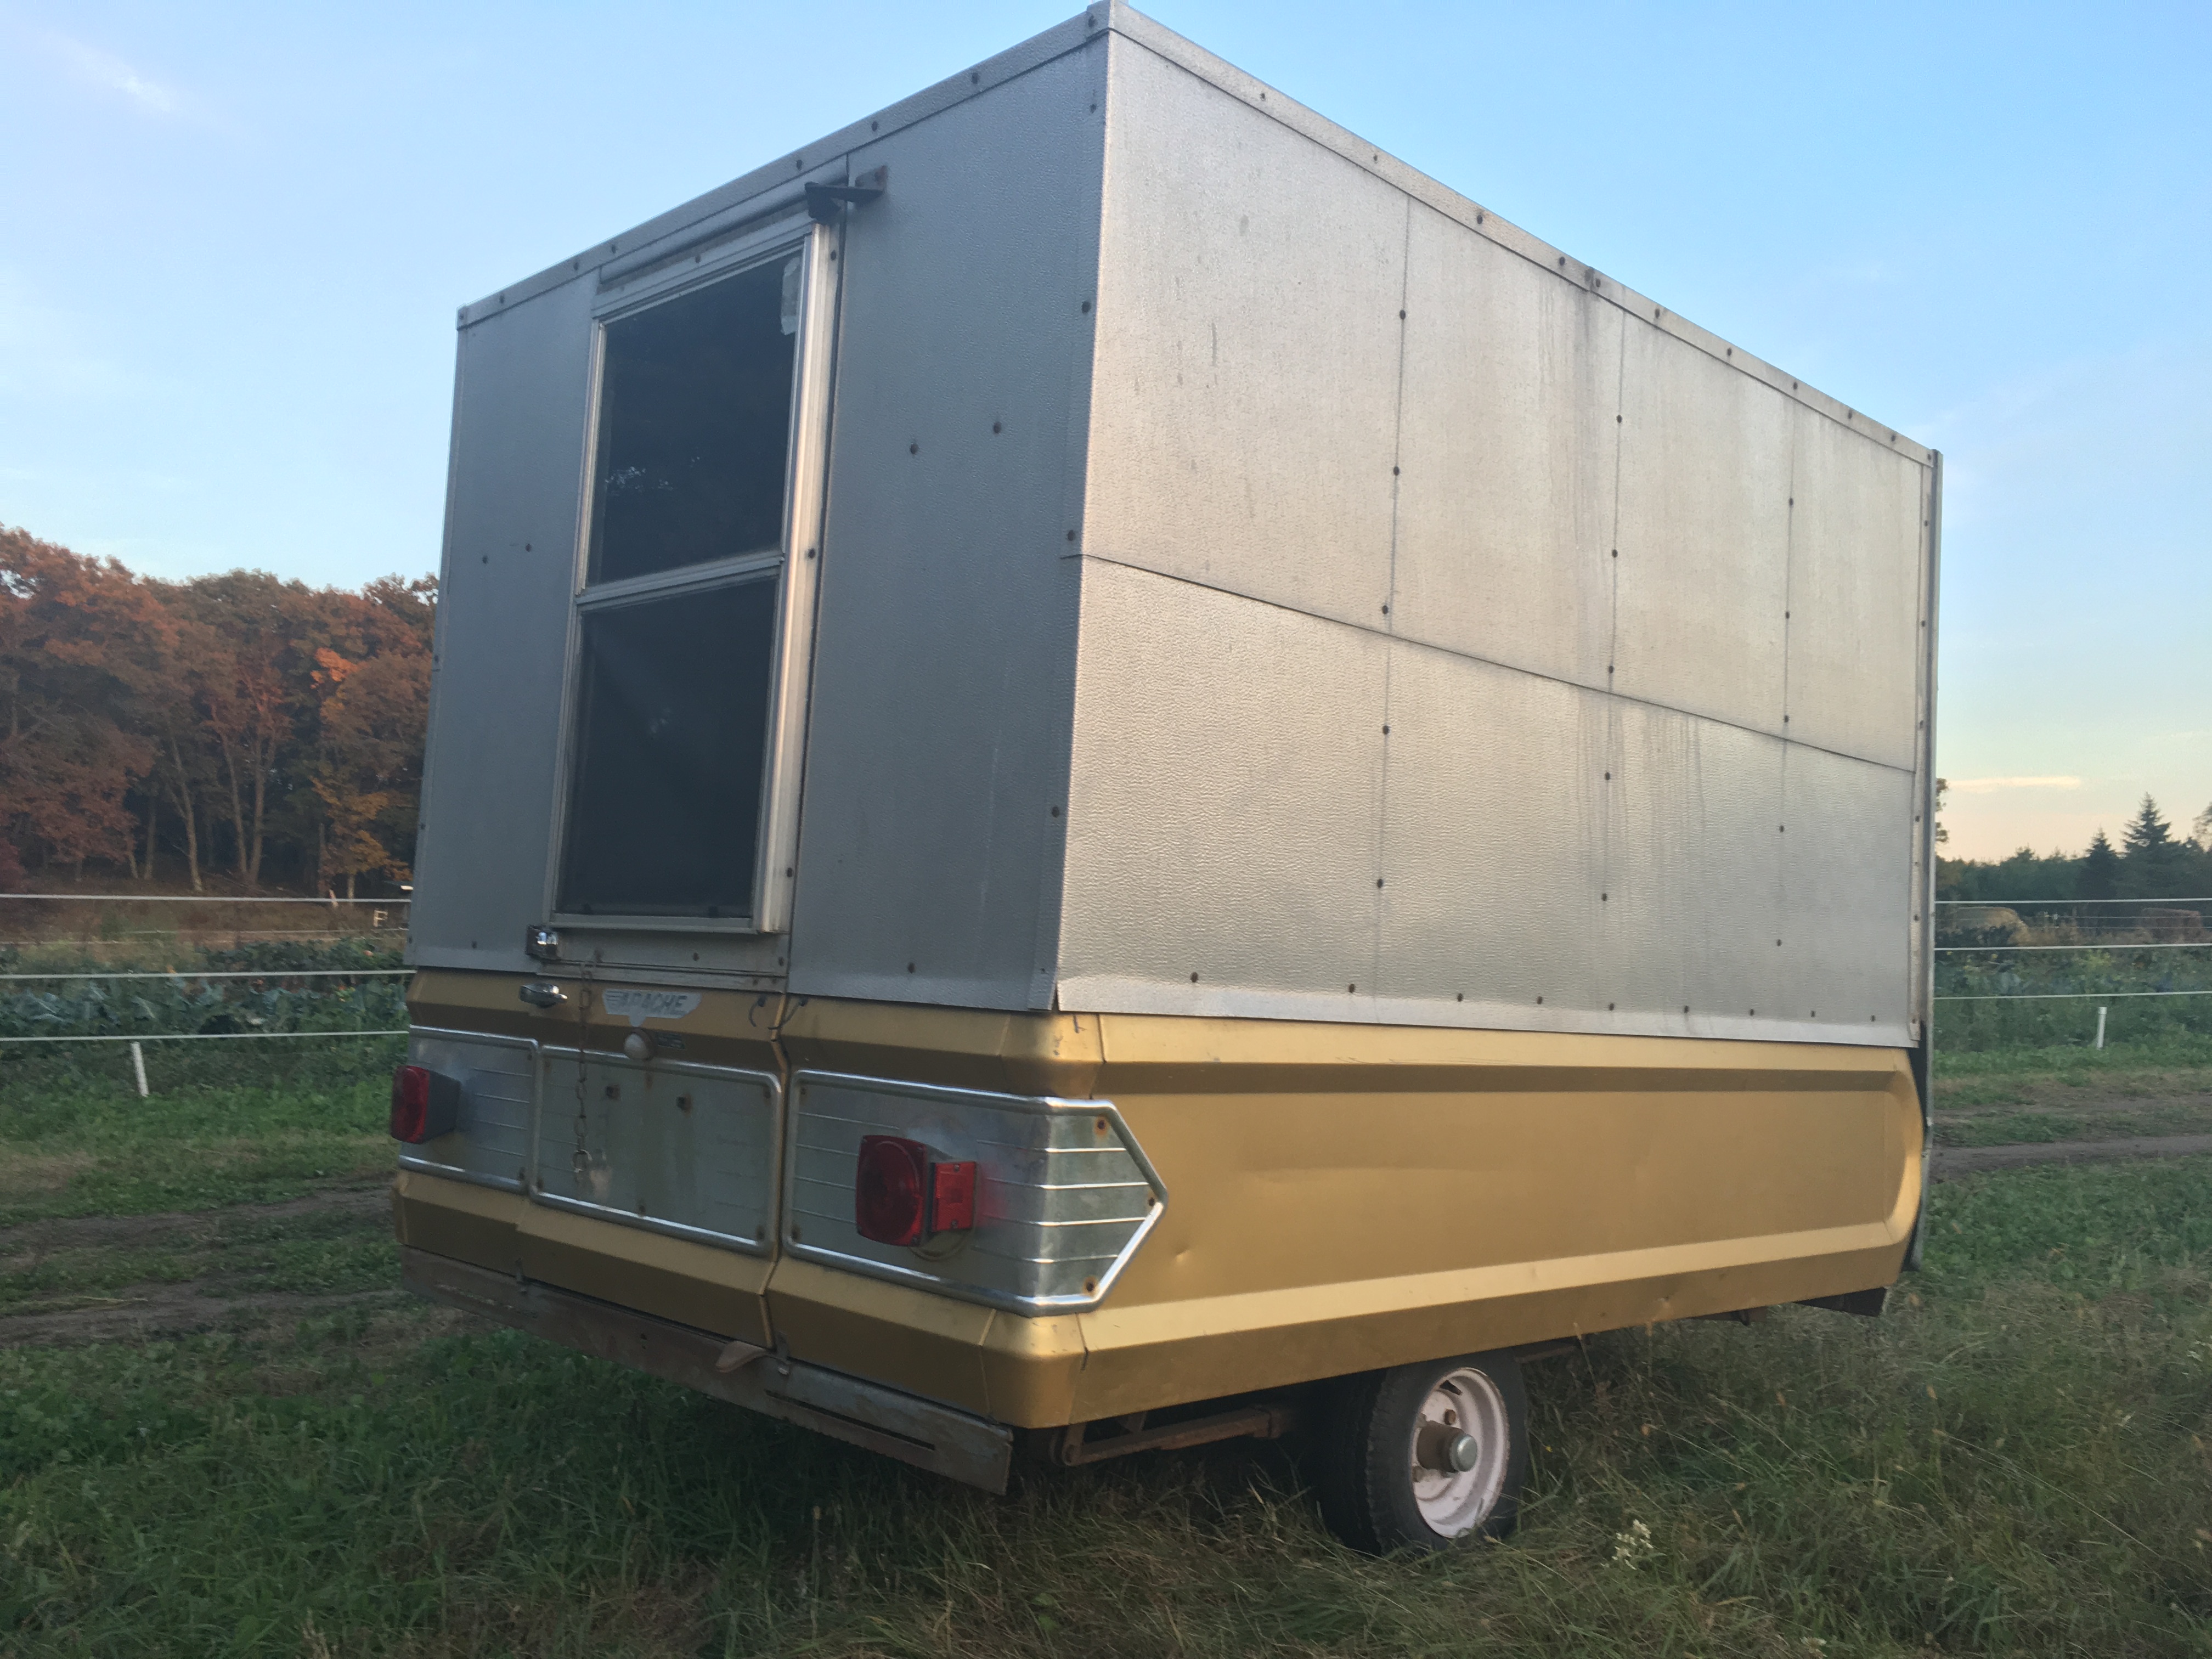
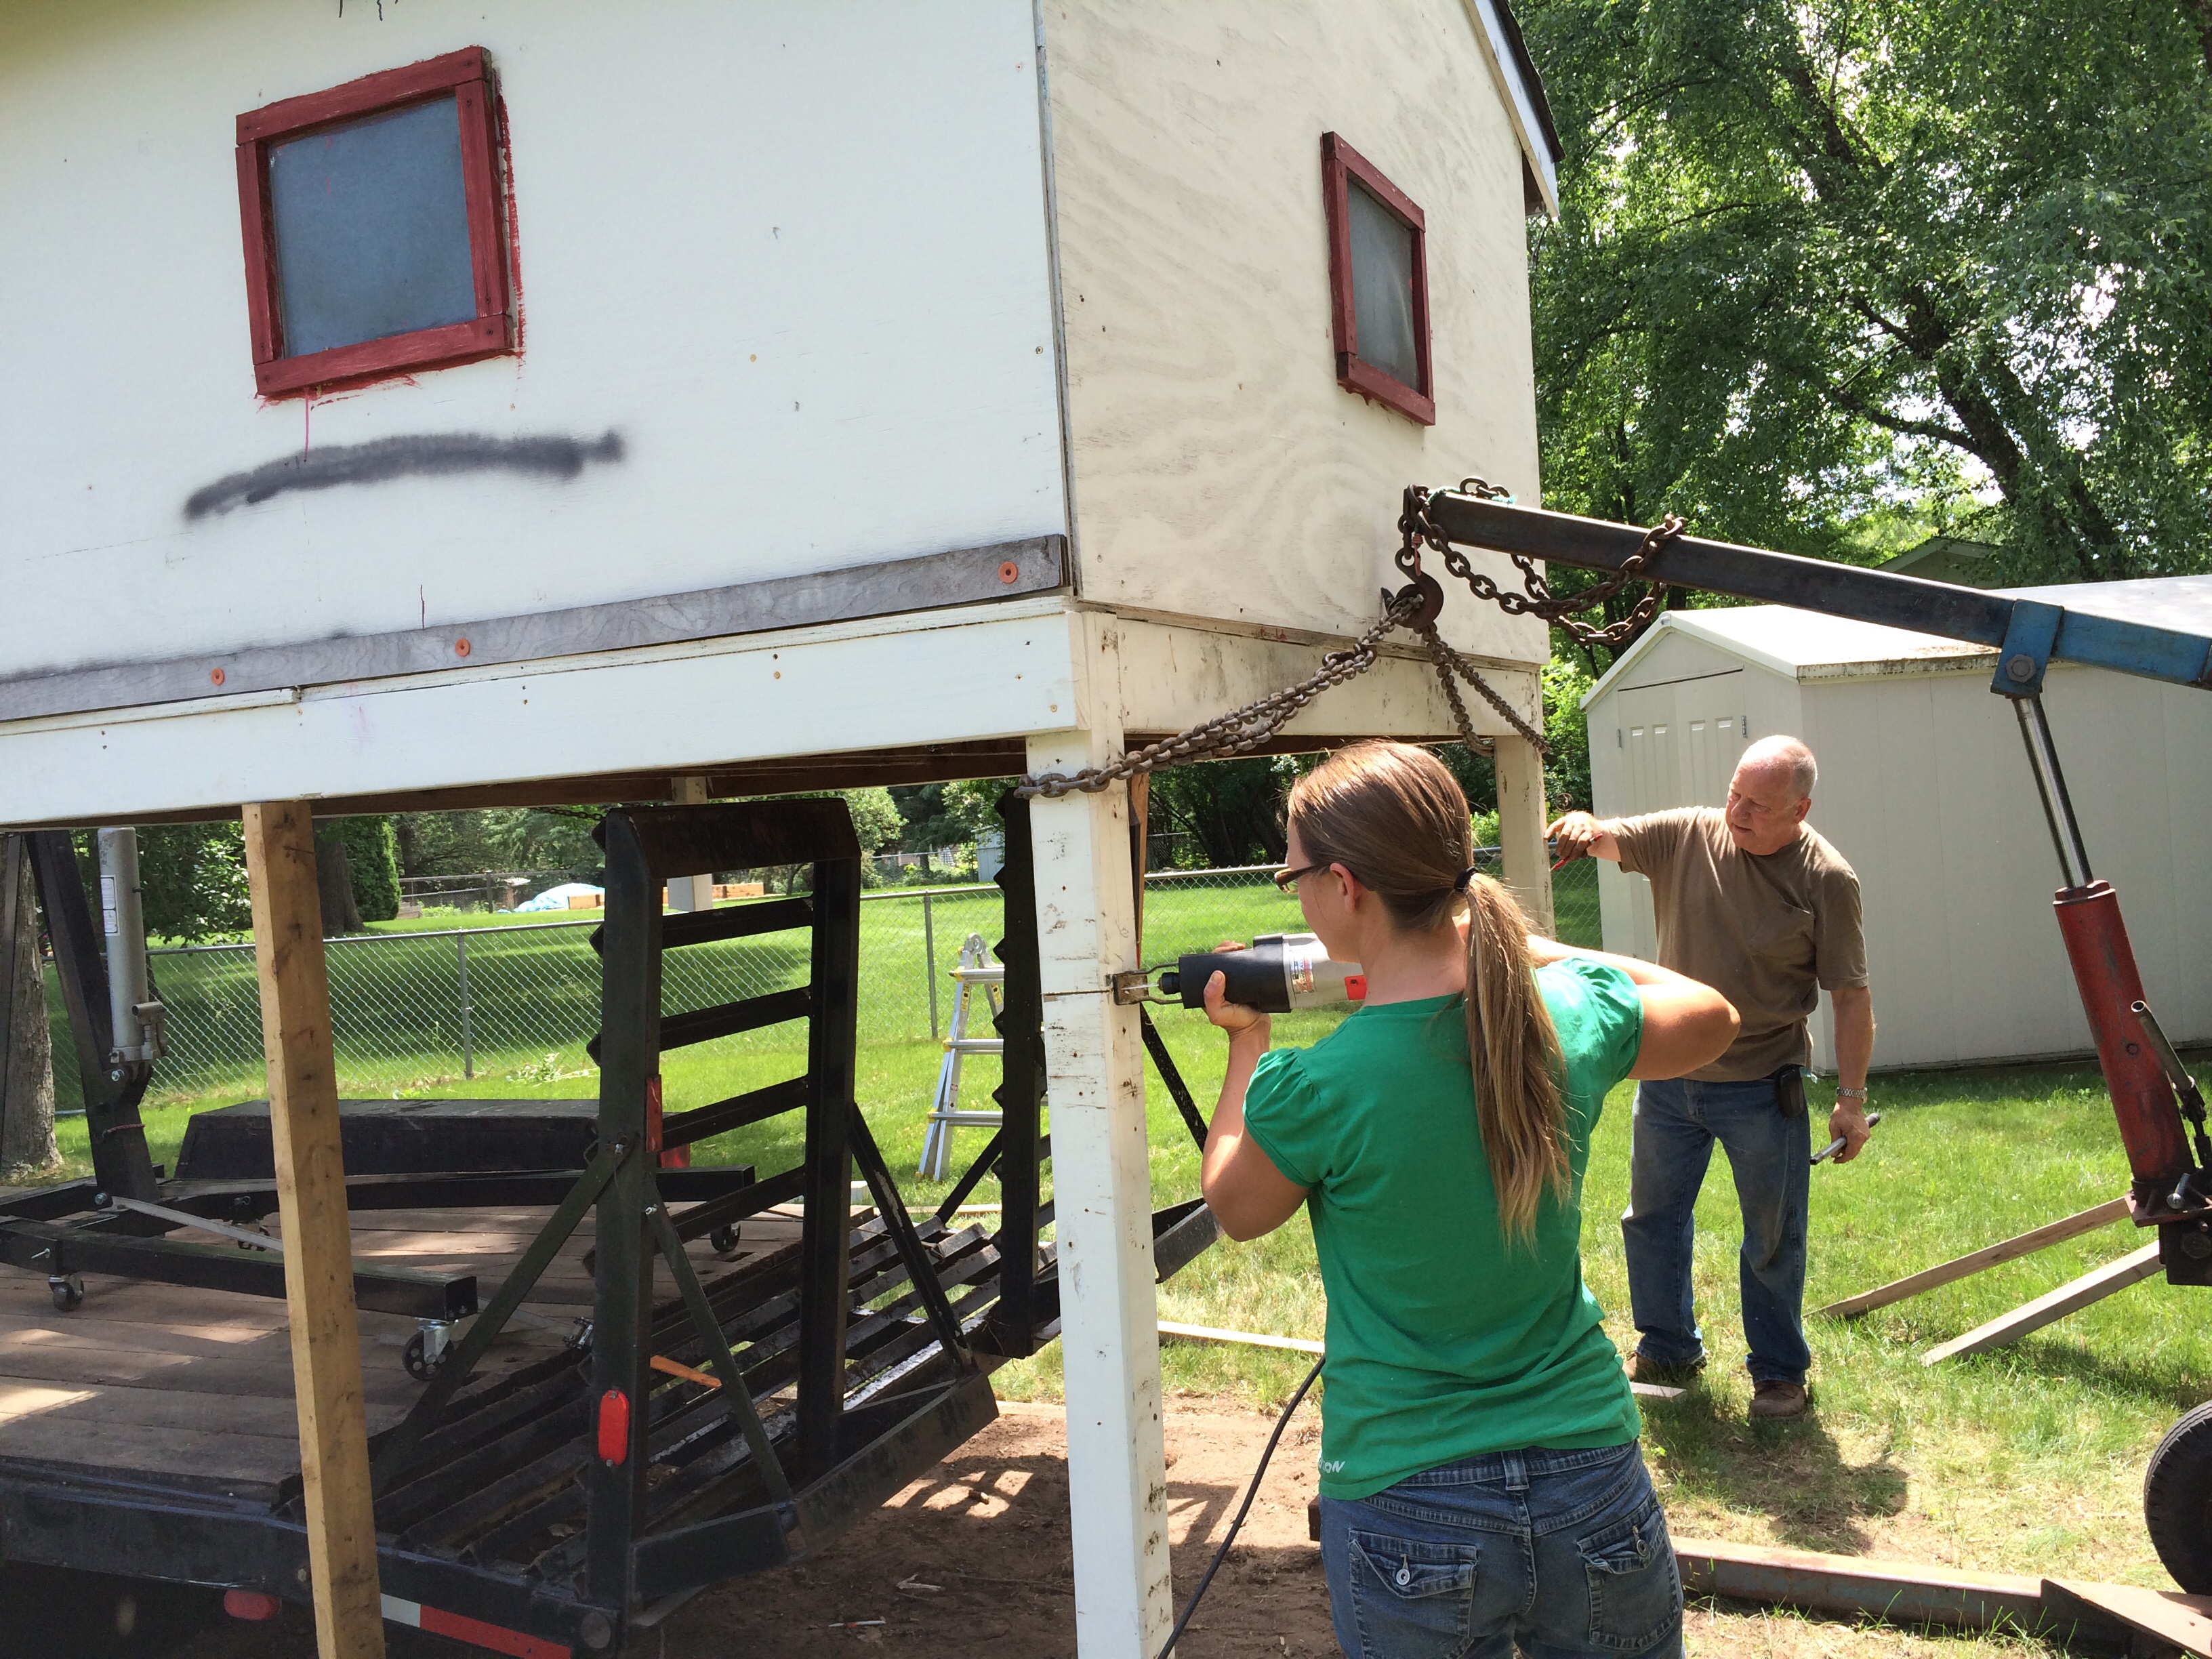
Farmers market trailer – born in the 60’s as a pop-up camper, transformed into an ice-fishing shack, and then put up for free adoption on Craigslist- where we found it and brought it home to become our farmers’ market trailer, used to store & haul the canopy, tables, chairs, and miscellany we need for our booth. (Kristin’s dad added a sheet metal wedge to the front to make it more aerodynamic when we found it was like pulling an open parachute down the road).
the free chicken coop nestled up to the free semi truck
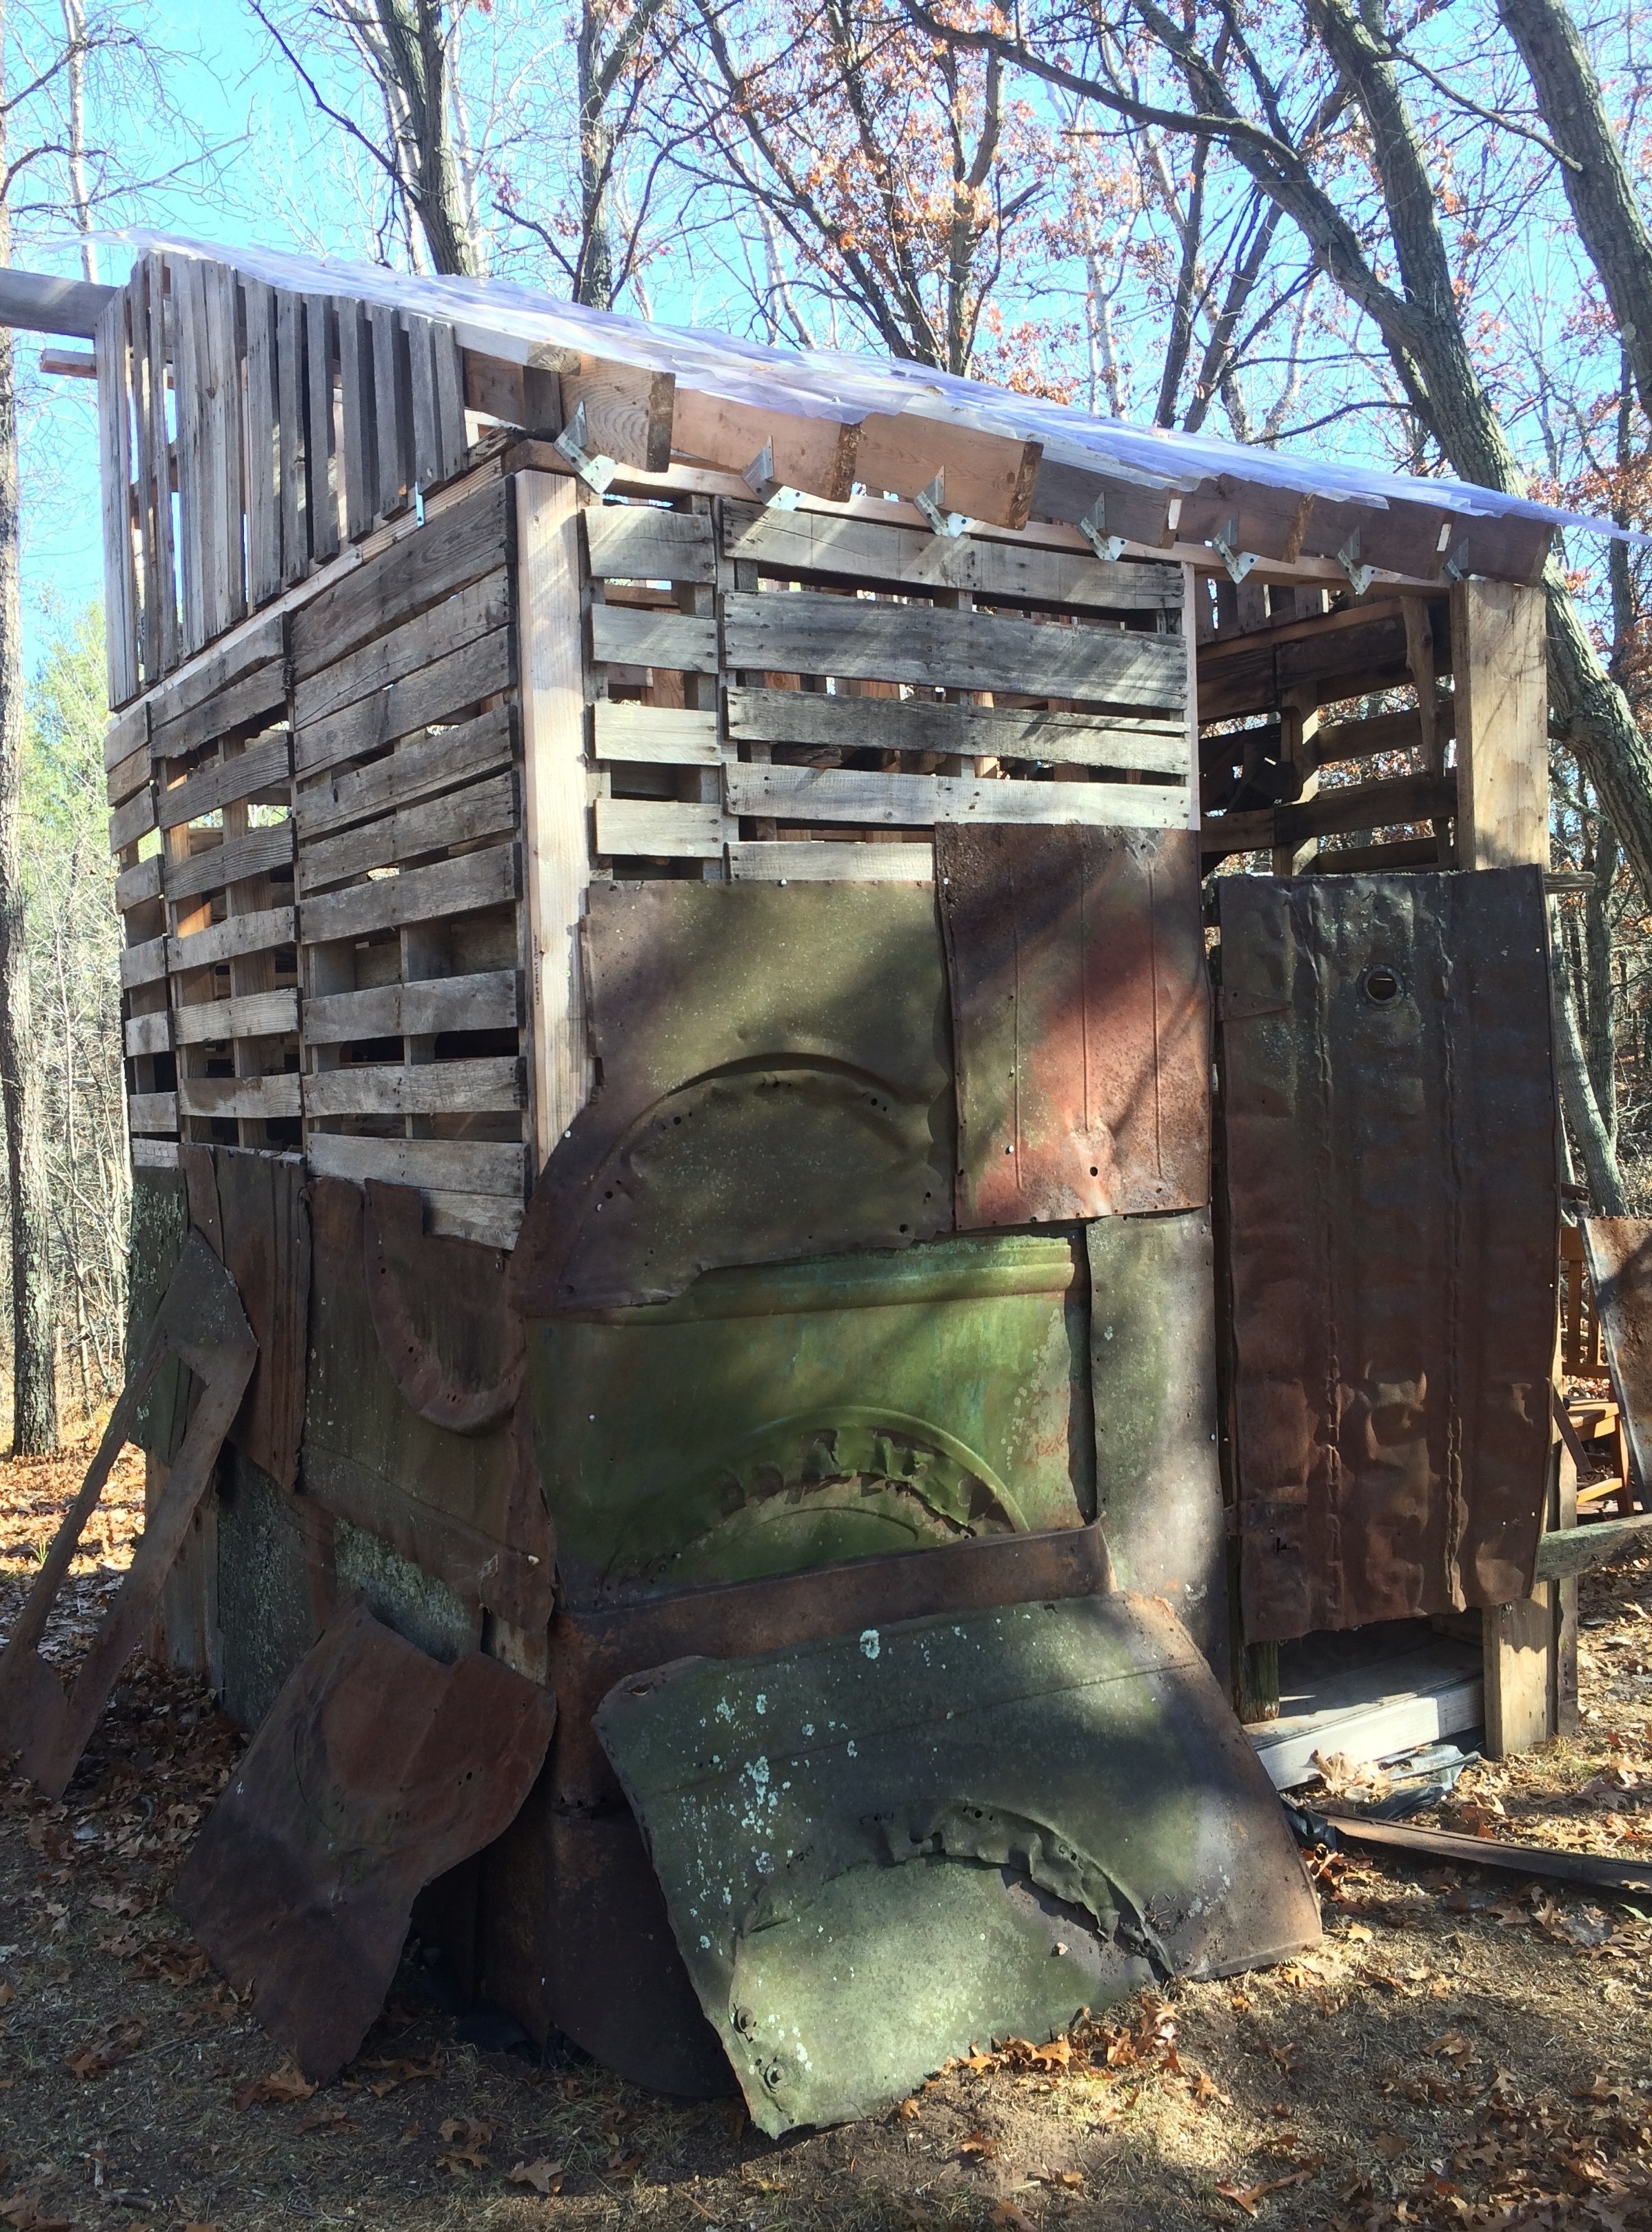
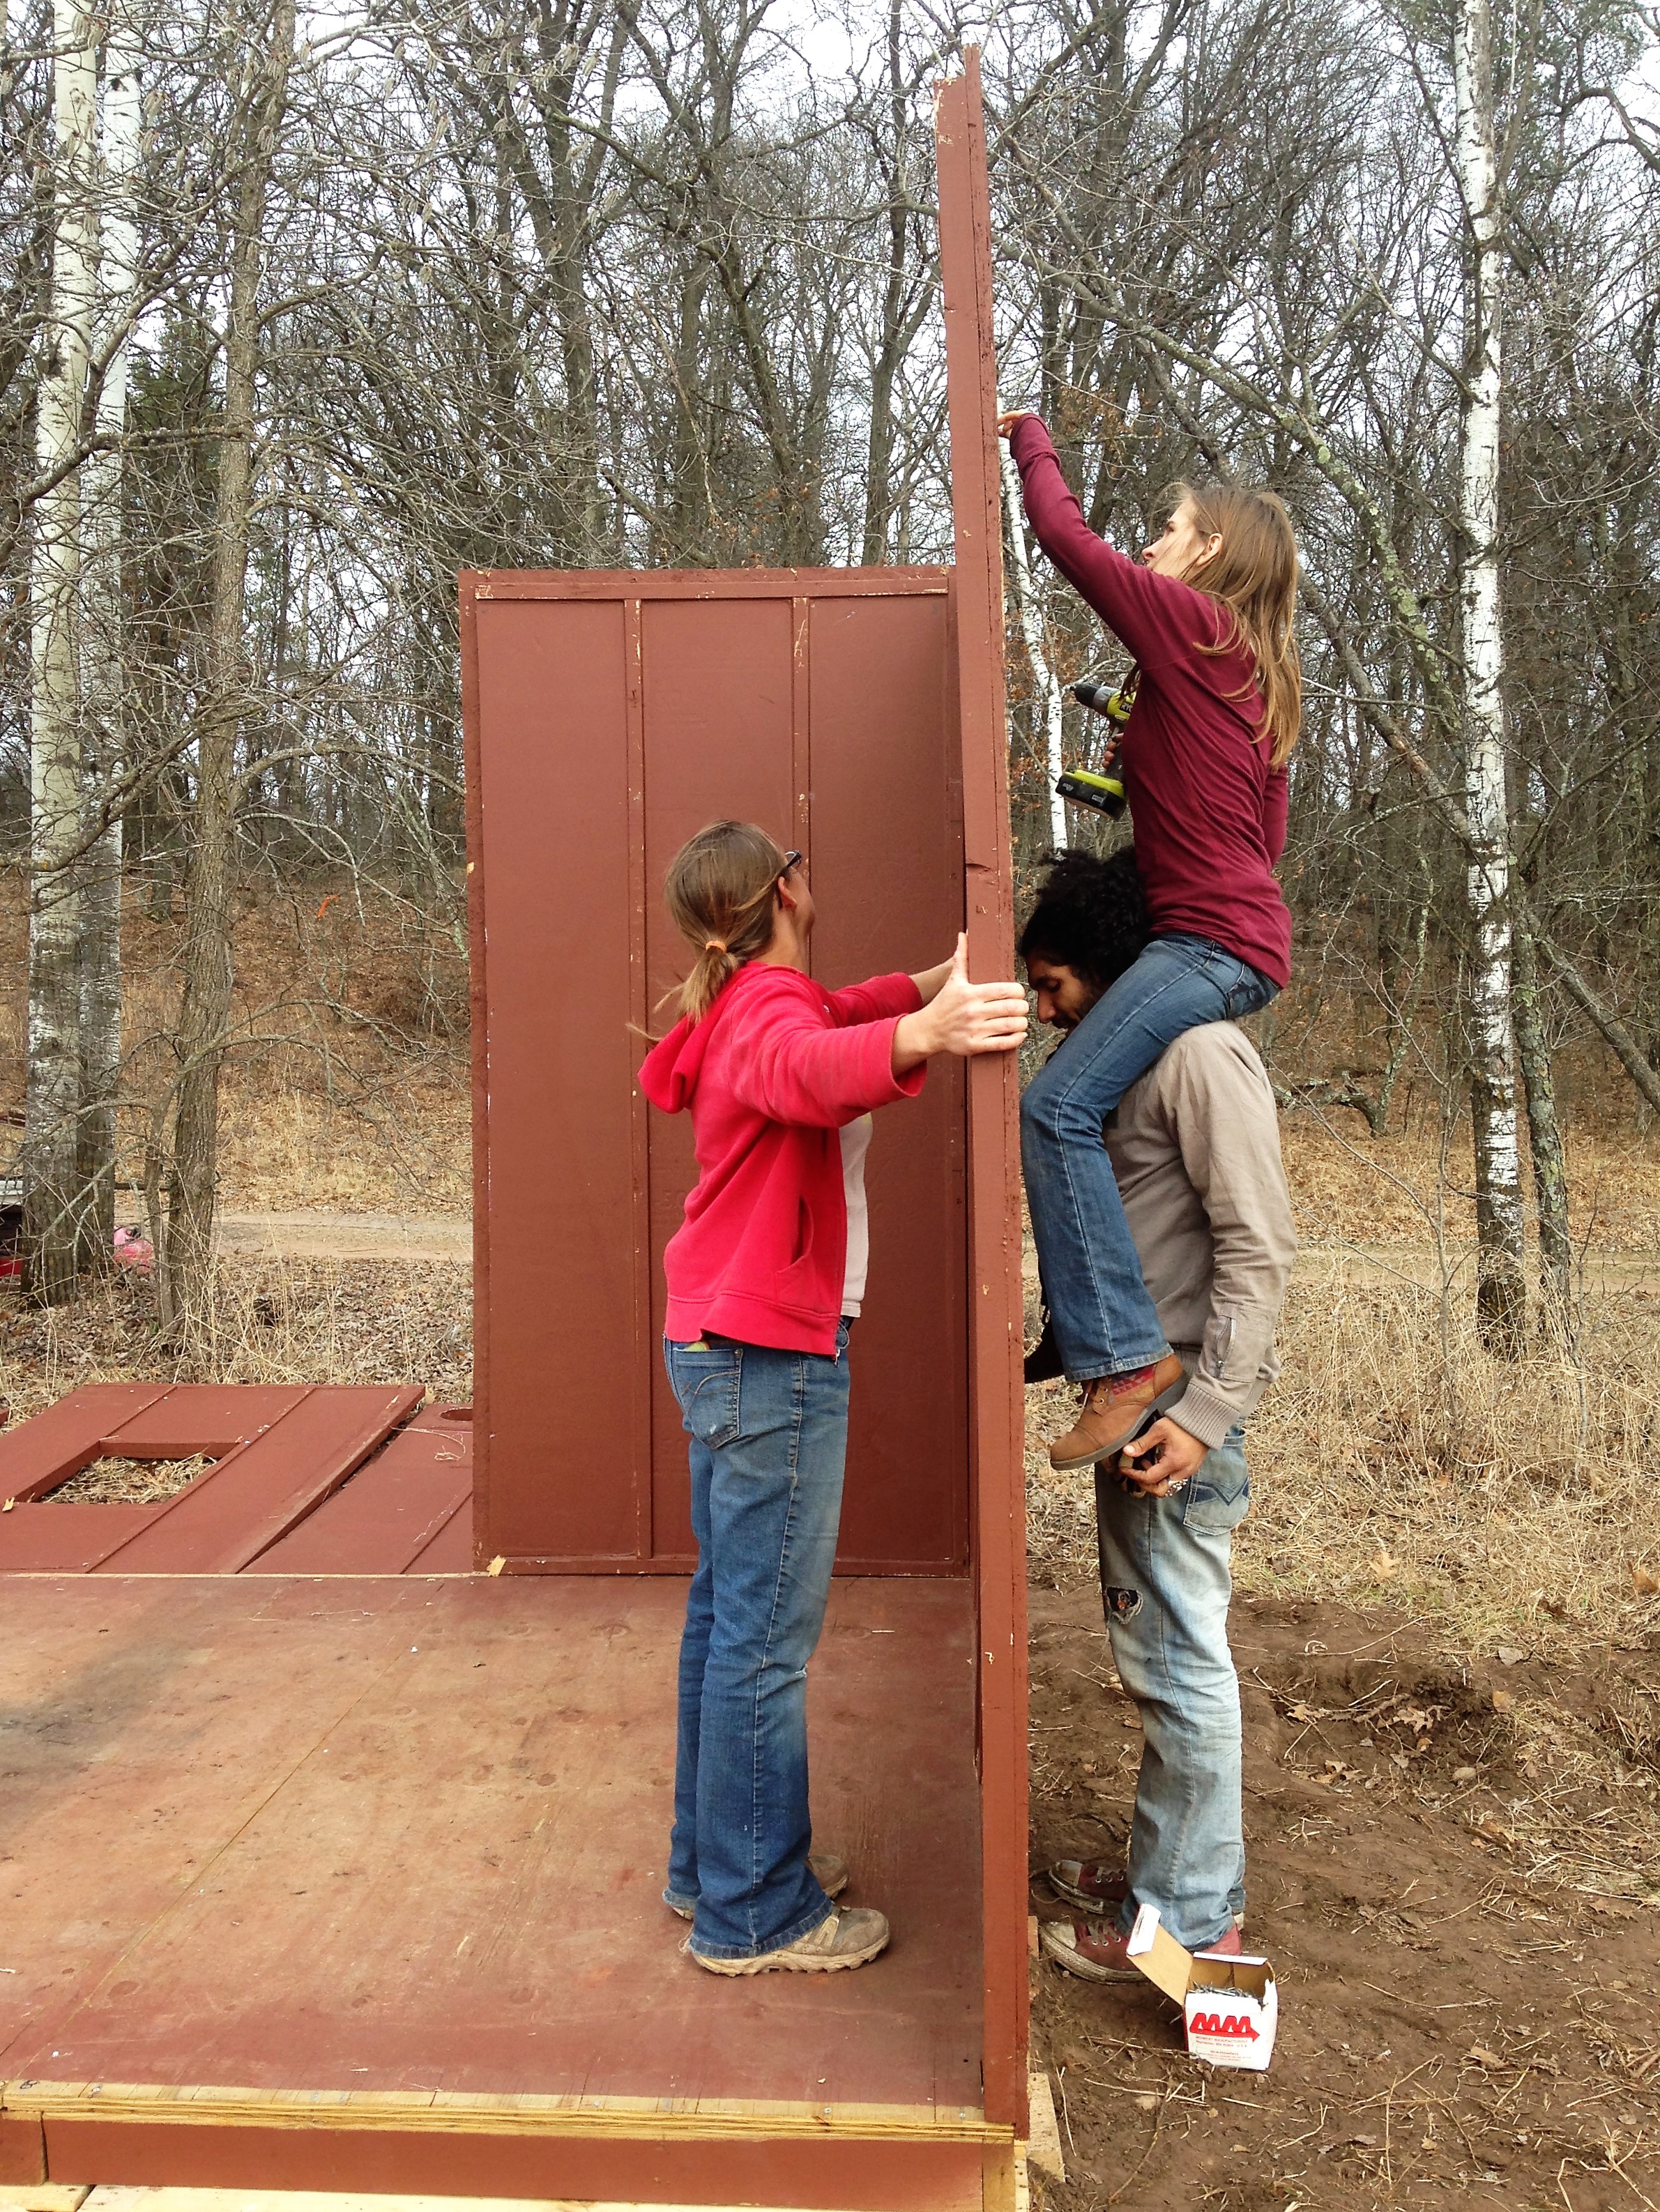
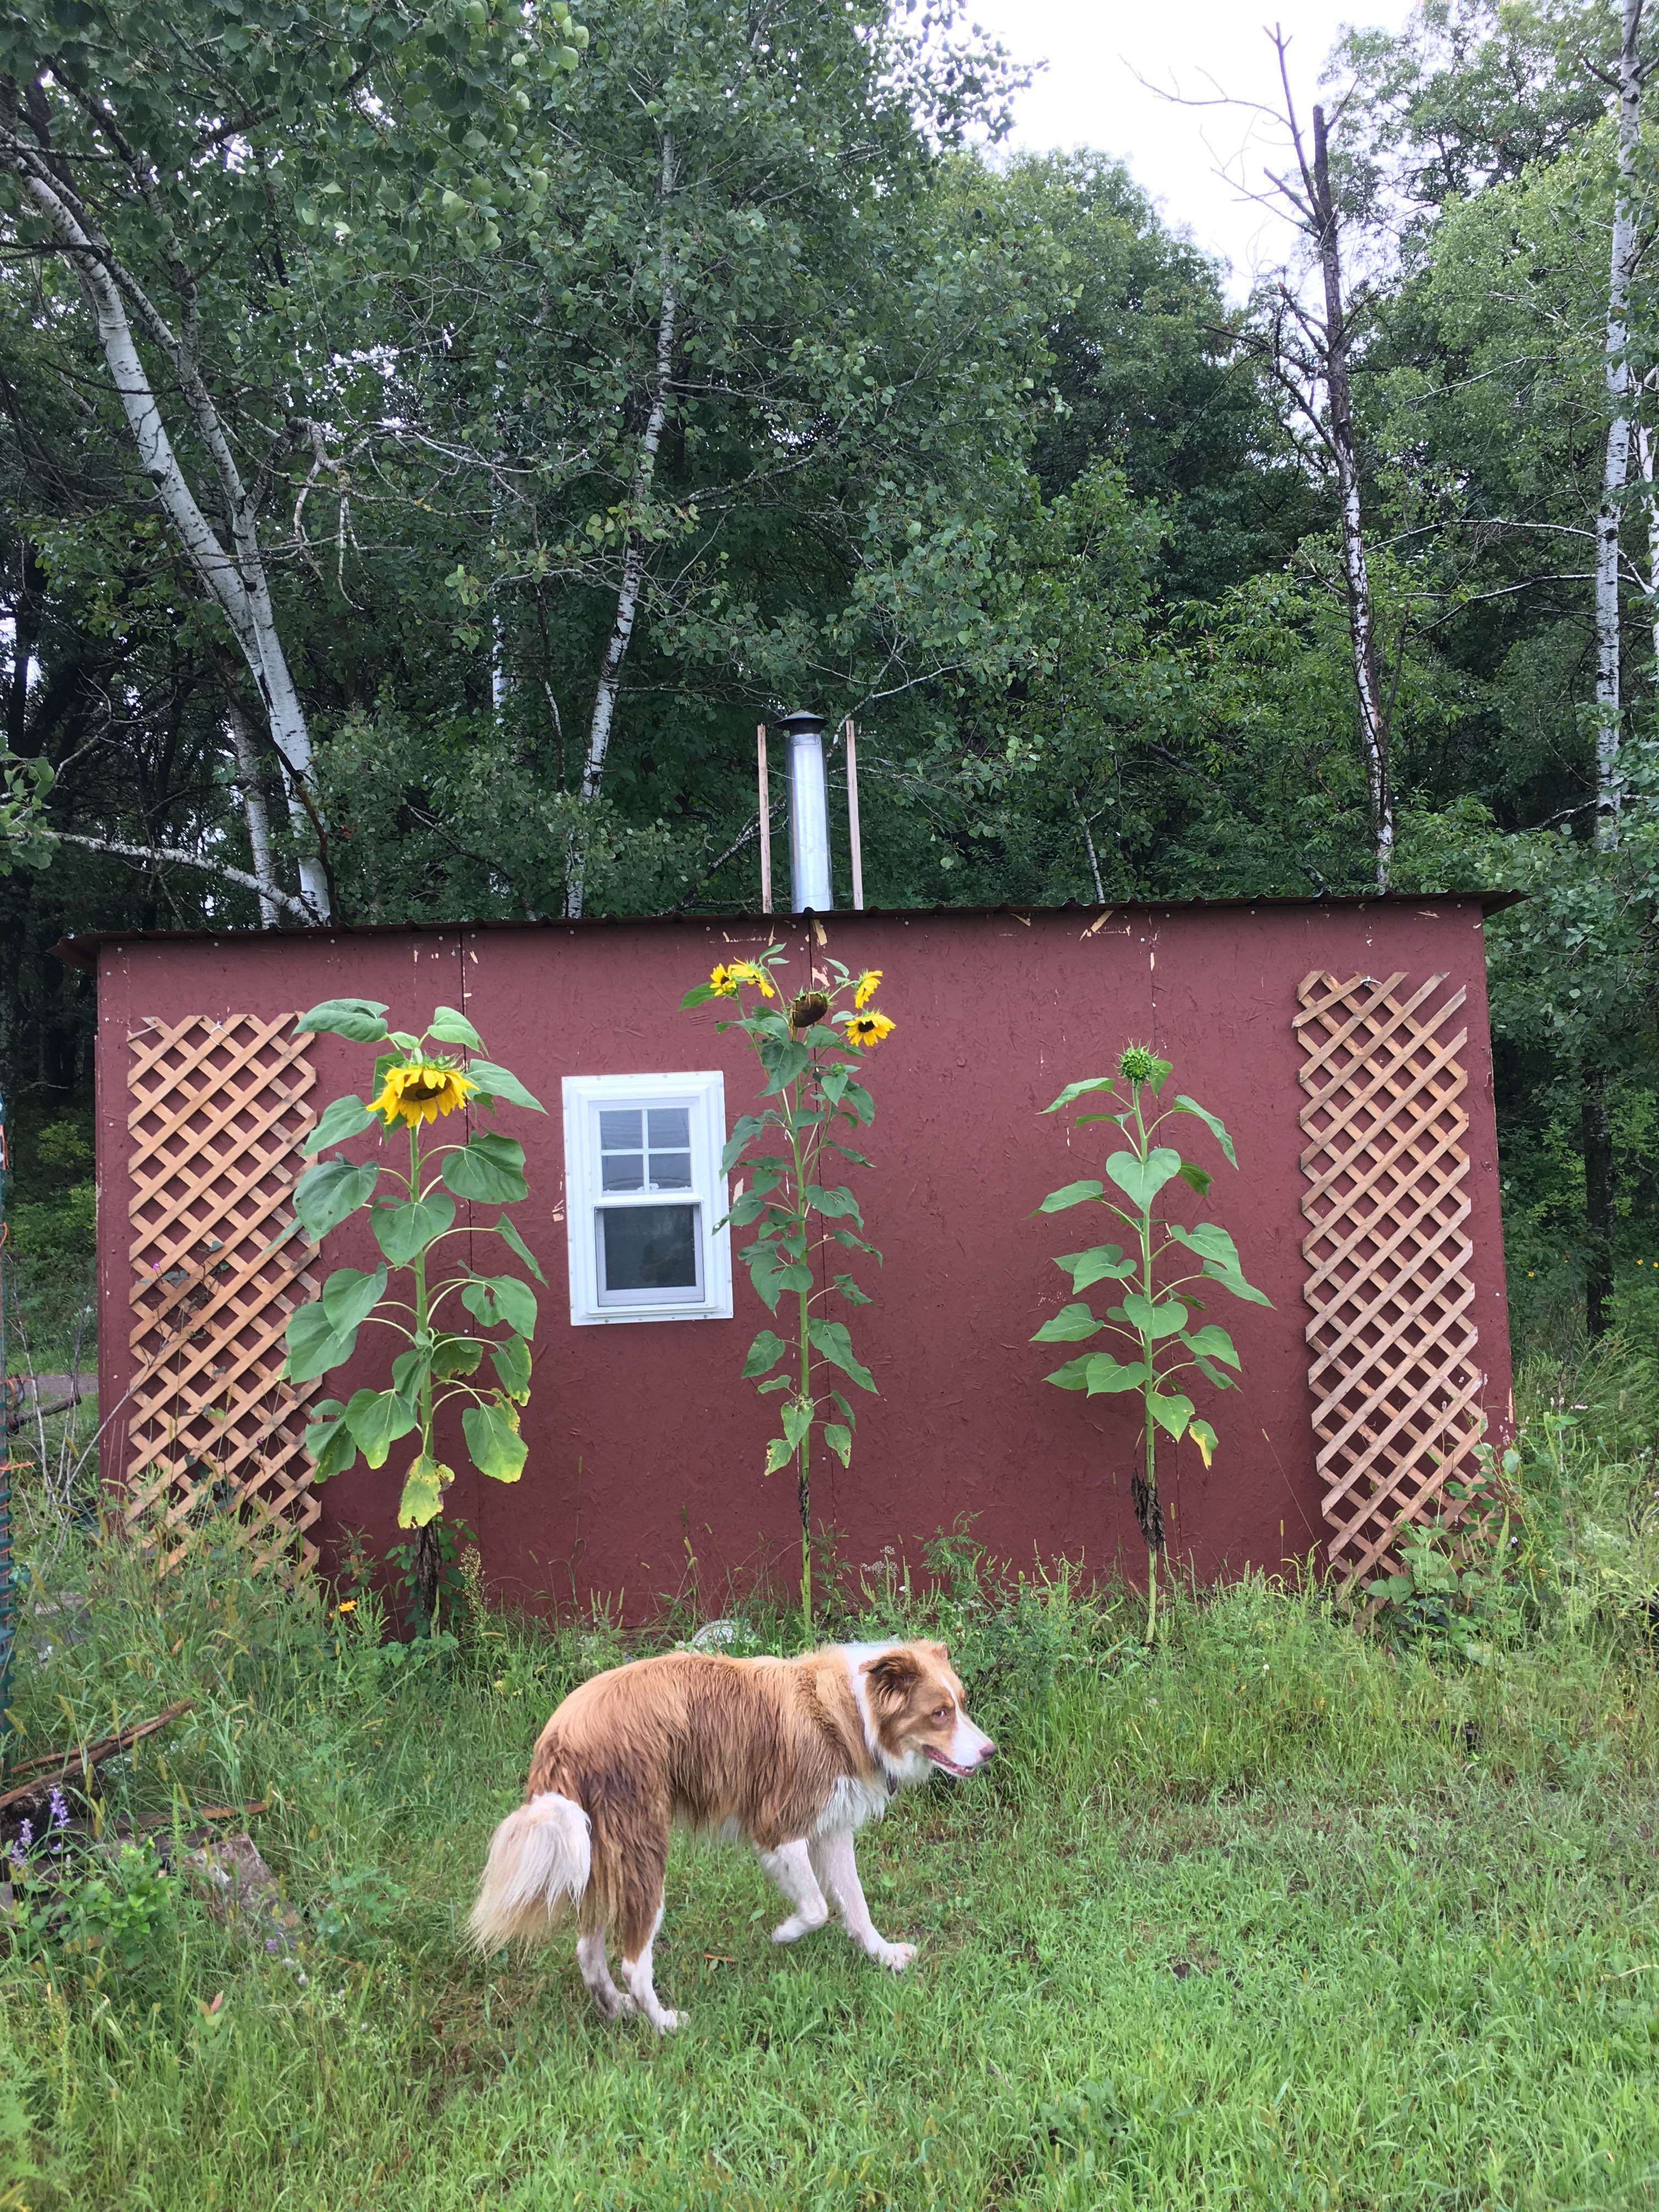
Rust shack frame – my favorite guest shack on the land is sided in old body panels from 1920s/30s cars, which we originally scavenged simply for their aesthetic and historical appeal, from the ruins of a Depression-era homestead in what’s now state land. When we scored a free “pallet fort” off Craigslist and hauled it home, the panels were reborn as shack siding once more …
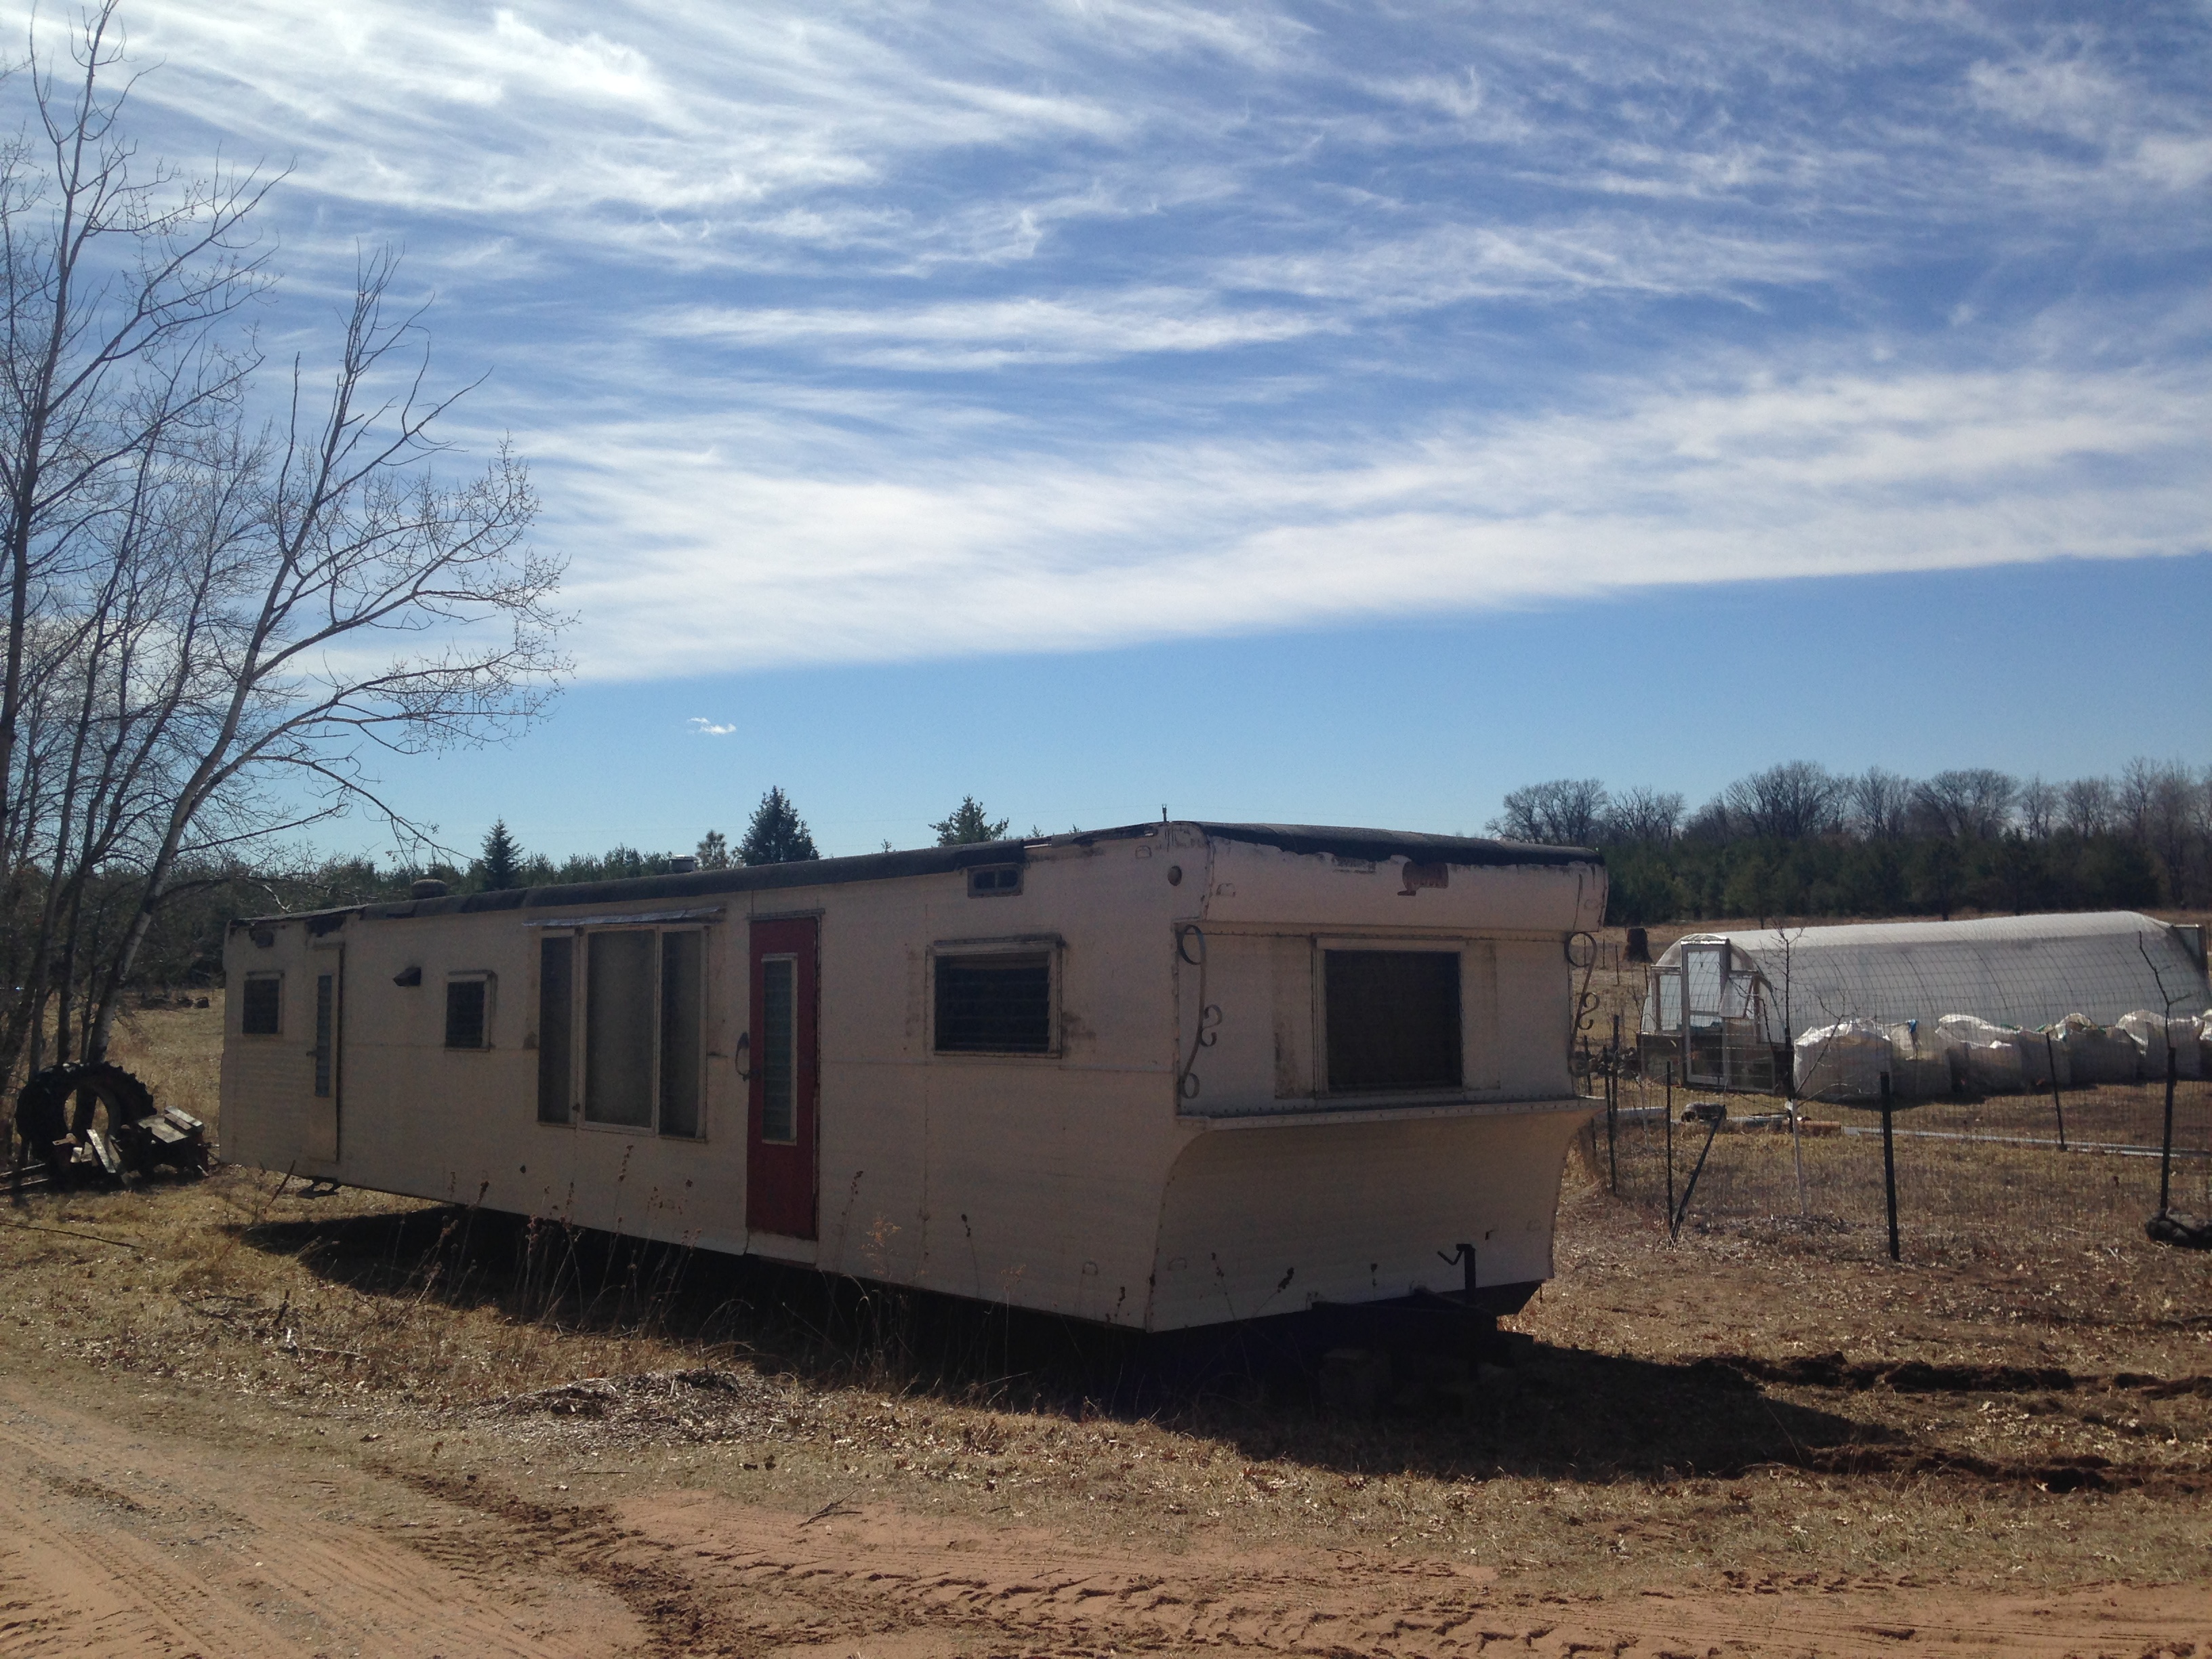
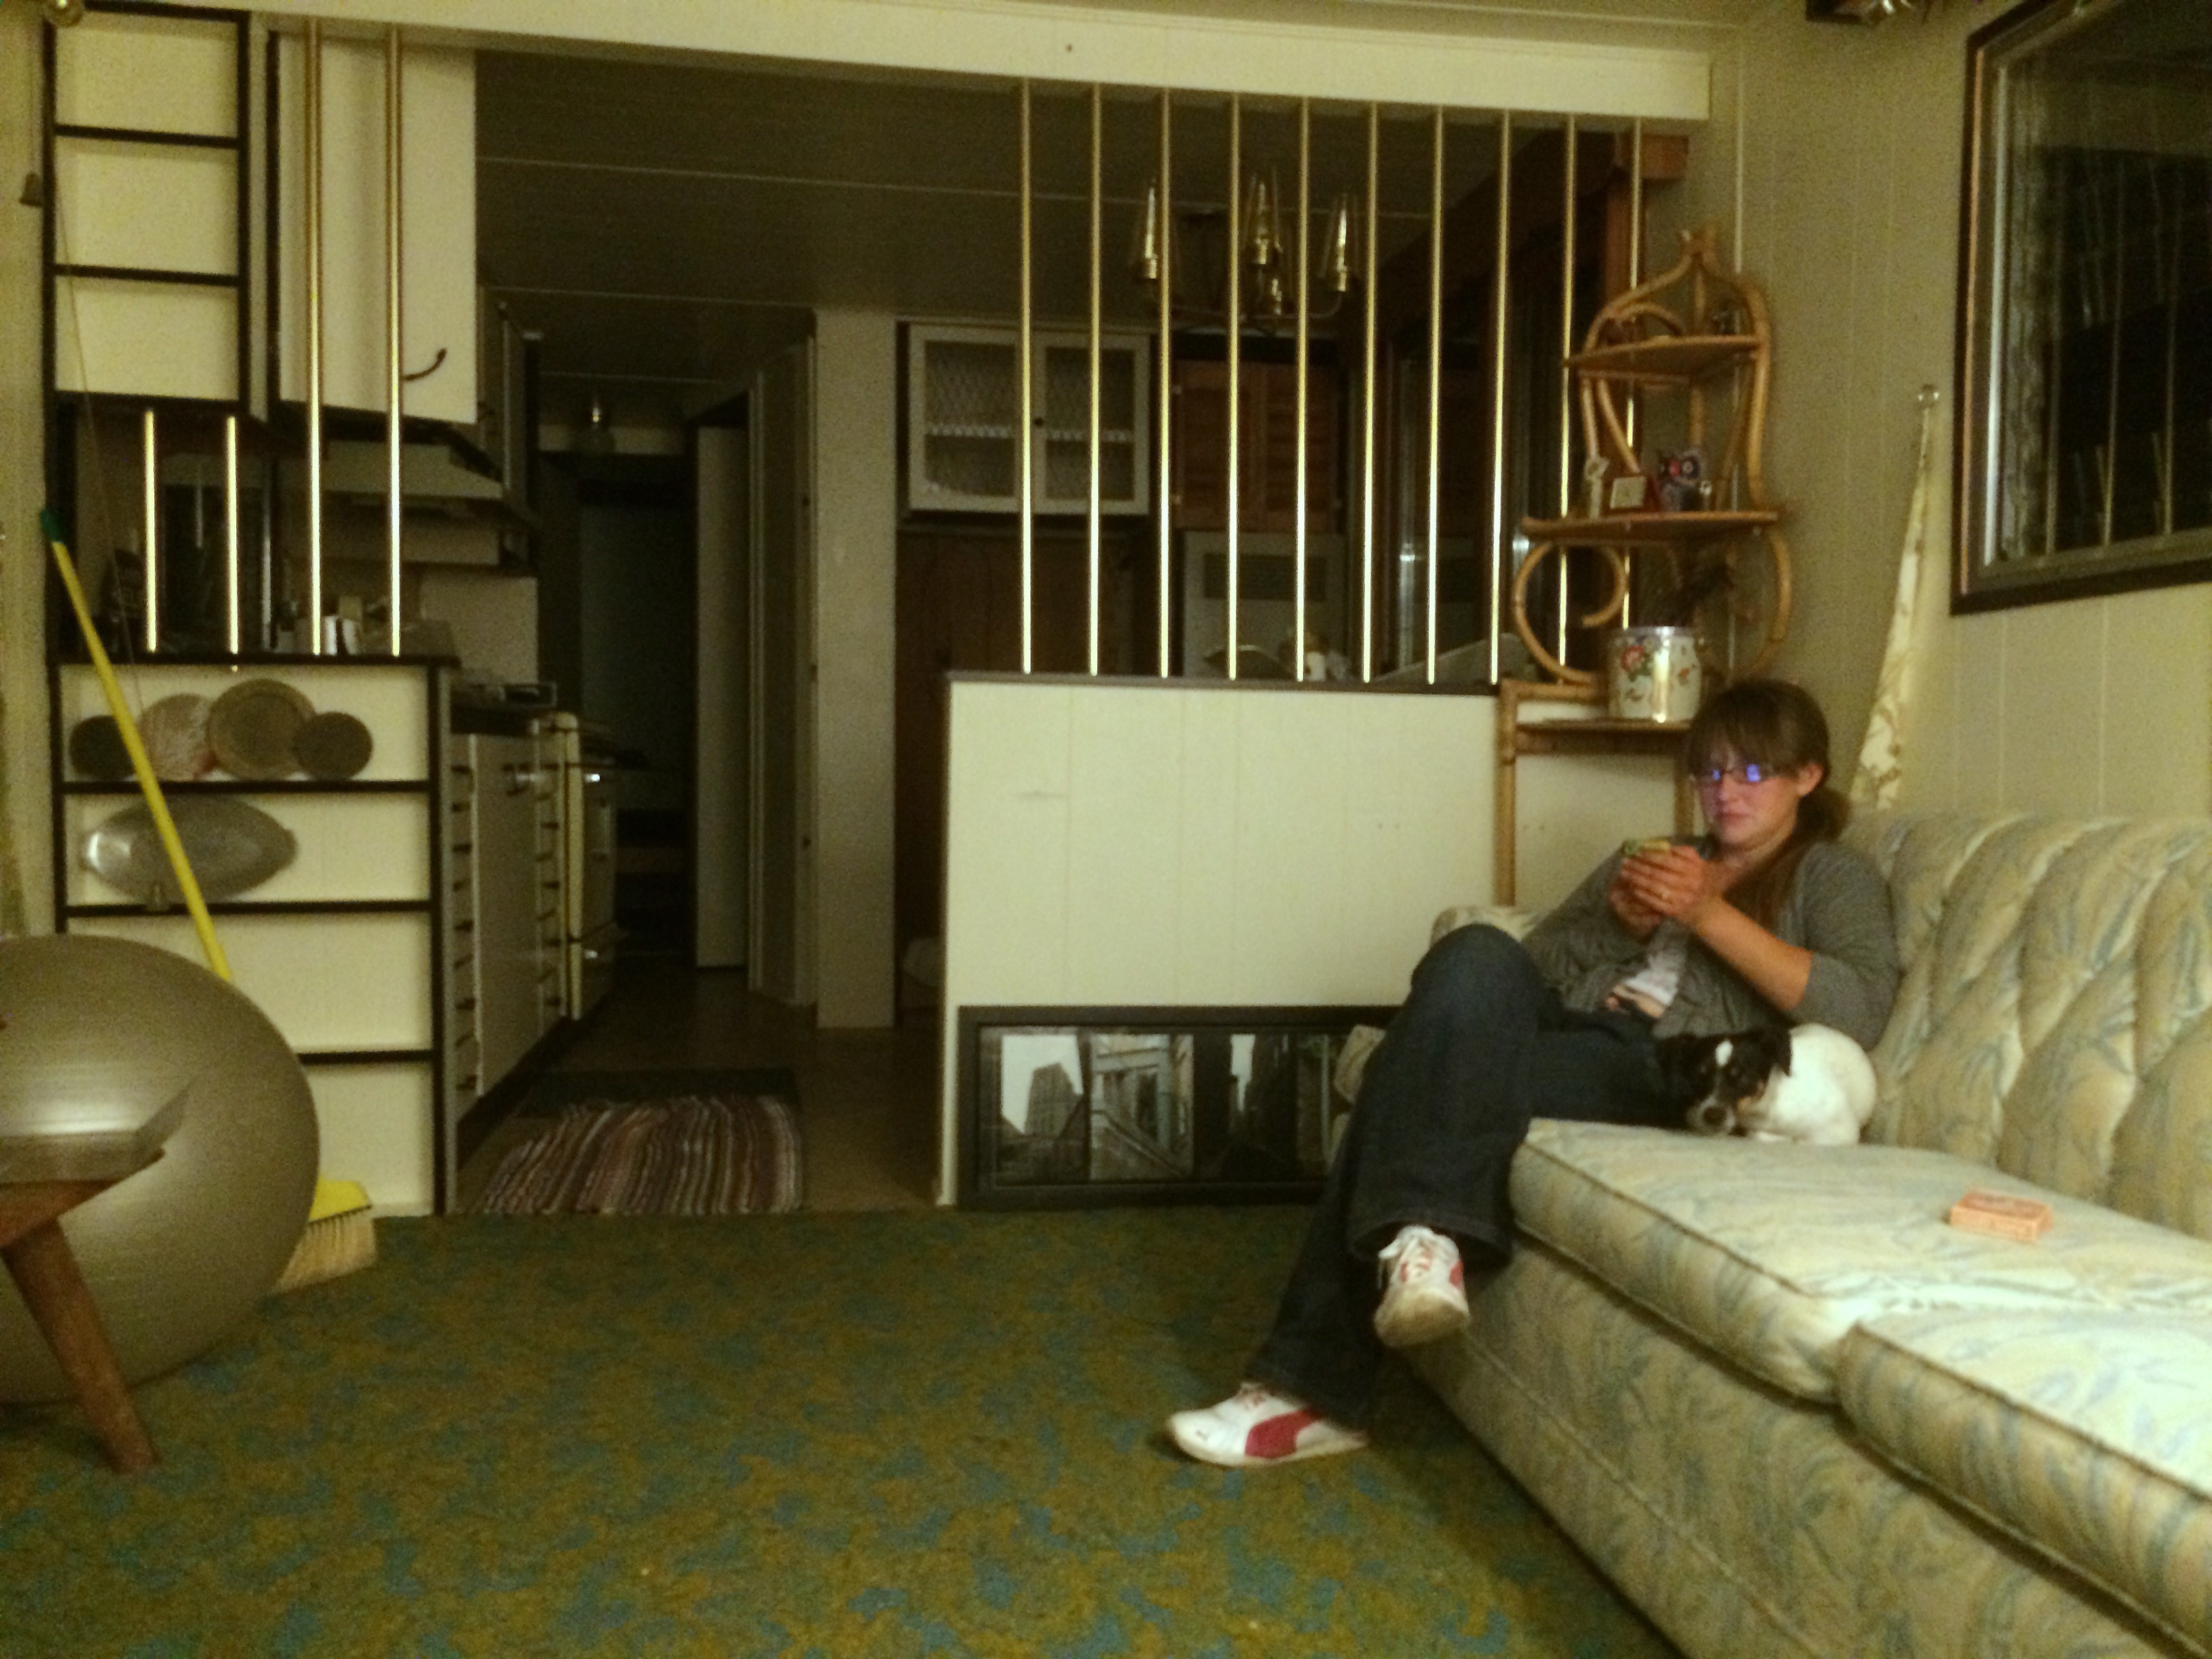
The Albatross (mobile home guest cabins) –
In spring of 2015, the Albatross gave us two guest bedrooms, a bathroom (now with composting toilet and gravity solar shower),and a common area living room and kitchen – quite the upgrade, for only the cost of moving it to the farm (it was tricky to get a mover willing to haul such an antique, but we got lucky).
The FishHouse ice shack
16×8 feet of insulated, easily-assembled, cozy indoor space for free! This not only has served as WWOOFer housing, but also as our cold weather quarters (also came with a free woodstove), and a controlled environment for sweet potato curing and herb drying.
Chickens Usually we buy our laying flock, but we got 14 hens for free last spring. Kristin does a Free Chicken Selfie
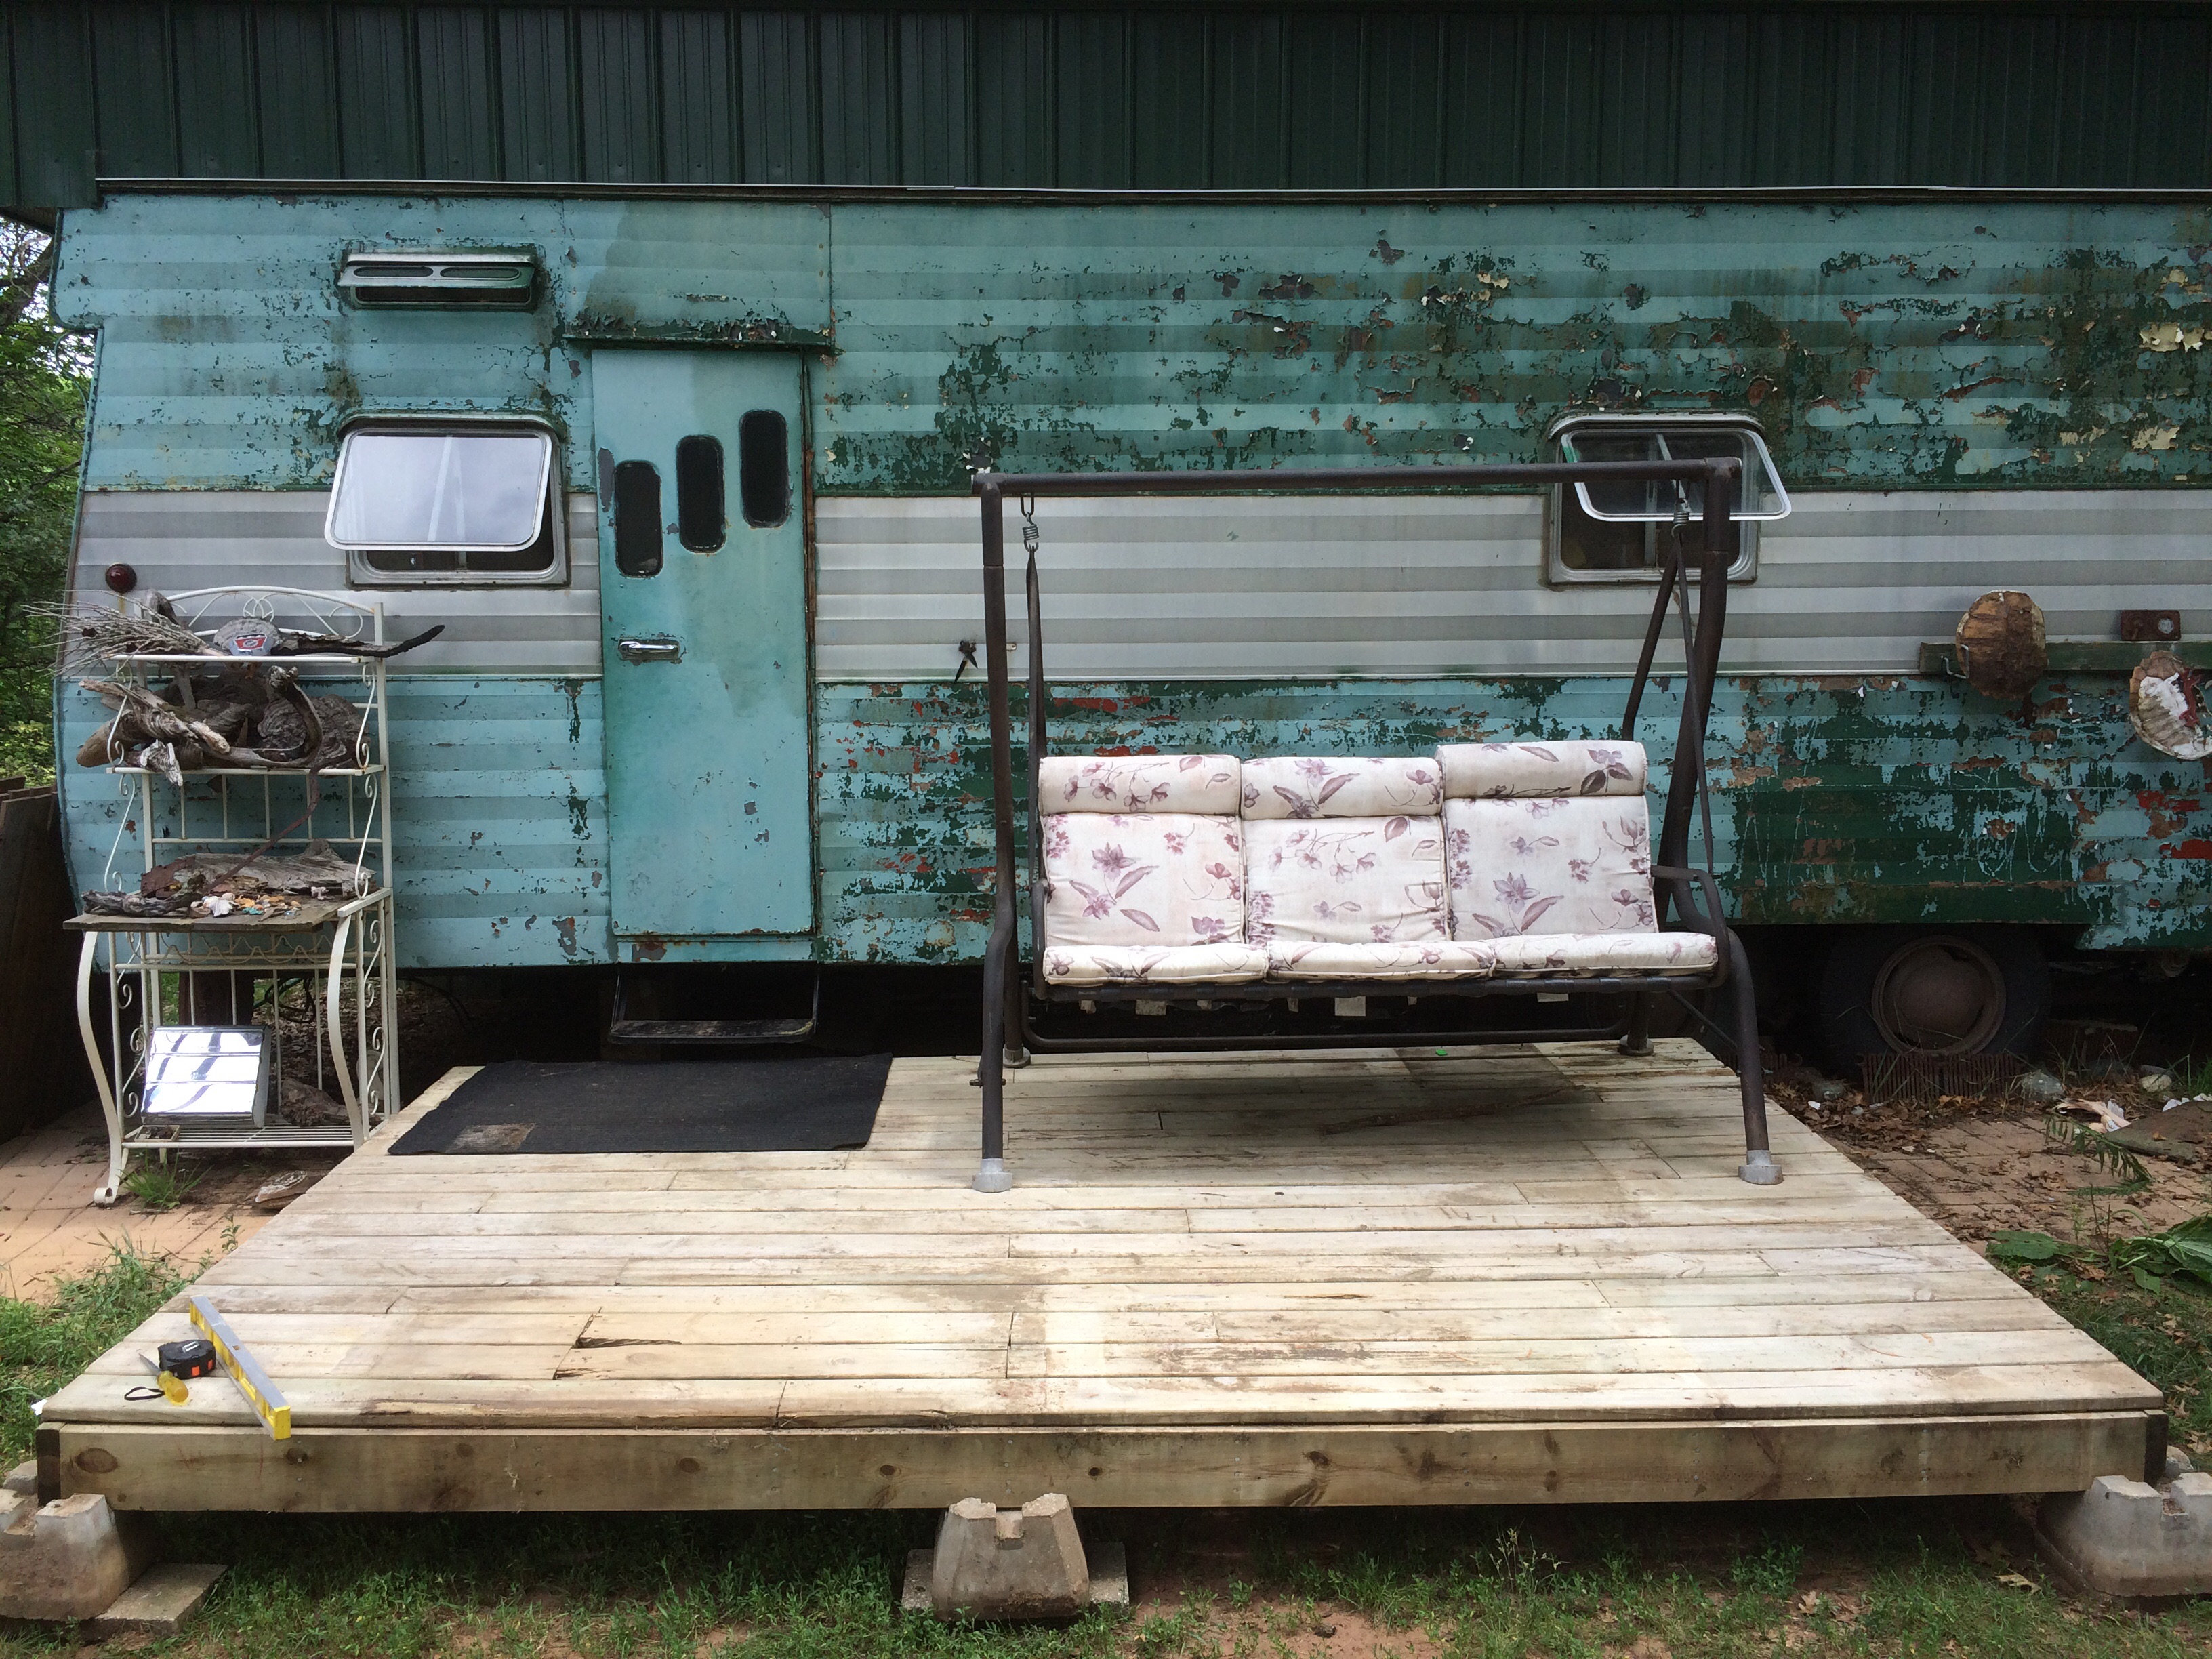
8×12′ Deck
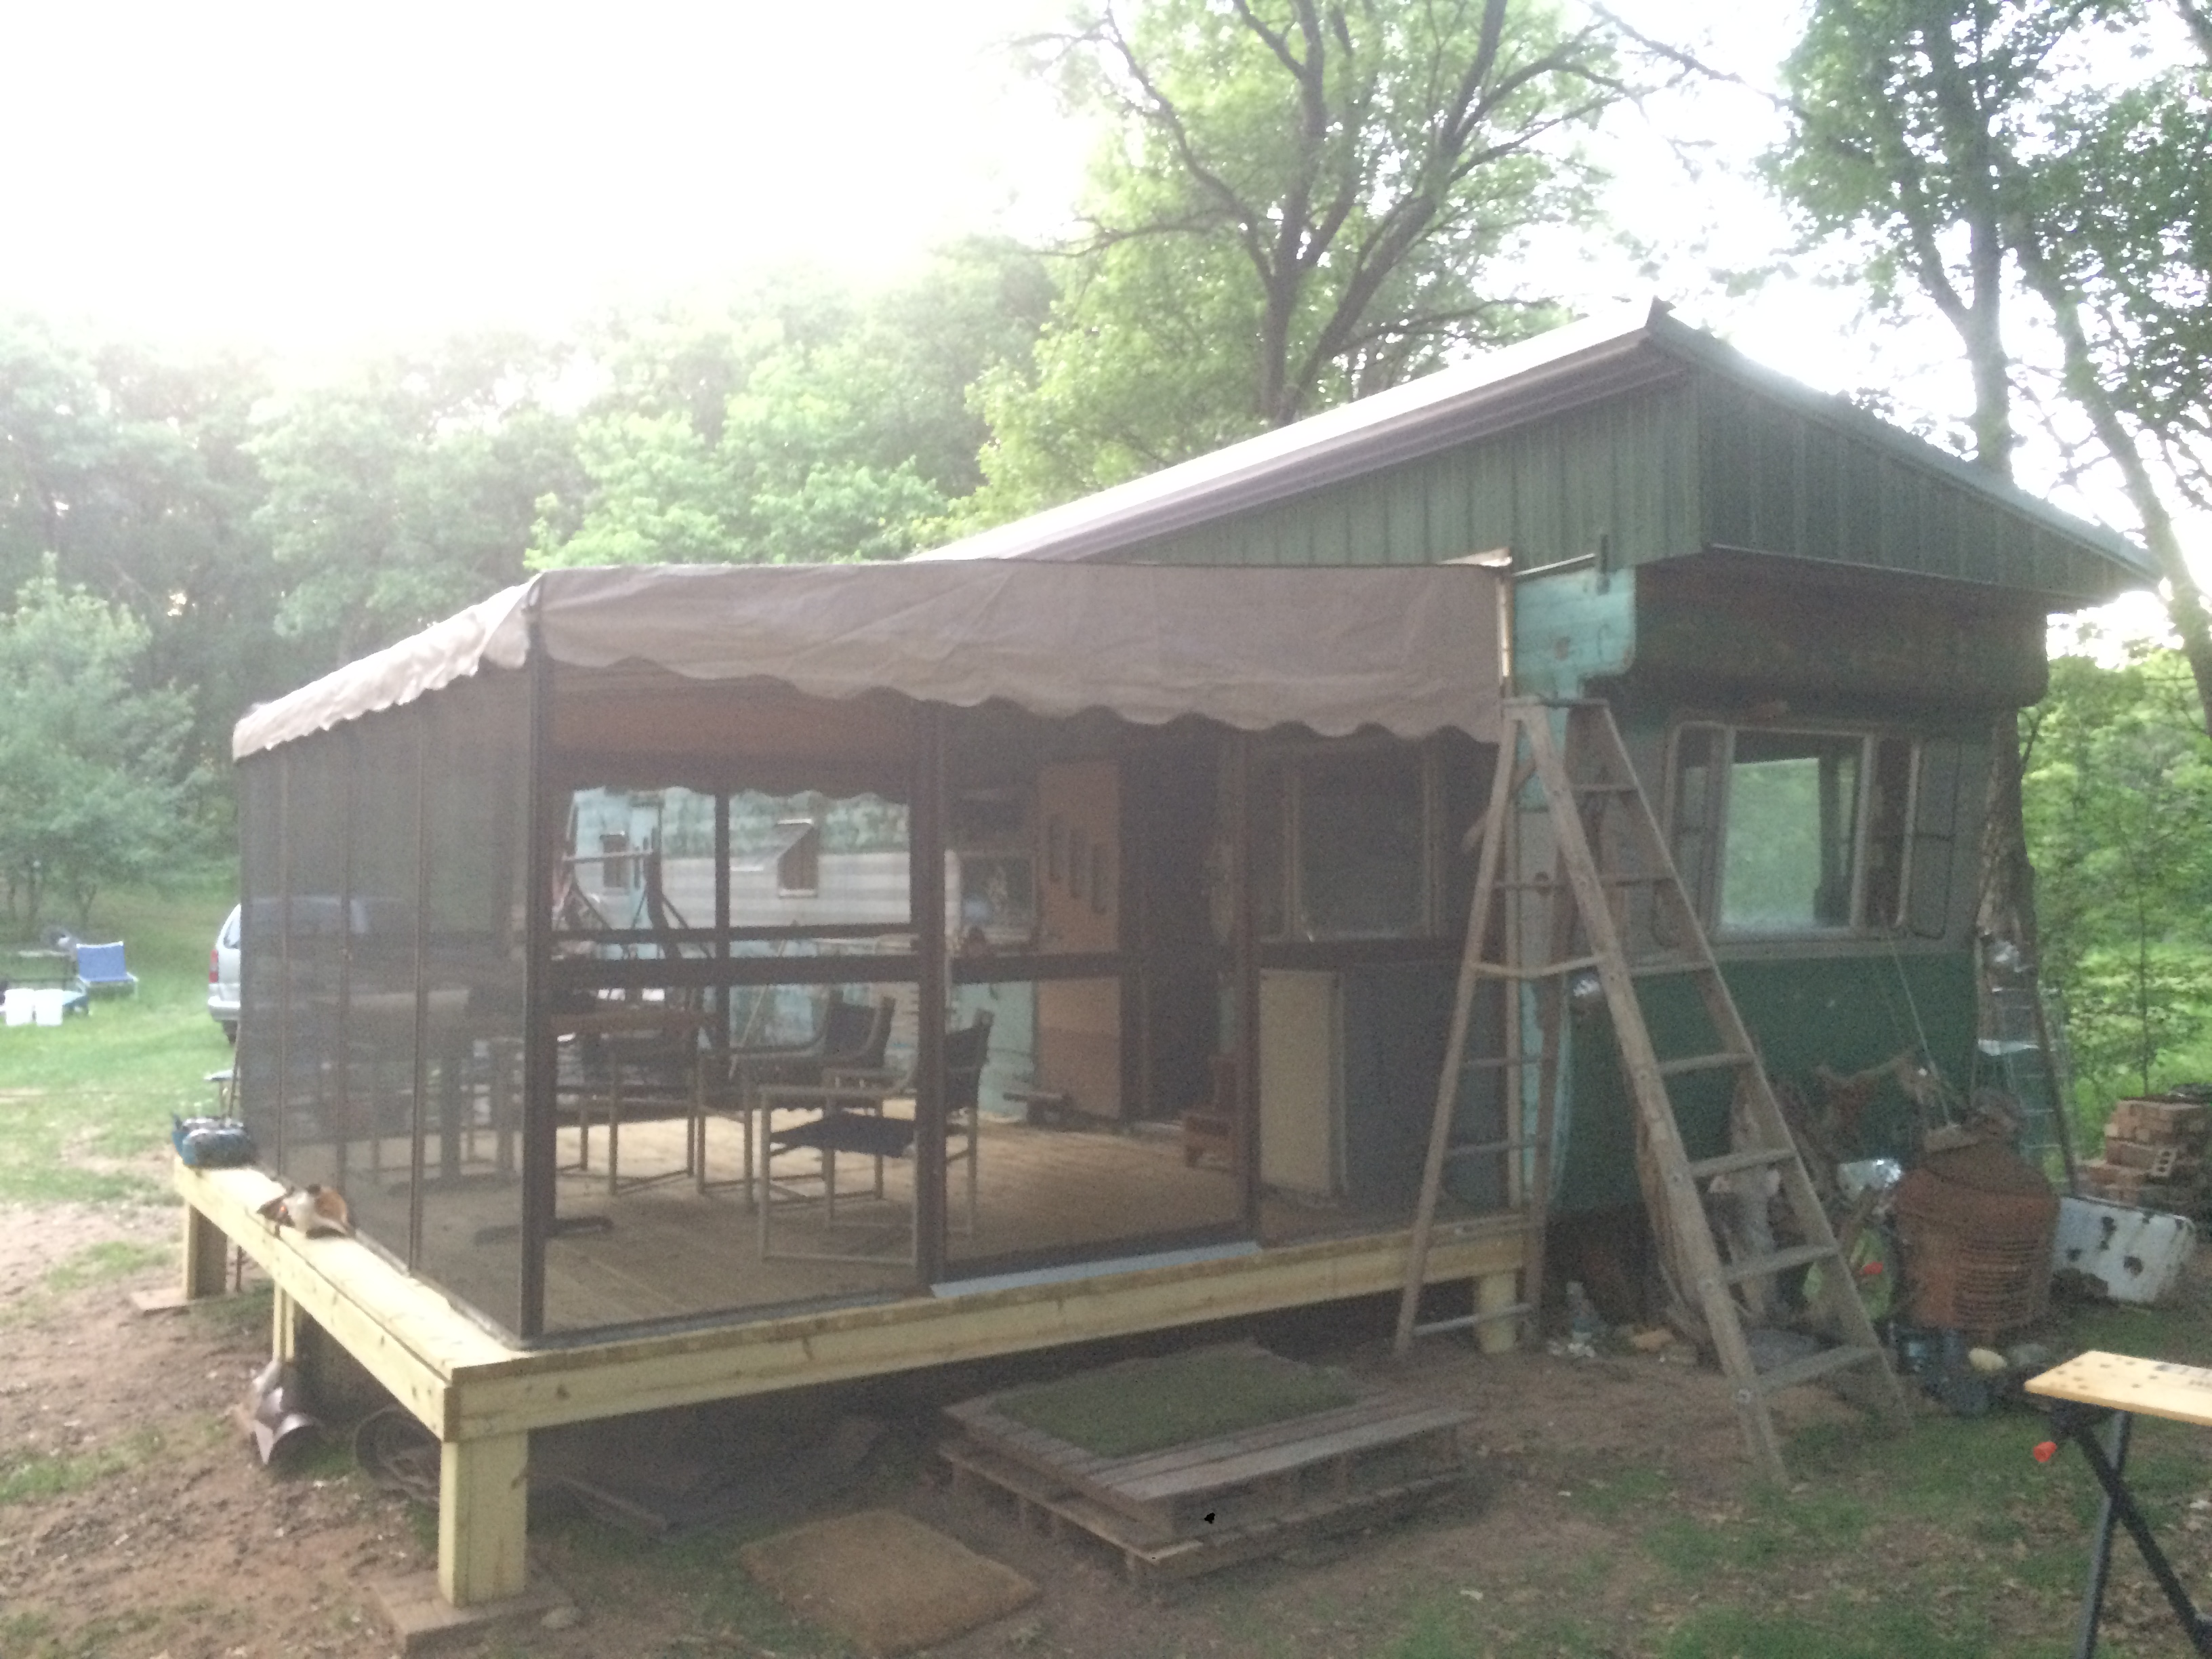
12×18′ Screen Porch – At certain times of day and season, mosquitoes can be a real menace – a free screenporch from someone upgrading their lake cabin’s porch to an all-aluminum version provided us with a much-needed safe haven when the vampires were swarming.
Fluorescent lighting – back before we built the little greenhouse, we had to start our seedlings indoors, on wire racks under lights – lights which we scored for free from an office that was switching to LEDs.
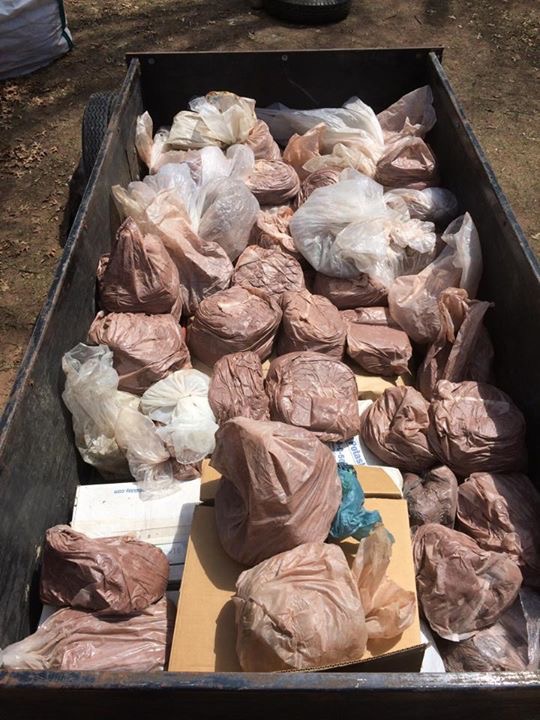
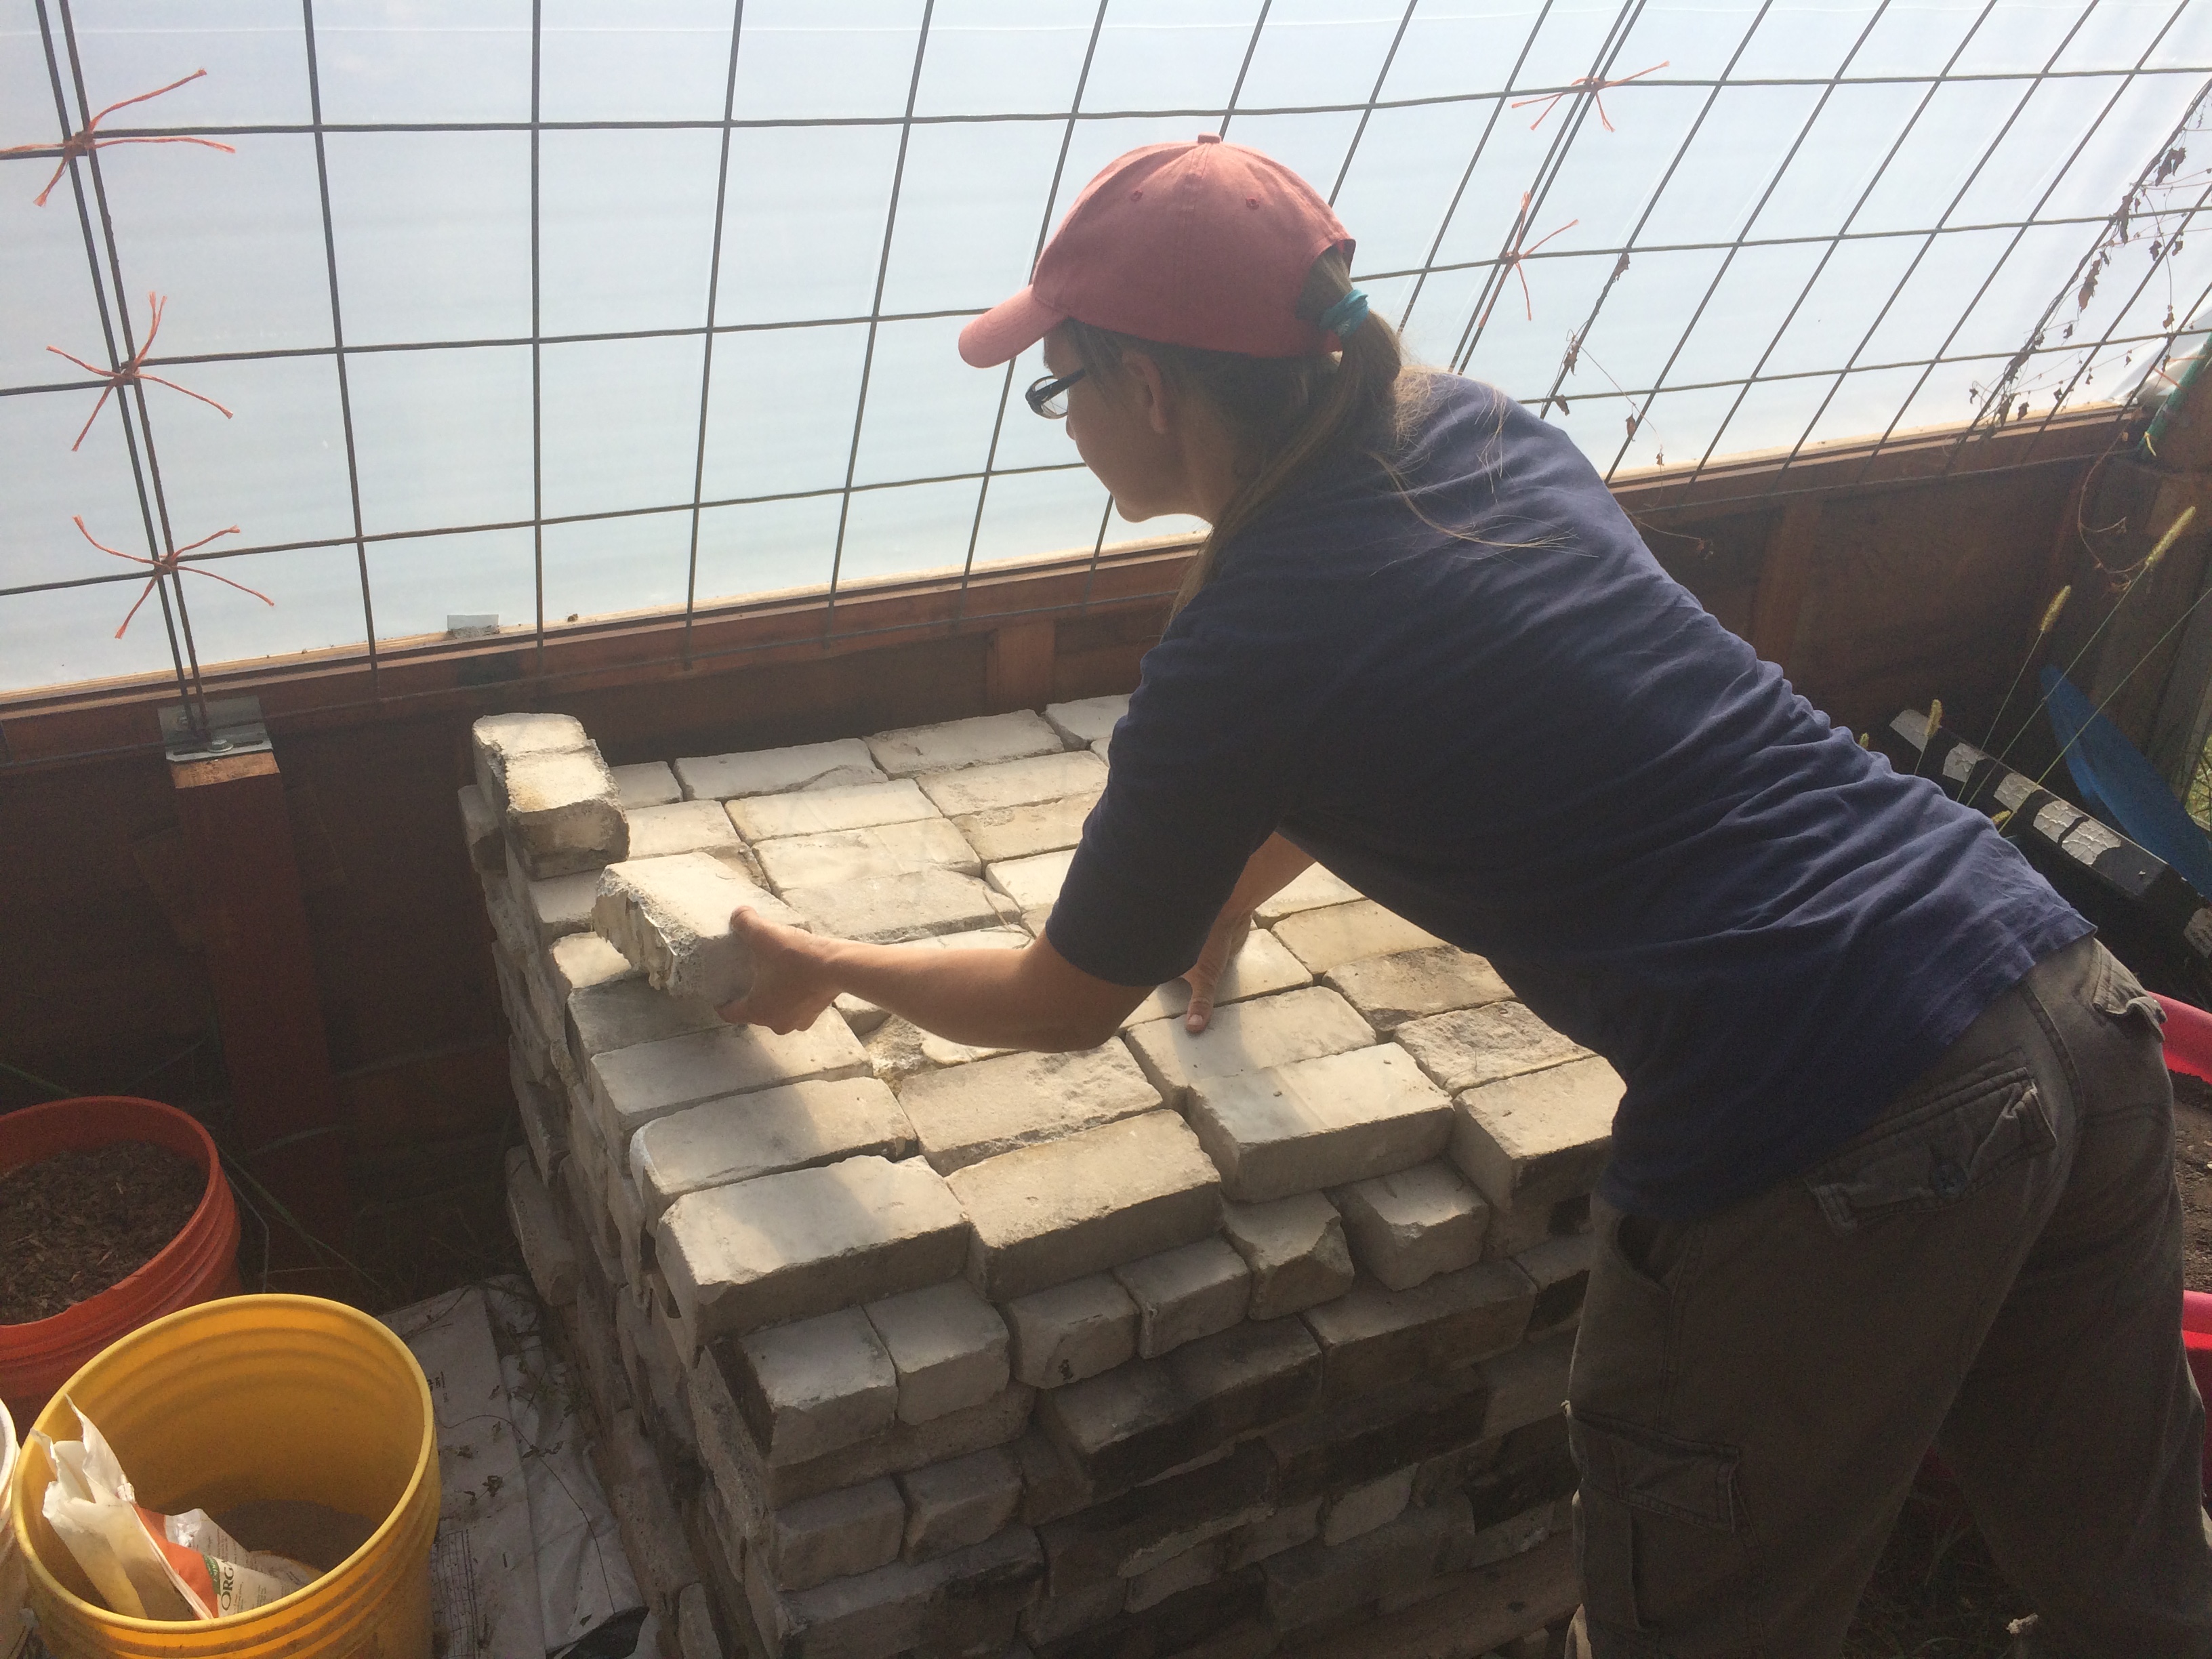
Fire bricks and clay – we wanted to build a wood-fired rocket mass heater for the greenhouse, on a low budget. Craigslist graciously provided … first thousands of pounds of pure clay (we have literally no clay soil to use on our land), and then piles of insulative fire bricks!
trailerload of clay 1 of 2 (it was too heavy to take all at once)from free firebricks …
… to clay greenhouse-heating bench.
Raspberry bushes – hundreds of them! We just had to dig the roots up from the up-pick raspberry farm that was closing down.
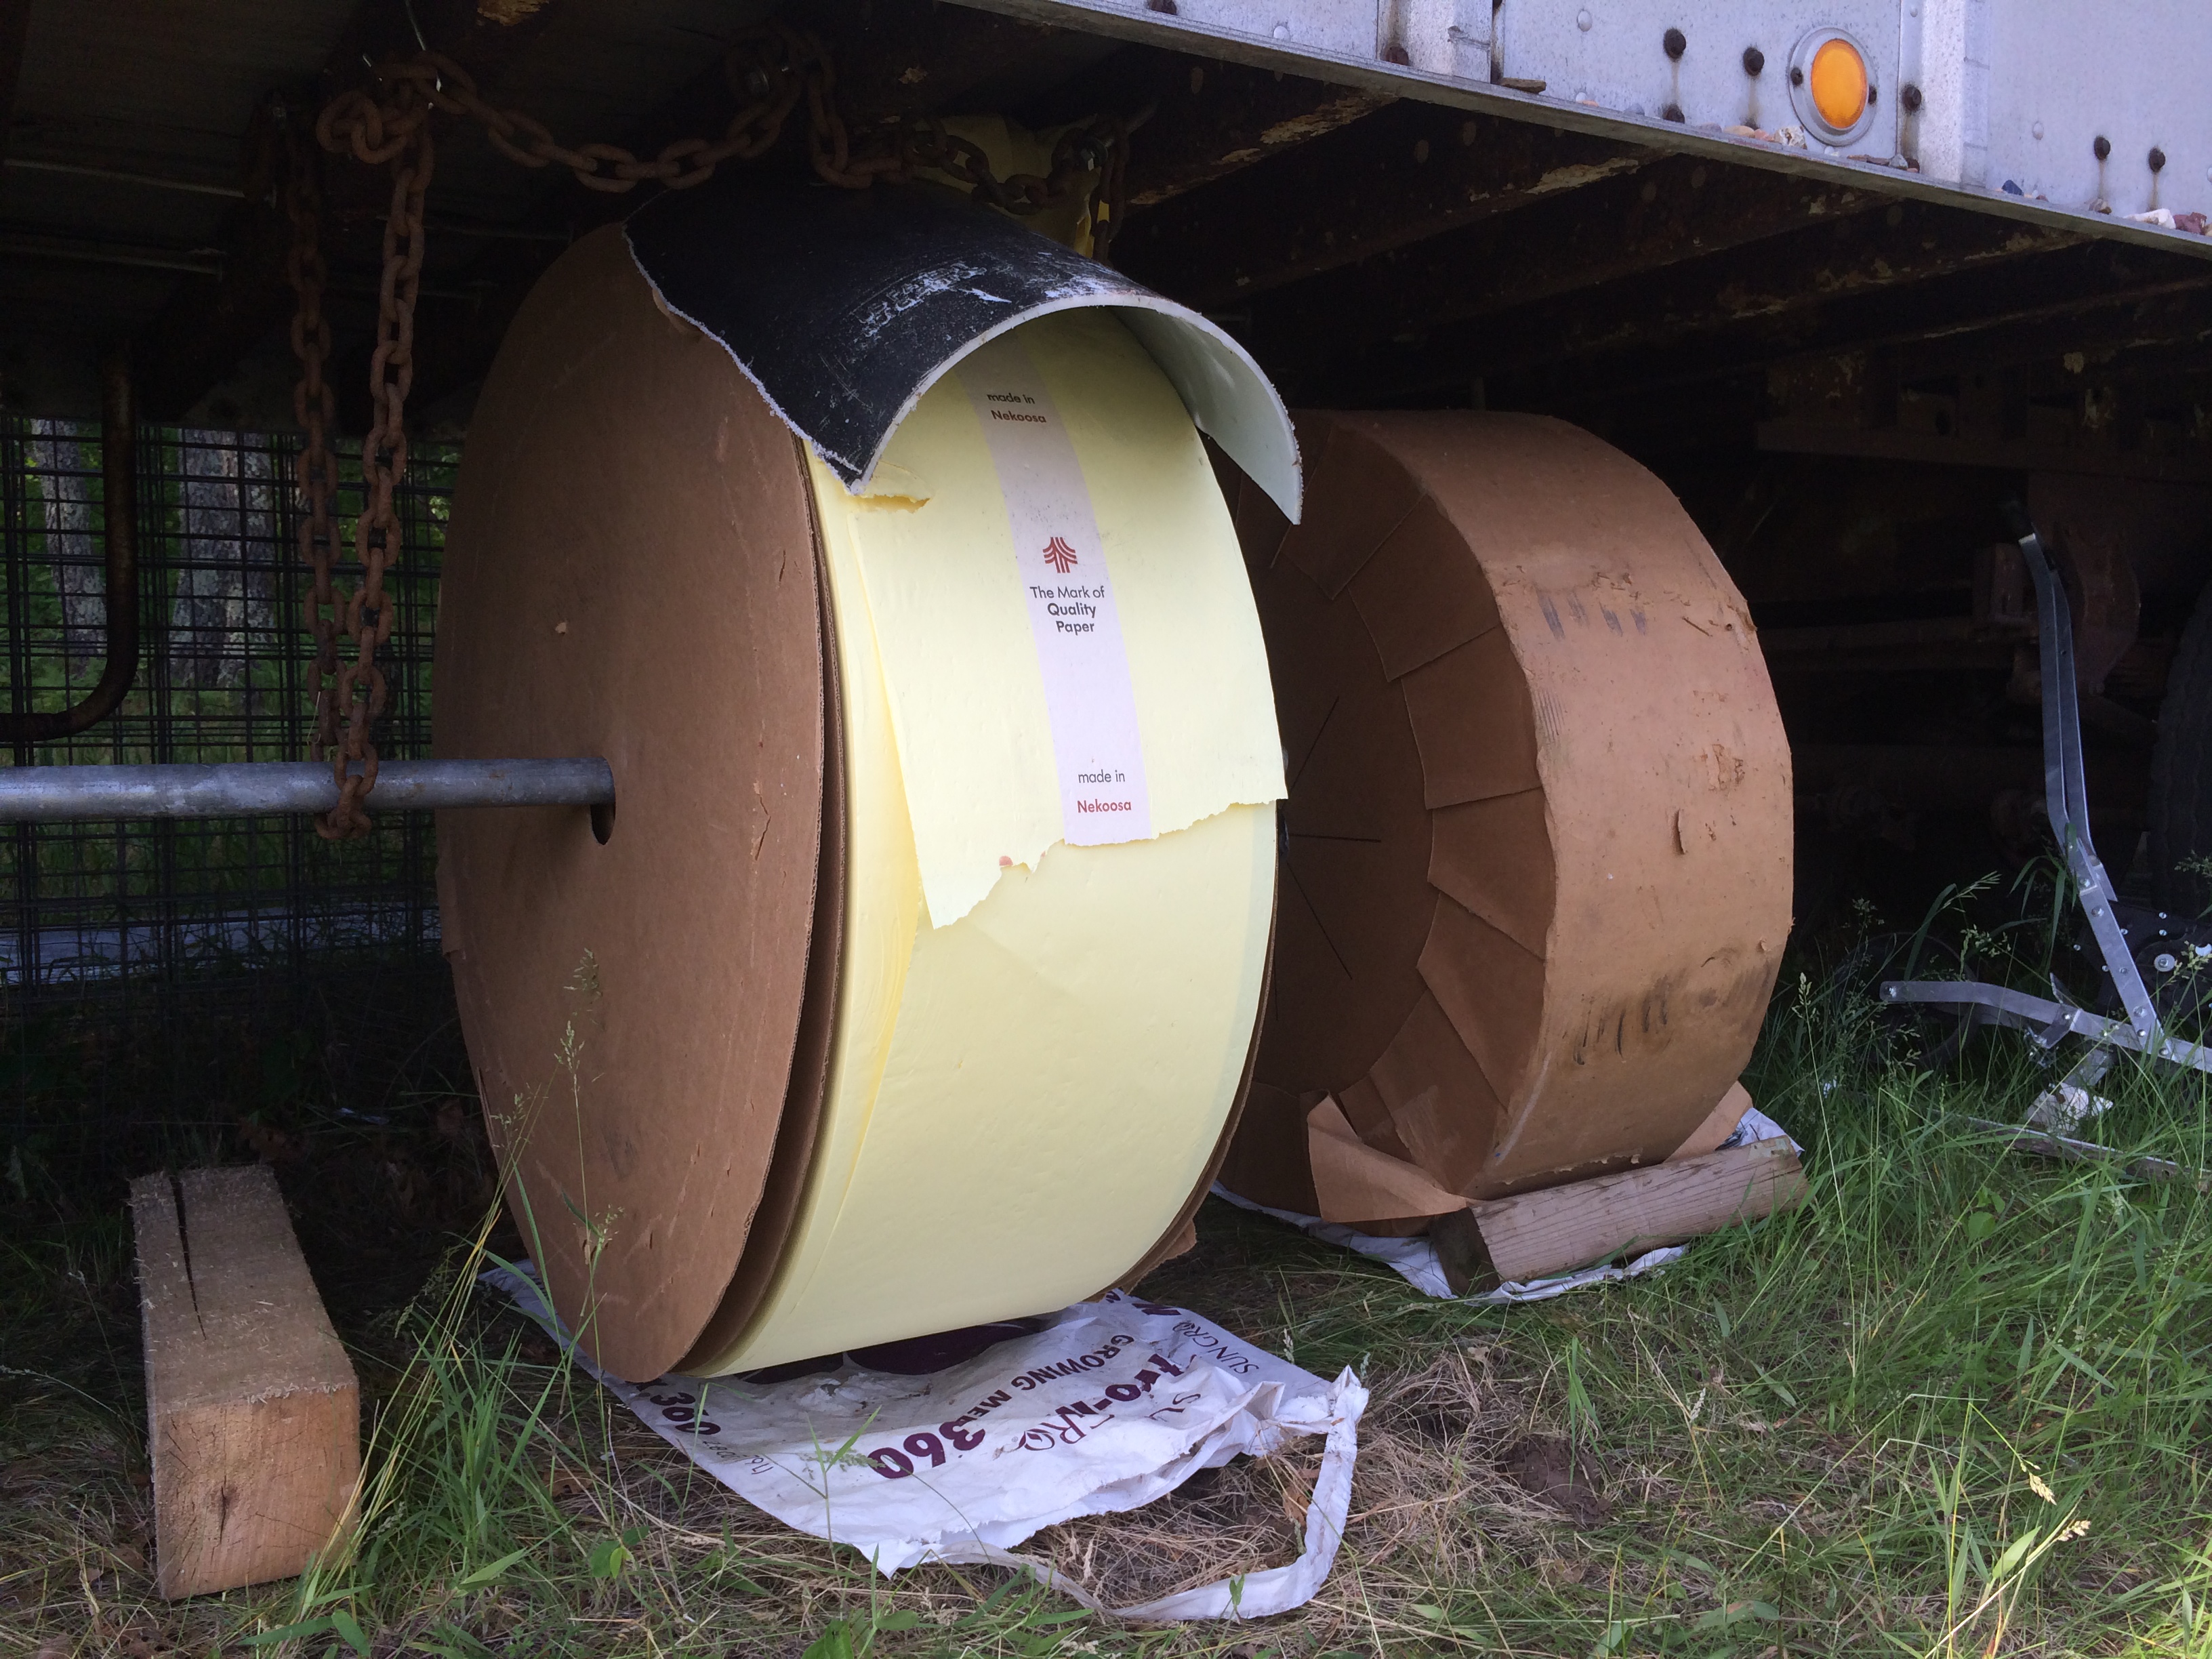
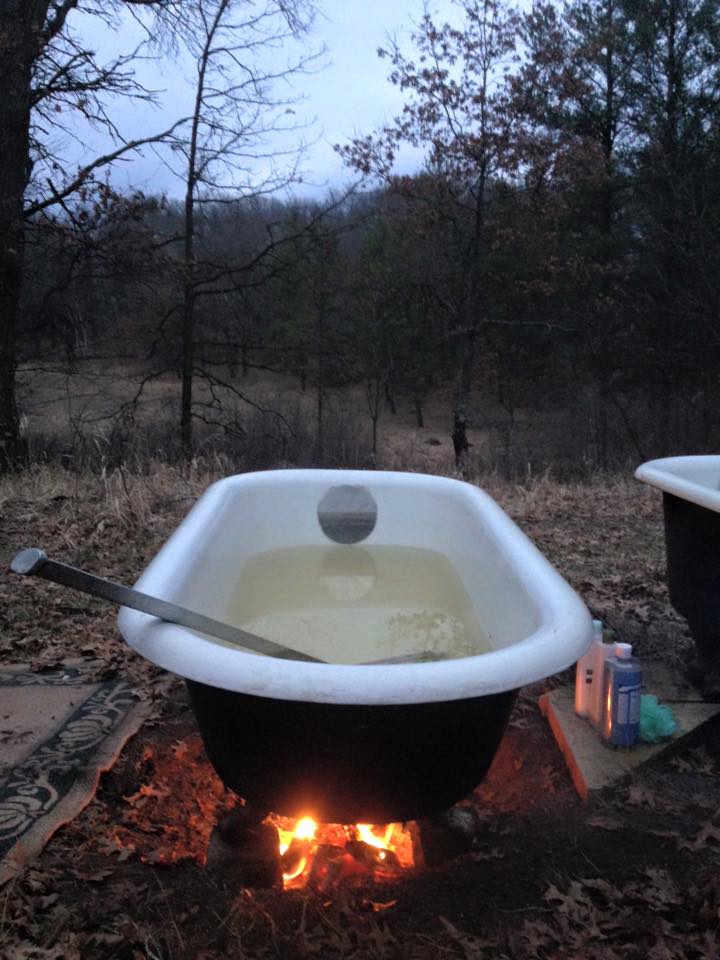
SO MUCH MISCELLANY… such as truck toppers (made into woodshed and chicken coop roofs, furniture, doors, windows, boards, bricks, blocks, hay bales, freezers, ladders, pallets, barrels and several 600 gallon IBC tanks for rainwater storage, water heater tanks, garden carts, two gargantuan 450 lb rolls of paper …… wooden stairs, shelves and cabinets, tons of rocks, hundreds of gallons of potting soil, a propane stove, a giant chalkboard (cut up into signs for the market booth), a clawfoot tub for off-grid hot baths …
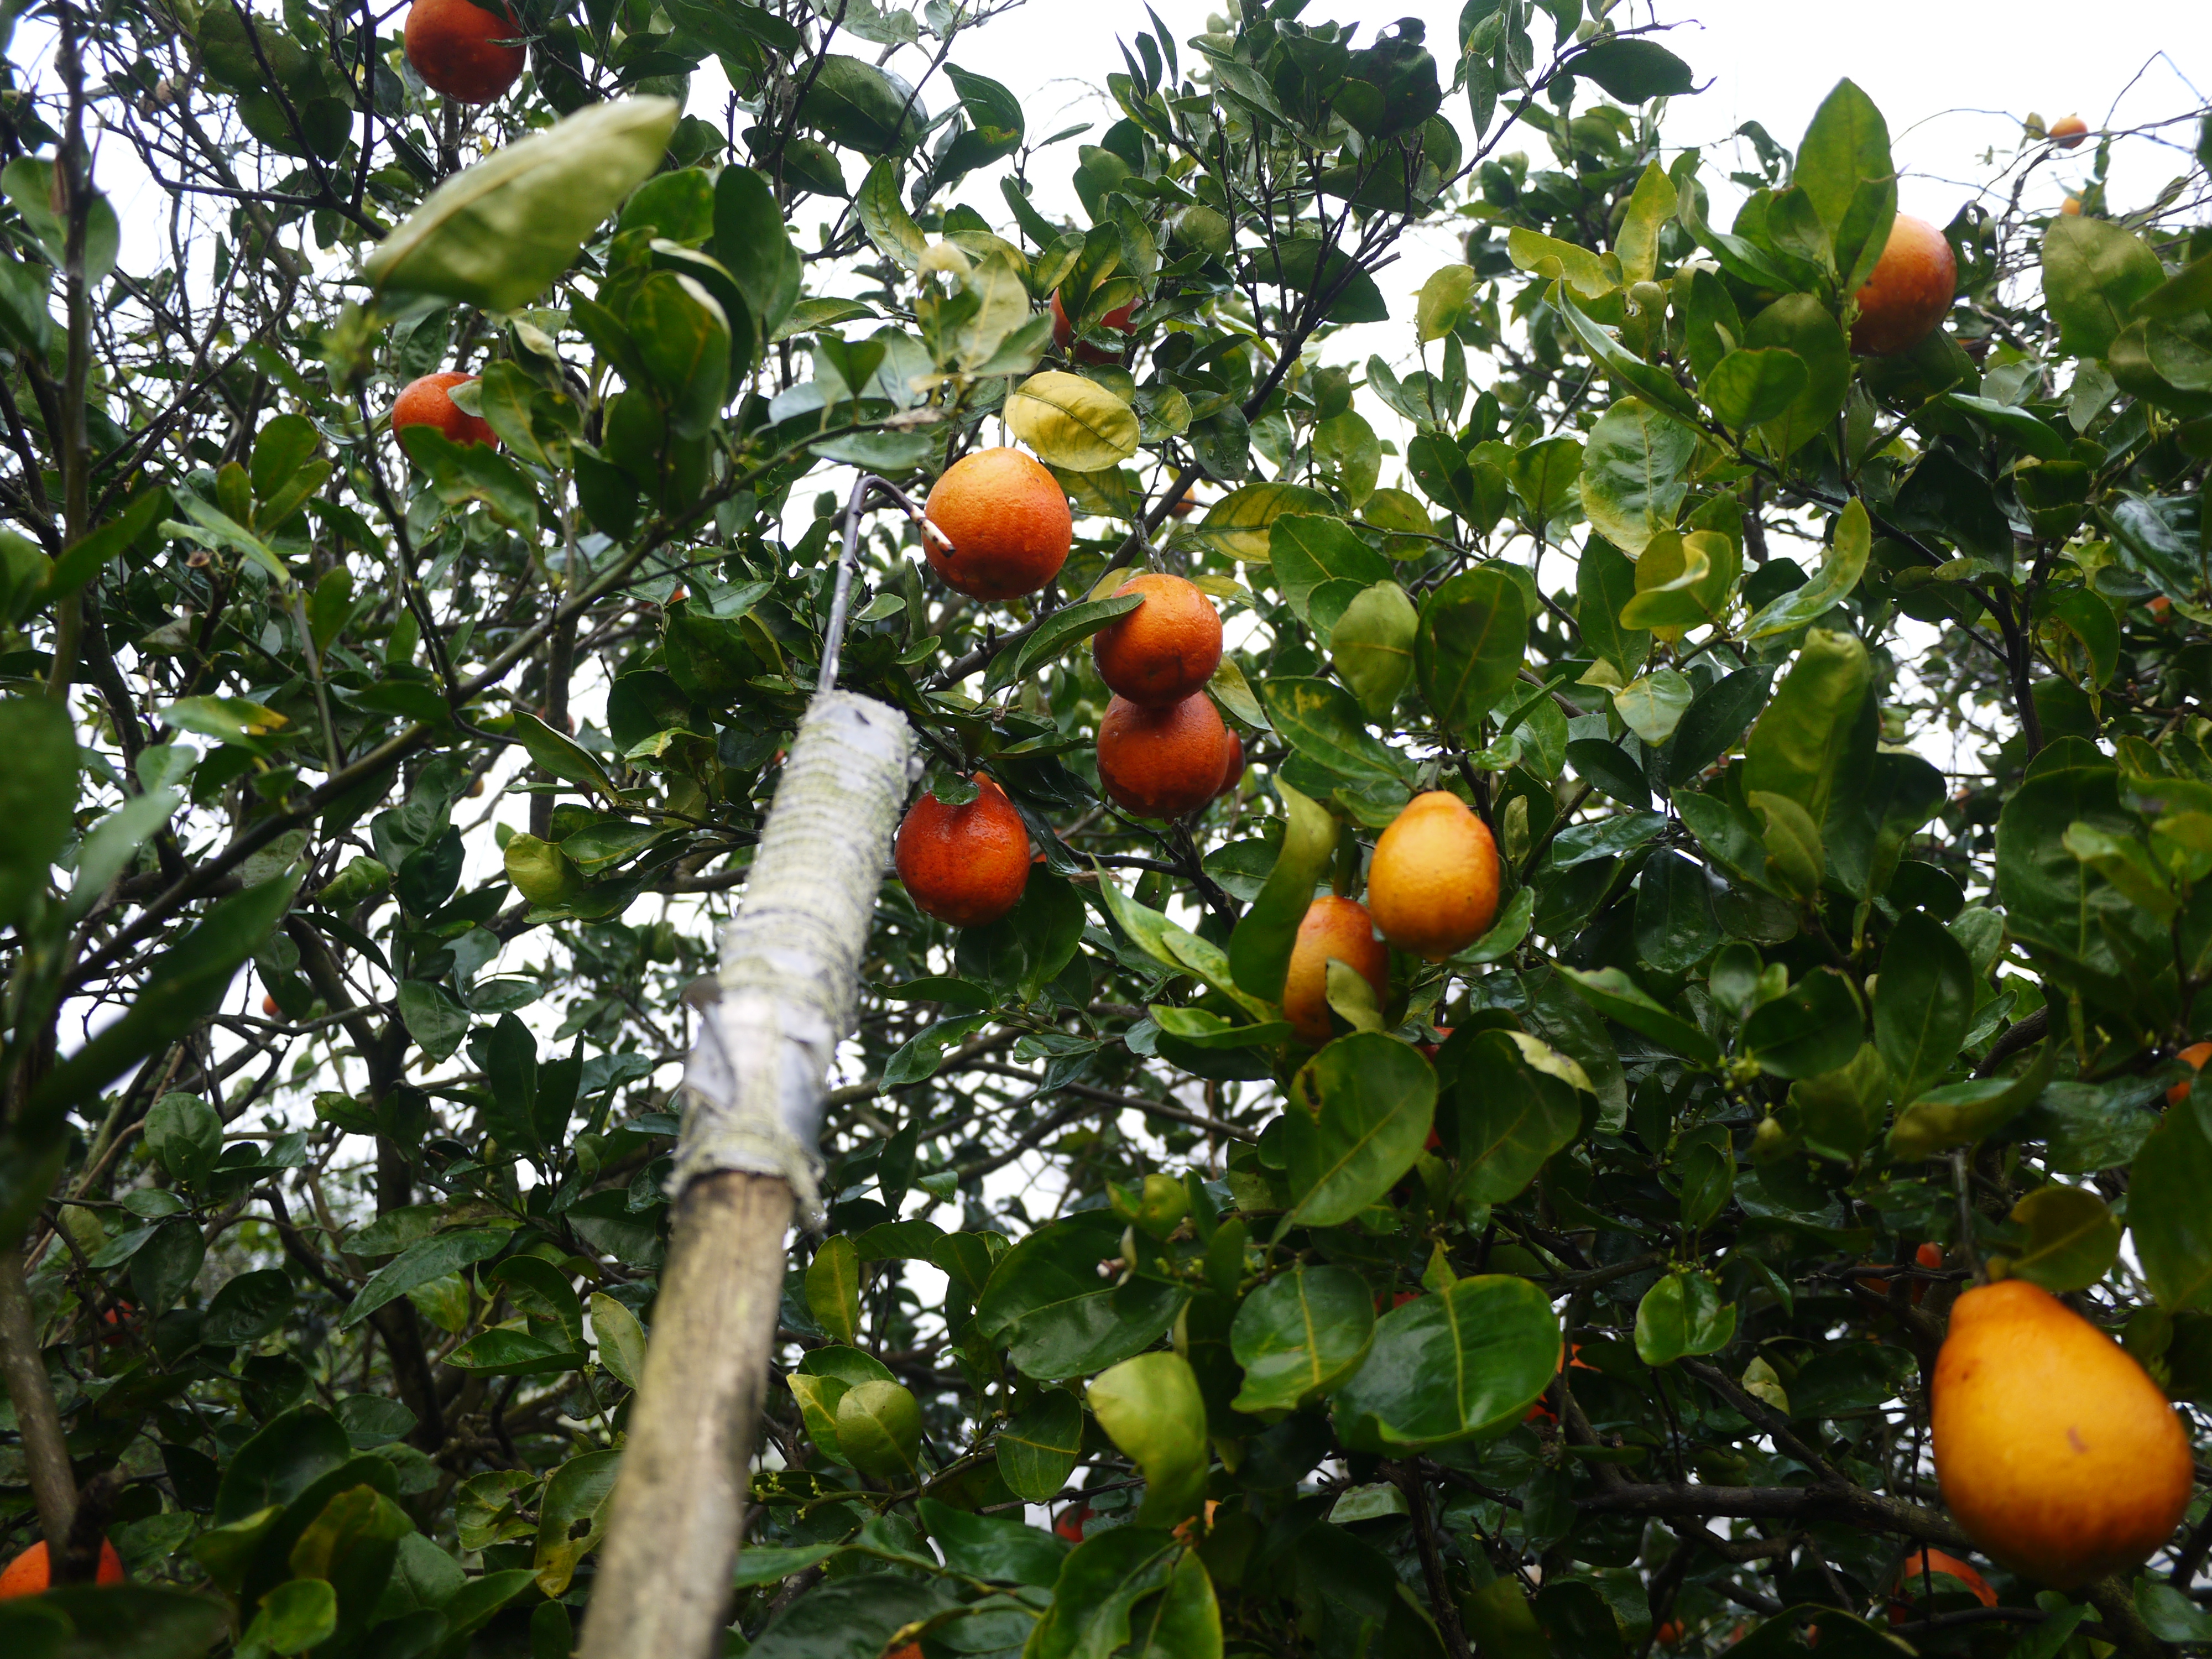
… loads of horse and rabbit manure, hundreds of oranges and grapefruits (made into preserves and juice, while WWOOFing down south) …… a DIY wood-fired water heater core, electric oven turned electric smoker (which we turned wood-fired) …
… etc! I’ll amend this post as time goes on, since I have no doubt at all that Craigslist will continue to be a source of many free treasures – things that make our deliberately-low-budget lifestyle not only possible, but fun.
We’ve wanted to build an earth oven for some time now – we have a small camper oven, but it doesn’t really work that well, and we like to use the abundant free oak wood for fuel when we can, rather than pay for propane. We finally got our chance to try our hands at it at Habitable Spaces – where they encouraged us to build some kind of structure before we left.
Three unrelated projects that we’d helped with in December & January led us to decide on the earth oven build:
First, when we were digging postholes to fence off their first major field, we discovered that the subsoil was a rich, malleable clay, perfect for sculpting and building with.
Kristin & Ali digging post holes
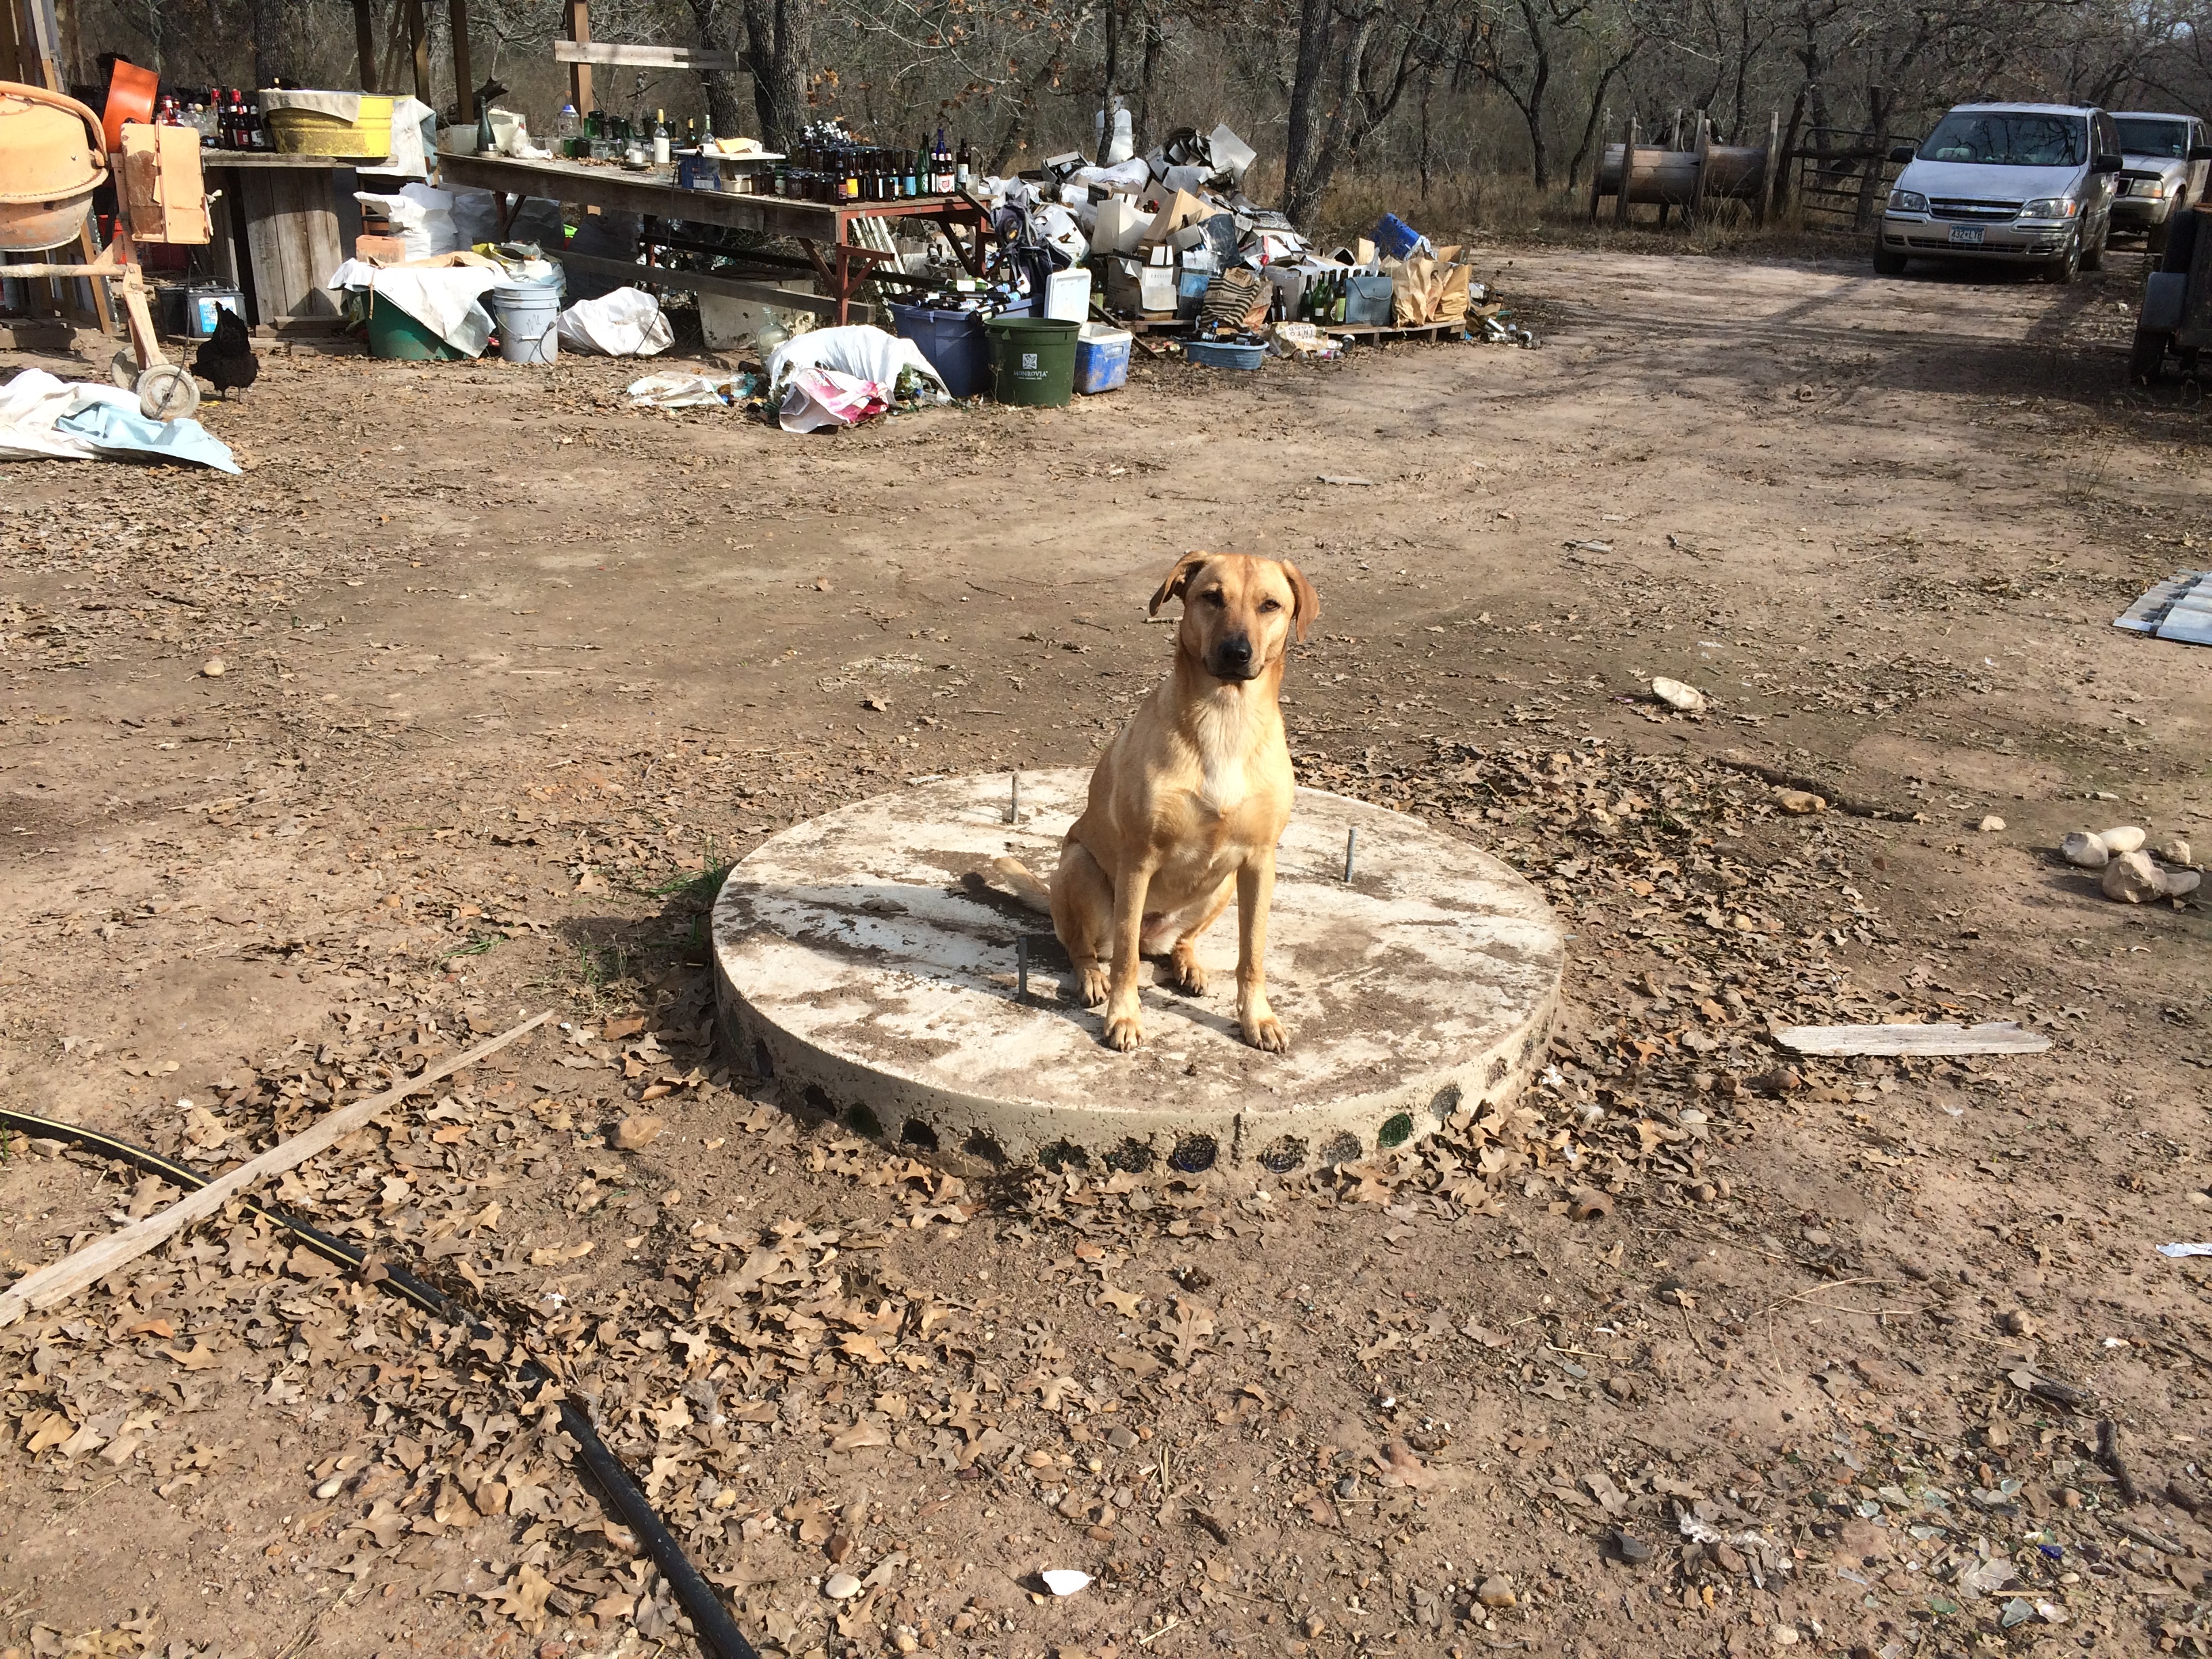
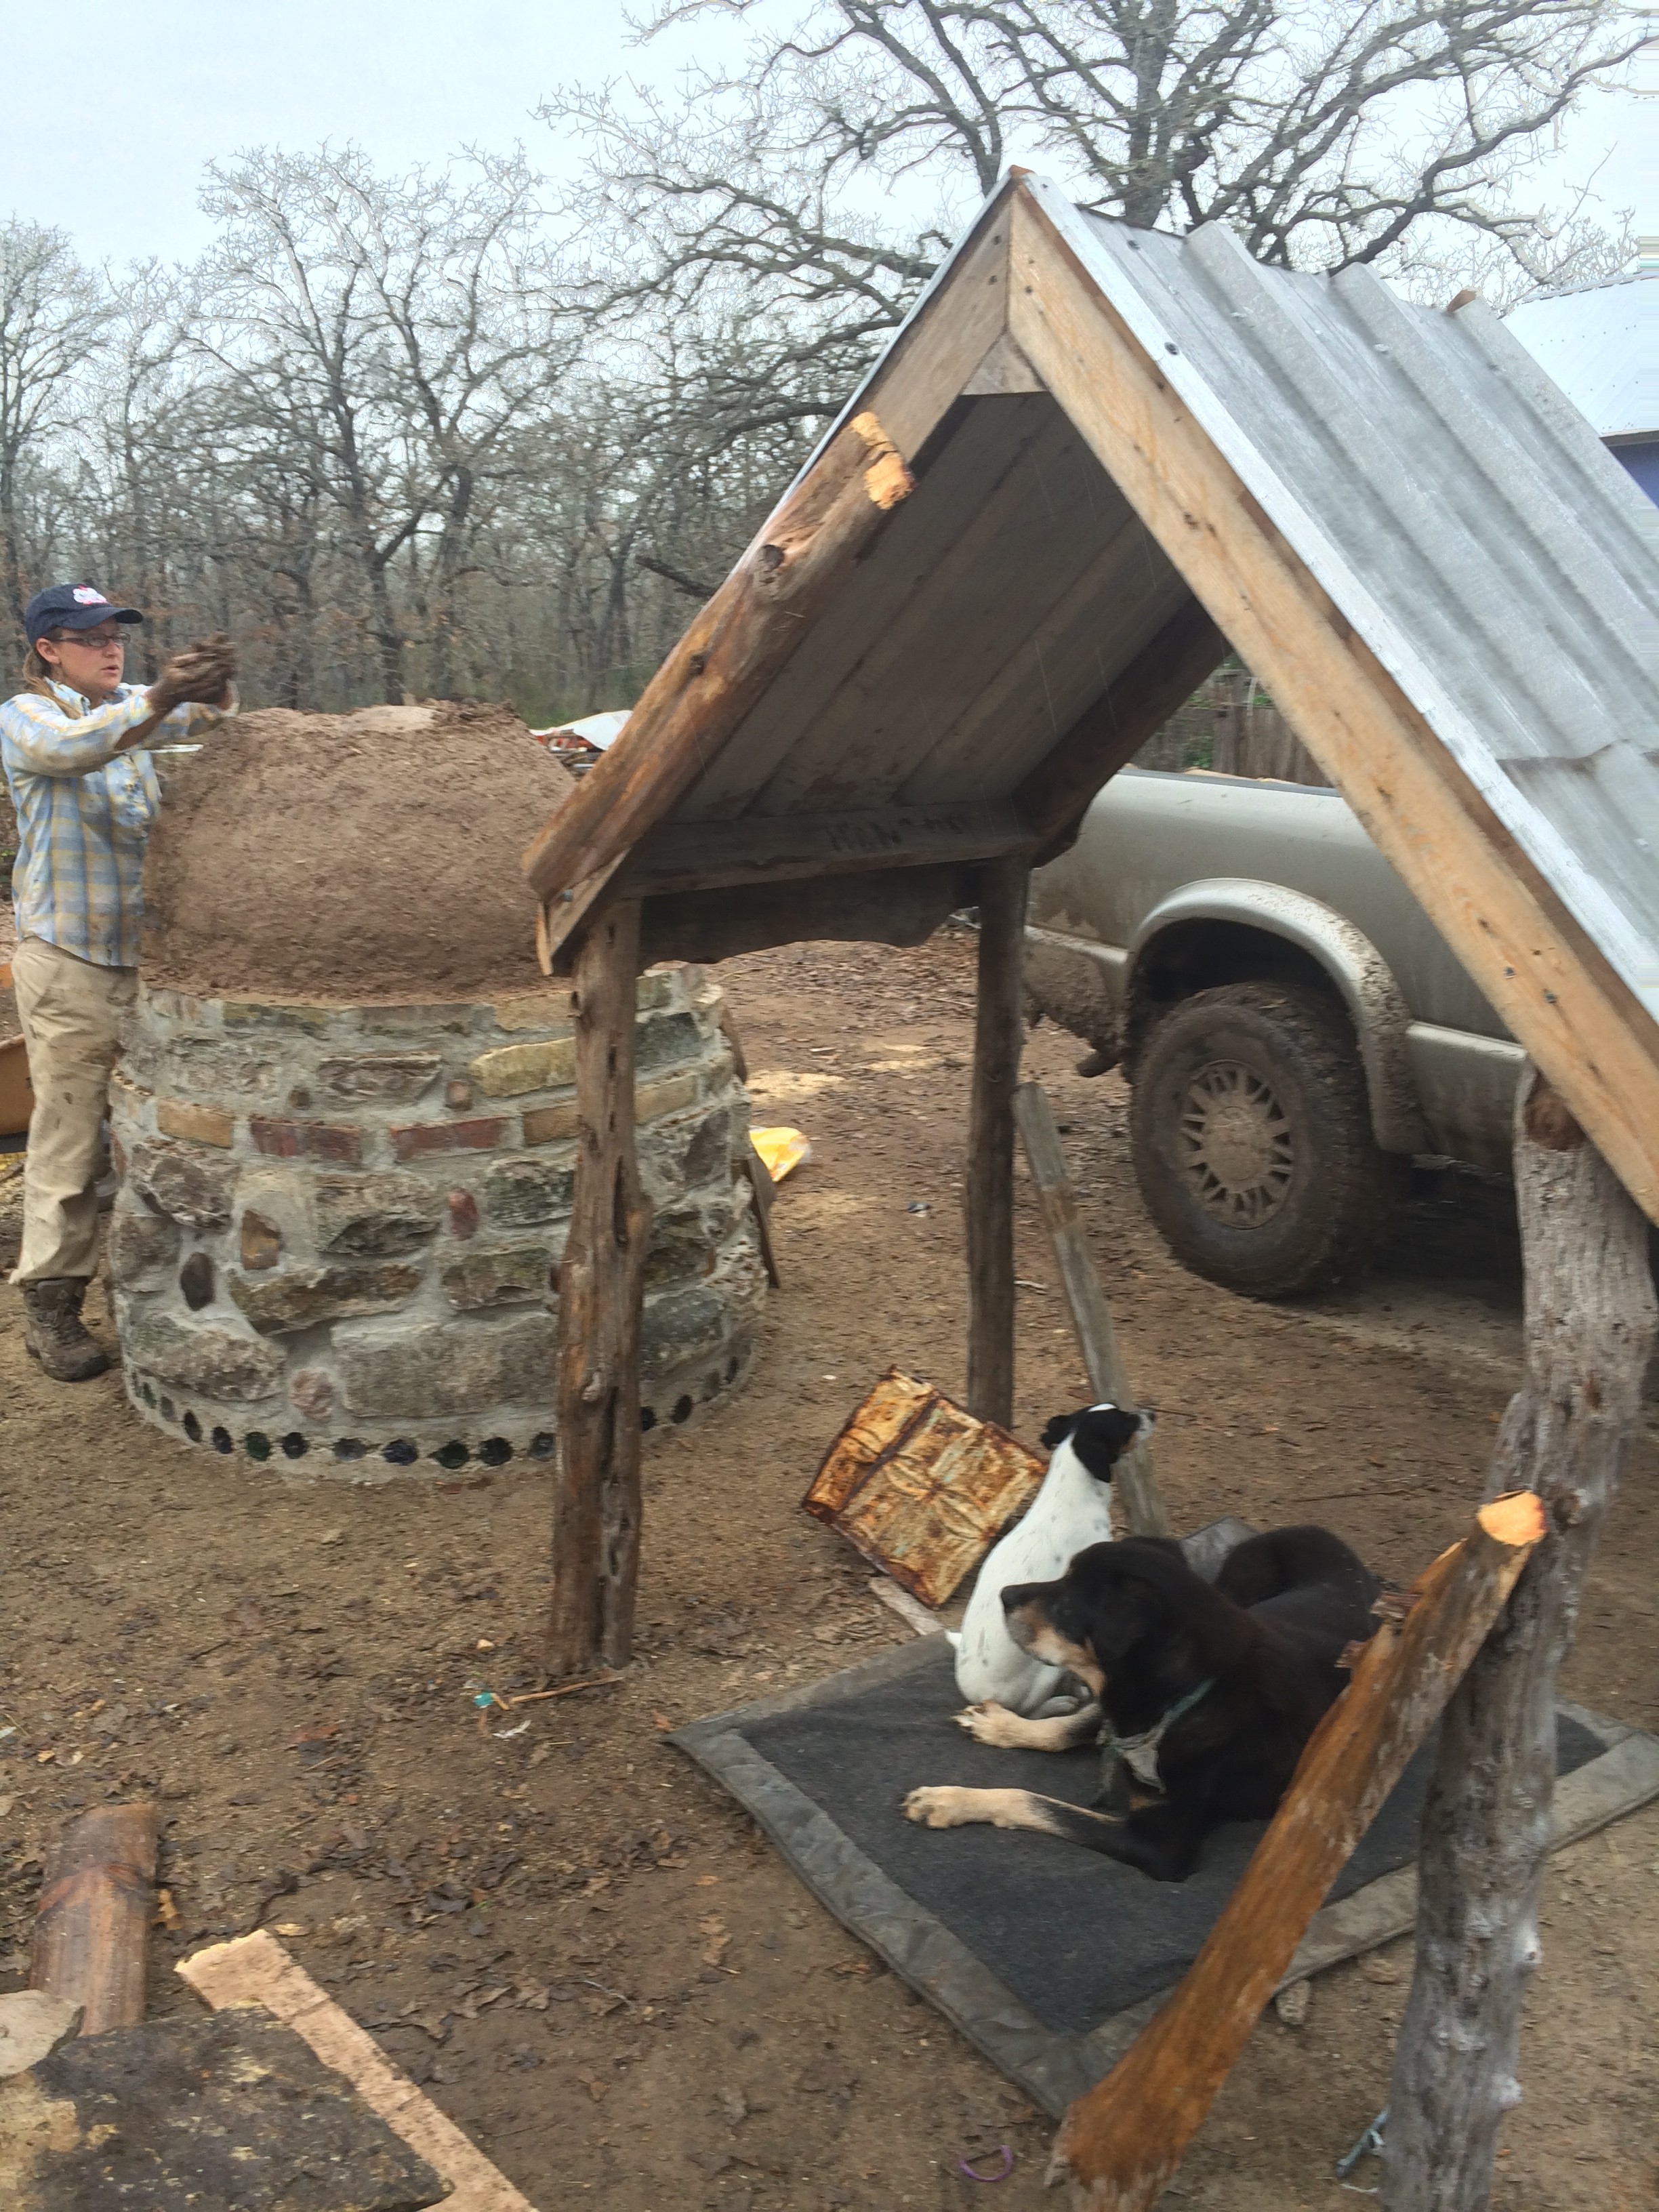
Secondly, we dismantled and felled the giant tower, made from three massive cable spools stacked upon one another – revealing a perfectly useable concrete foundation pad beneath.
Lily posing on the tower foundation – the 3 spools can be seen in the background where we rolled them away post-demo
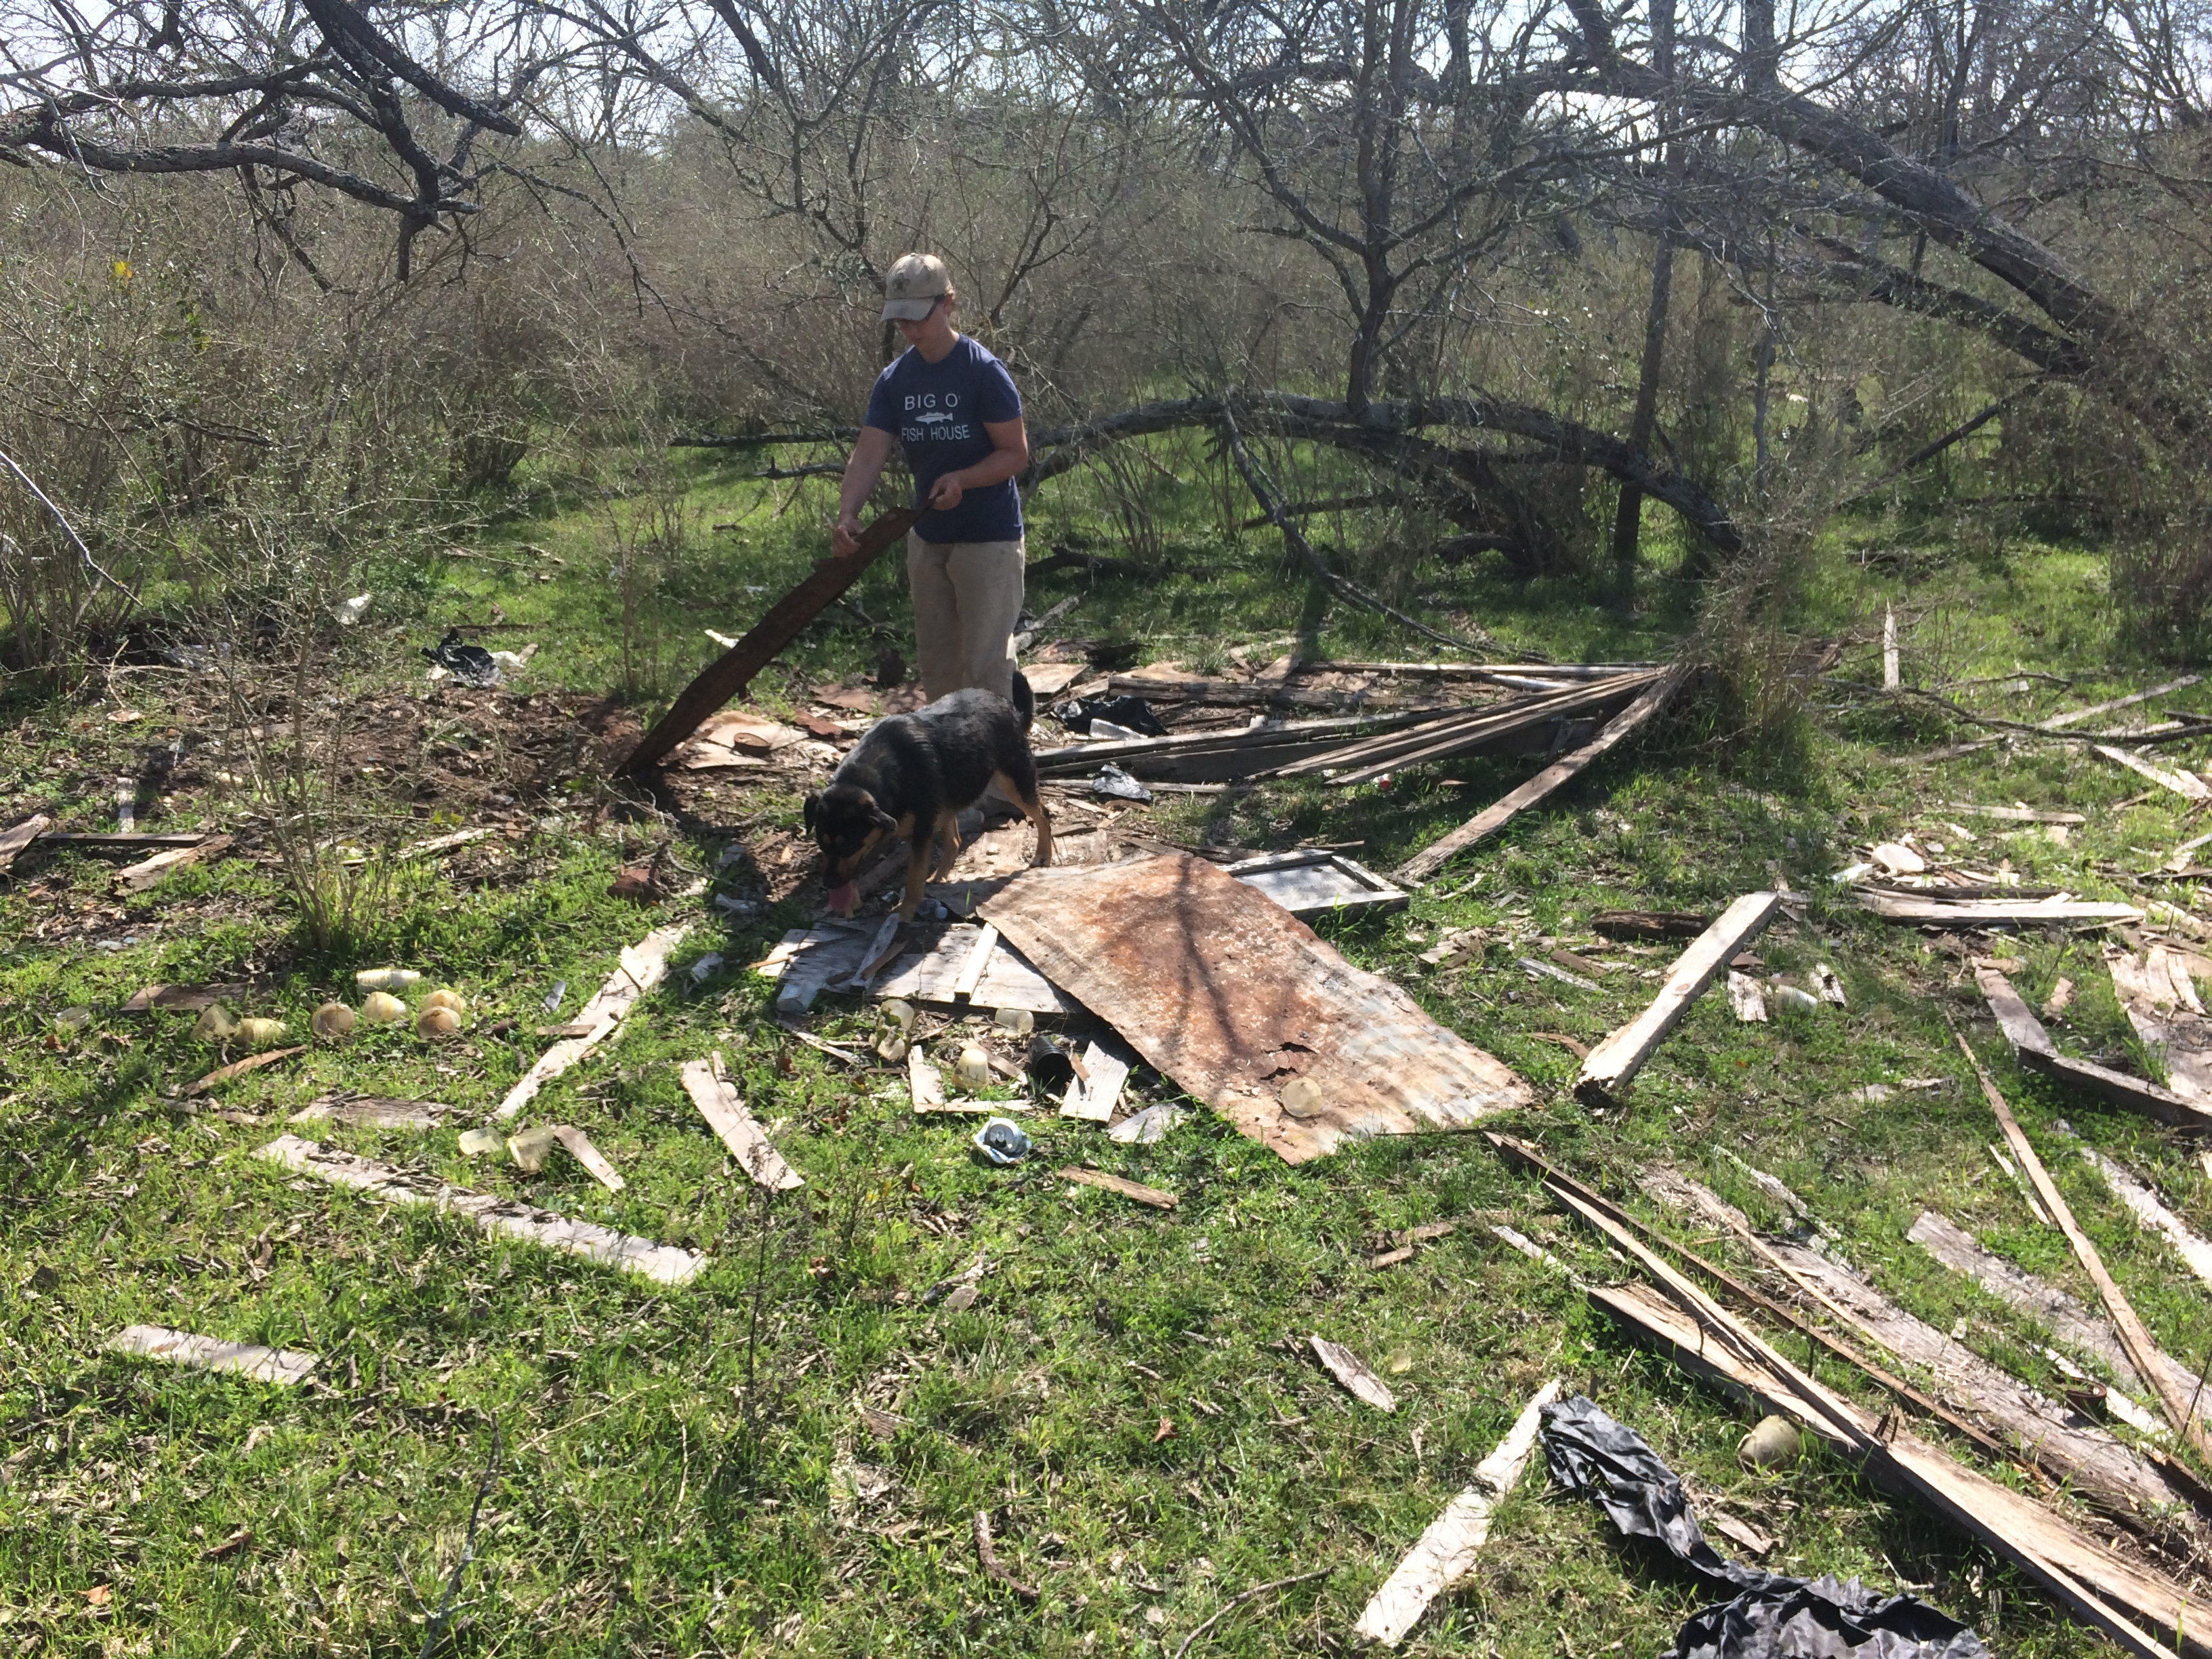
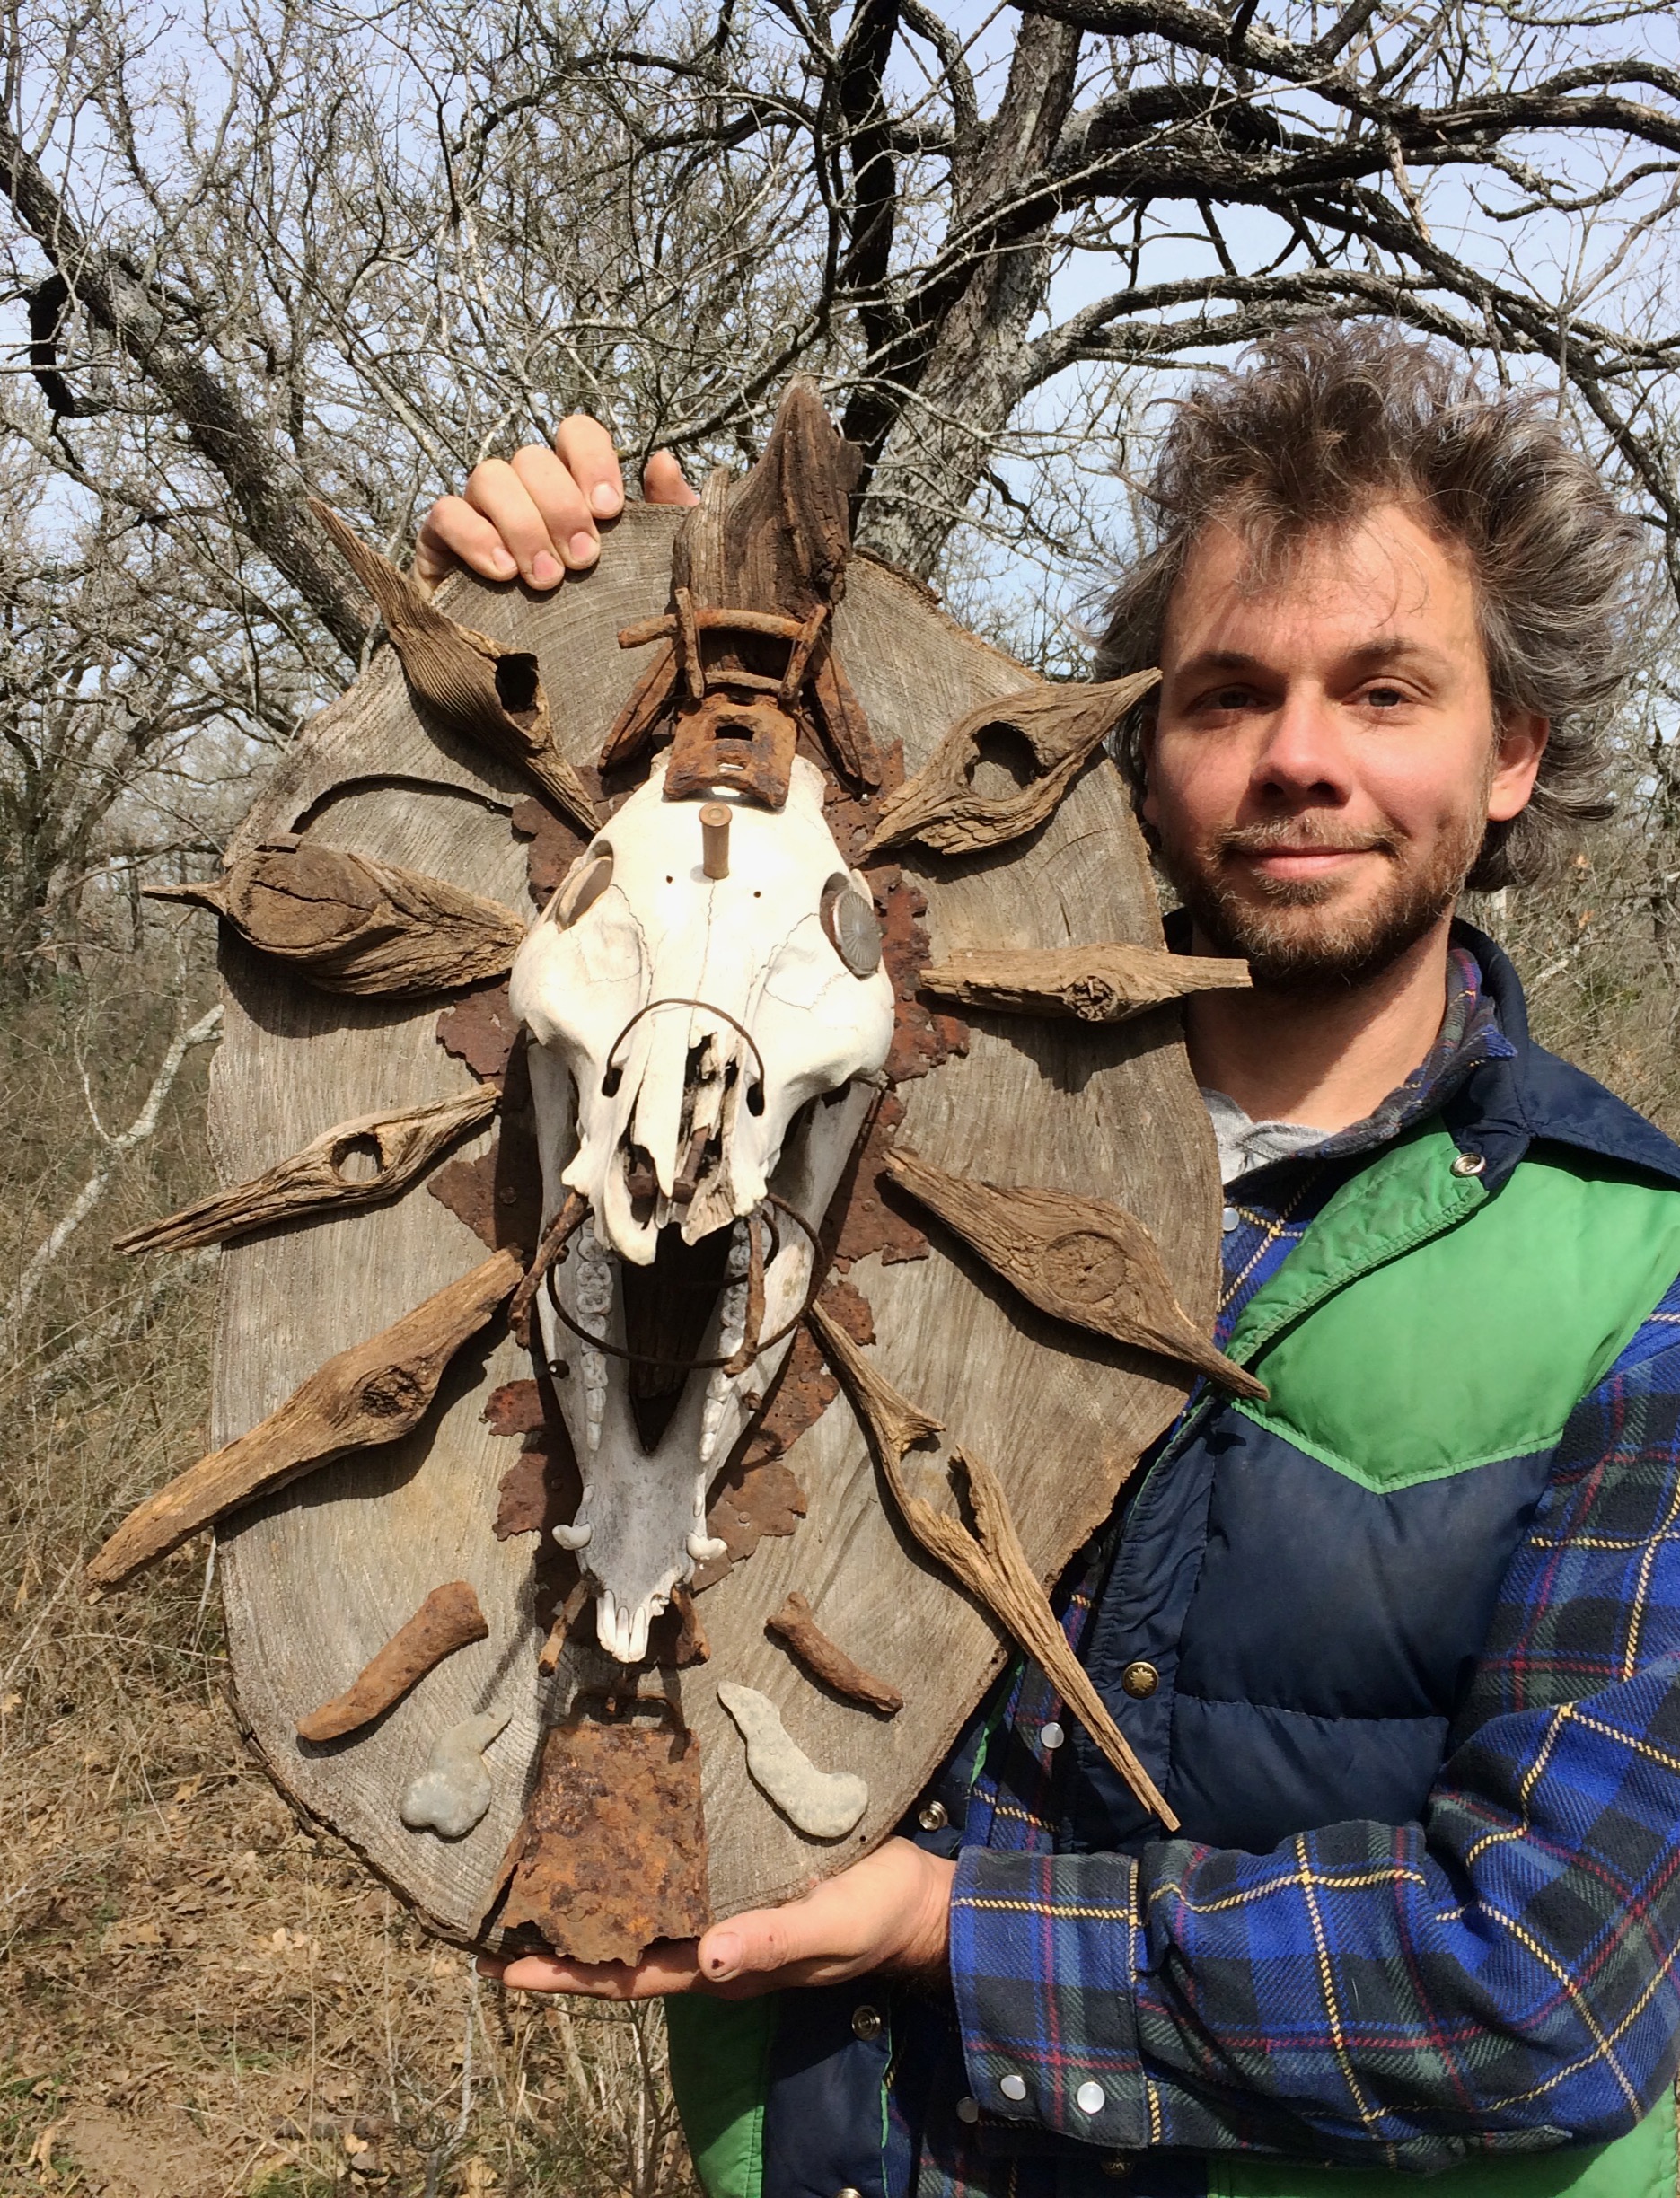
Third, we’d spent a lot of time scavenging the ruins of two old homesteads on their property, which had been home to Shane’s grandmother and other ancestors. We metal detected and scrounged, and Gabe created a skullpture with items we discovered throughout January.
Lola helping Kristin scavenge in the ruins of Shane’s grandmother’s Depression-era homestead
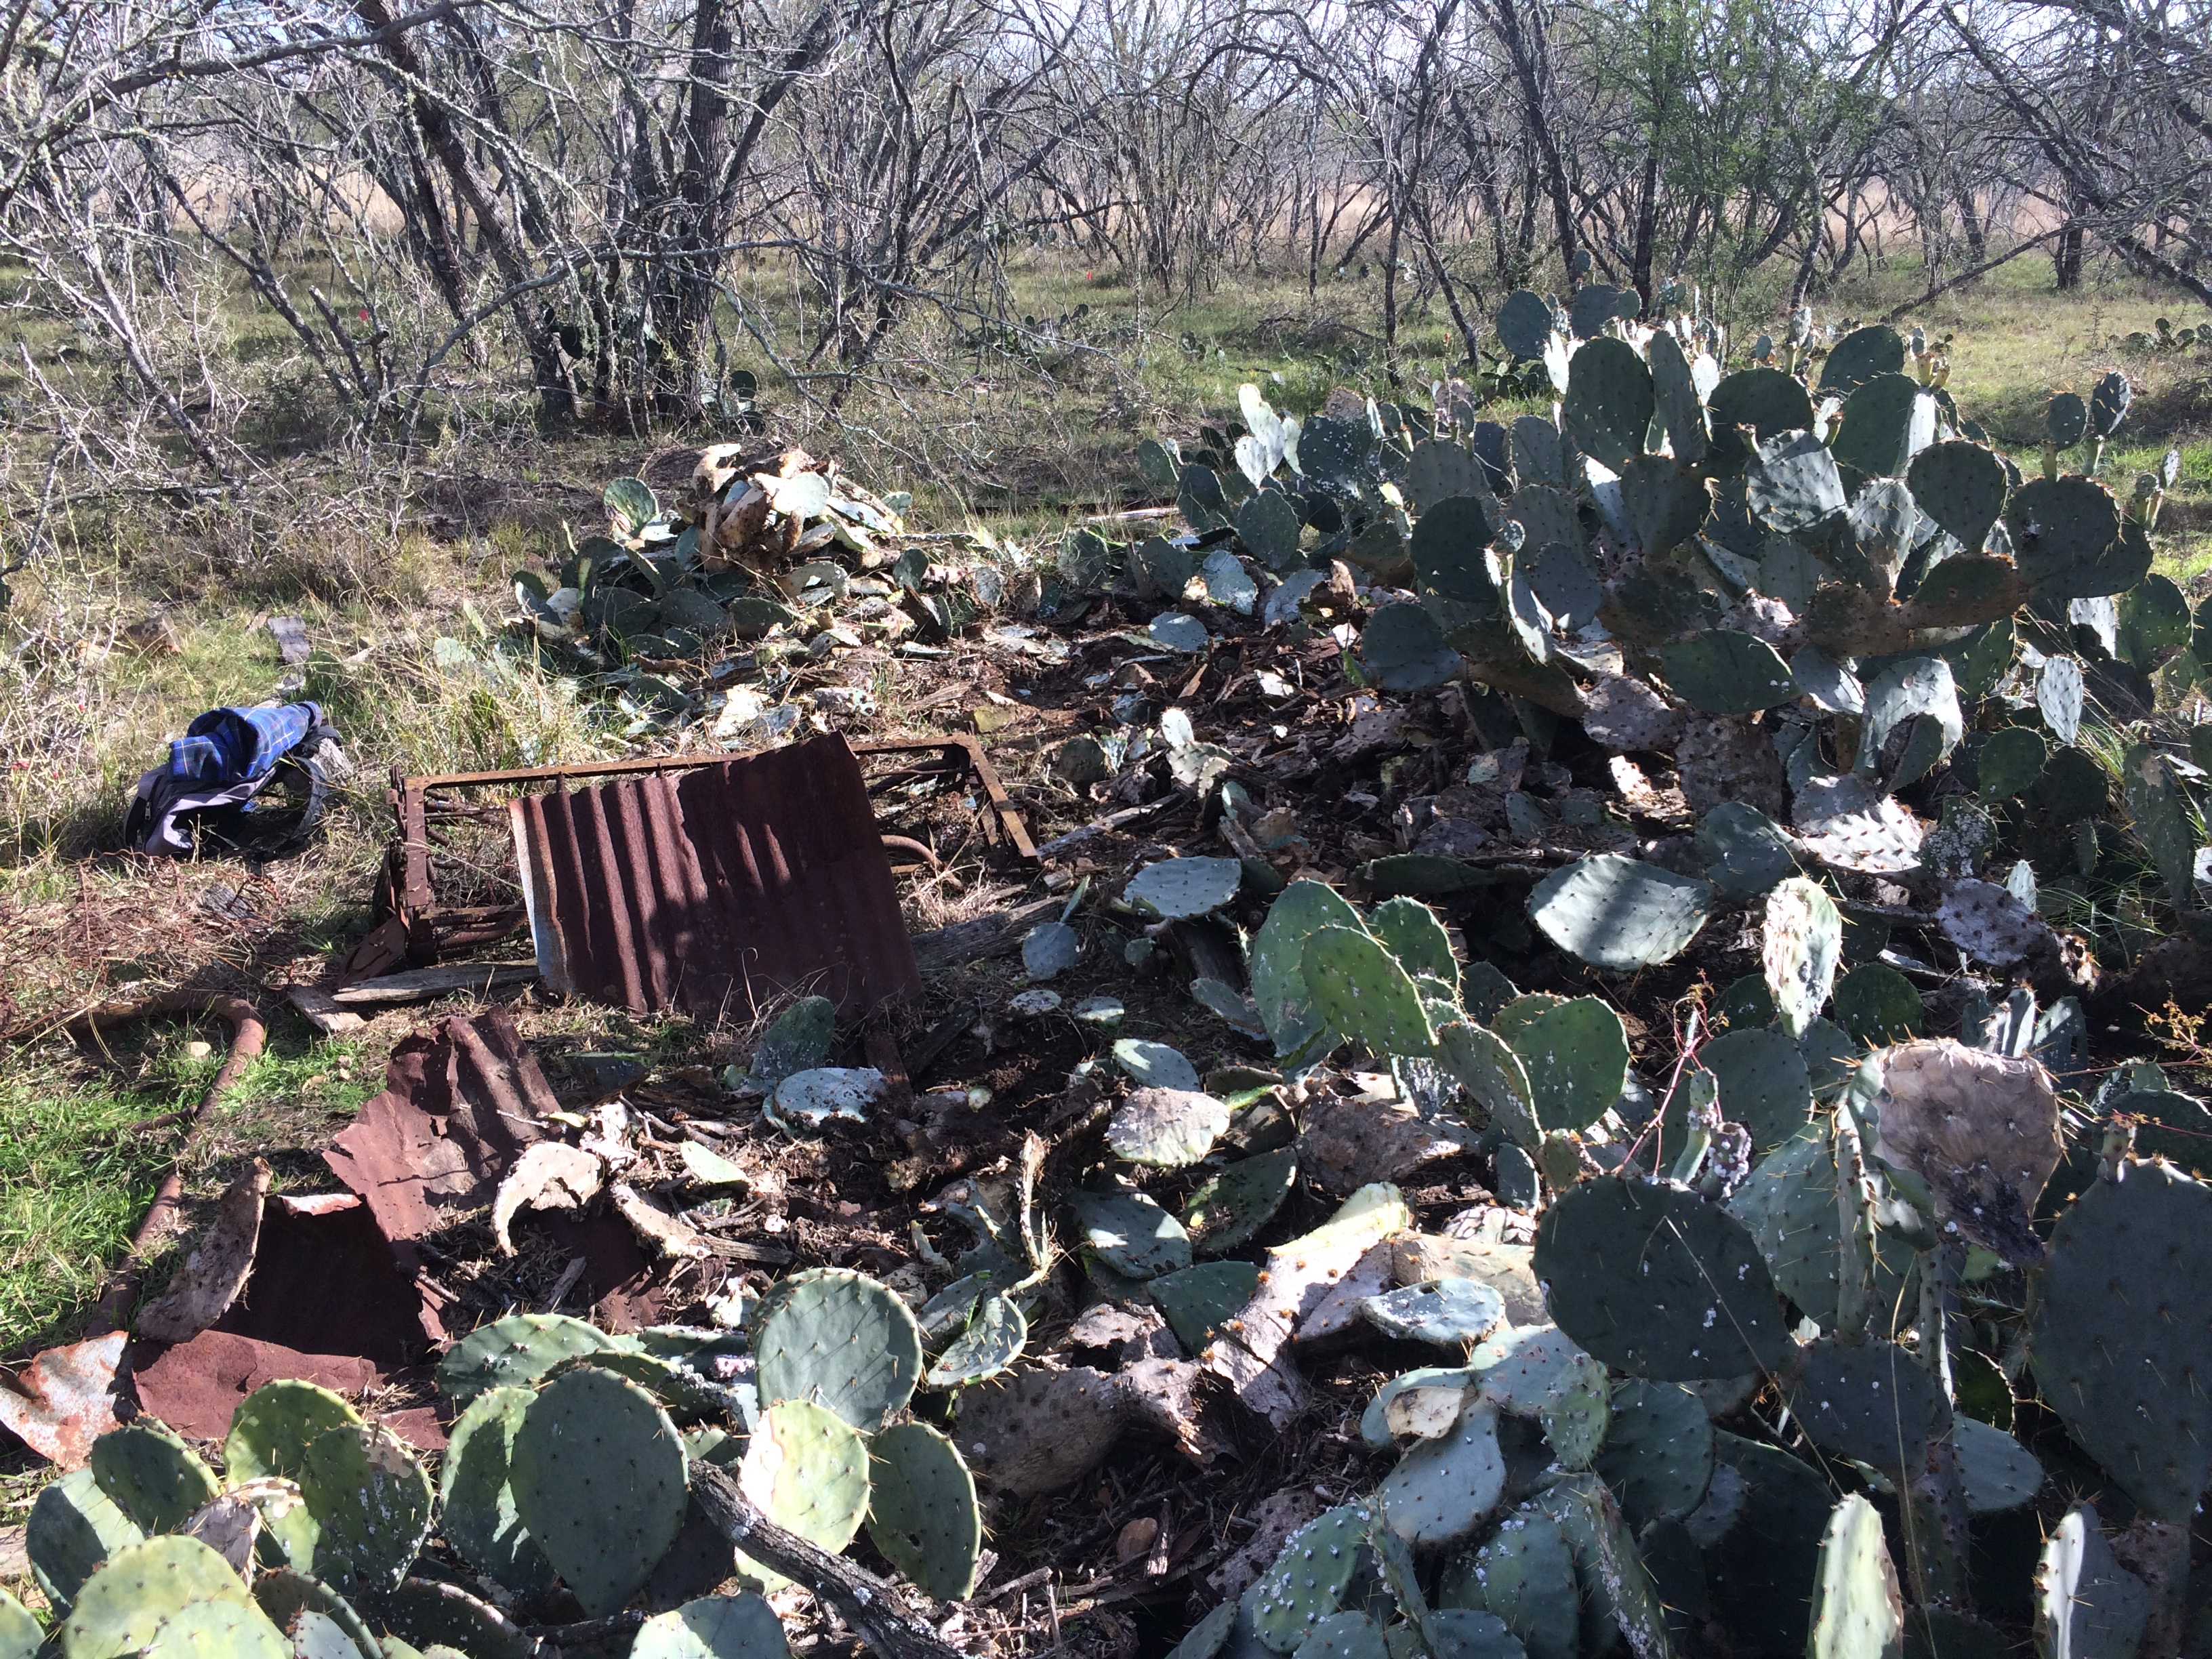
“Homestead #2” required us to chop through a thick stand of cacti to get to … prickly work
Kingsbury Totem: wild boar skull with homestead bullet, board knots, cow bell, bed spring, melted aluminum blobs, & other artifacts, secured with scraps of old barbed wire etc
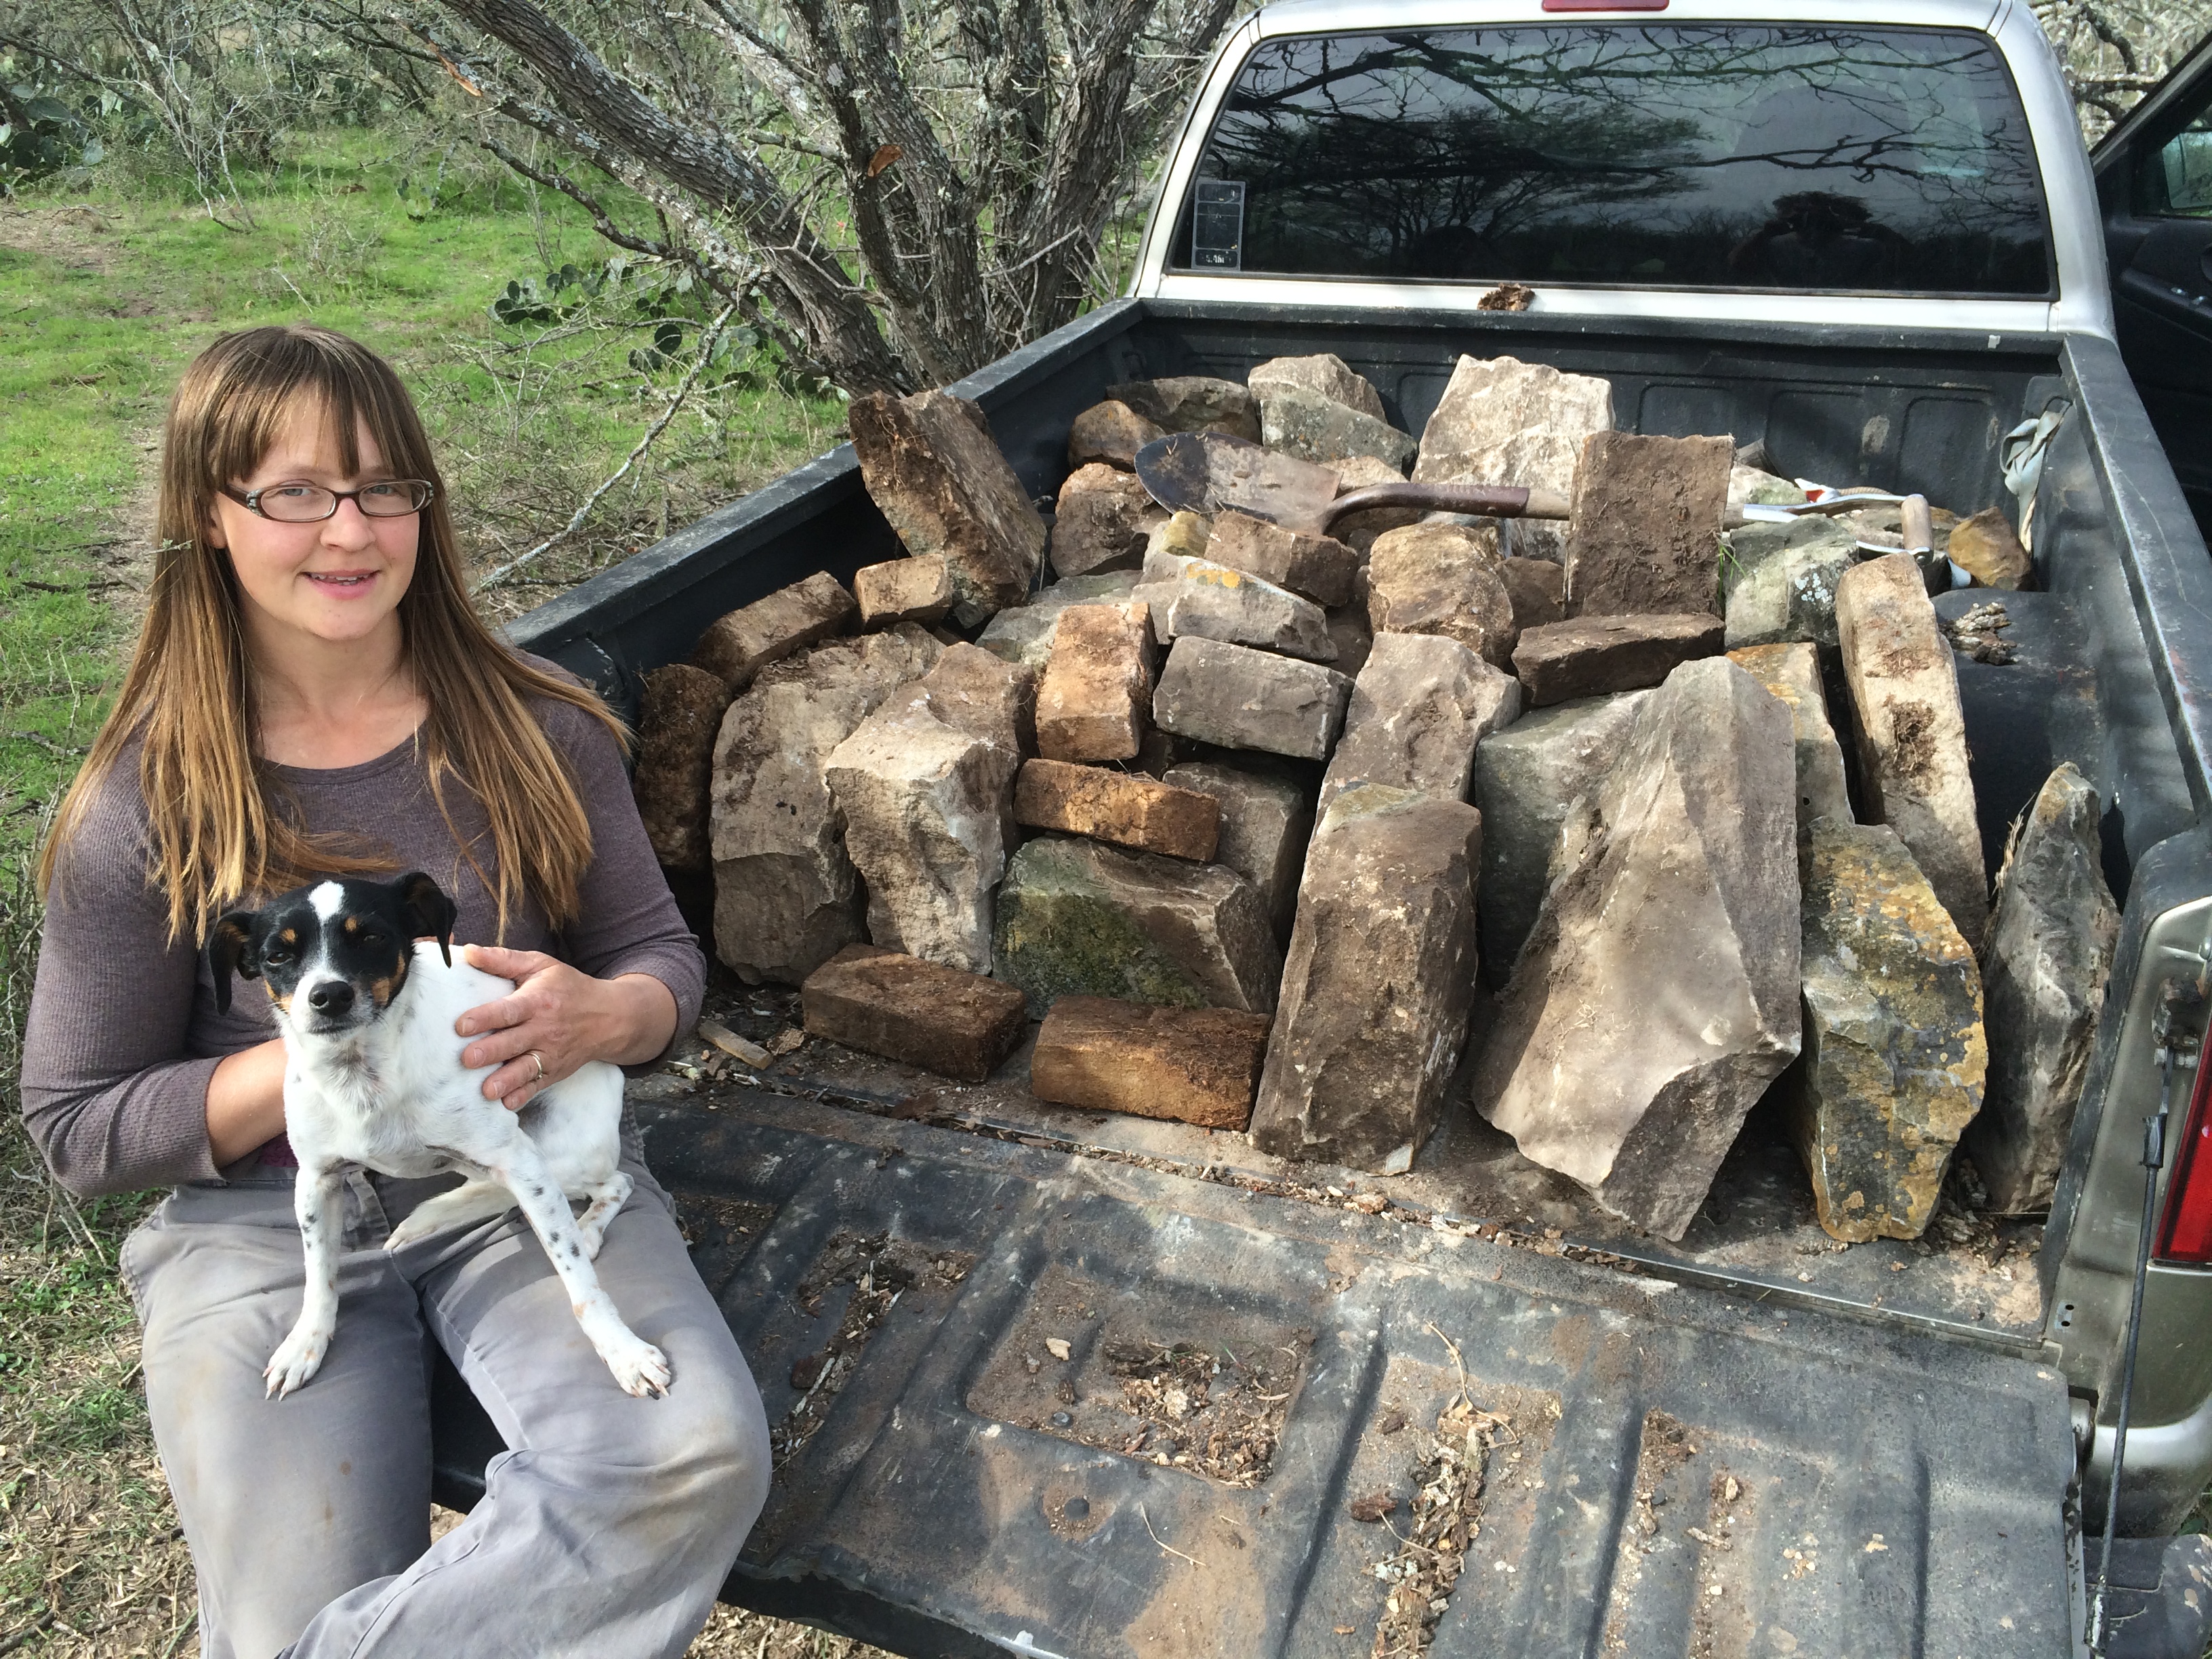
In our scavenging, we discovered piles of old bricks, and several dozen partially-buried split limestone blocks, at both sites – these had once been house foundations. We’d excavated them when we found them, and left them propped up on the surface for possible retrieval later on.
Once we realized we wanted to create an earth oven, we decided these blocks would be the perfect base to build upon – beautiful, free, and full of the character and history of the land. So we borrowed the farm truck and a wheelbarrow, and got to collecting …
all the foundation blocks from Homestead #2 – we got another load the next day from Shane’s Grandma’s place. (we’d brought home a load of bricks from both sites weeks earlier without any specific plan for them)
Kristin ordered a book on earth oven construction – this would be our Bible for the duration of the construction project that we embarked on, not sure if we’d even have time to finish it before we had to head to Austin in three weeks …
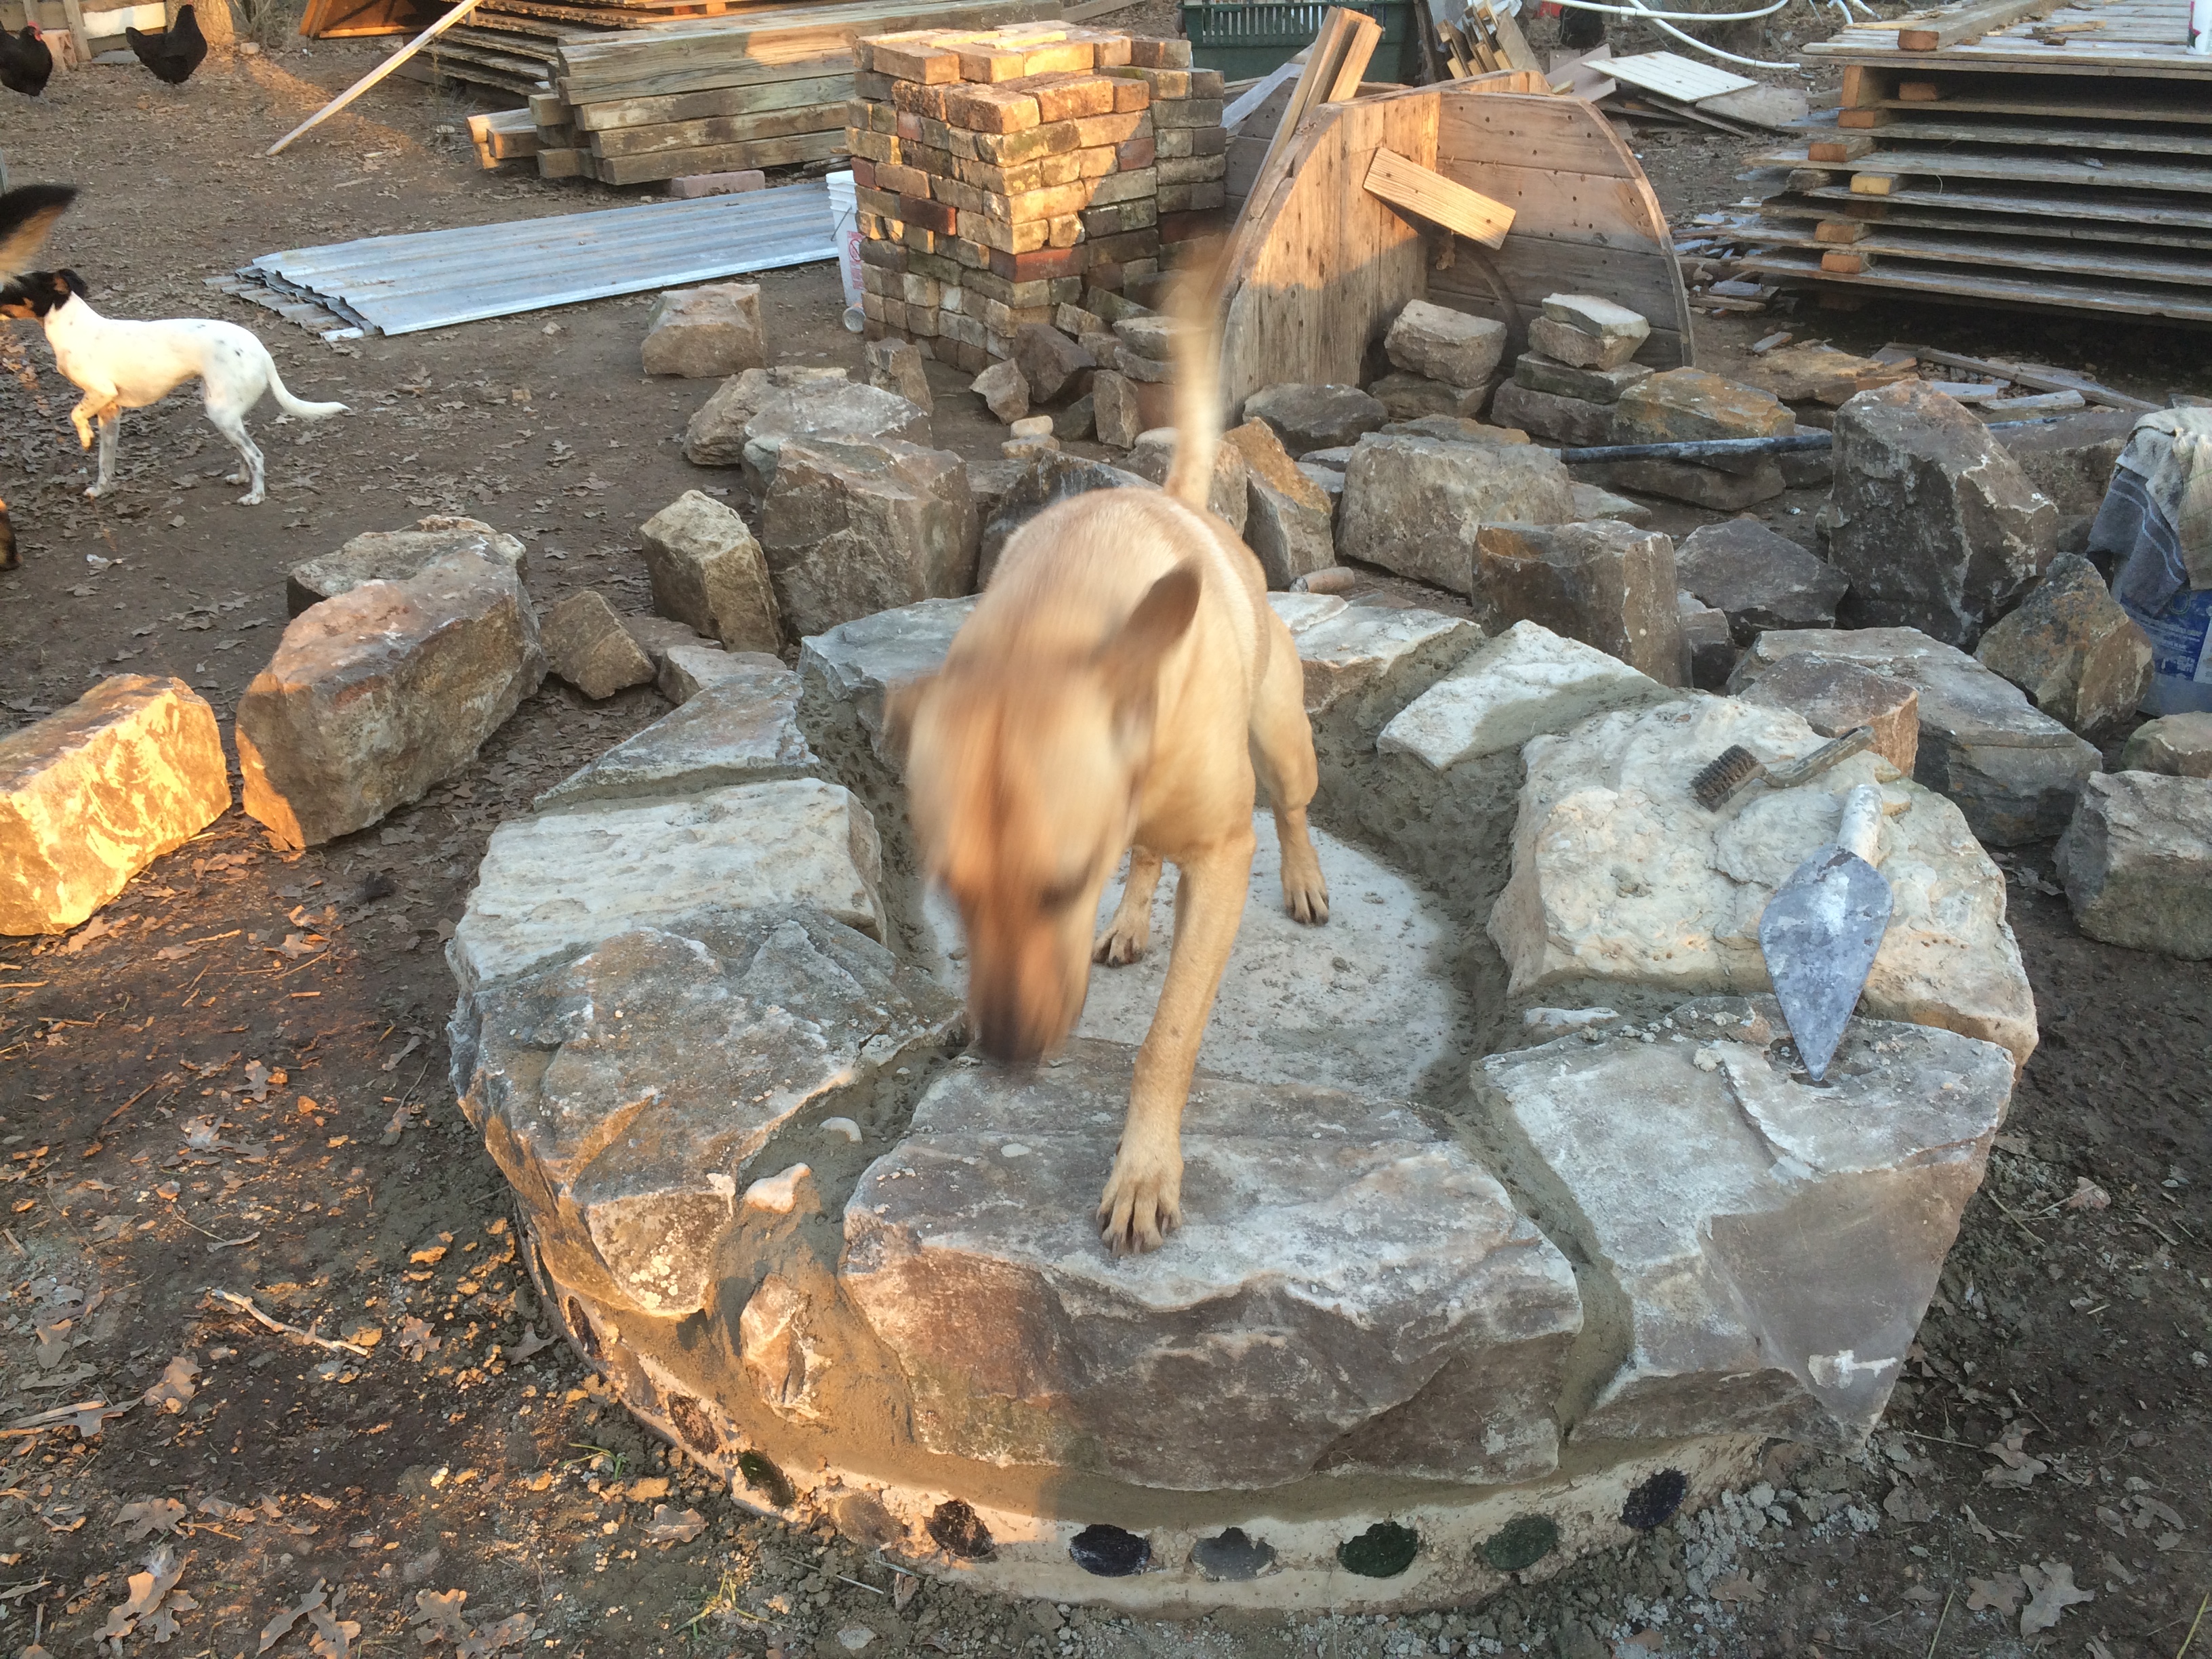
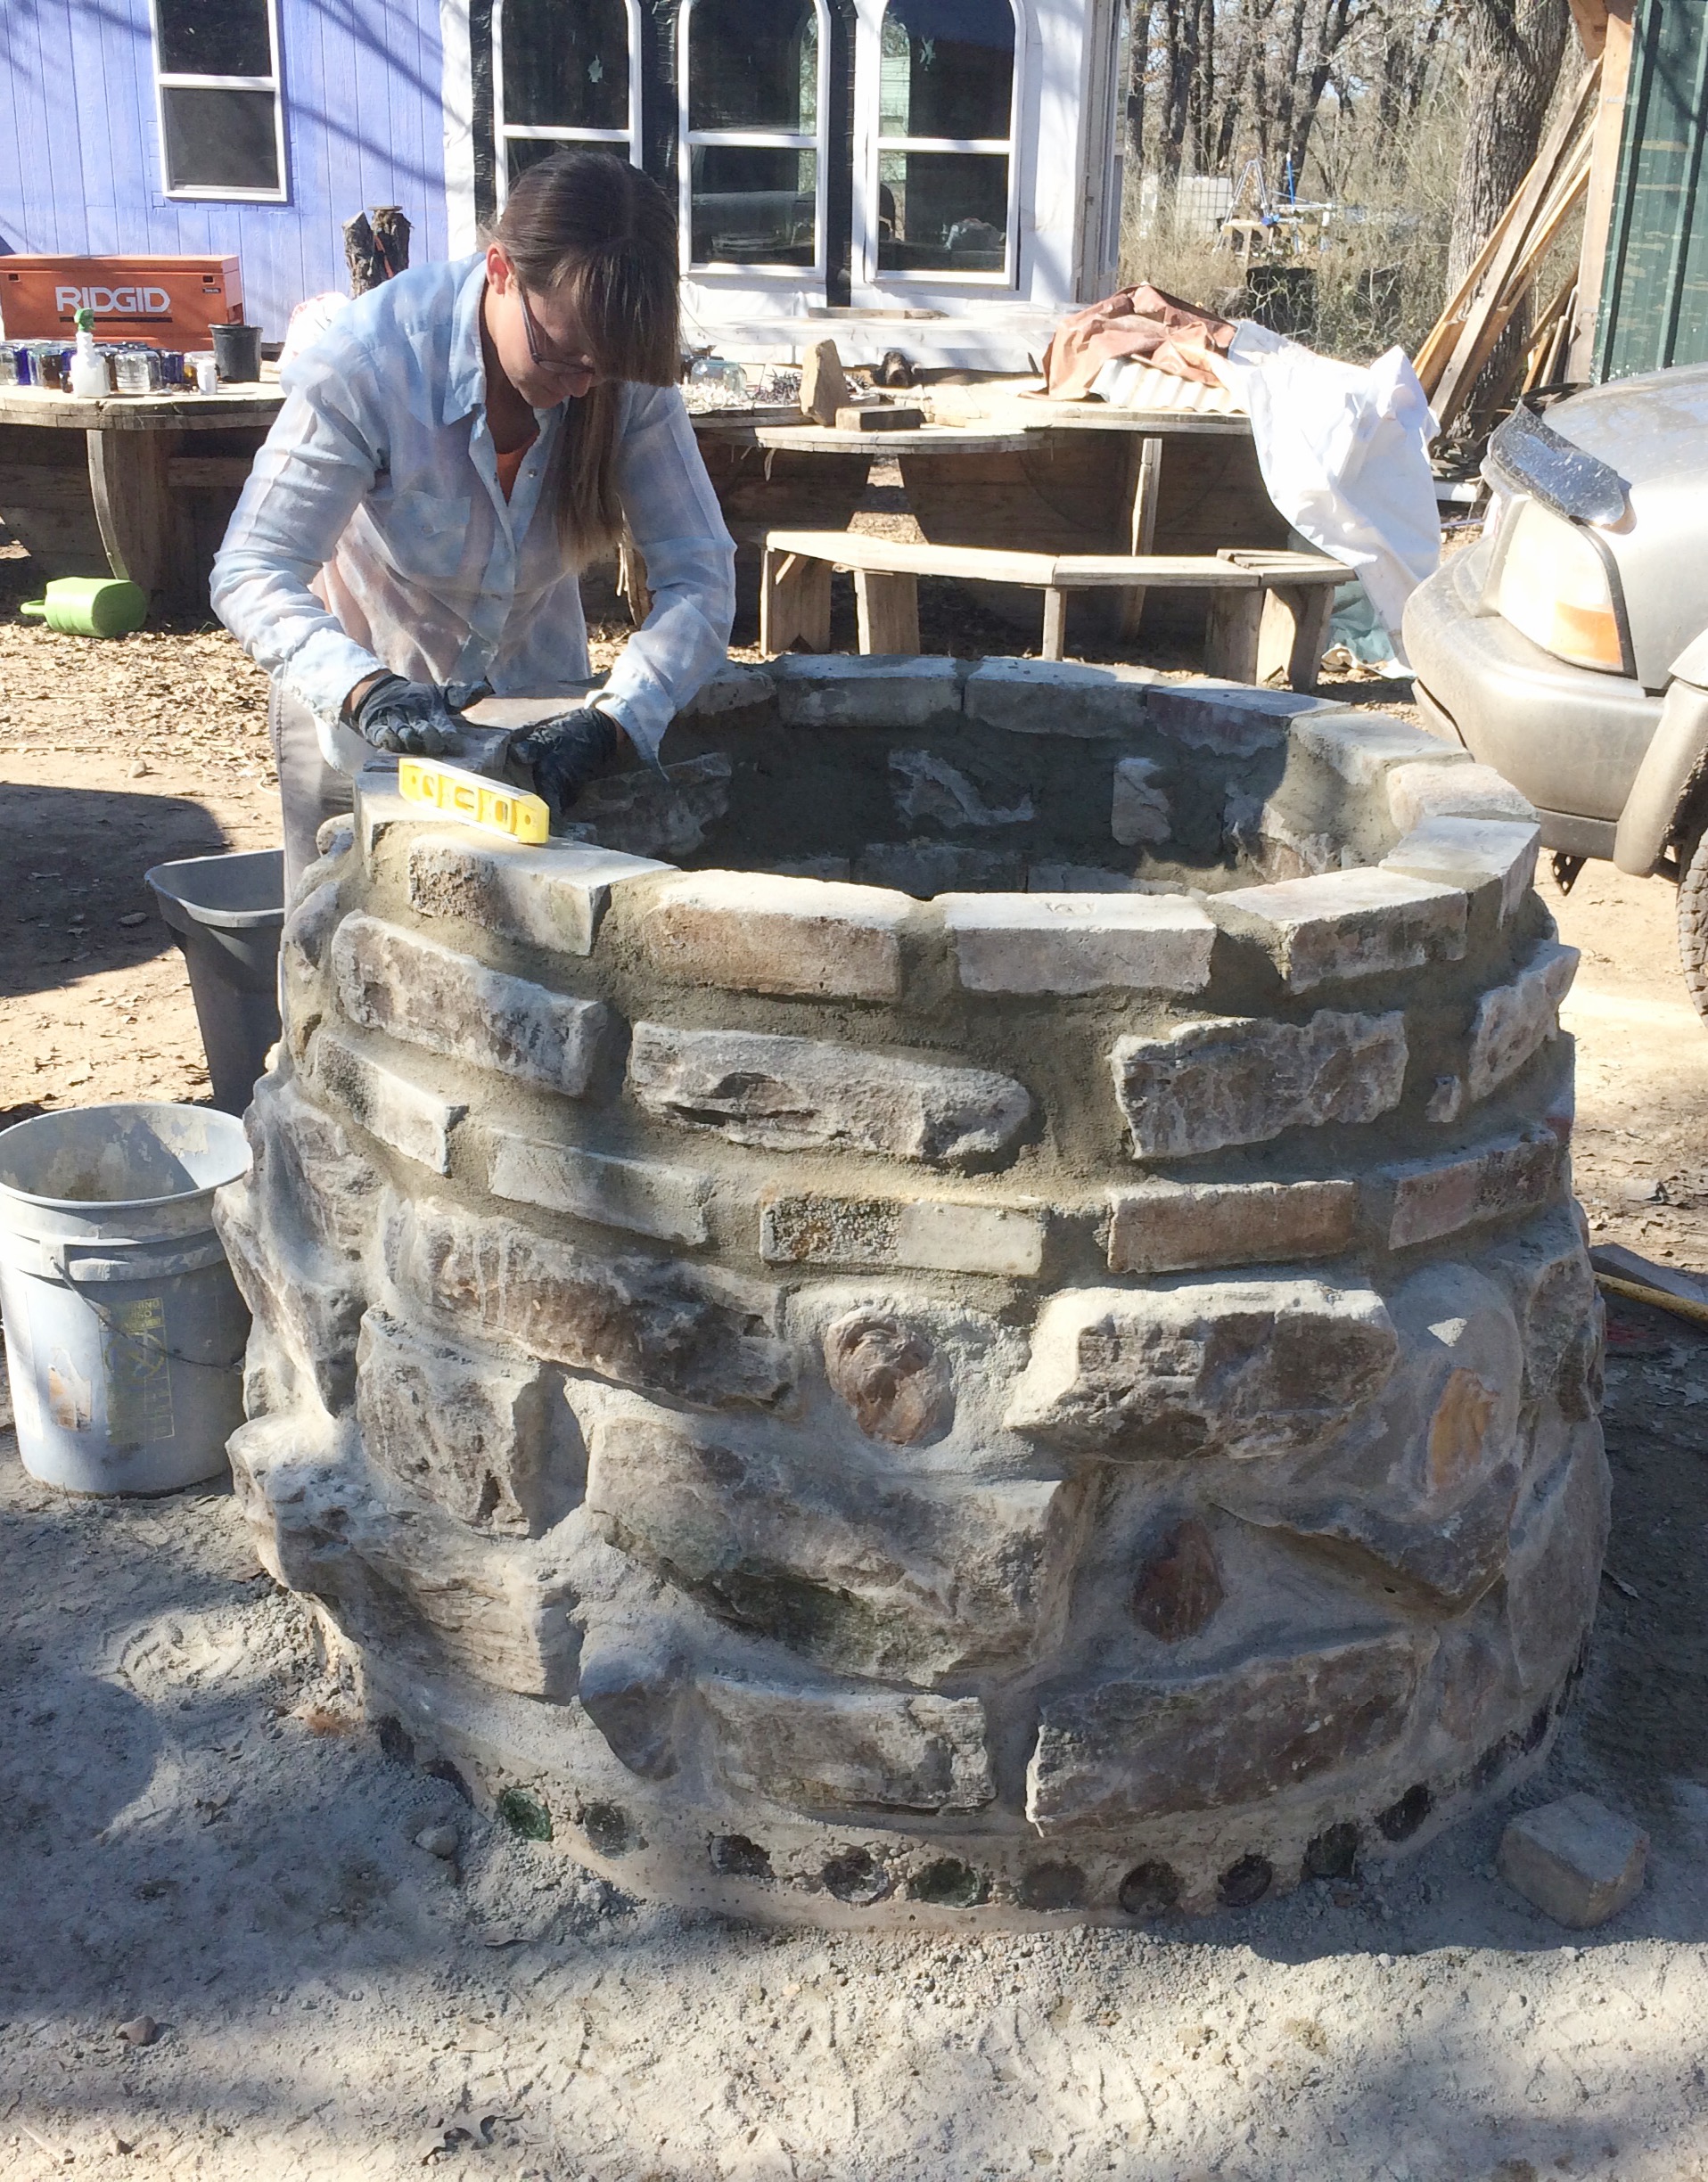
We began mortaring in the blocks, one tier at a time, spending hours fitting the stones together with minimal gaps and maximum stability/levelness.
Lily hanging out inside of tier one – the largest & thickest foundation blocks
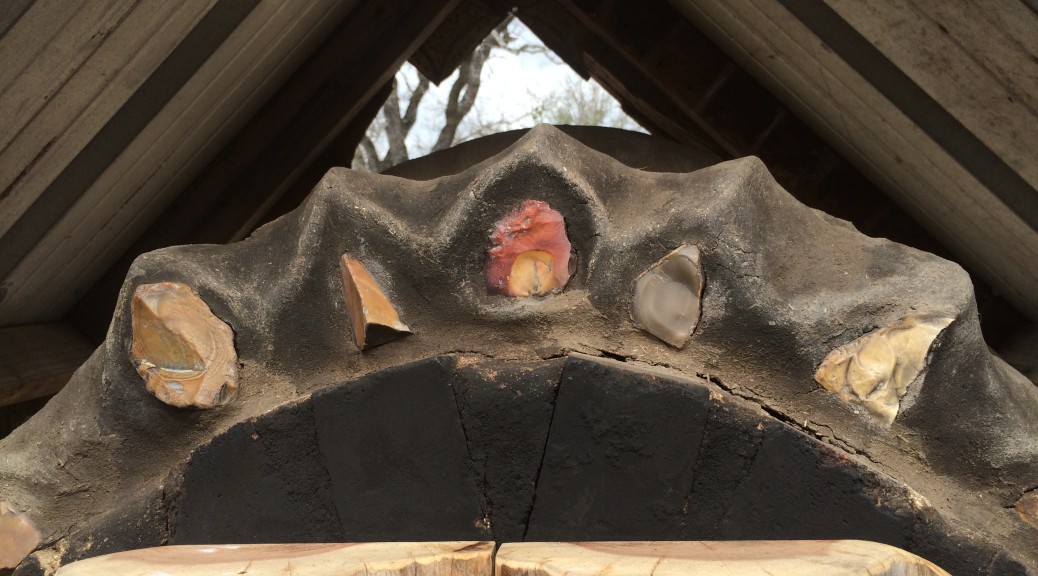
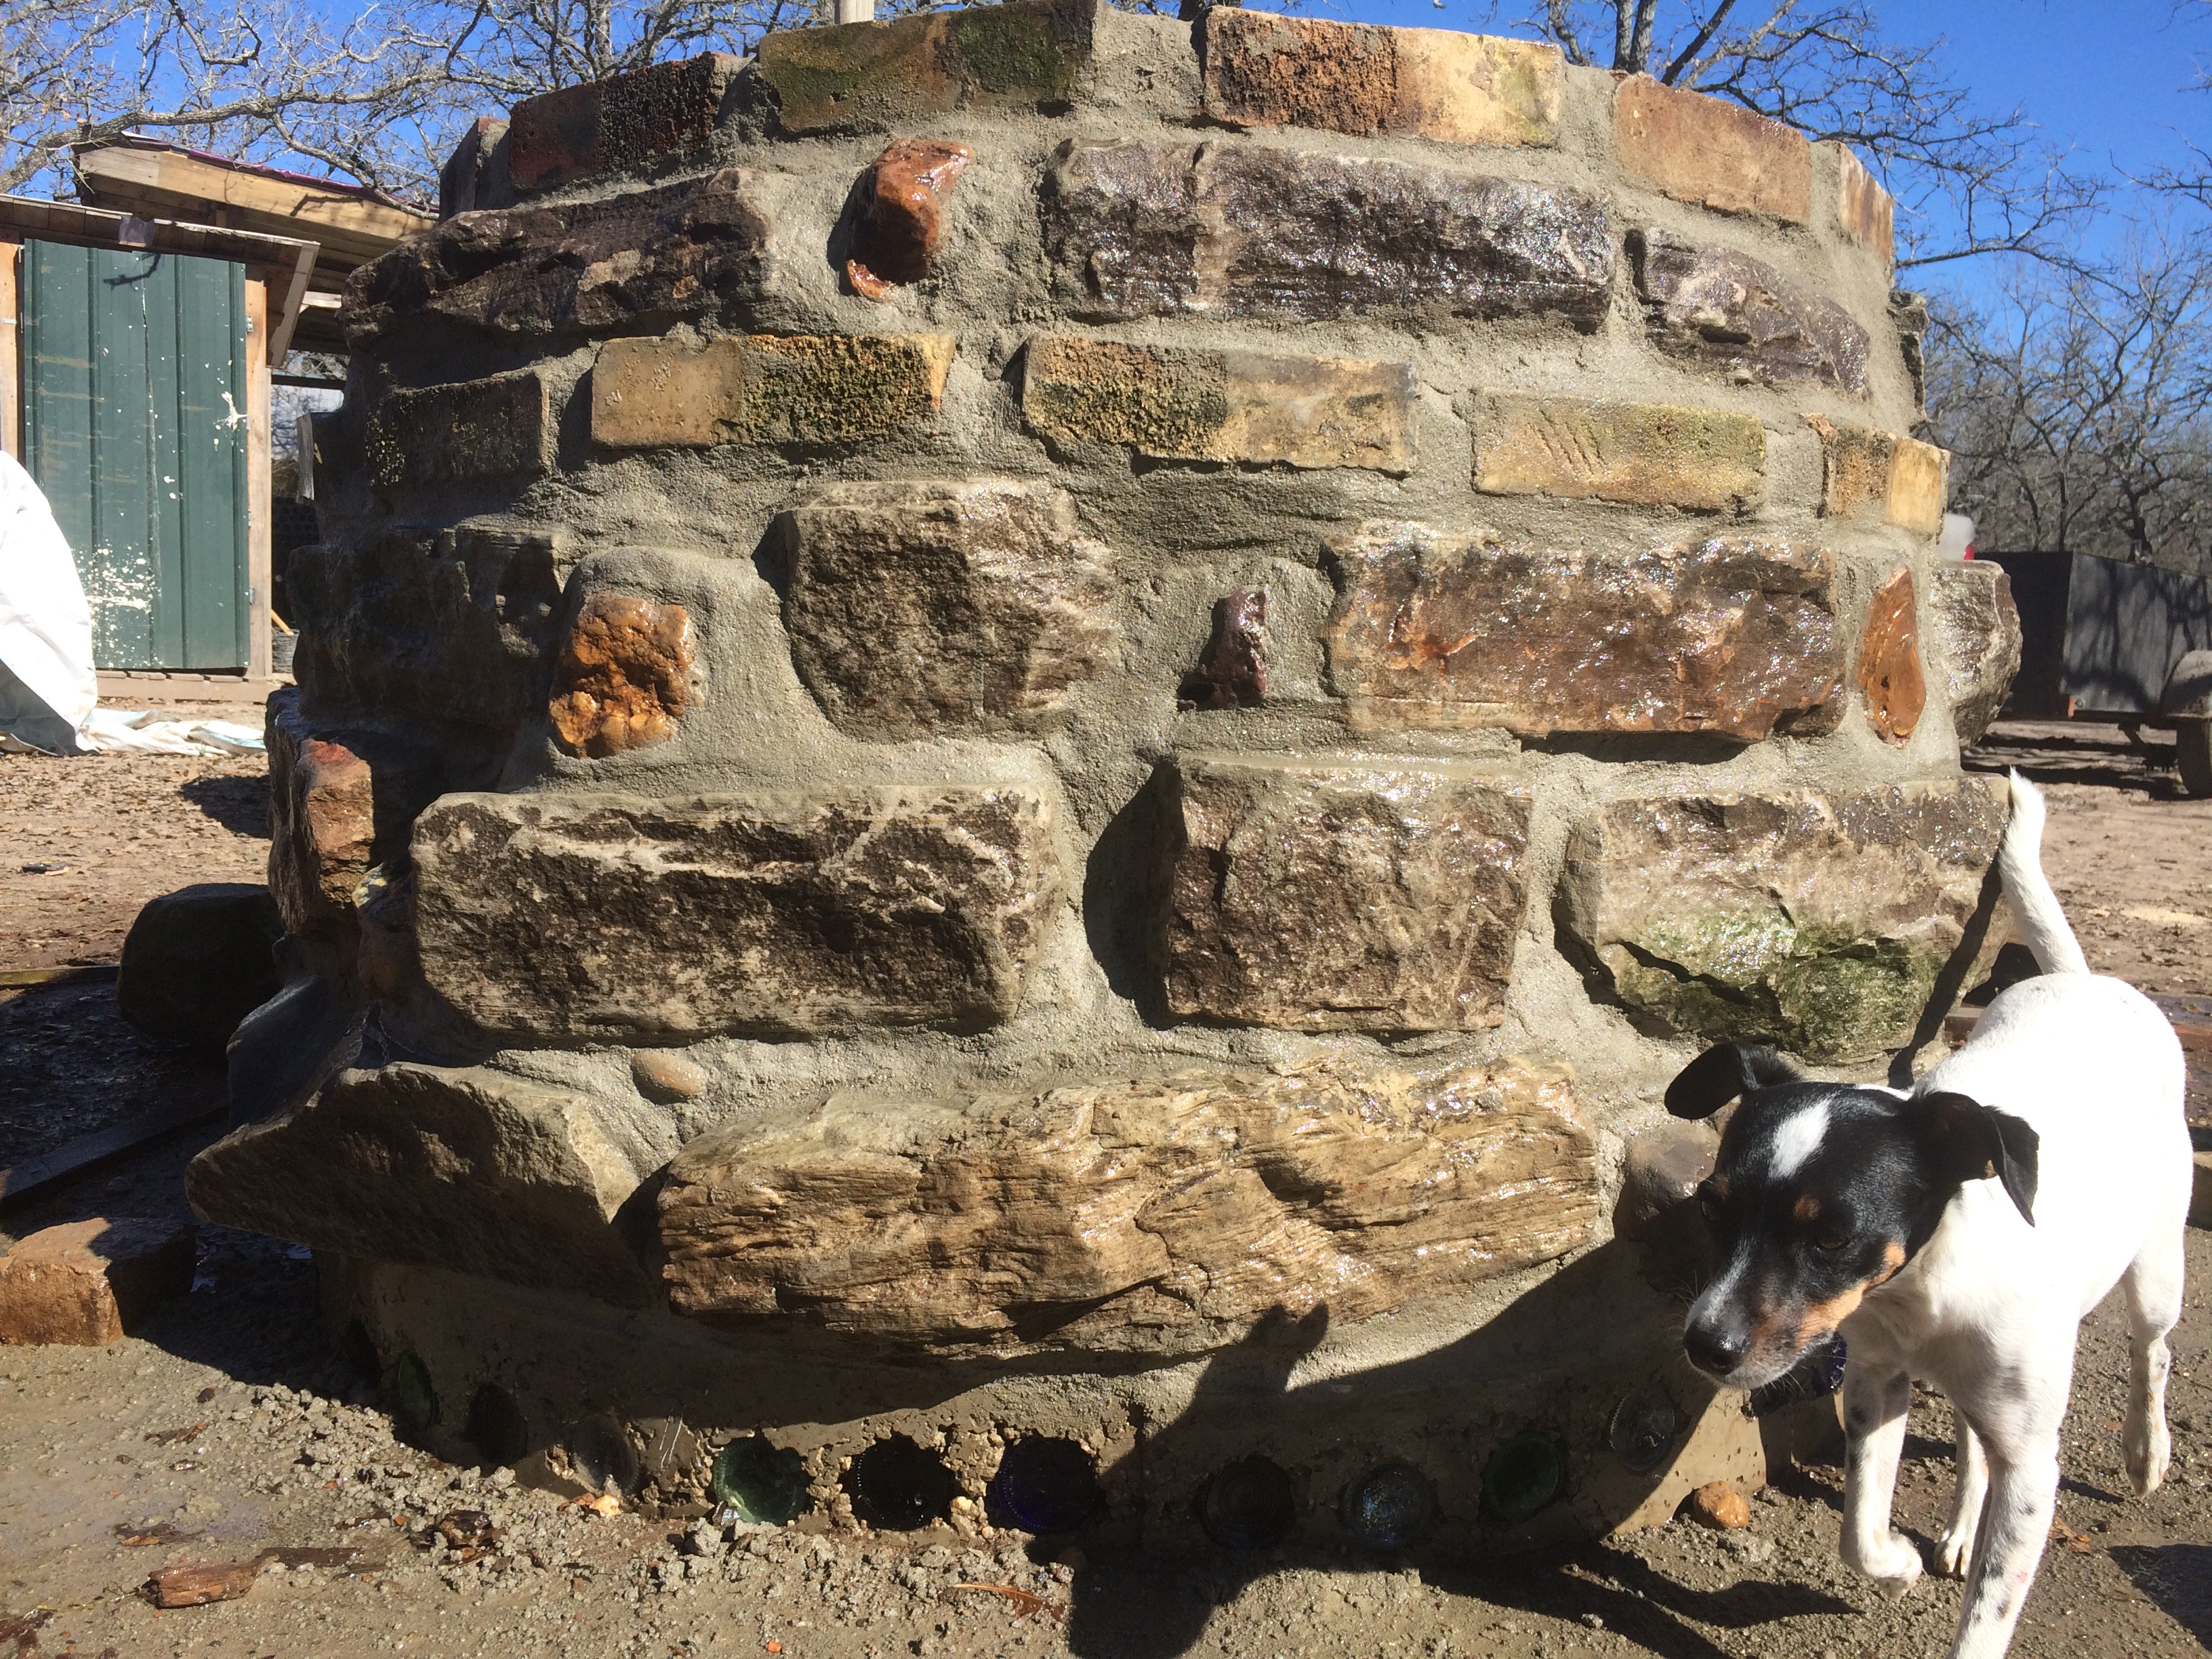
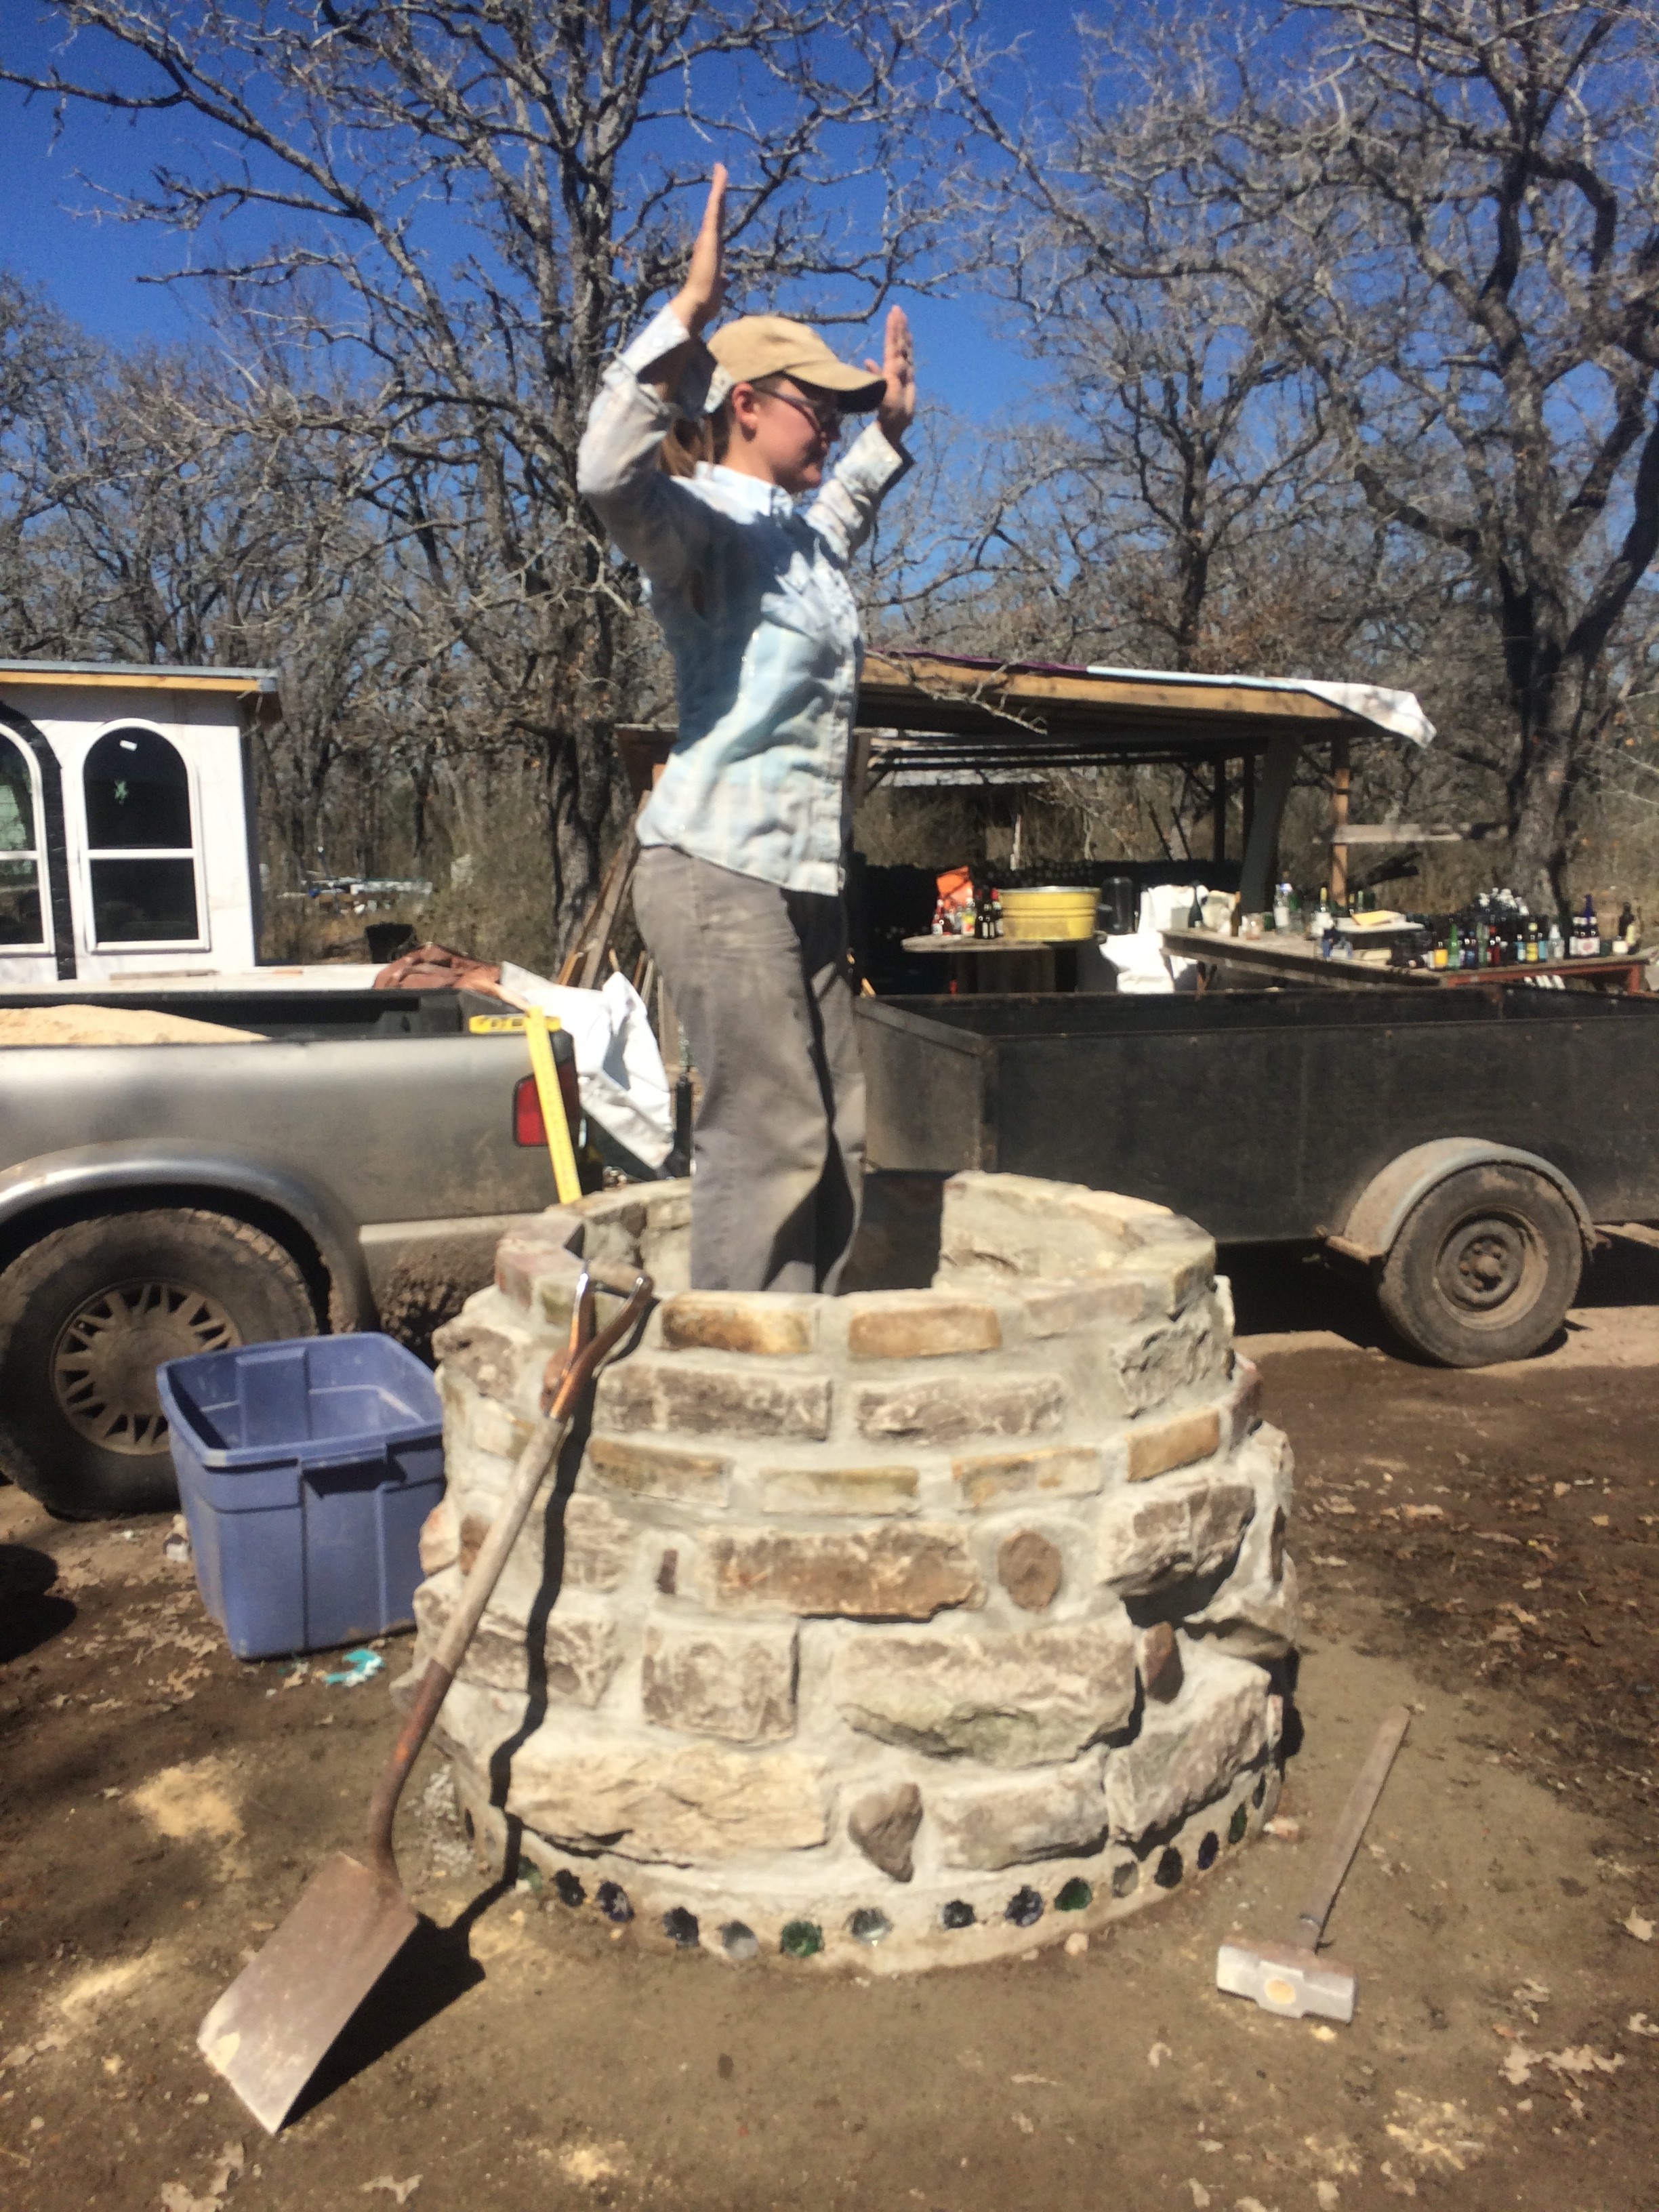
as we neared the top, we worked in two tiers of old homestead bricks – and were proud (& sort of amazed!) when the top was level across from side to side in all directions
we filled gaps with flame-colored flint rocks, thinking they looked ember-esque. (The true color of the blocks shows most clearly when wet – it will be some time before the chalky mortar dust finishes washing off)
Next we mixed the first batch of insulation – clay slip and pine shavings – the shavings dry up and even burn out completely, leaving air pockets and a clay-foam heat barrier.
mixing insulation from clay slip & pine shavings
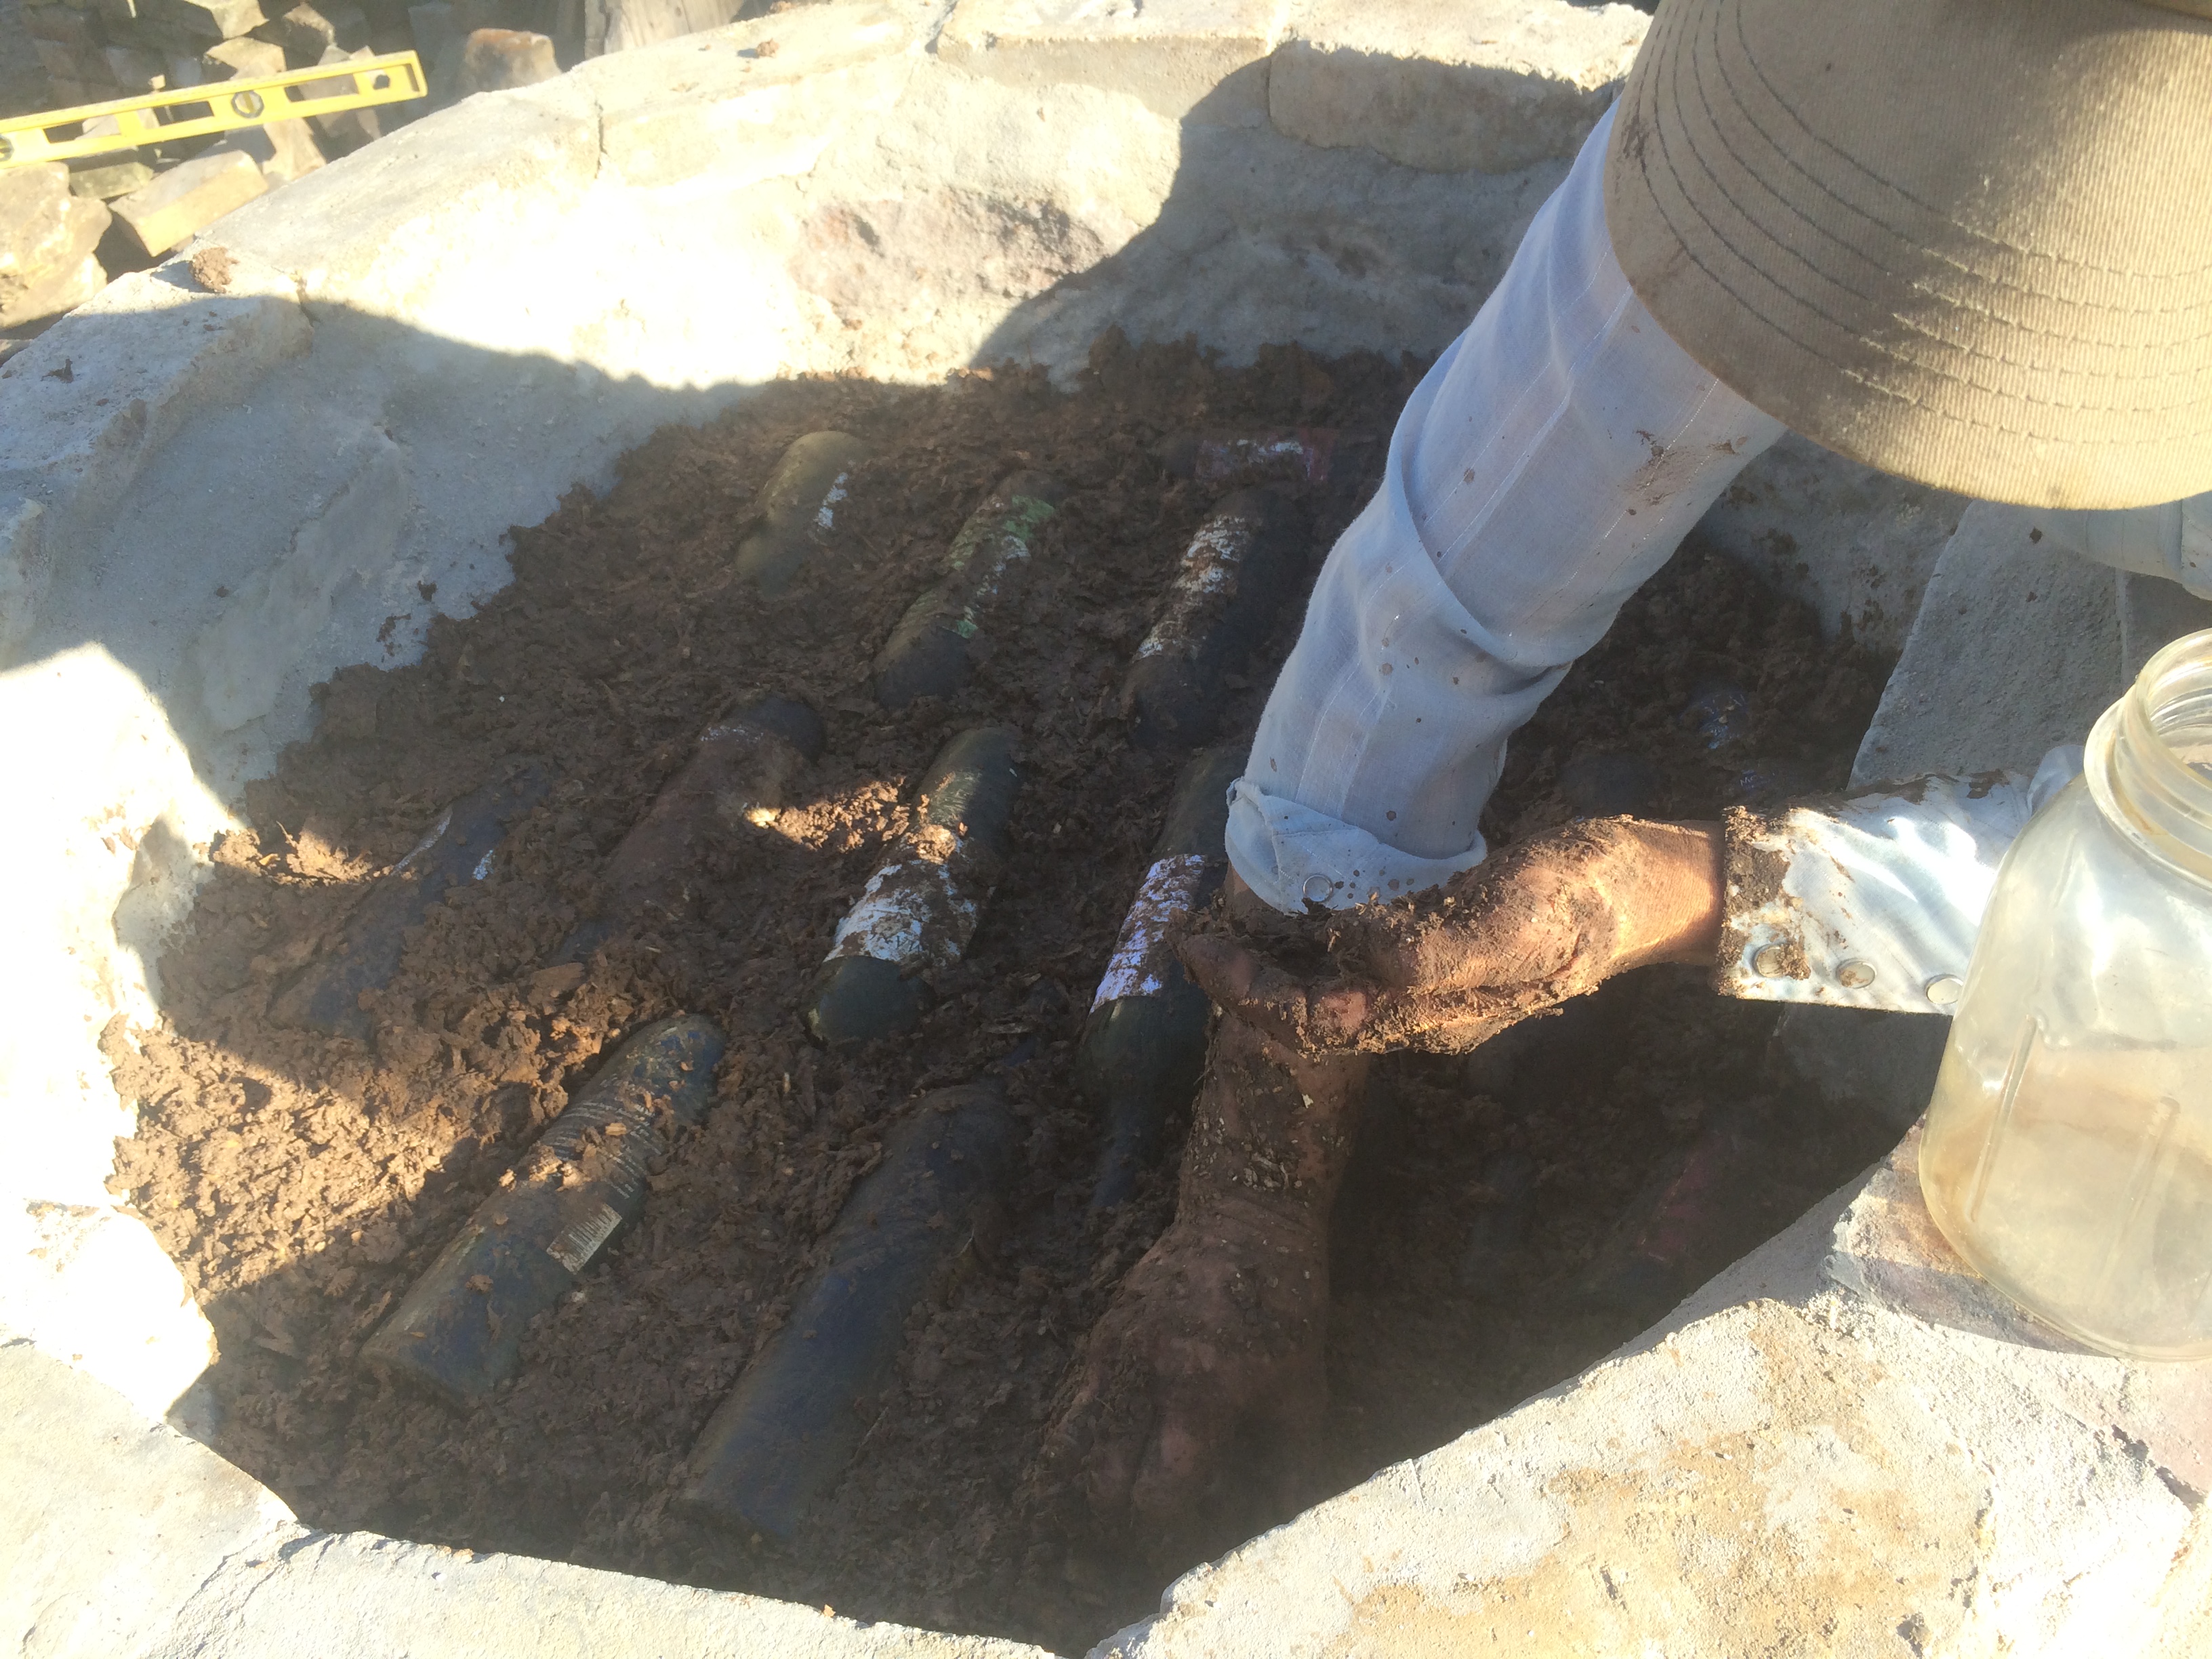
The insulating clay was used to fill a foot-deep layer designed to prevent the infinite thermal heat sink of the ground from leaching away the oven’s heat. We included a layer of wine bottles, and a layer of beer bottles (from the bottle house supply pile) – these would form stable insulating air pockets within the insulation clay.
wine bottle layer being filled in with clay slip/wood shaving insulation mud
we’d found a racoon skull in the woods back in January – the scavenger spirits wanted it included within the base, so we packed it with sand and tucked it in, where it will likely remain for a century or two …
Kristin does the Tamping Dance – we filled the lower base with a mix of sand and crushed glass (necks left over from bottle bricks used in the ongoing bottle-house construction, visible in the background)
Once we got within four inches of the top of the base, we paused to mix up a batch of “oven mud” – clay and coarse sand. Oven mud clay is designed to hold heat for baking – it would be roughly the same clay used to build the interior of the oven dome, later on.
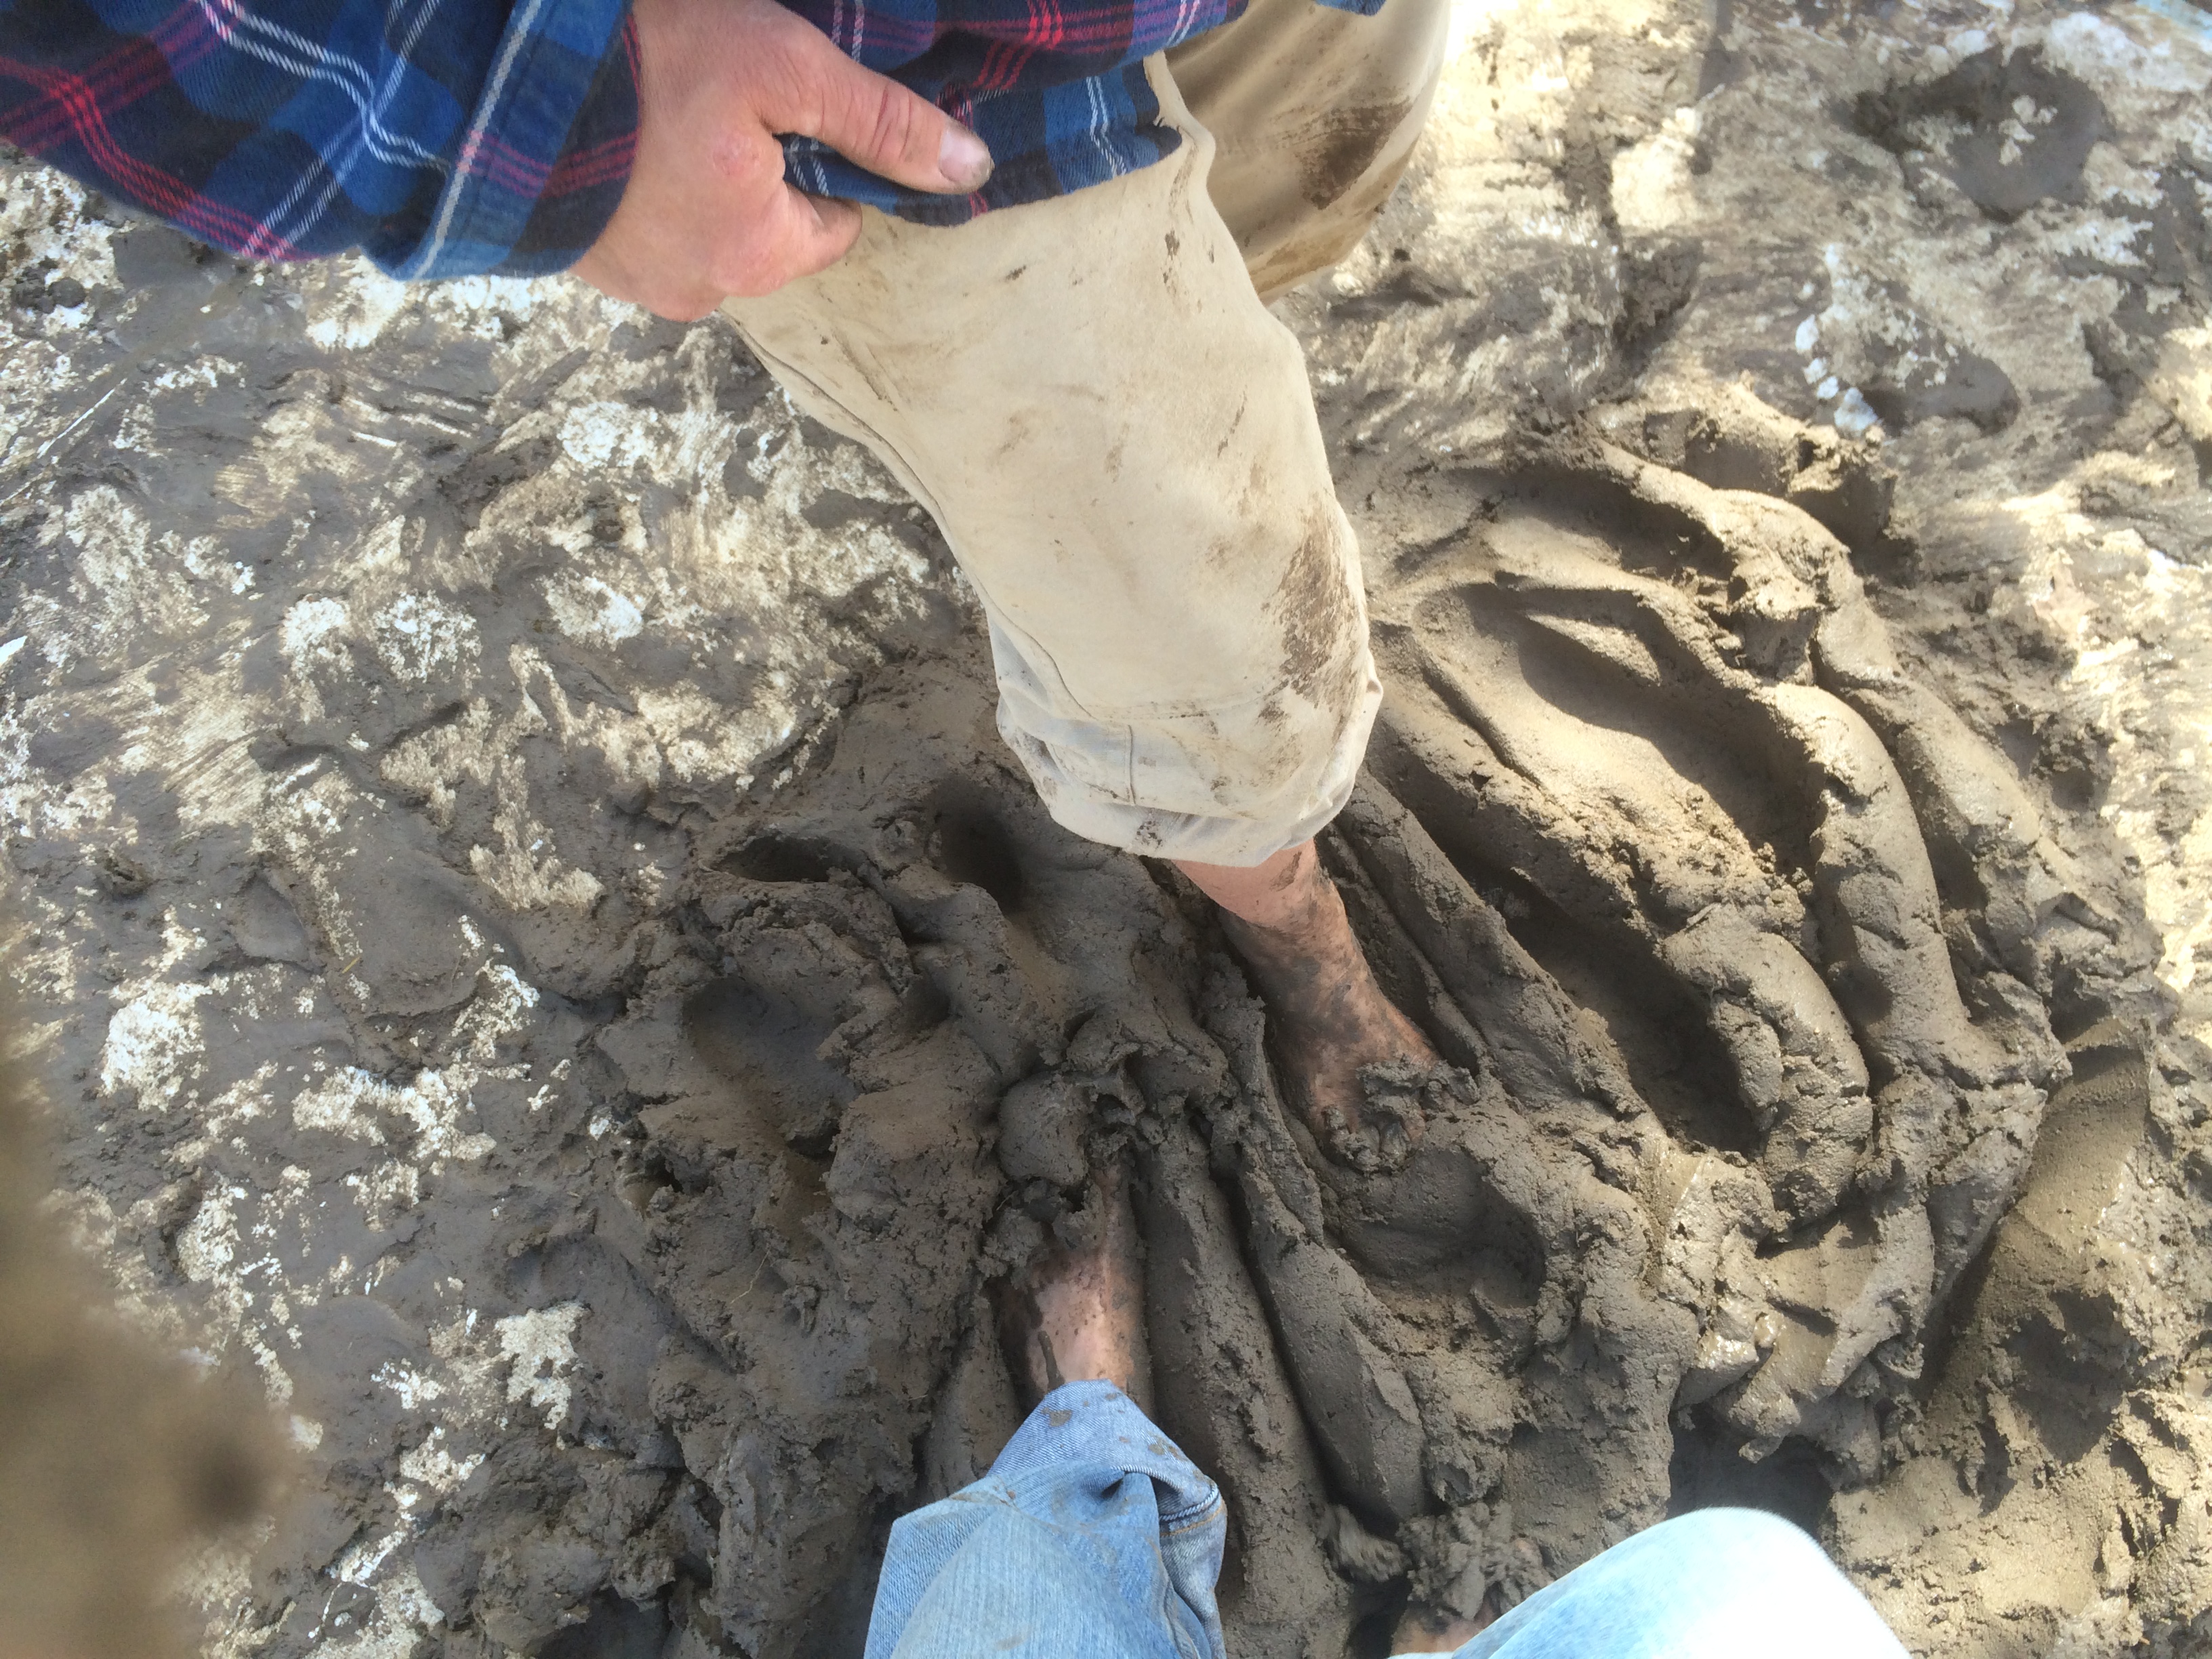
it turned out that mixing oven mud barefoot was not the happy hippie dance party that we’d been led to believe it would be.
The sand we were using was quite rough & coarse – ideal for structural stability, but also quite good at abrading one’s feet completely off. We quickly switched to our rubber muck boots for stomp-mixing. (It might have been easier if the mix was wetter, but we wanted to avoid slumping and long drying times, so we kept it as dry as possible.)
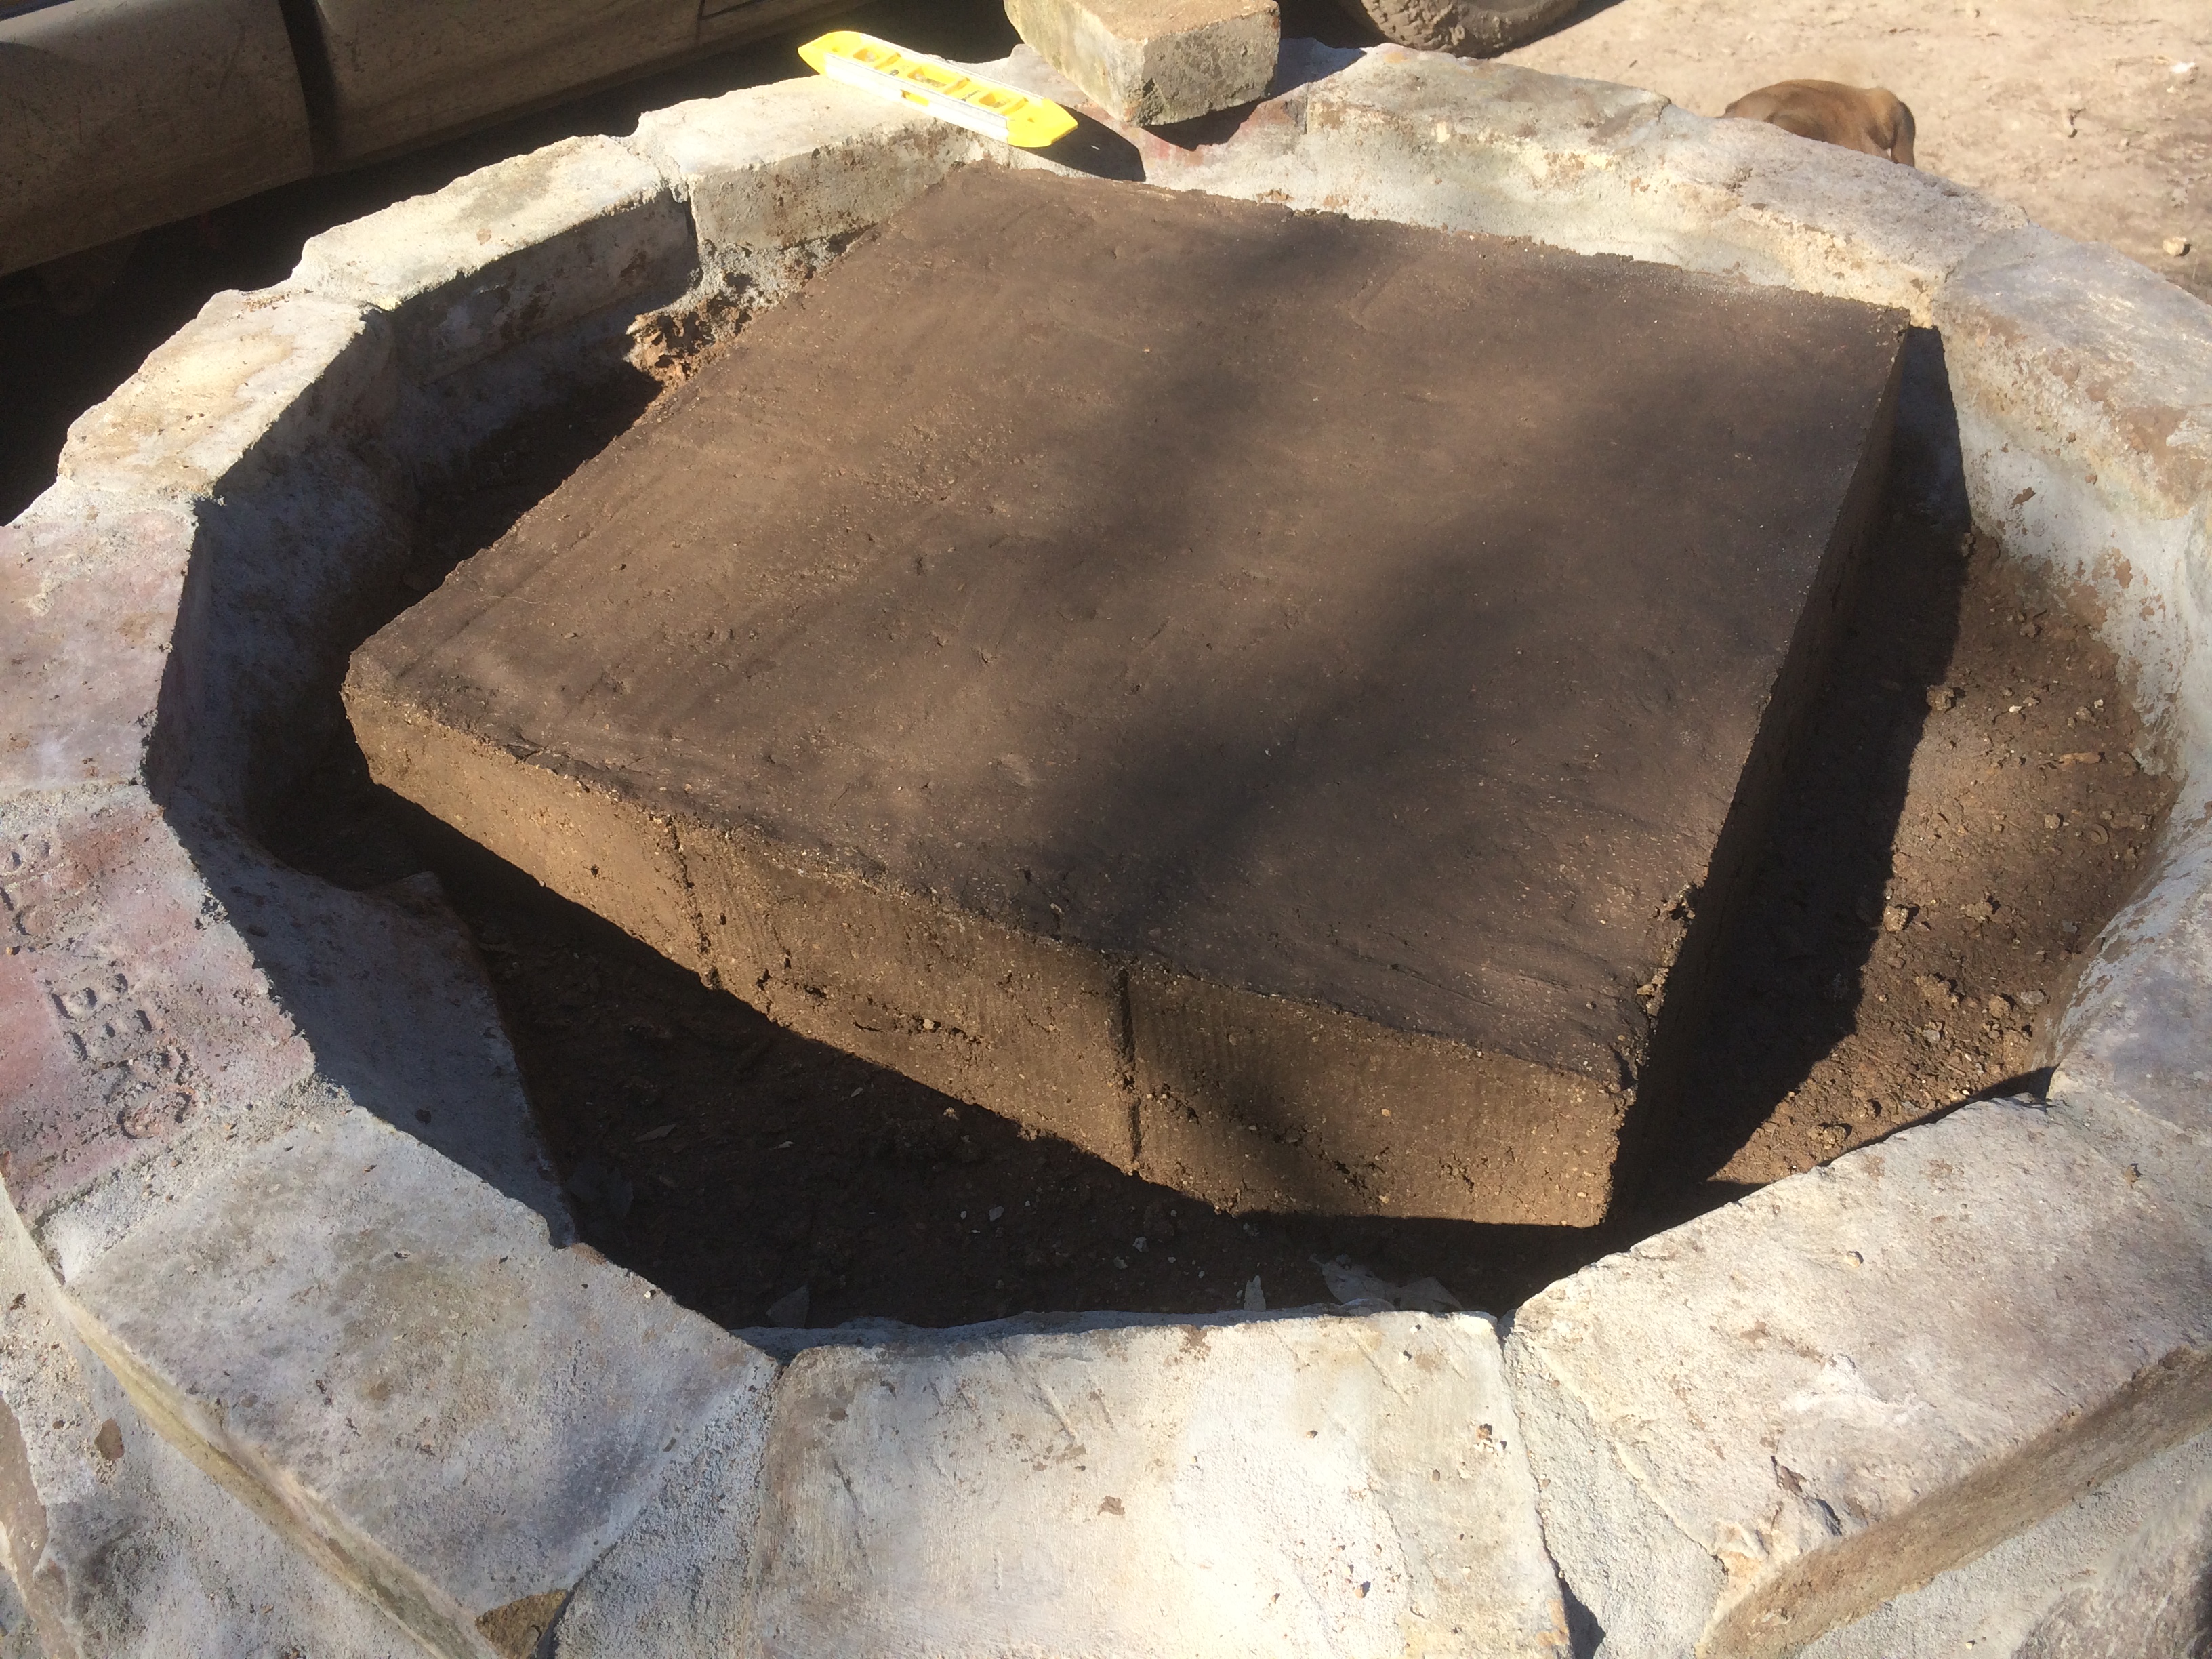
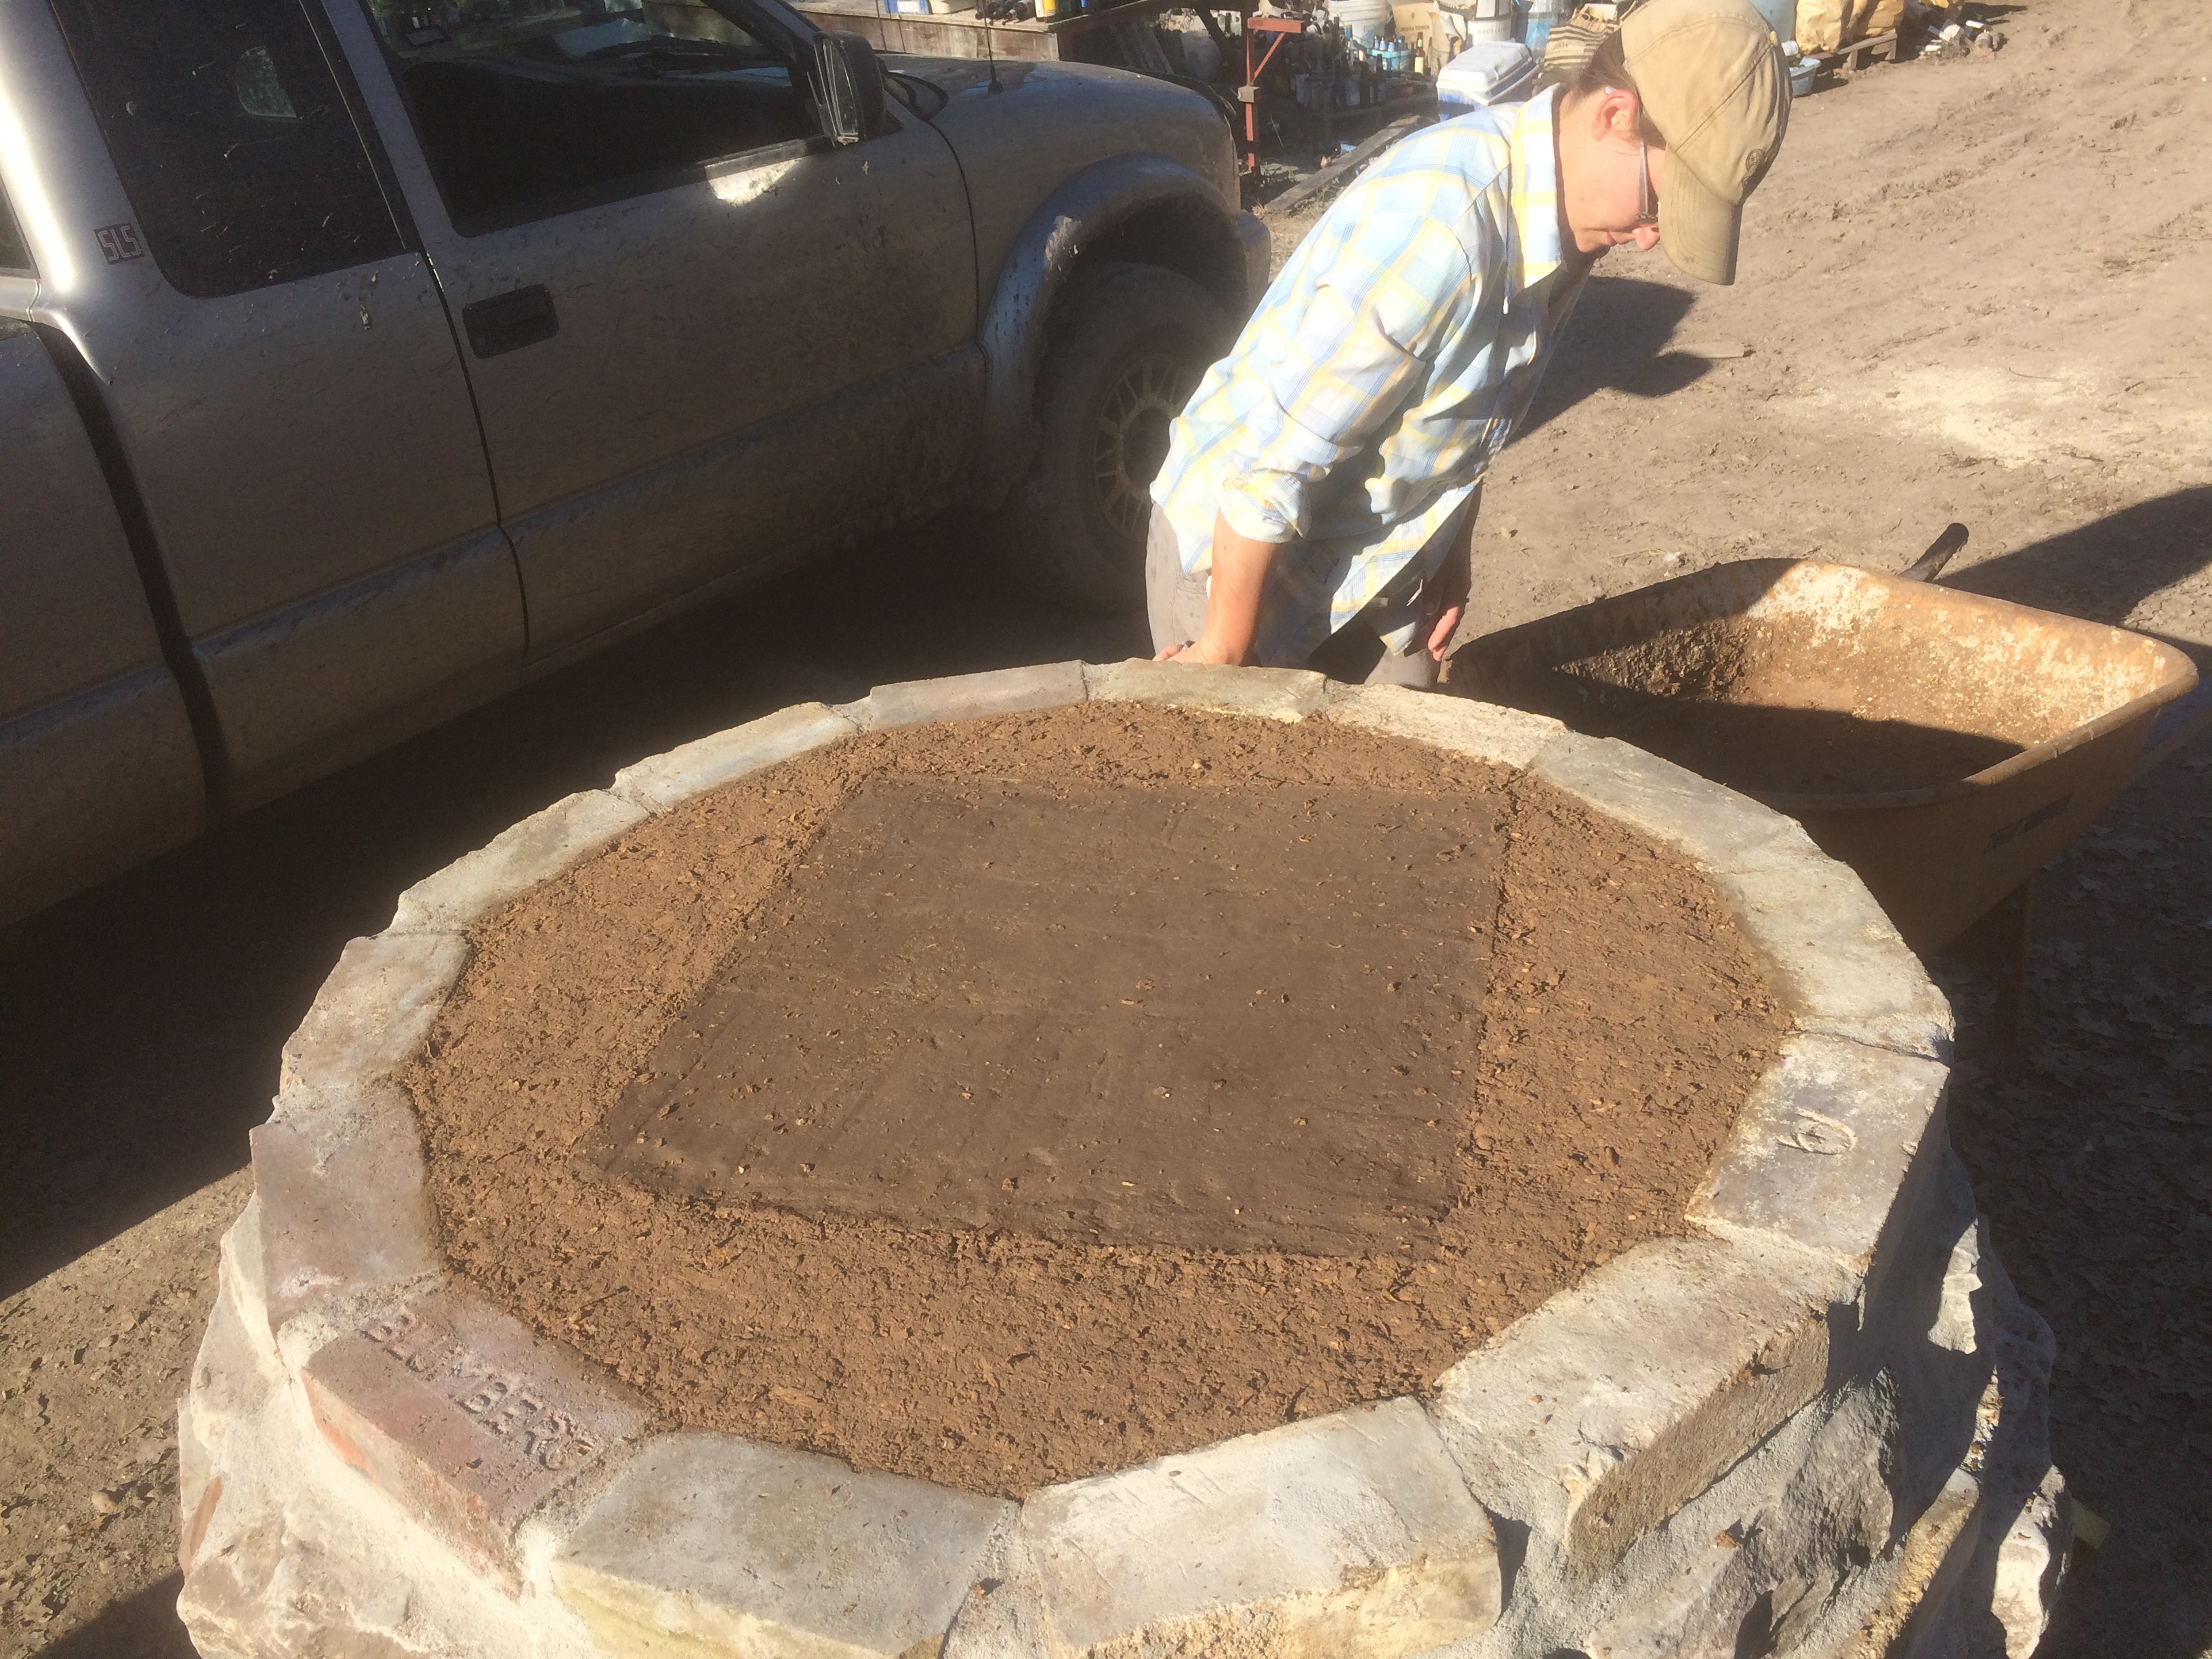
The first batch of oven mud was used to make an oven pad, in the same dimensions as the firebrick interior baking floor would have (we laid out the firebricks on the ground to determine the measurements).
We created a wood frame and packed it with the oven mud to make a subfloor heat pad
Then we filled in the surrounding gaps with more insulation mix, keeping everything level with the top exterior bricks.
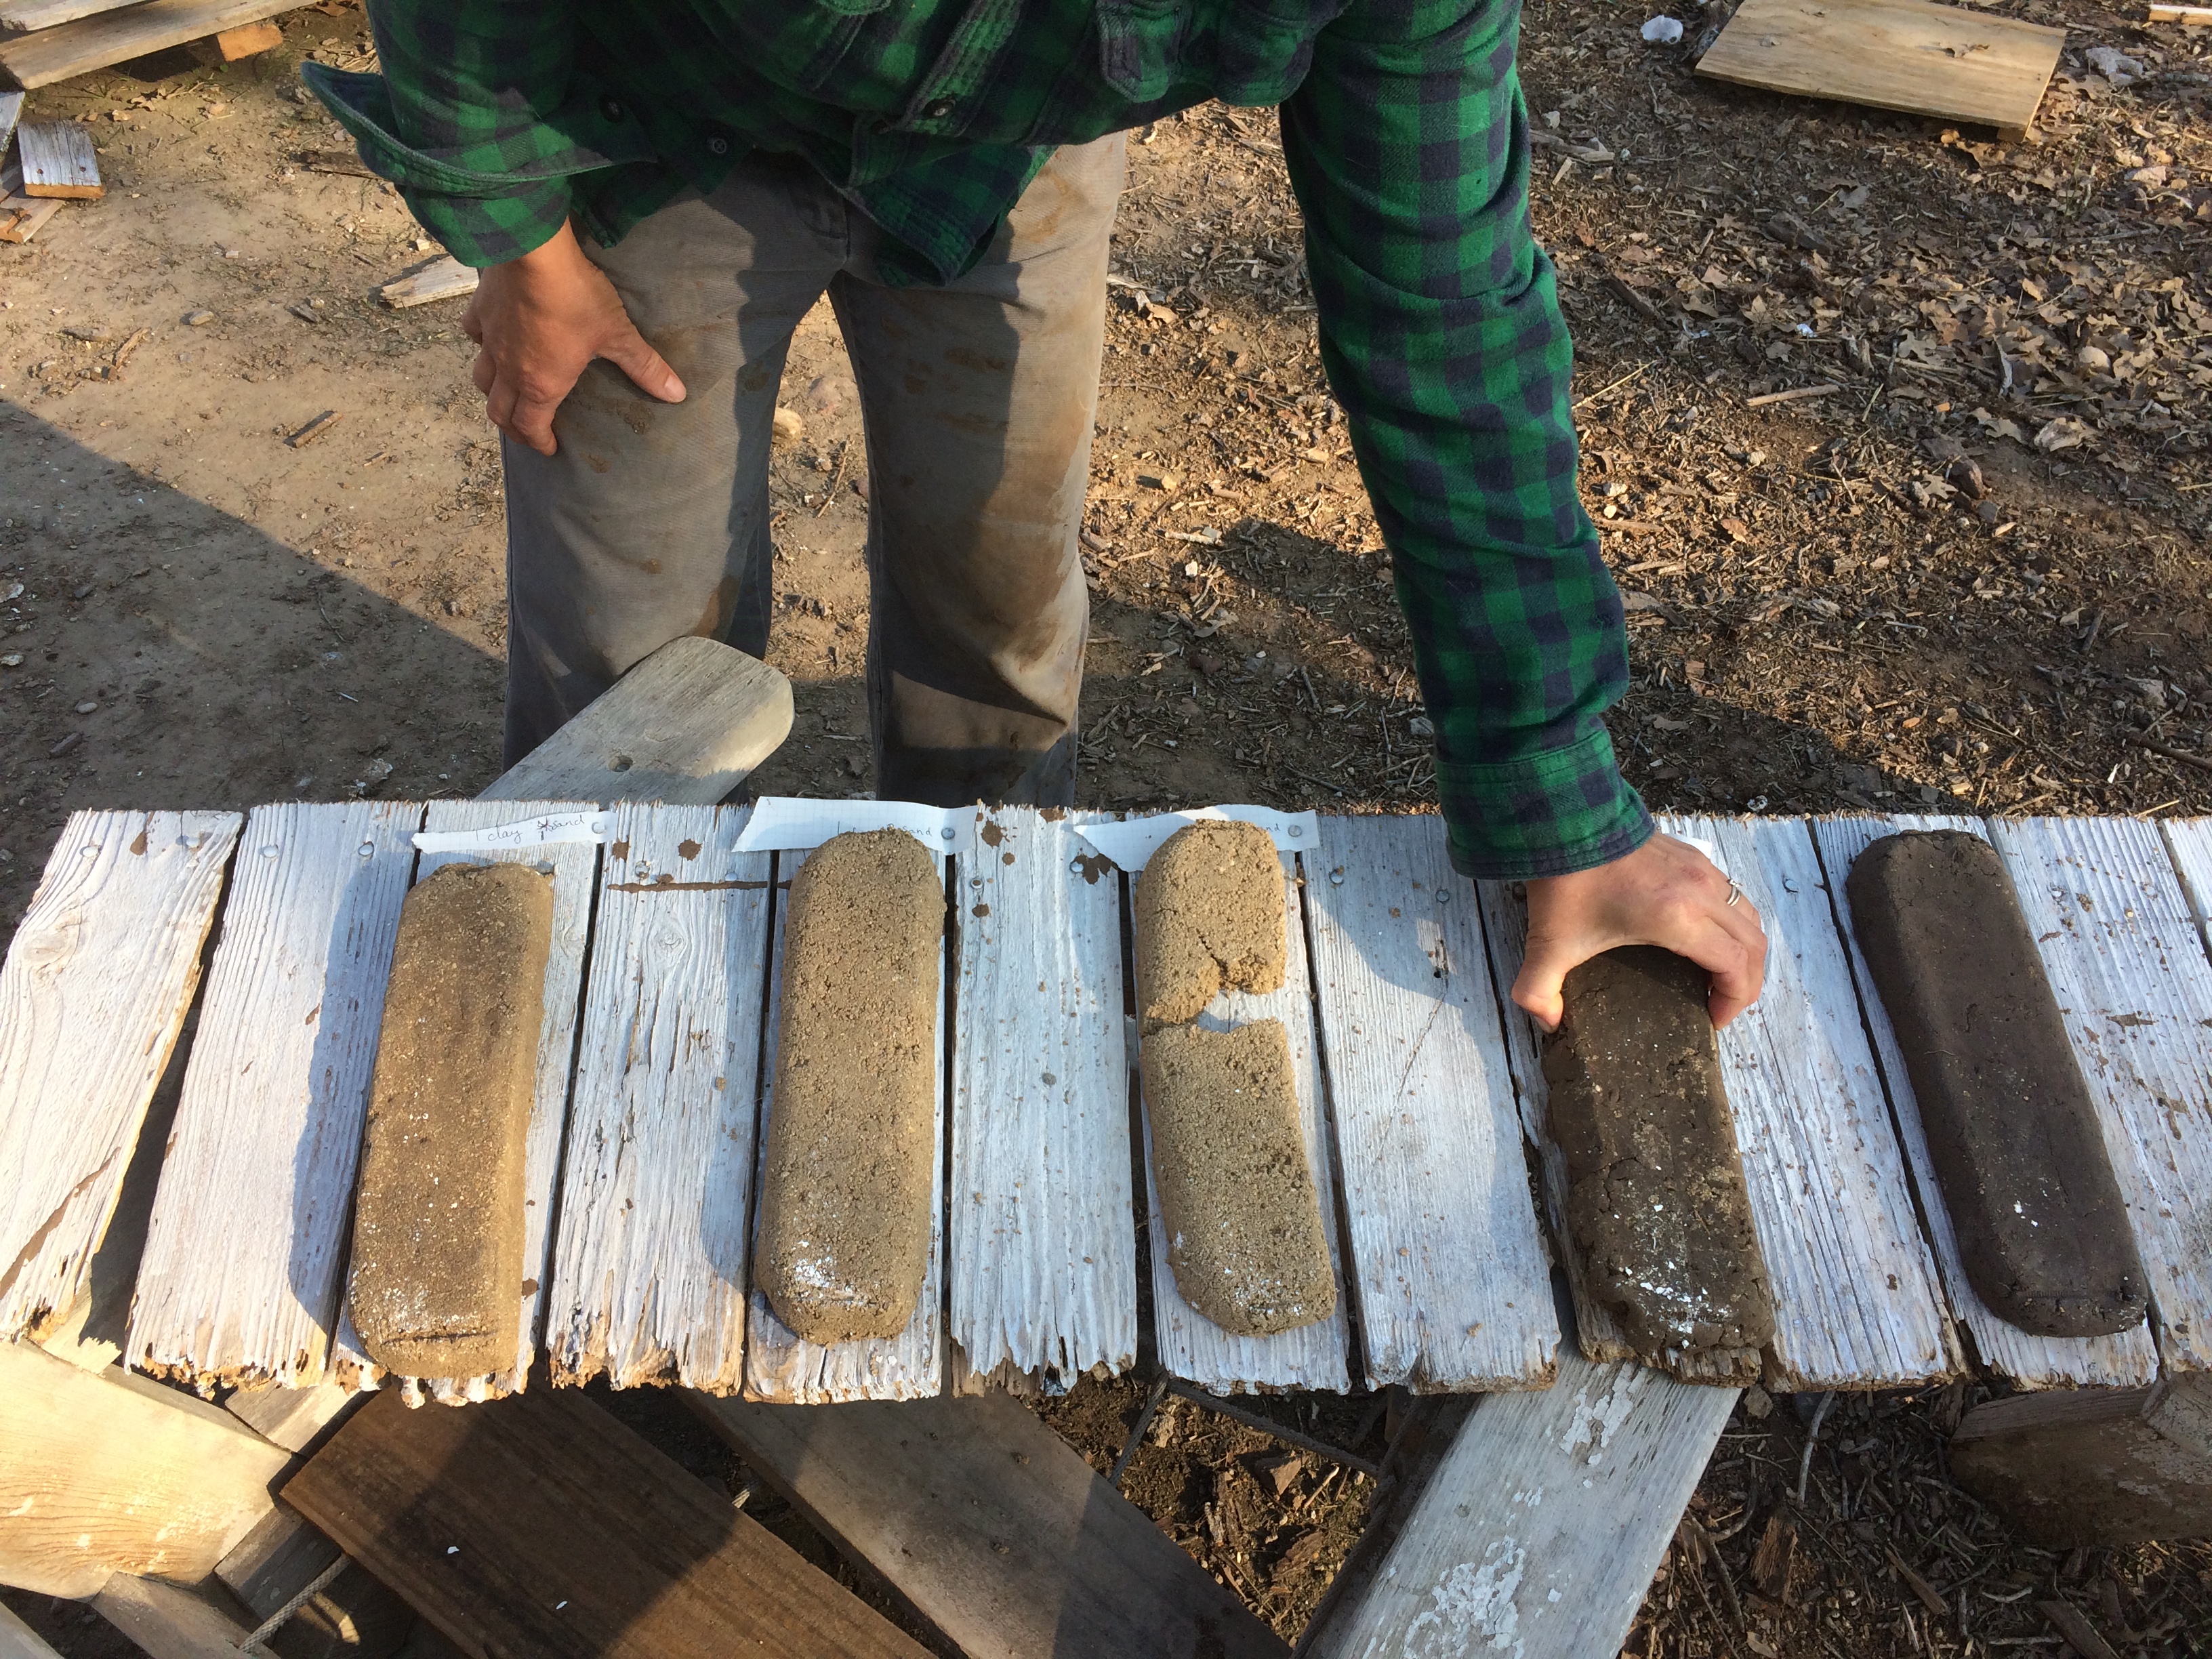
In the meantime, we’d created several “test bricks” with different proportions of sand and clay – as well as one of pure soil (from the layer above the clay, but beneath the topsoil).
For the oven interior dome, we wanted to find what ratio would be strongest, and crack or shrink the least. The bricks dried out over a couple of days while we prepared for next steps and gave the water-soaked base insulation time to dry out some.
We decided that a ratio of 1.5 parts sand to 1 part clay was our ideal target, based on the test bricks
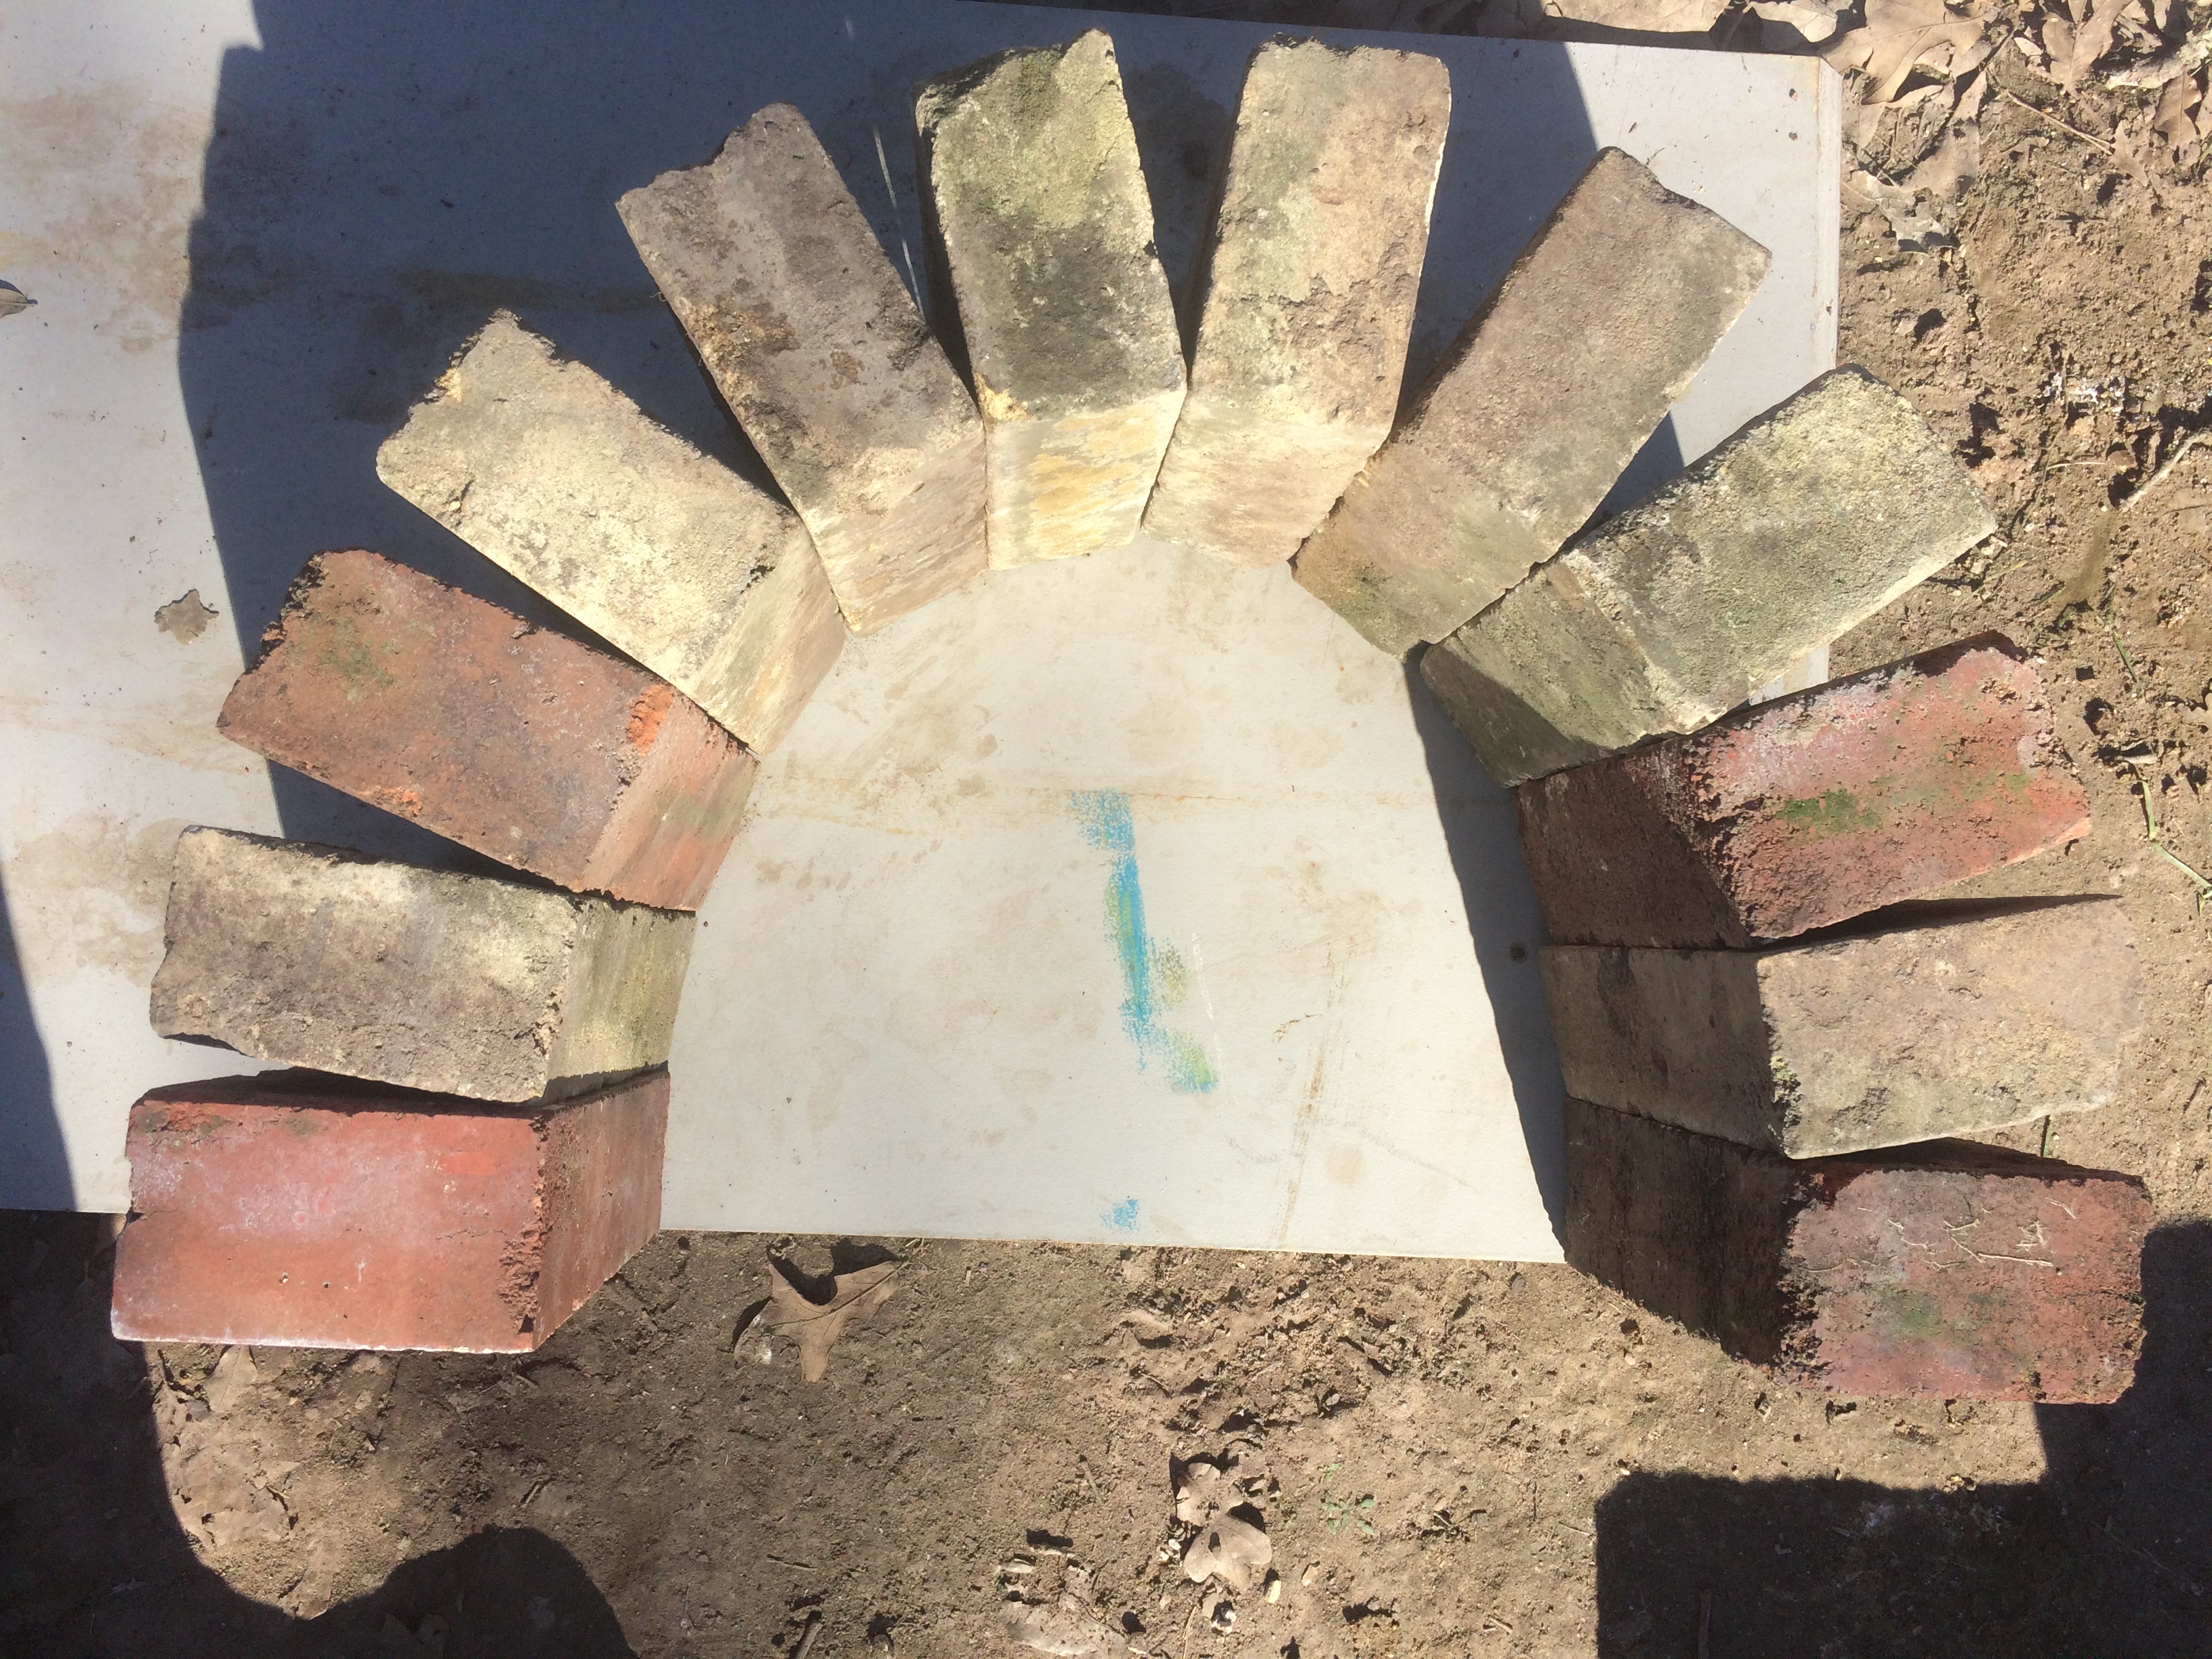
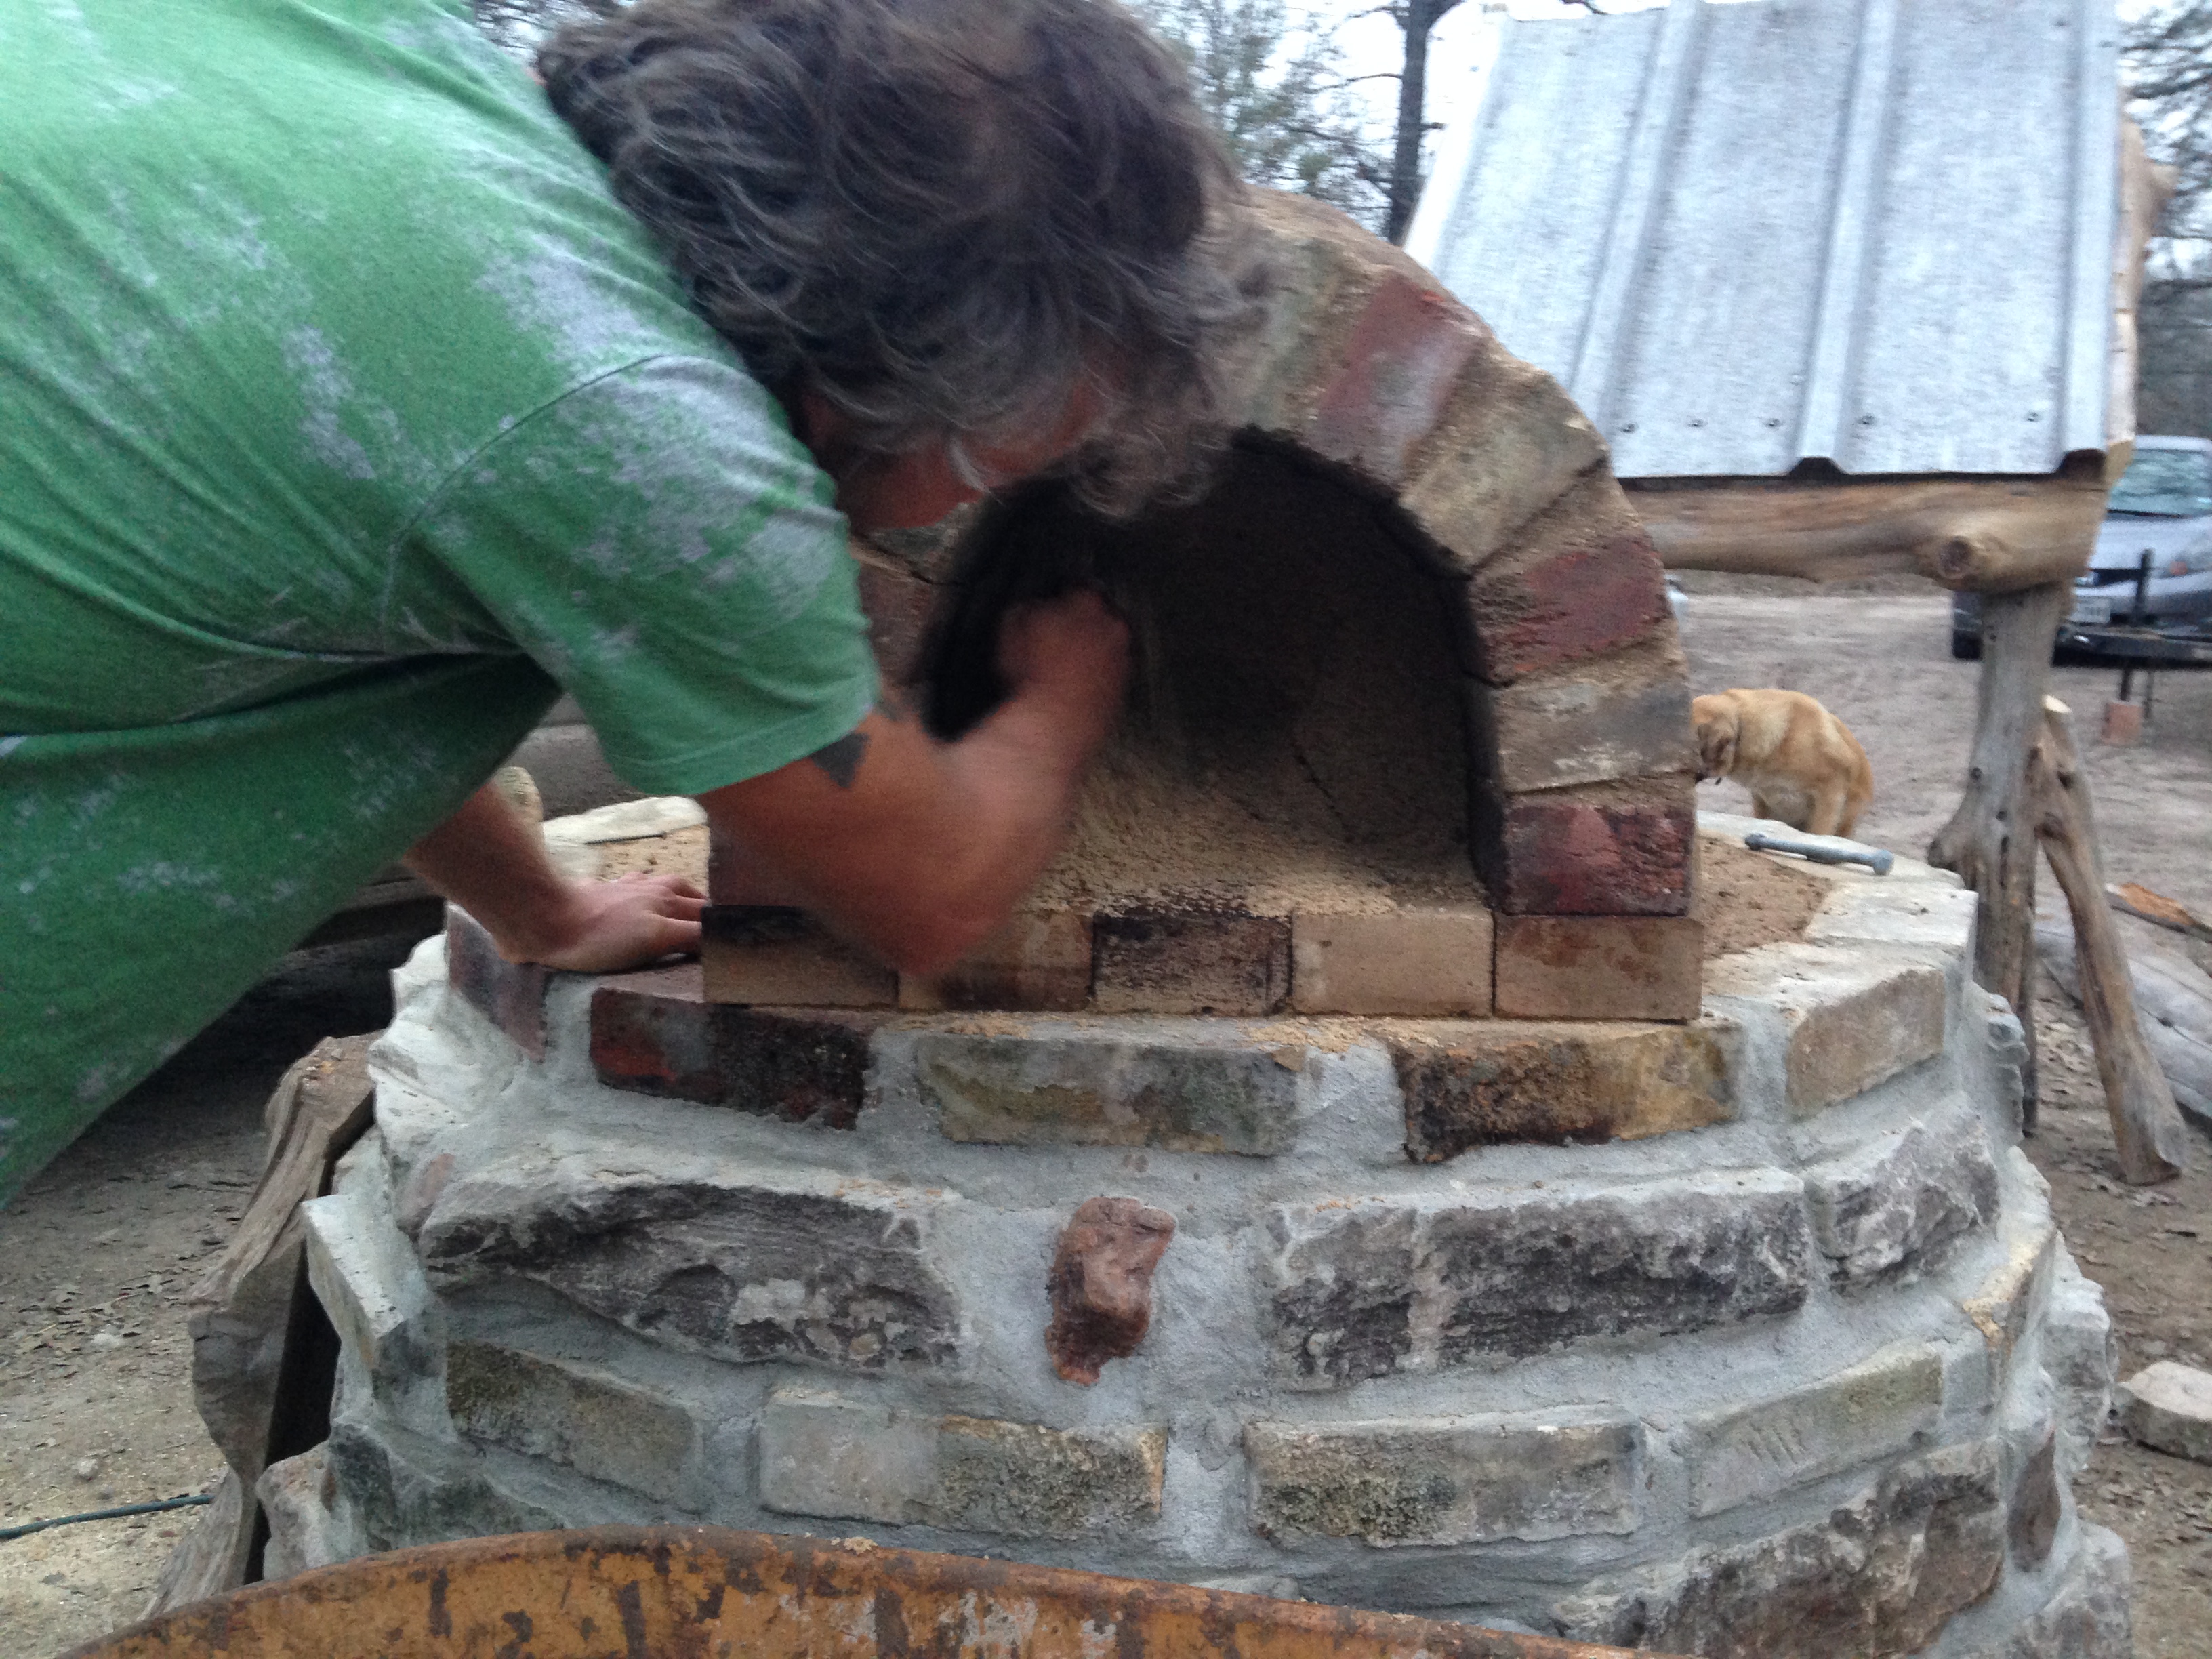
Next we worked on the arch opening. The book said that the ideal opening height was 63% of the interior dome, but we had to go just slightly higher to get a nice stable arch, with good supportive edge-to-edge contact throughout. We also tested to make sure that Habitable Spaces’ pizza peel would fit through (yep, just right!)
laying out the arch, using scavenged homestead bricks – old bricks are actually better than most modern bricks for durability under heat stress.
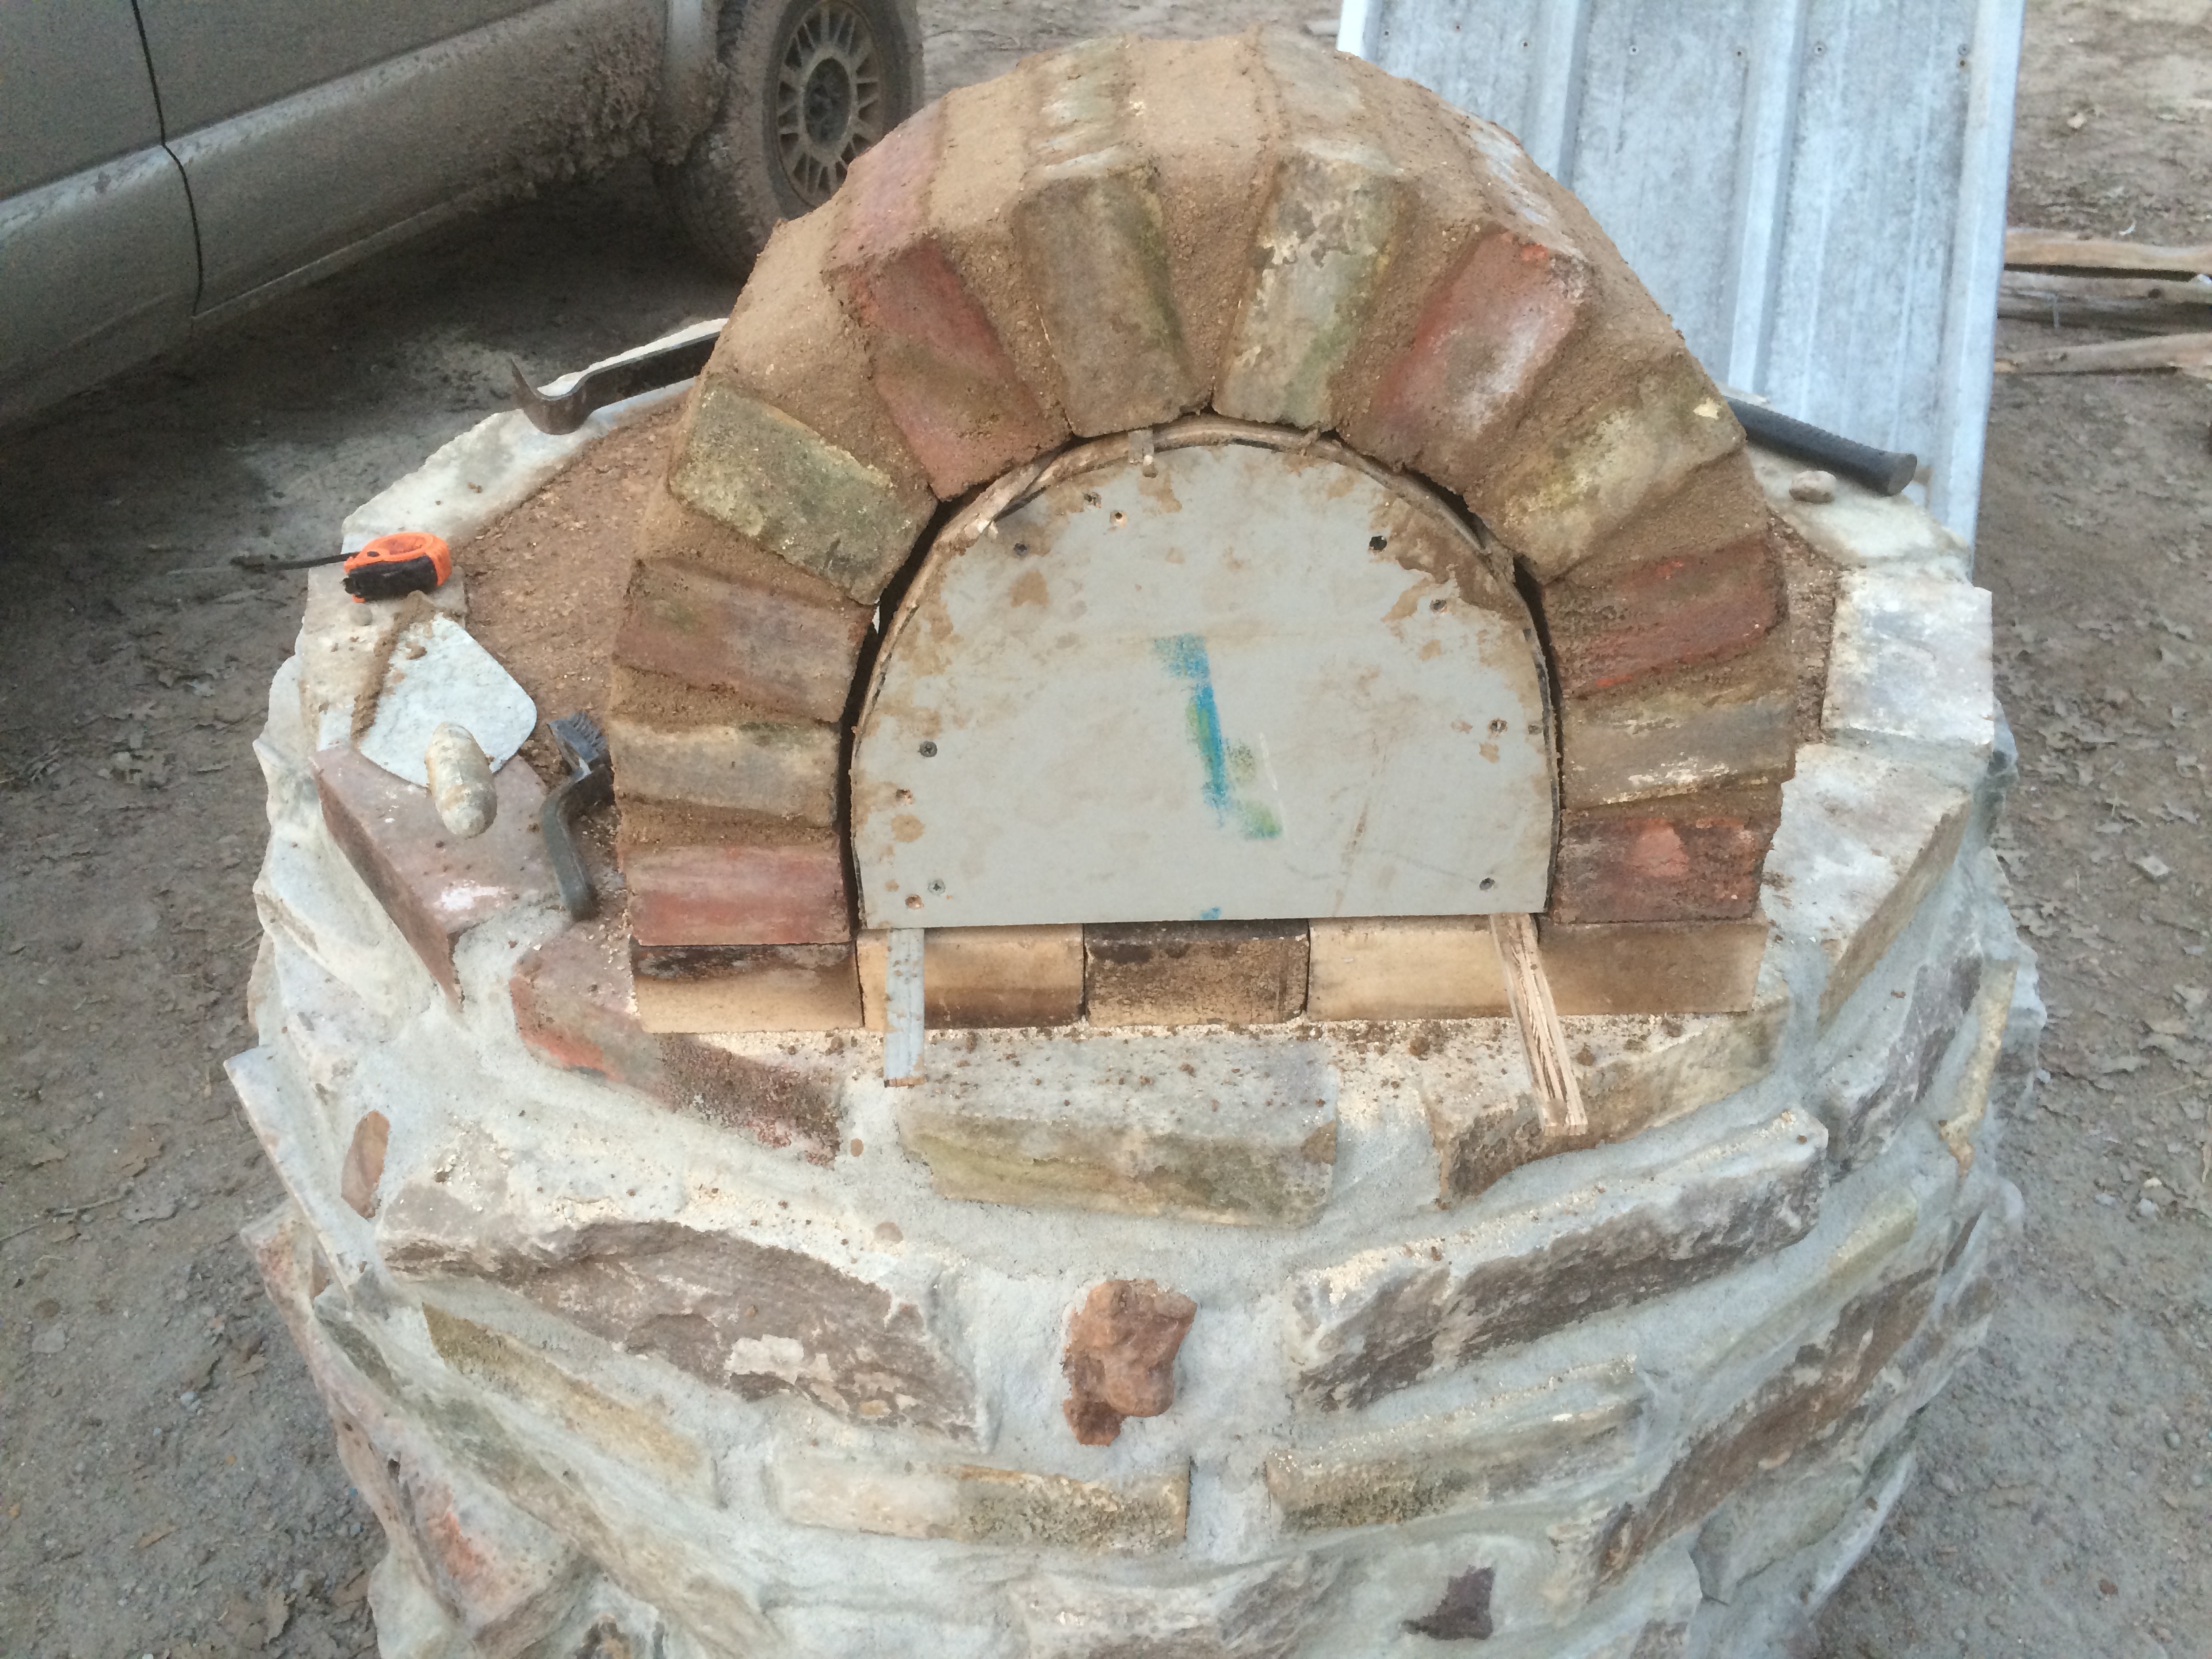
The resulting arch shape was traced onto plywood – Ali helped cut out two pieces in the proper shape and build a form by joining them together with 2x4s. This supported the bricks while we spaced them out with pebbles, and filled in the gaps with oven mud mortar.
We had to shave a 1/4″ off the bottom in order to keep the height low while still allowing shims beneath – these shims would allow us to easily remove the form later.
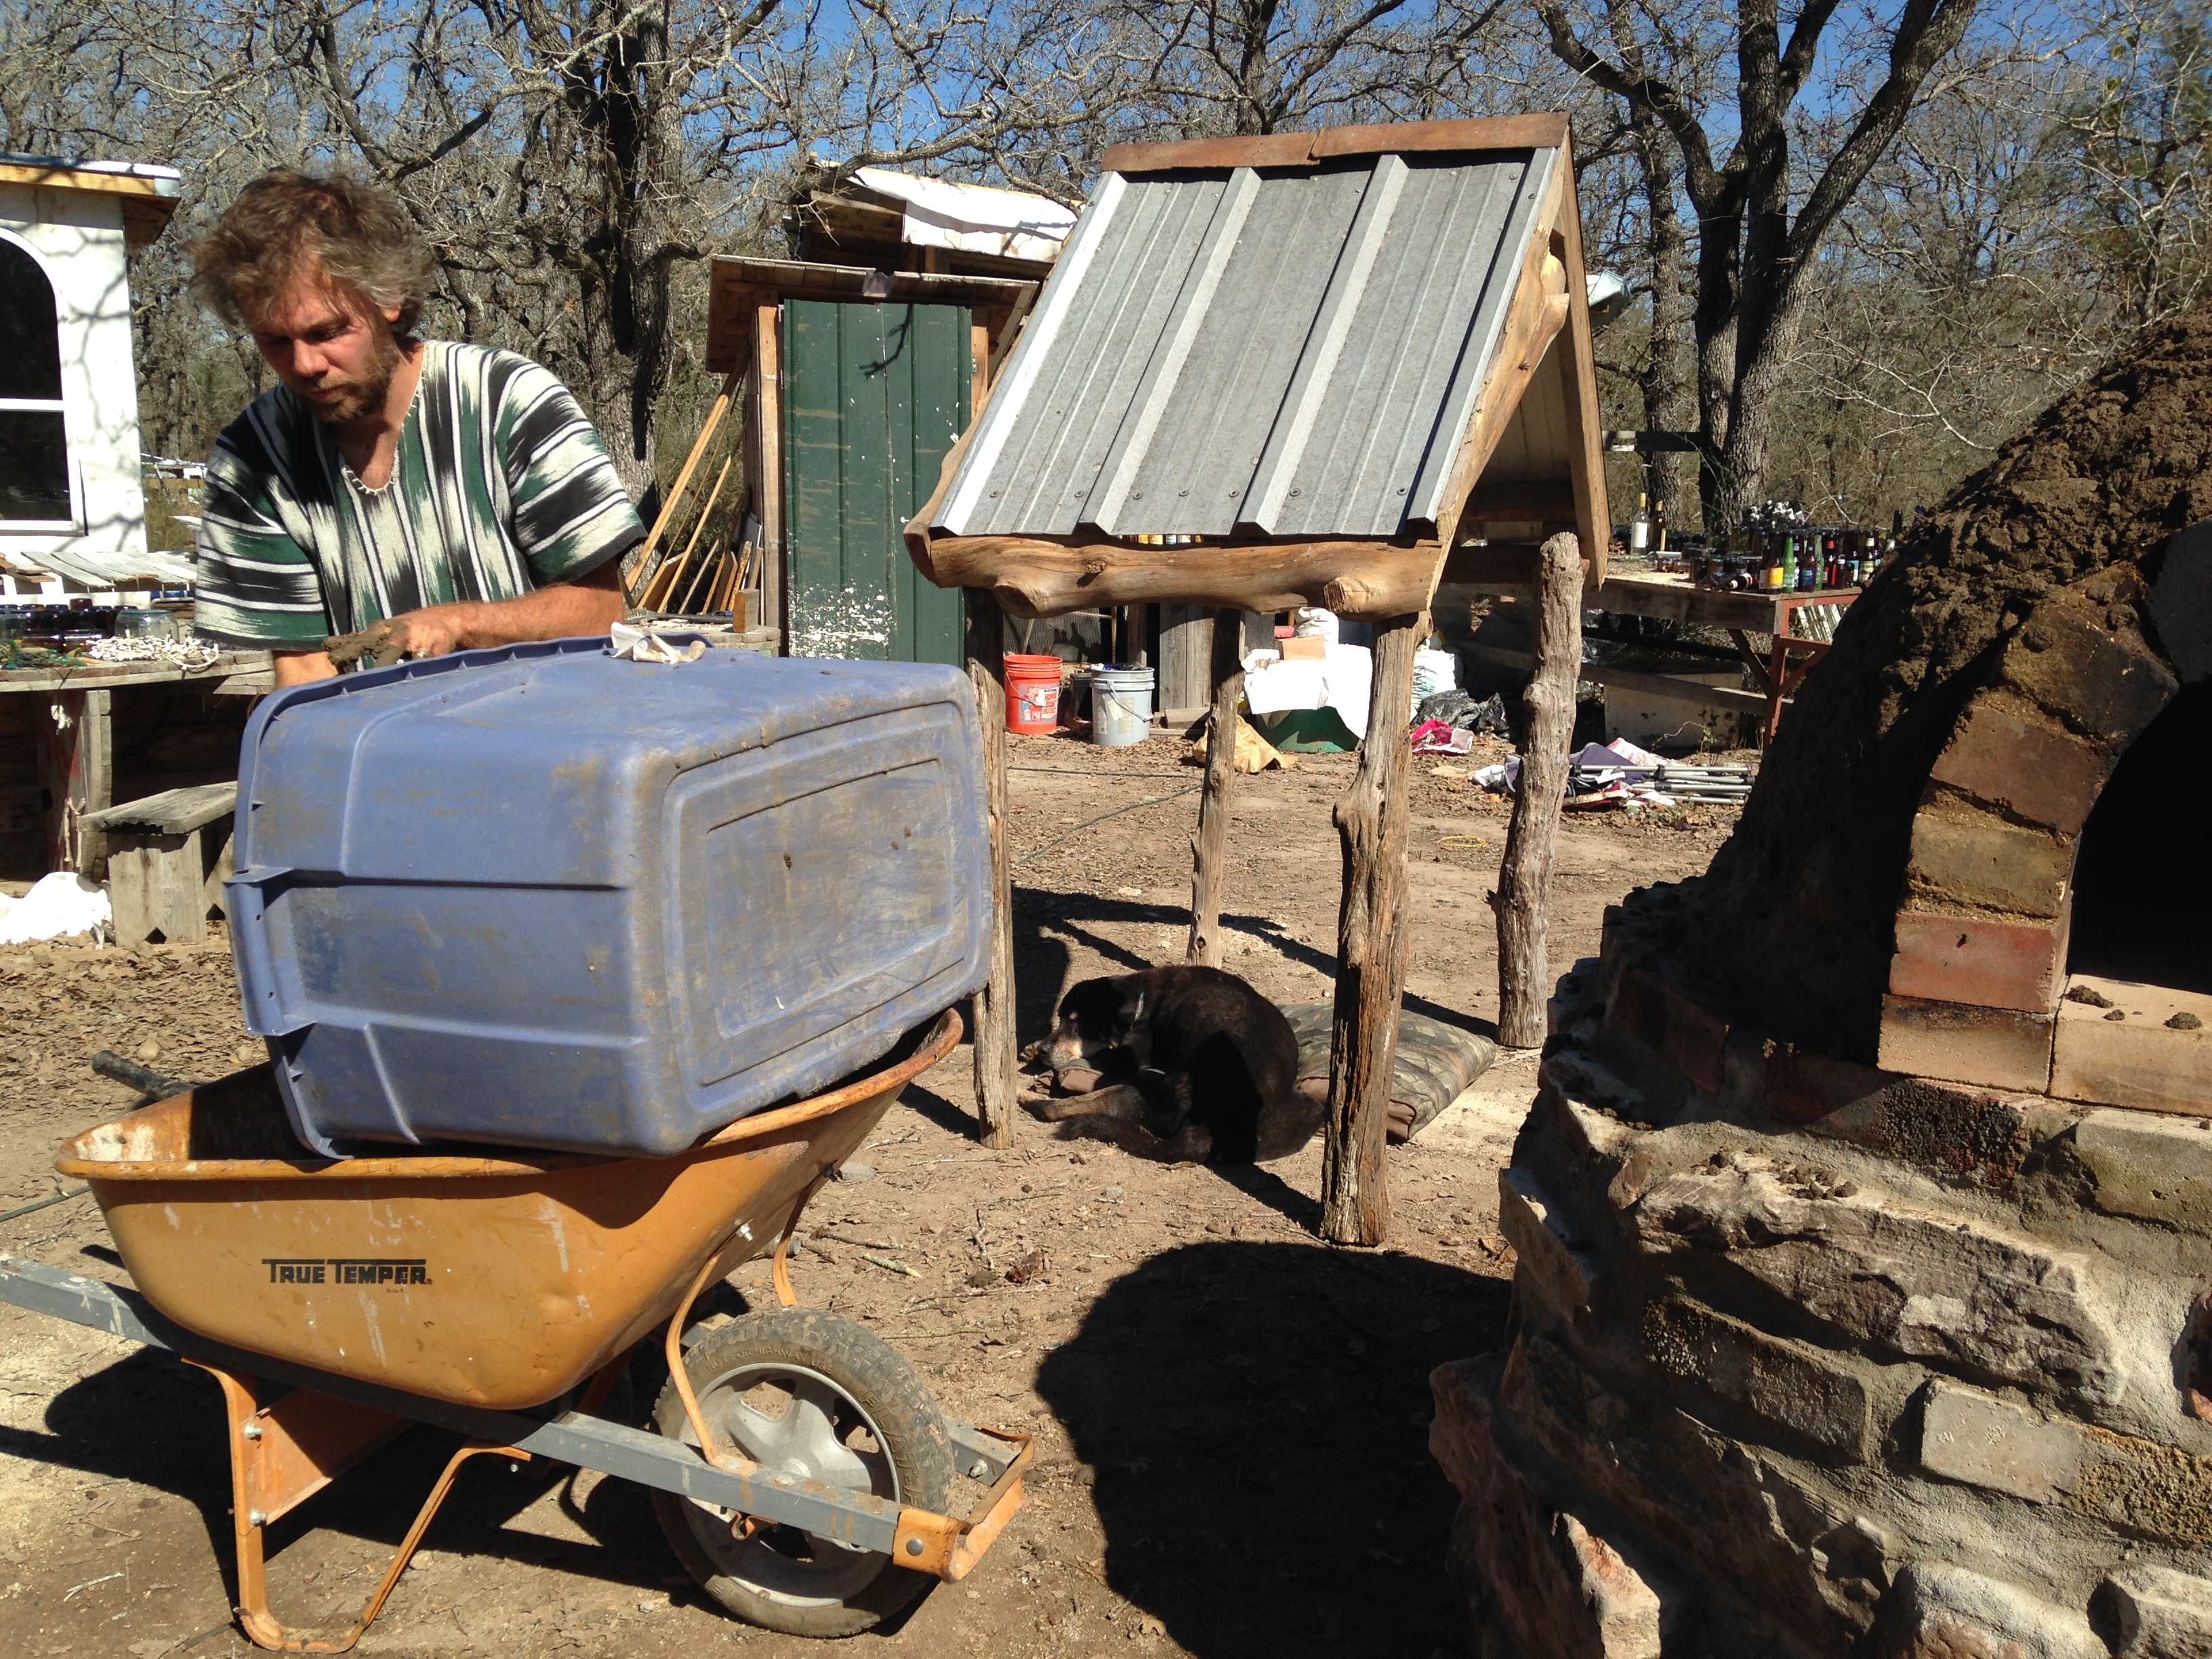
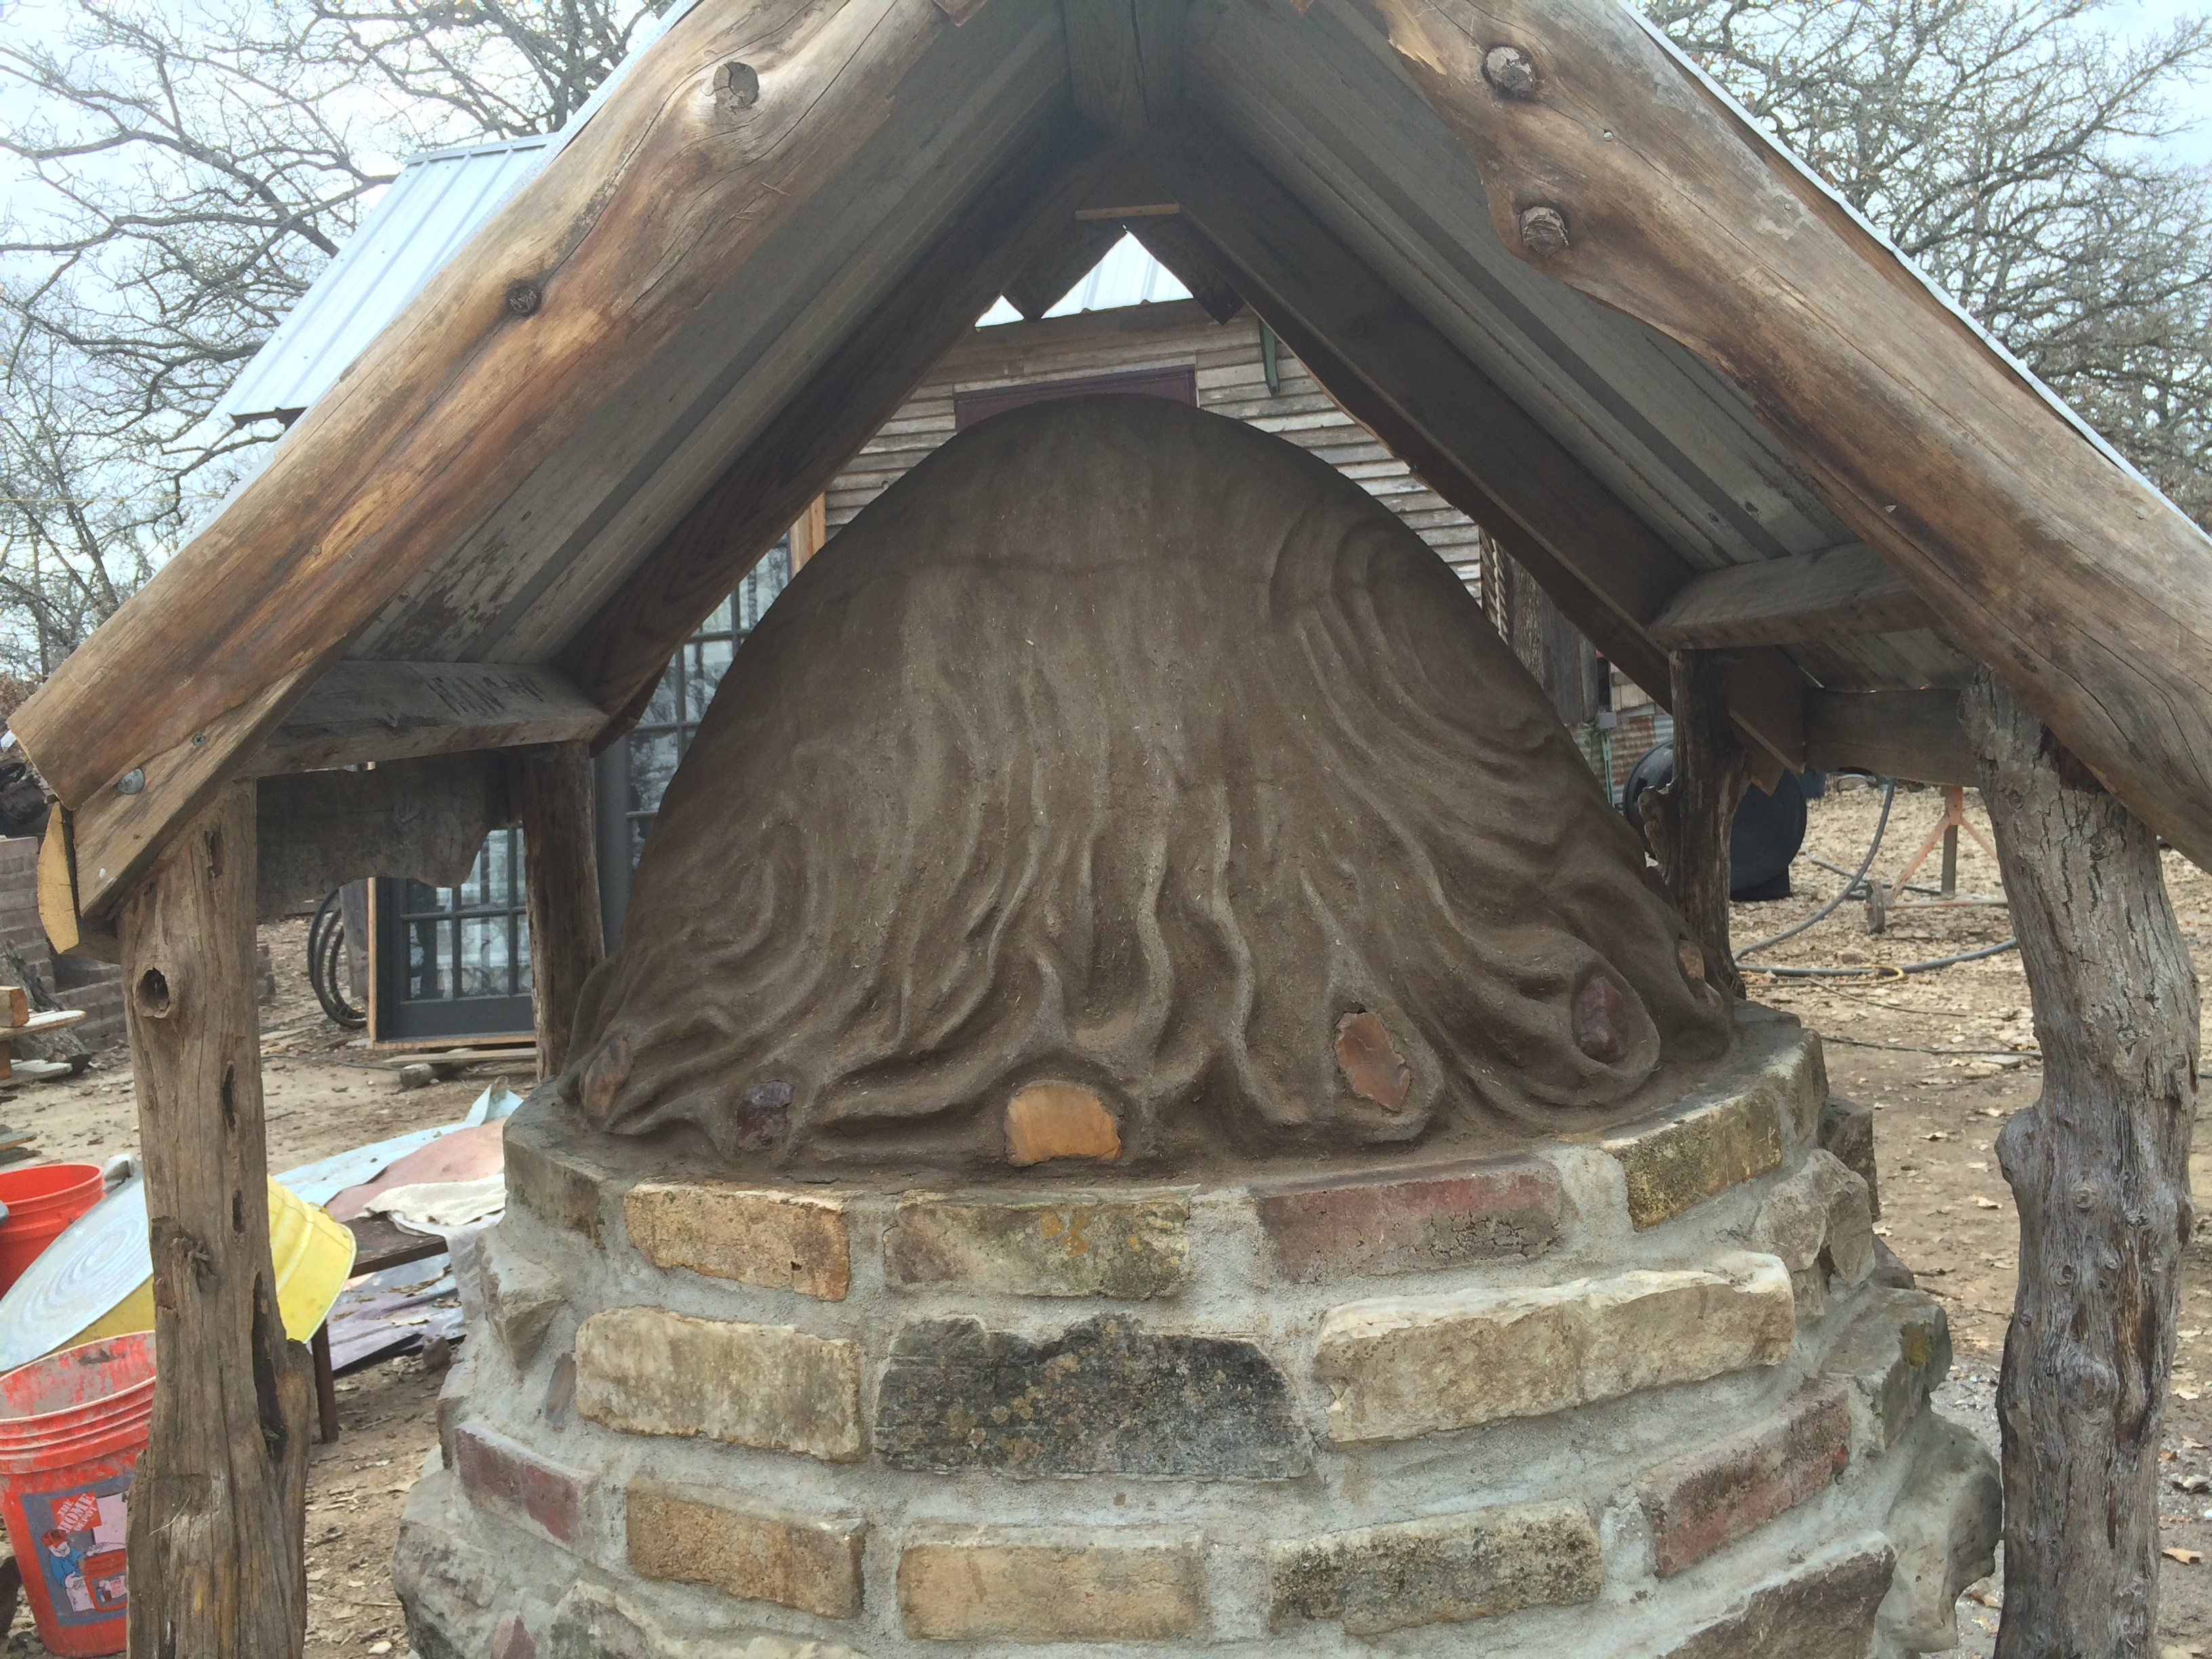
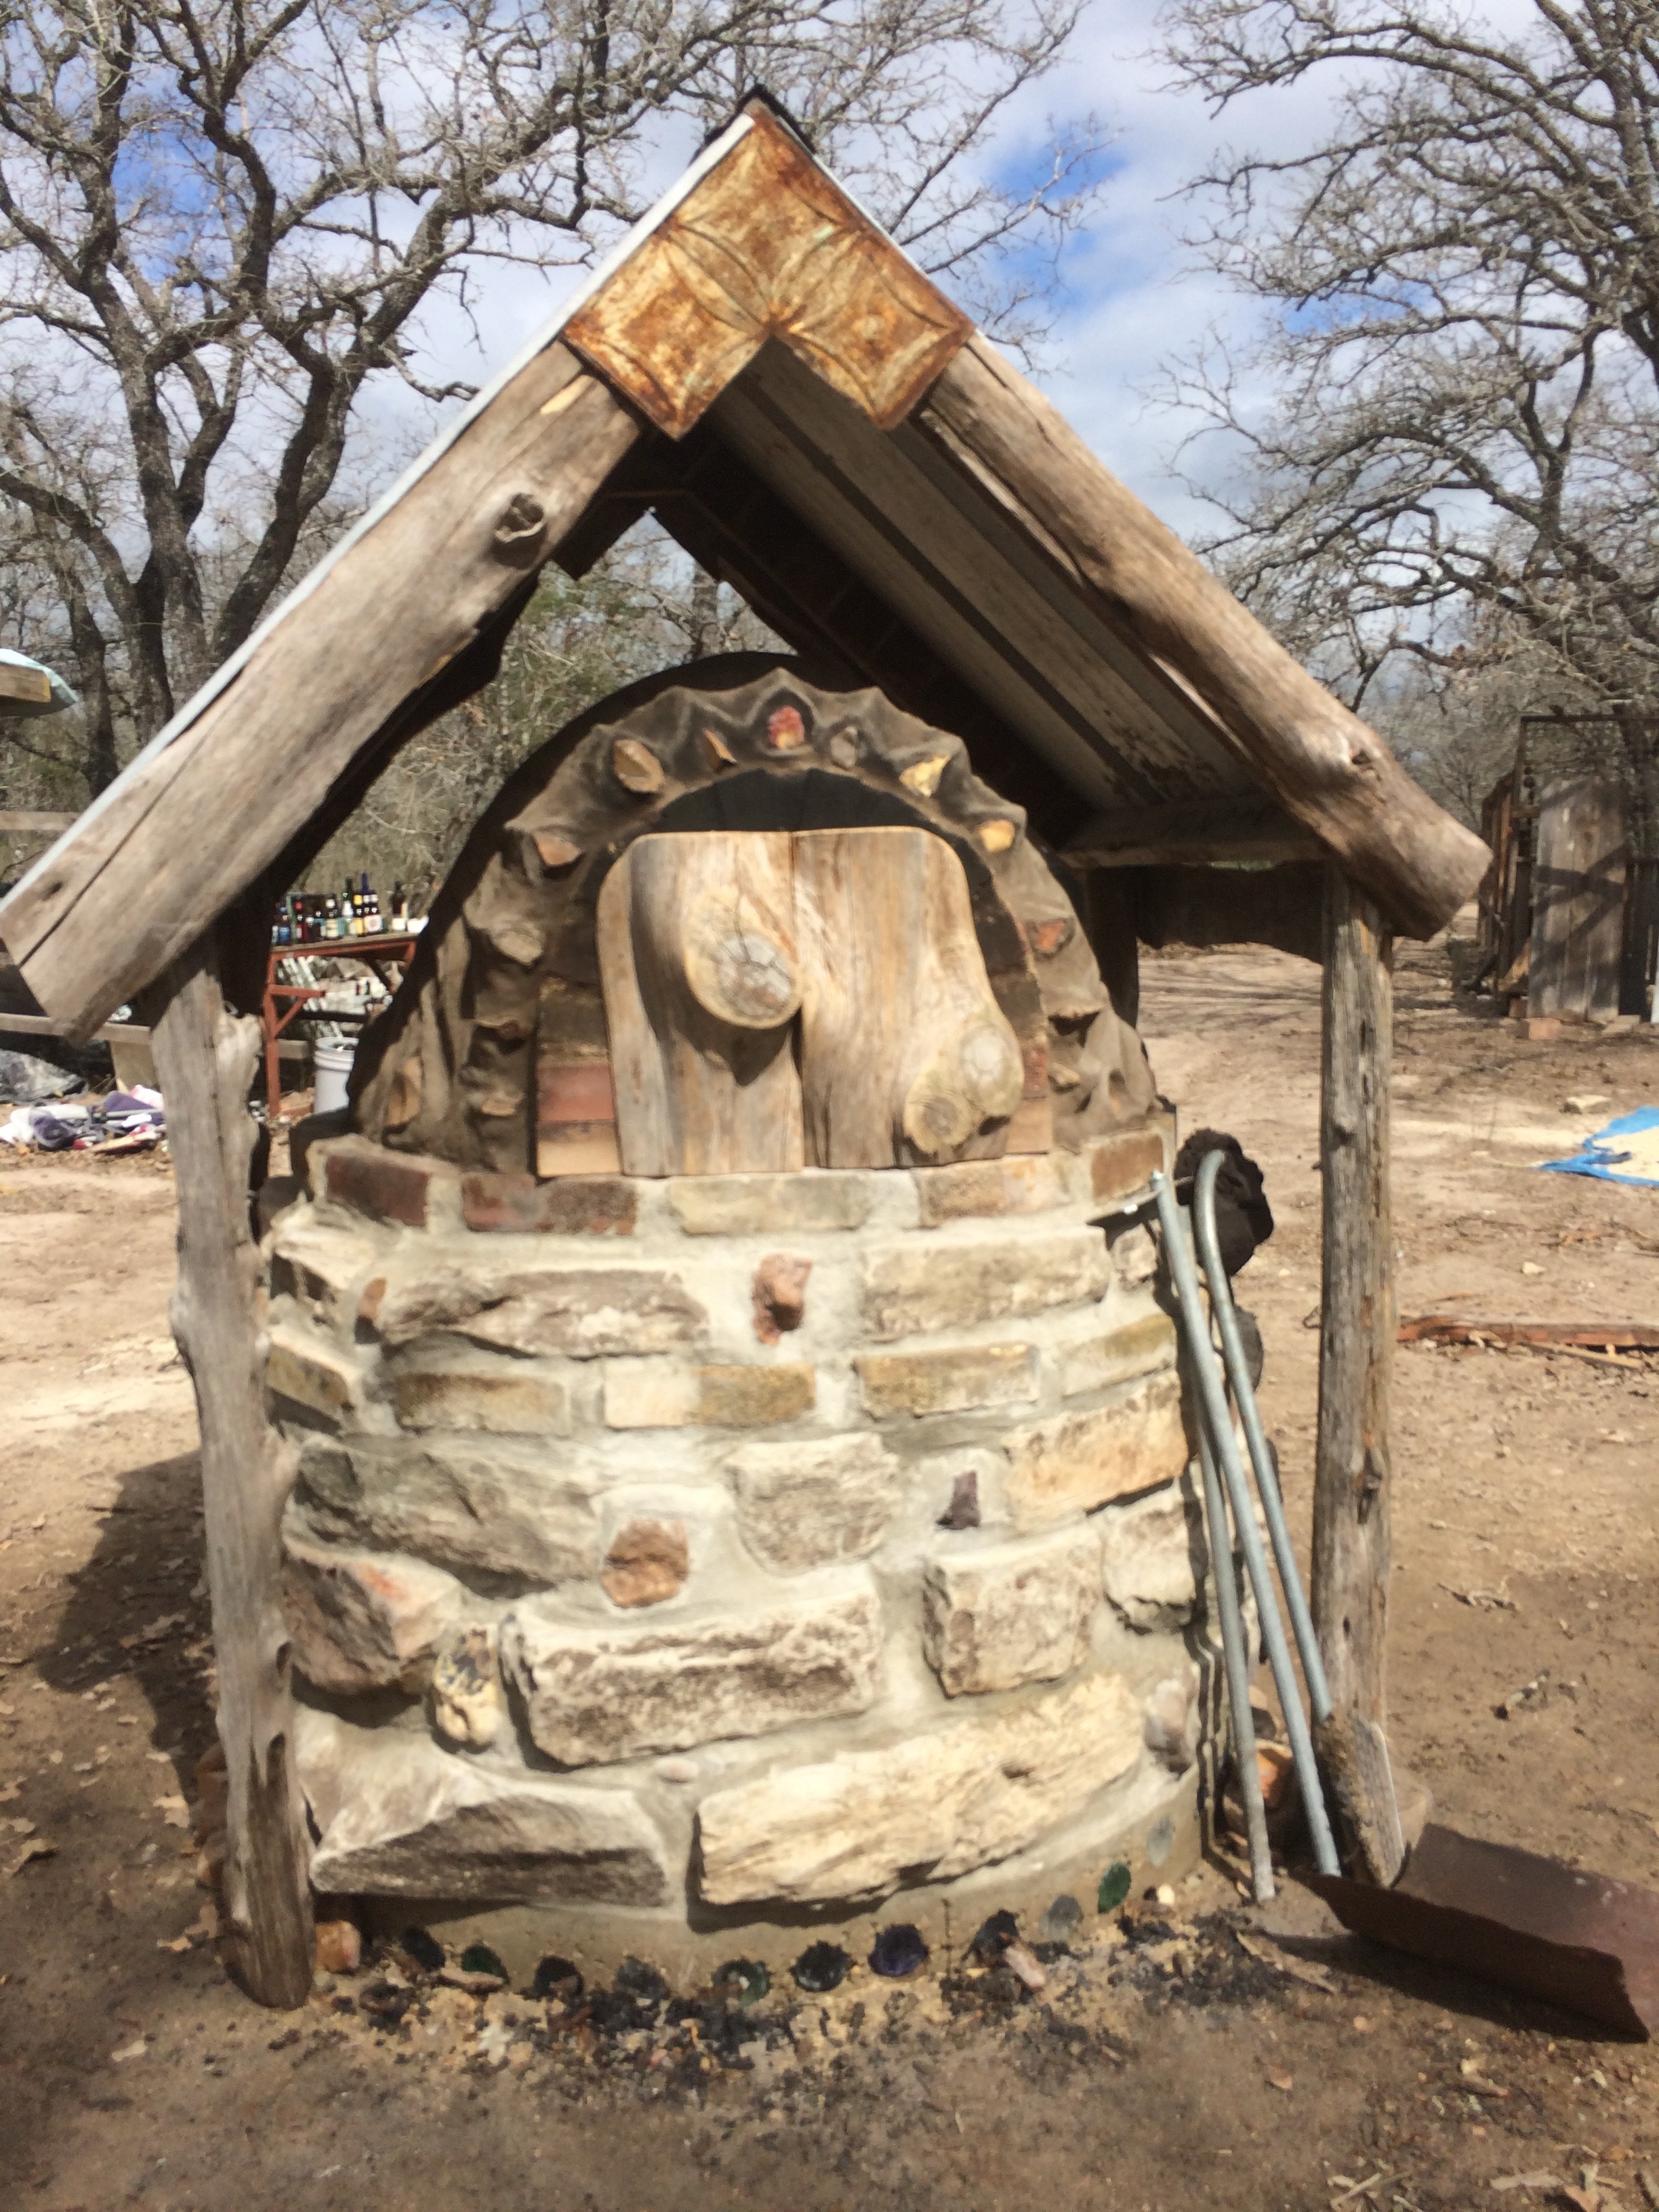
We also started work on the protective roof – while rain wouldn’t destroy the oven, it would saturate the clay, requiring many more hours of firing time to get it up to temp, and shortening the working life of the oven. There were a couple short pieces of roofing left over from the house and kitchen, perfect for our needs. We scavenged together some cedar posts and scraps with lovely knotty character, wanting to make the roof match the organic, natural appeal of the oven’s base.
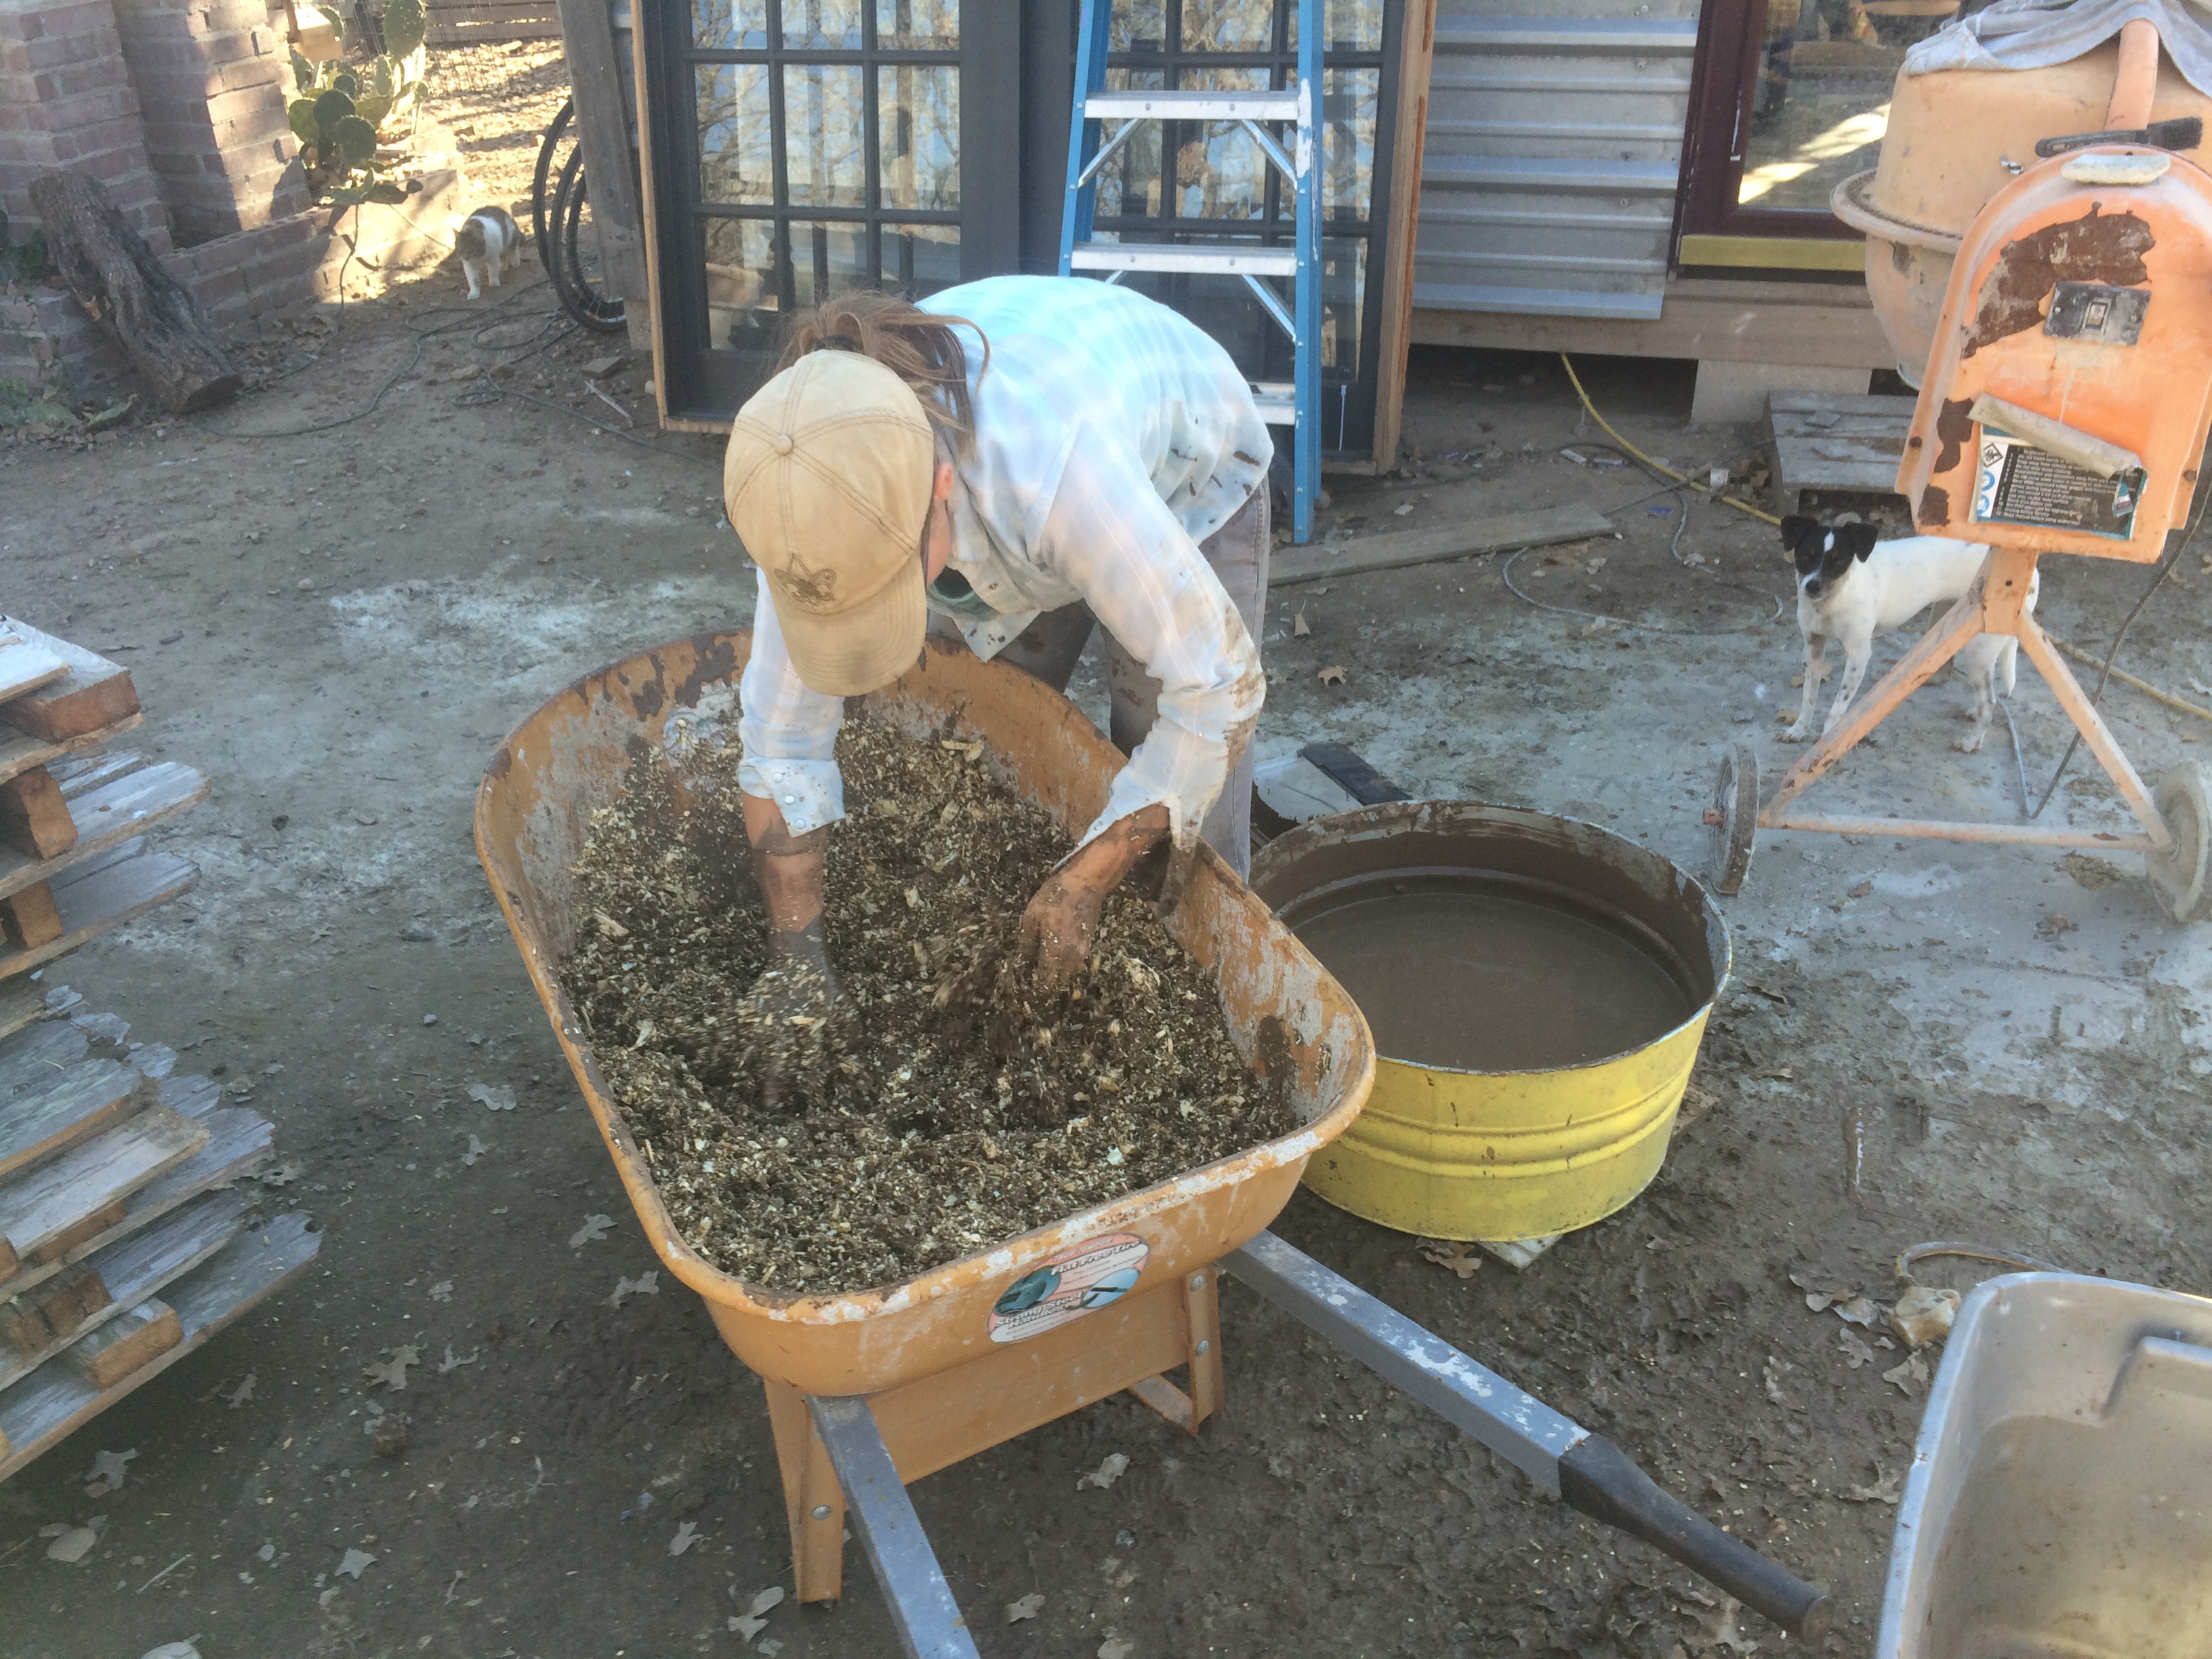
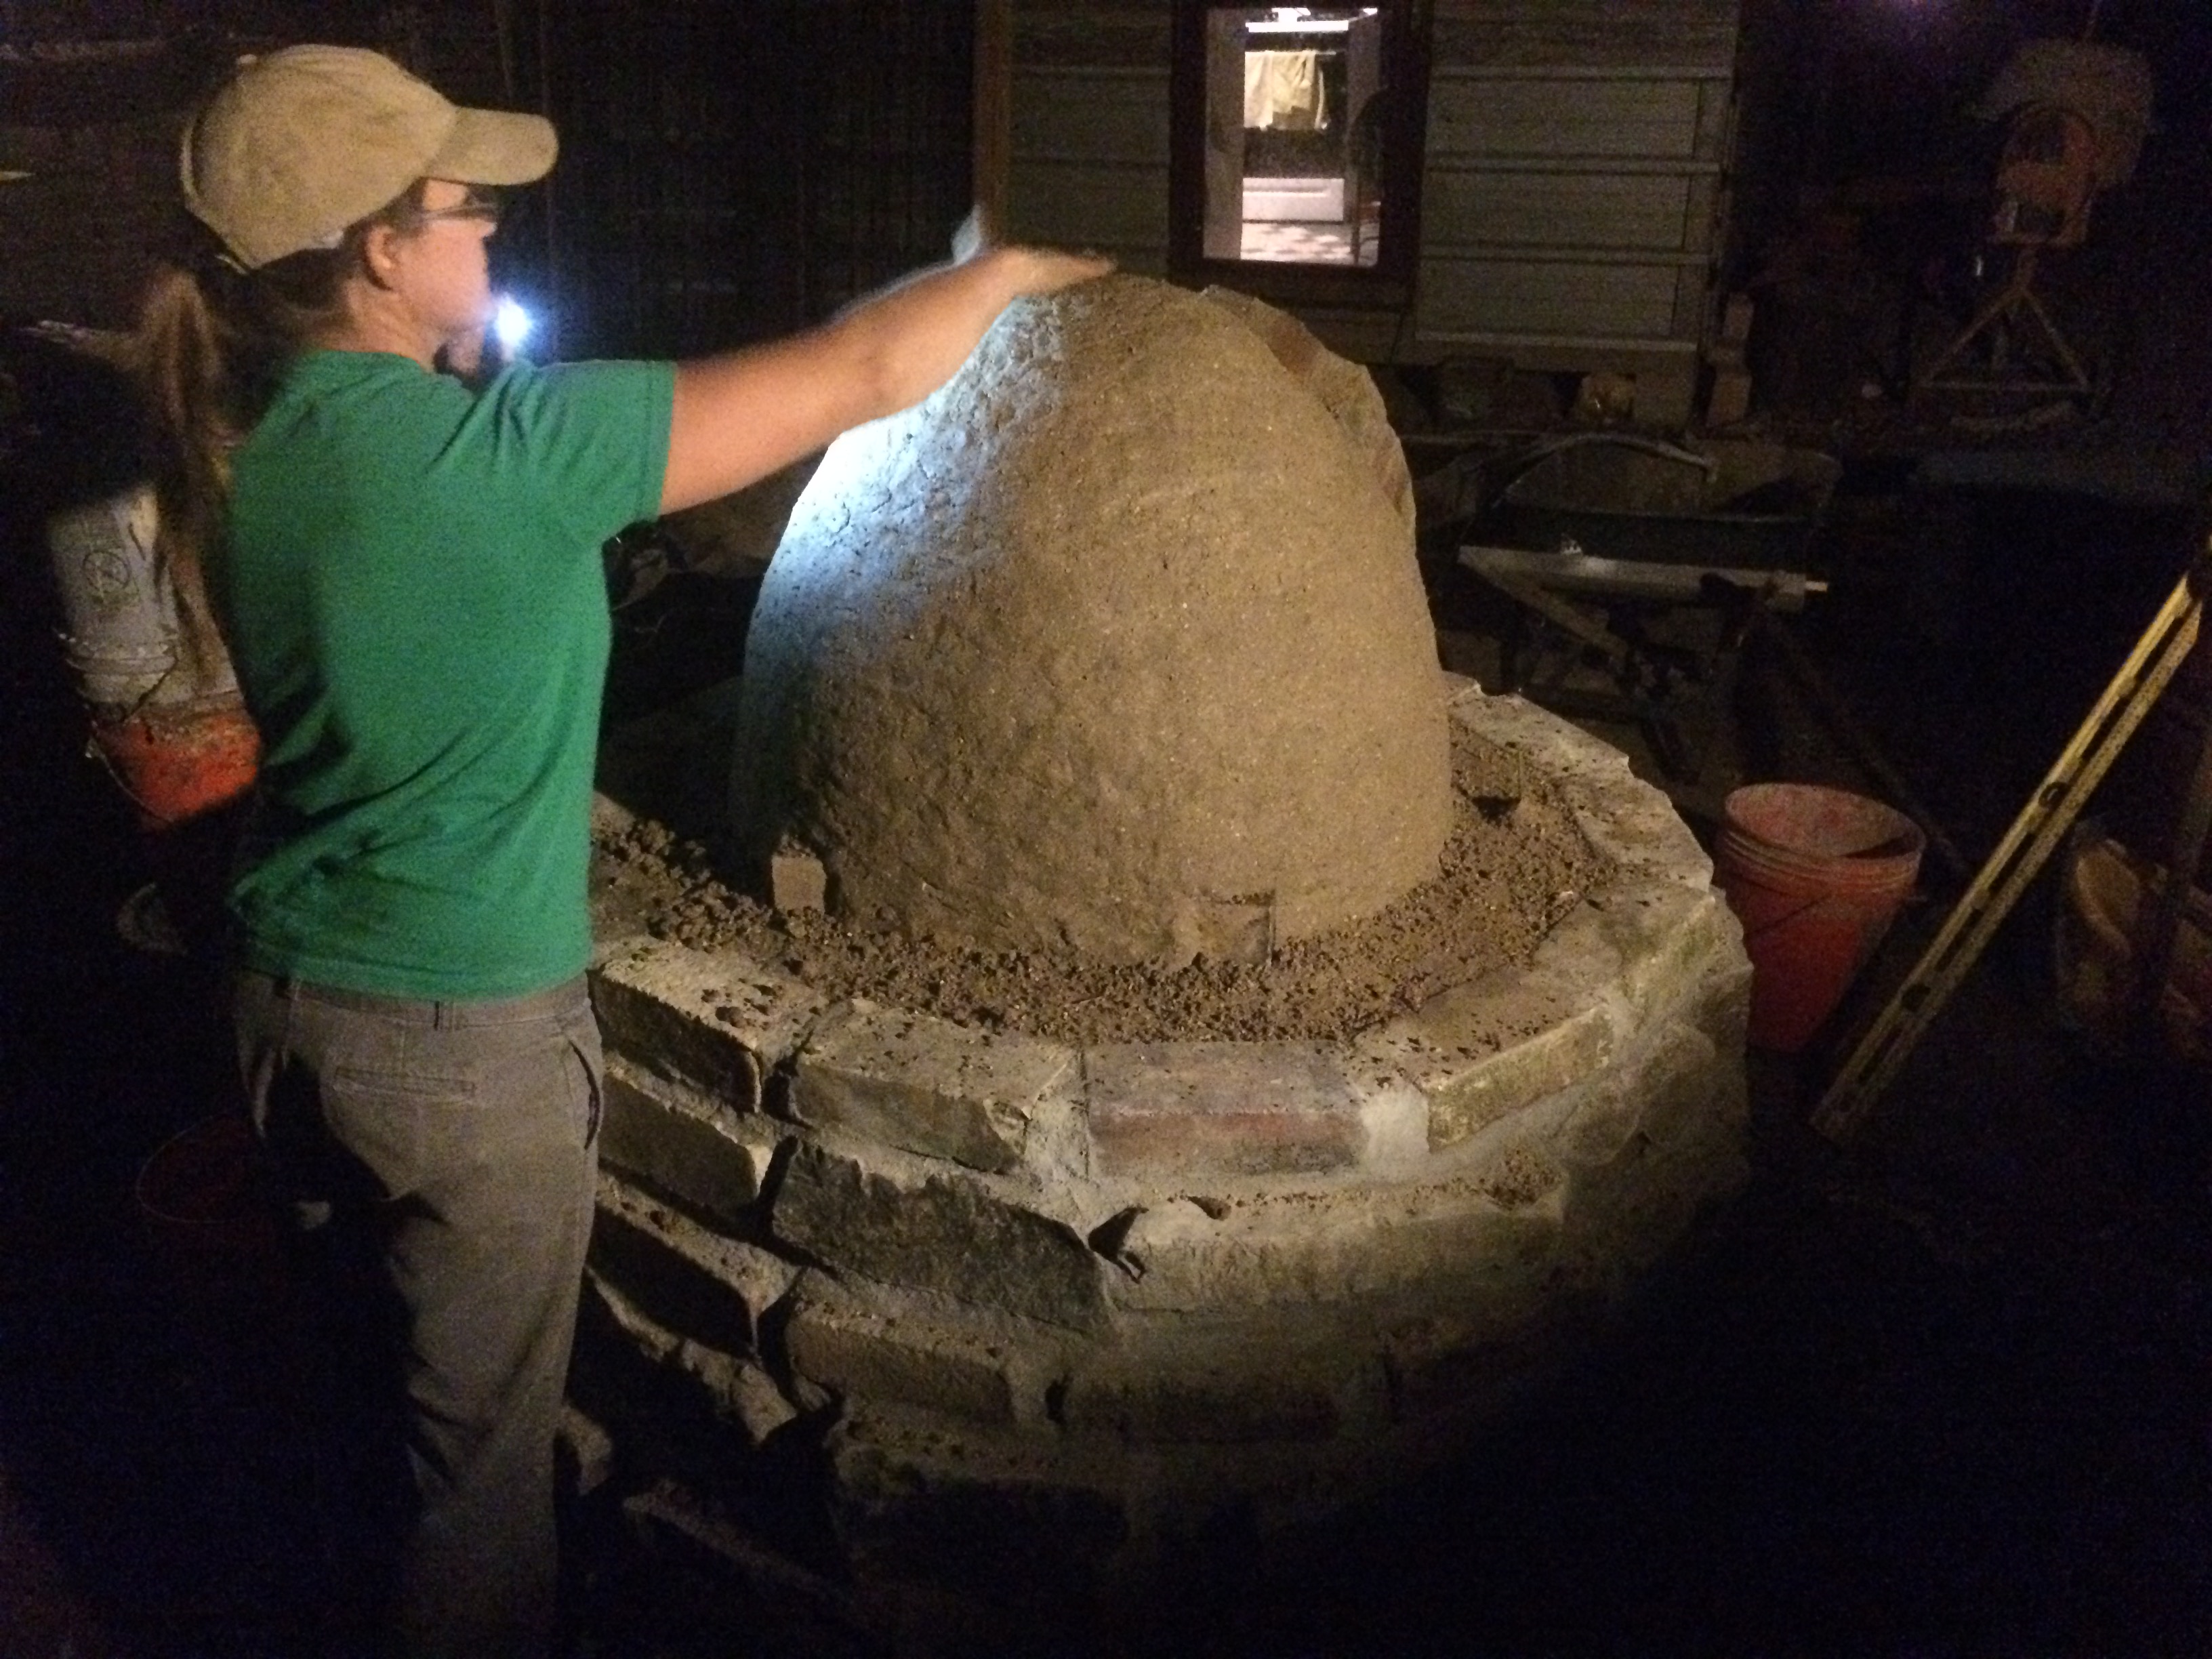
Before starting the next phase of the build, we mixed up a huge batch of oven mud, making it a little bit wet and leaving time for it to dry out a bit, before we launched the most significant single piece of the construction – the interior dome.
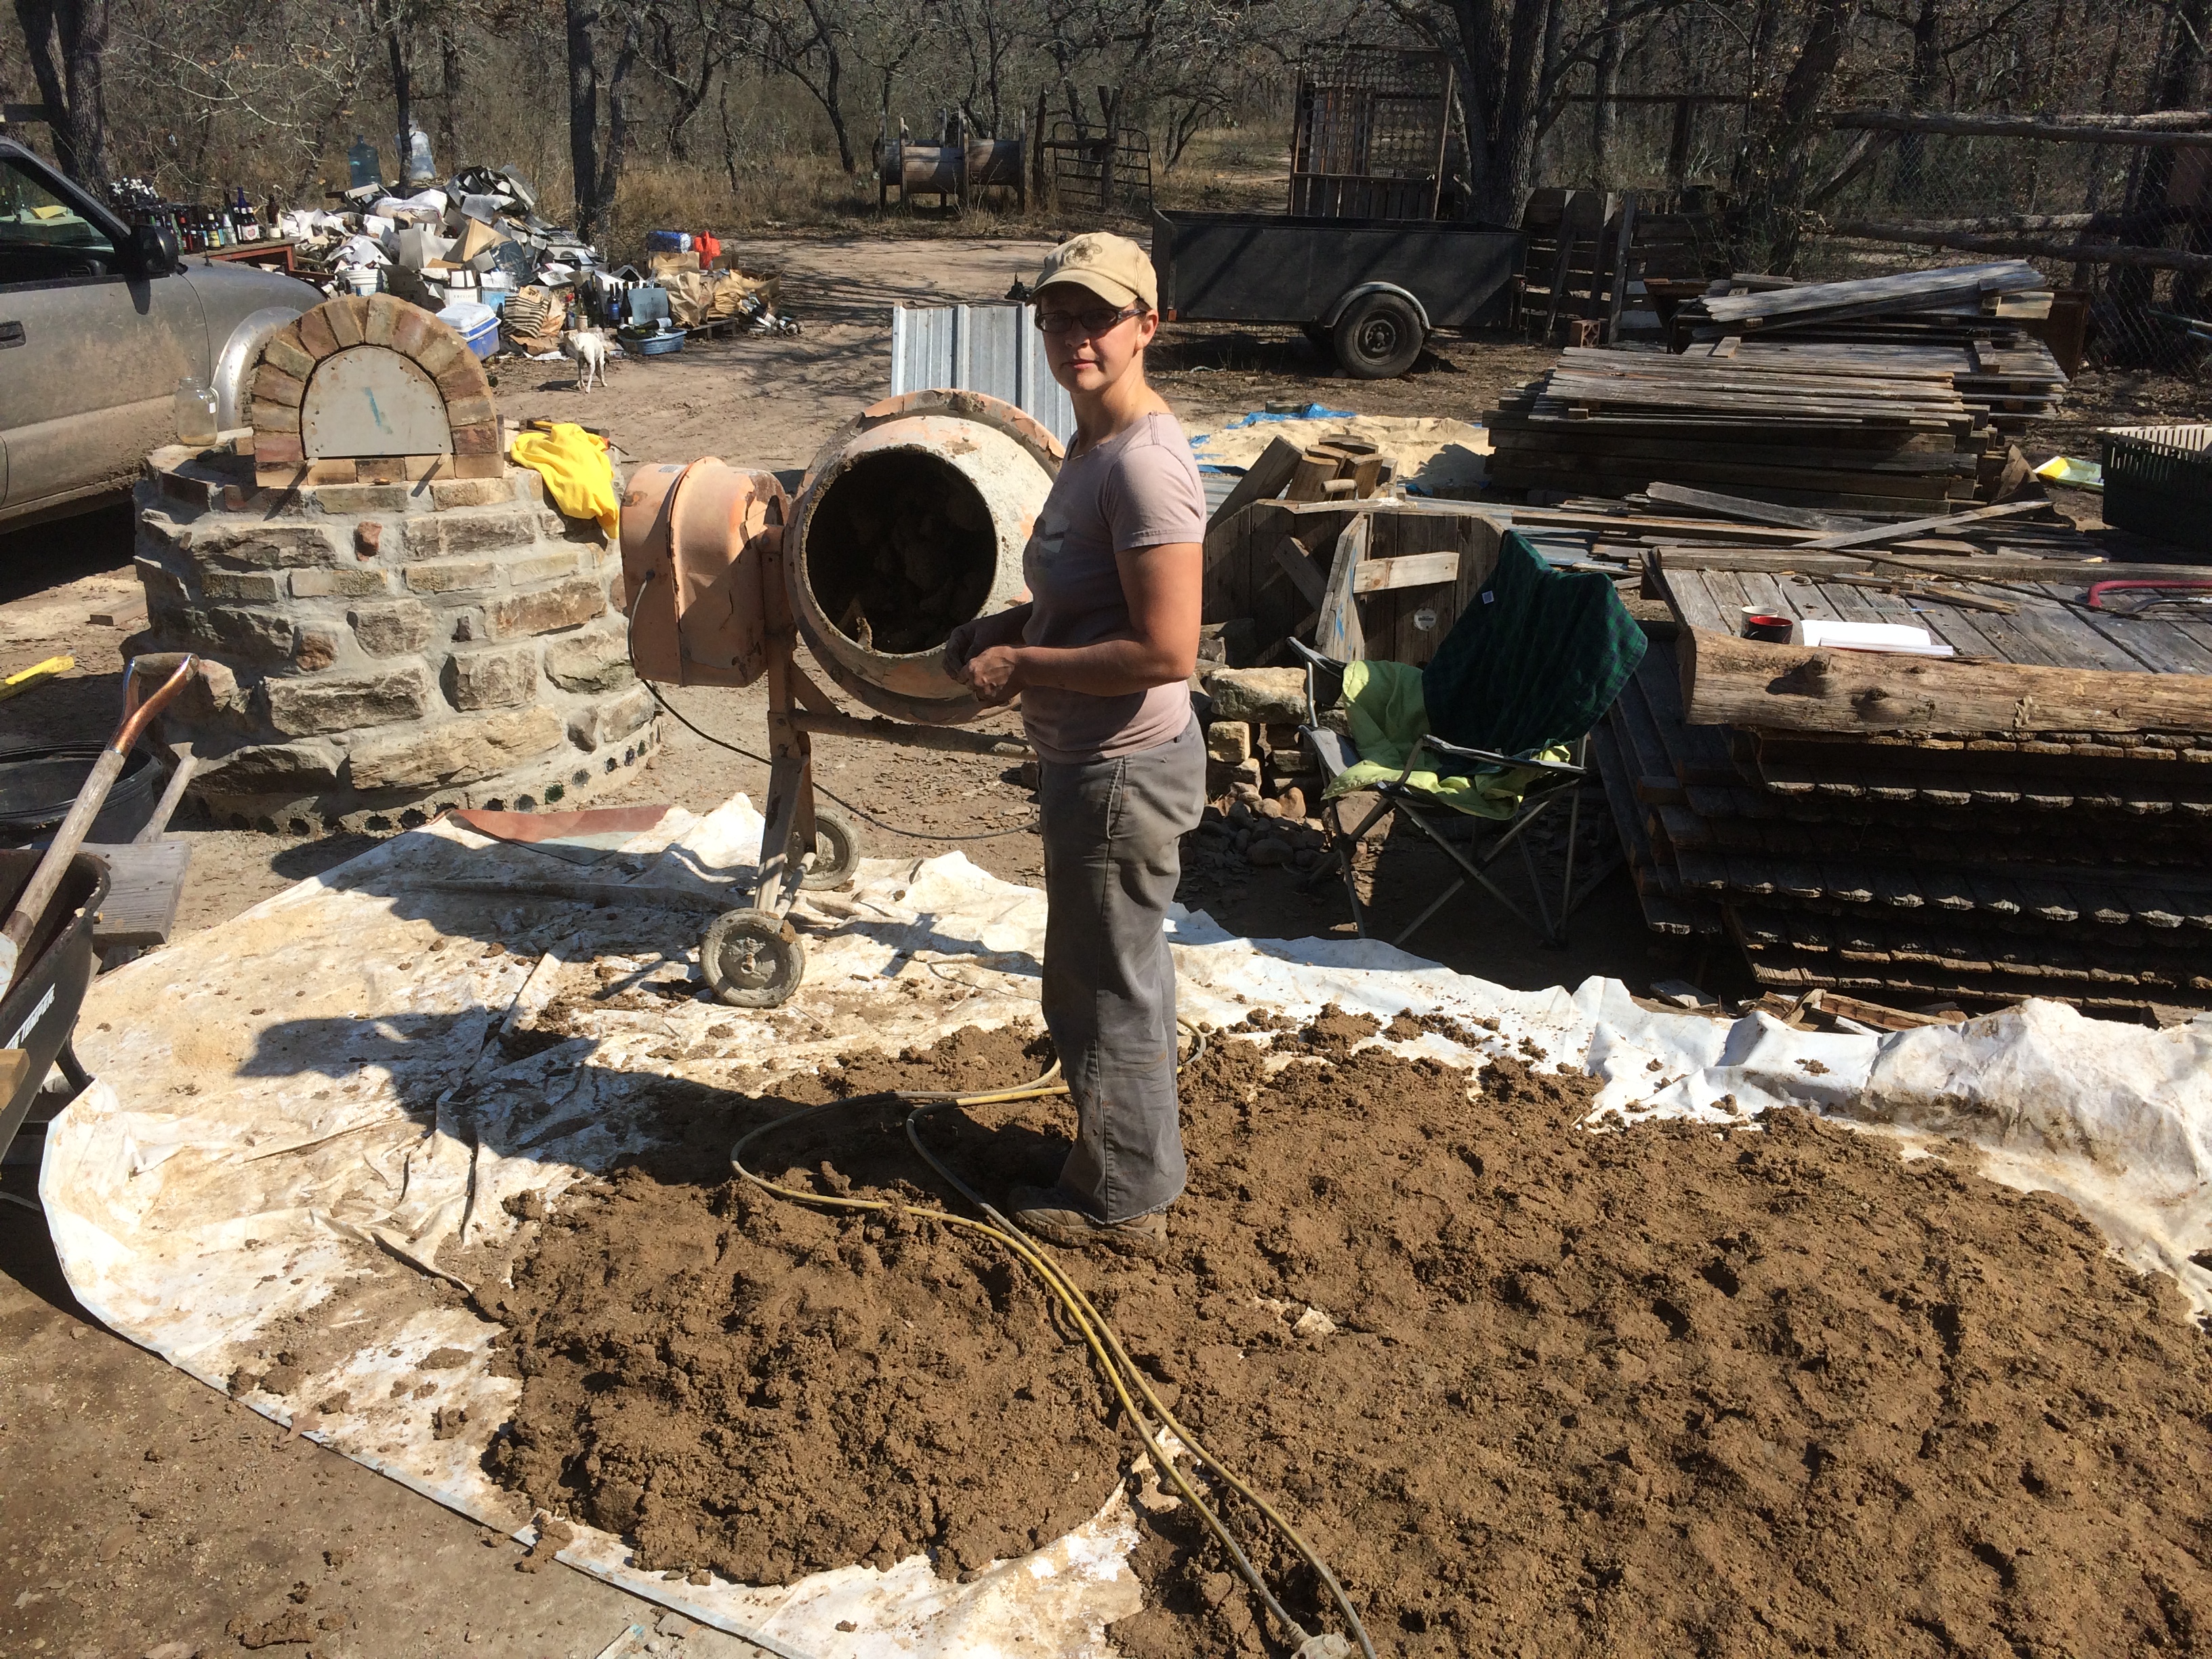
we decided to test out the concrete mixer for making the sand & clay for the oven mud – and boy was it a time and effort saver! (Especially since we wound up making two to three times more than we actually needed …) We still foot/tarp mixed it, but only after a pre-mix tour through the mixer
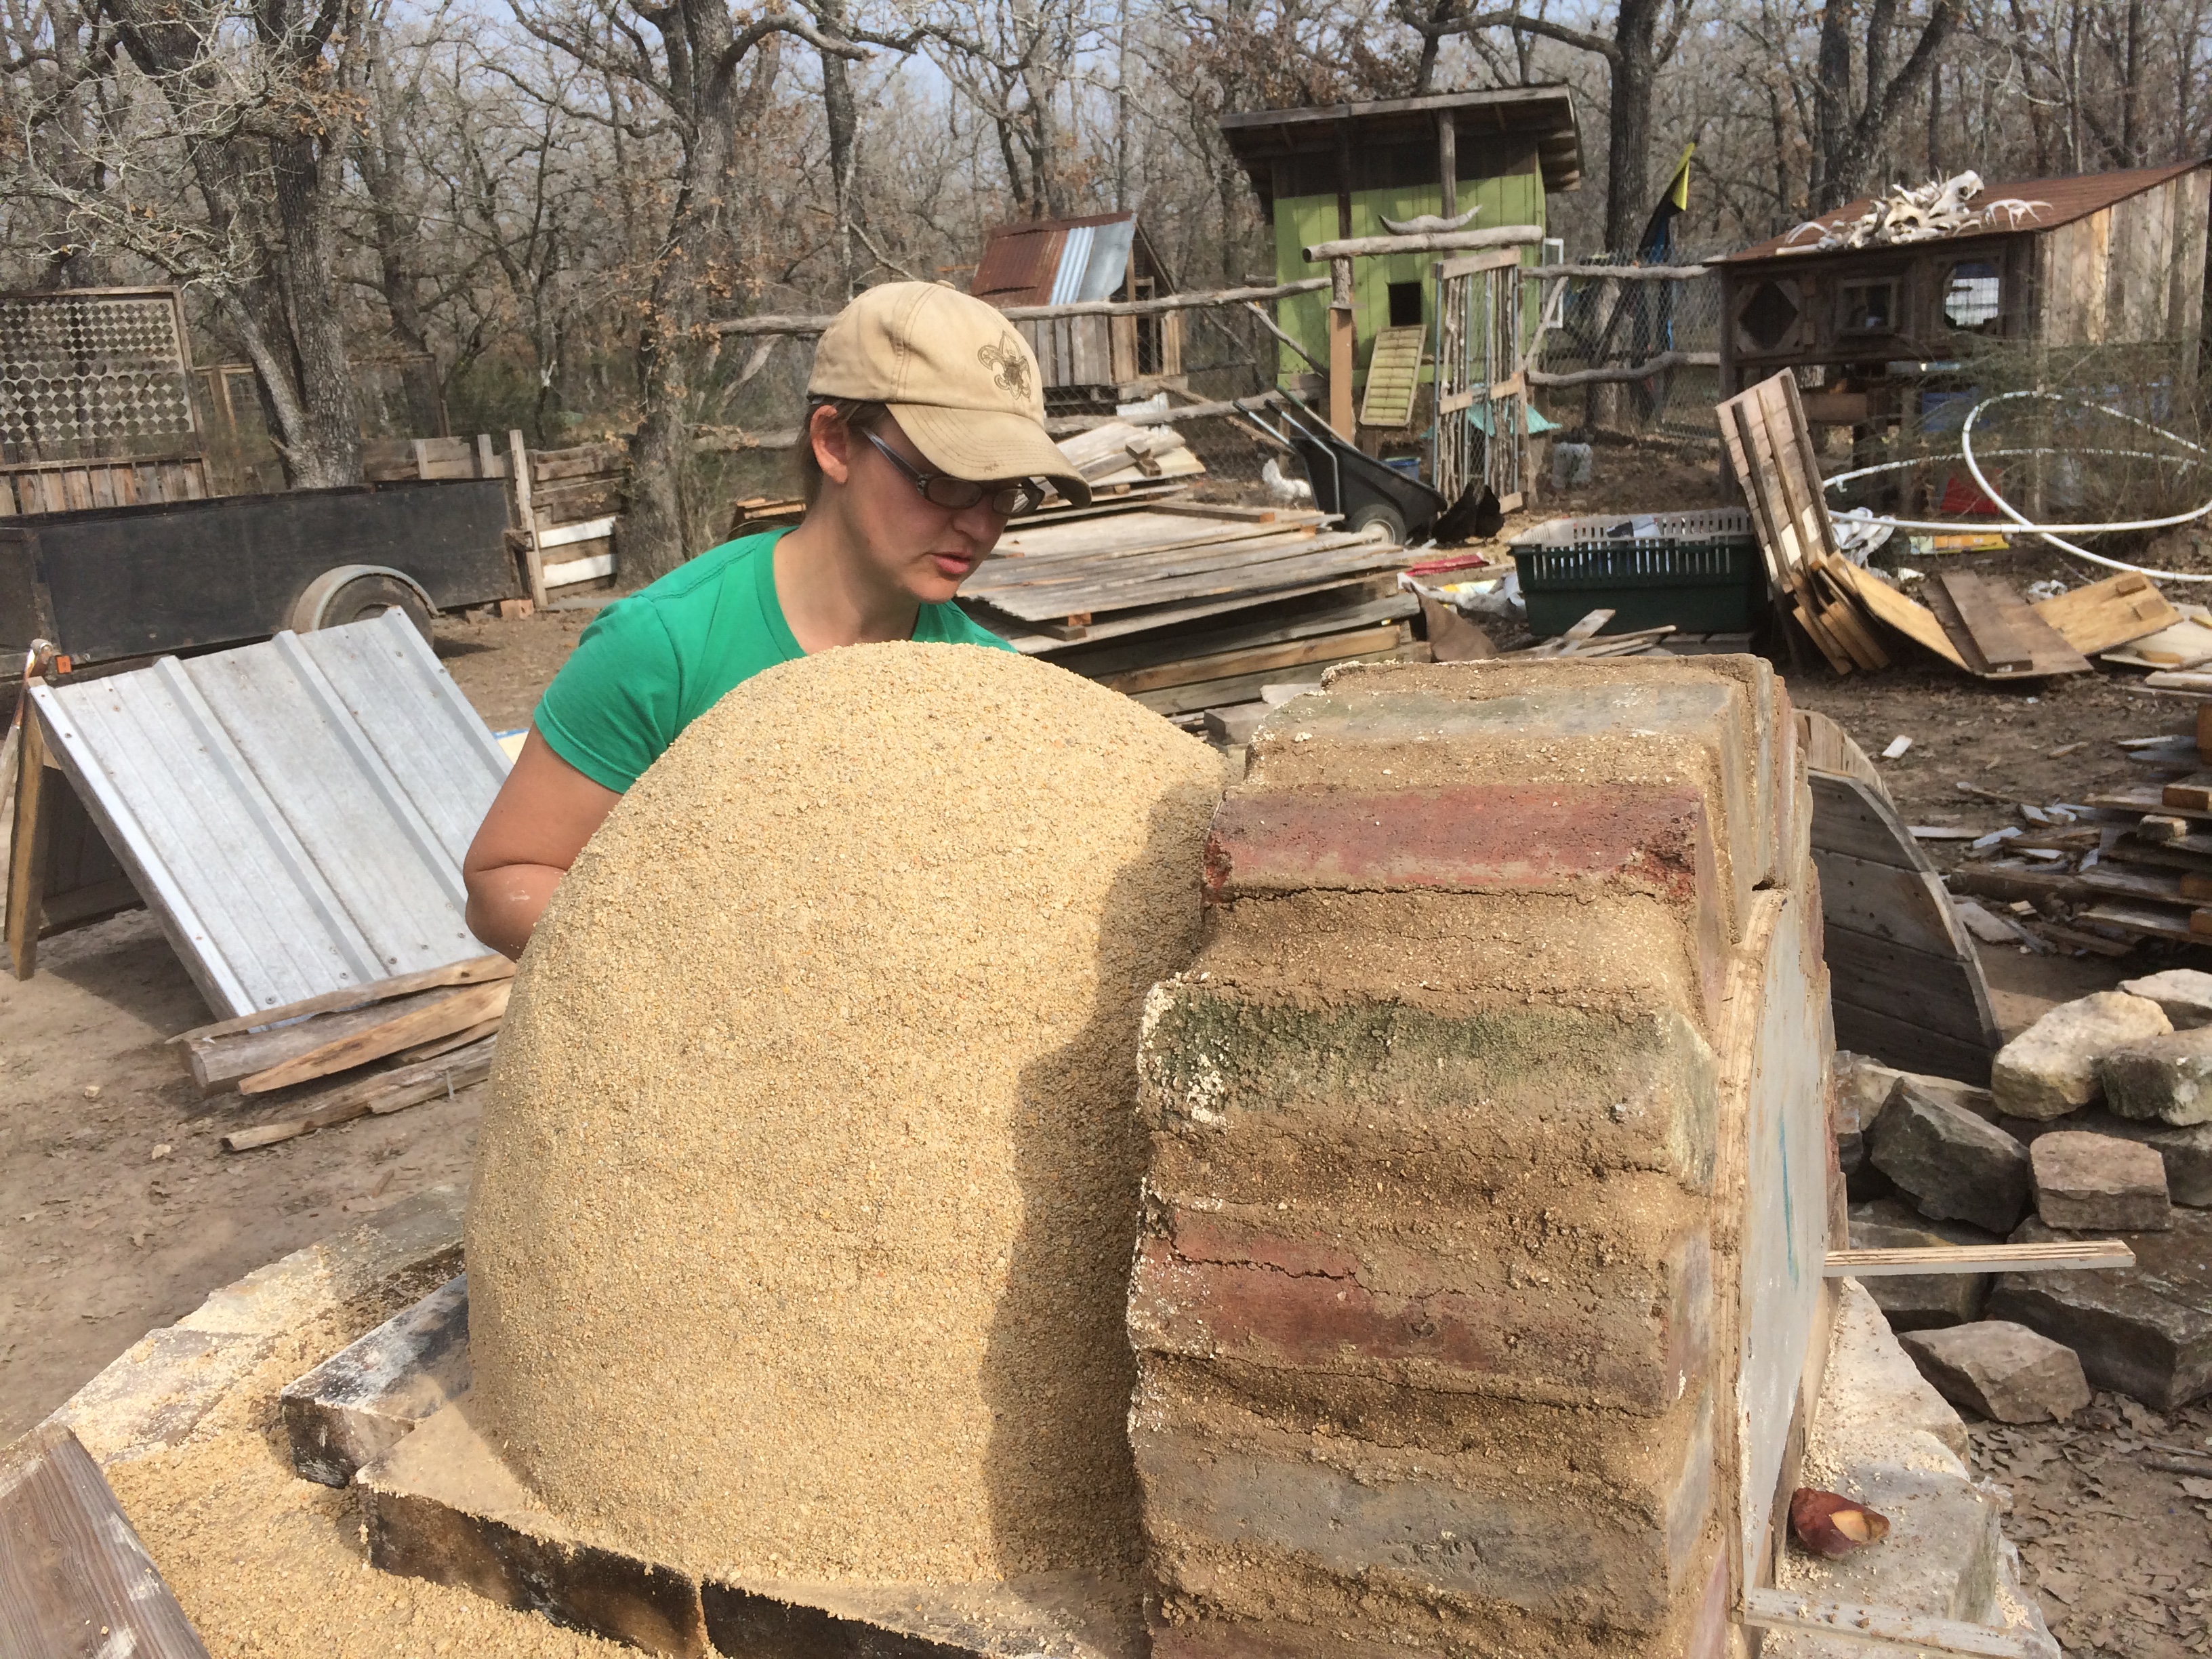
First, we built the sand mold, like a sandcastle – this was the shape of what would become the void within the oven. We sprayed it with water and patted it tightly as we worked, attempting to create a smooth, flowing interior that fire and hot gas would roll through nicely.
building the void – sand form almost completed (with the beginnings of the roof visible in the background)
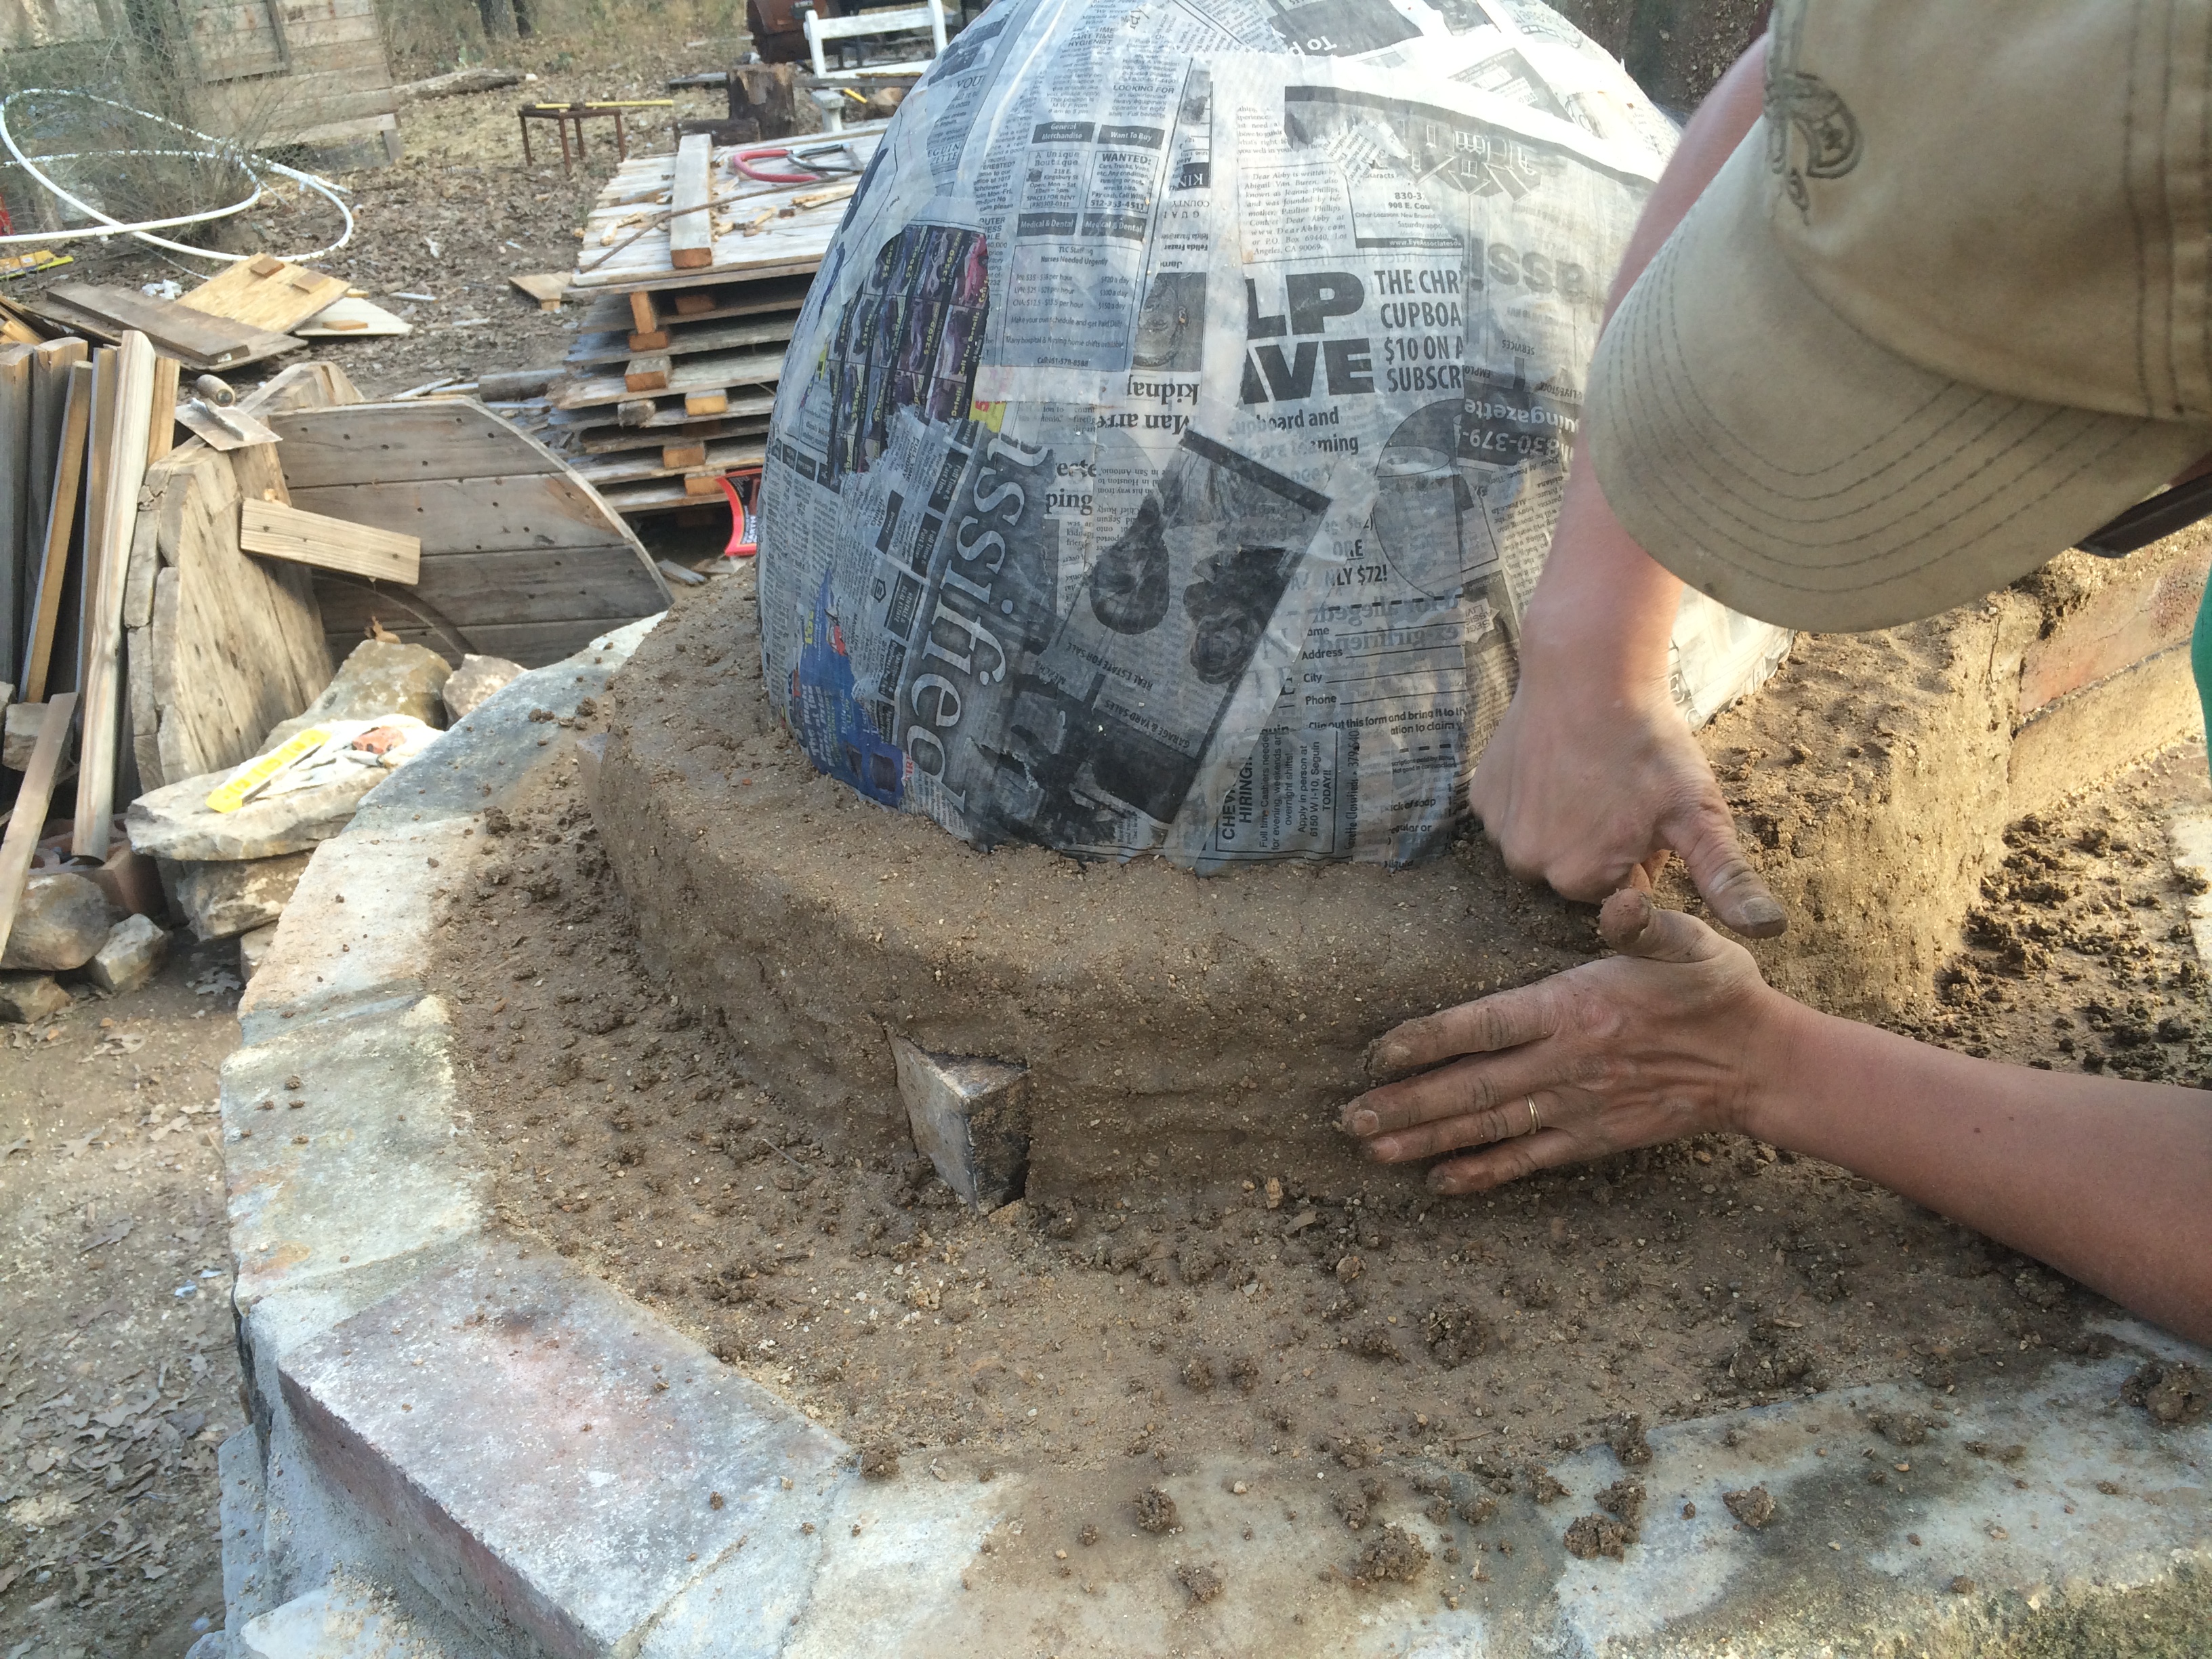
The hardest part of the sand form was the newspaper layer, which would help us remove the sand from the clay later – it was frustrating to get it to stay smooth and in place, but we learned as we went, using lots of water, and smaller pieces of paper.
The sand form and the oven mud interior layer had to be done the same day – we we launched immediately into it.
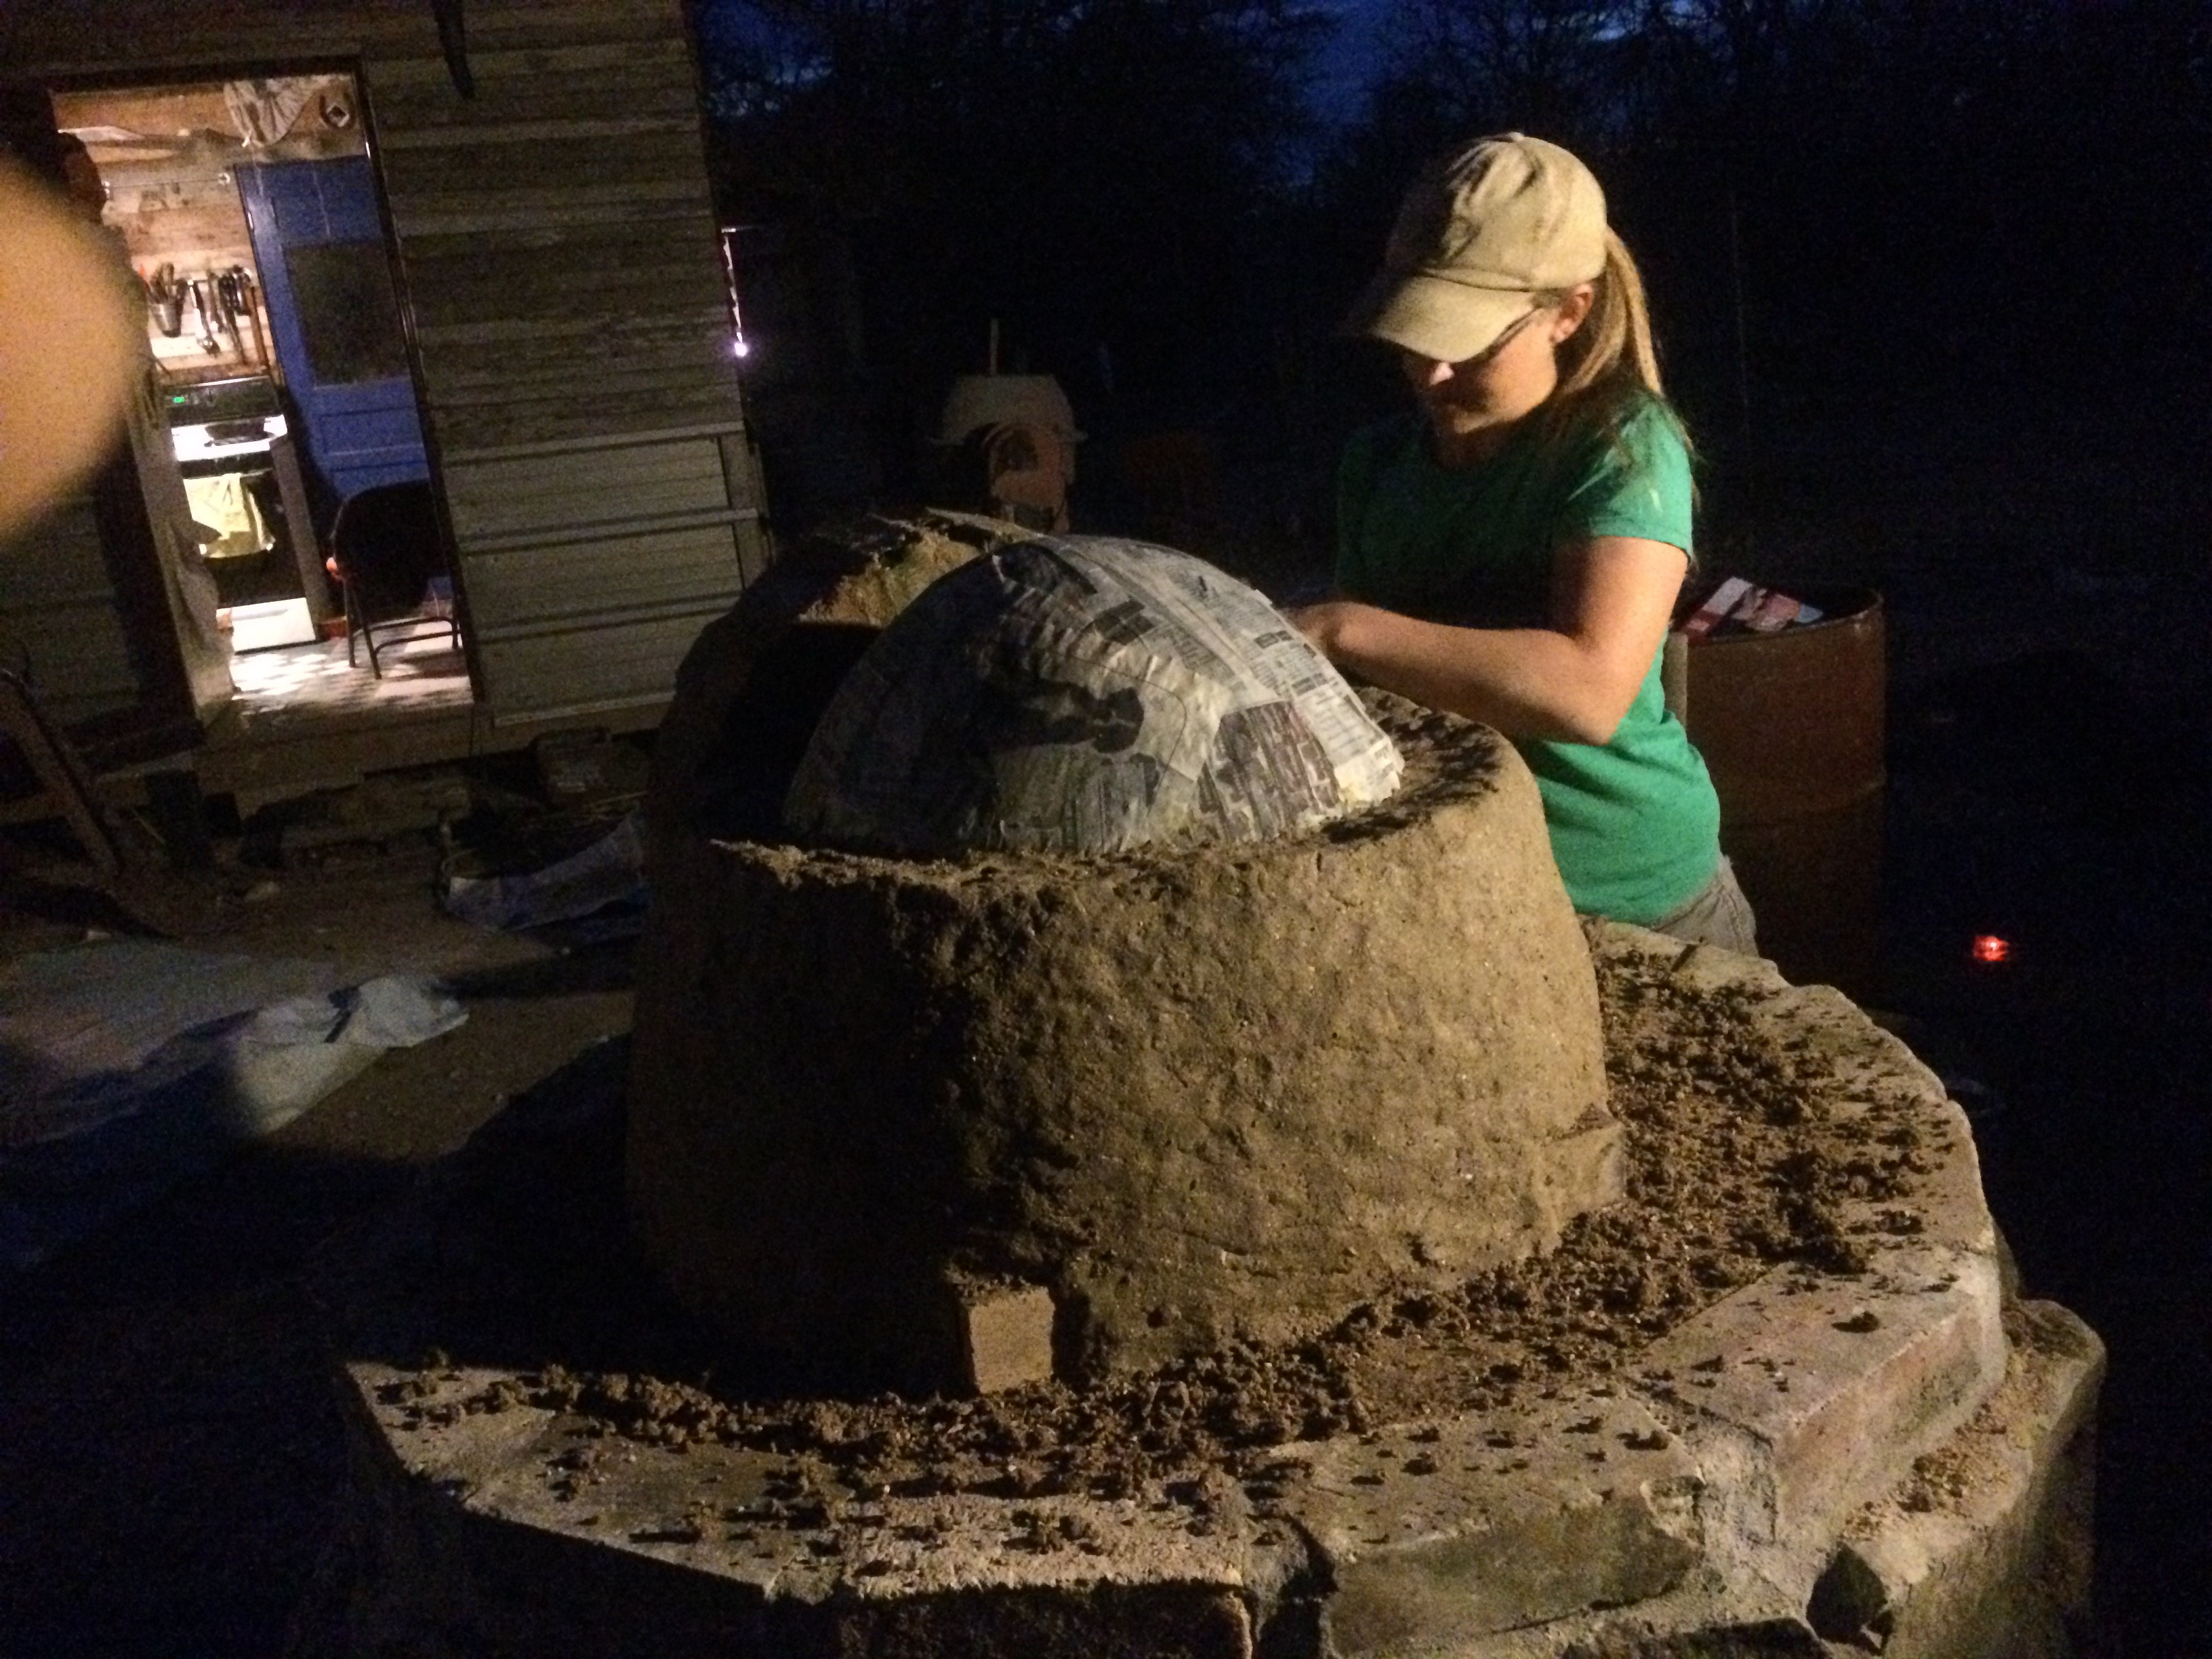
packing the oven mud interior layer
The going was slow, as we carefully packed the oven mud into place, a fist-sized chunk at a time, maintaining a consistent 3″ thickness, and only applying force into existing clay (not into the fragile sand form). A CD we’d bought in Austin from the musician Kiko Villamizar played on repeat for hours – it was not the first or the last time the album provided the soundtrack to our work, but it was the longest continuous stretch.
We each worked from one side of the arch to the back, meeting in the middle – and then switched sides for the next layer, so that any idiosyncrasies in our individual methods would be evenly distributed on either side, and layered with the other’s style.
step by step, blob by blob – higher & higher …
Darkness fell, and we set up lights on each side so we could finish the vital layer.
While the interior oven mud layer dried, we left it alone and spent a day working on the protective roof, not wanting to impatiently cause a collapse.
Once it seemed dry and stable, we filled in a couple of drying cracks with oven mud, and pulled out the arch form to reveal the sand within.
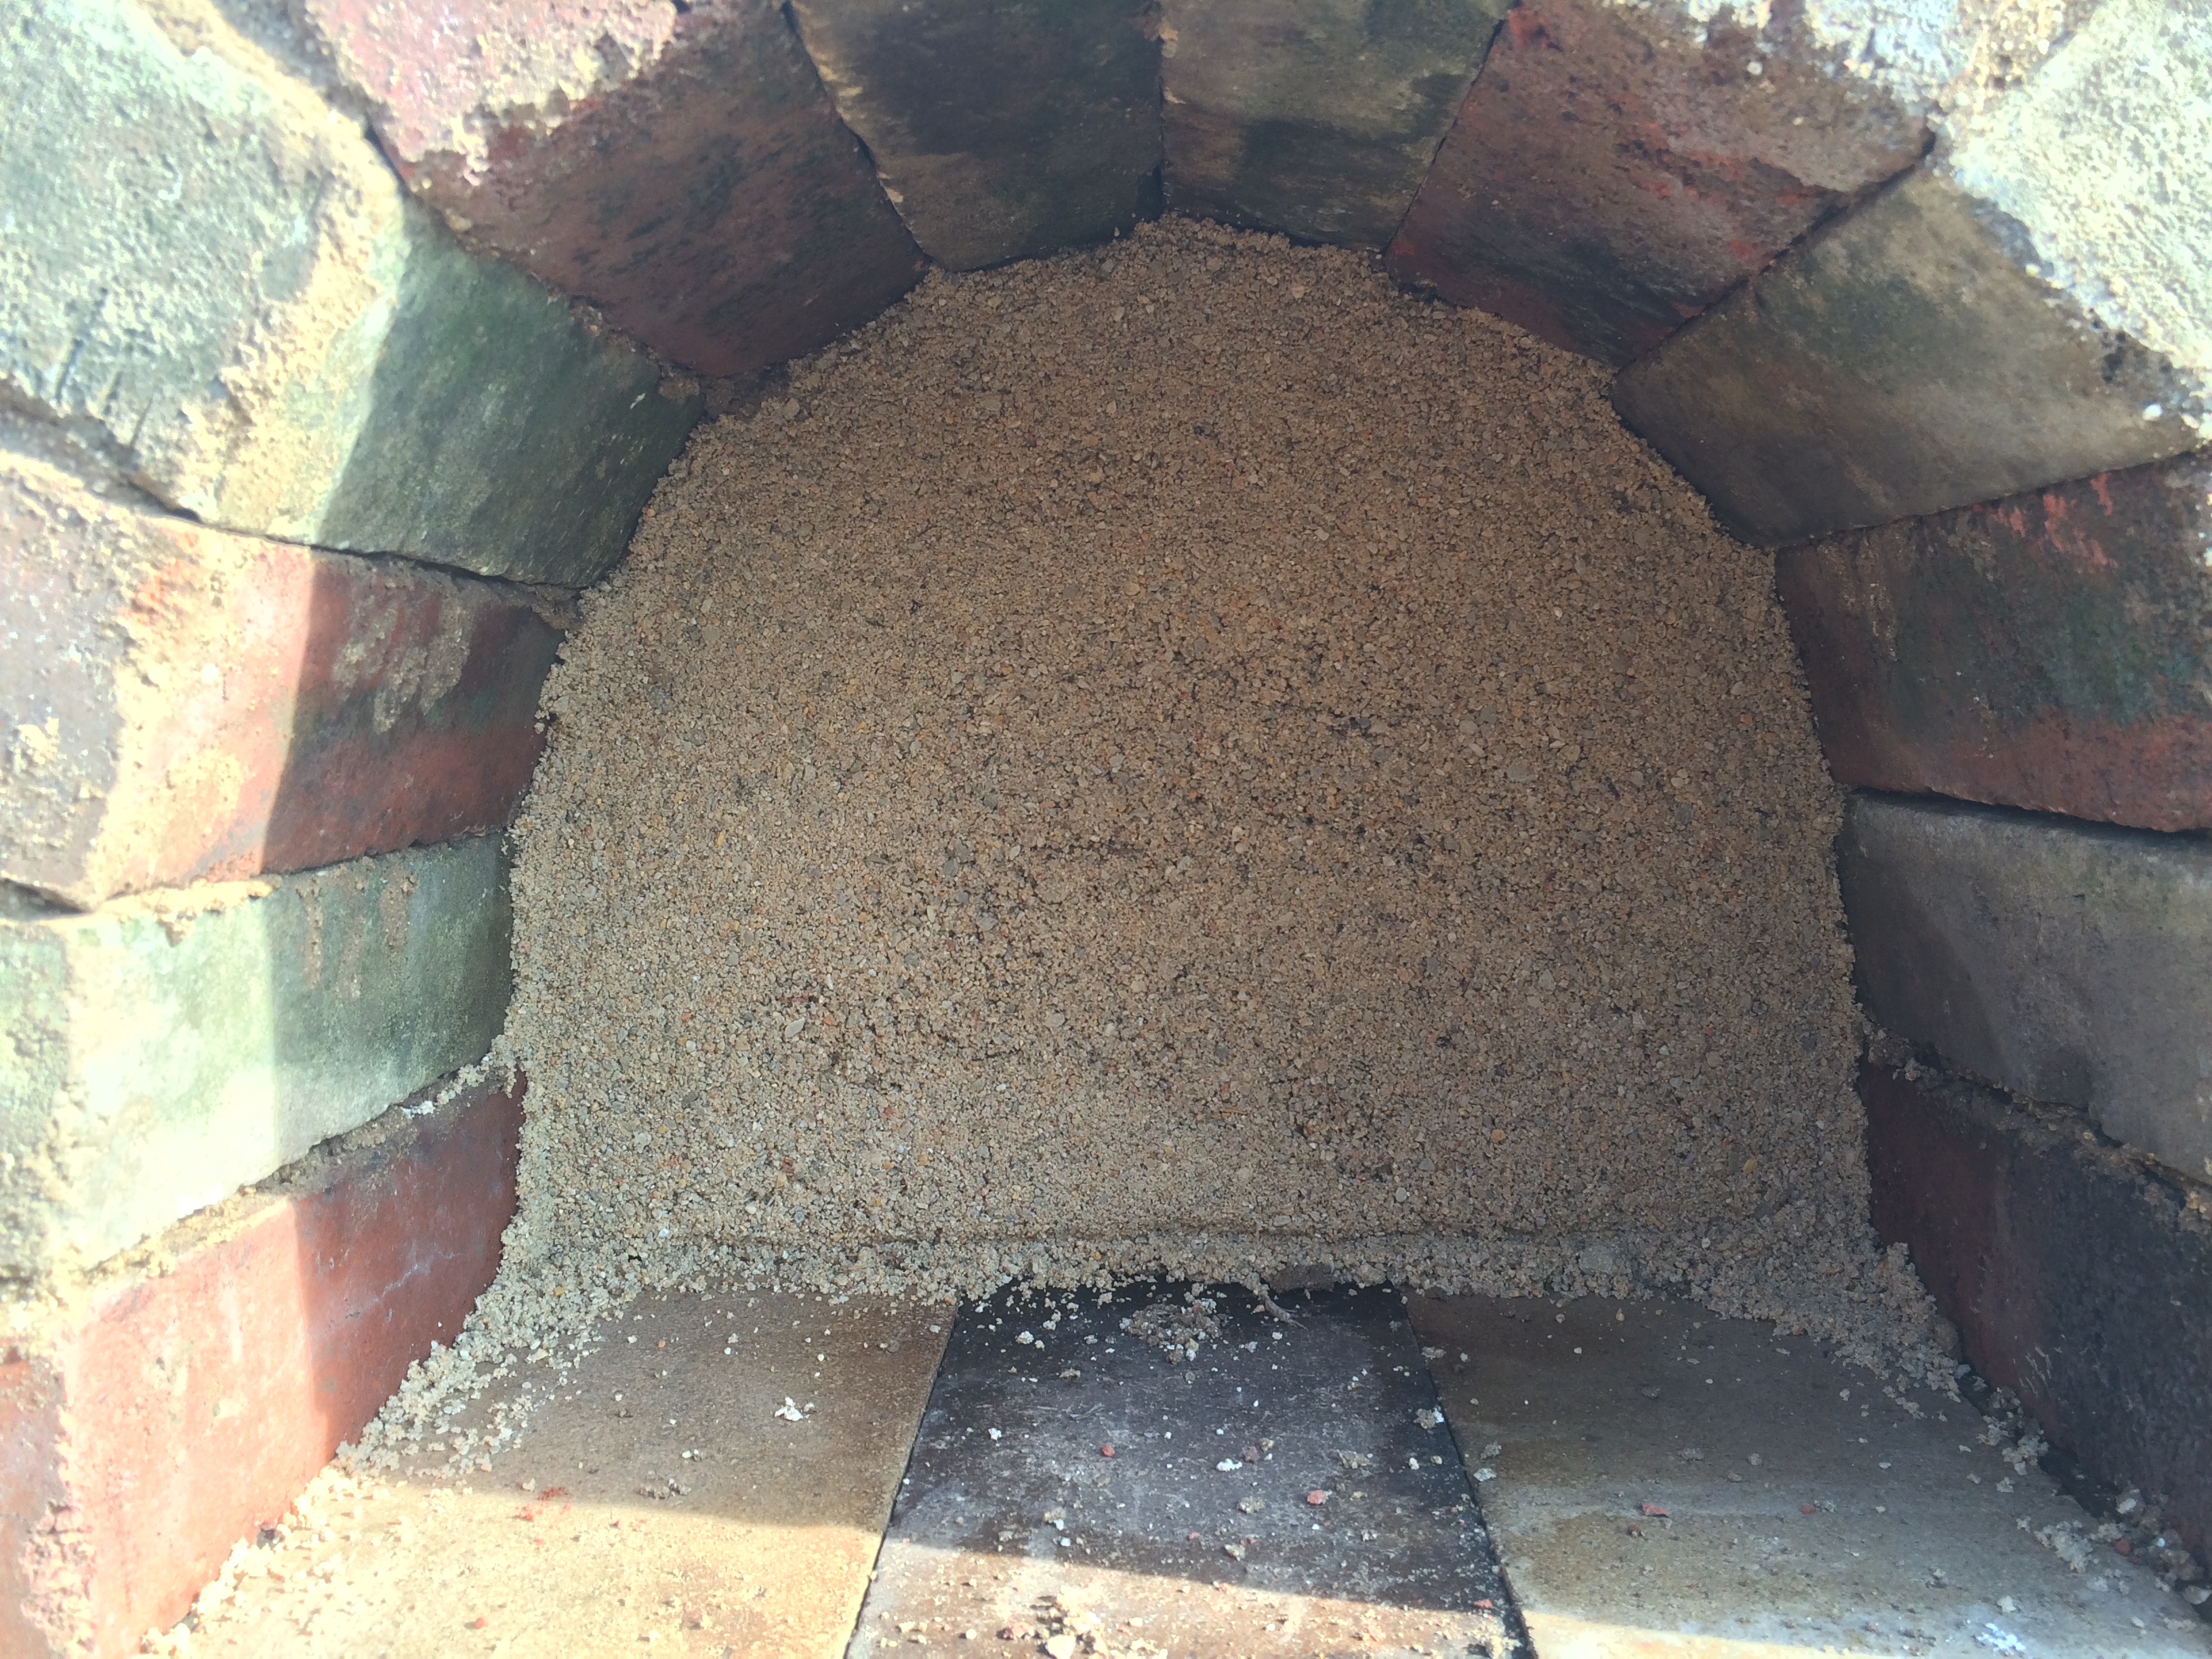
sand behind the arch form – we let it sit open to help the oven mud dry out more from within
Then it was time to scoop out the sand form, and create the void.
removing sand form, with the roof in the background
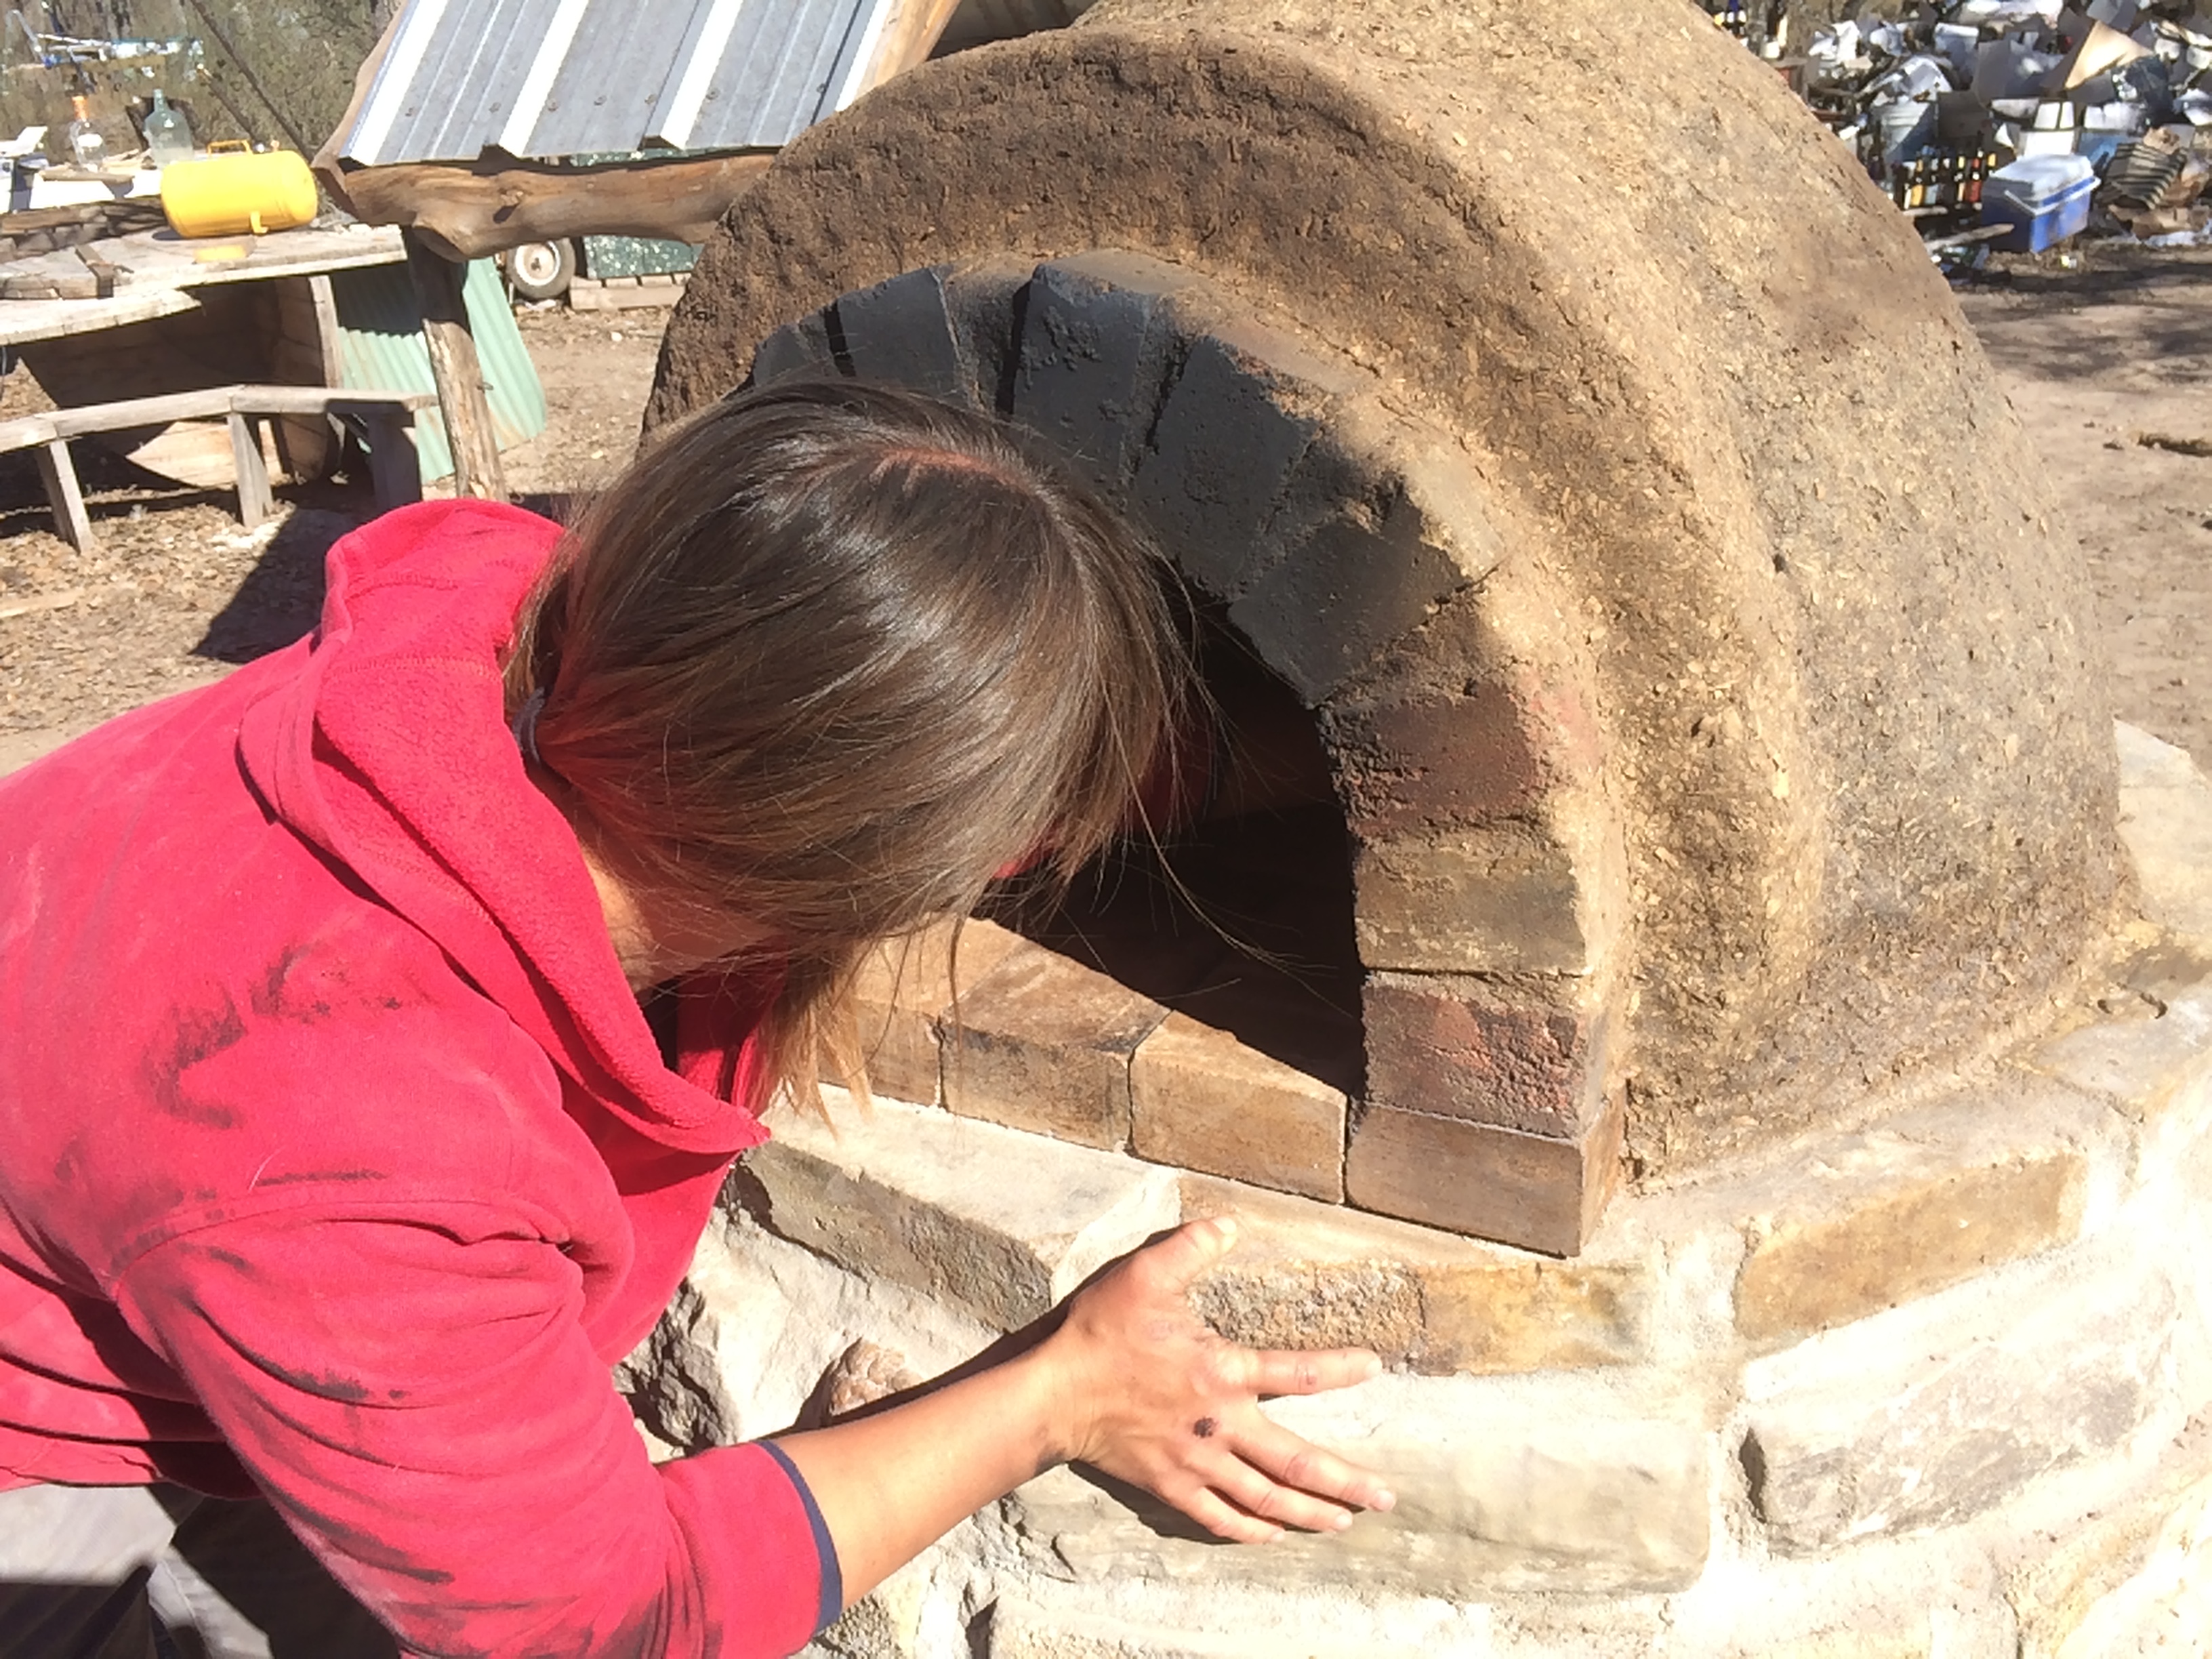
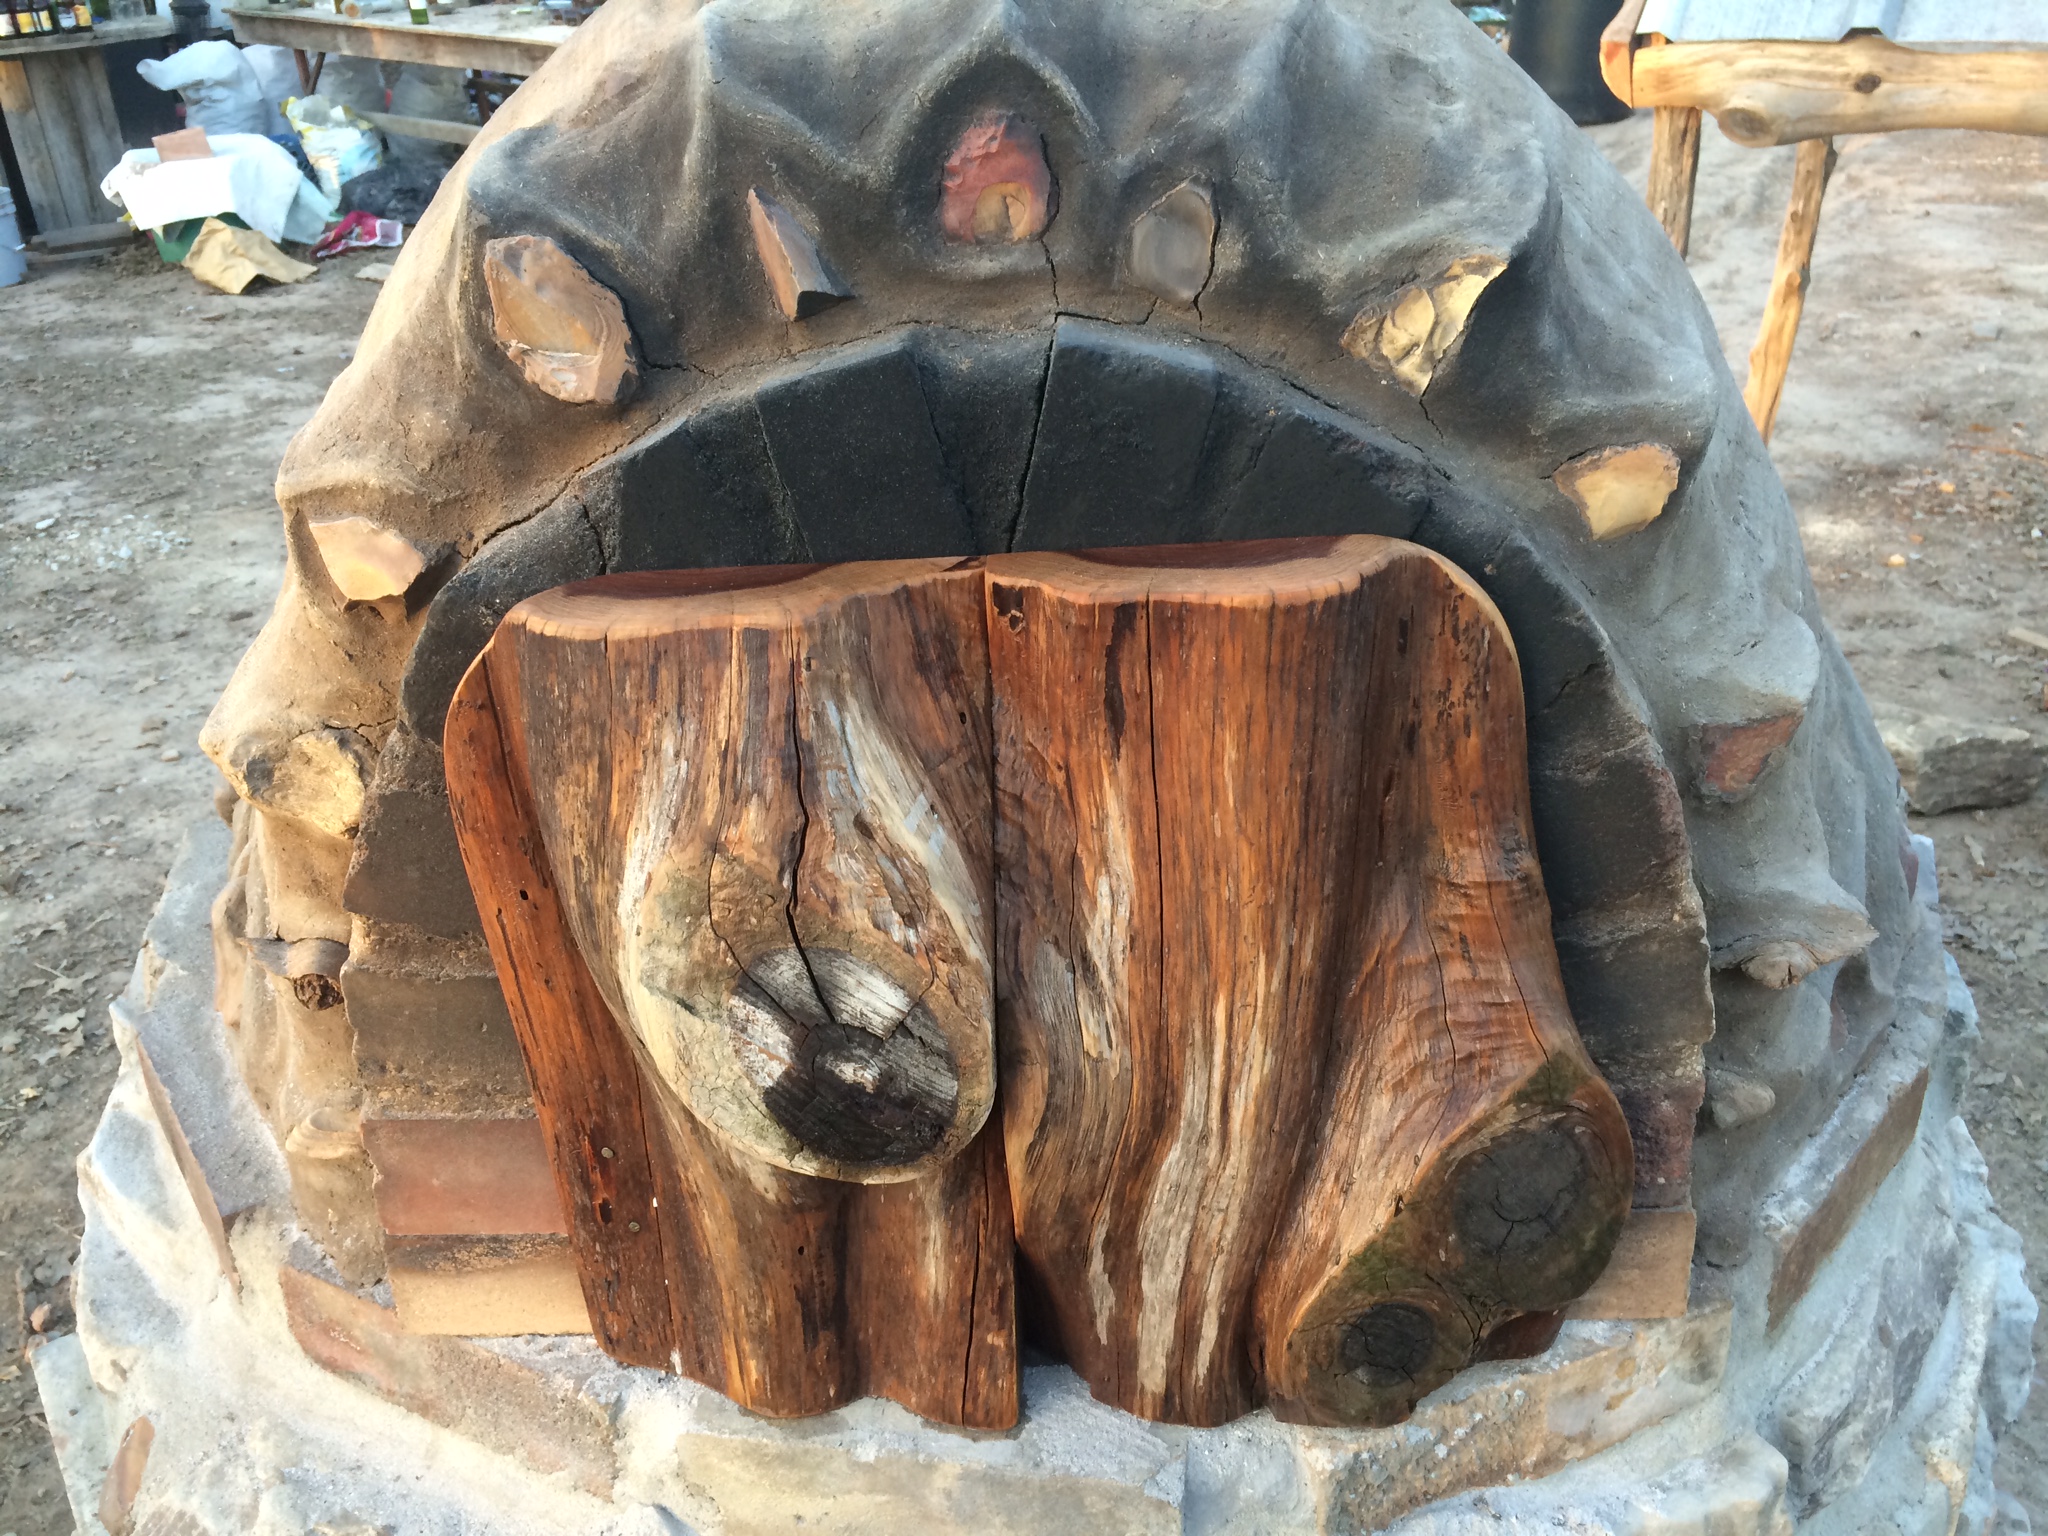
interior layer complete! the five firebricks within and beneath the arch are not for baking (they lack the thick subfloor heat pad – the outer support the arch, and the inner 3 allow bread or pizza to be slid in and out from the baking surface)
Once the oven mud was stable and we’d pulled the sand out, we started on the next layer – 4 inches of the same wood shaving/clay slip insulation that we’d used in the base. This layer went much more quickly – the insulation was simple to mix, and fast to apply and shape in big double handfuls.
Widget & Cleo loved hanging out beneath the roof-in-progress & watching us work – here, the insulation layer is almost completed
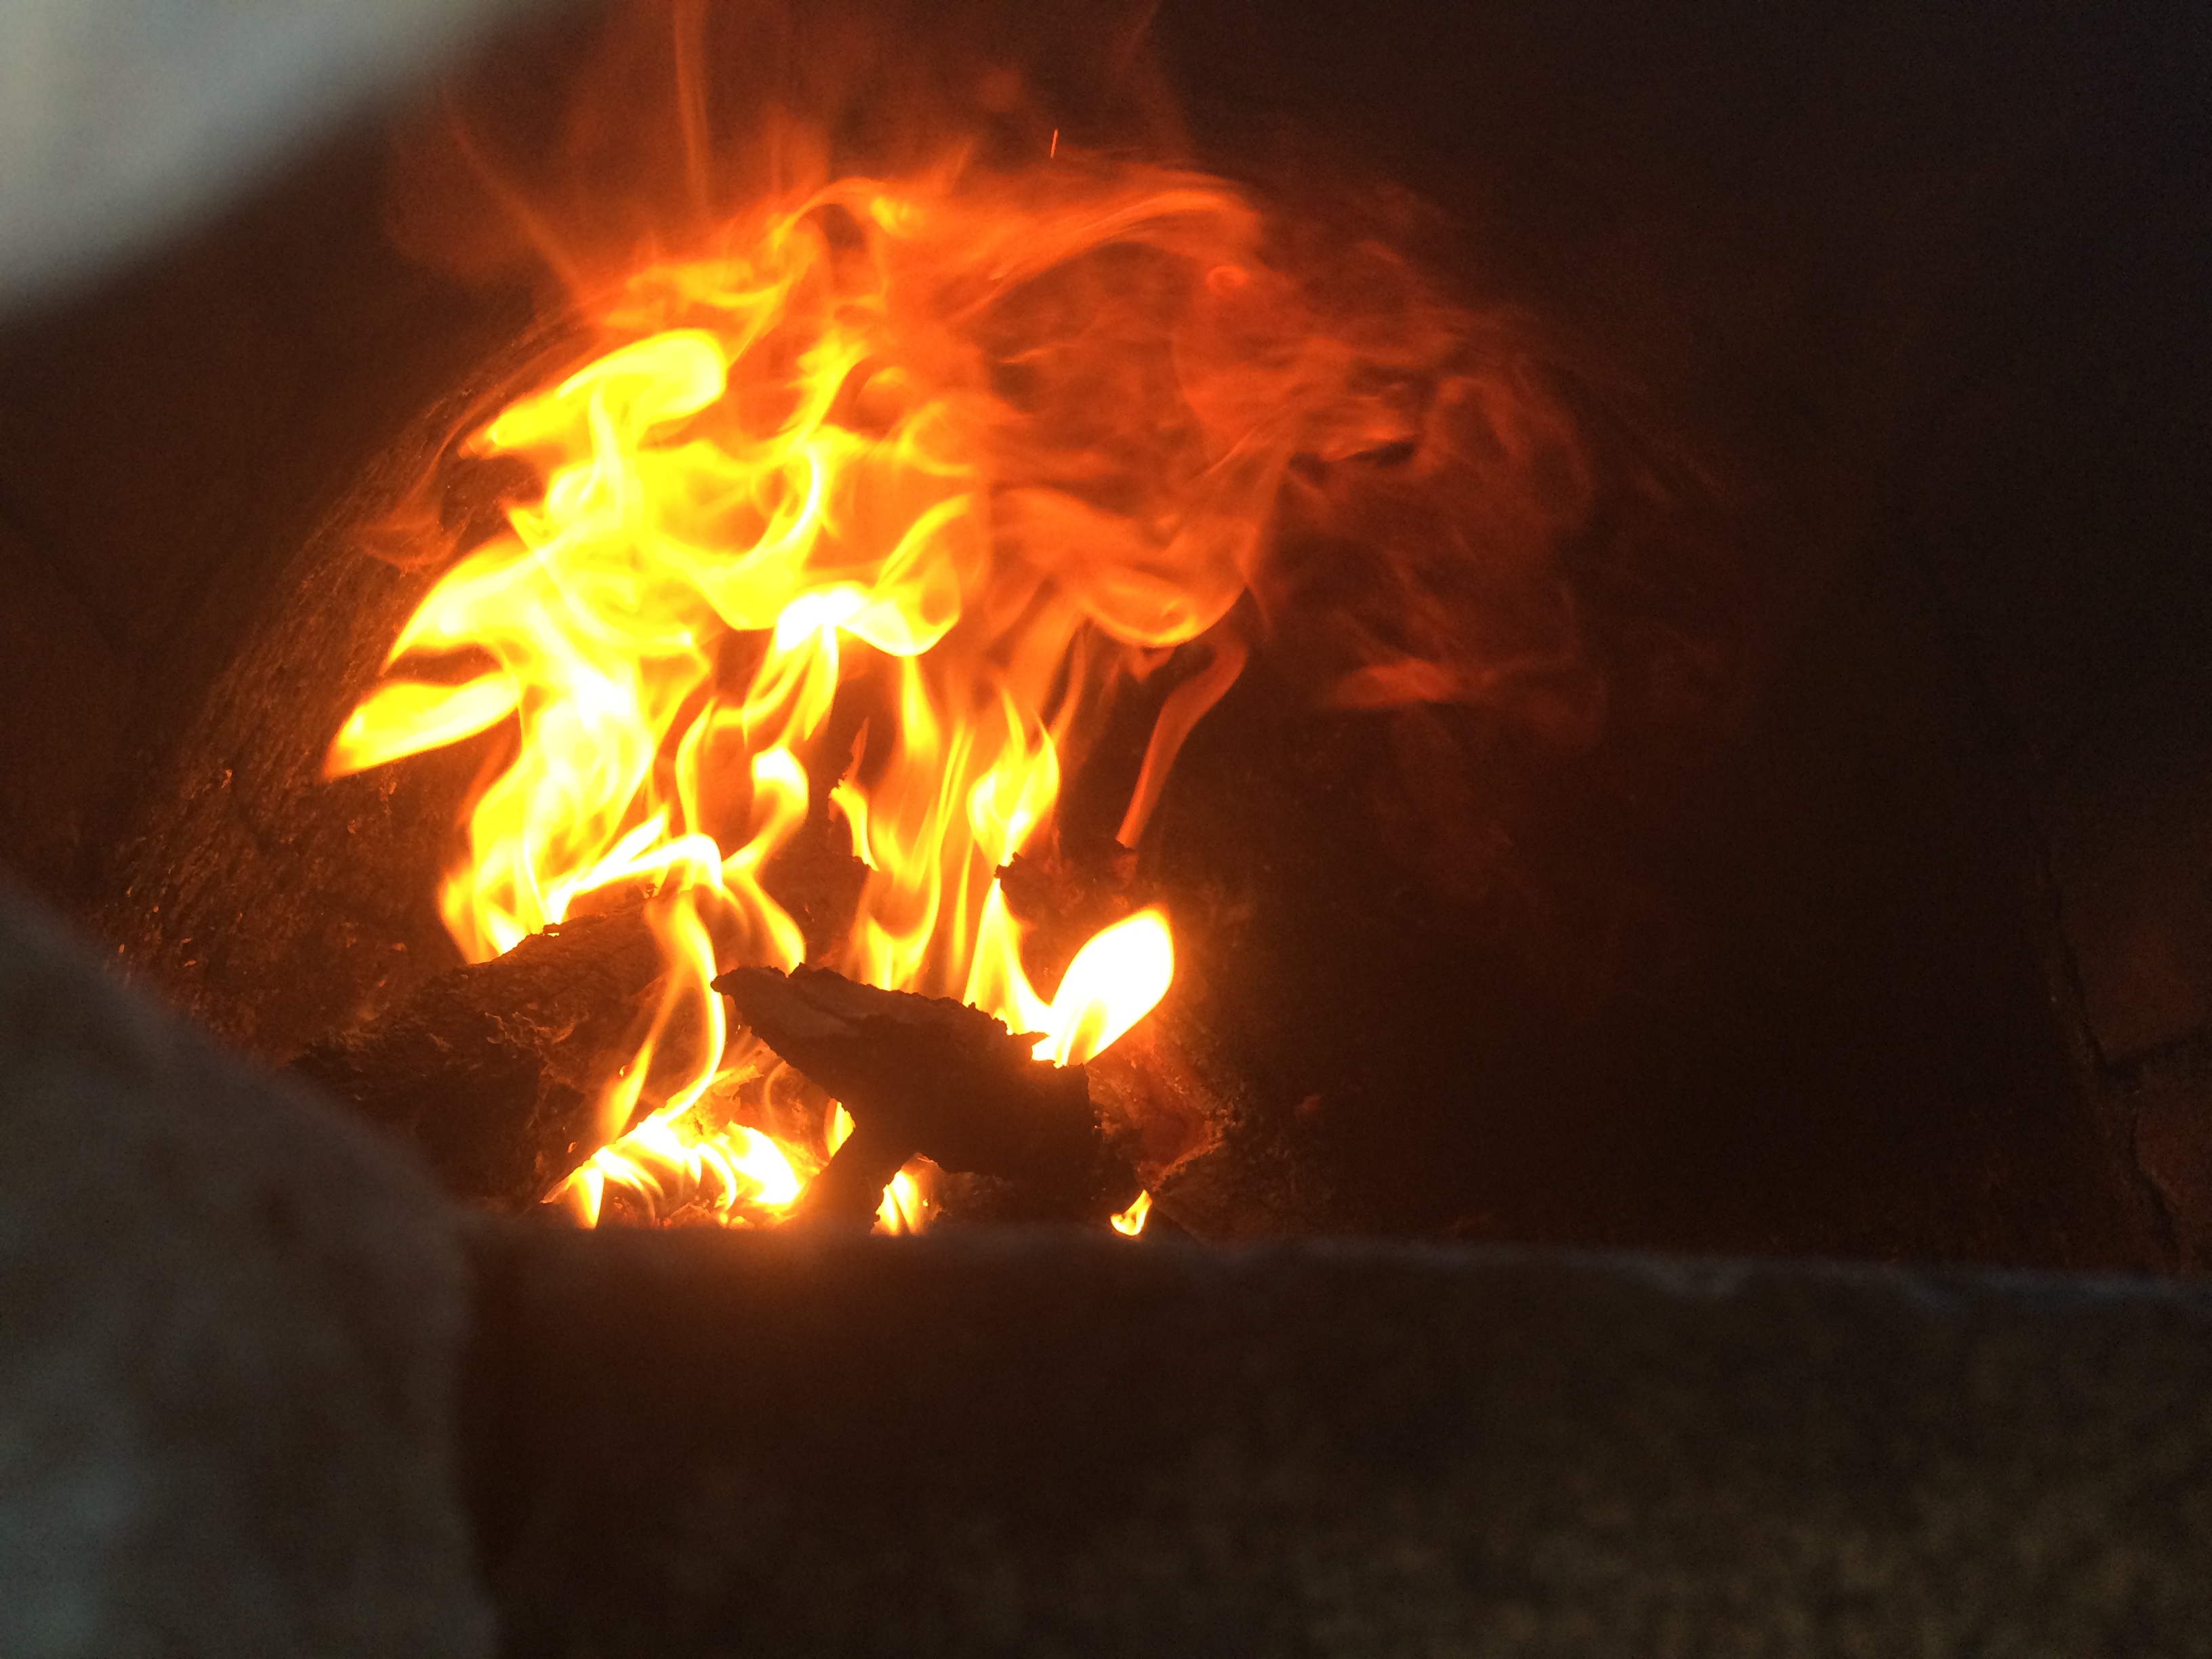
The next day, we started the first-ever fire inside – a drying fire, which we kept going for about two straight days, speeding along the drying of the water-soaked insulation – we needed it to be mostly dry before we applied the final exterior clay, and we were quickly running out of time at Habitable Spaces.
at first, we kept the drying fire small …… but as the insulation began to harden, we grew bolder and build a sweeping wave of flame, moving the fire around the interior throughout the days and enjoying the way it moved through the oven
In order to use the oven effectively before we left, we had to dry out not just the insulation layer over the dome, but the insulation down in the base – which was now wicking moisture up, into the dome, and out into the air as the top dried out more and more.
steam exuding from the insulation, driven out by the fire inside
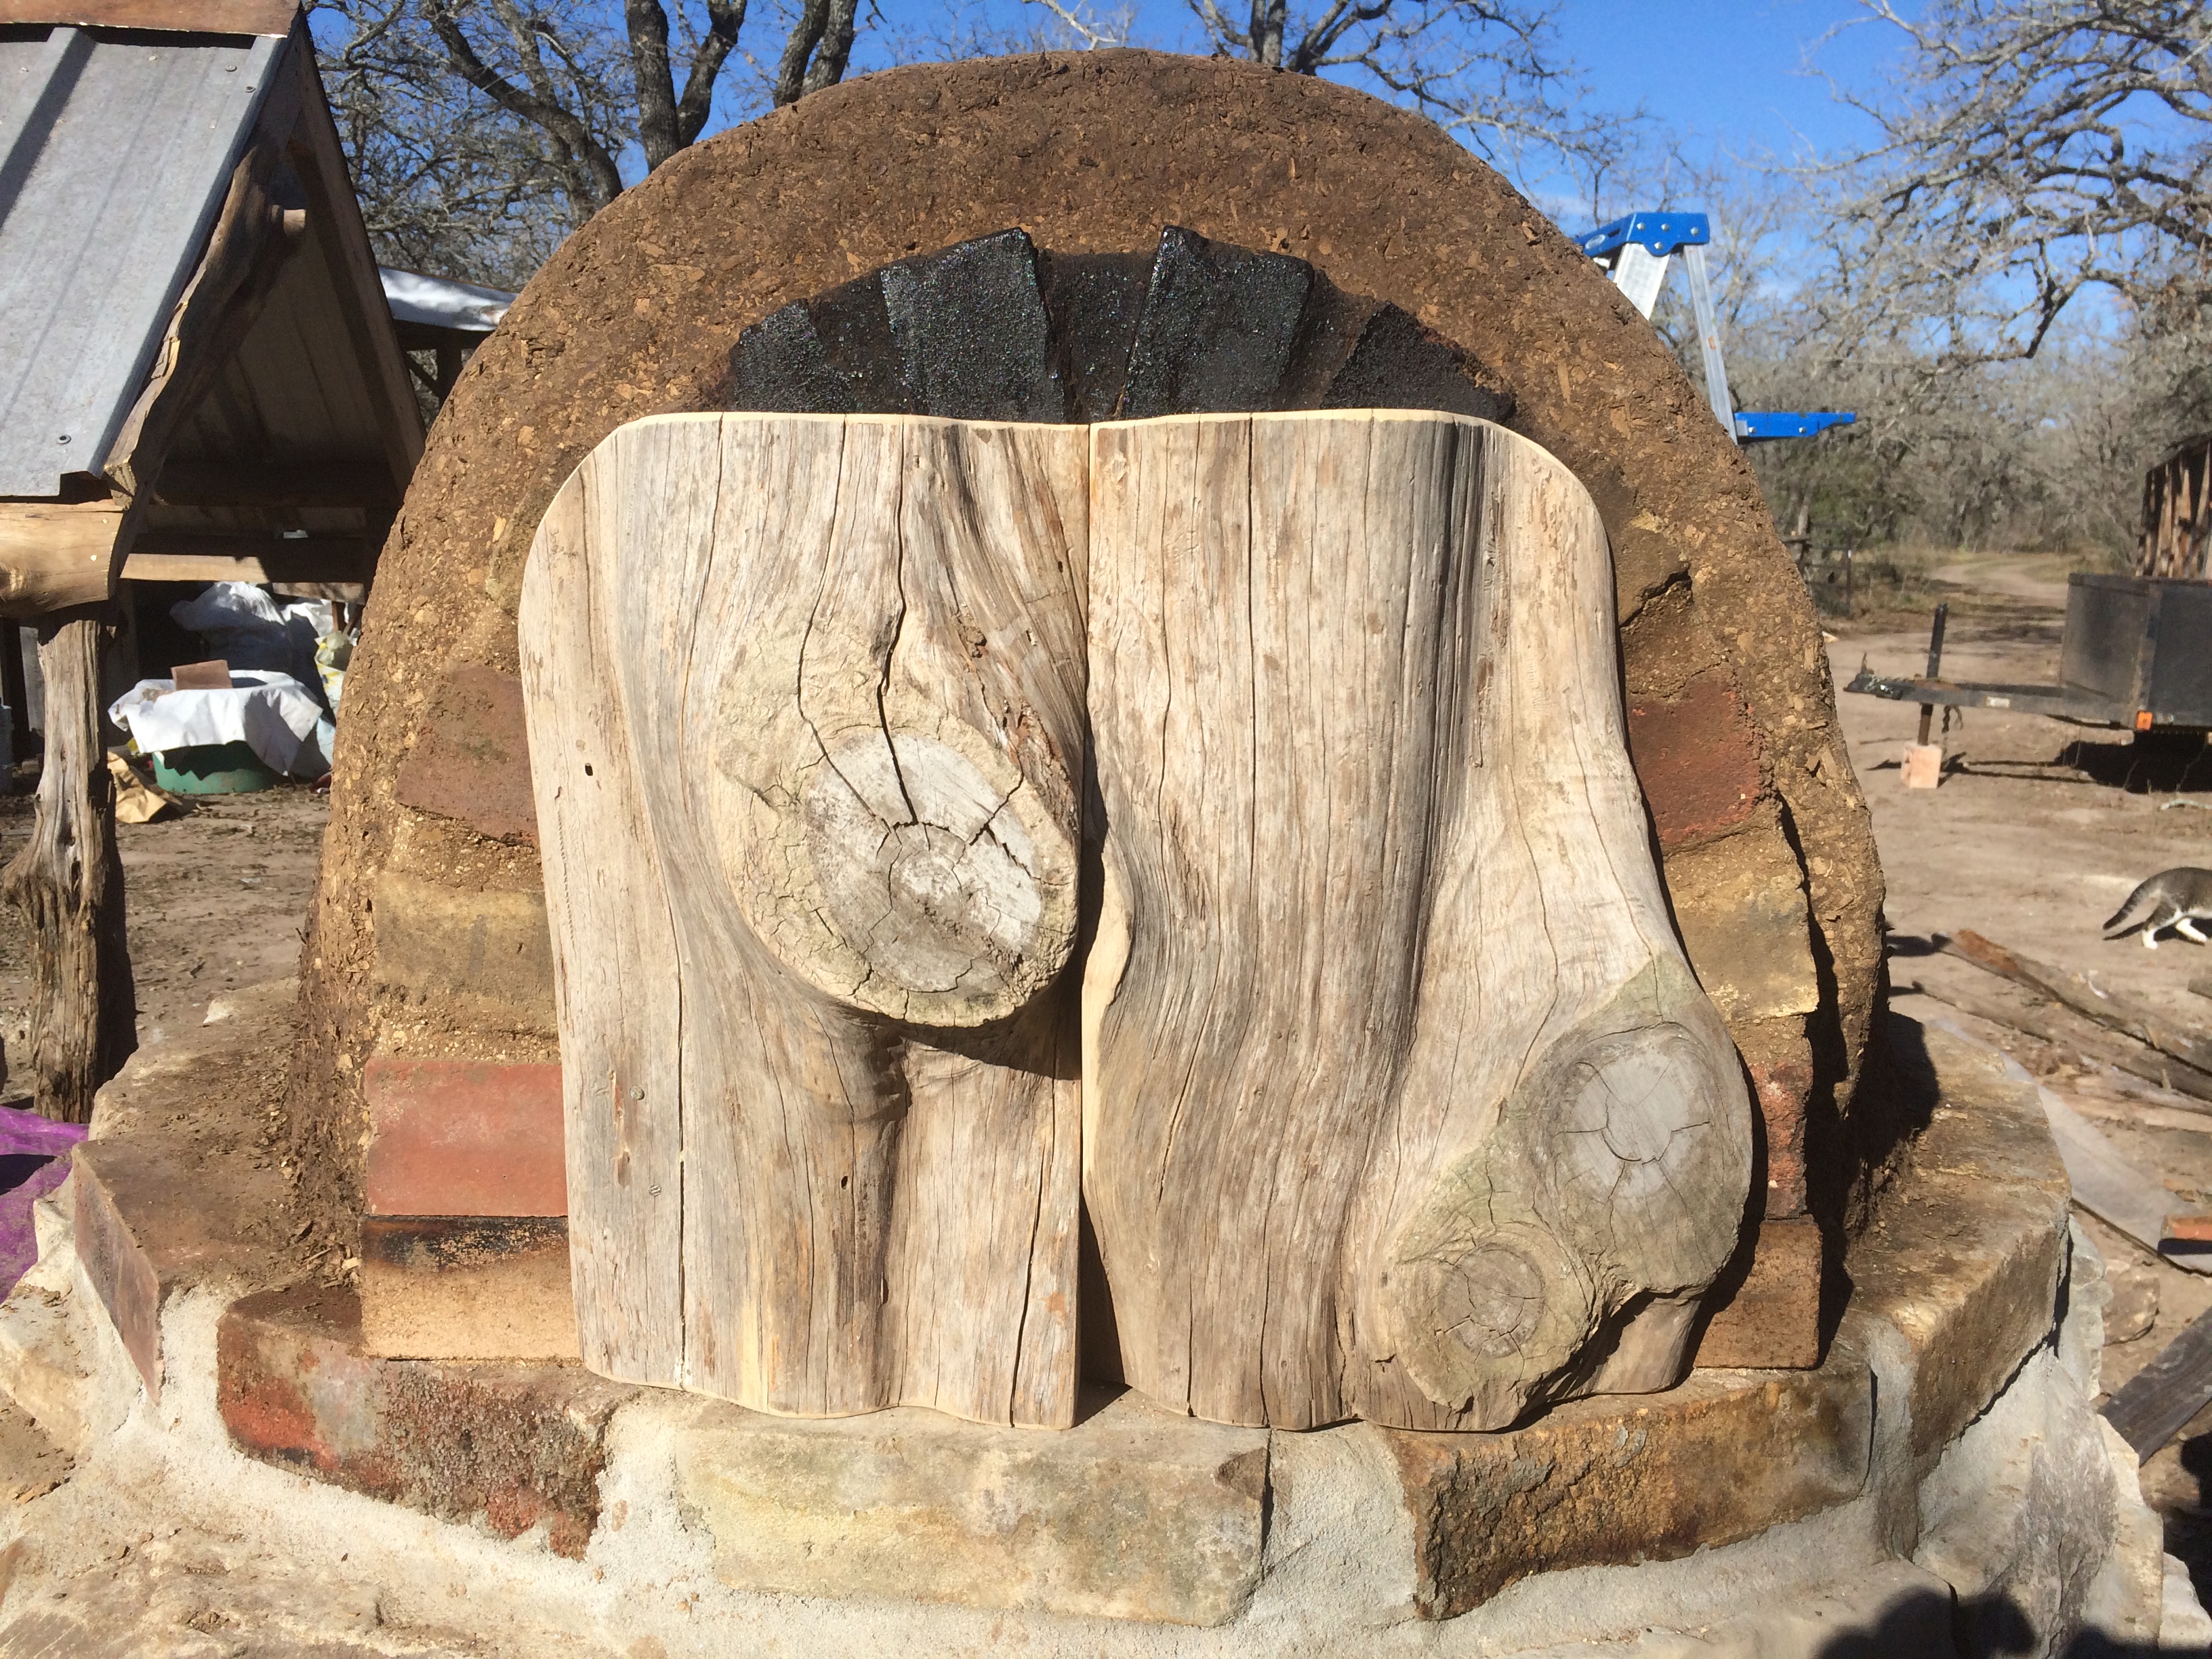
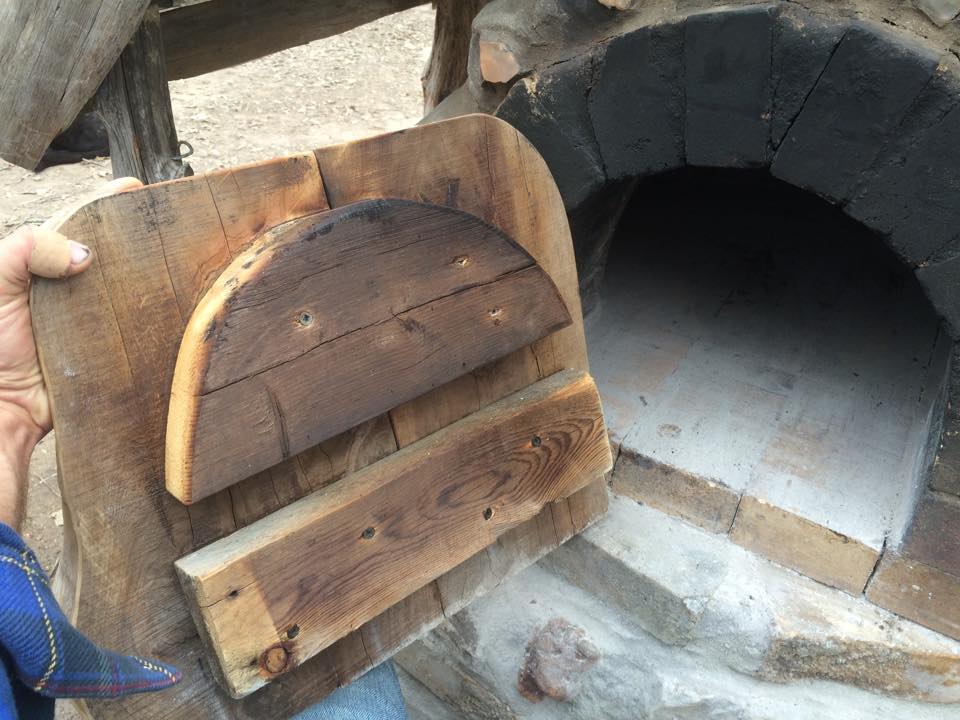
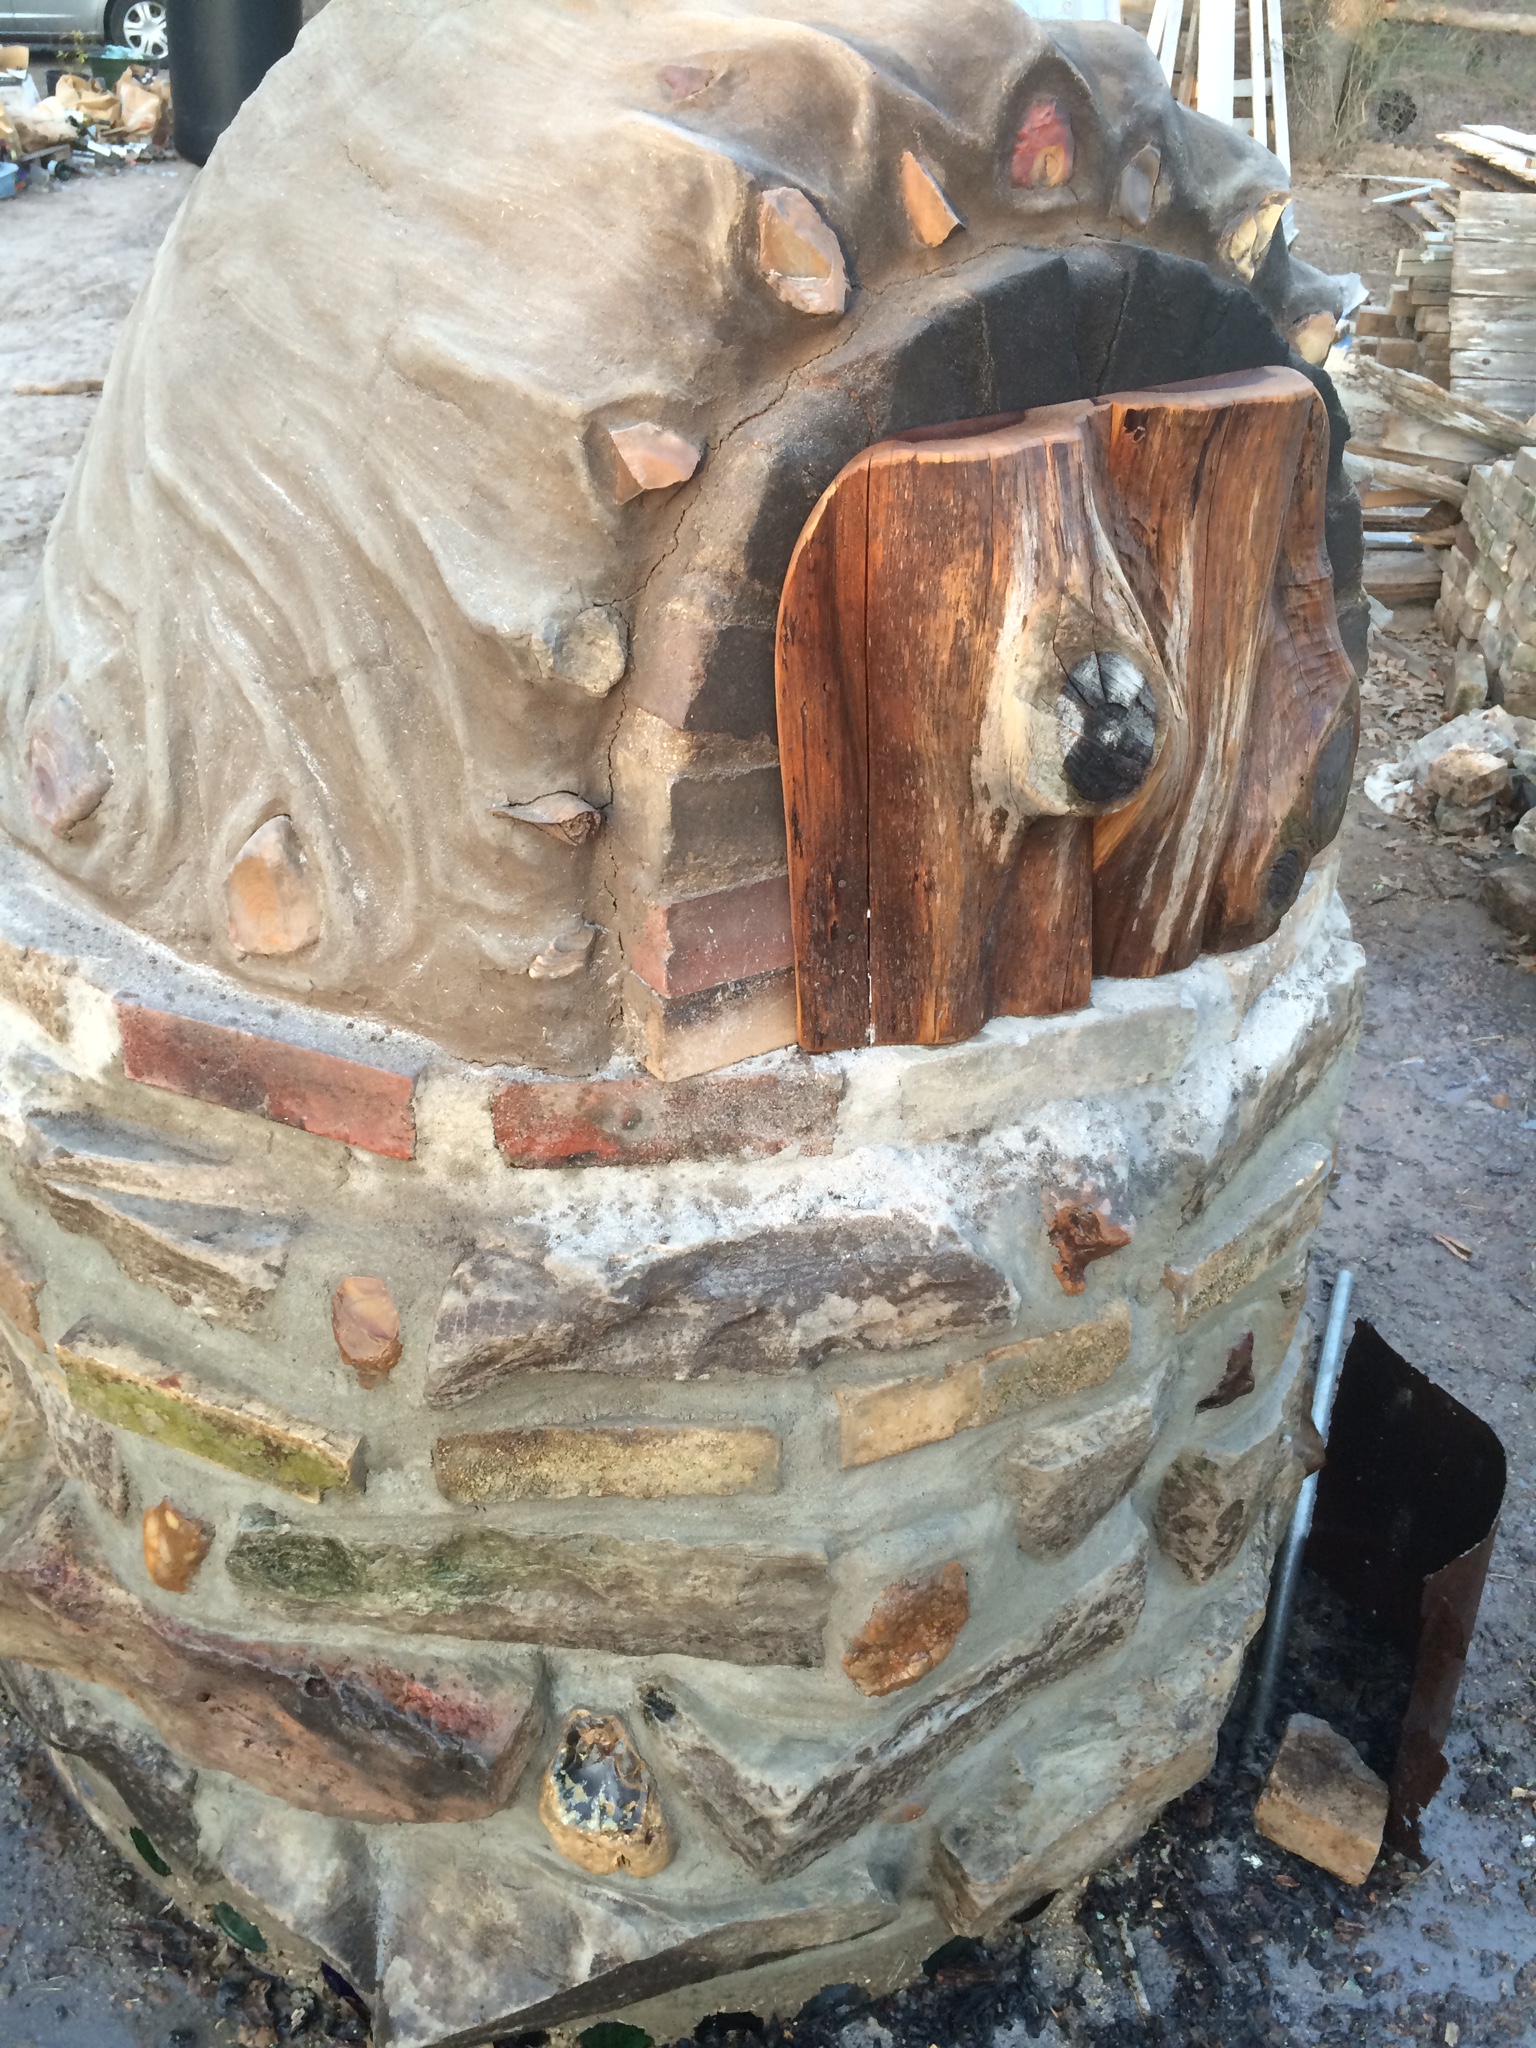
While we burned the drying fire for days, we built a baking door out of cedar scraps – this would seal in the heat of the oven after a fire had heated up the clay thoroughly, the embers had been removed, and the pizza or bread or pie was inside.
baking door – plugs the entrance, sealing in heat
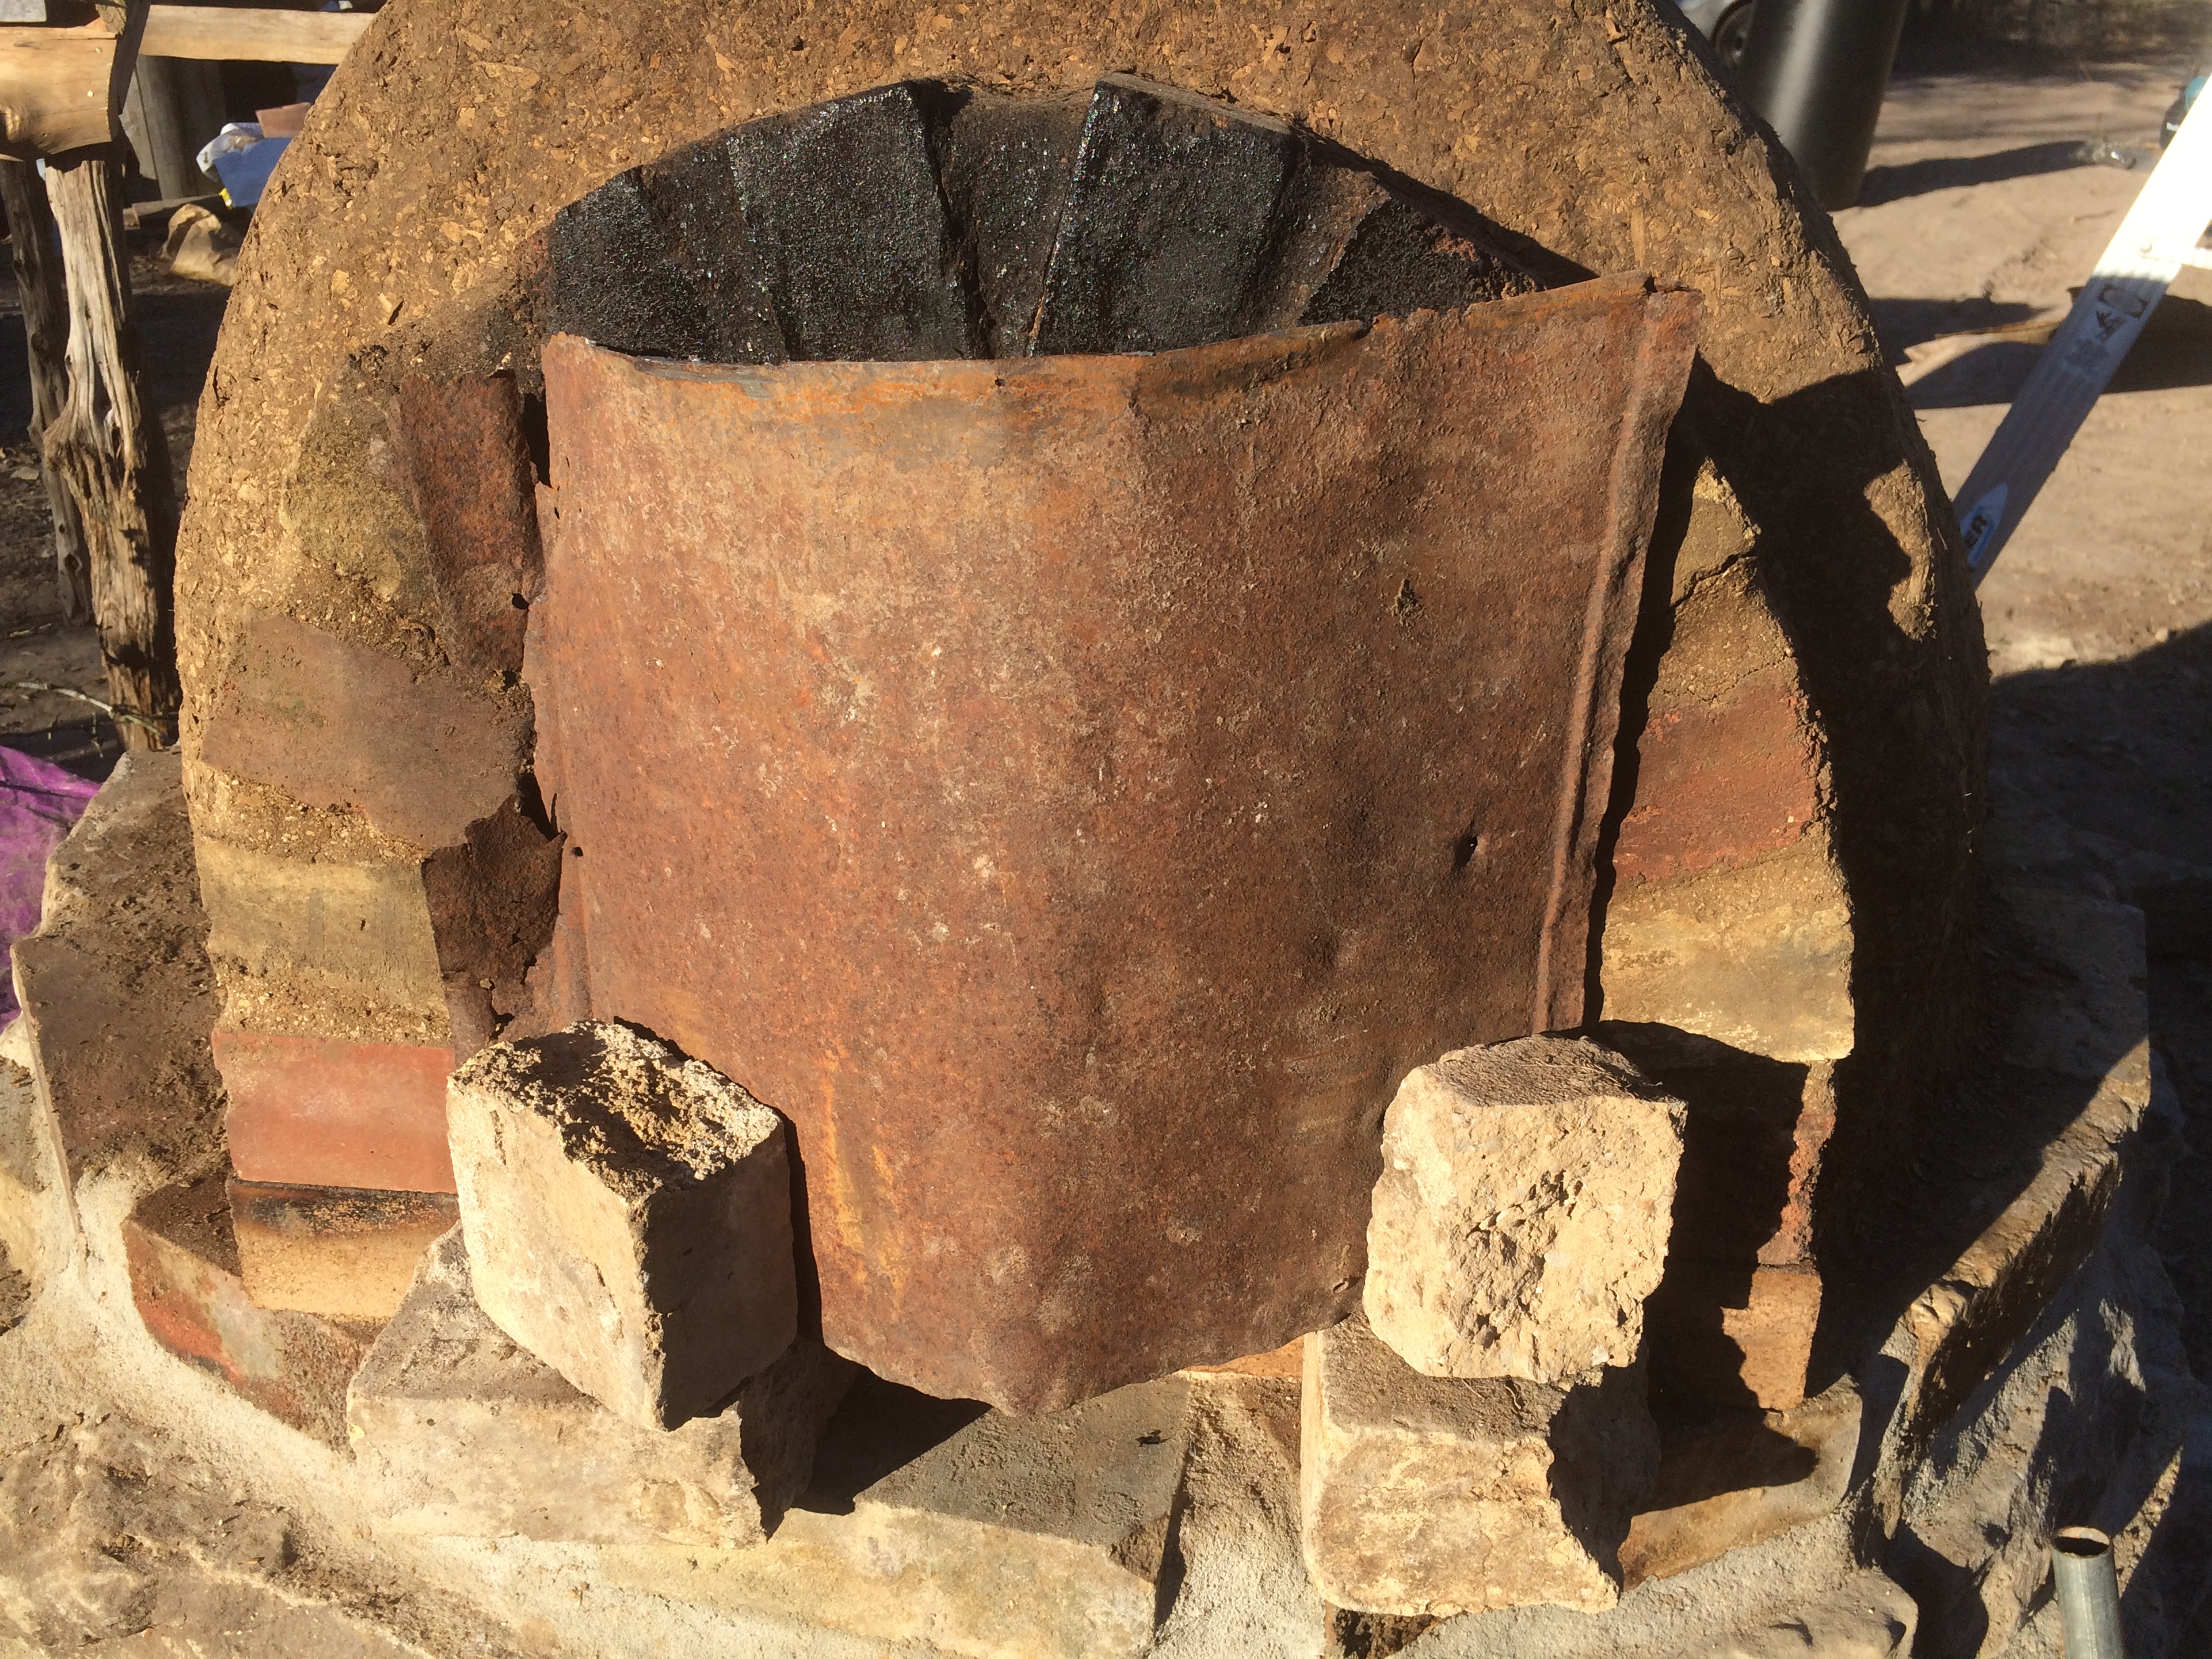
We also mocked up a simple “fire door” – not totally necessary, but nice to have on windy days when the fire is struggling to breathe due to turbulence. Cool fresh air comes in the bottom to feed the flames, and hot gases and smoke swirl out the top of the arch and above the door.
the metal fire door also reflects radiant heat back into the oven, for added efficiency
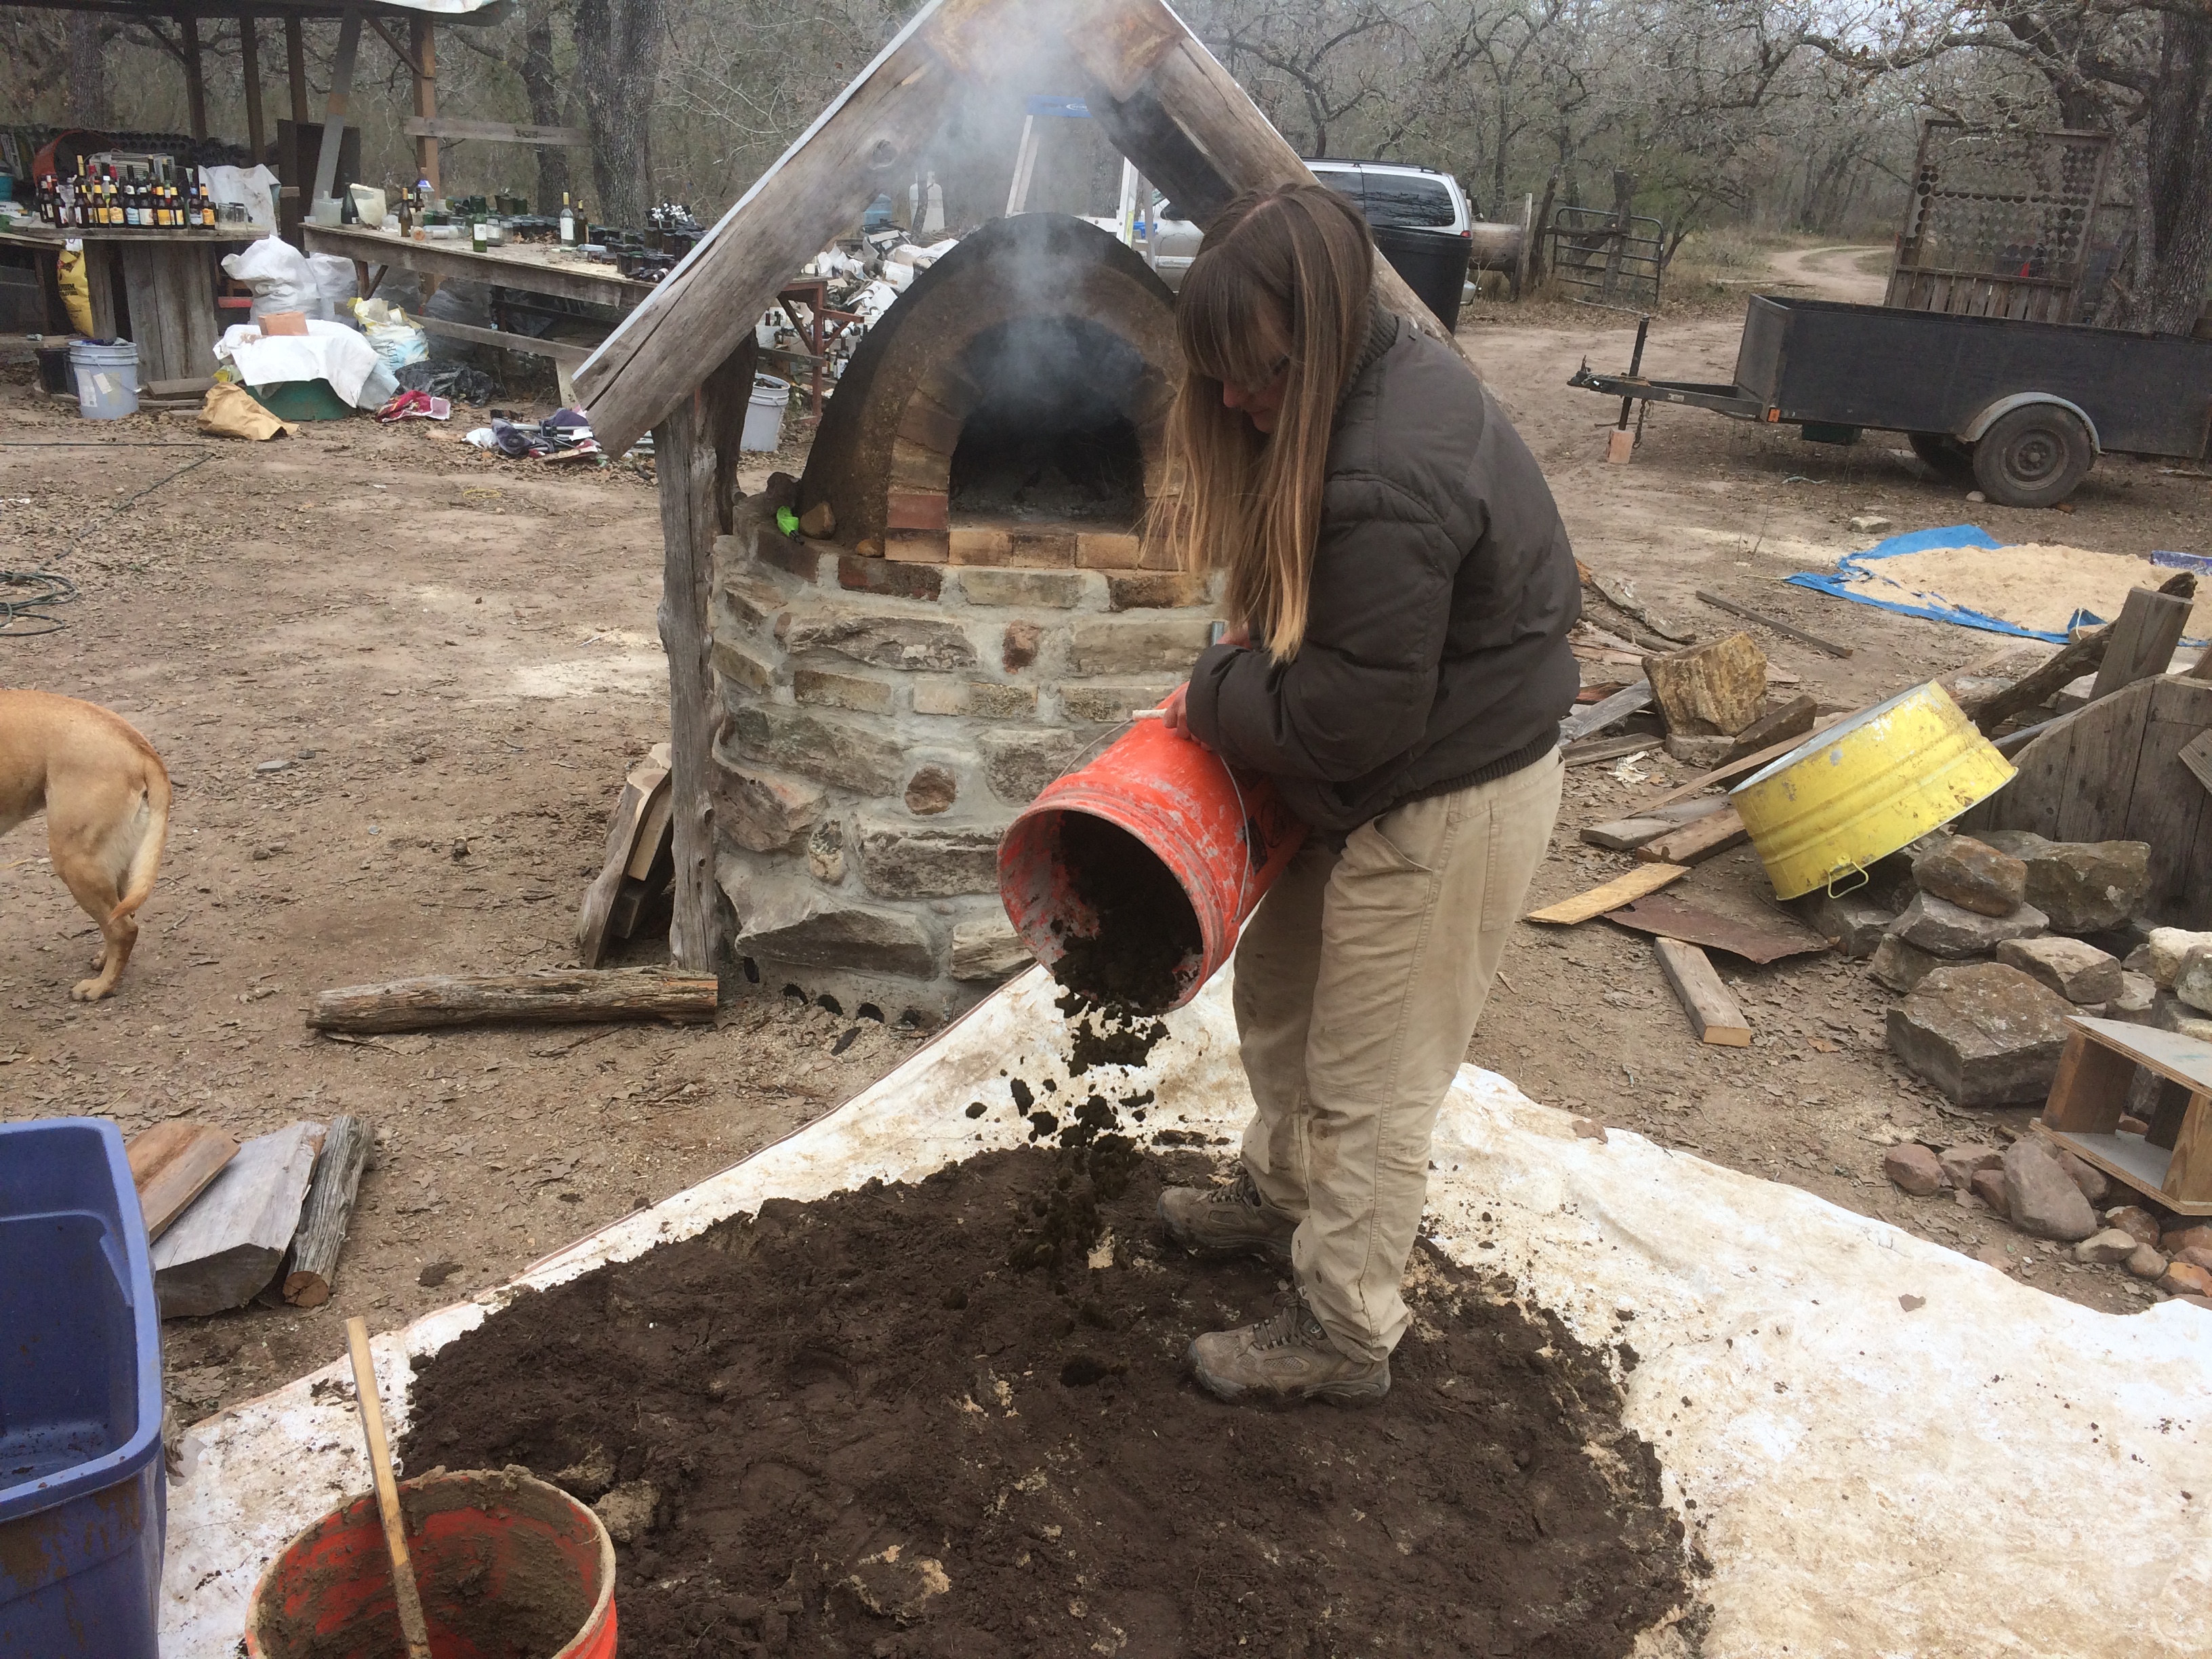
It was rainy on the final day of the drying fire, so we put the unfinished roof over the oven as it continued to dehydrate. We prepared for the final coat by mixing up a big batch of exterior mud the day before – this consisted of a new mix:
some fine playground sand,
a bunch of subsoil (above the clay layer and beneath the topsoil – we did a soil test with a jar of water that indicated it contained mostly very fine sand),
some clay (about 1 part to the 2 parts of fine sand), and
about 3 gallons of fresh cow manure (for the smooth strength of the fine fiber of 7-times digested grass)
adding in the secret ingredient – cow poop!
the exterior mud was much softer than the interior clay – squishy & without rough sharp sand in it – barefootable! (as long as a little cow poop doesn’t scare ya)
cleaning out the last of the sand. the insulation layer has baked almost dry, so we let the long drying fire go out, in preparation for application of the final exterior clay
final exterior mud
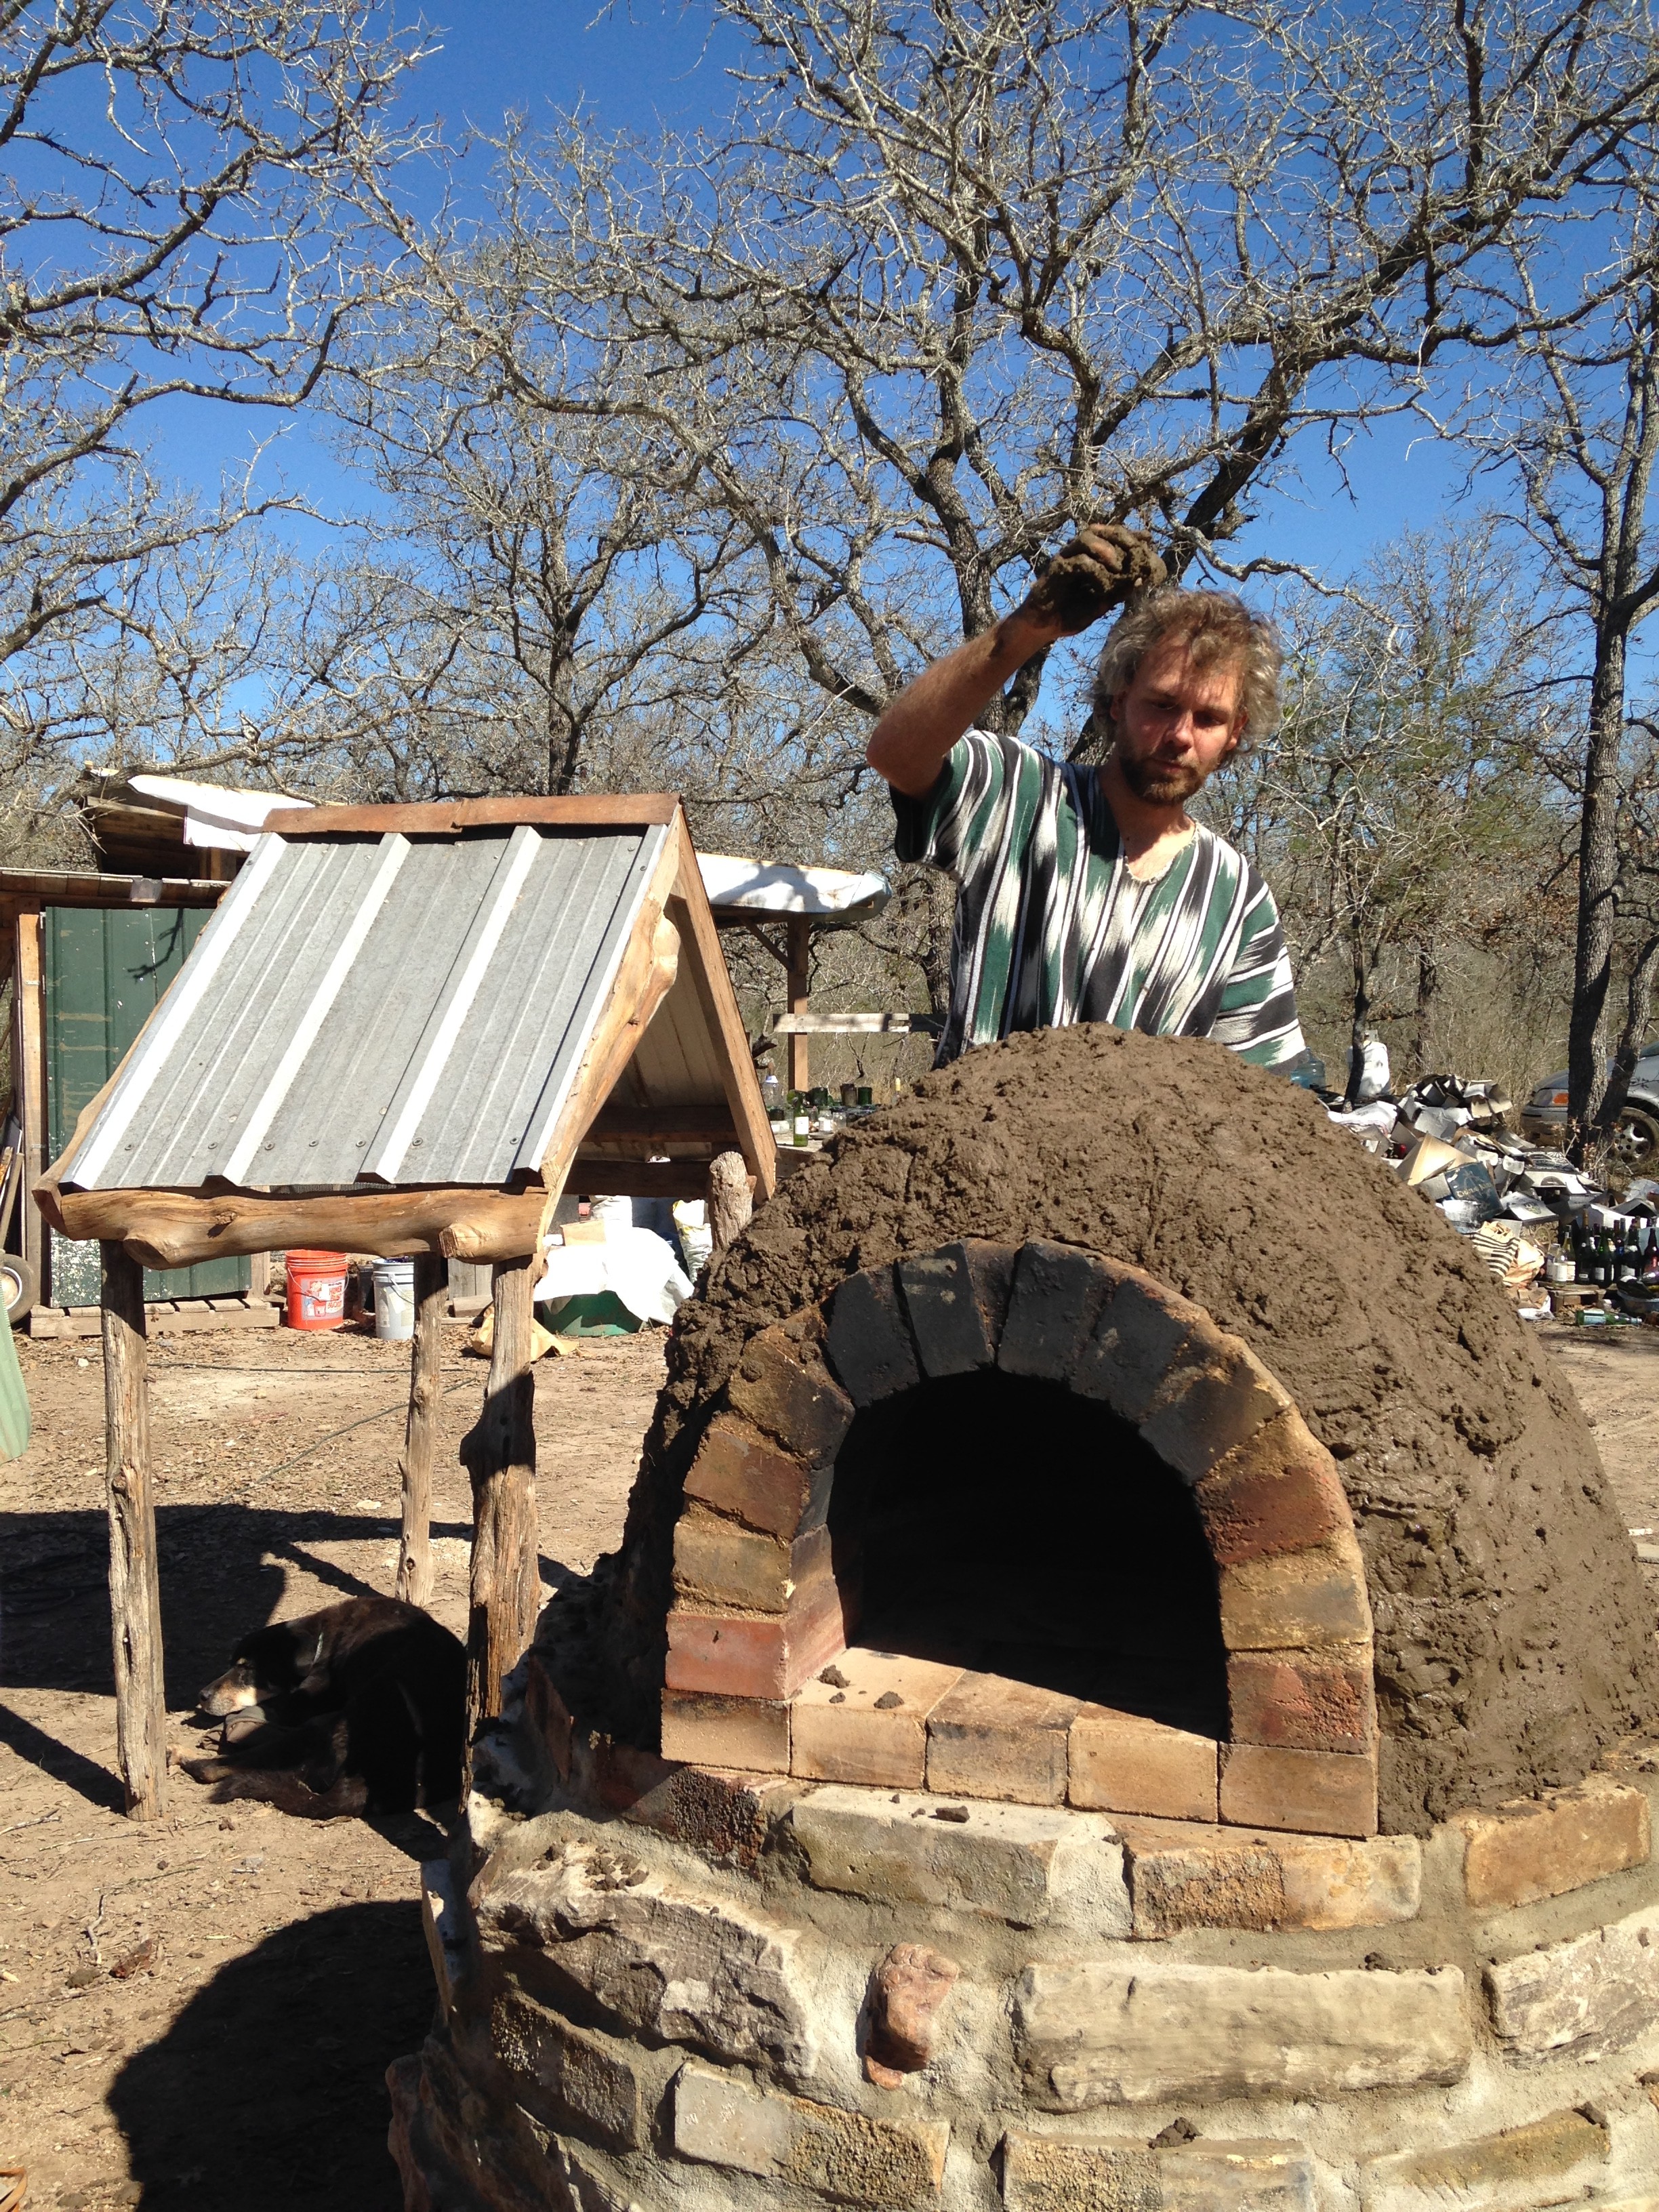
the “Bible” told us to “schmear” the final layer on like frosting, but we found it much more effective to throw it on by the handful – “splat! splat! splat!”
flingin’ poo
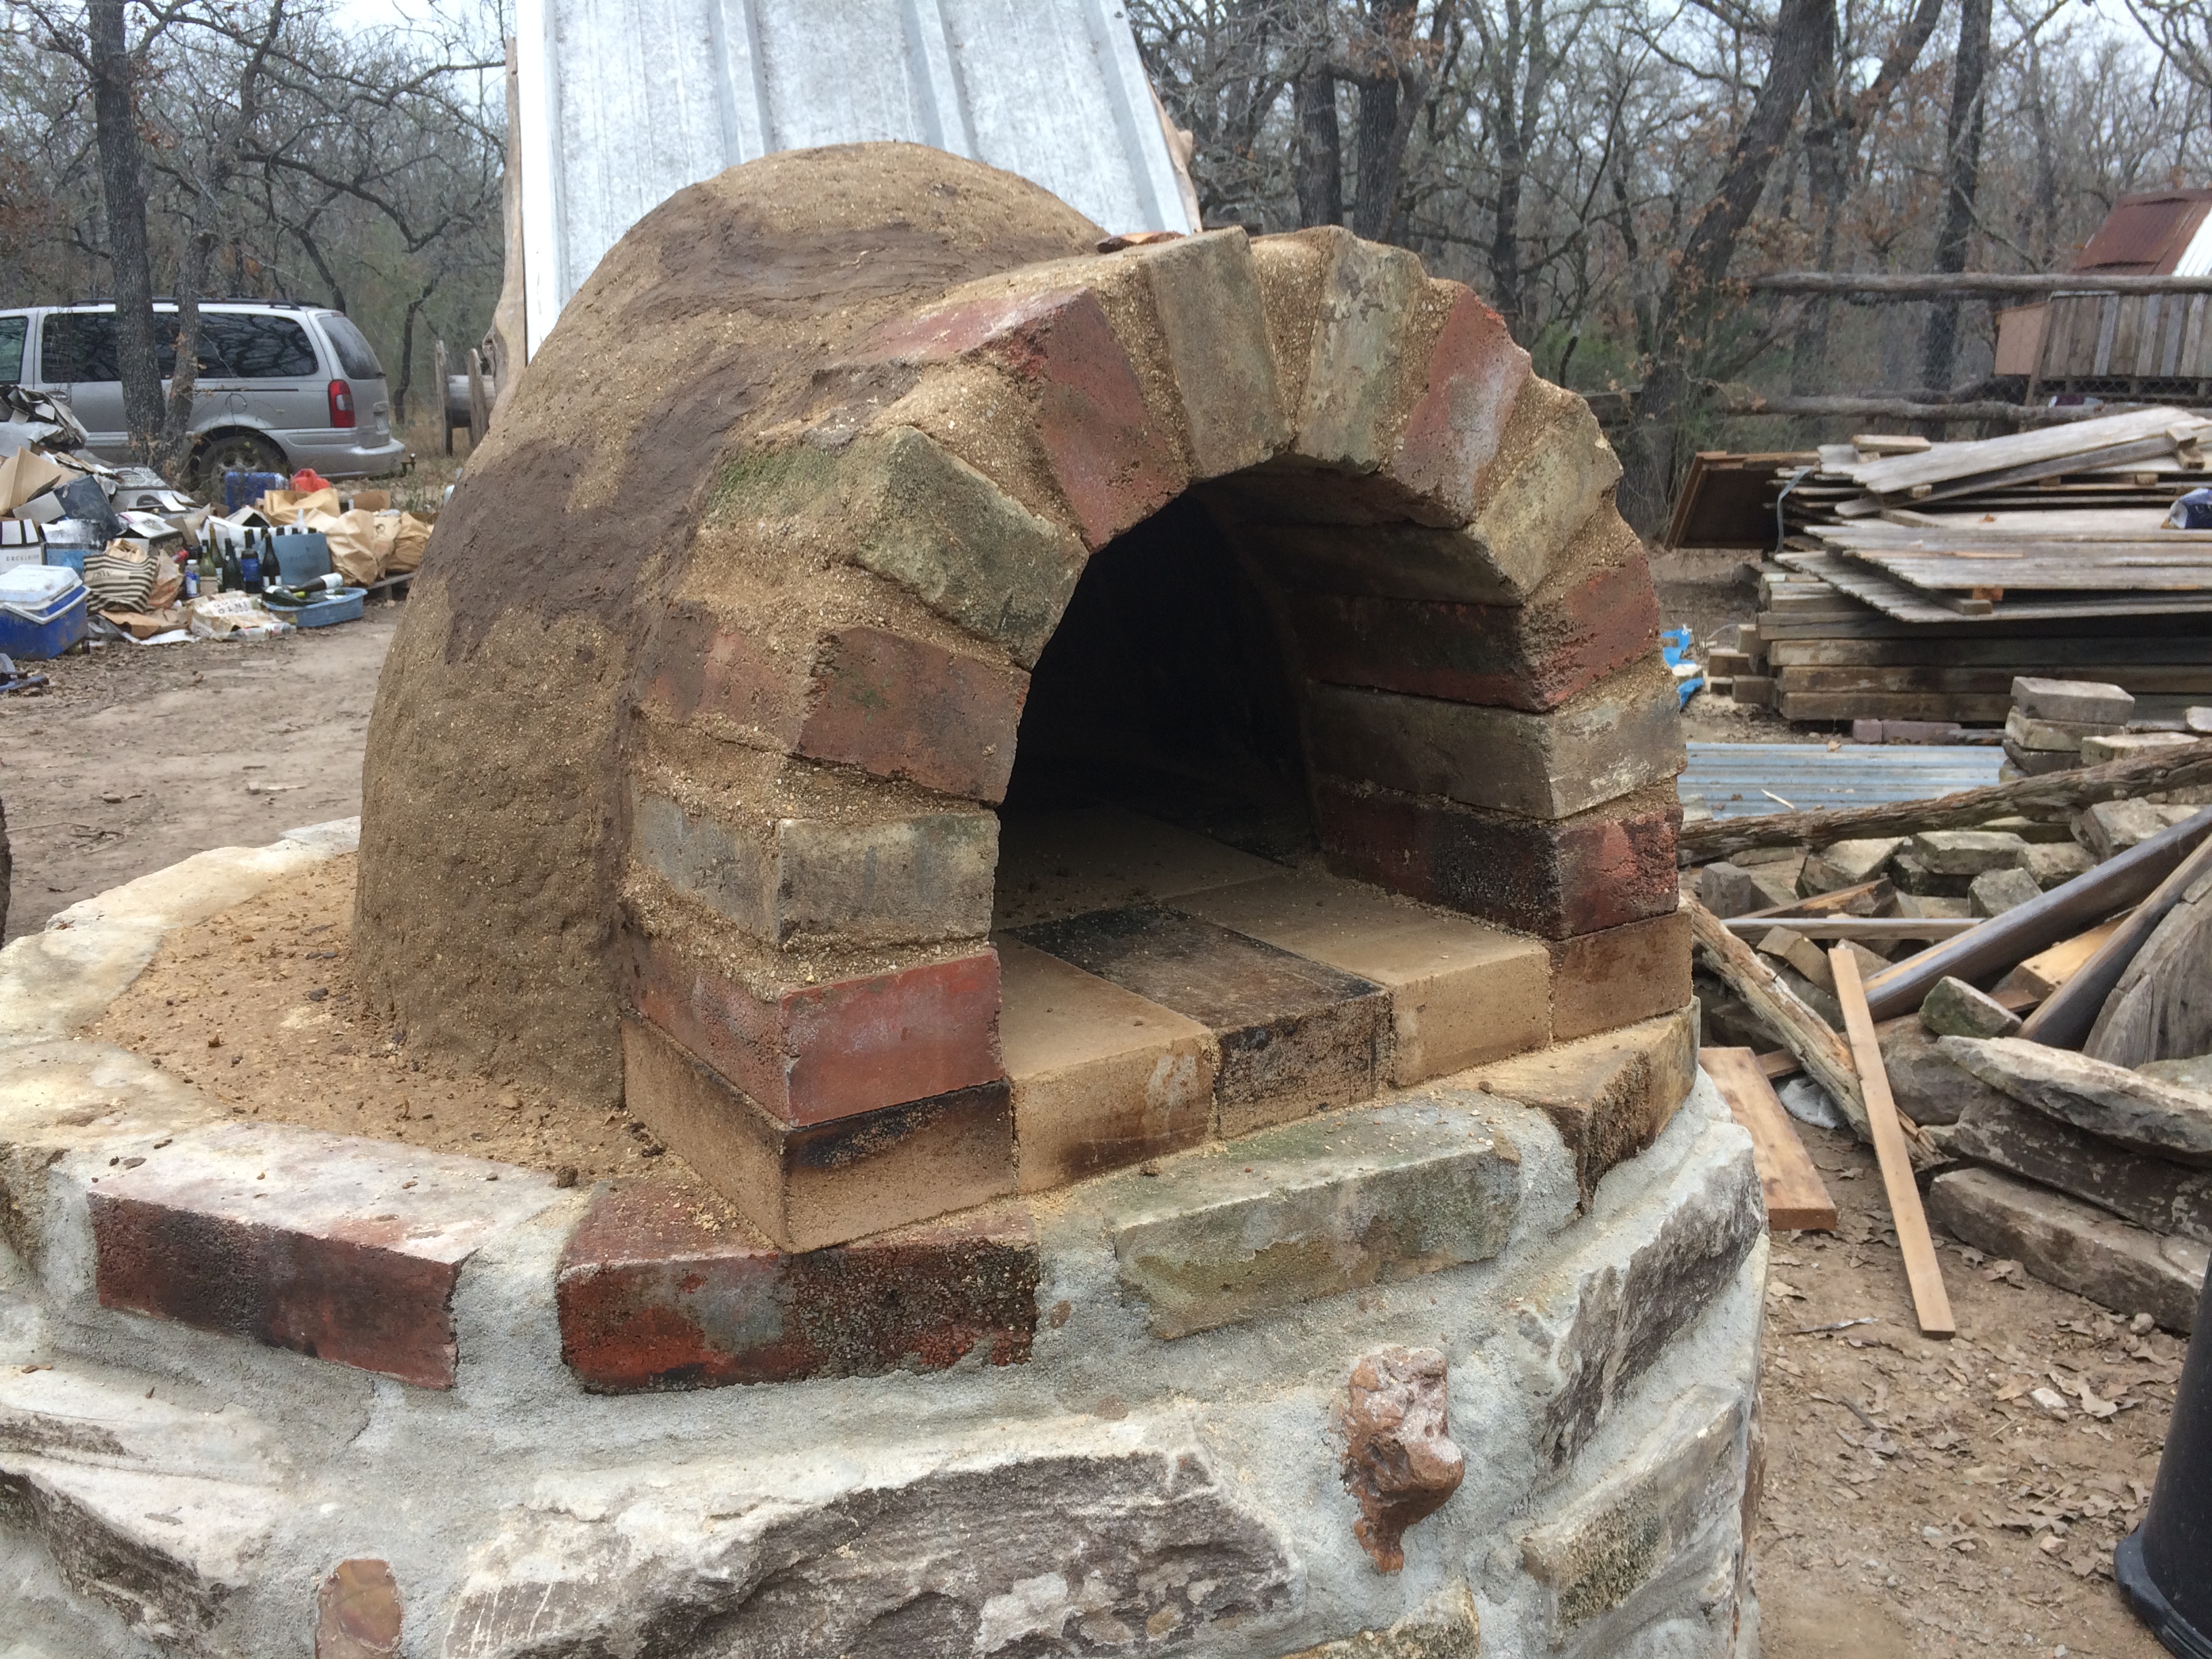
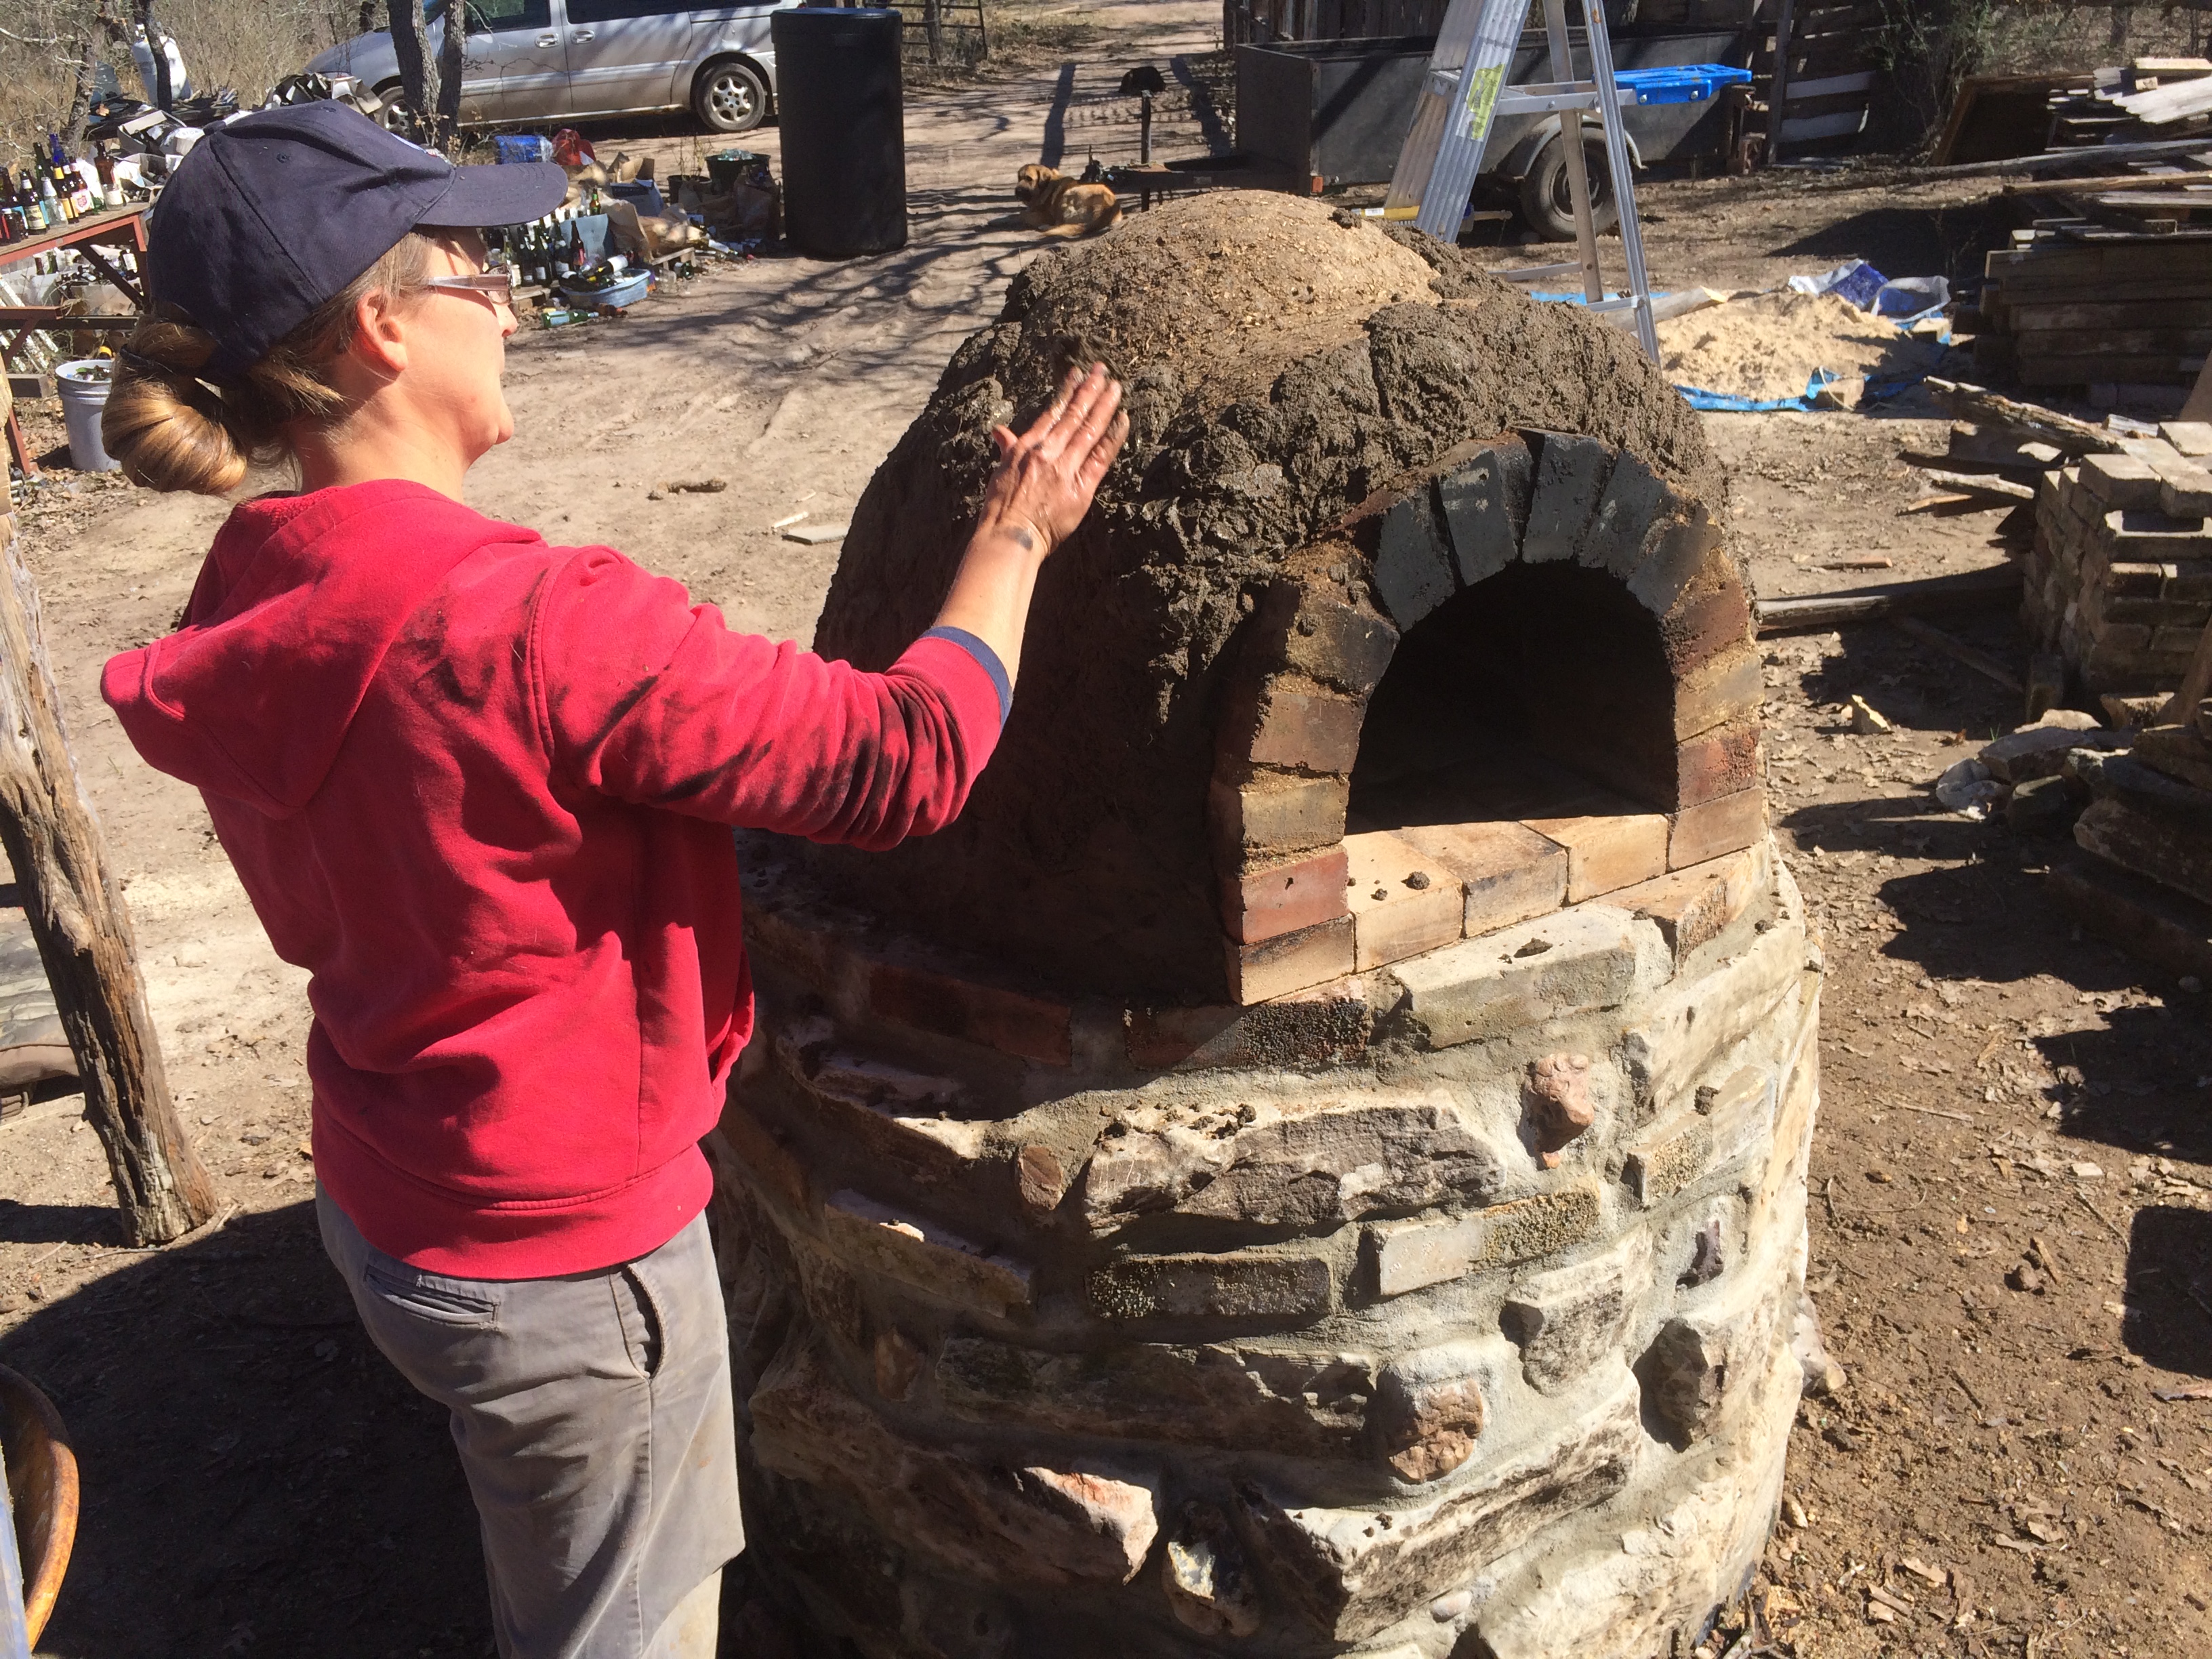
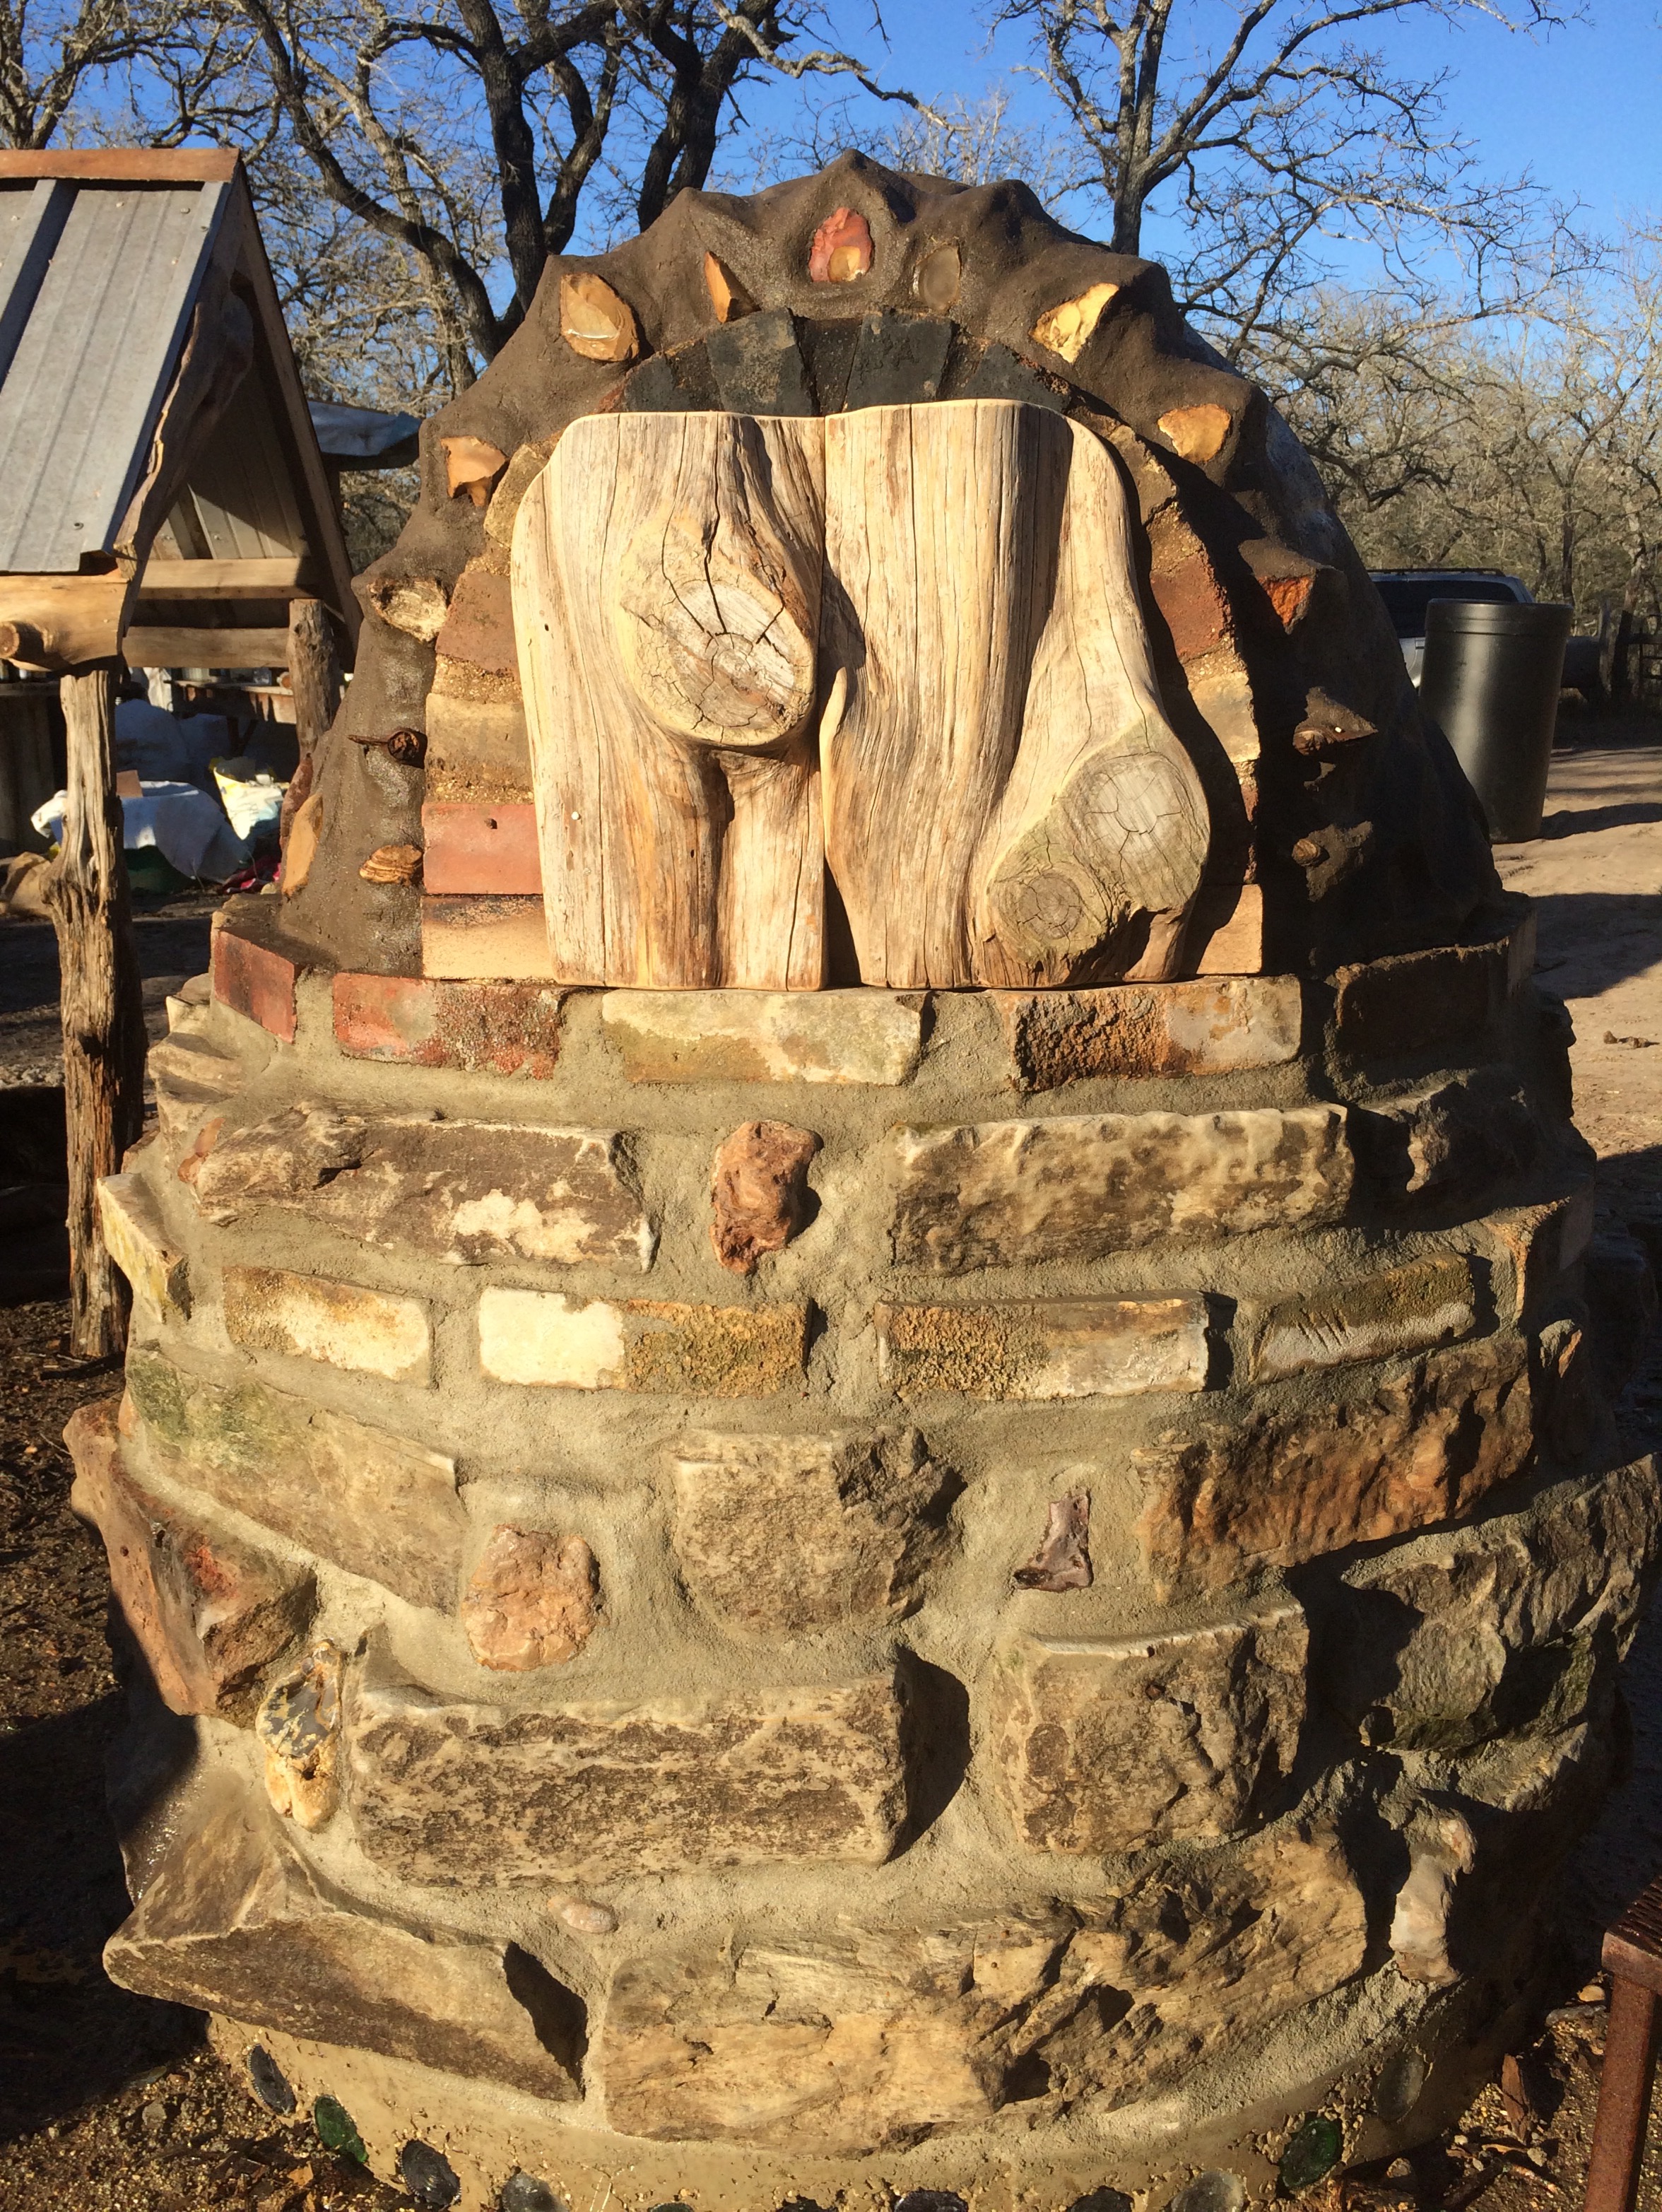
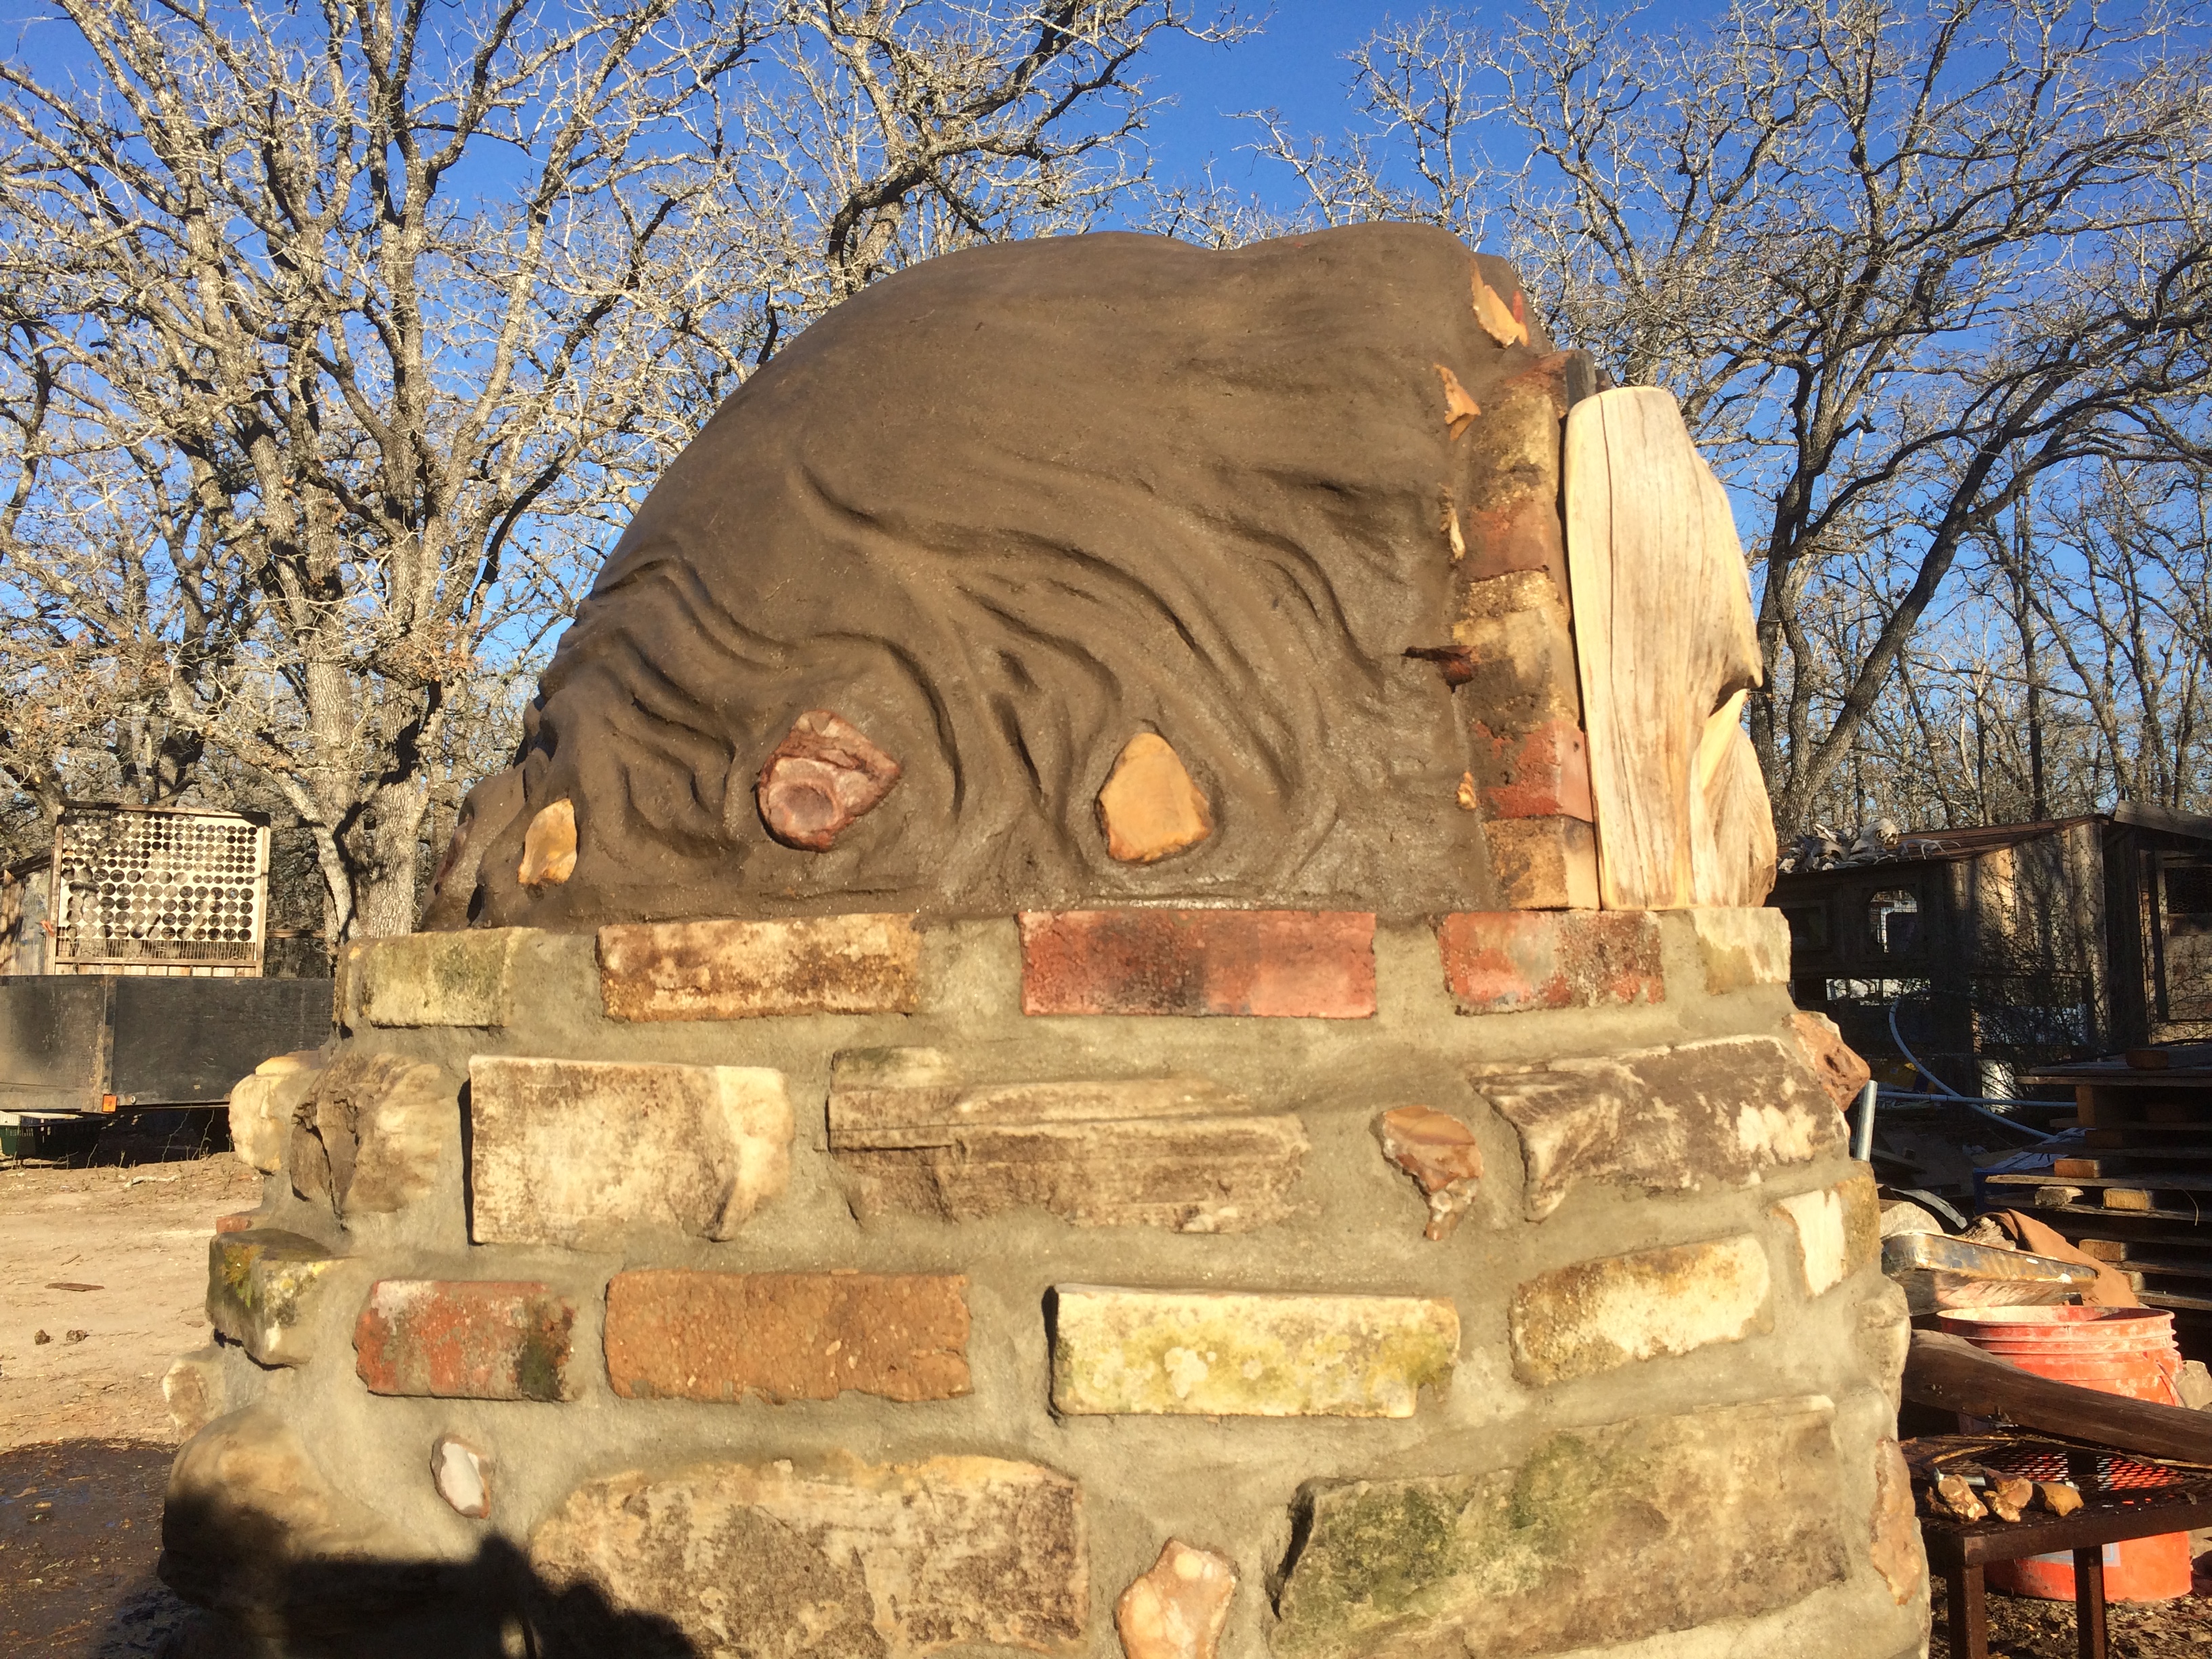
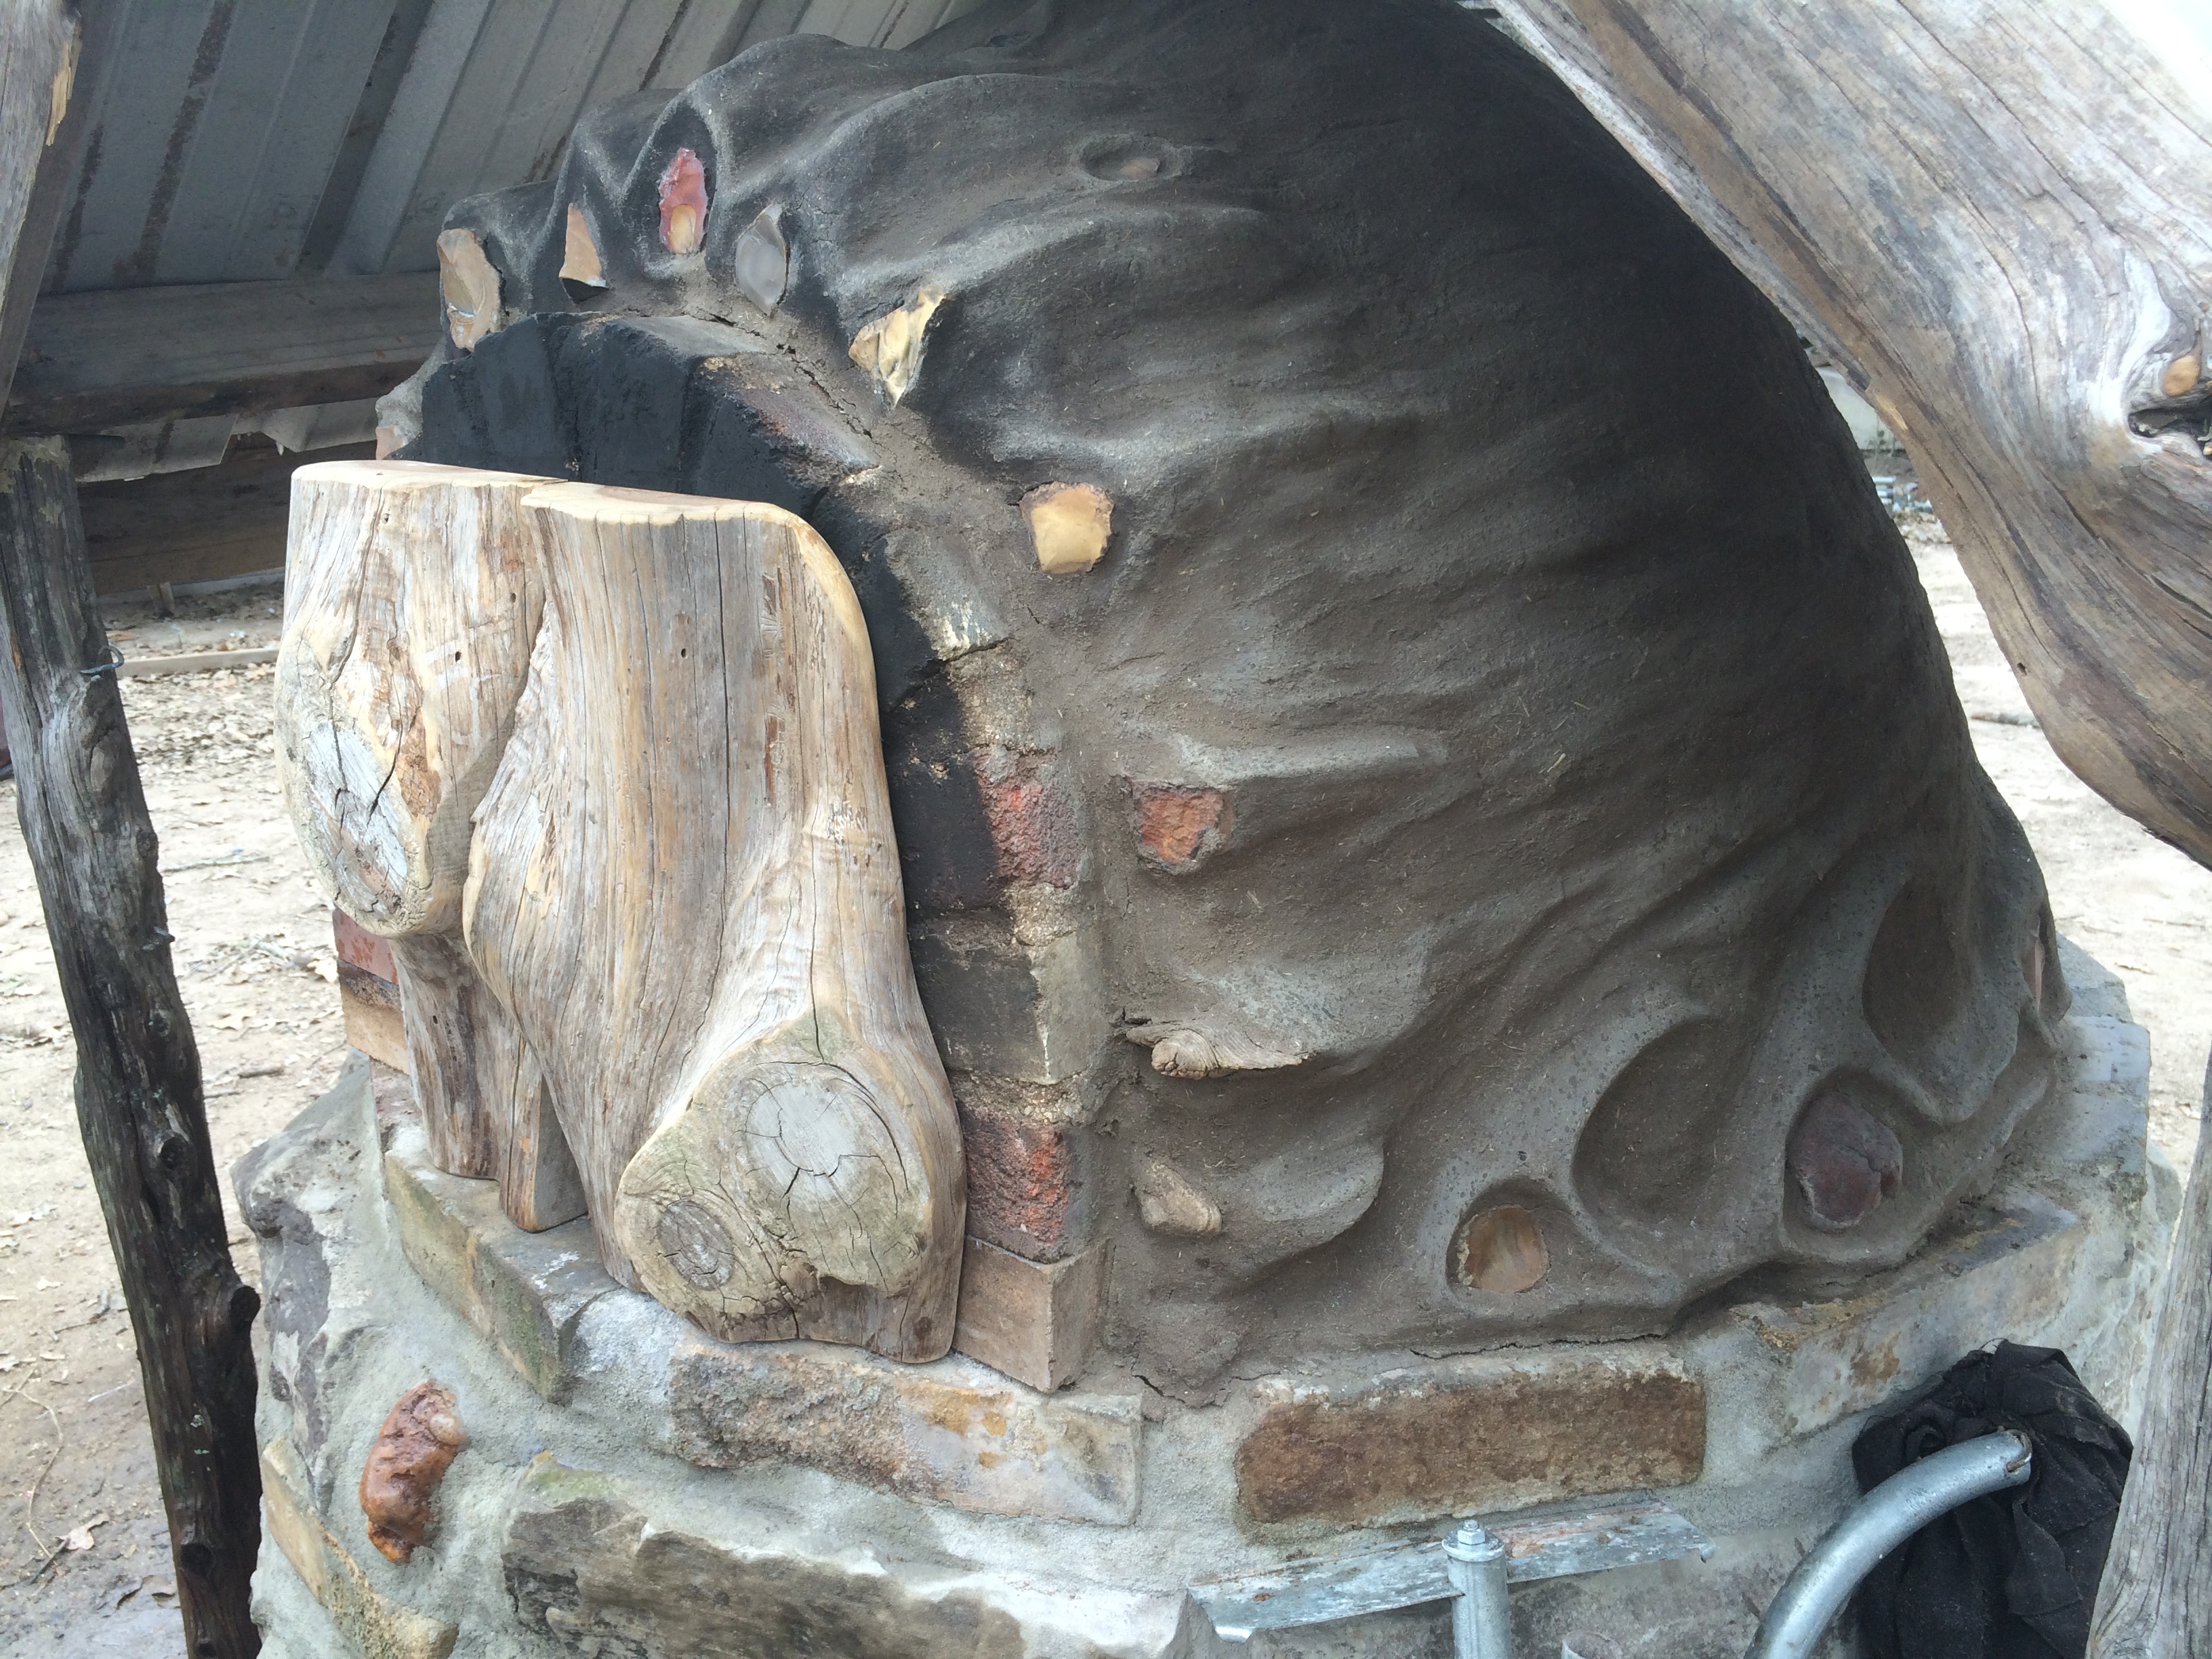
Once we had a 2-4″ layer of plaster mud all over, we got to work shaping and decorating – smoothing, adding flame and ember colored rocks around the base and arch, and sculpting flames and heat waves in the mud …
We had just two days left before we were leaving Habitable Spaces – and we were determined to be able to eat some food from the oven before we left!
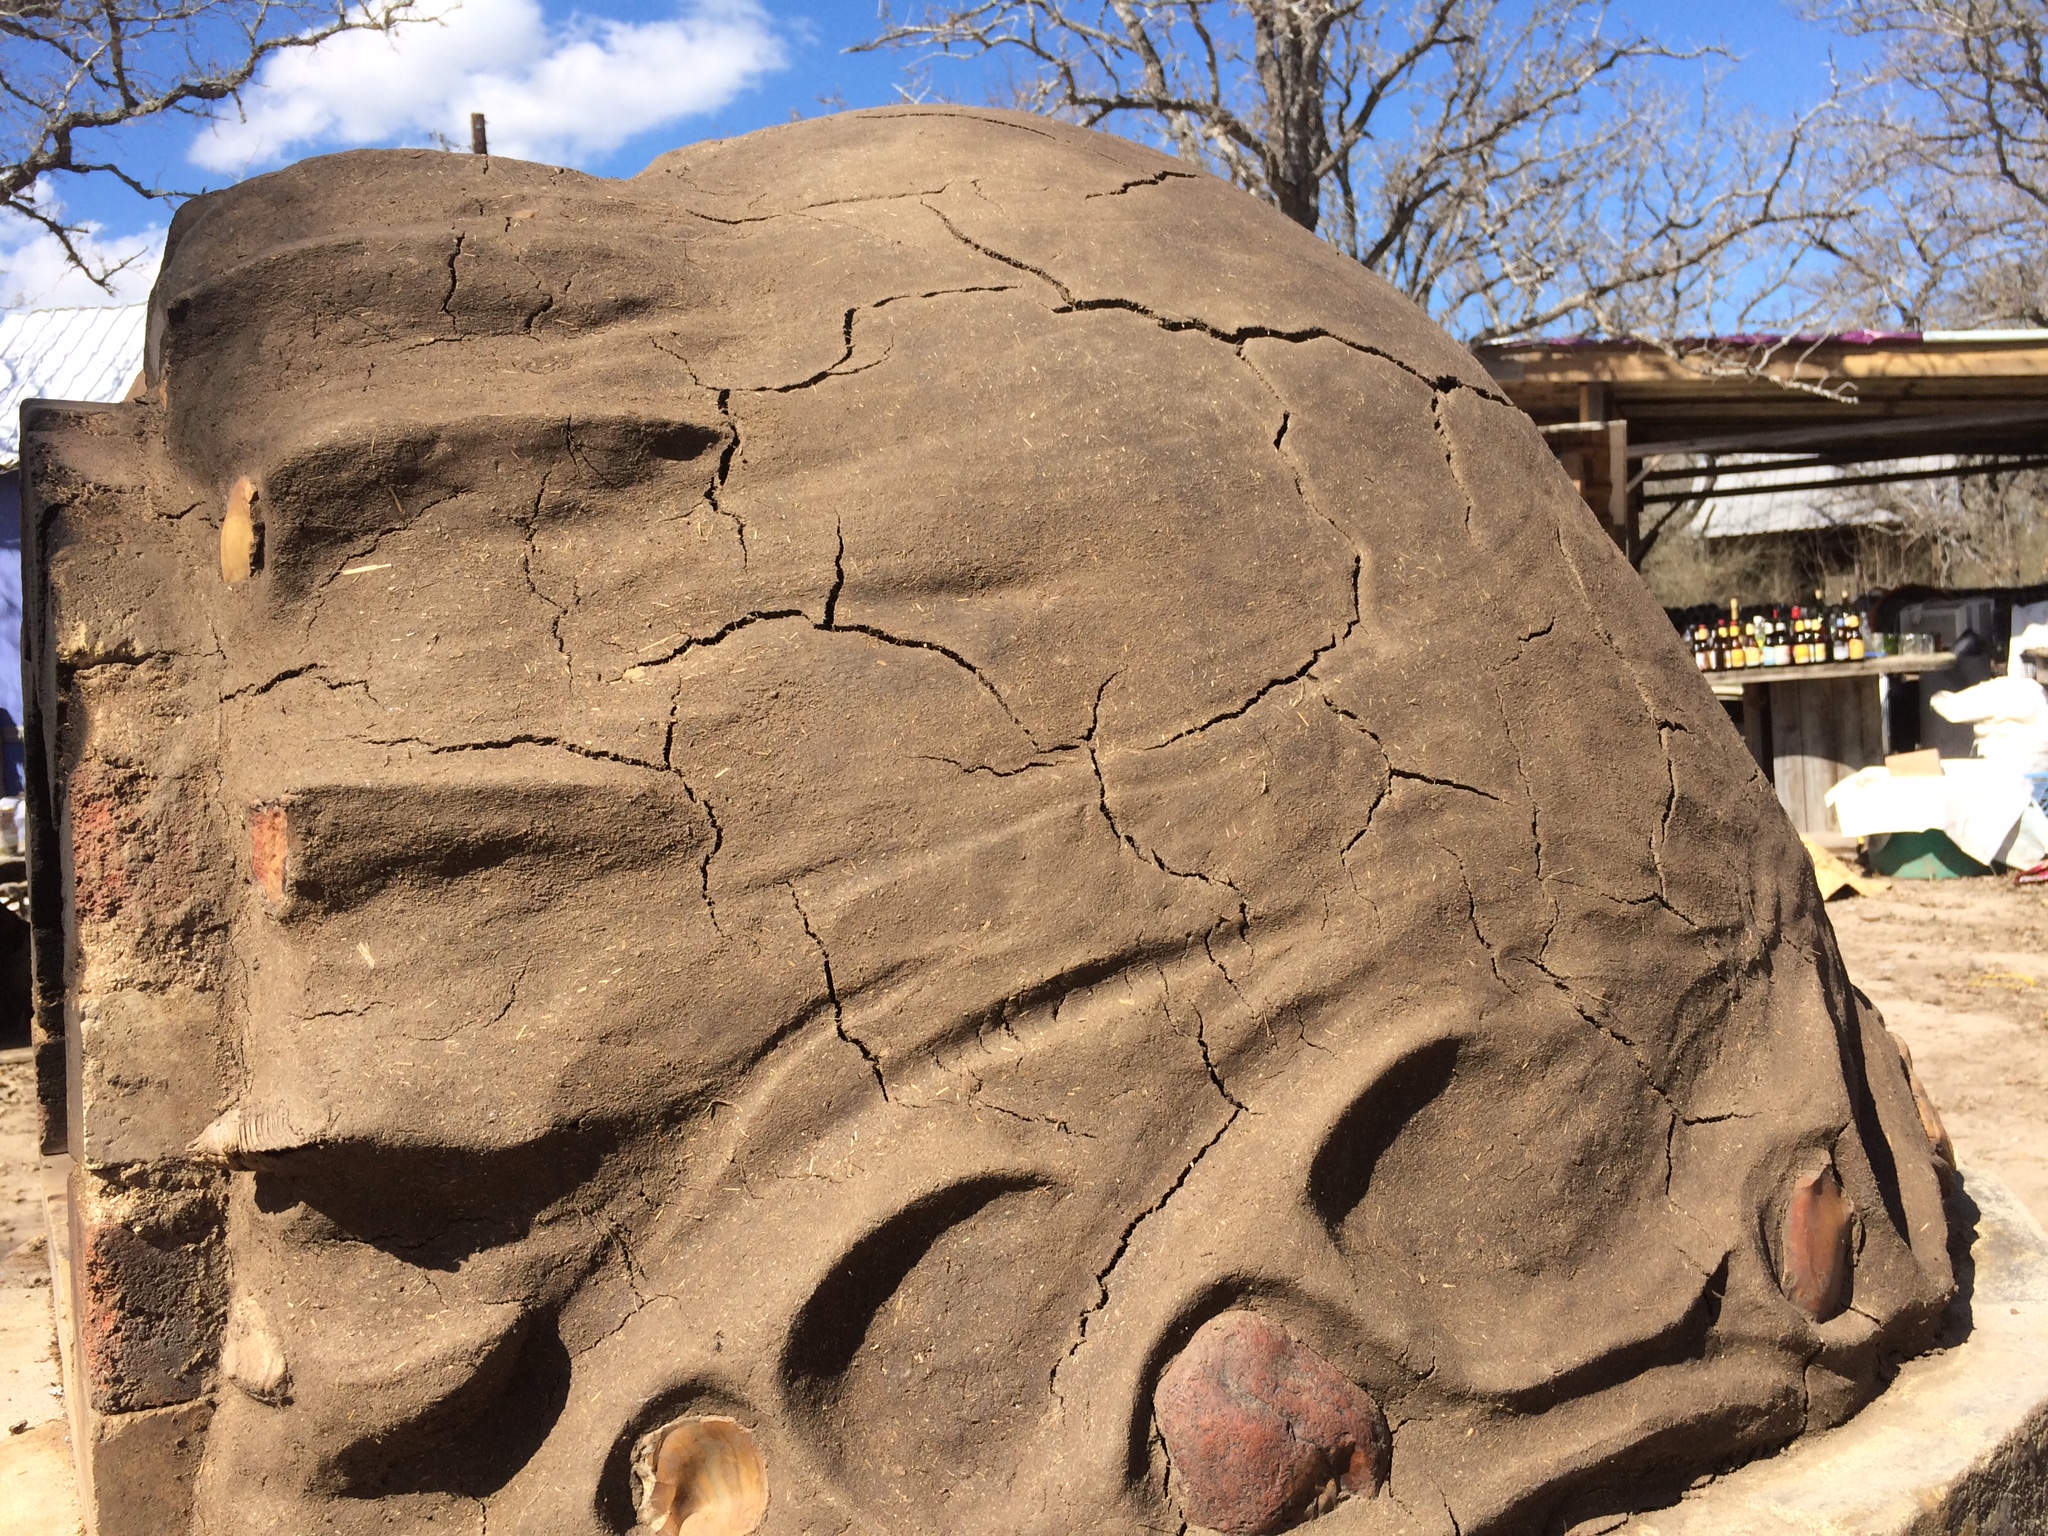
So we started a new drying fire inside, knowing that the fast drying would likely lead to cracking, but willing to take our chances.
cracking of the exterior plaster
There was, indeed, considerable cracking due to the fast-drying action of the fire, but the scary-looking cracks turned out to be easy to fix – we waited until it was dried out and stable, then filled them in with a wet mix of the same plastering material.
The warm exterior (from the sunshine and drying fire) caused the repair slip to dry almost instantly, creating a rough surface – which led us to the discovery that some wirebrushing created a nice light color, which highlighted the flame patterns pleasantly.
We built some tools from the junkpile (a scraper, a cleaning swab, and a fire blowing tube) – and eagerly awaited the next day: our final full day at Habitable Spaces, and the day we would finally test the oven out on some food!
We tinkered and smoothed and prepared throughout the day and the following afternoon …
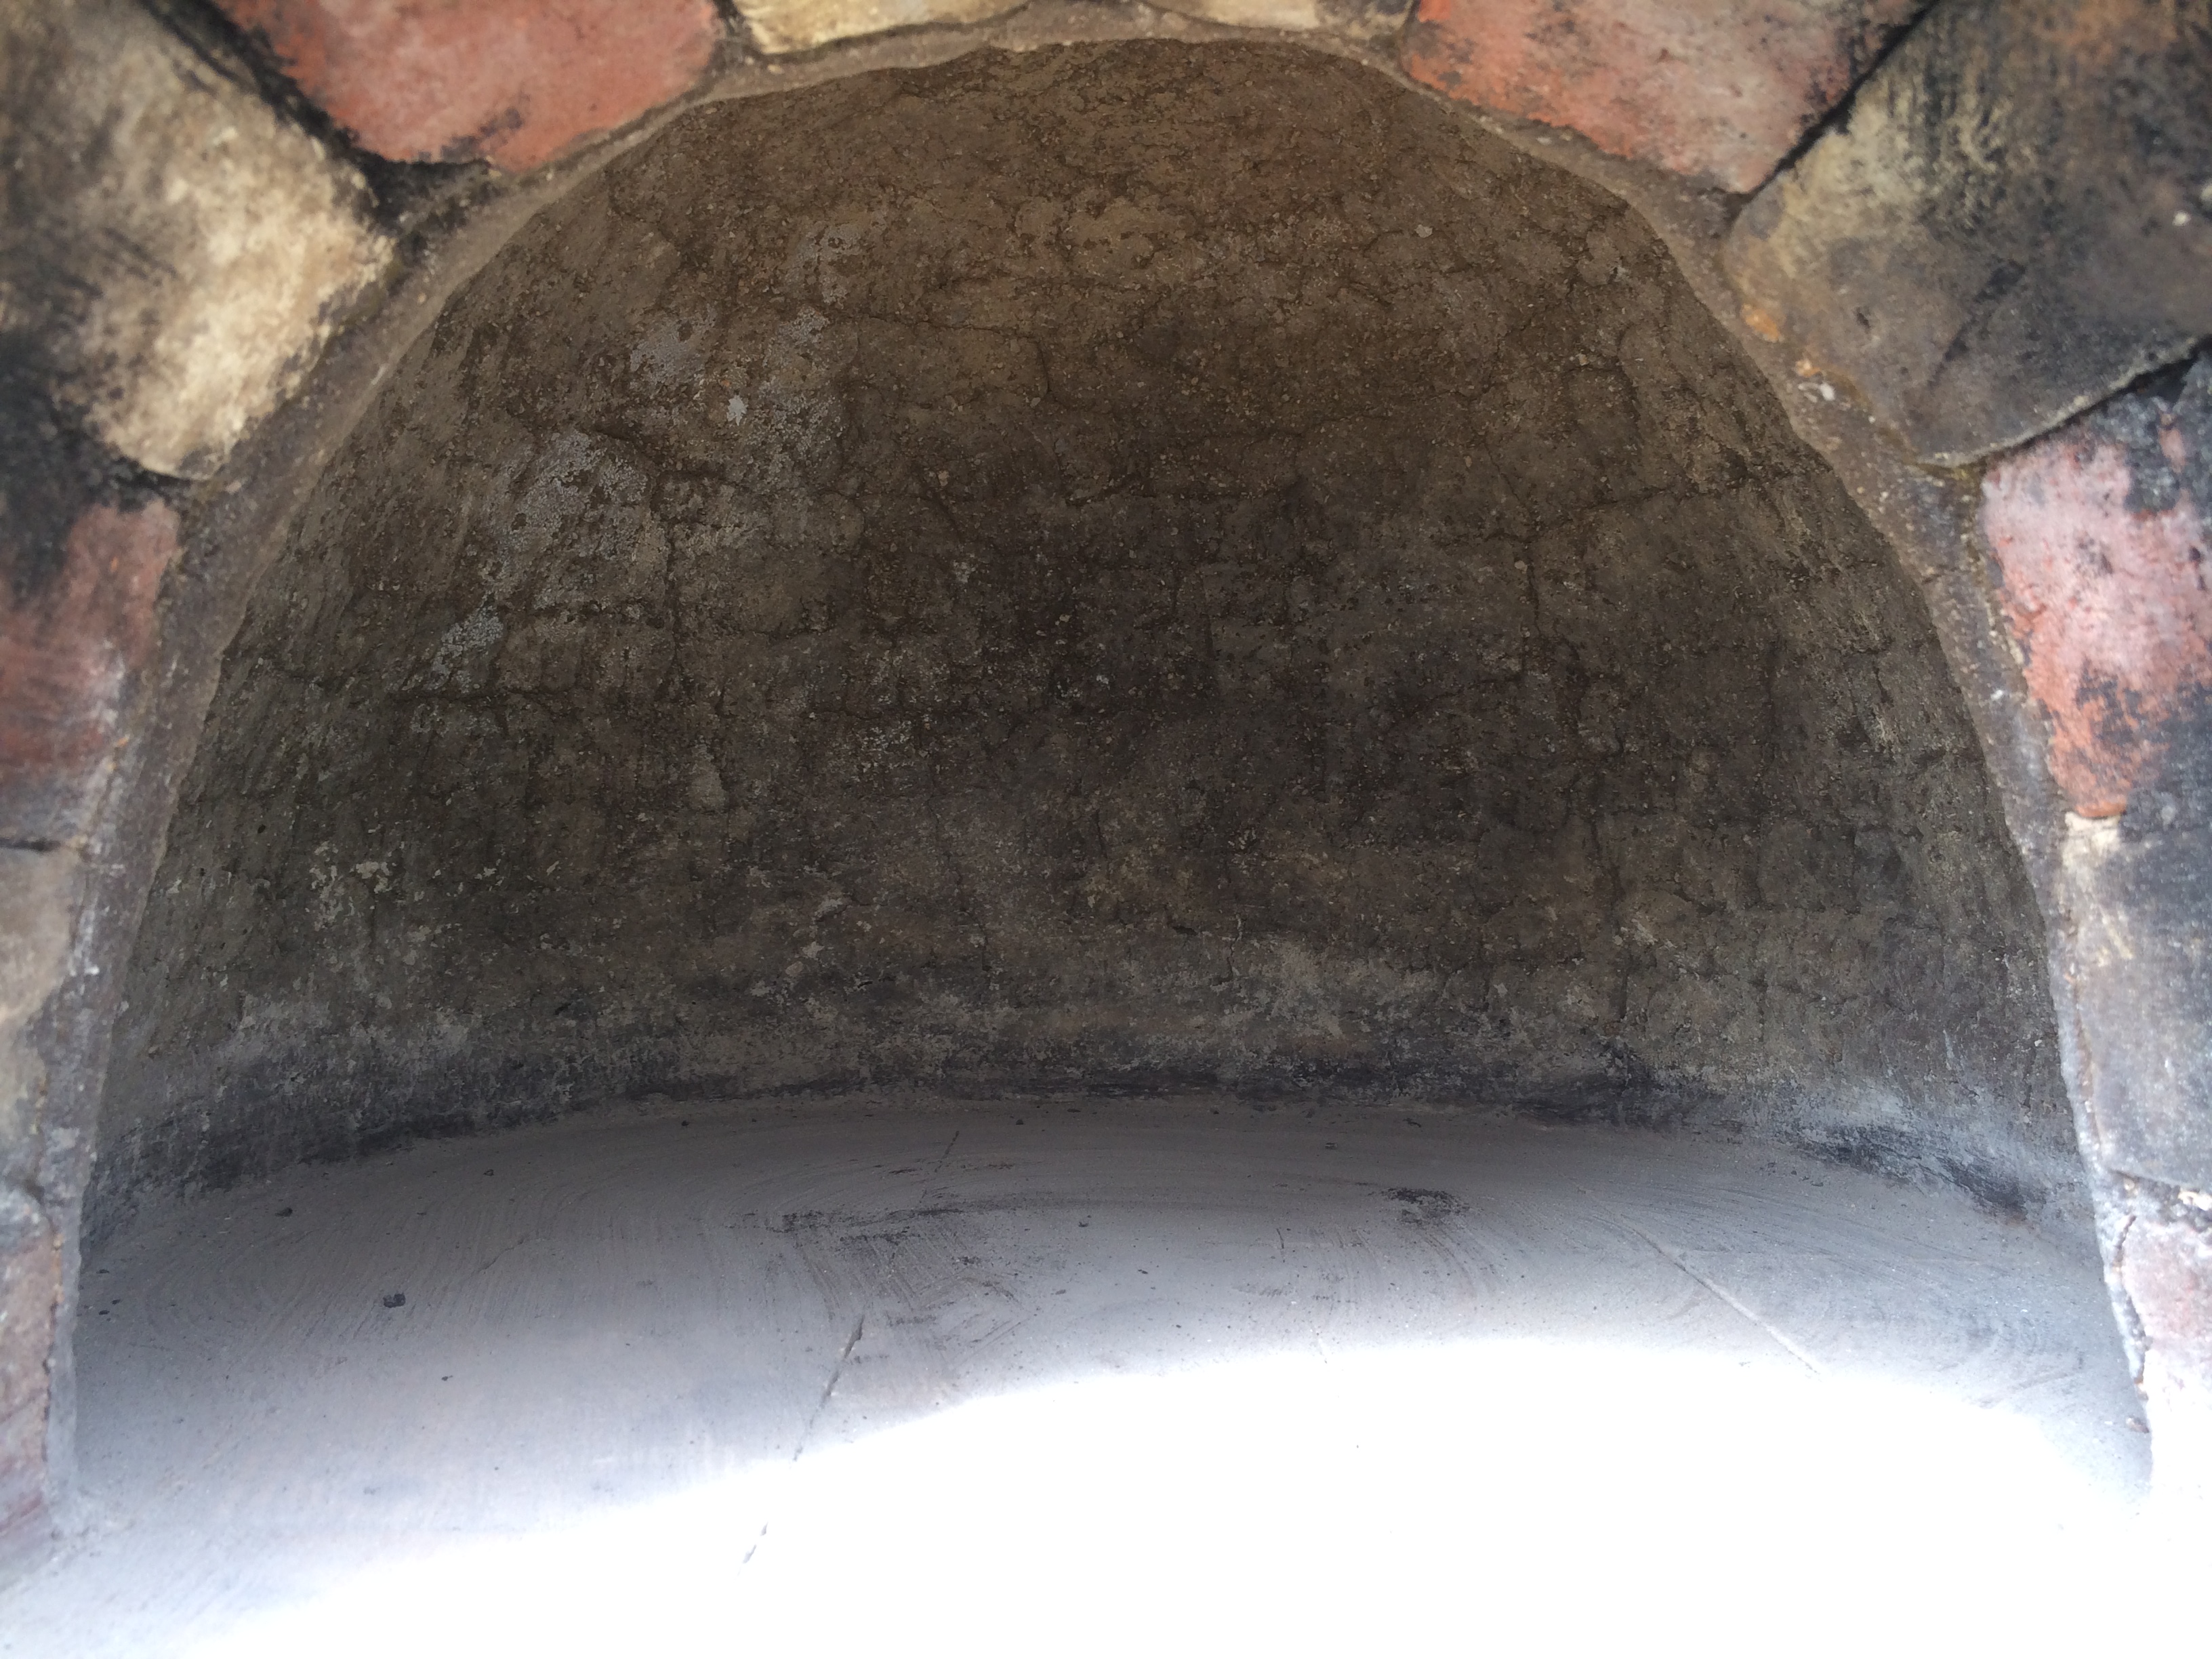
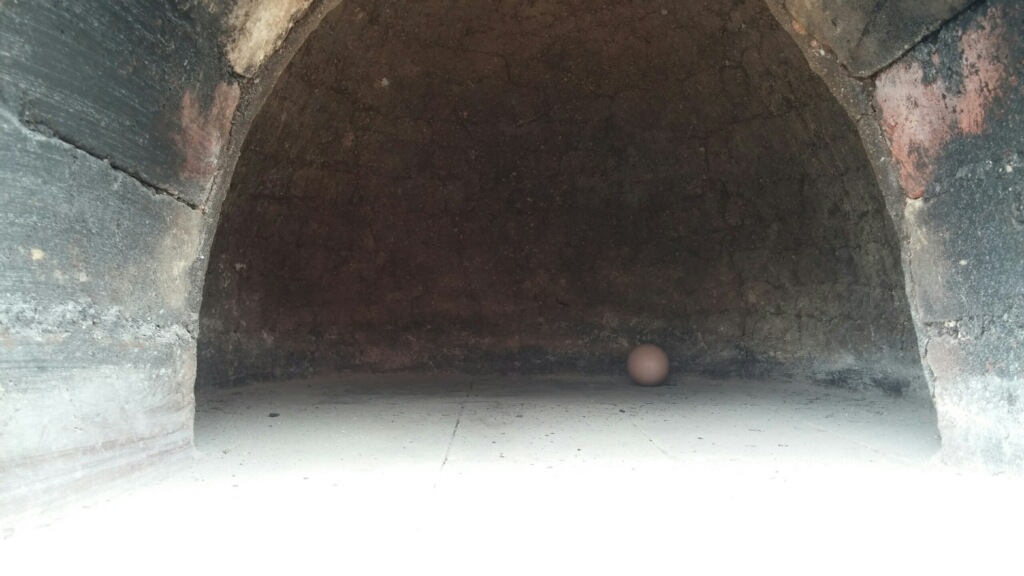
the interior reveals the clump-by-clump construction method of the oven mud layer
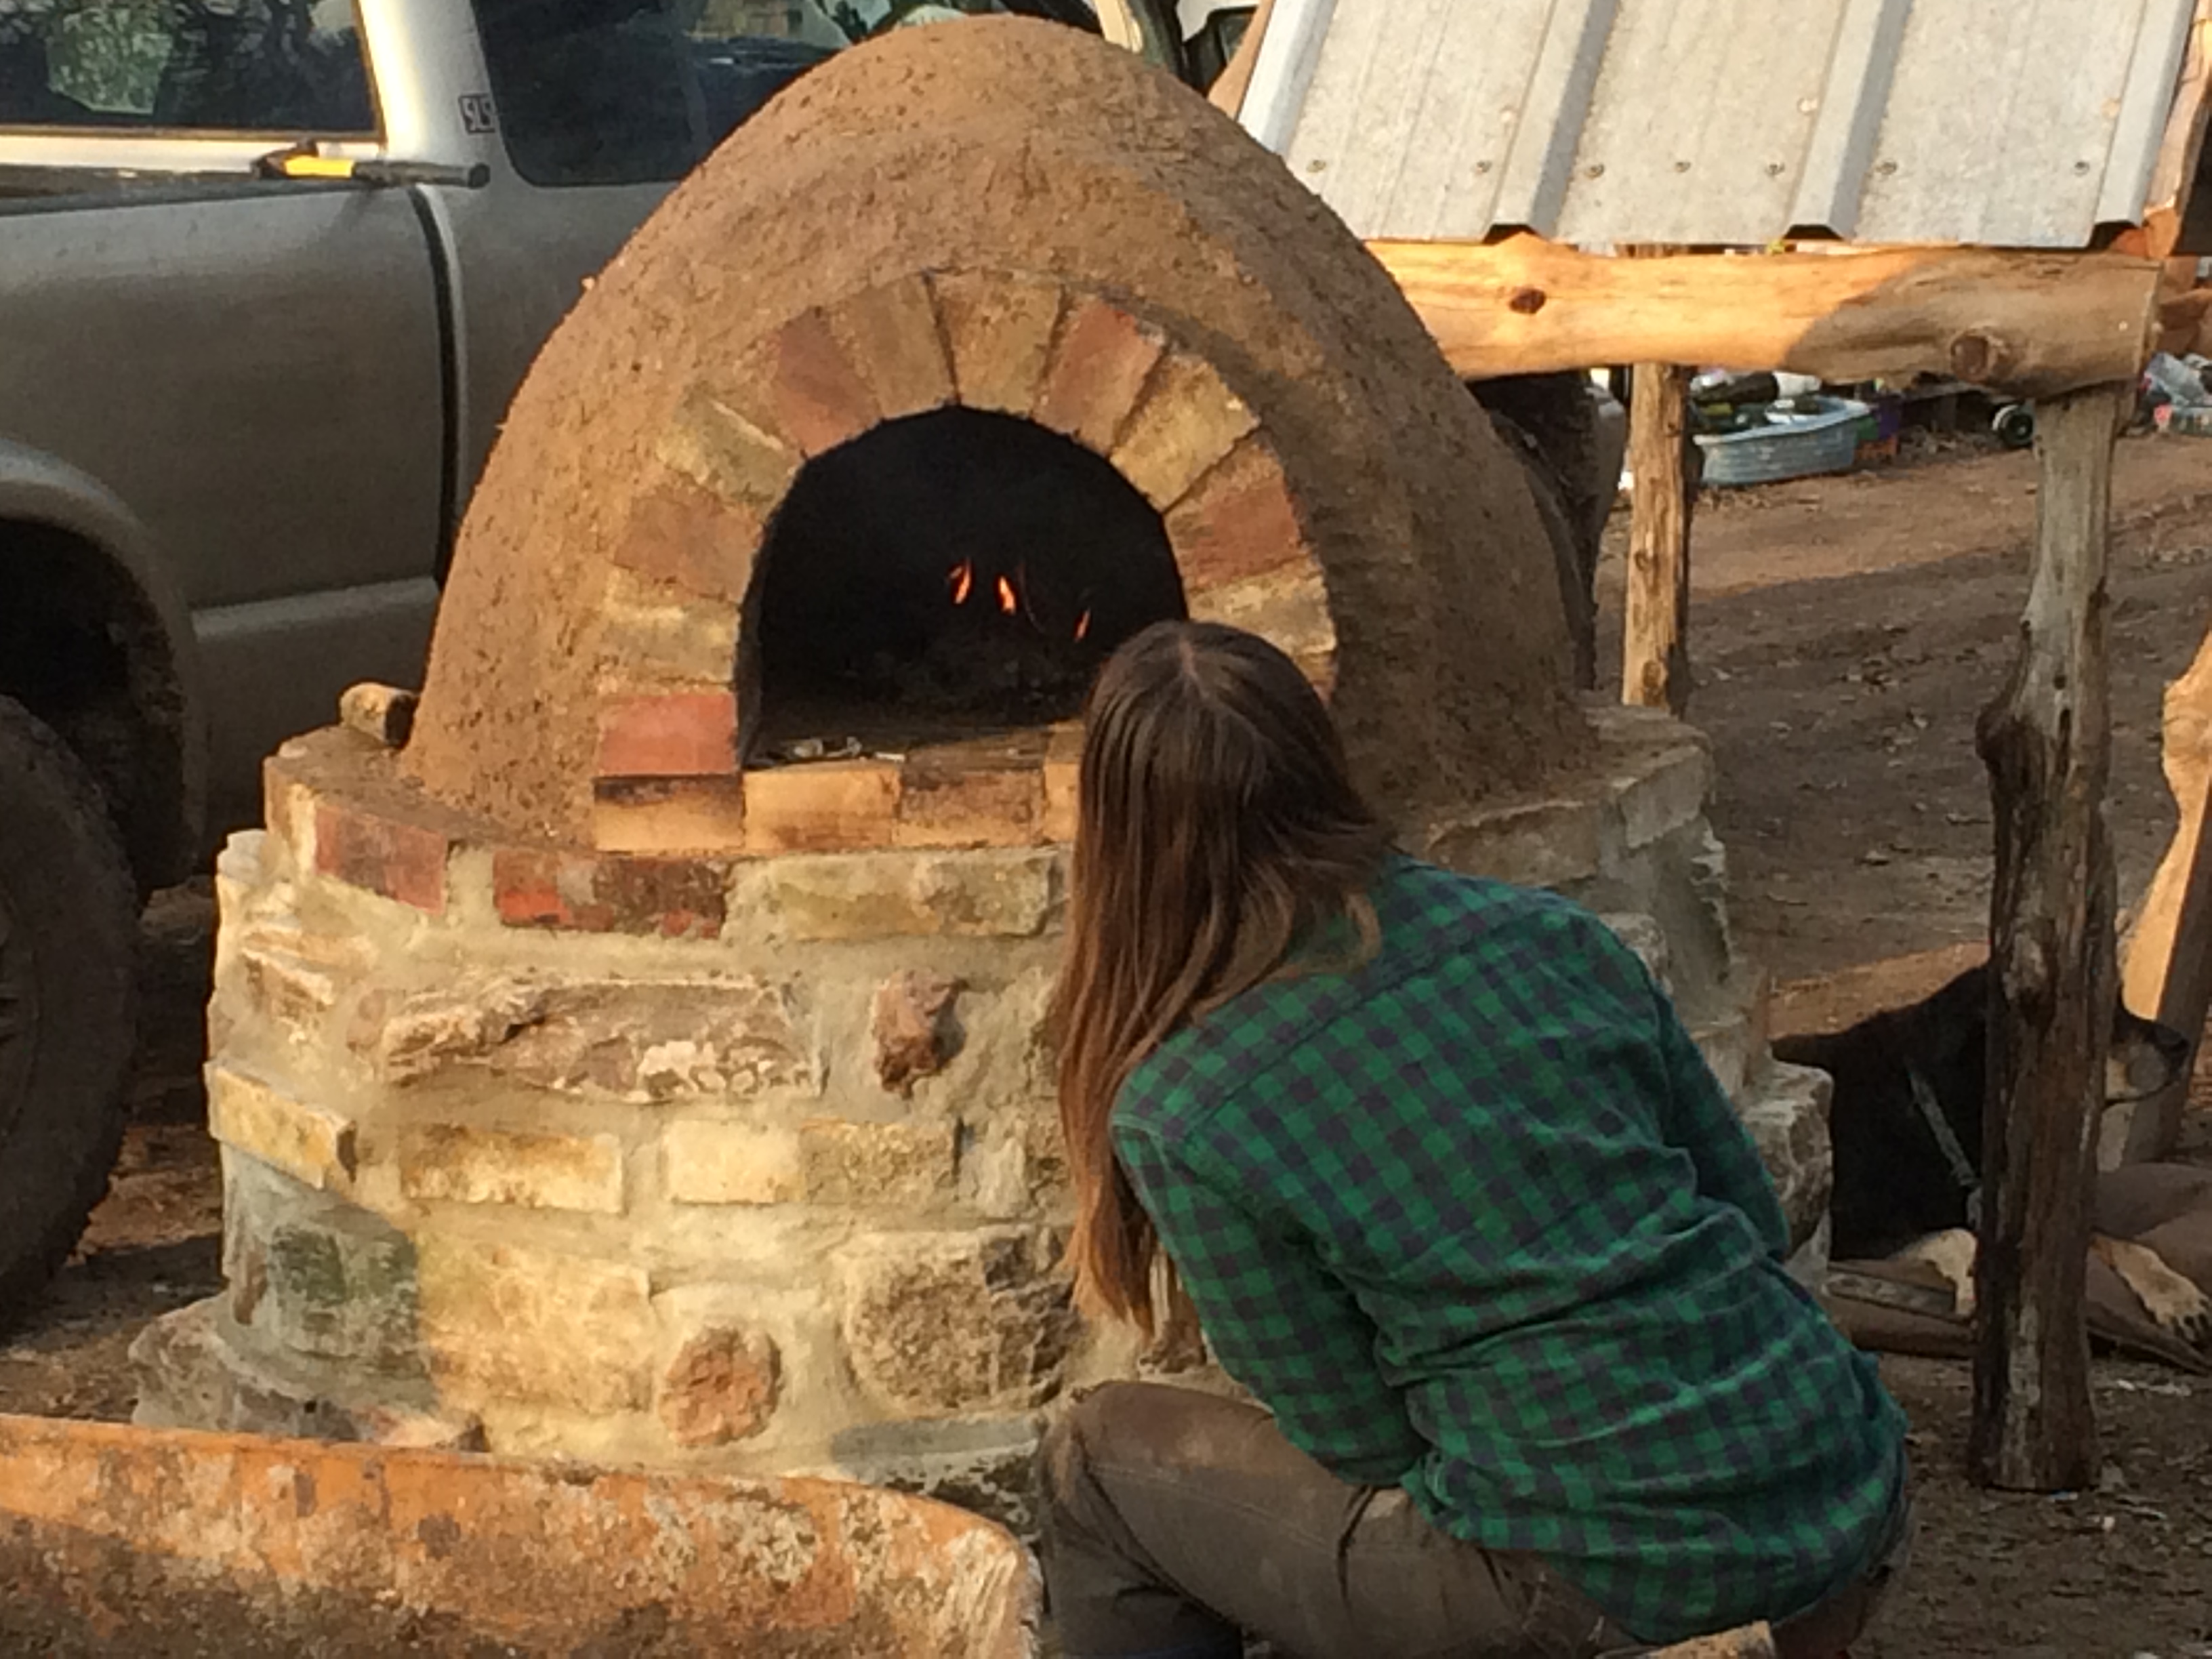
We kept the drying fire going – now it was going to provide the heat for the first baking!
Kristin prepared two kinds of pizza dough – Neapolitan & New York style, and we soaked the inside of the cedar baking door by floating it in a large bucket, in order to minimize burning/charring.
Finally, we there in the first pizza, which sizzled satisfyingly as it hit the firebrick. Within minutes, delicious scents began wafting from the narrow gaps around the baking door …
baking the first pizza behind the soaked door
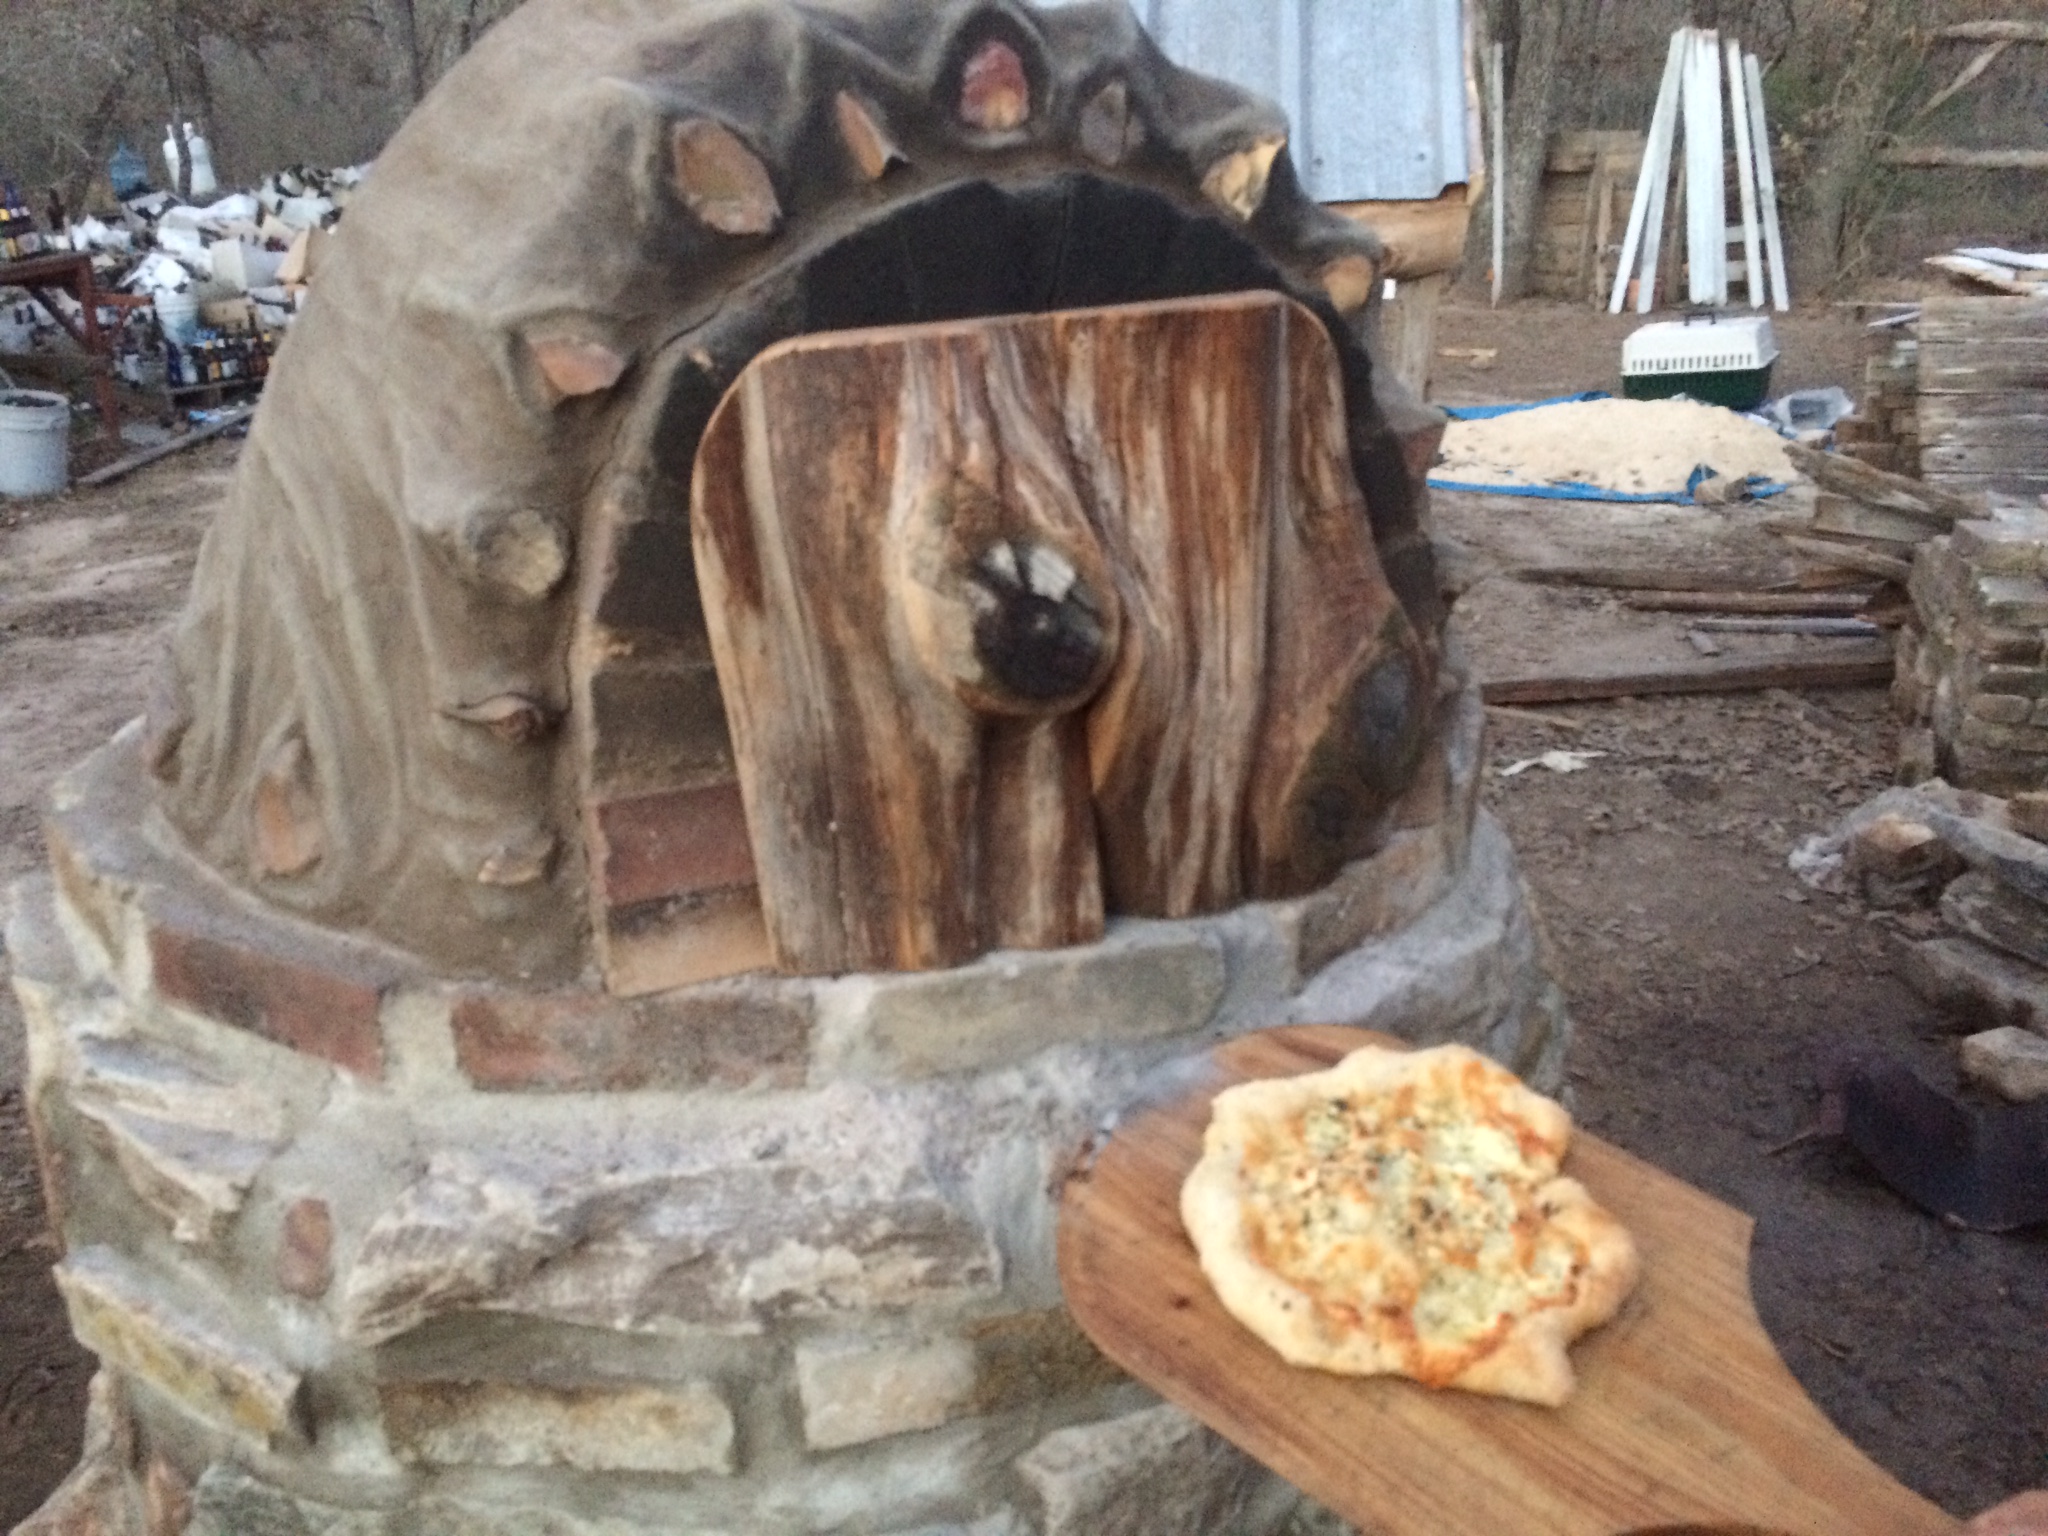
first ever pizza emerges!! (We got better at shaping the subsequent five pizzas, which had various combinations of bacon, caramelized onions, mushrooms, herbs, garlic, cheeses, pickled jalepenos …)
And five minutes later, we pulled the first pizza from the oven. (It will take less time in the future, once the oven is finished drying out – at first, it loses efficiency to the energy that water takes to steam out.)
We baked into the night, leaving each pizza in for one minute longer than the last, until we were all too full to eat another slice and we’d exhausted our supply of ingredients. Then we threw a shortbread crust in for awhile, took it out and added a filling of blackberries, apple, ginger, and sugar, and replaced it inside for another 40 minutes of baking.
When it was done (and devoured), we used the considerable remaining heat to overnight slow cook a cast iron pot of beans with jalepenos, pepper, and cumin for our breakfast tacos the following day – our last morning at Habitable Spaces, capping off our wonderful two-month stay!
Postscript:
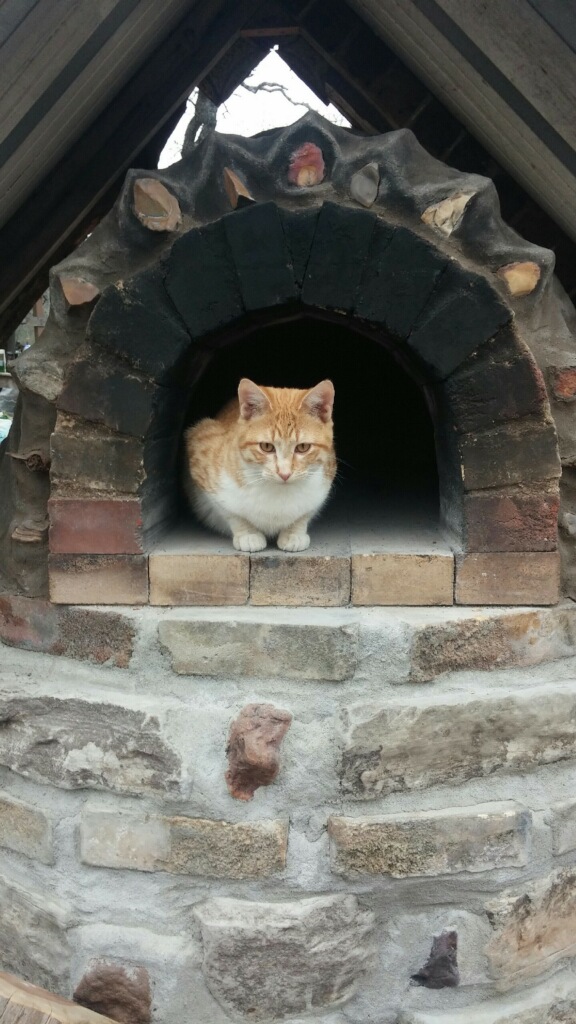
A couple of days after we left, Shane and Alison sent us the photos below – while they were soaking the door (in preparation for a bakefest of 8 pizzas & a loaf of bread), both a chicken and a cat had decided that the earth oven was a “habitable space,” indeed ….
It was a lot of work but incredibly rewarding and fun – we’re looking forward to visiting again to eat from it someday … and we can’t wait to build our own, back home on our farm!!


