Category Archives: CSA

Quest for Fire: A Rocket Mass Heater for the Greenhouse

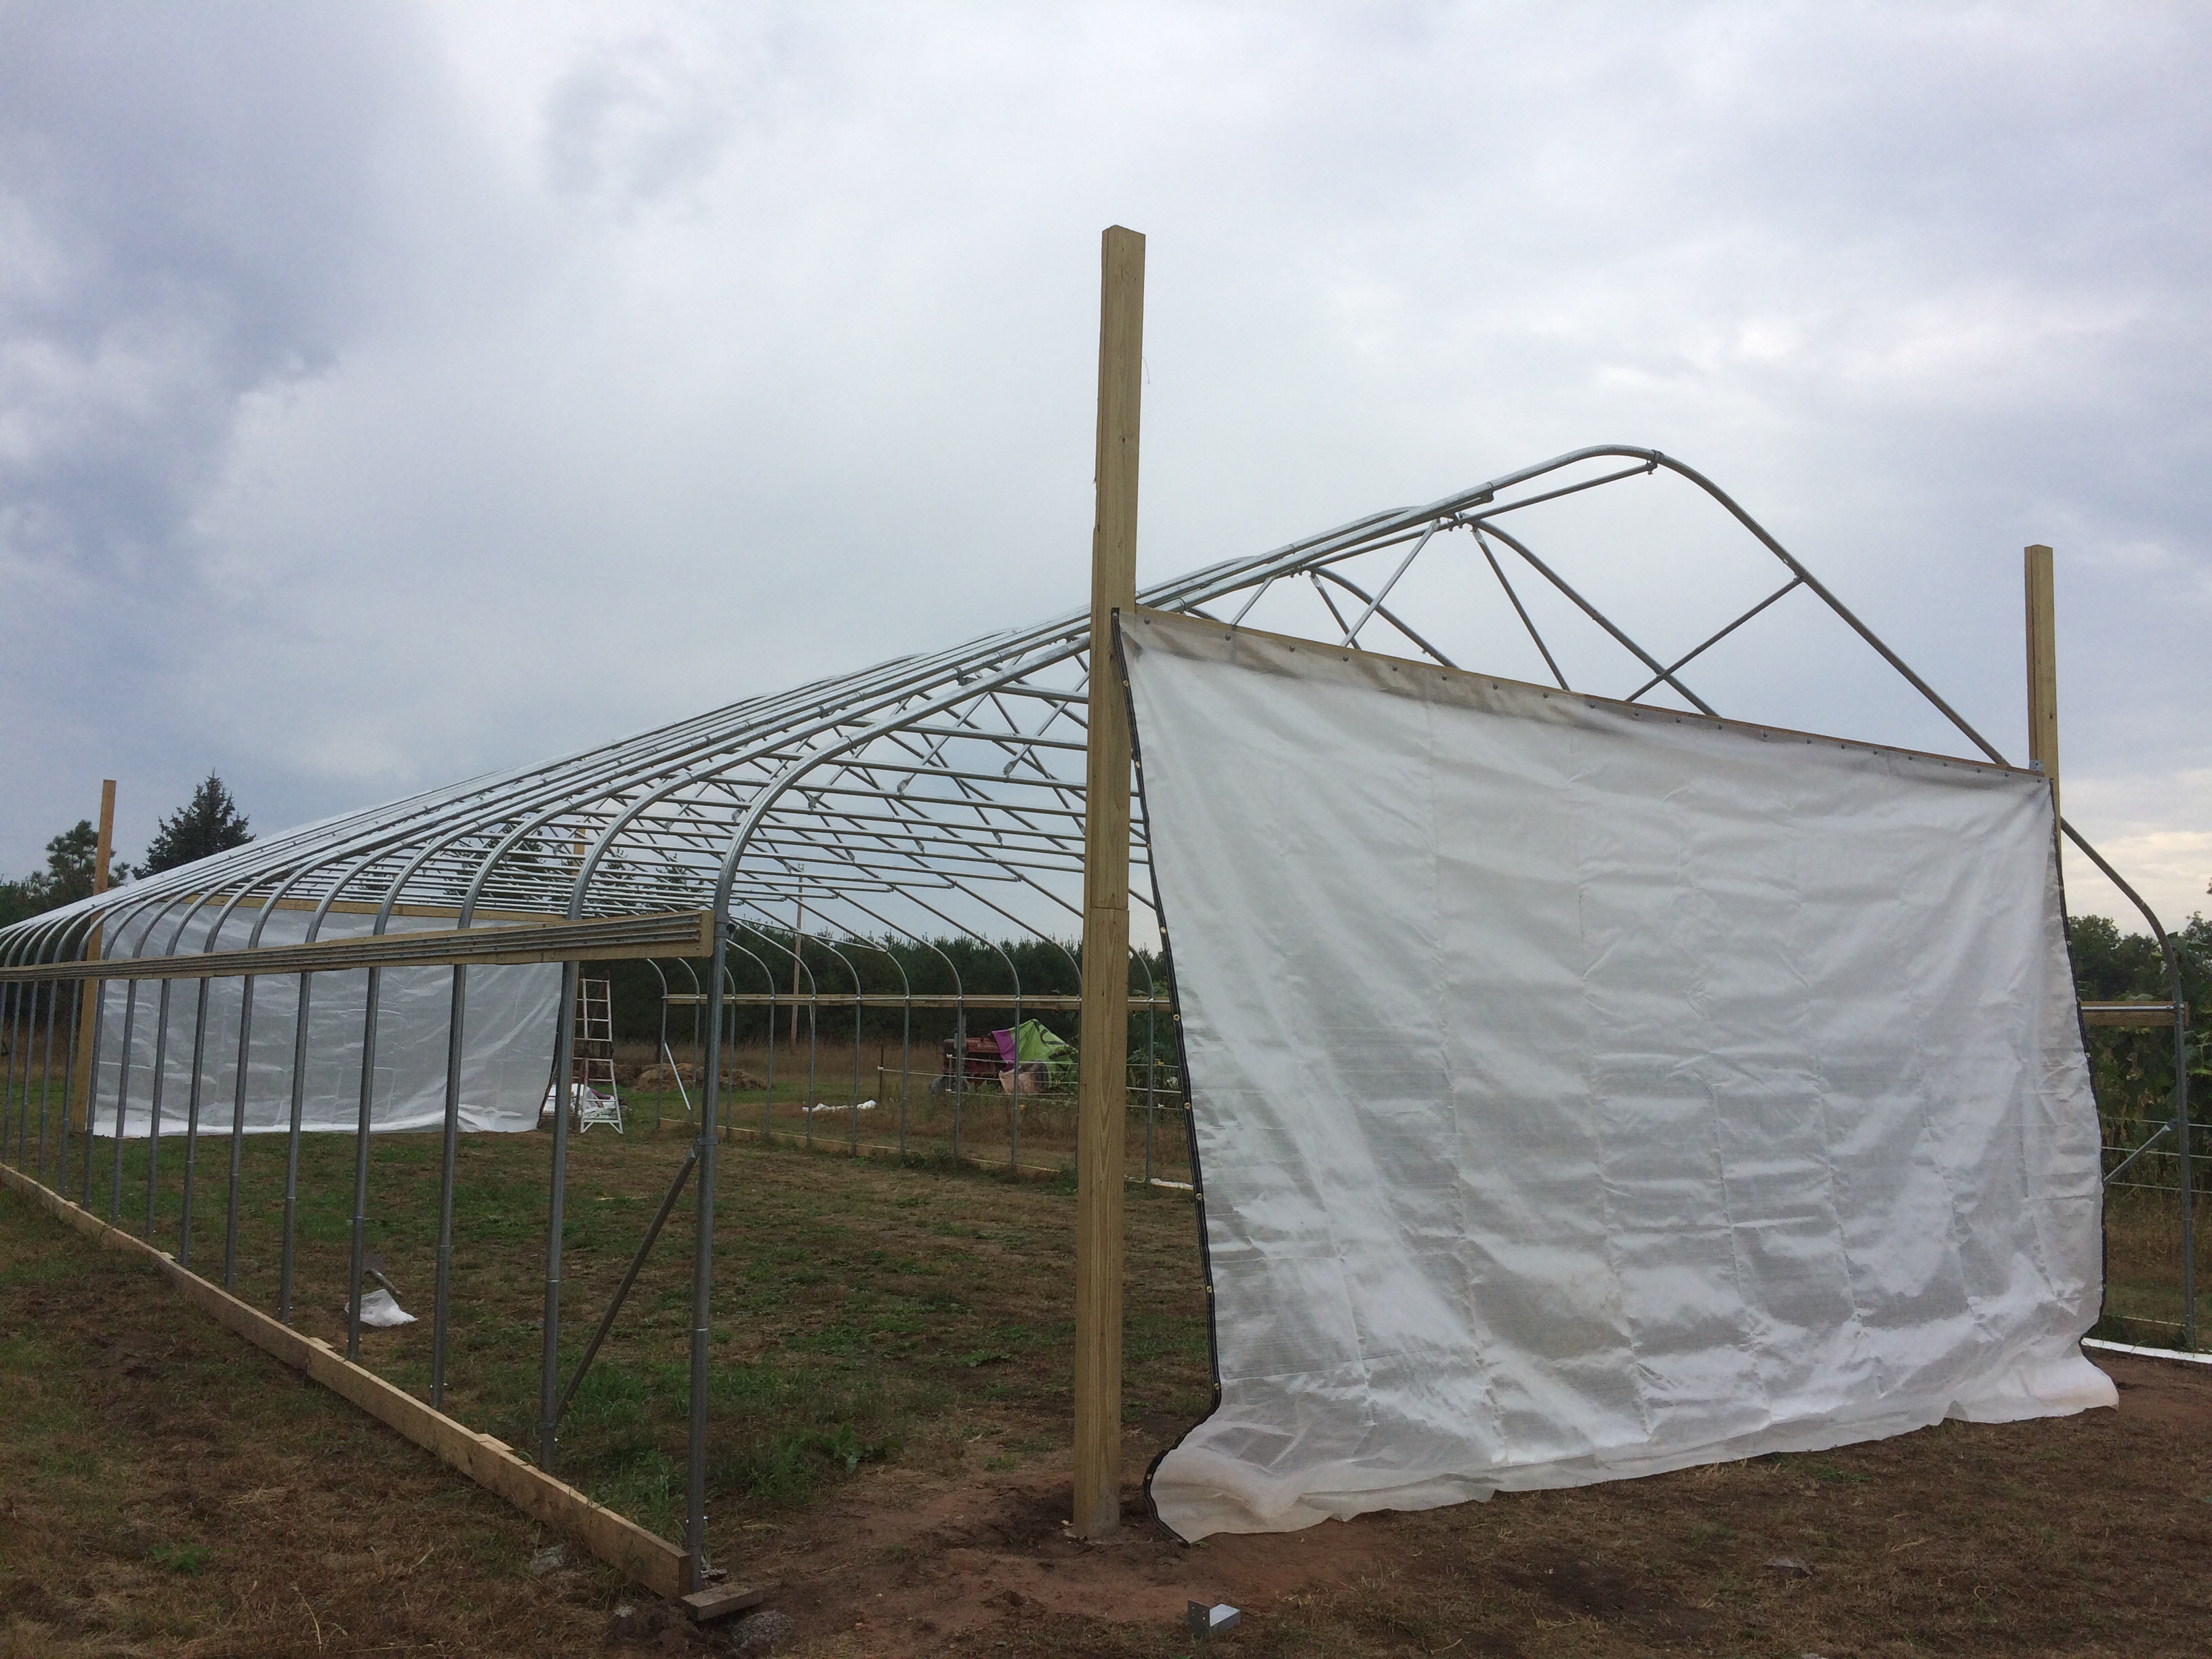
Being off grid (without utility hookups to water, gas, and electricity) is challenging even just for a dwelling –  but even more so for a farm, especially in this climate. In the spring, we have to start our plants indoors, so they will be developed enough to produce before it gets too hot for the cool weather plants in summer, and before the killing frosts of fall take out the heat lovers. They all need to be kept warm day and night, especially when germinating from seeds – but they also need to be under good bright sunlight. The sunlight is great in the greenhouse, which also gets plenty warm most days if it’s not totally cloudy – but greenhouses lose heat quickly after sundown. We solved for this in previous years by nightly driving all the baby plants up to the trailer, where they slept toastily on floor-to-ceiling shelving next to the wood stove.

plus trays on the front passenger seat and foot well.

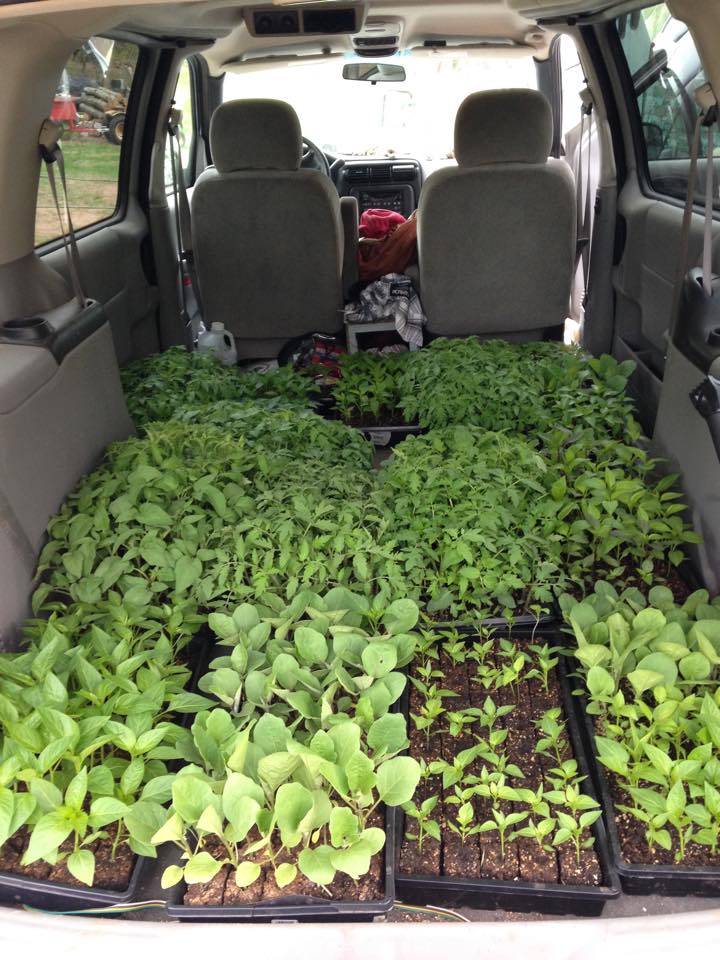
Then every morning just after dawn, we drove them all back down to the greenhouse for their daily sunshine. We worked out a good two-person method to get it done as efficiently as possible, but it was a time-consuming process – and we couldn’t have the lights on near the plants when they were inside (or they’d get leggy trying to get fed by the artificial lighting). Yeah, it worked … but we needed to come up with something better.

Heating the greenhouse at night was the obvious solution, but it seemed impossible – the plastic covering lost heat so quickly that it would cost us a fortune in propane … and we’d always be fearful that the tank was going to run out in the night, leaving all our crops to freeze to death. And of course our little solar power system was not capable of generating enough electric heat (which is inherently inefficient) to do the job. A wood stove like the one we use in the trailer would require repeated fueling throughout the night, and again, the heat would mostly be going to the roof and then out through the plastic film.

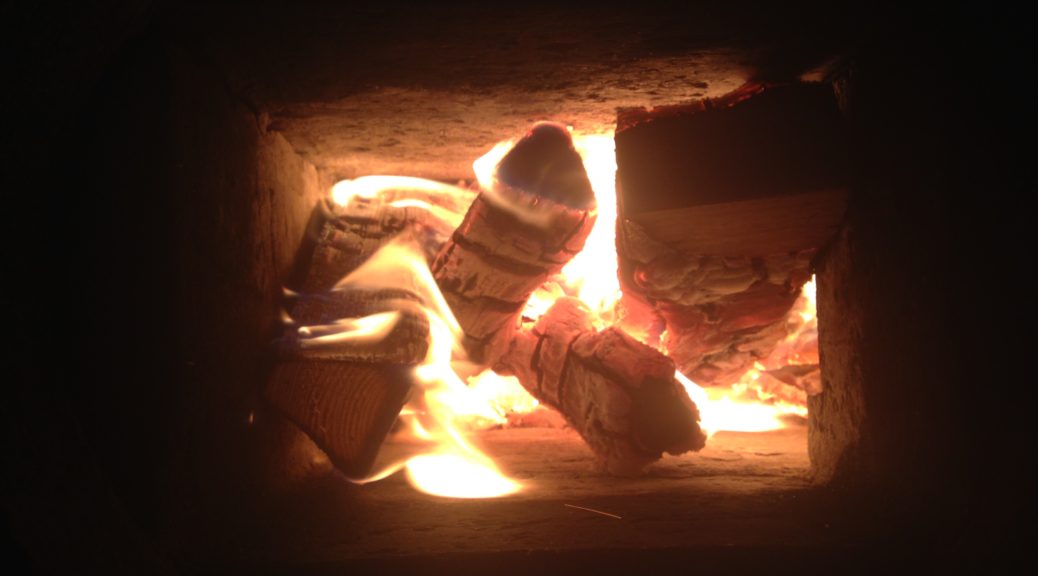
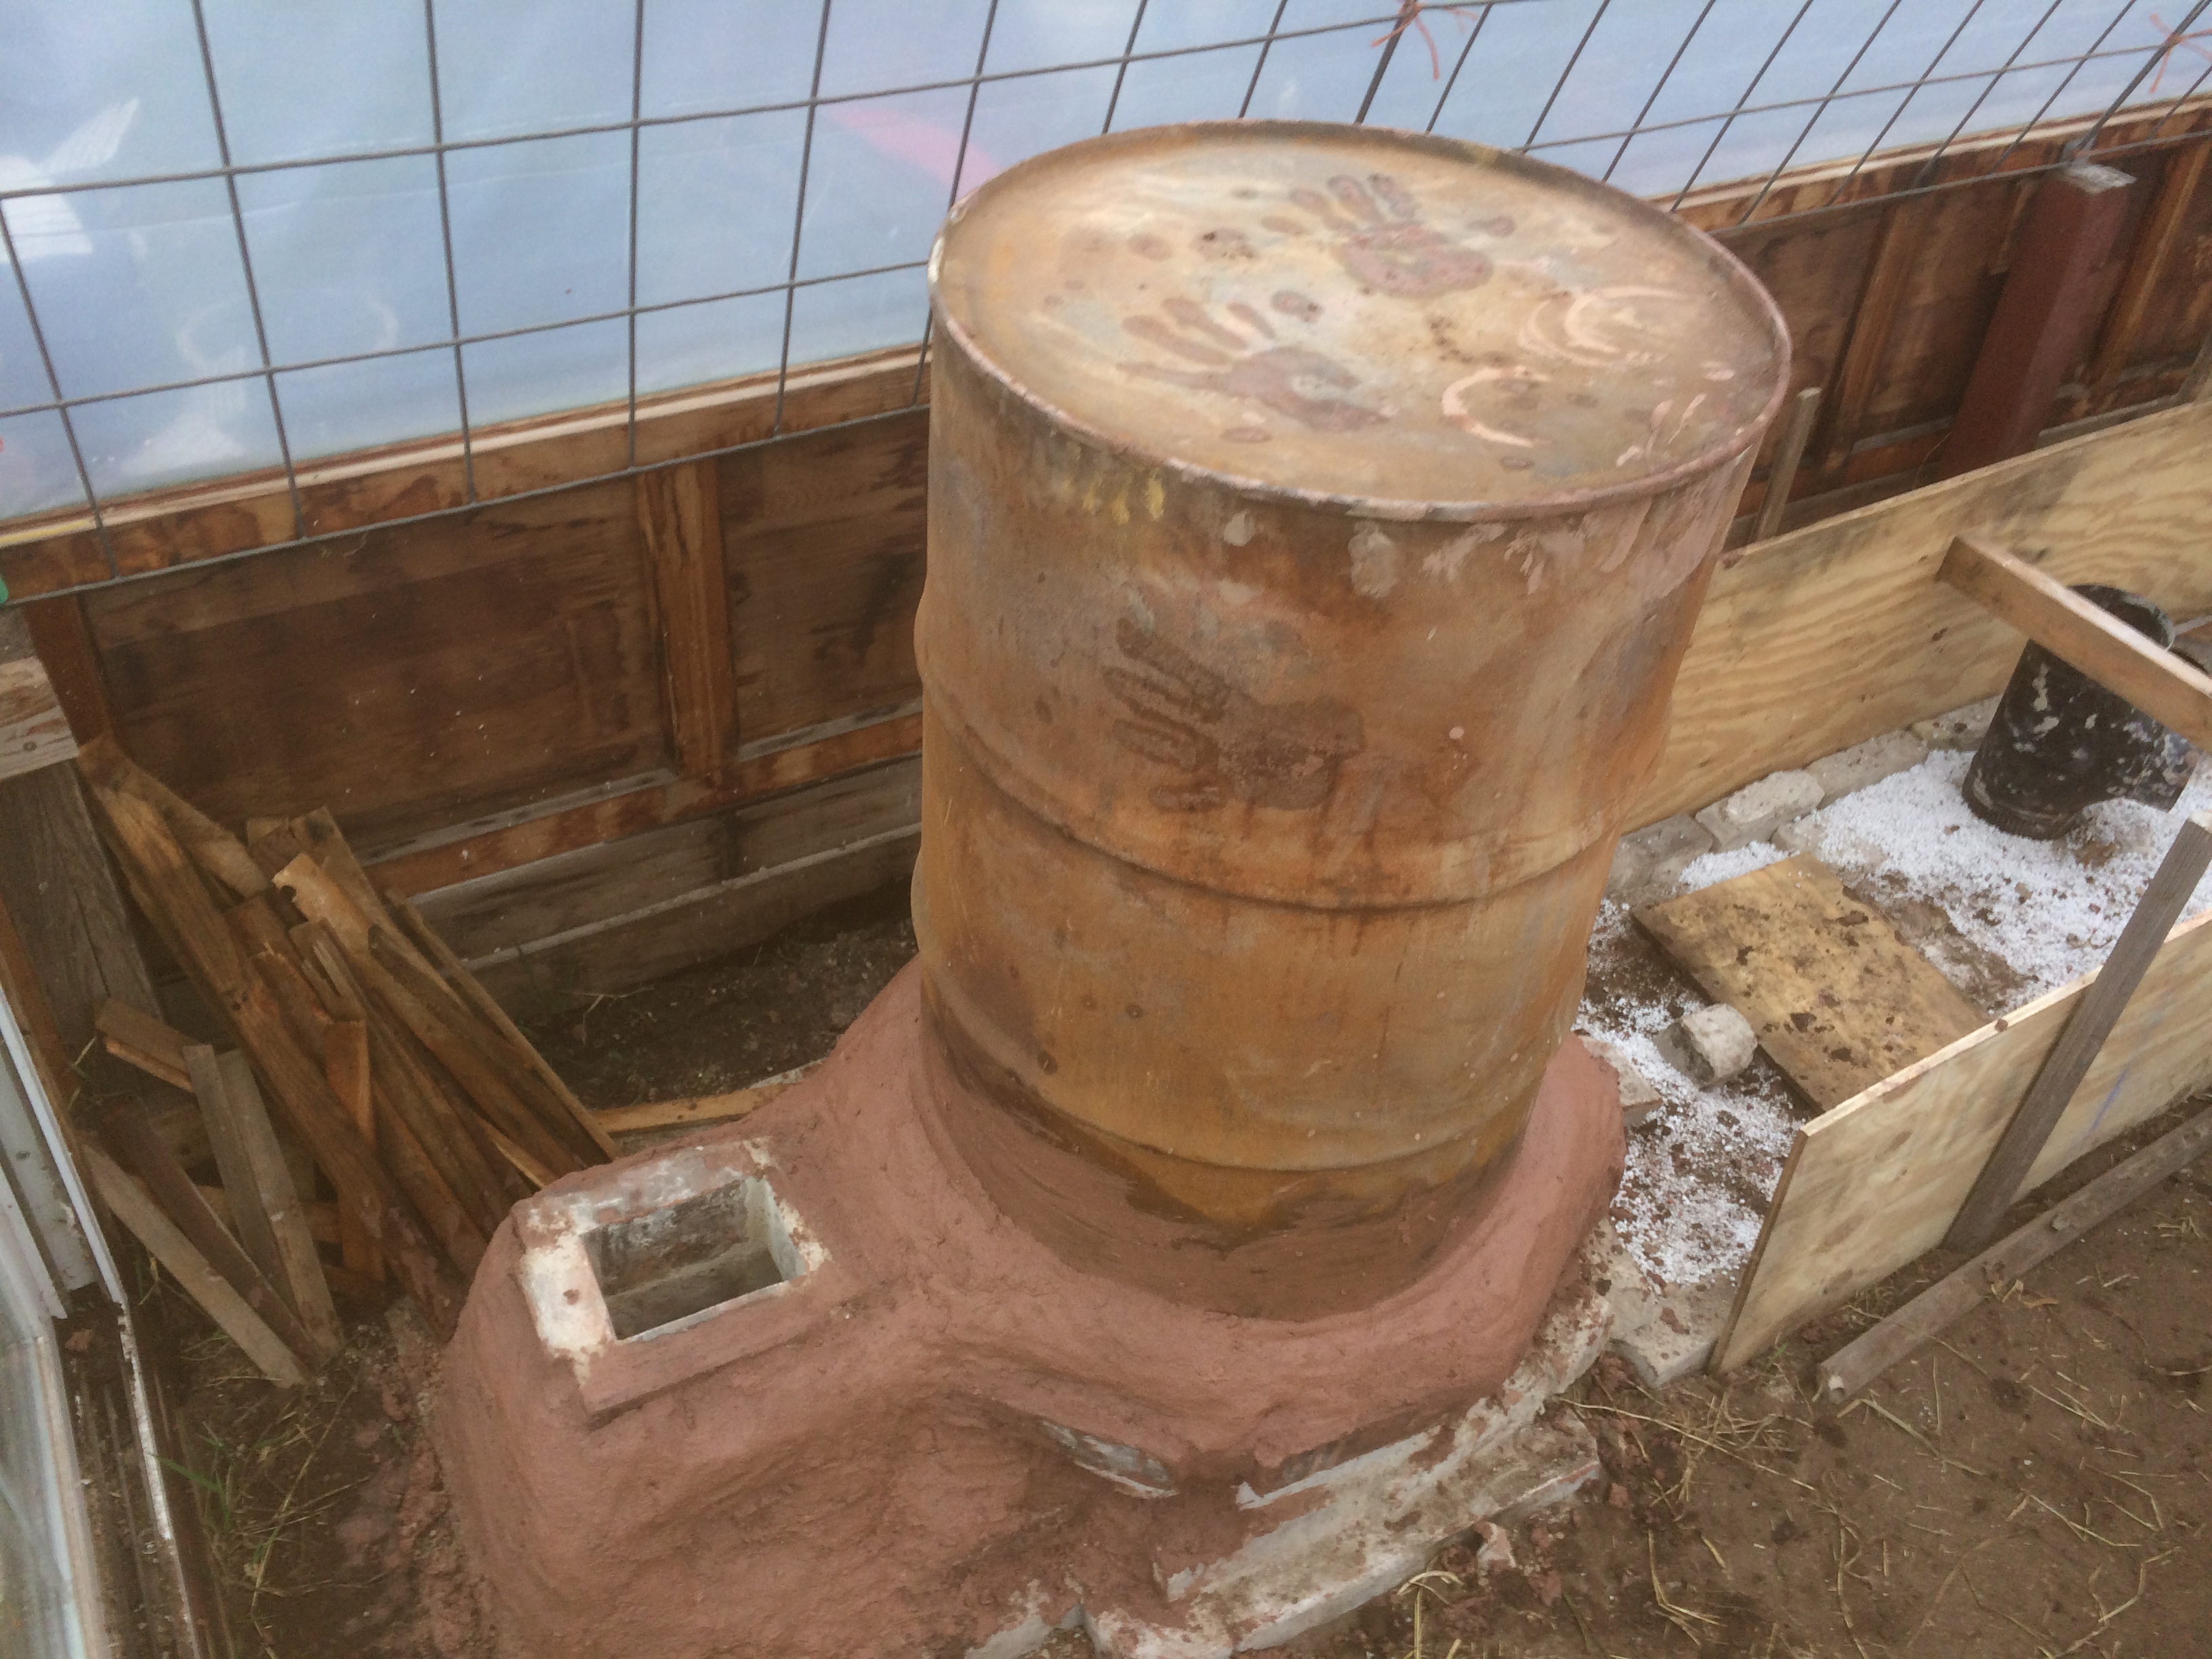
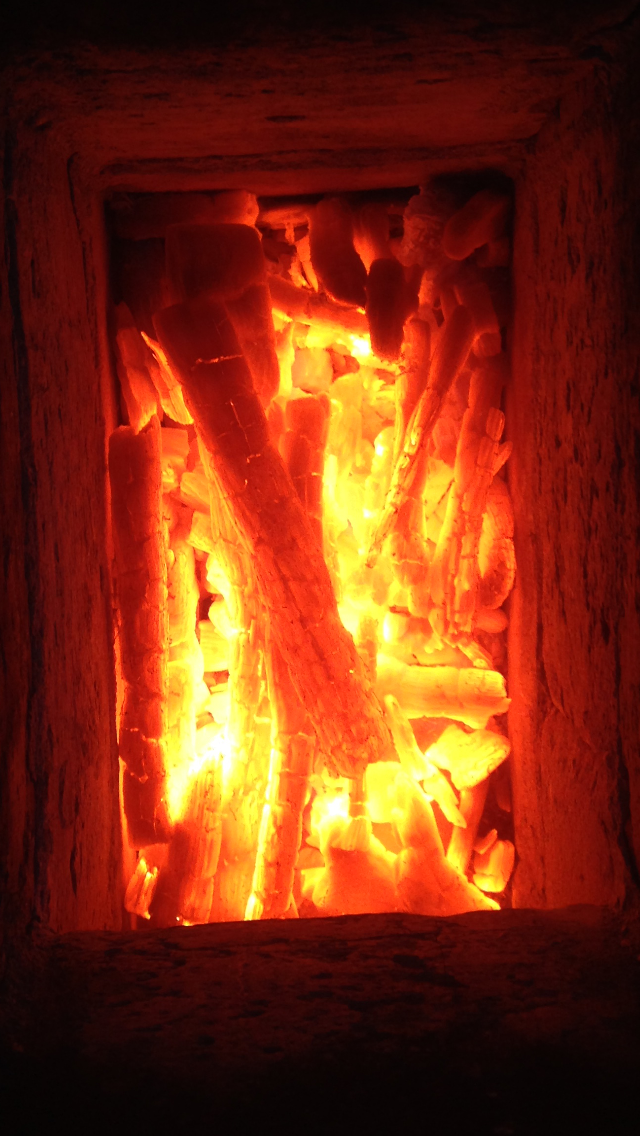
Research led us toward a possible solution – “rocket mass heaters,” which use small amounts of wood burned efficiently at high temperatures to heat up a thermal mass, which then slowly radiates the heat outward for many hours after the fire has gone out.

Rocket-Stove-Mass-Heater

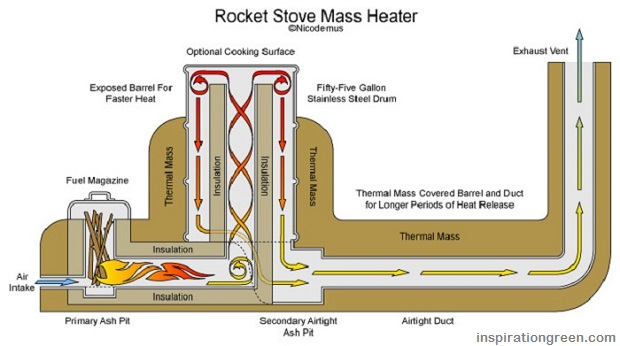
It would still be a challenge to heat the whole greenhouse with this method unless we built a prohibitively large heater, however. Hmmm.

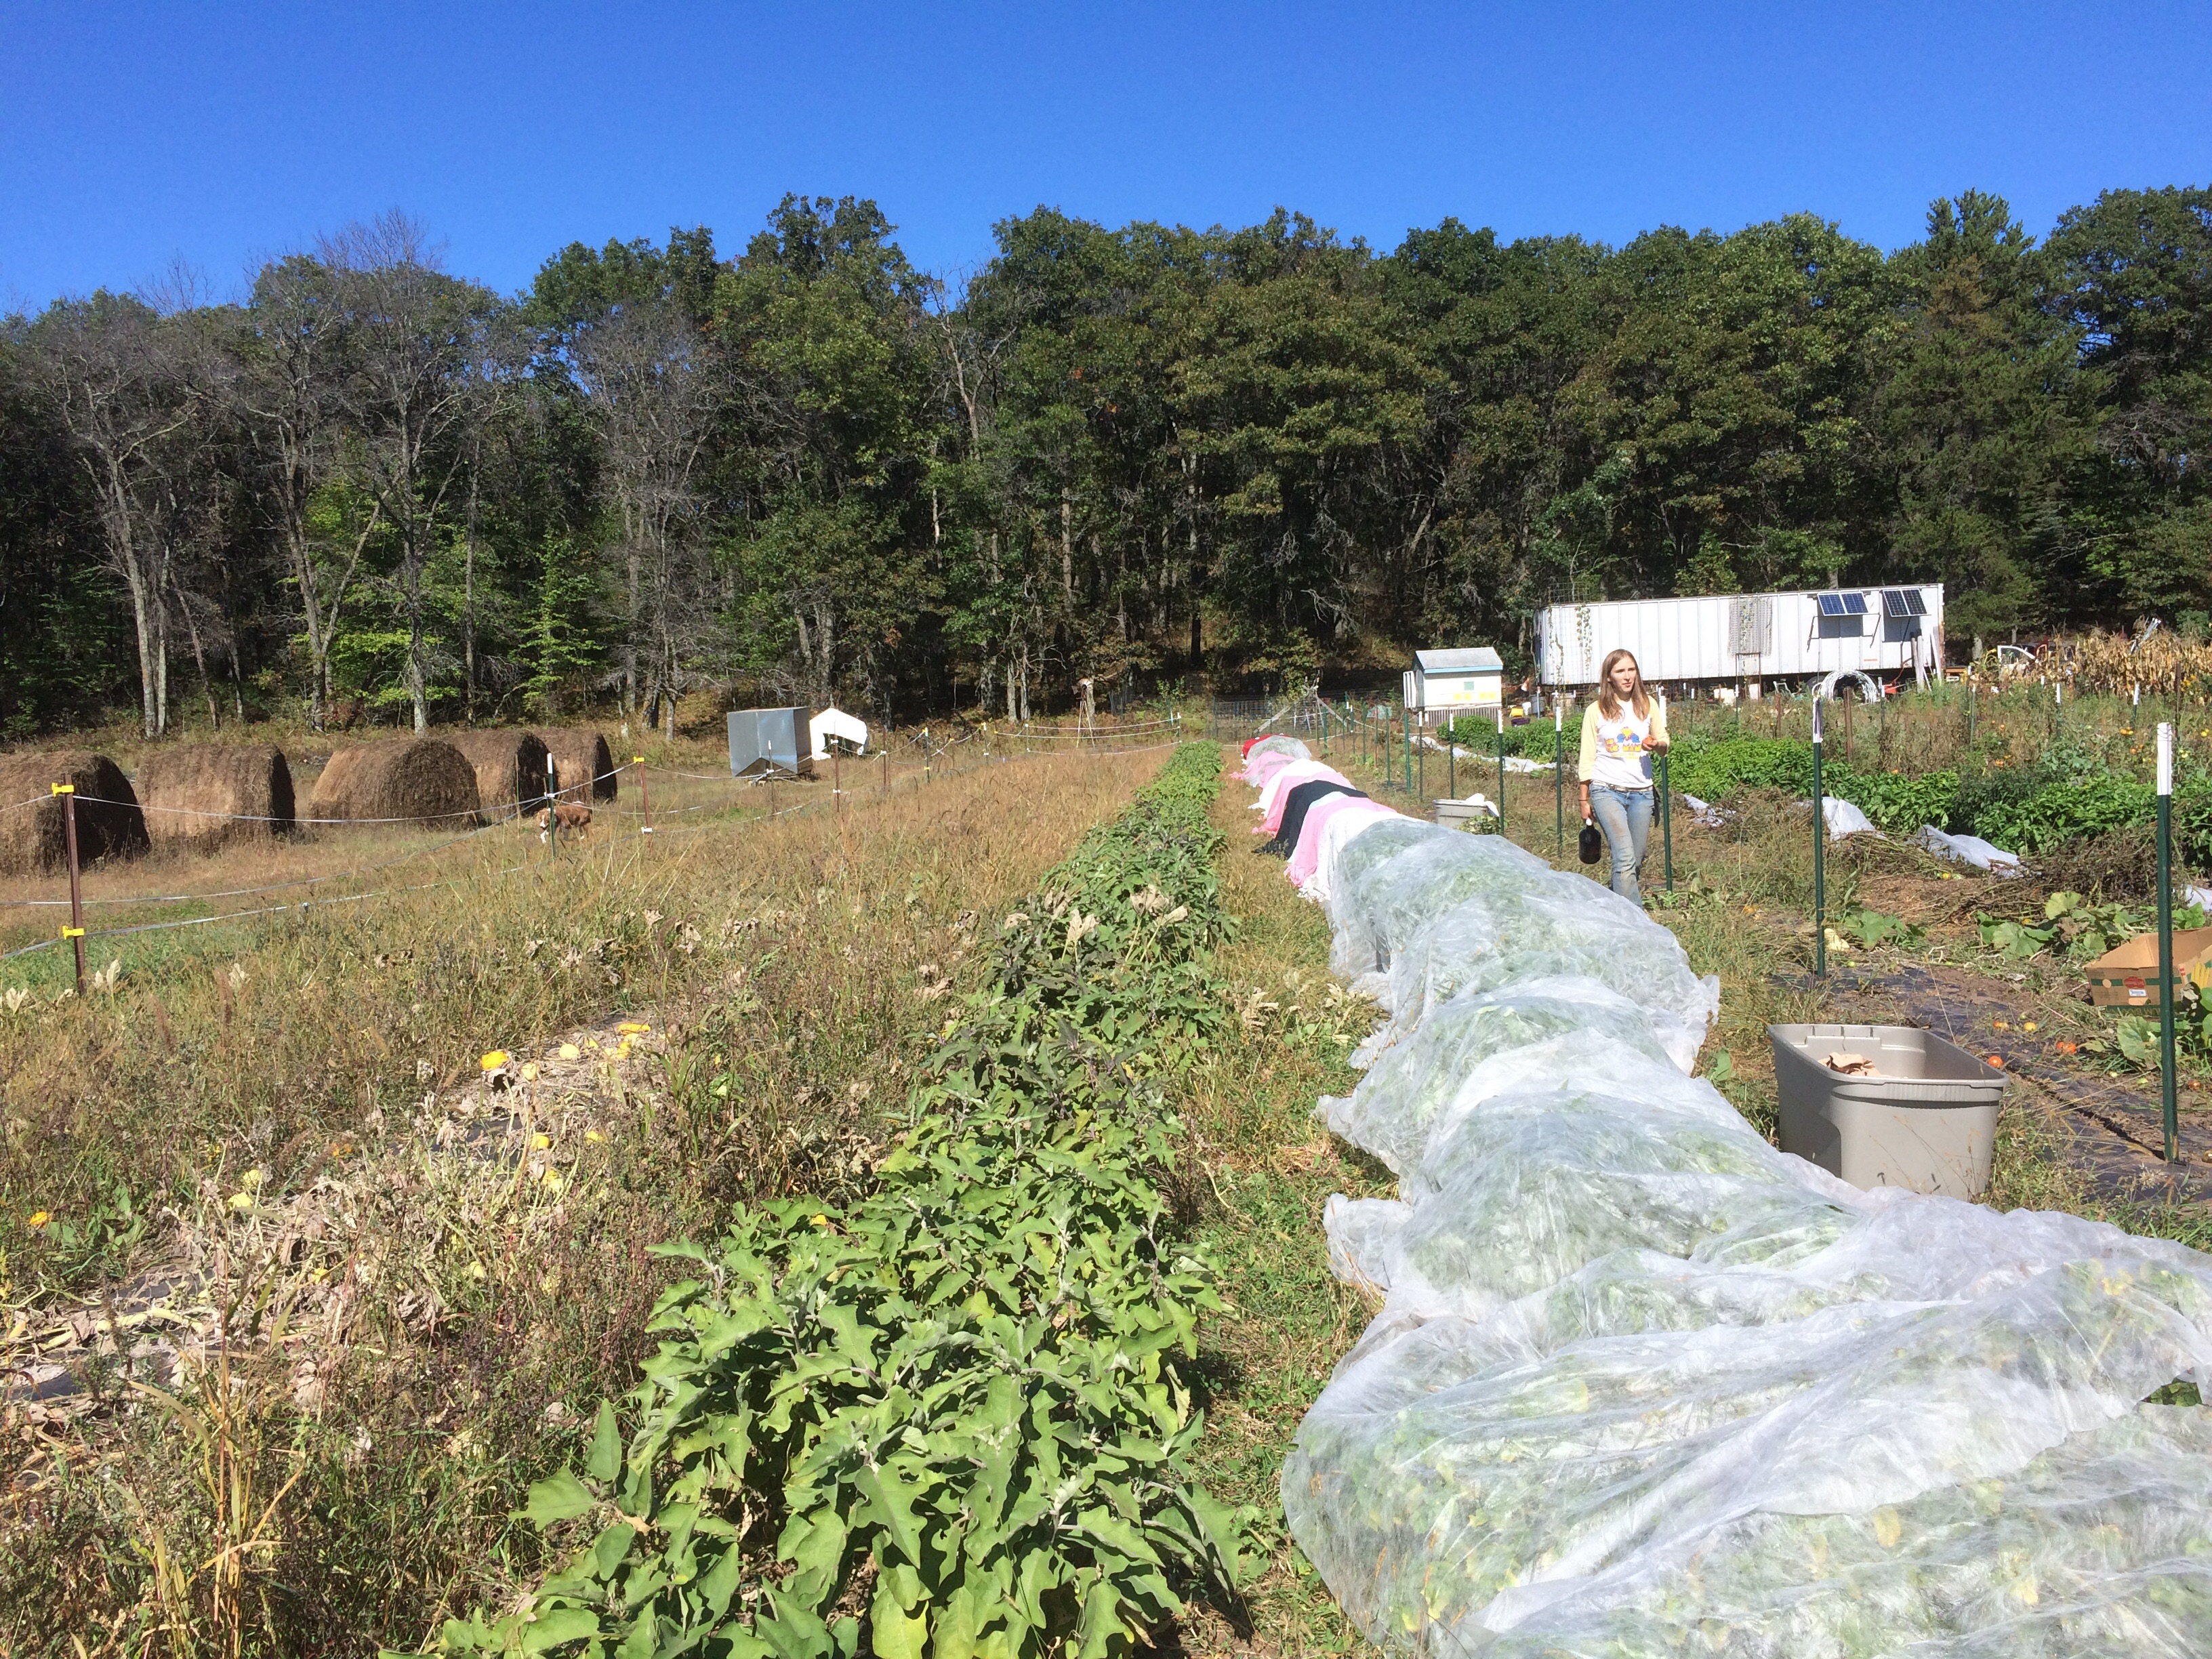
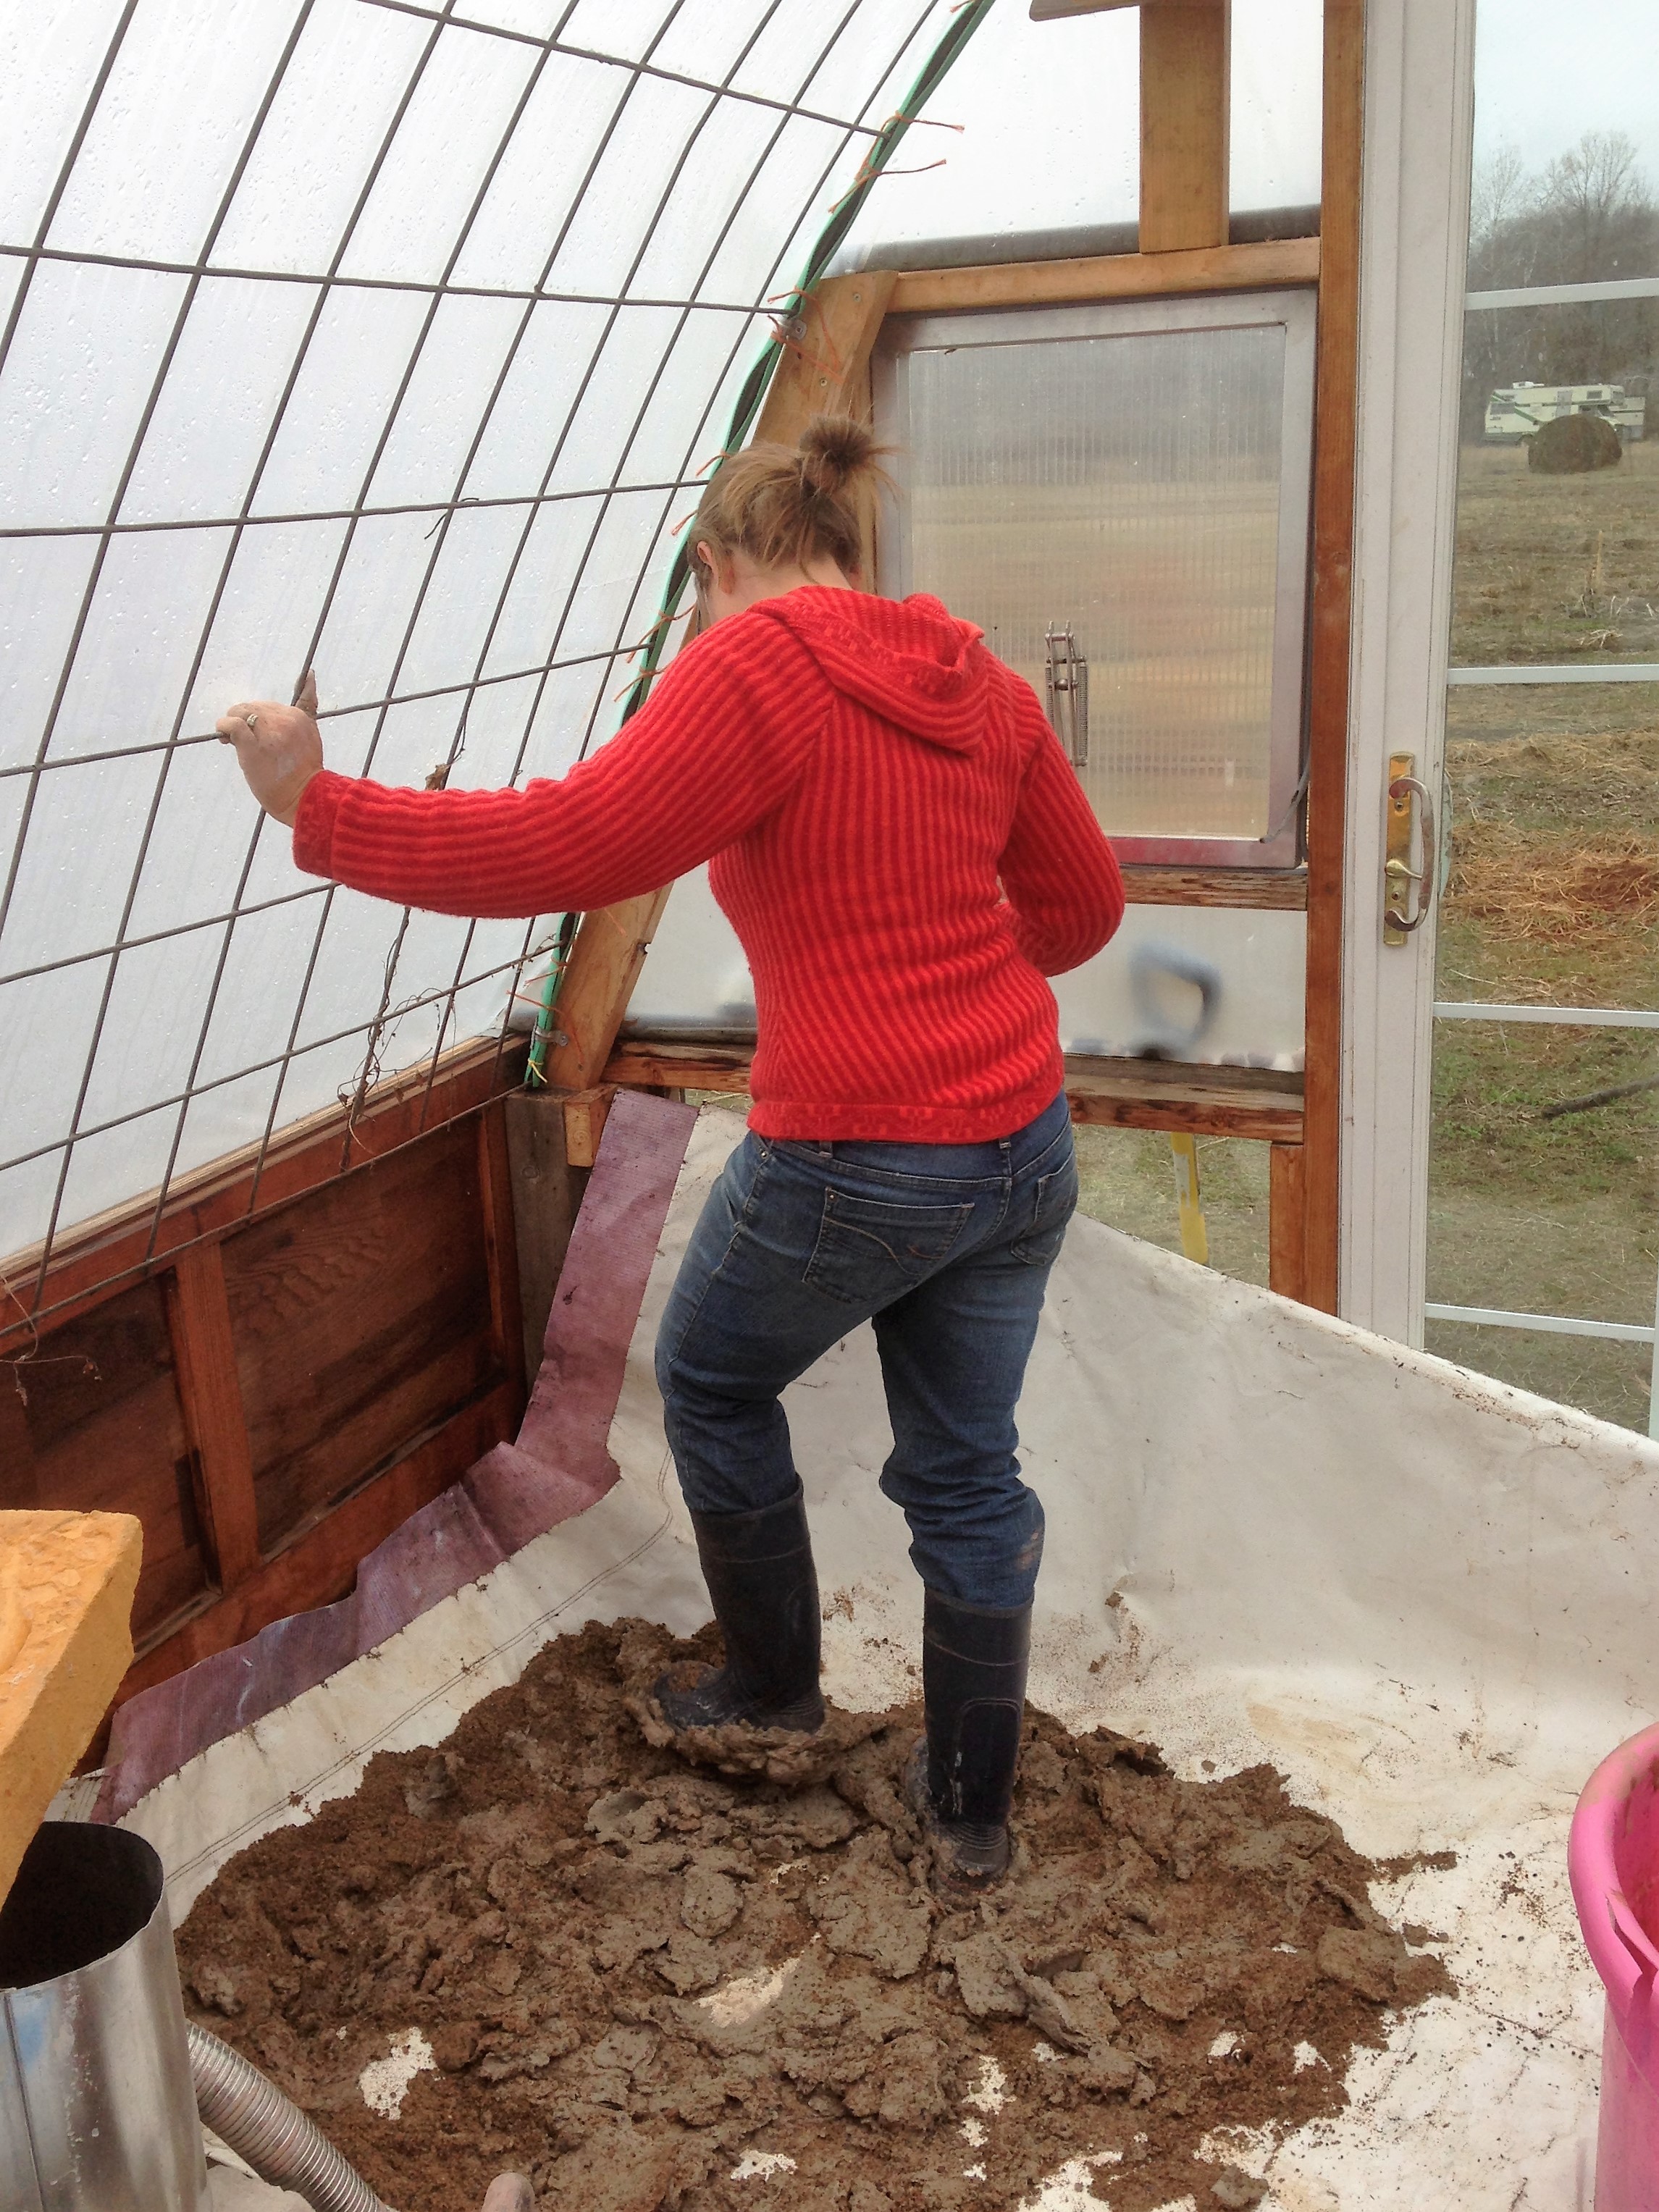
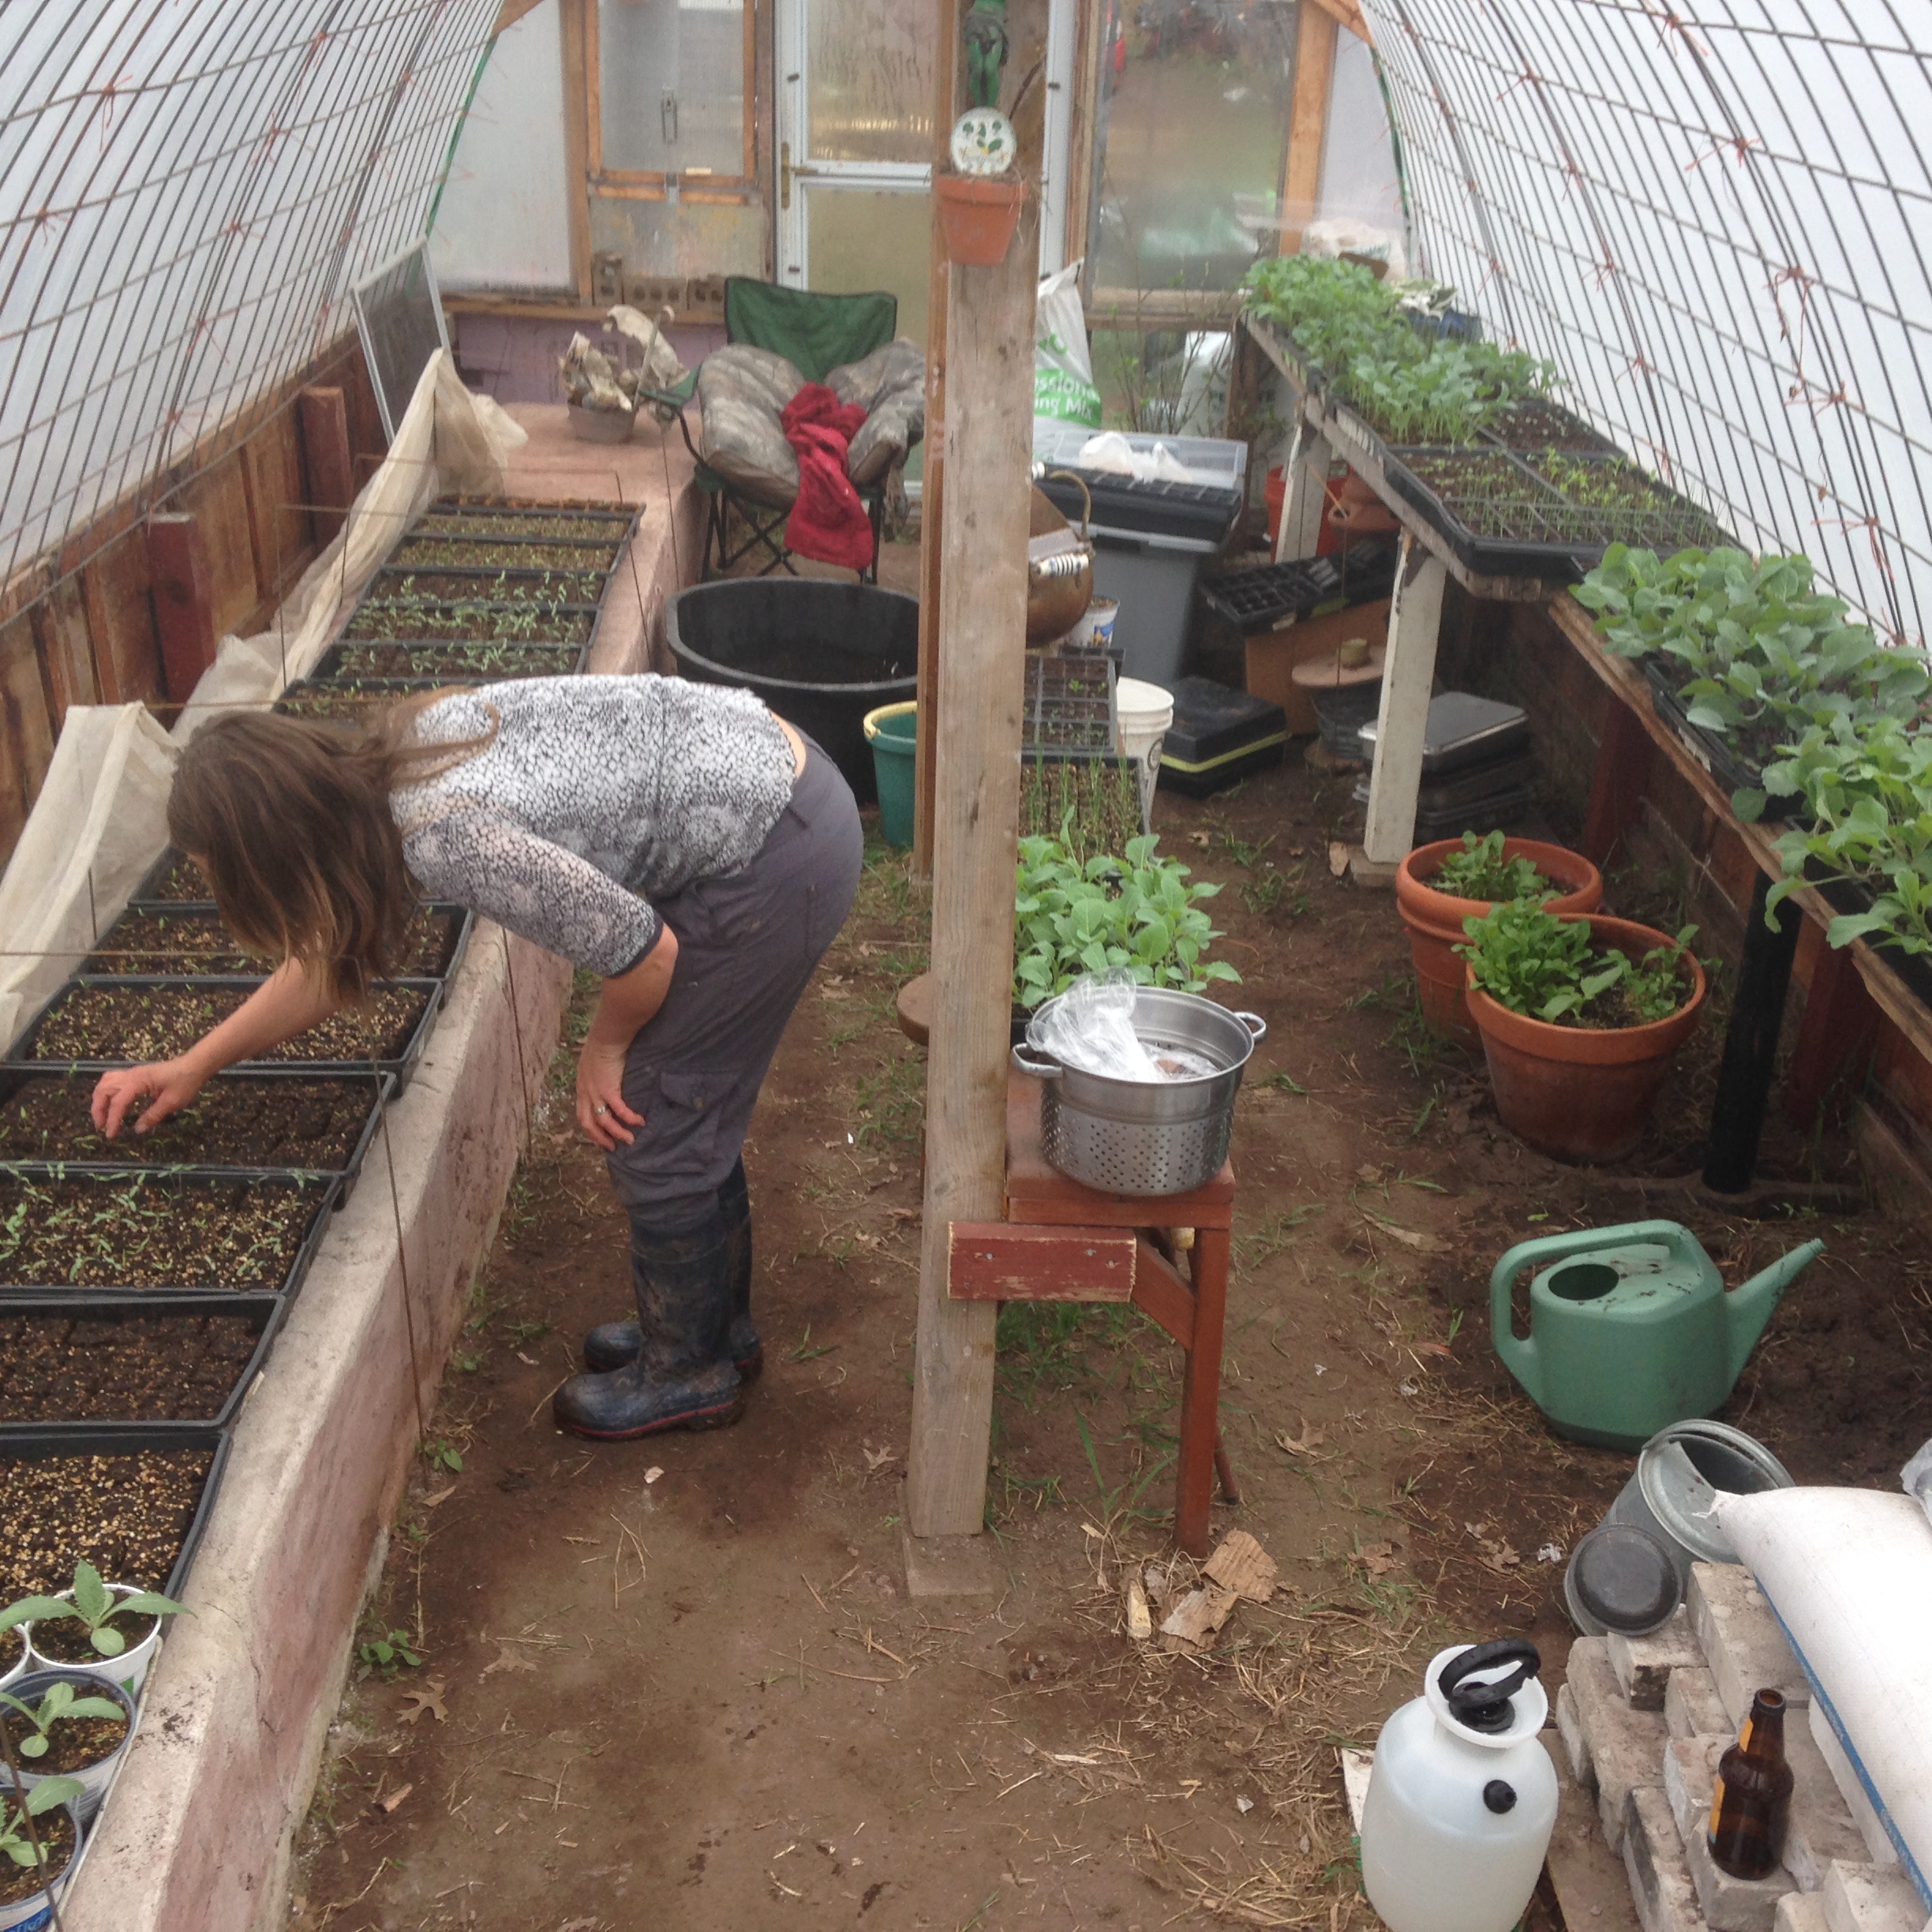
Well, we’d already been experimenting with a technique that Elliot Coleman promotes, using row cover fabric to create a greenhouse-within-a-greenhouse – just putting the plants on the ground and covering  them inside a low tunnel of fabric kept them warmer than the surrounding air, thanks to the day’s heat in the soil. That only got us a few degrees, but it was a crucial difference when temps might be just barely dipping below freezing.

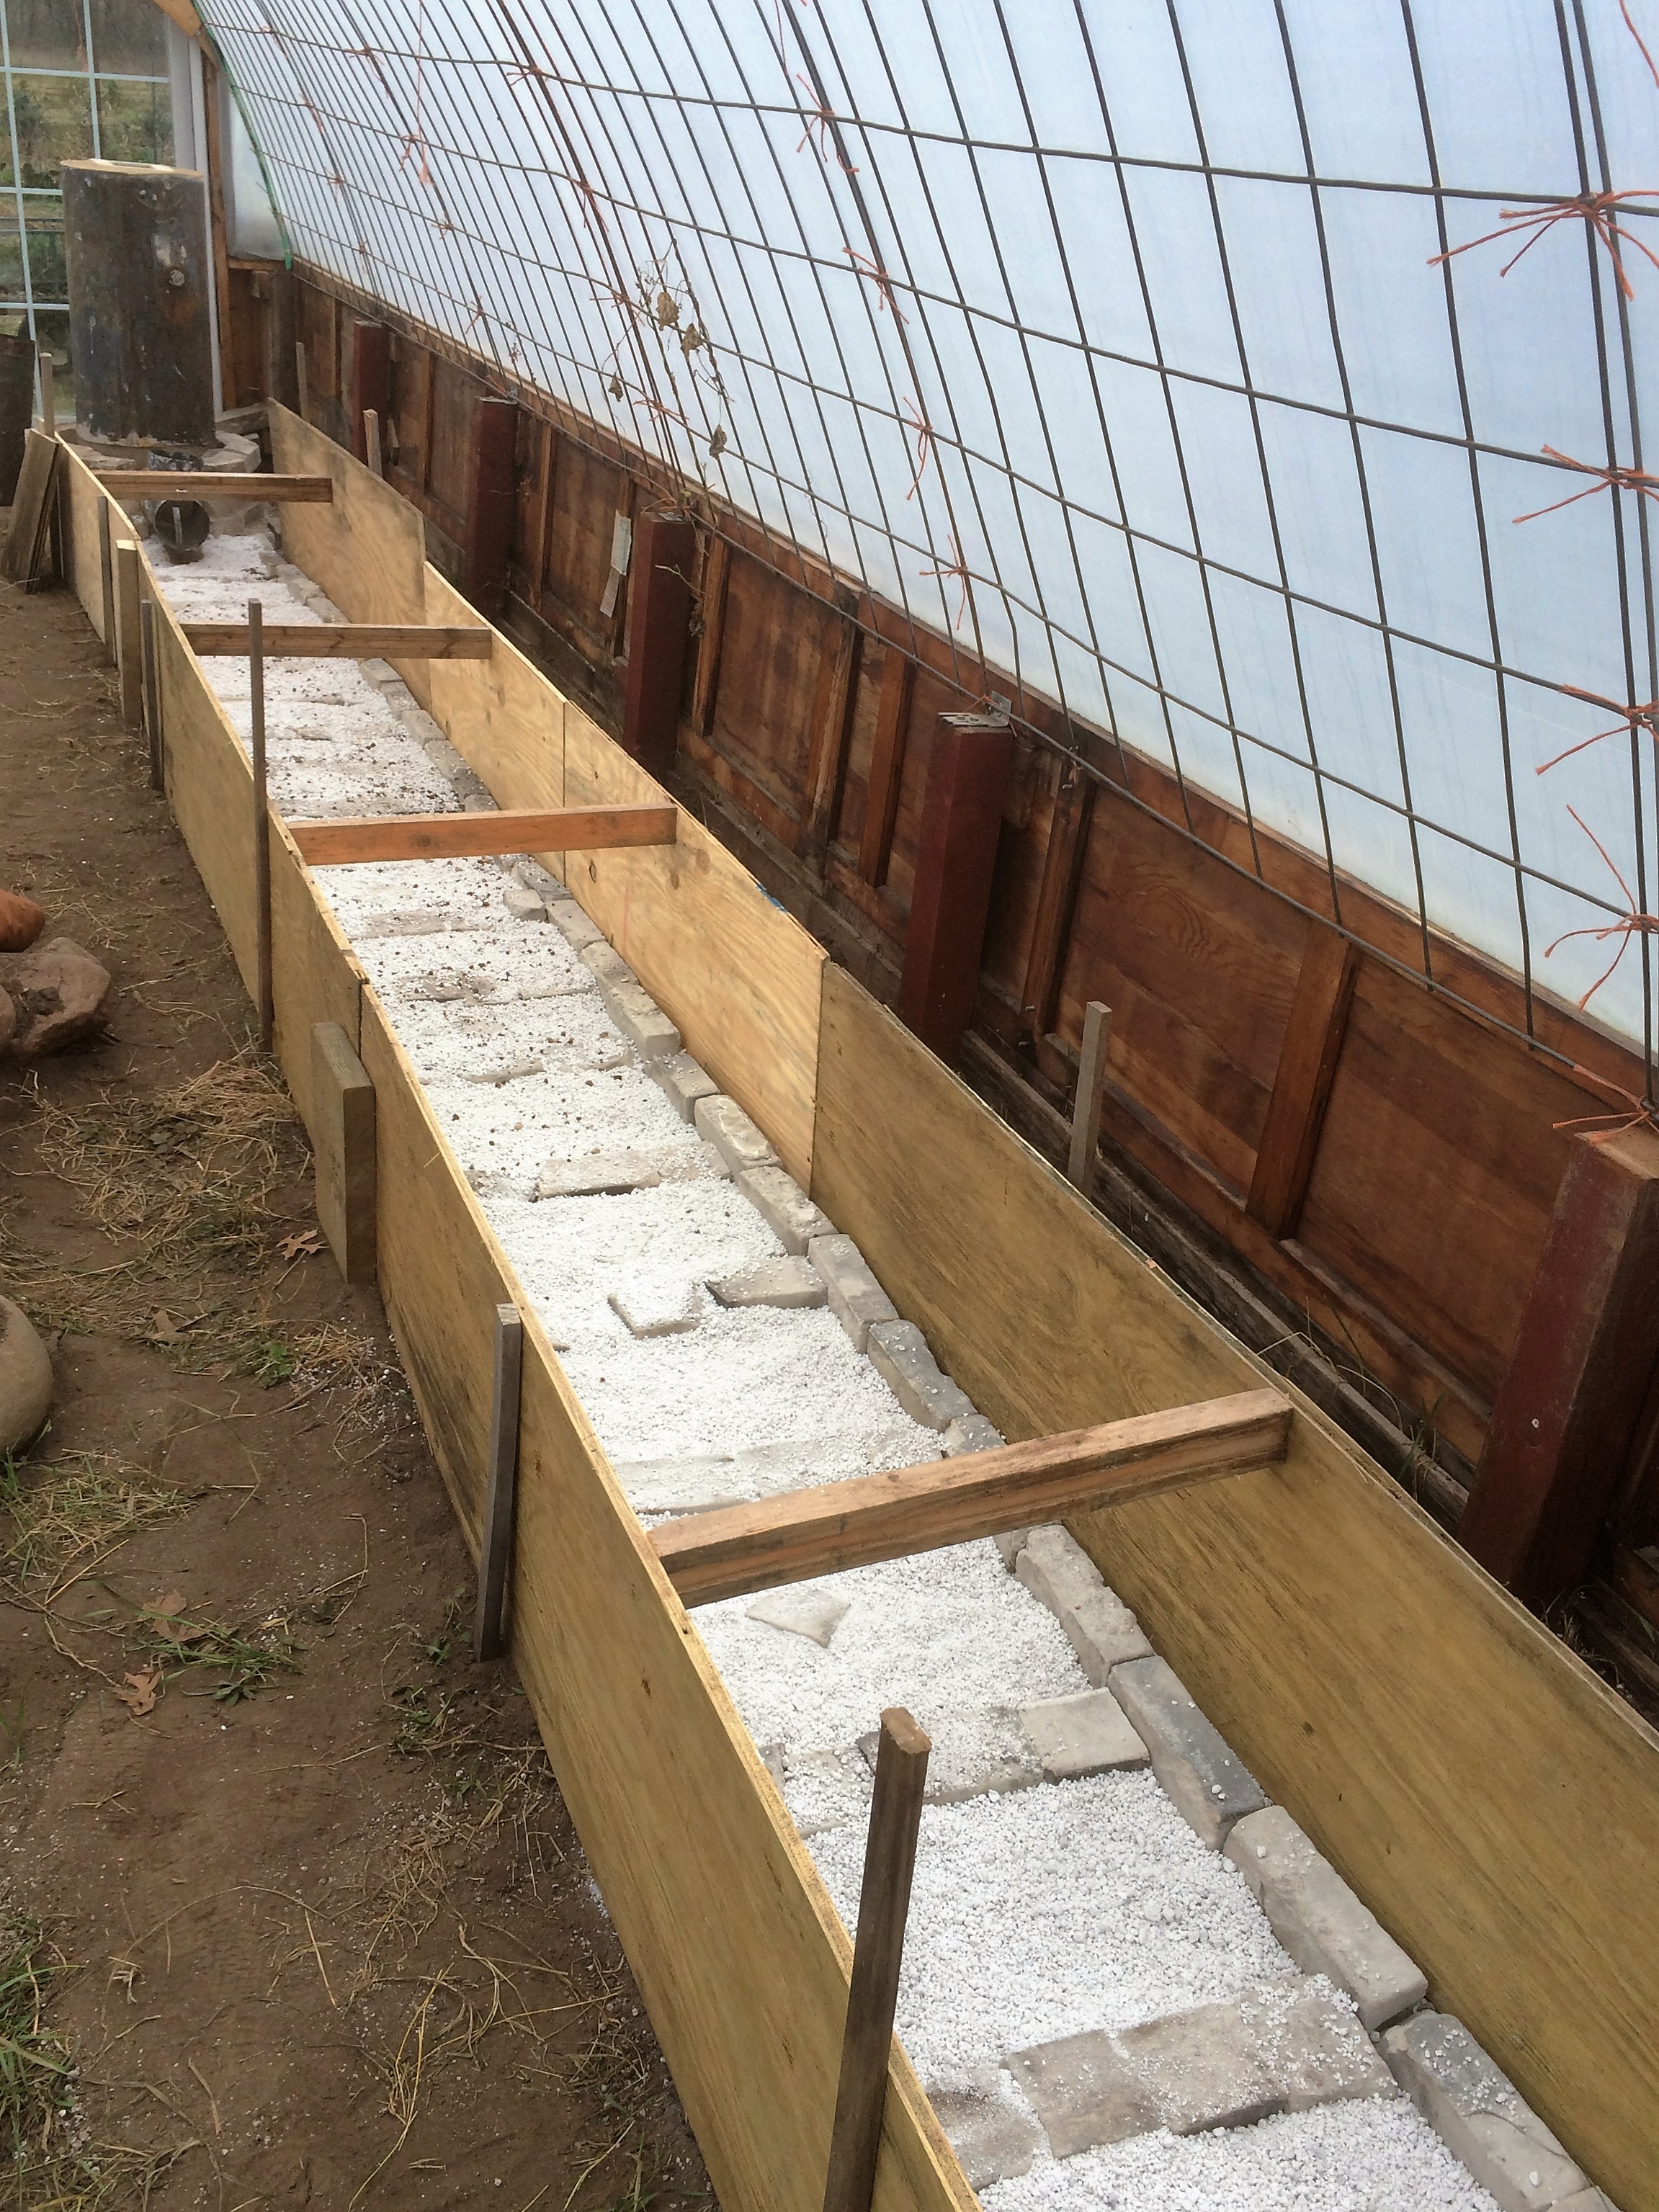
What if we did the same thing atop a thermal mass? It seemed like a winning idea – so we decided to build a heated bench sized for seed trays, and put a cover over them at night to hold heat in.

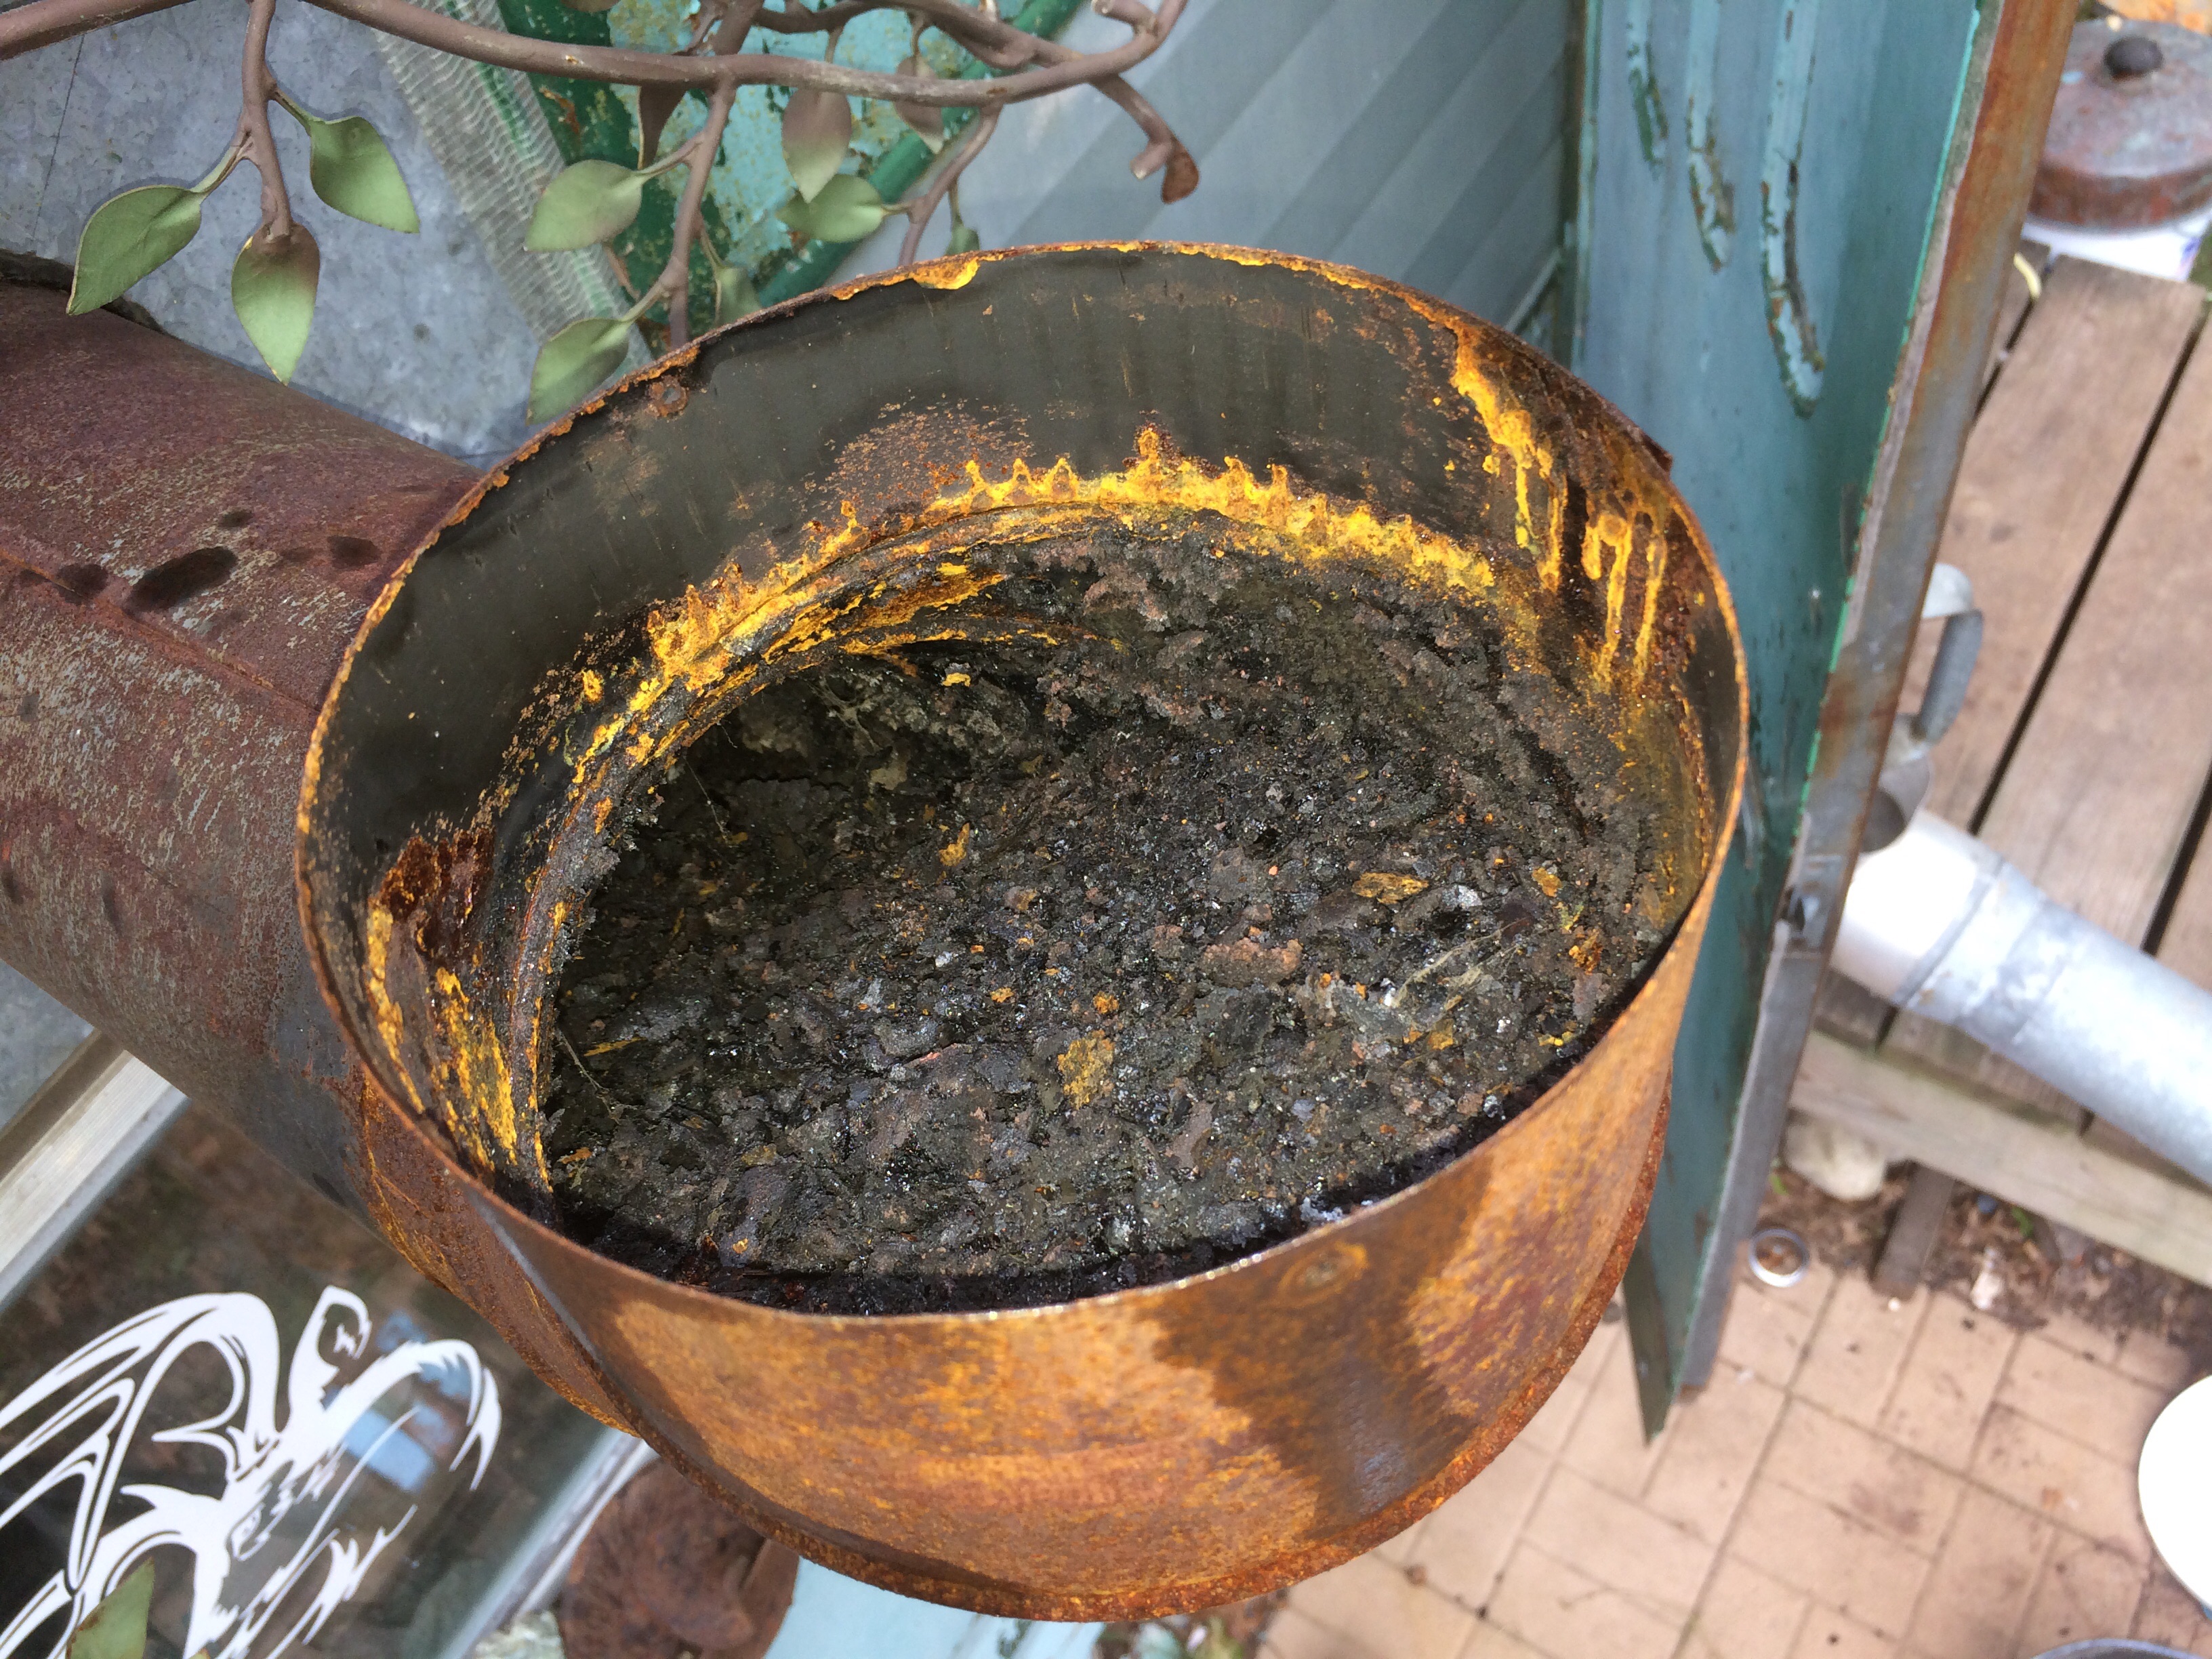
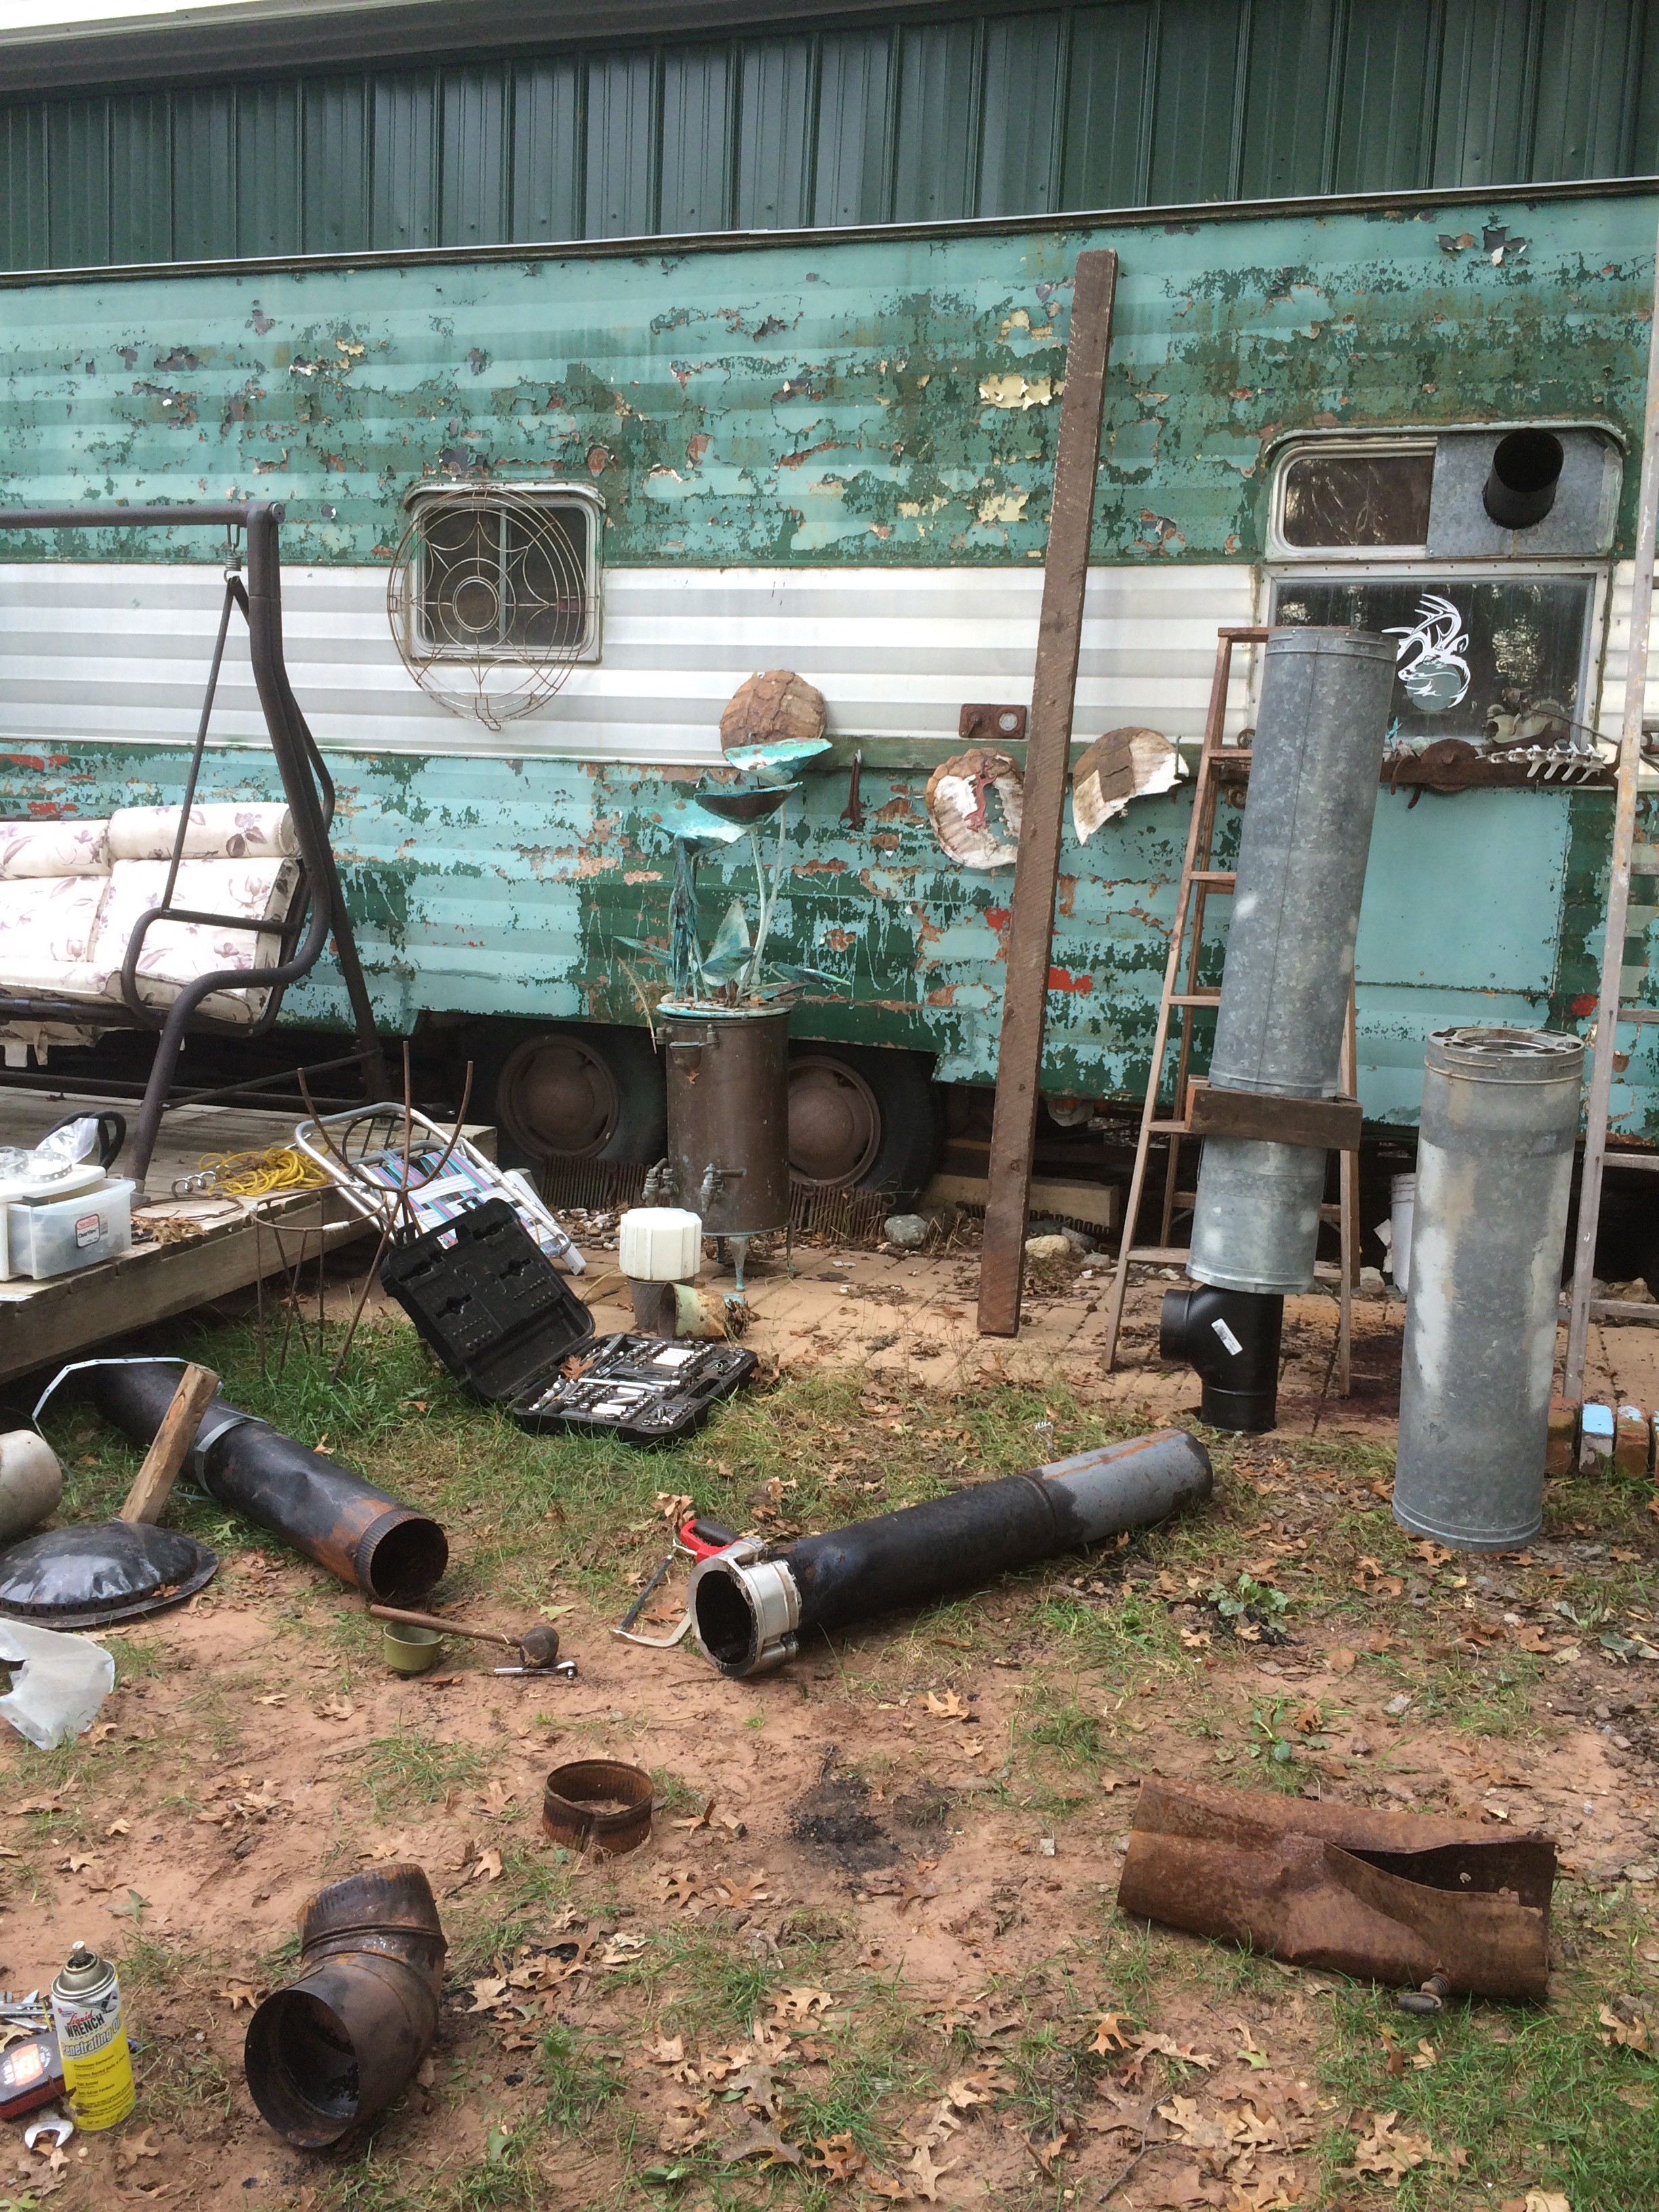
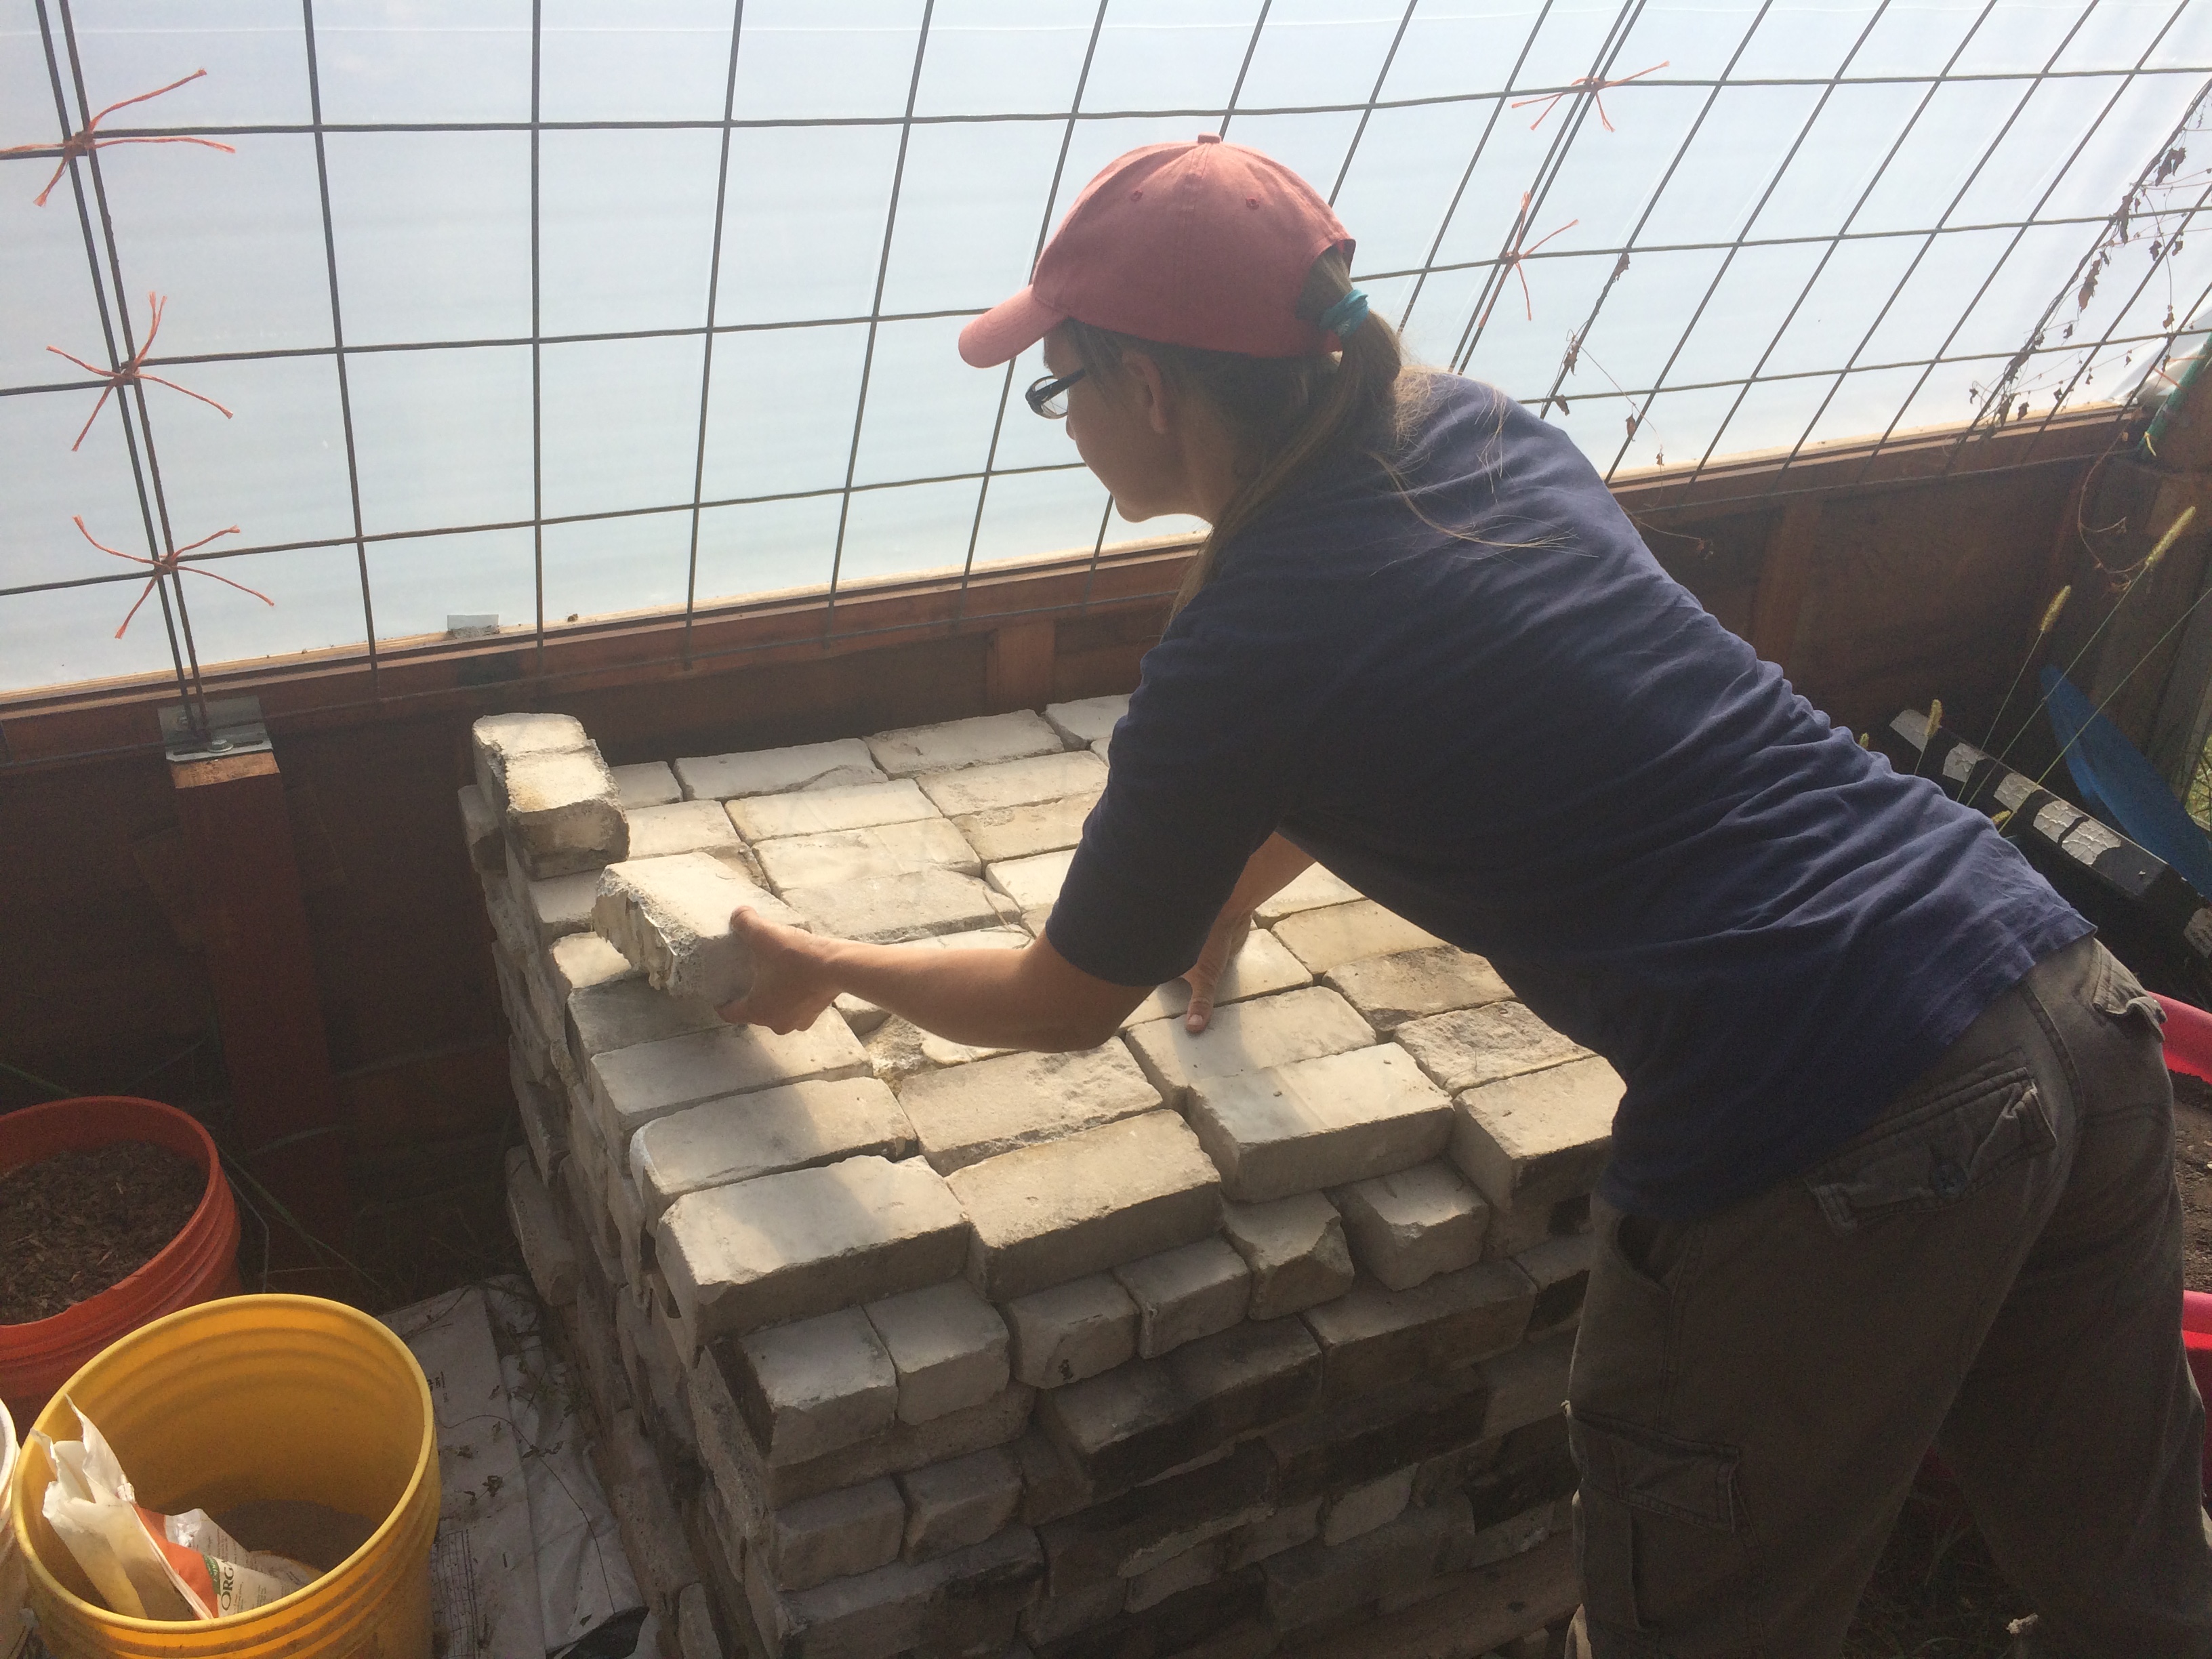
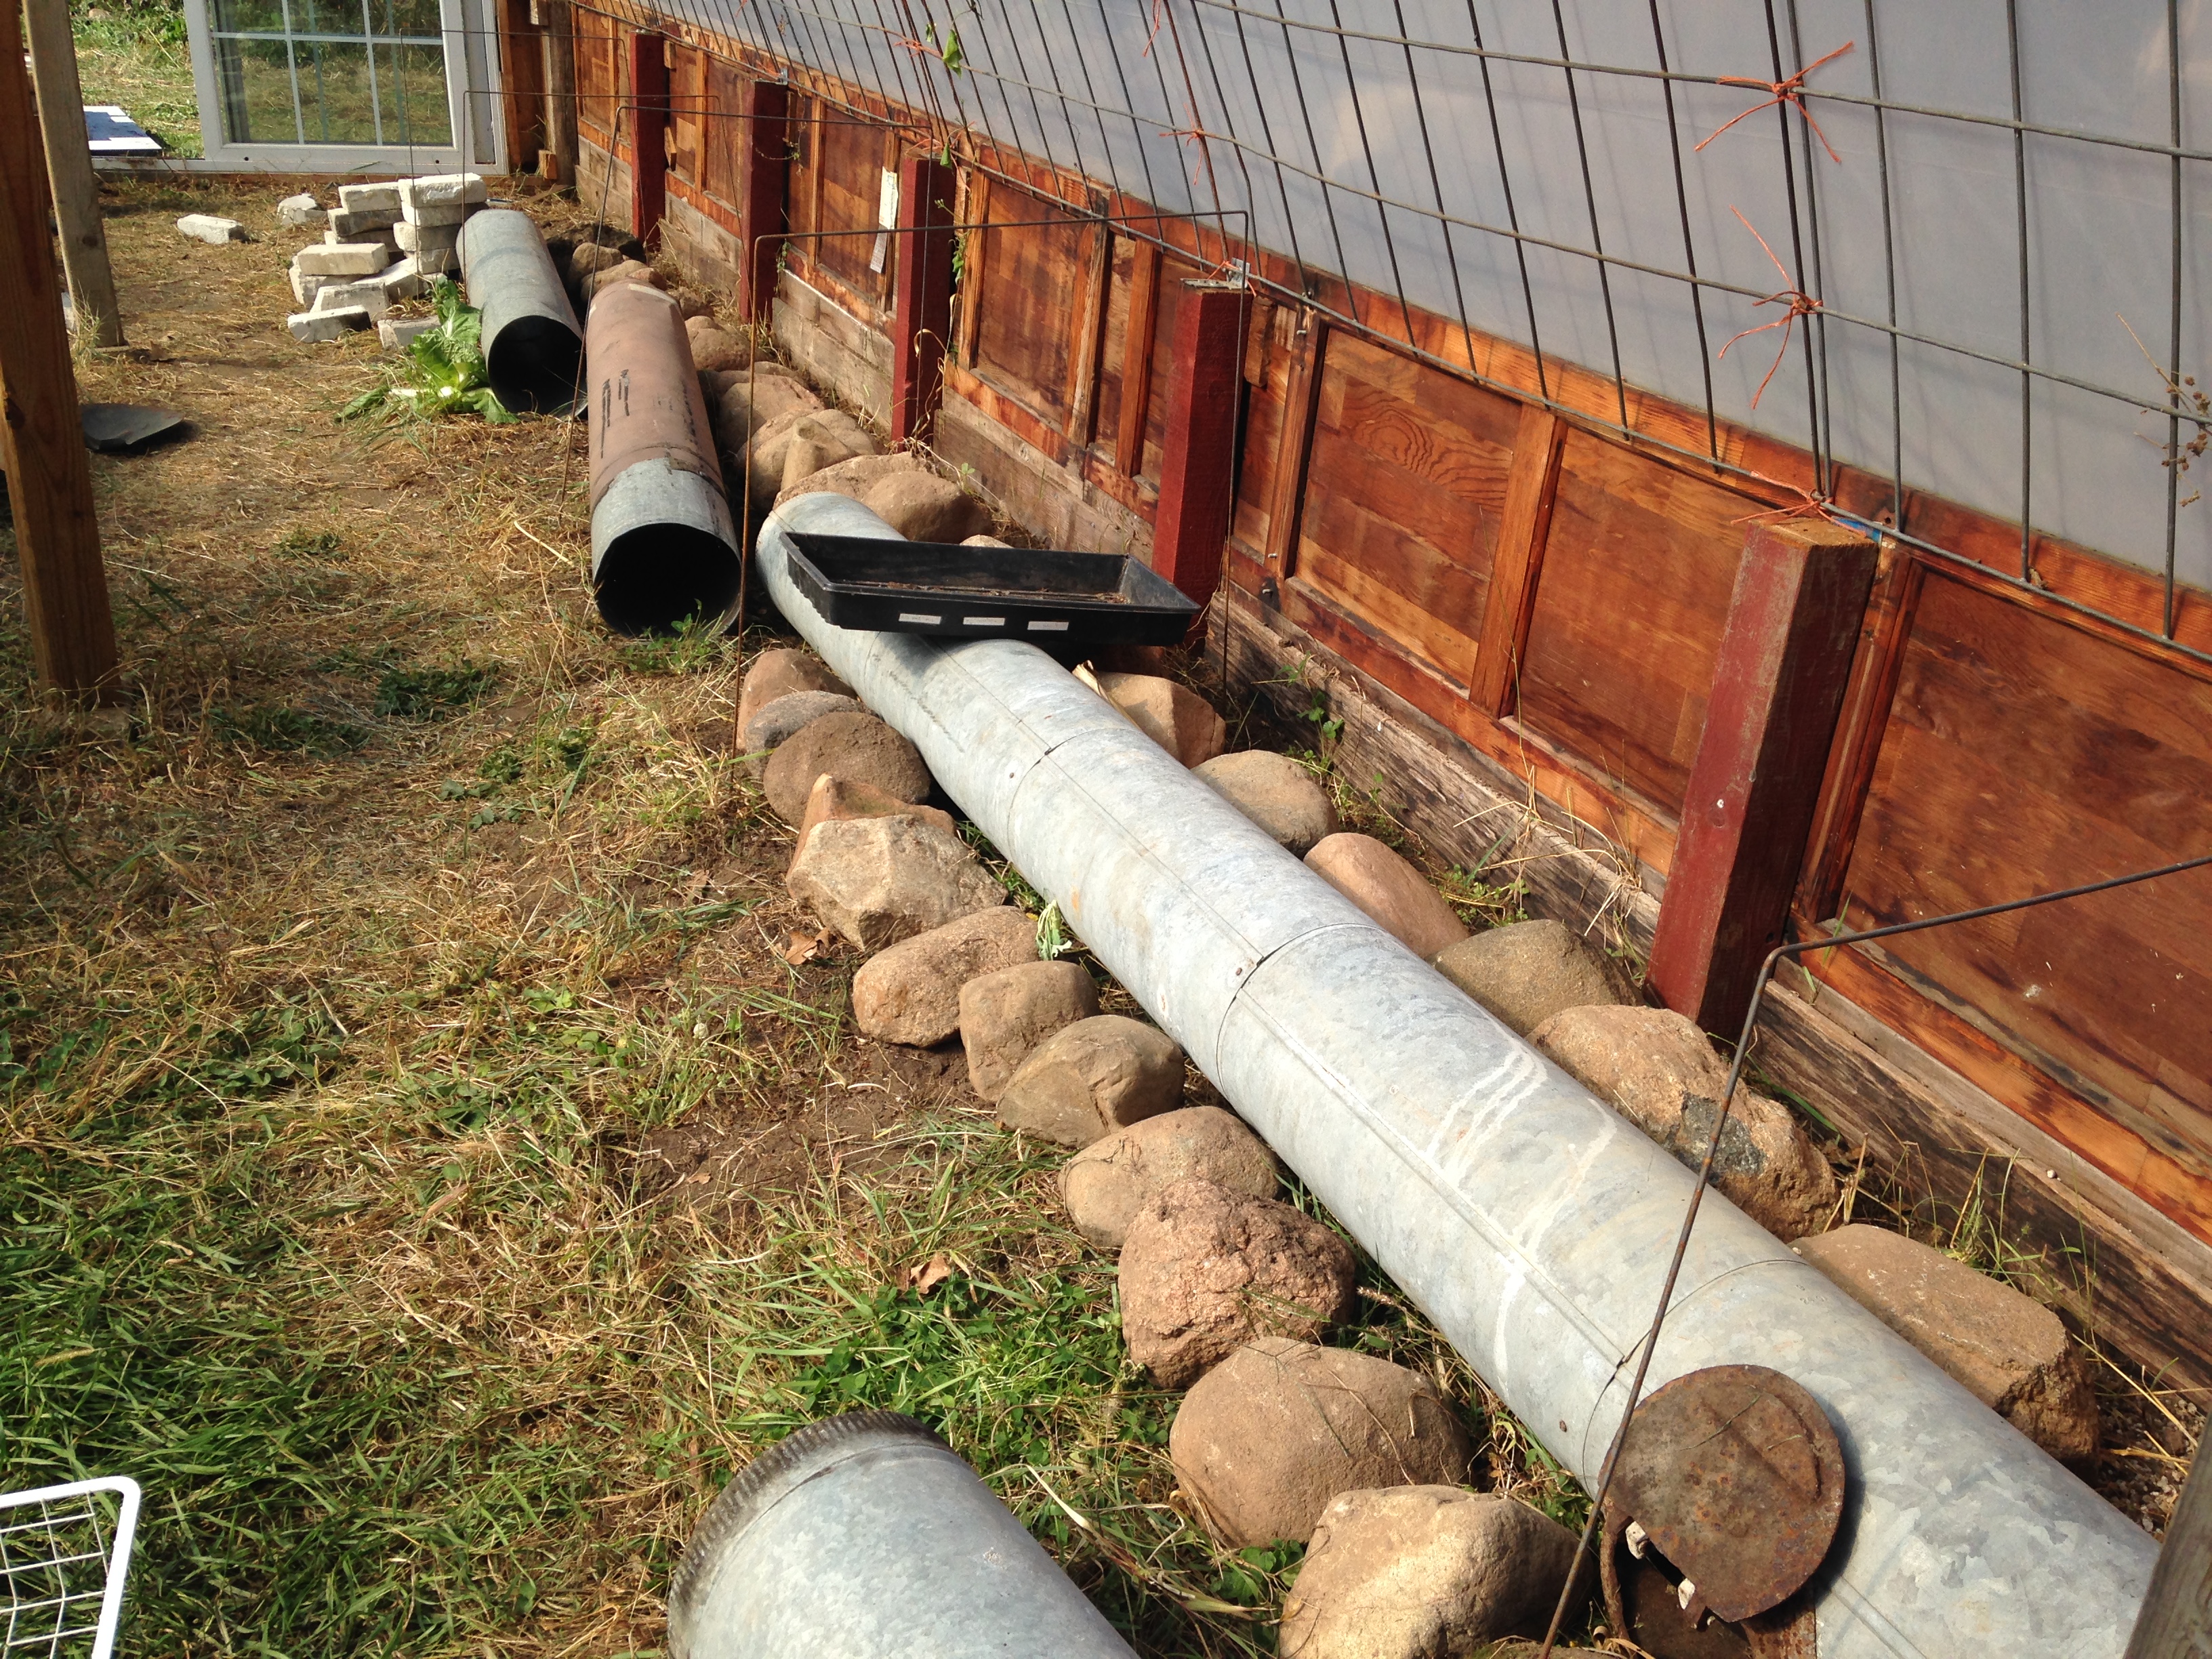
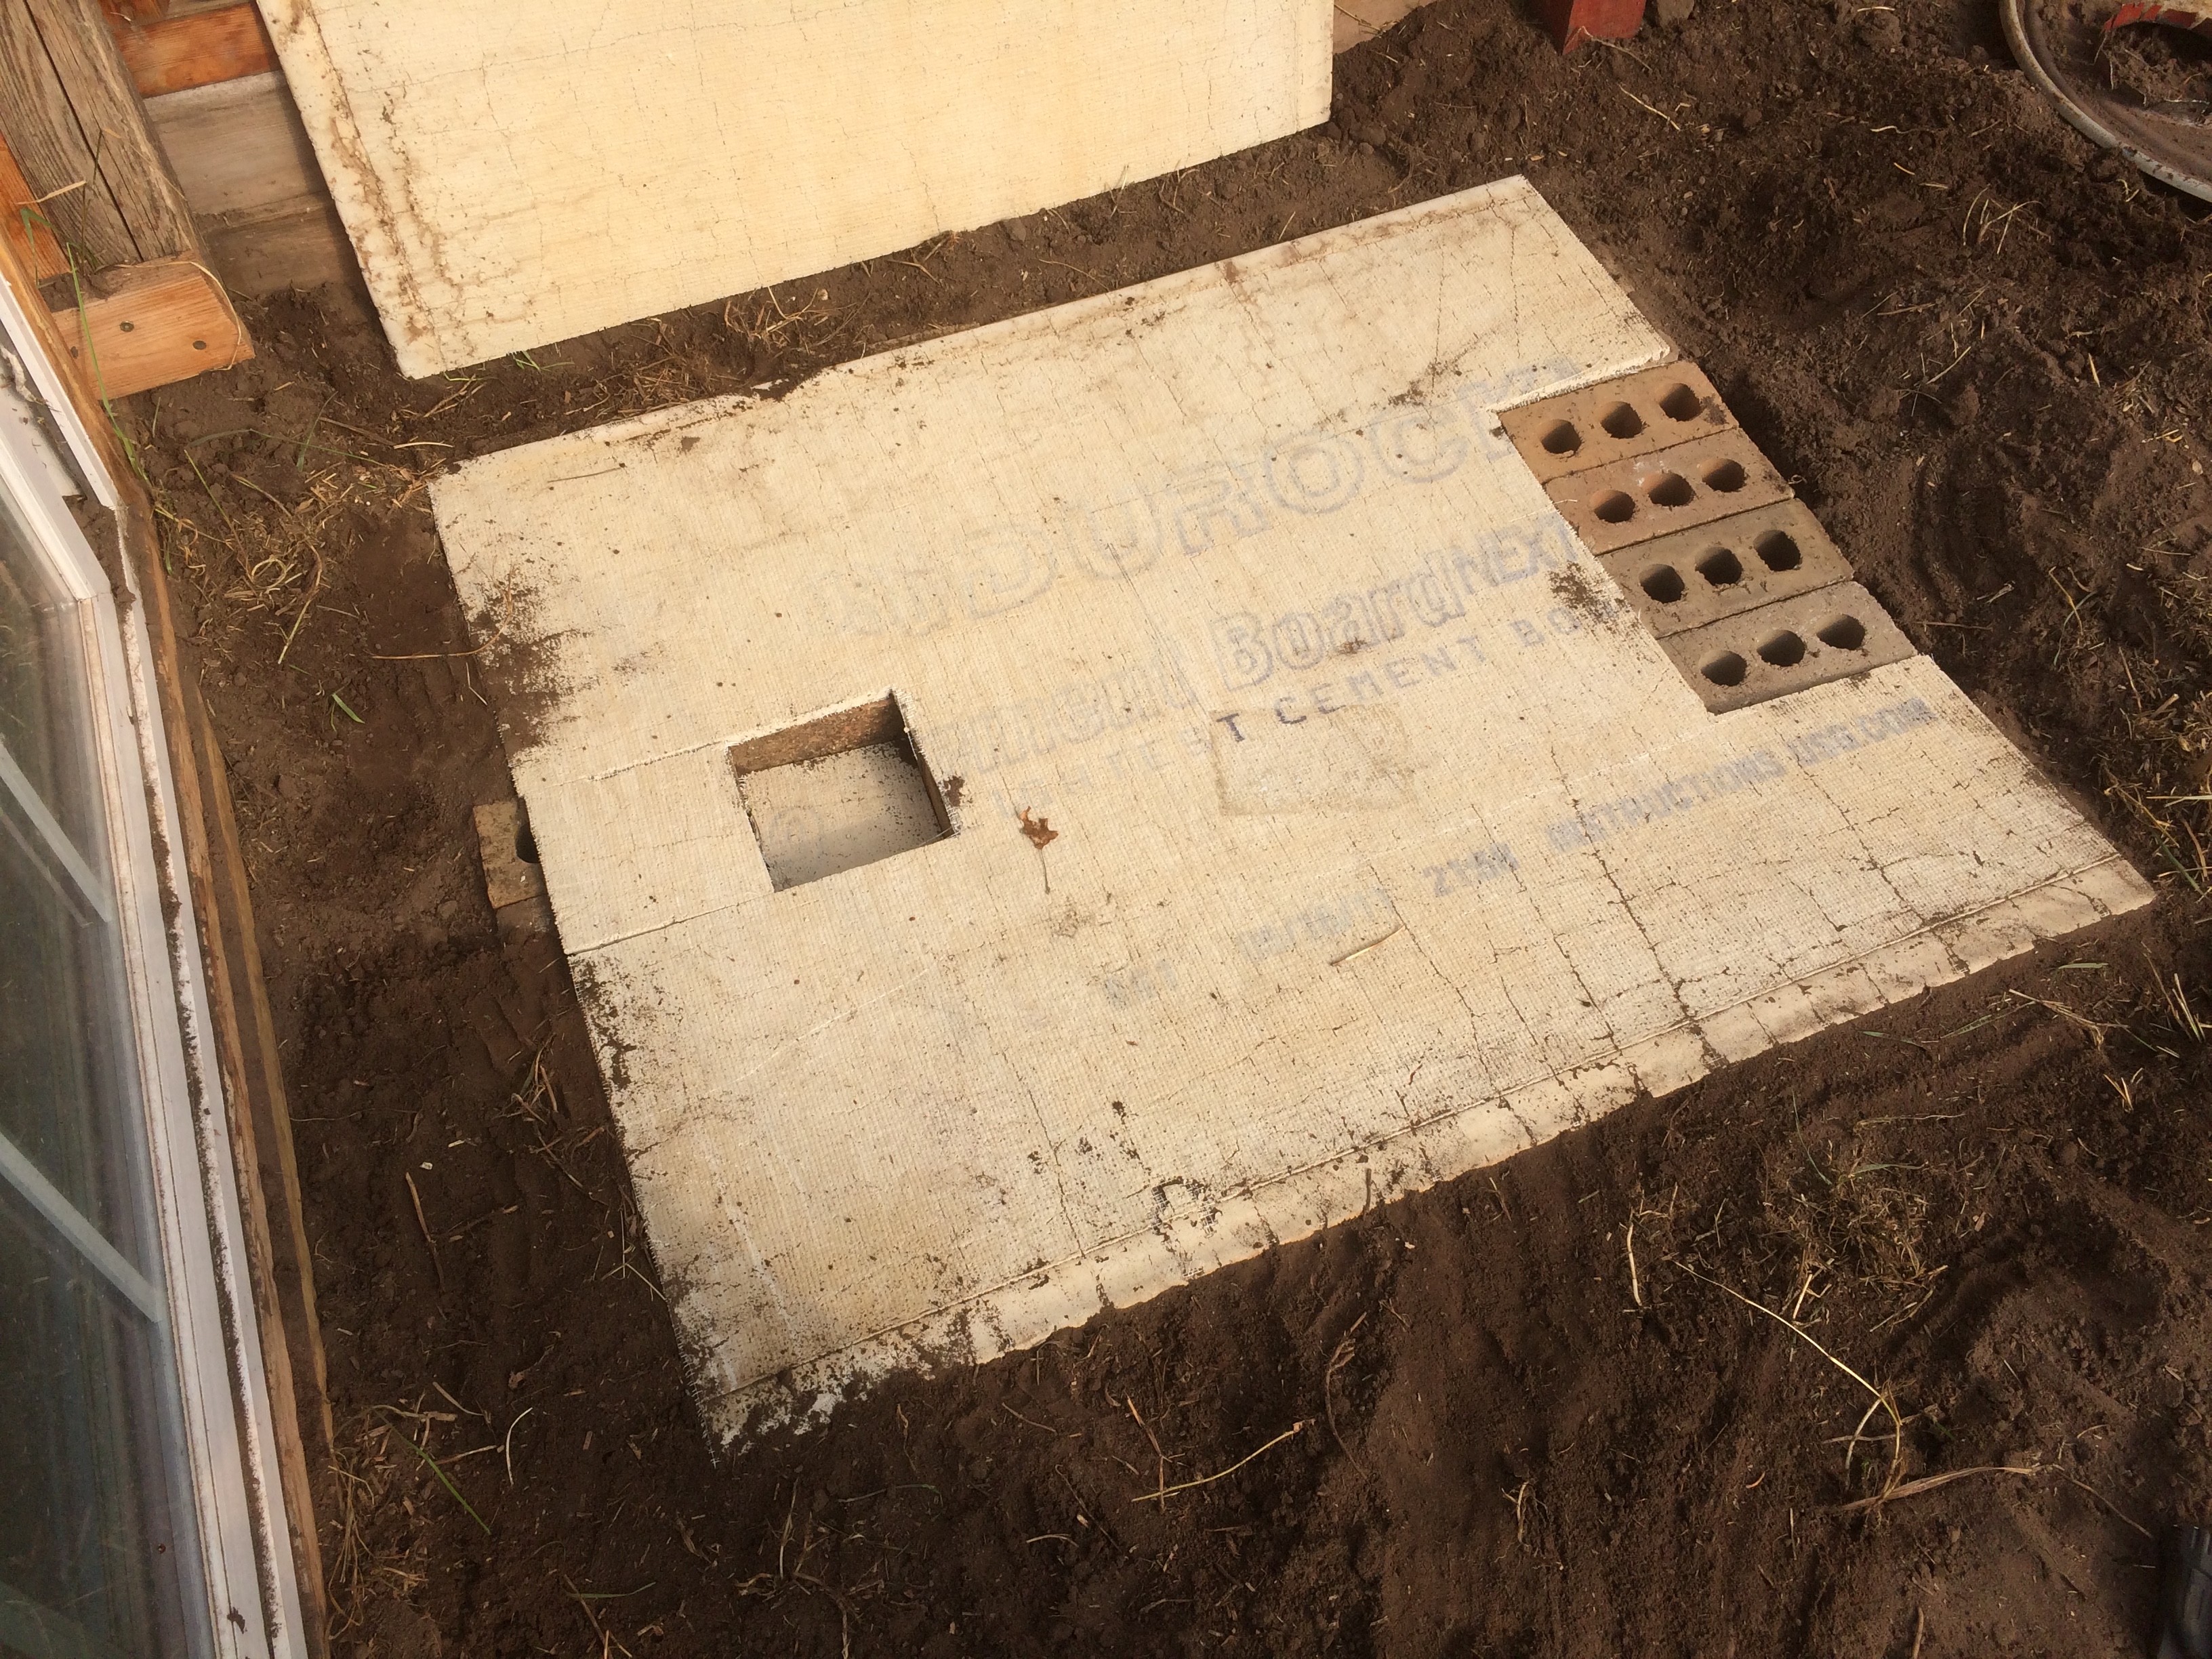
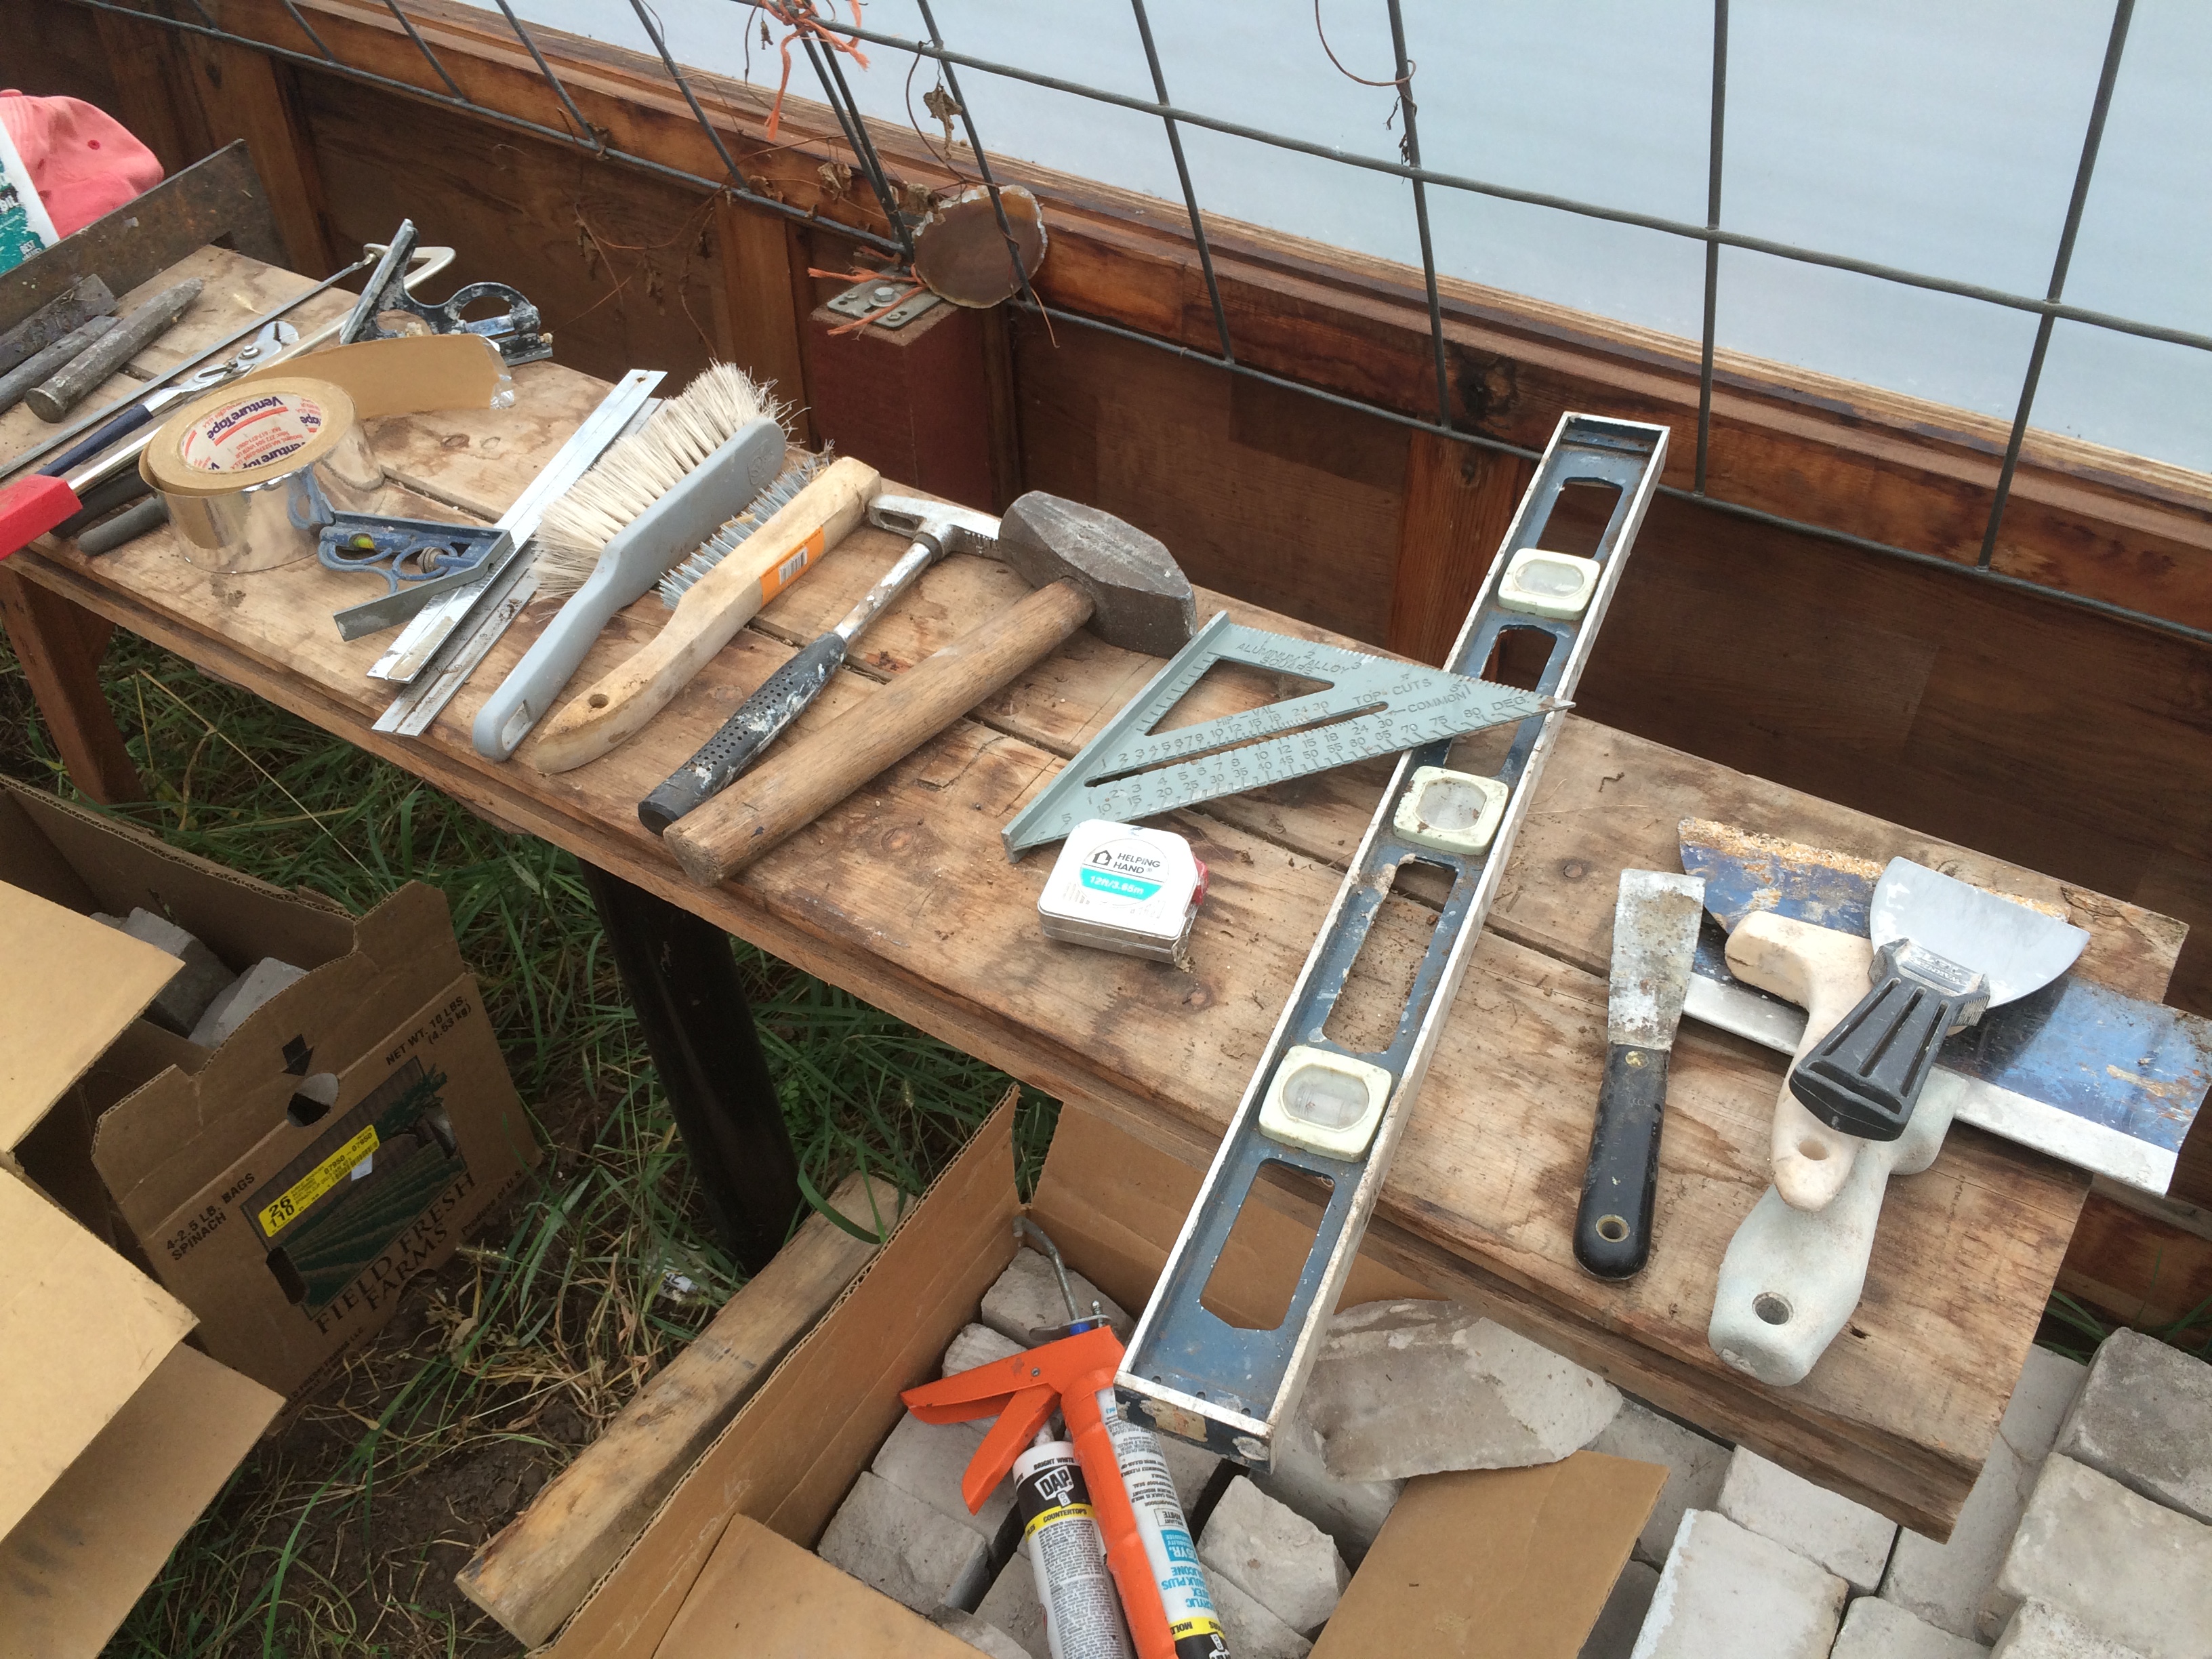
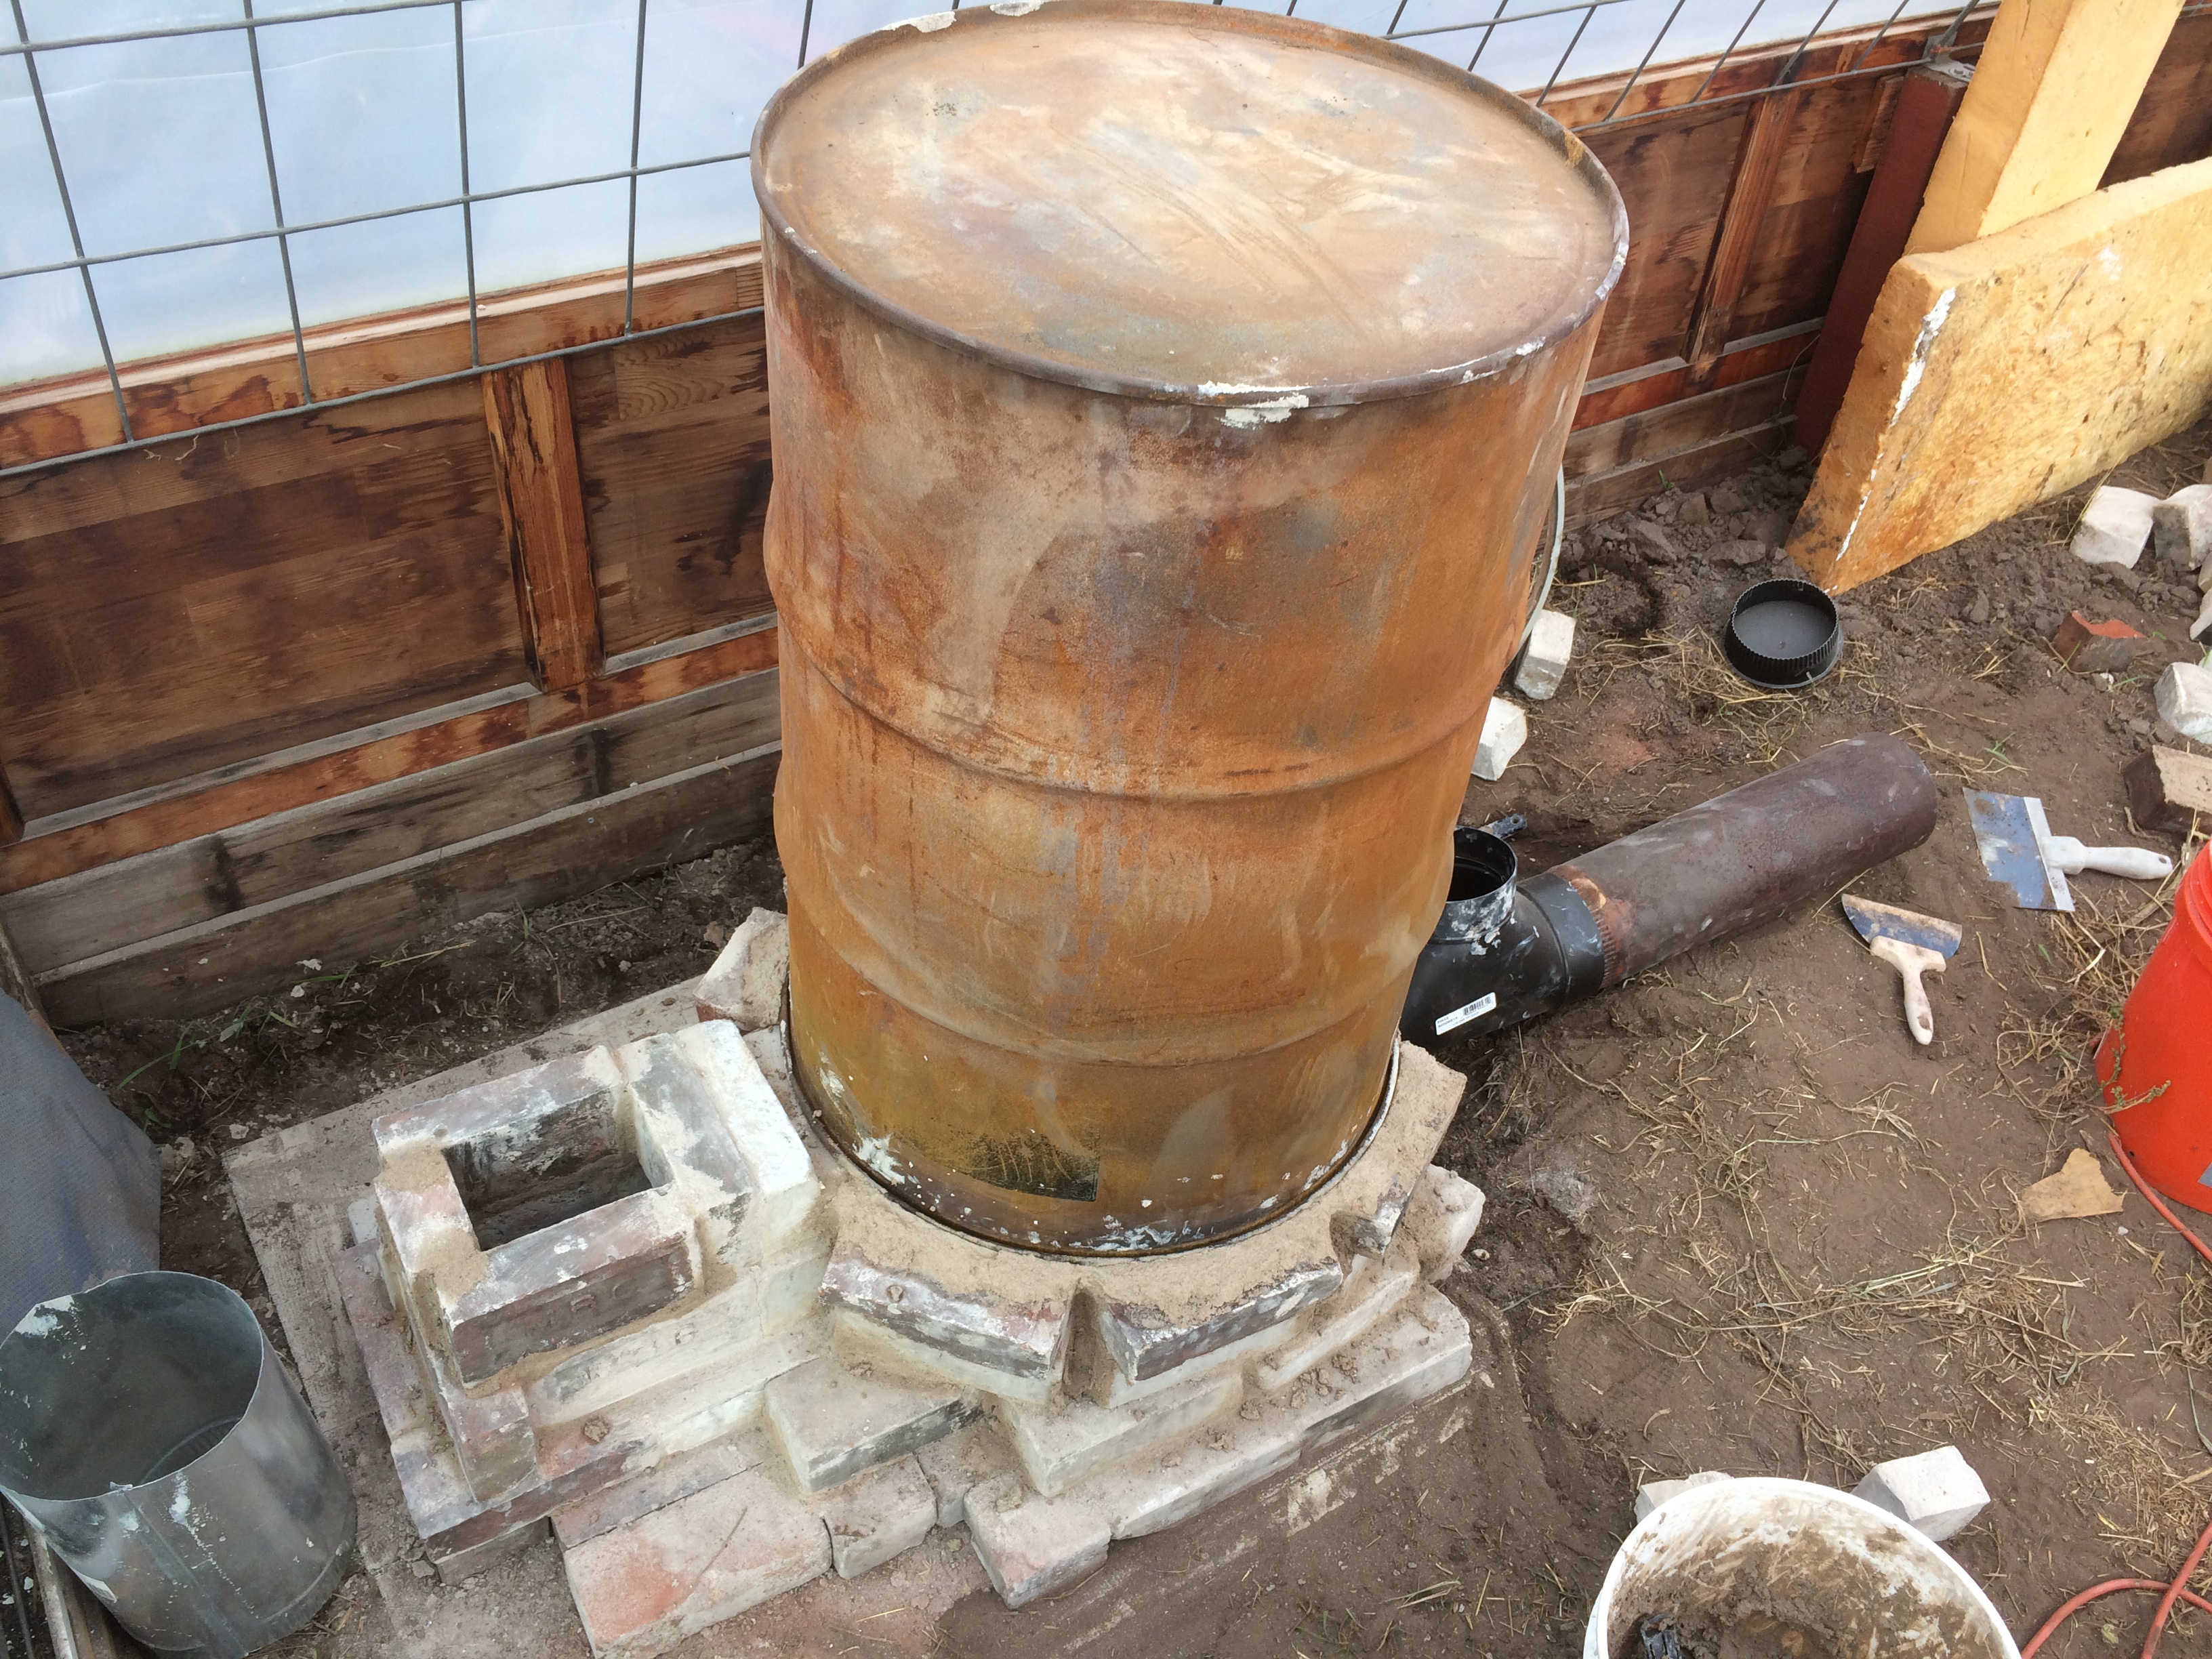
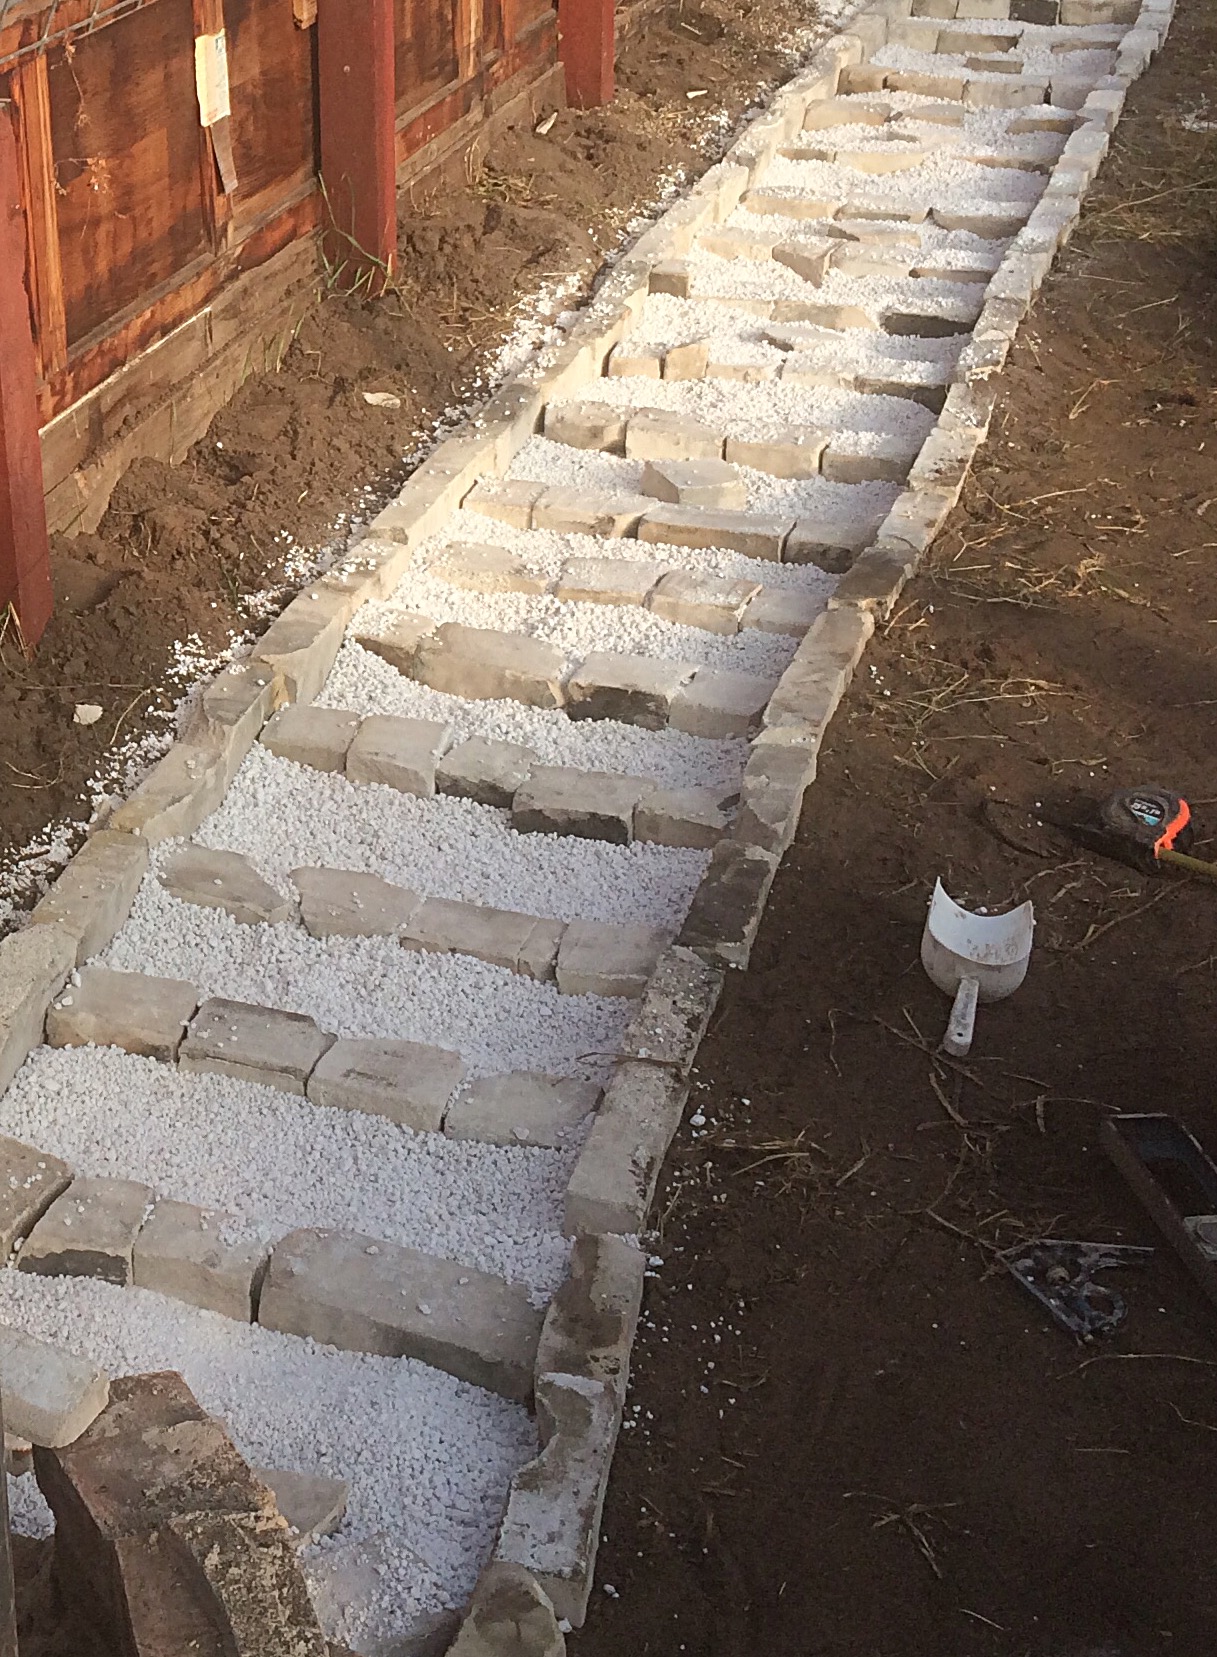
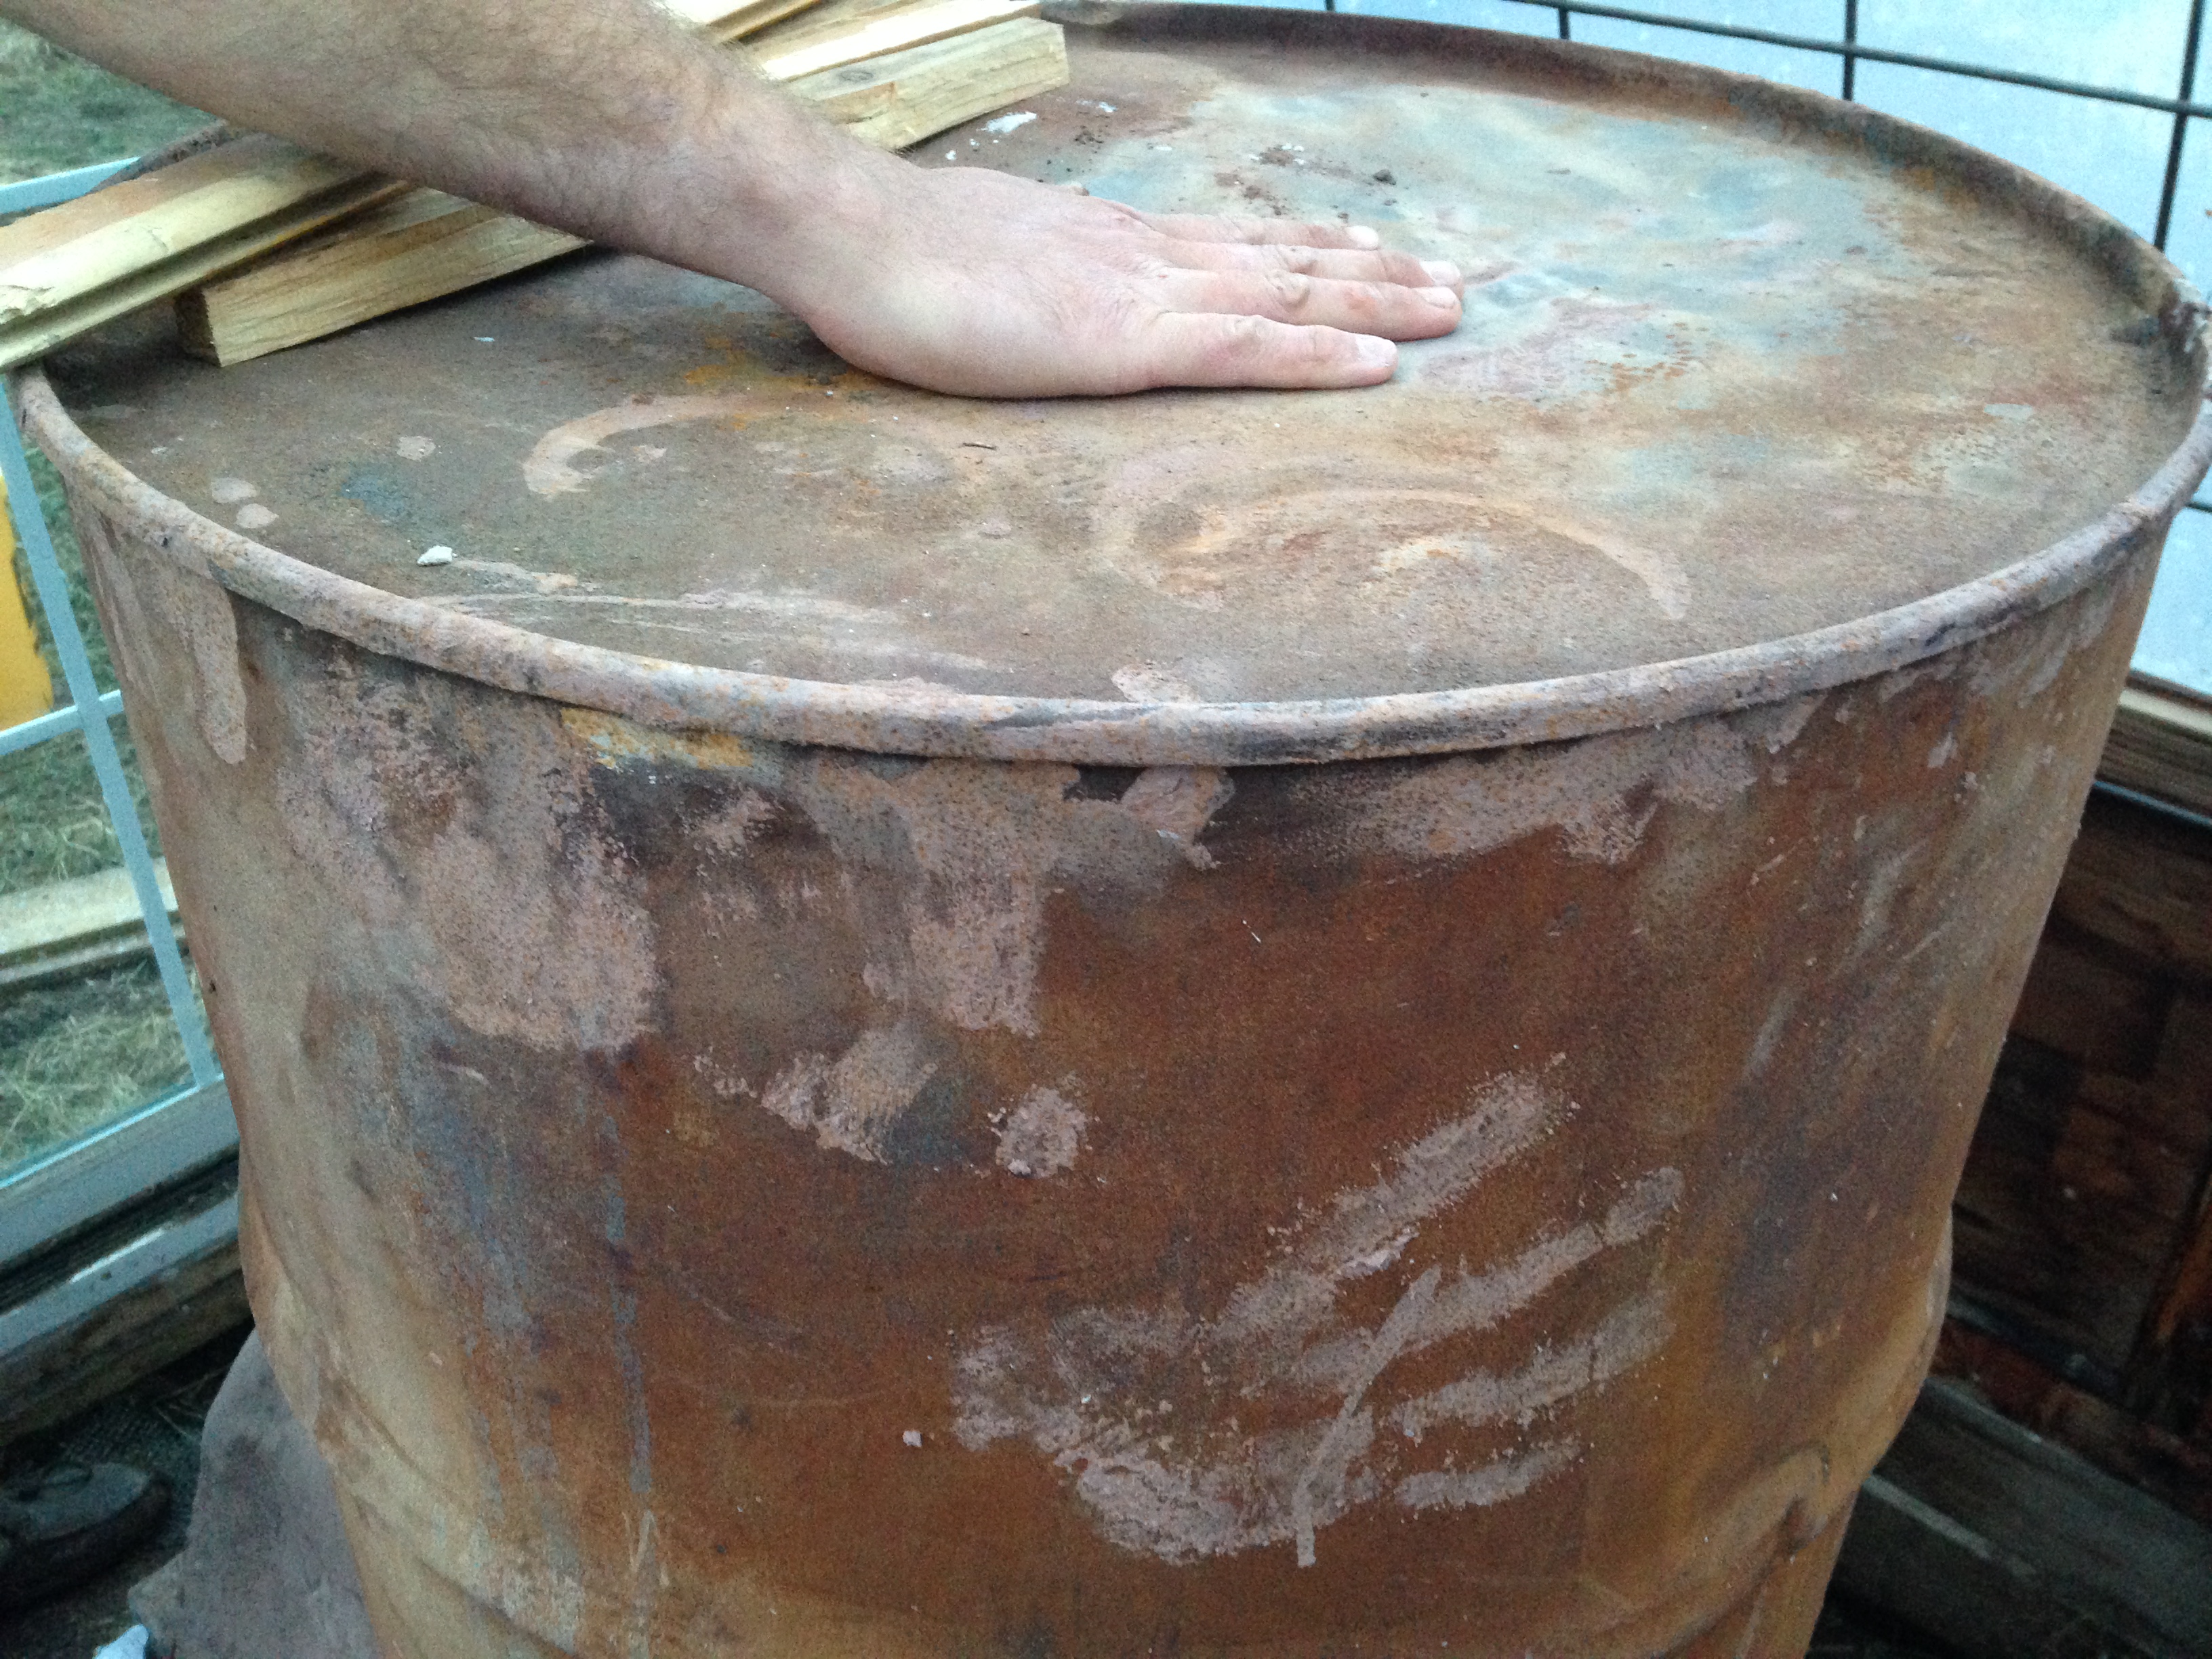
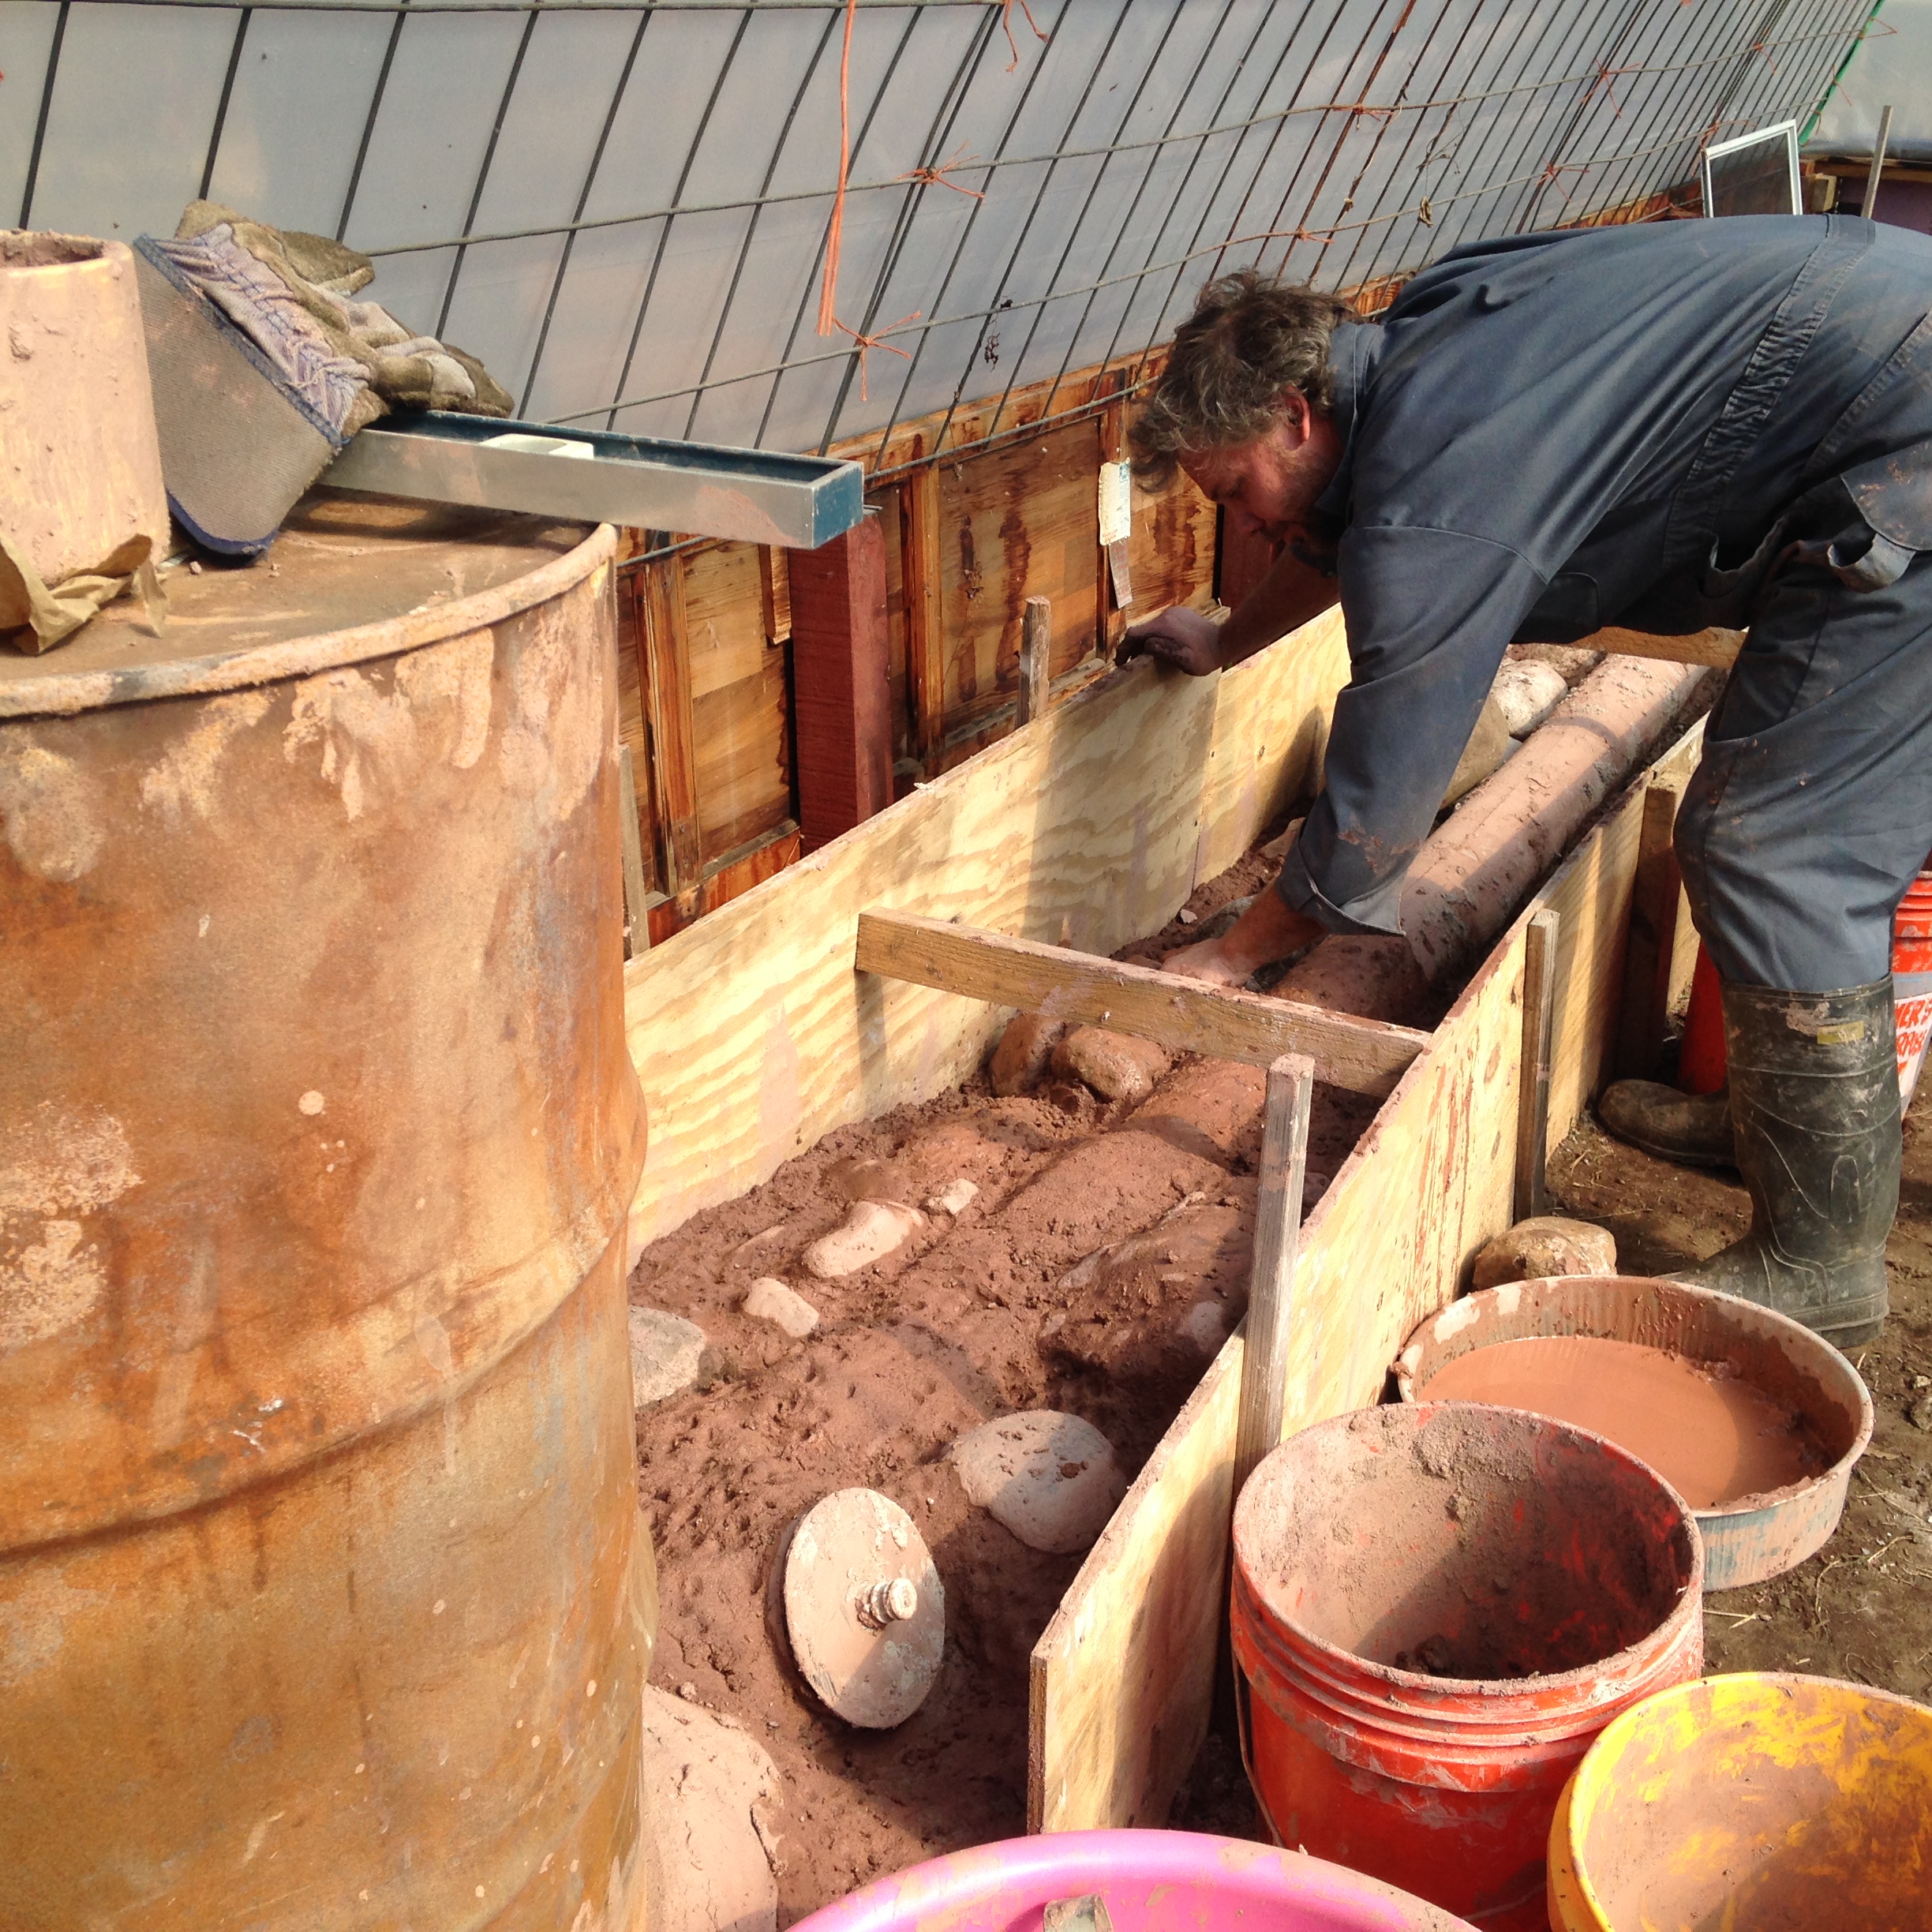
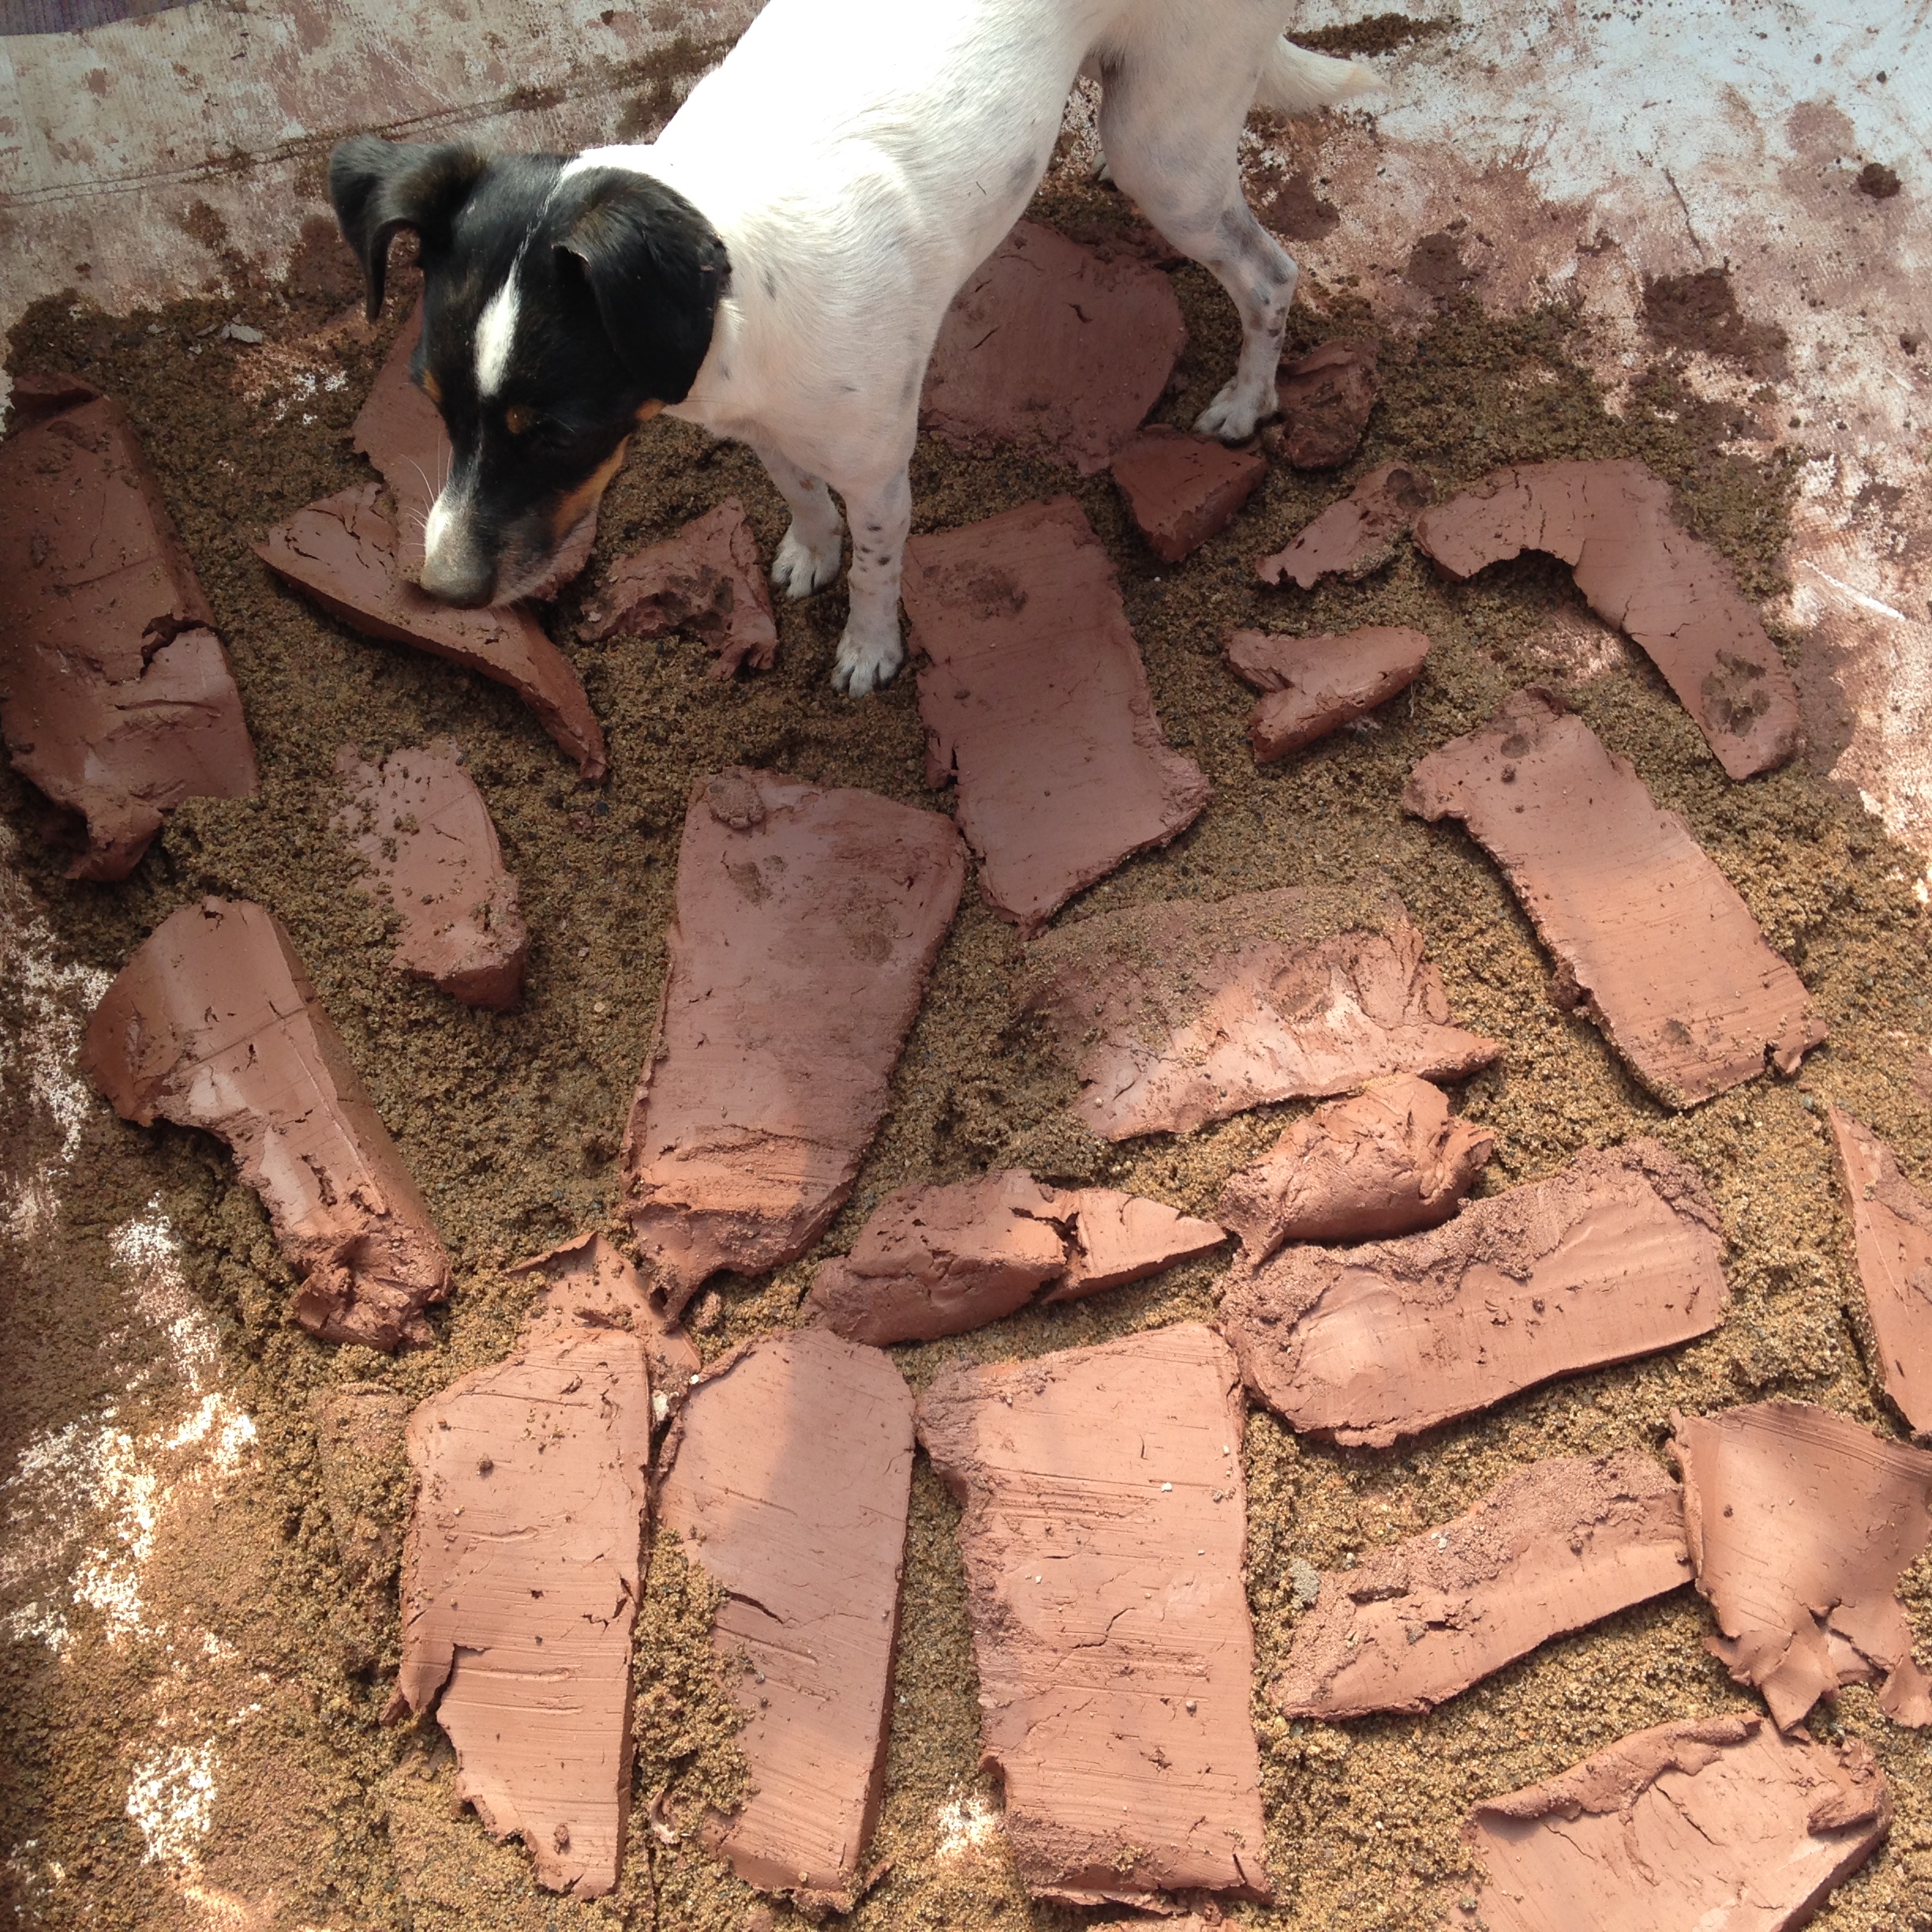
For a year, we researched and gathered materials for the build – scavenged from garbage and the Free section of Craigslist; two trailer loads of clay from a retired sculptor, stove pipe of various diameters, a 55 gallon drum, river rocks from the neighbor’s pile they’d unearthed when building their house, cement board, and bricks – the best score of all was a huge free load of white “insulative firebricks,” which withstand high heat without heating up much themselves – ideal for our purposes.

IMG_0741

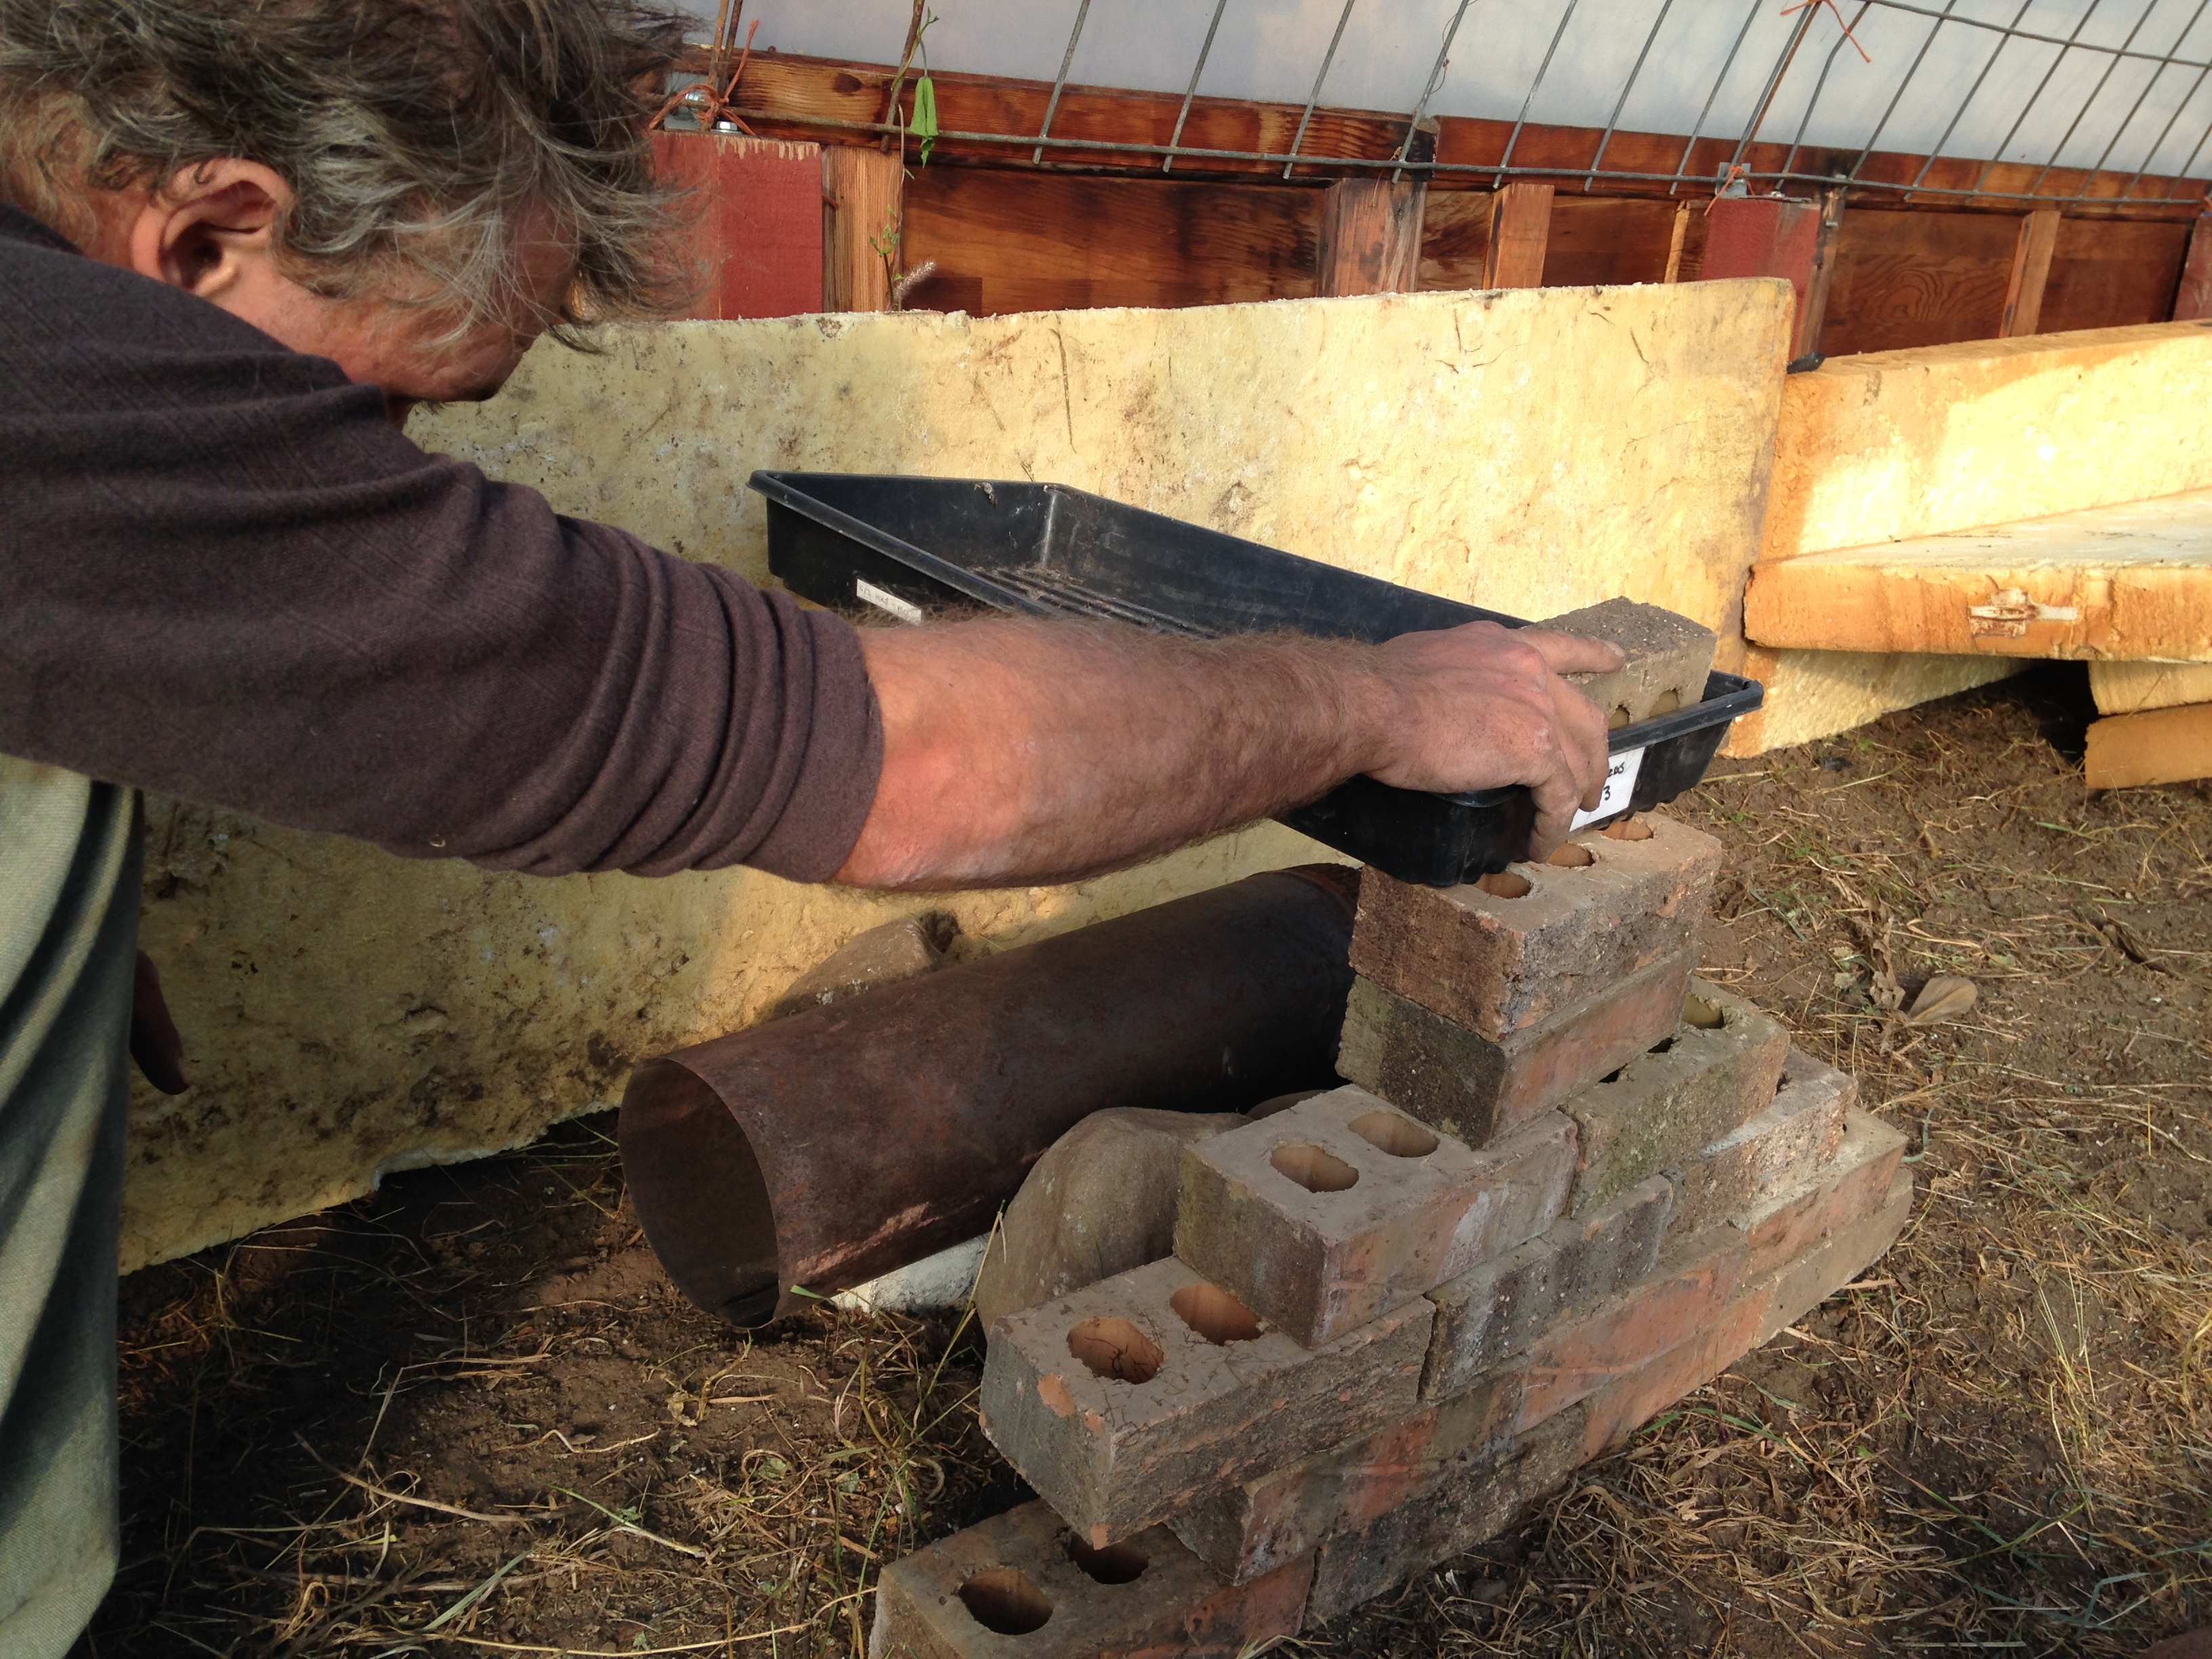
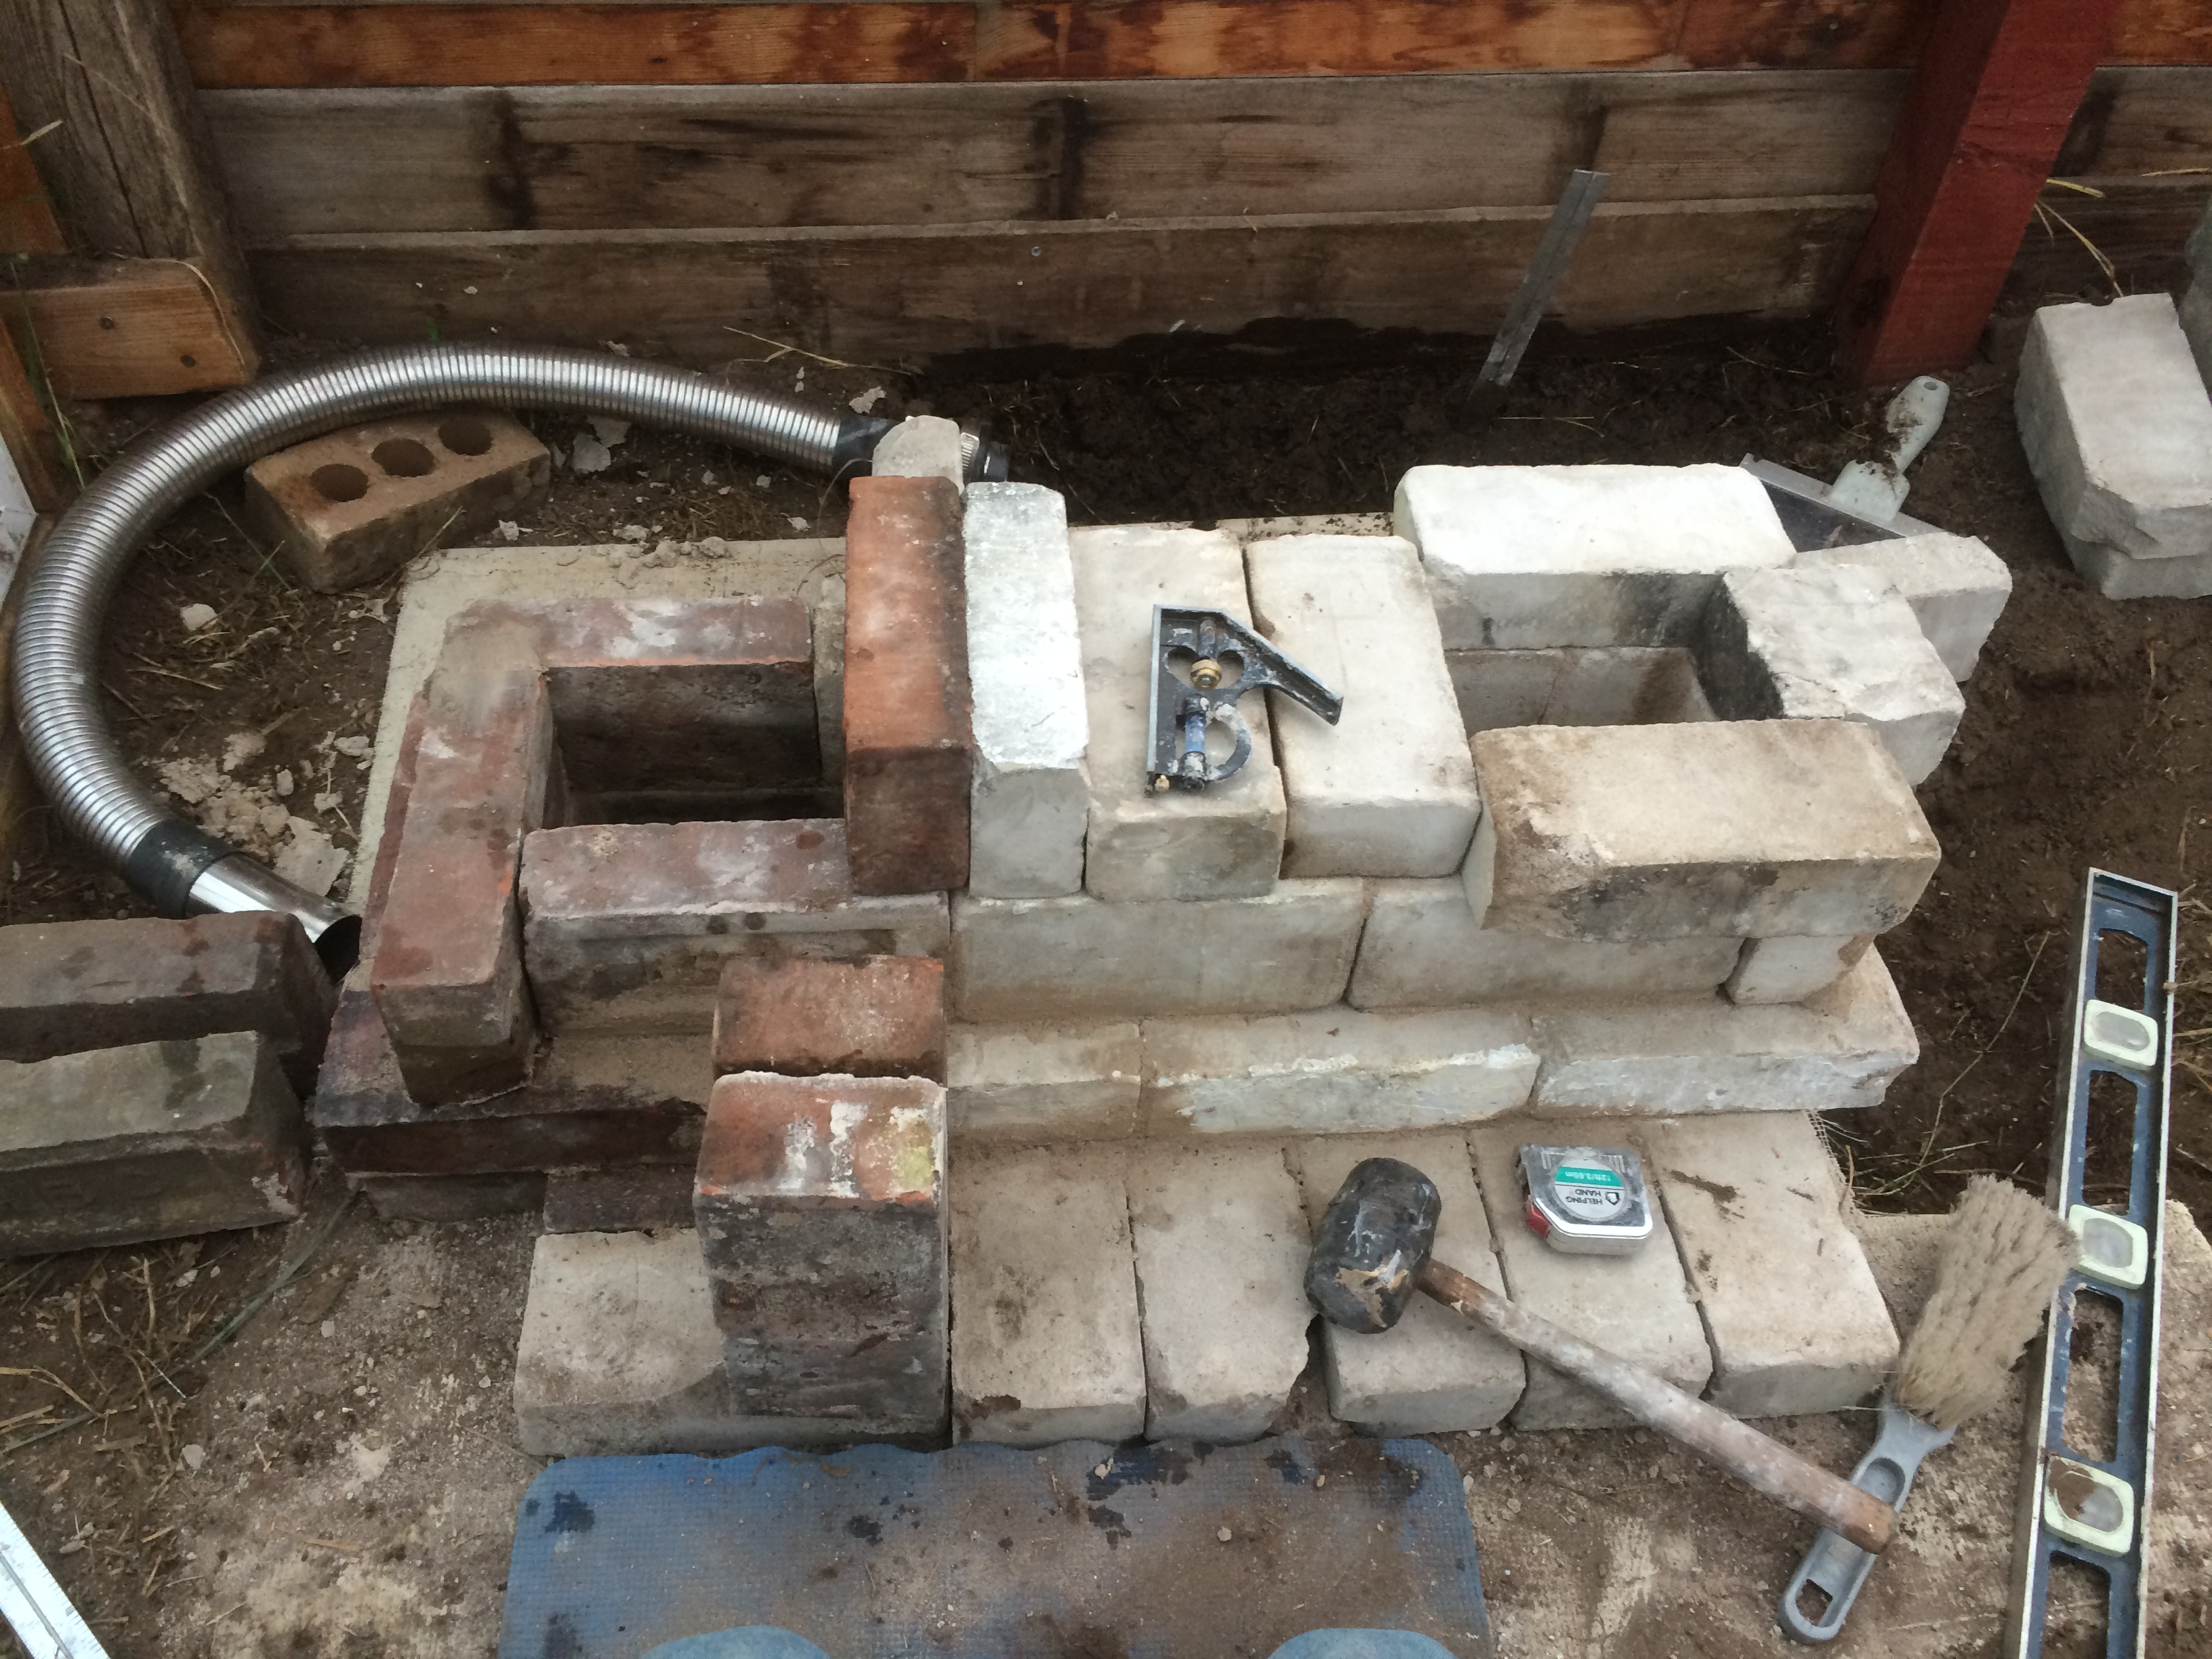
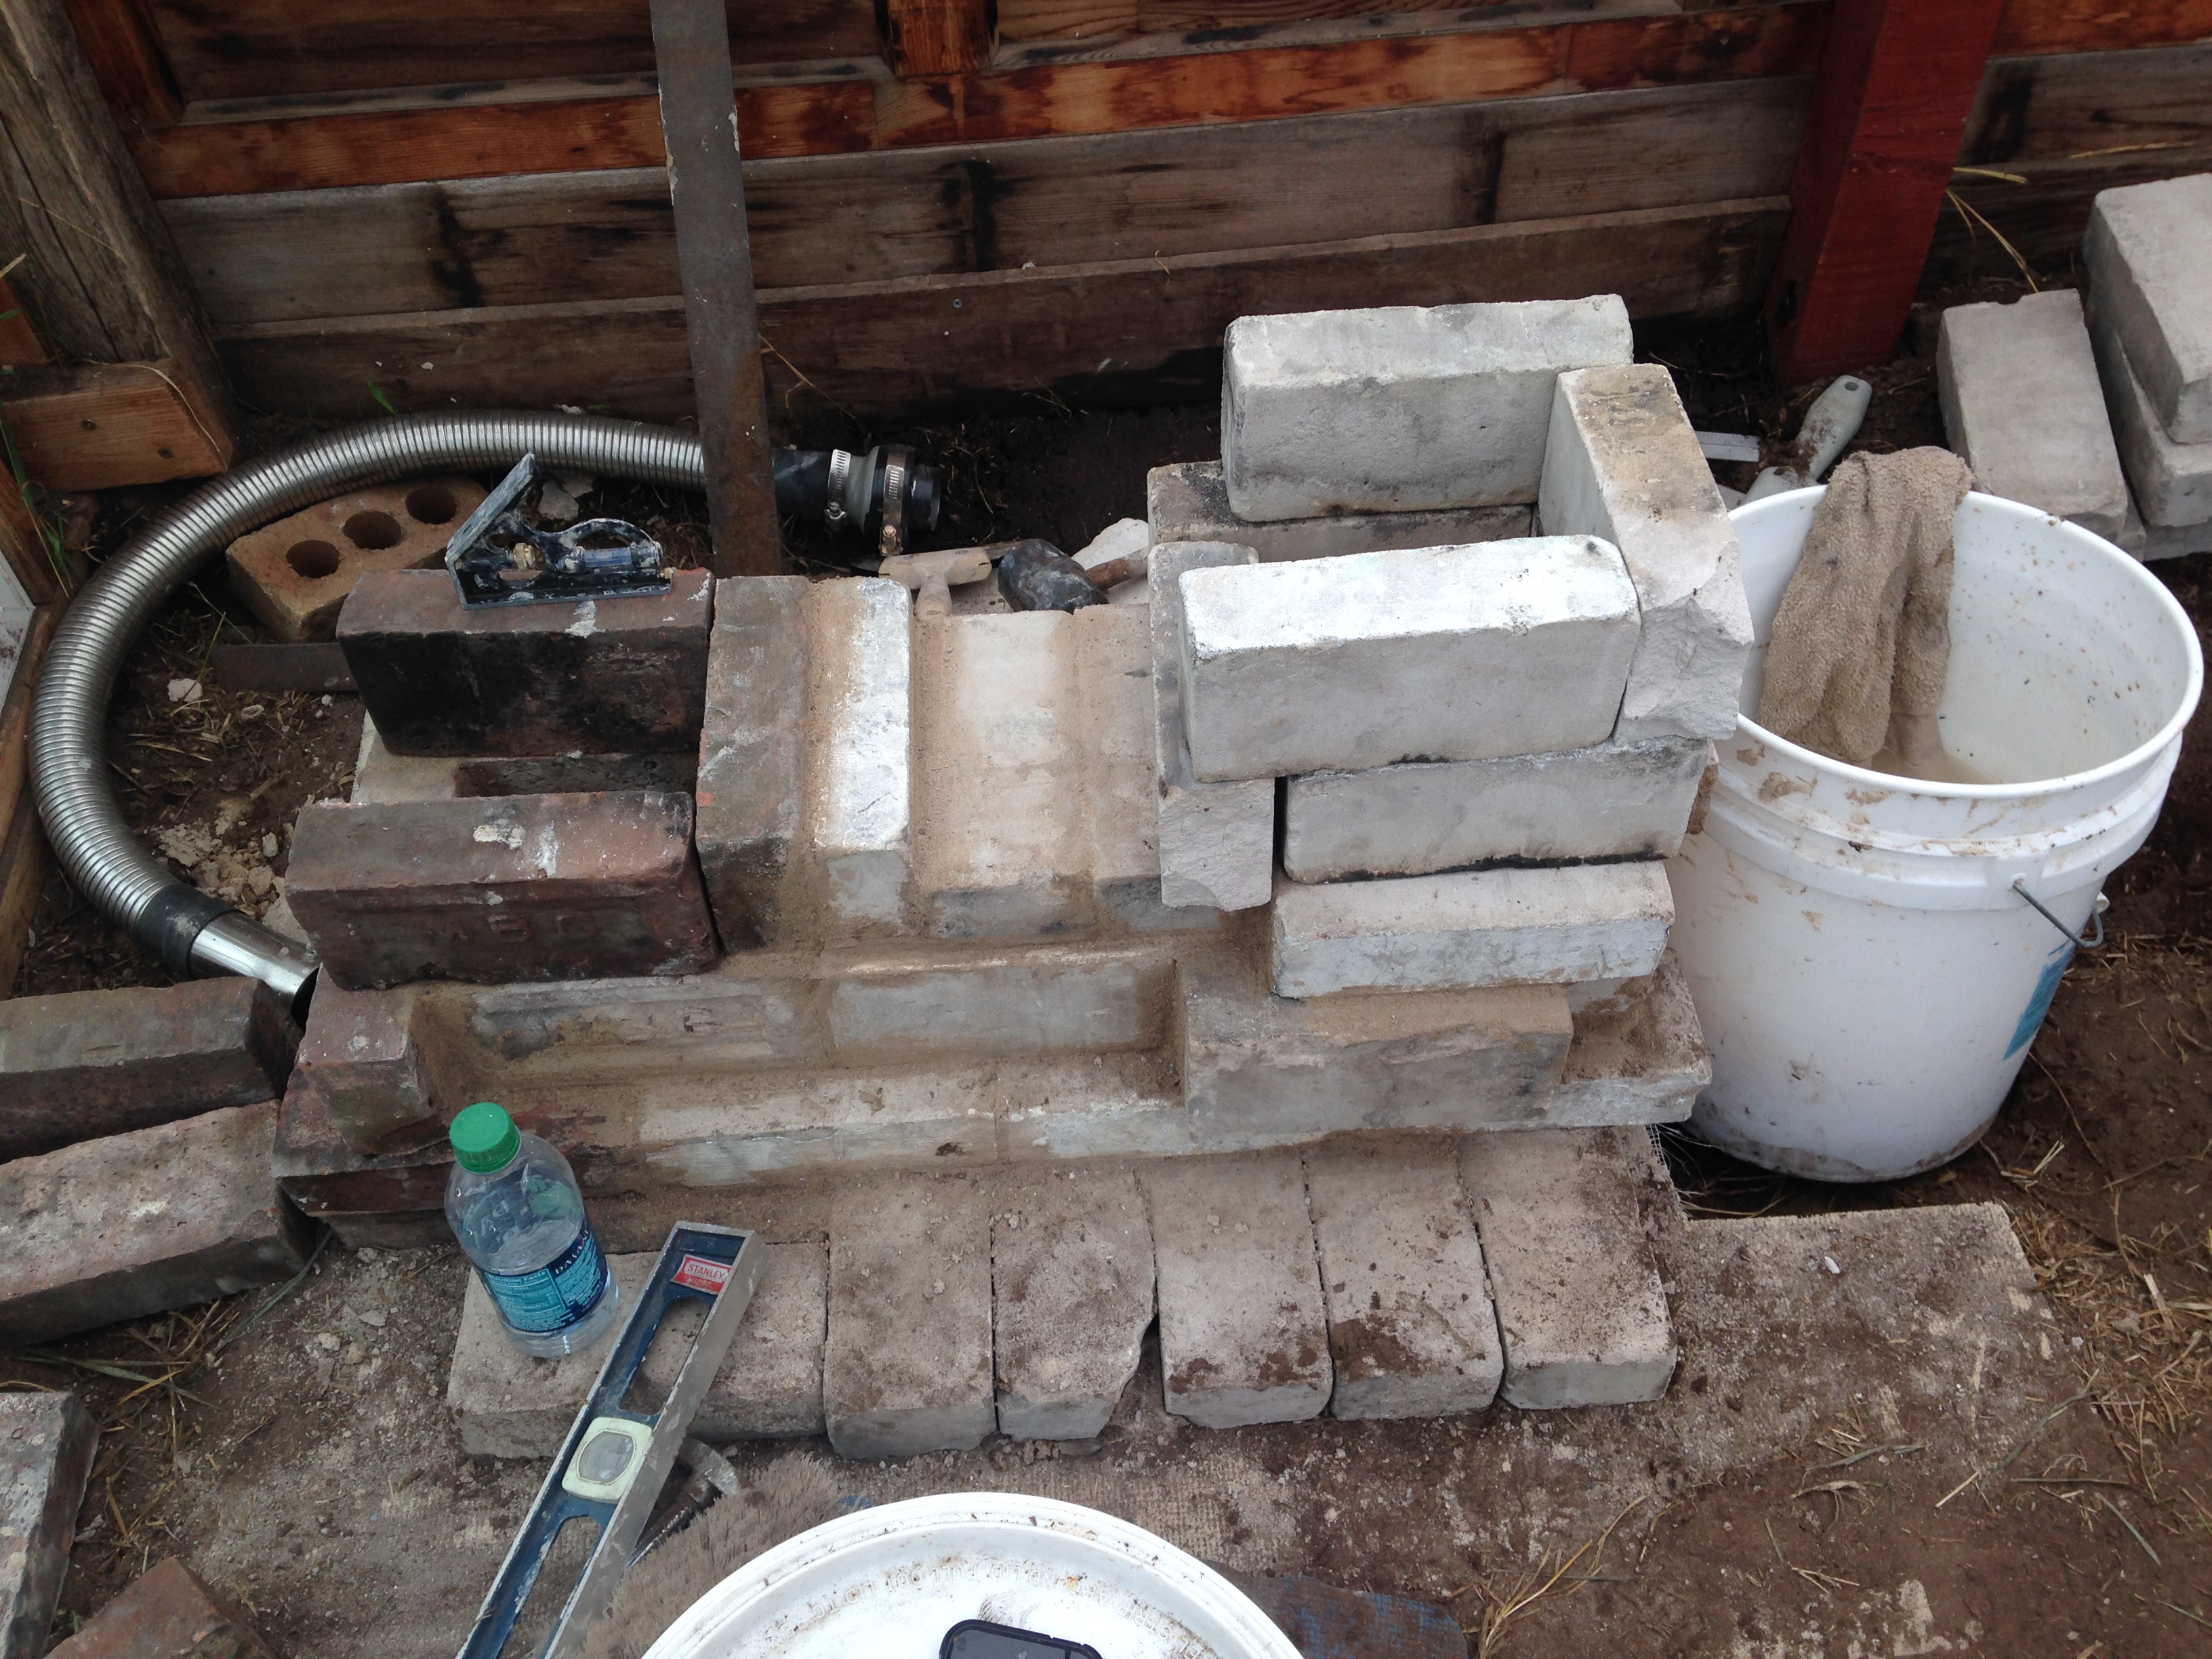
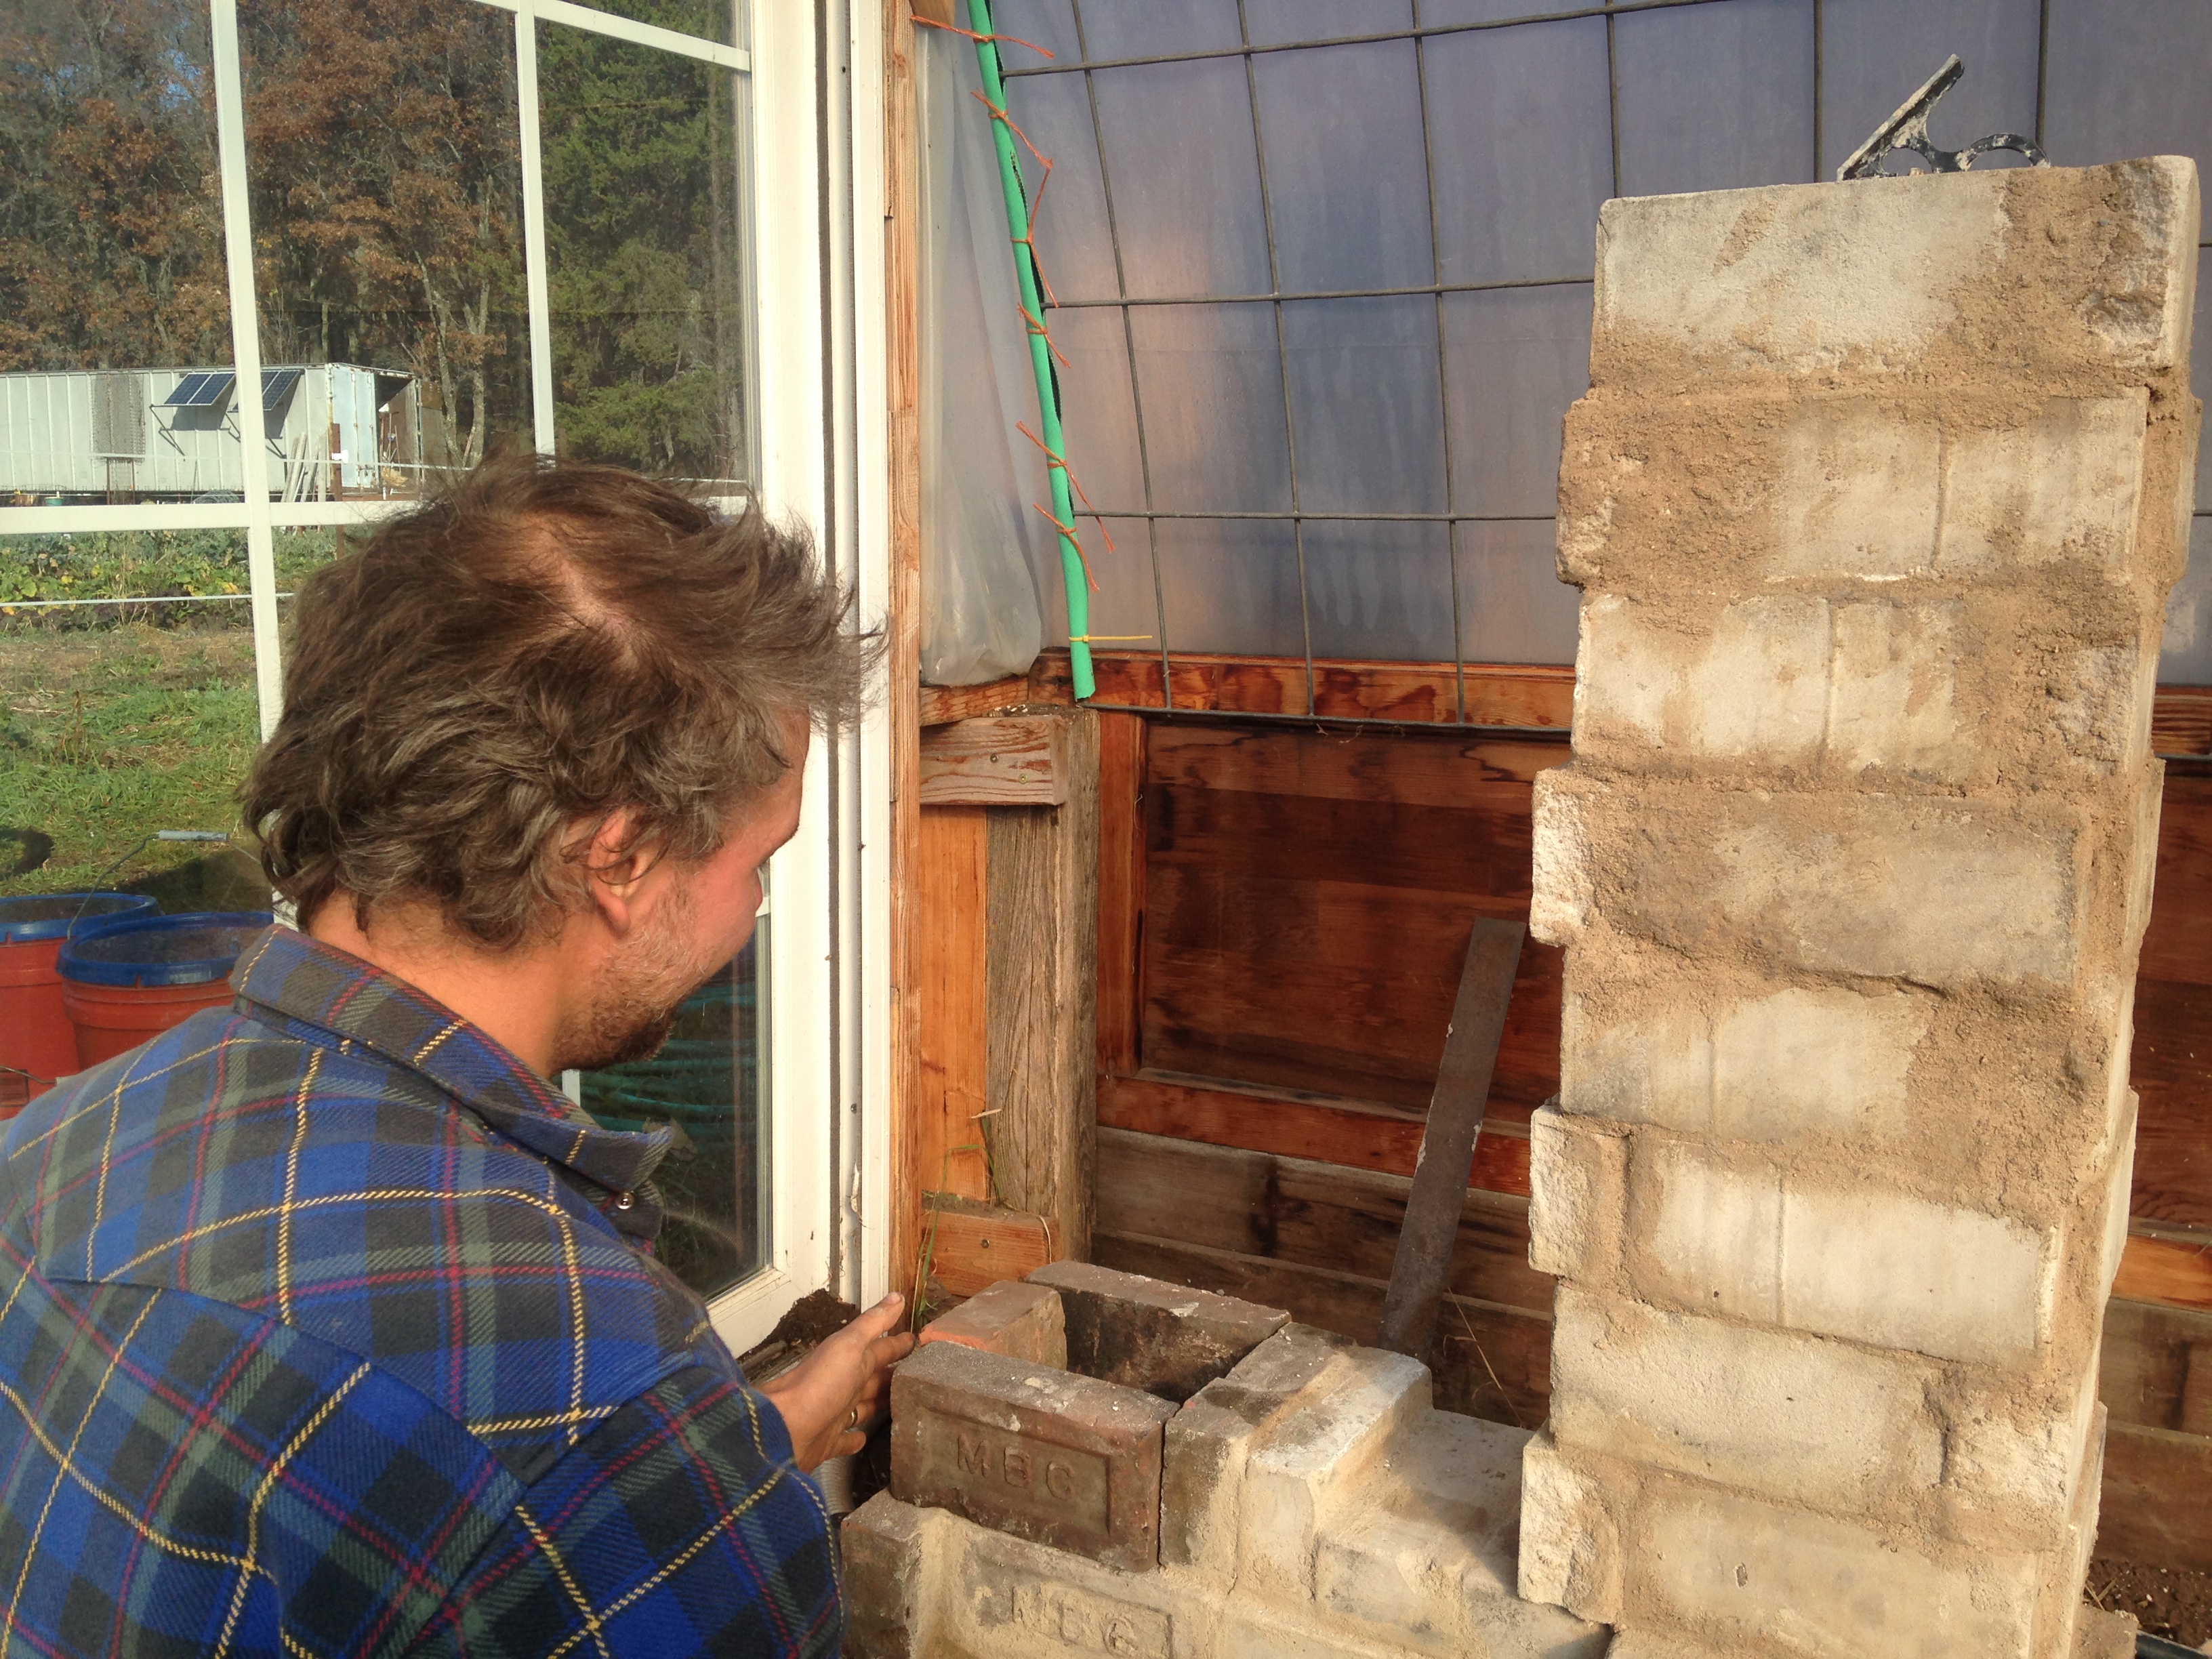
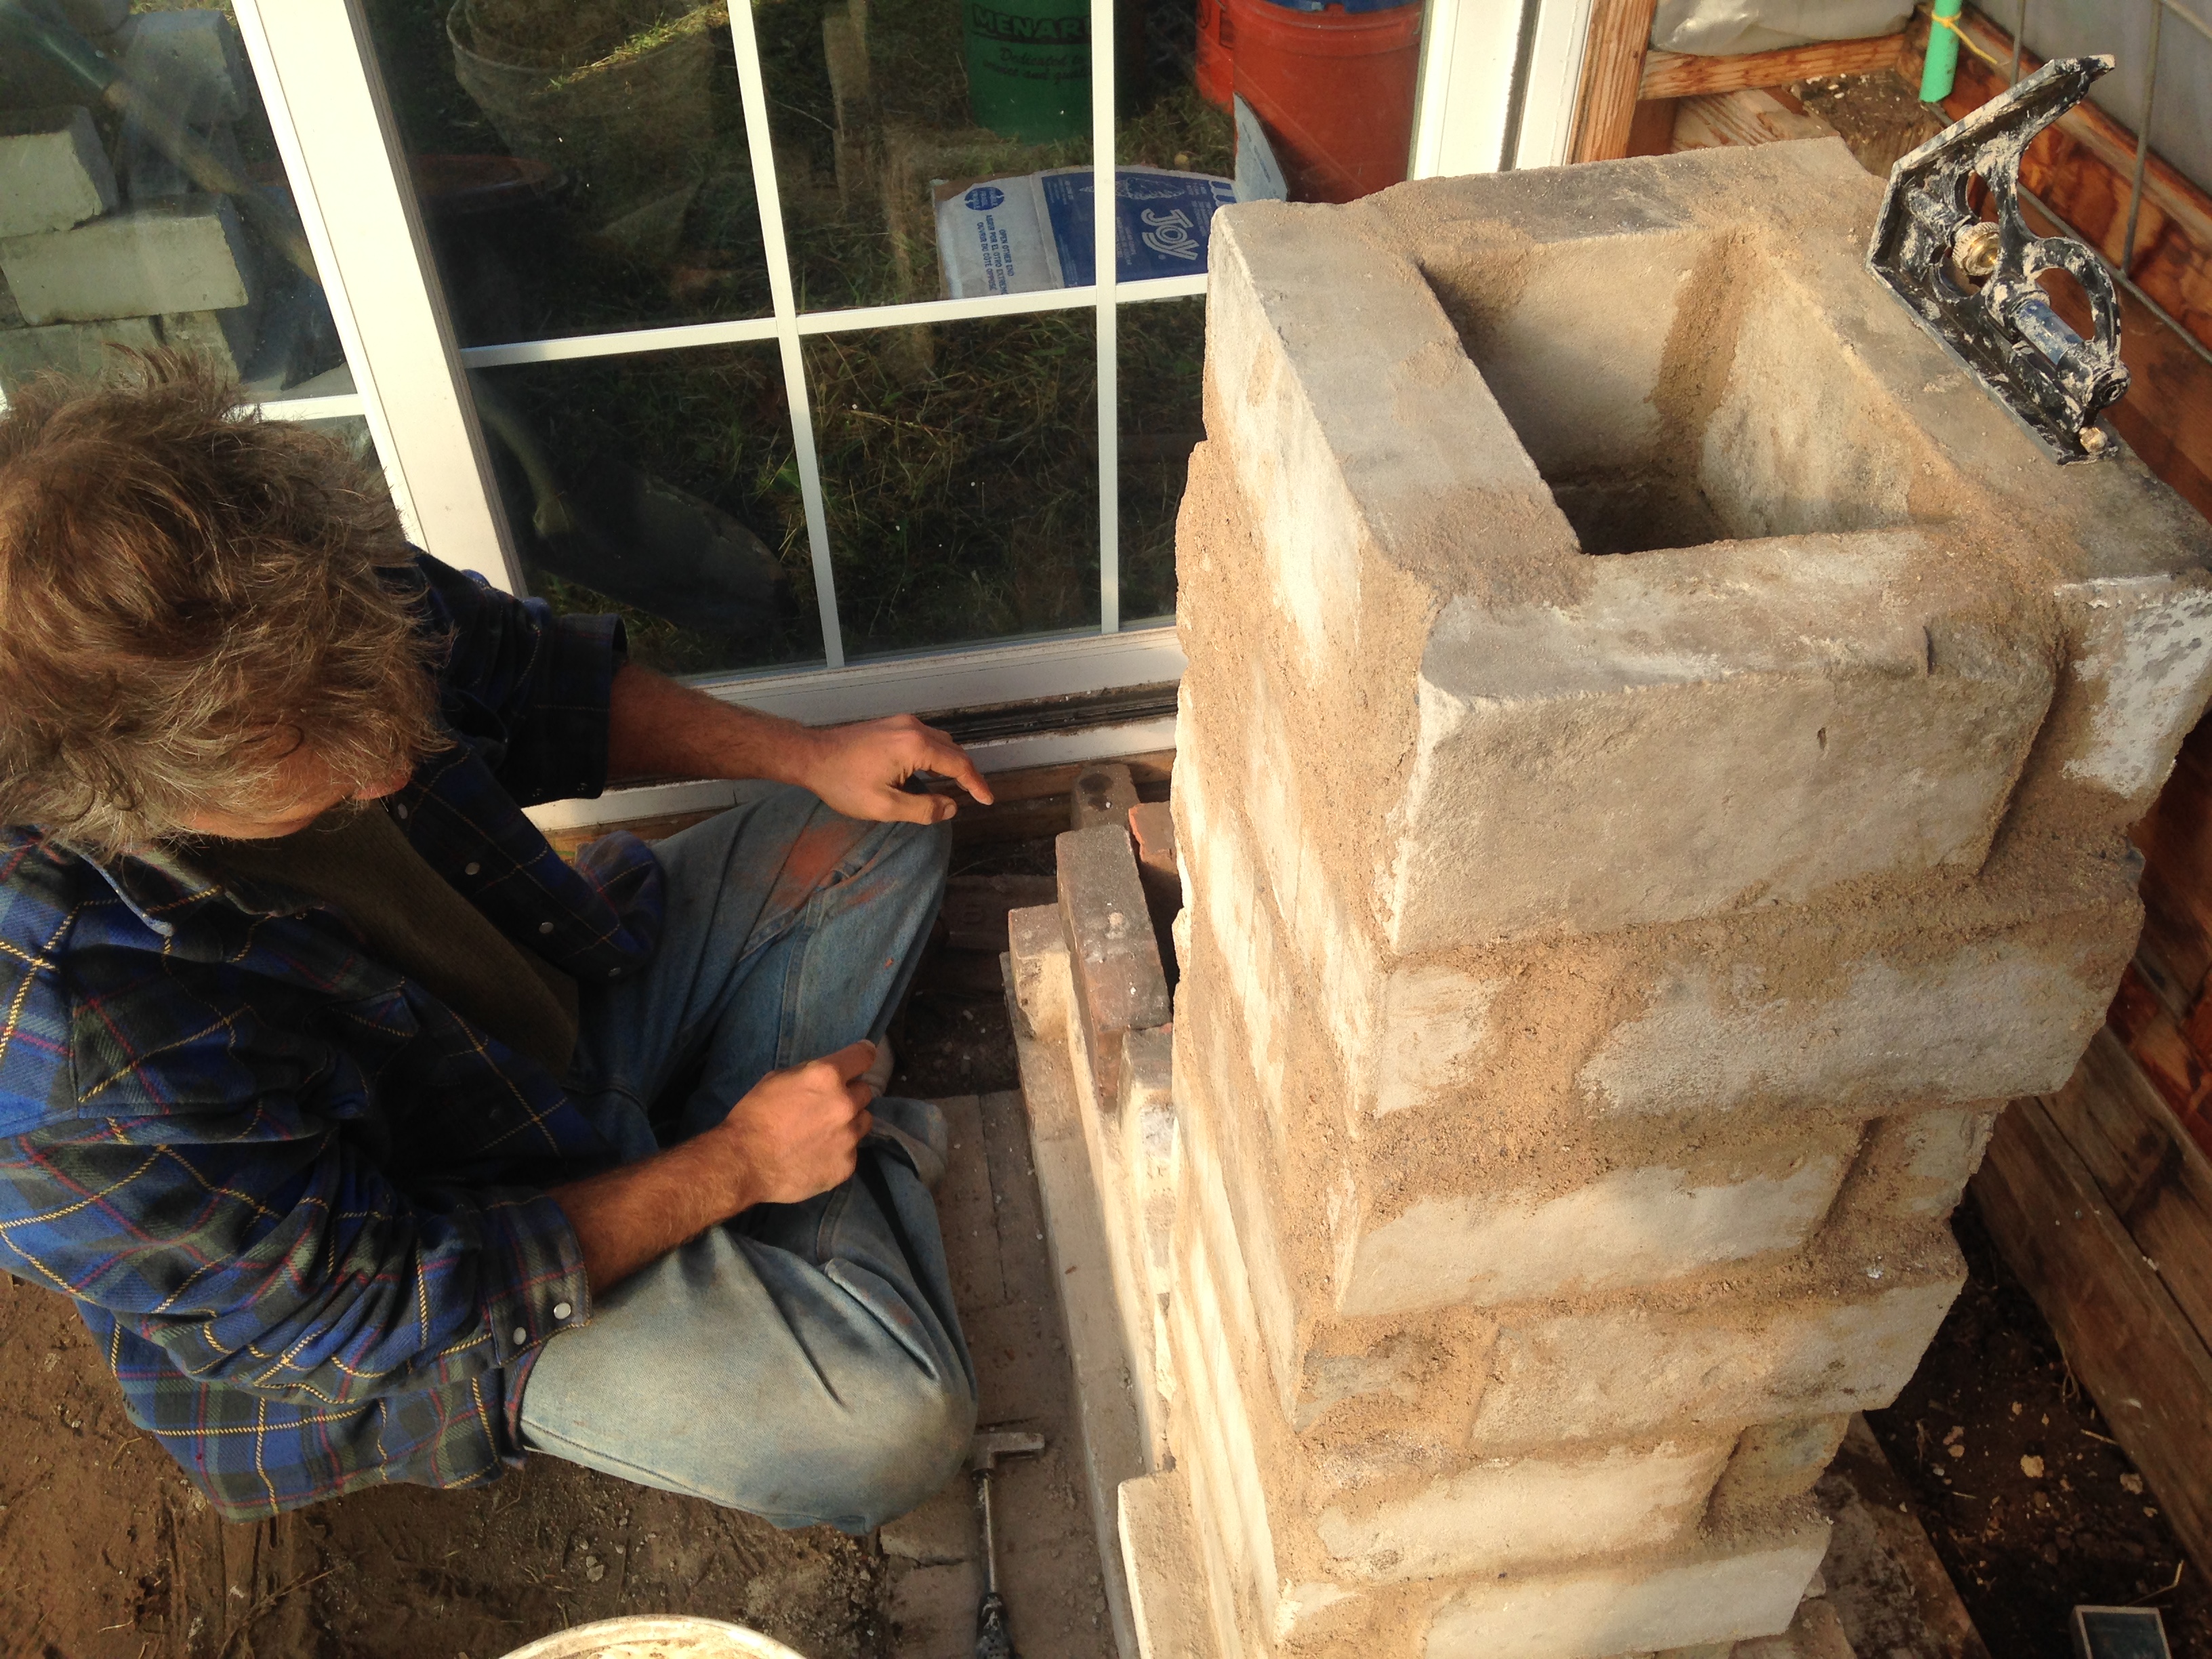
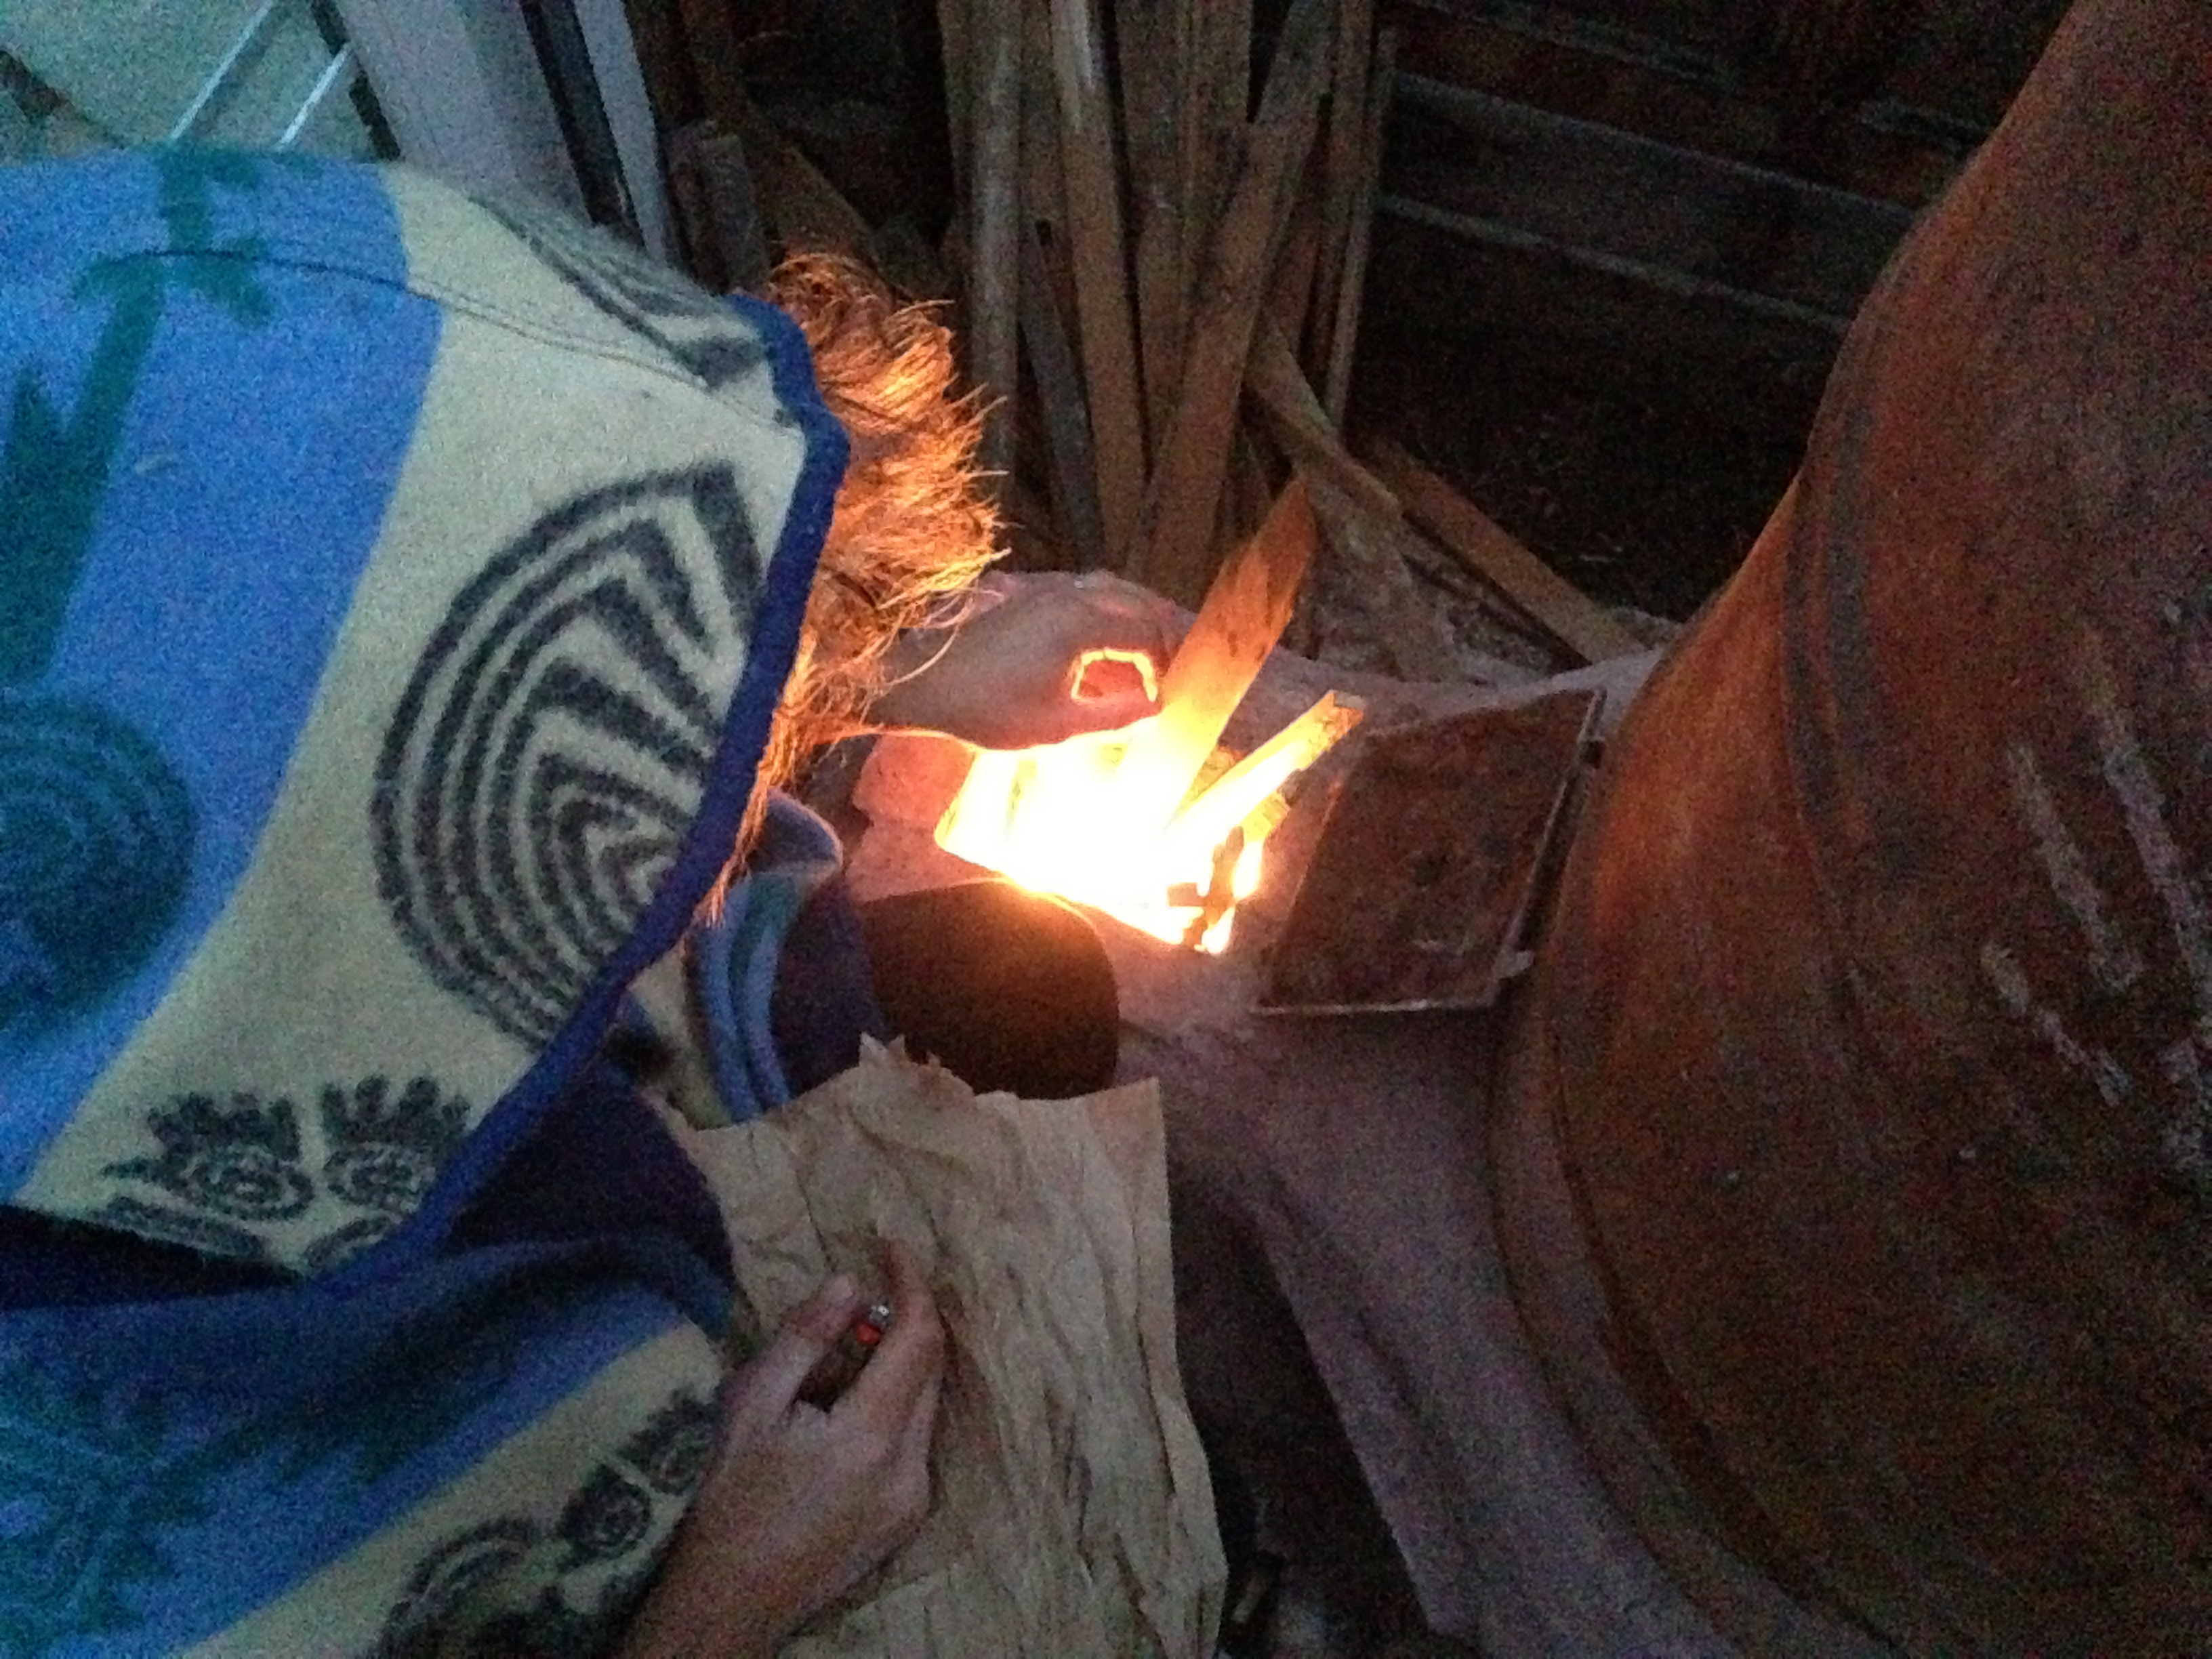
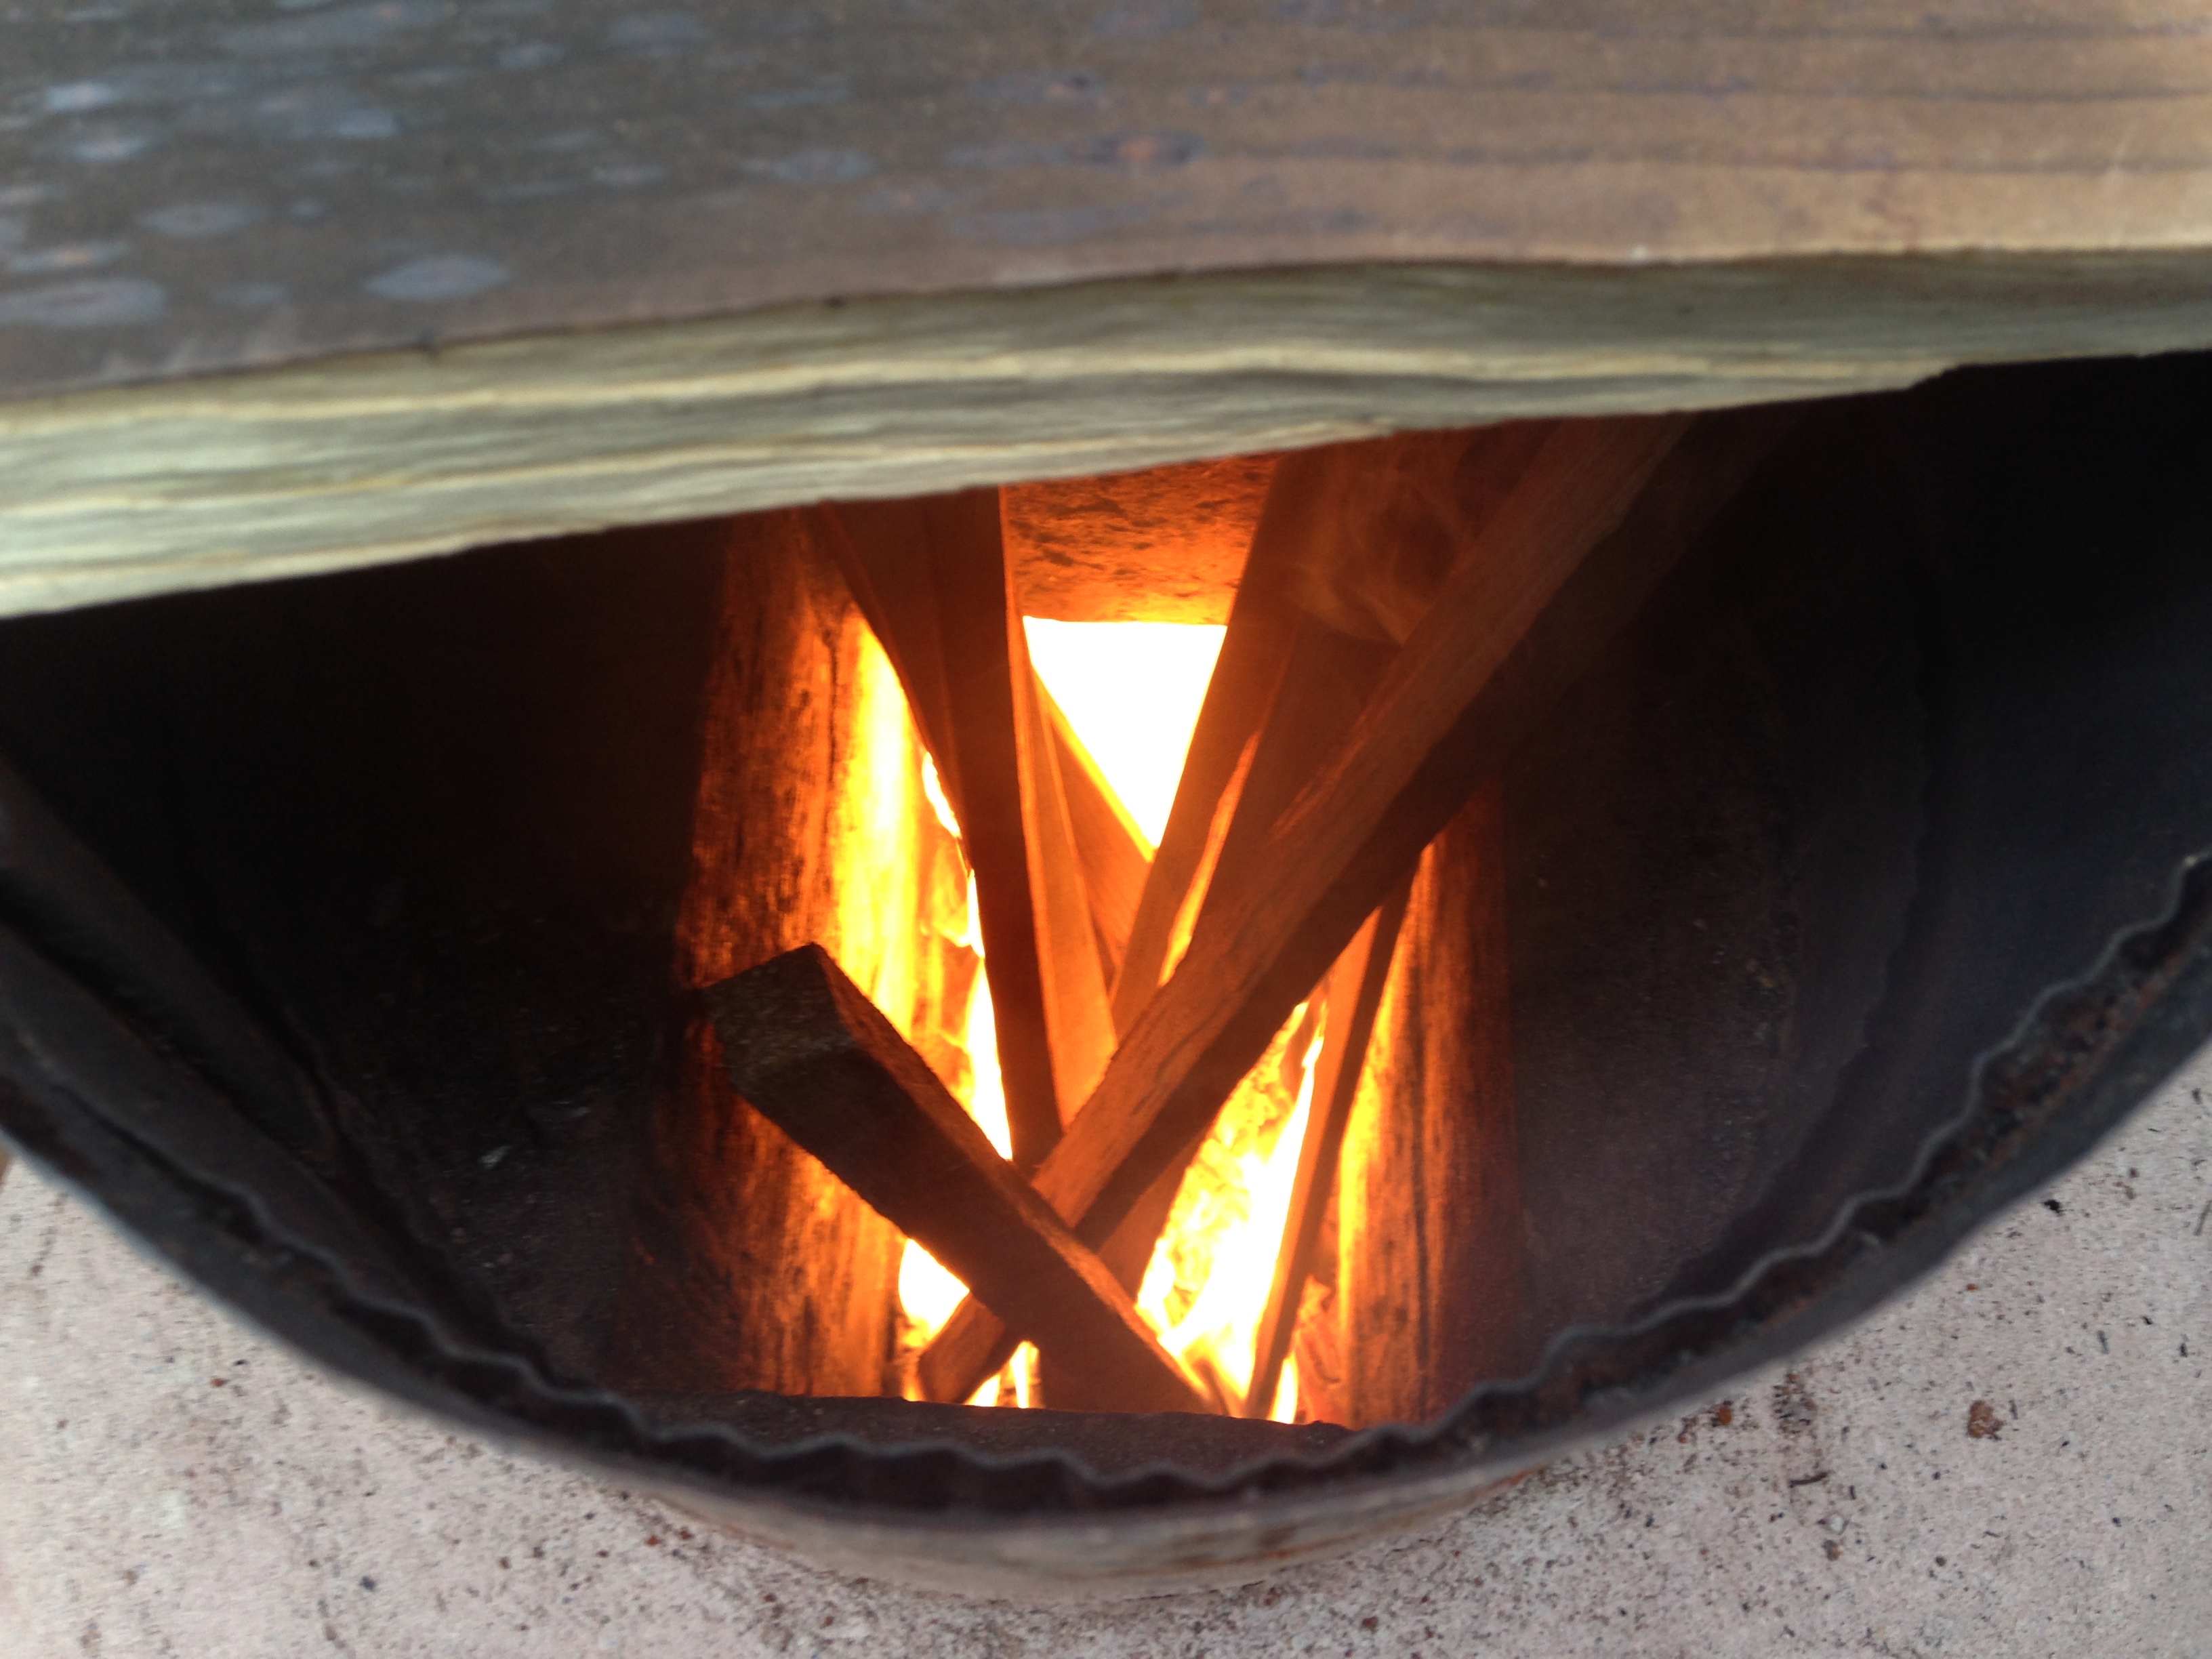
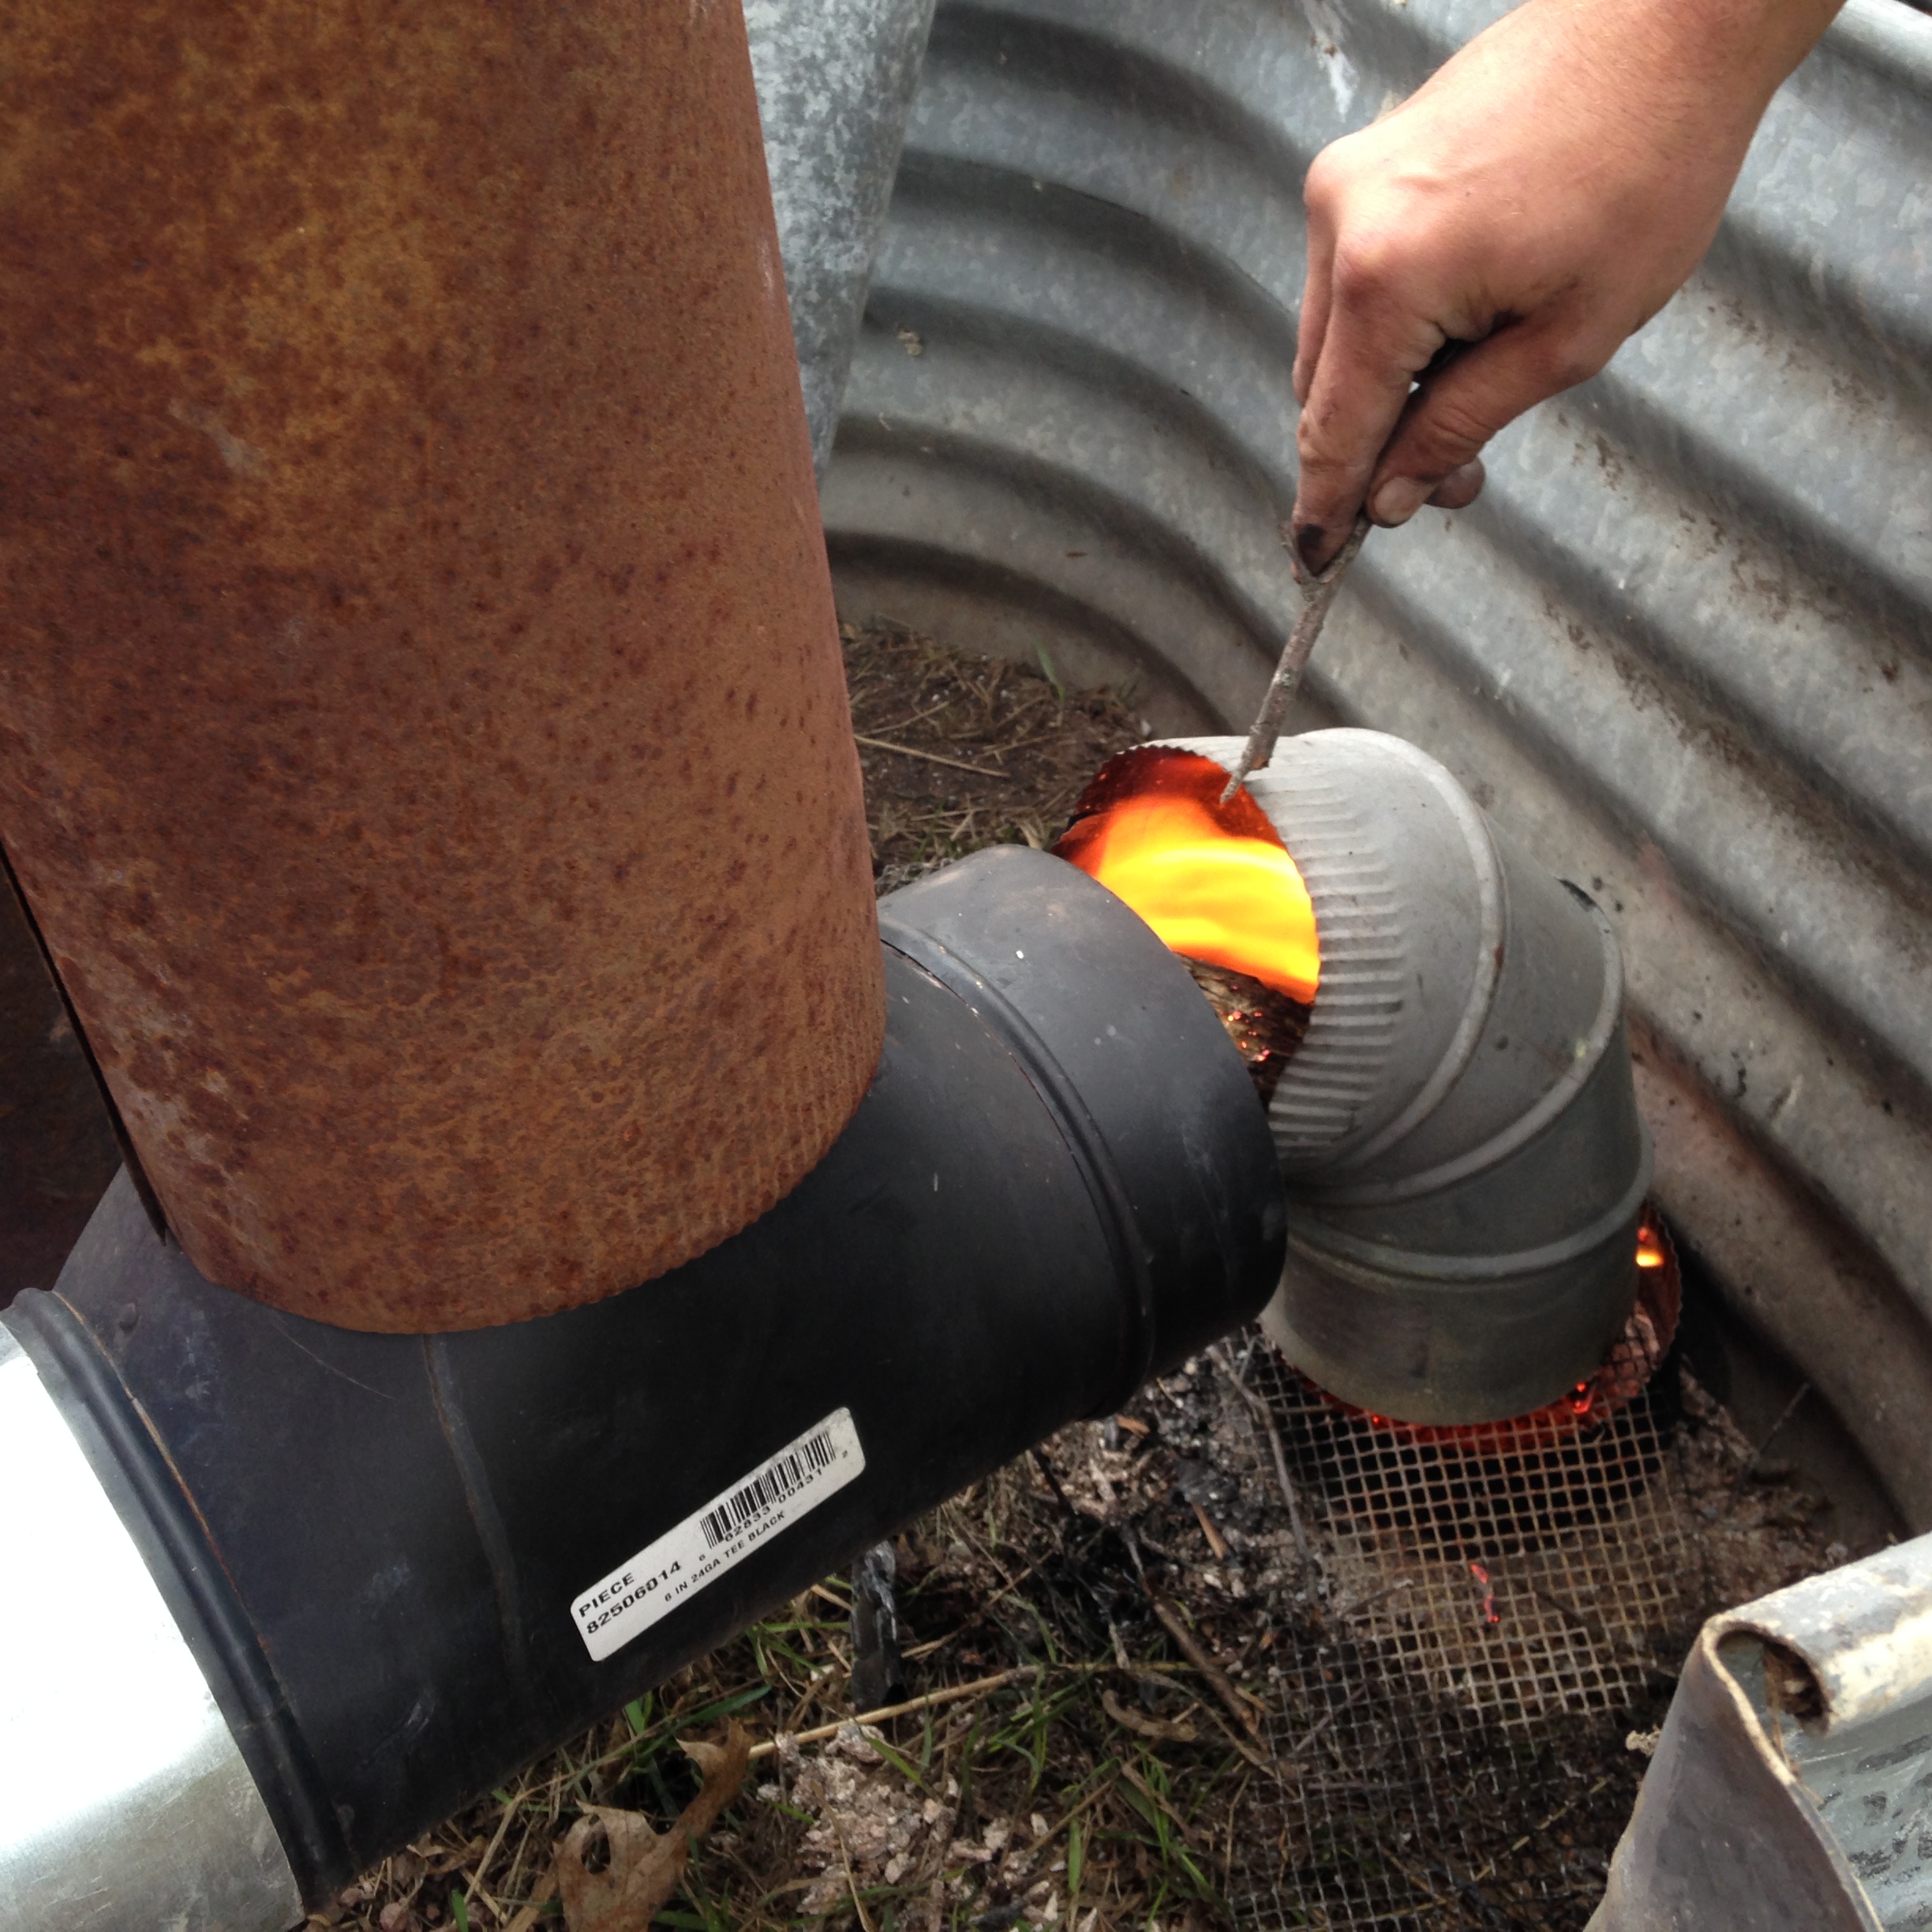
Last fall, after the killing frost had come and the 2015 CSA was over, we got to work, starting to test combustion chamber designs the day after our CSA potluck.

IMG_1120

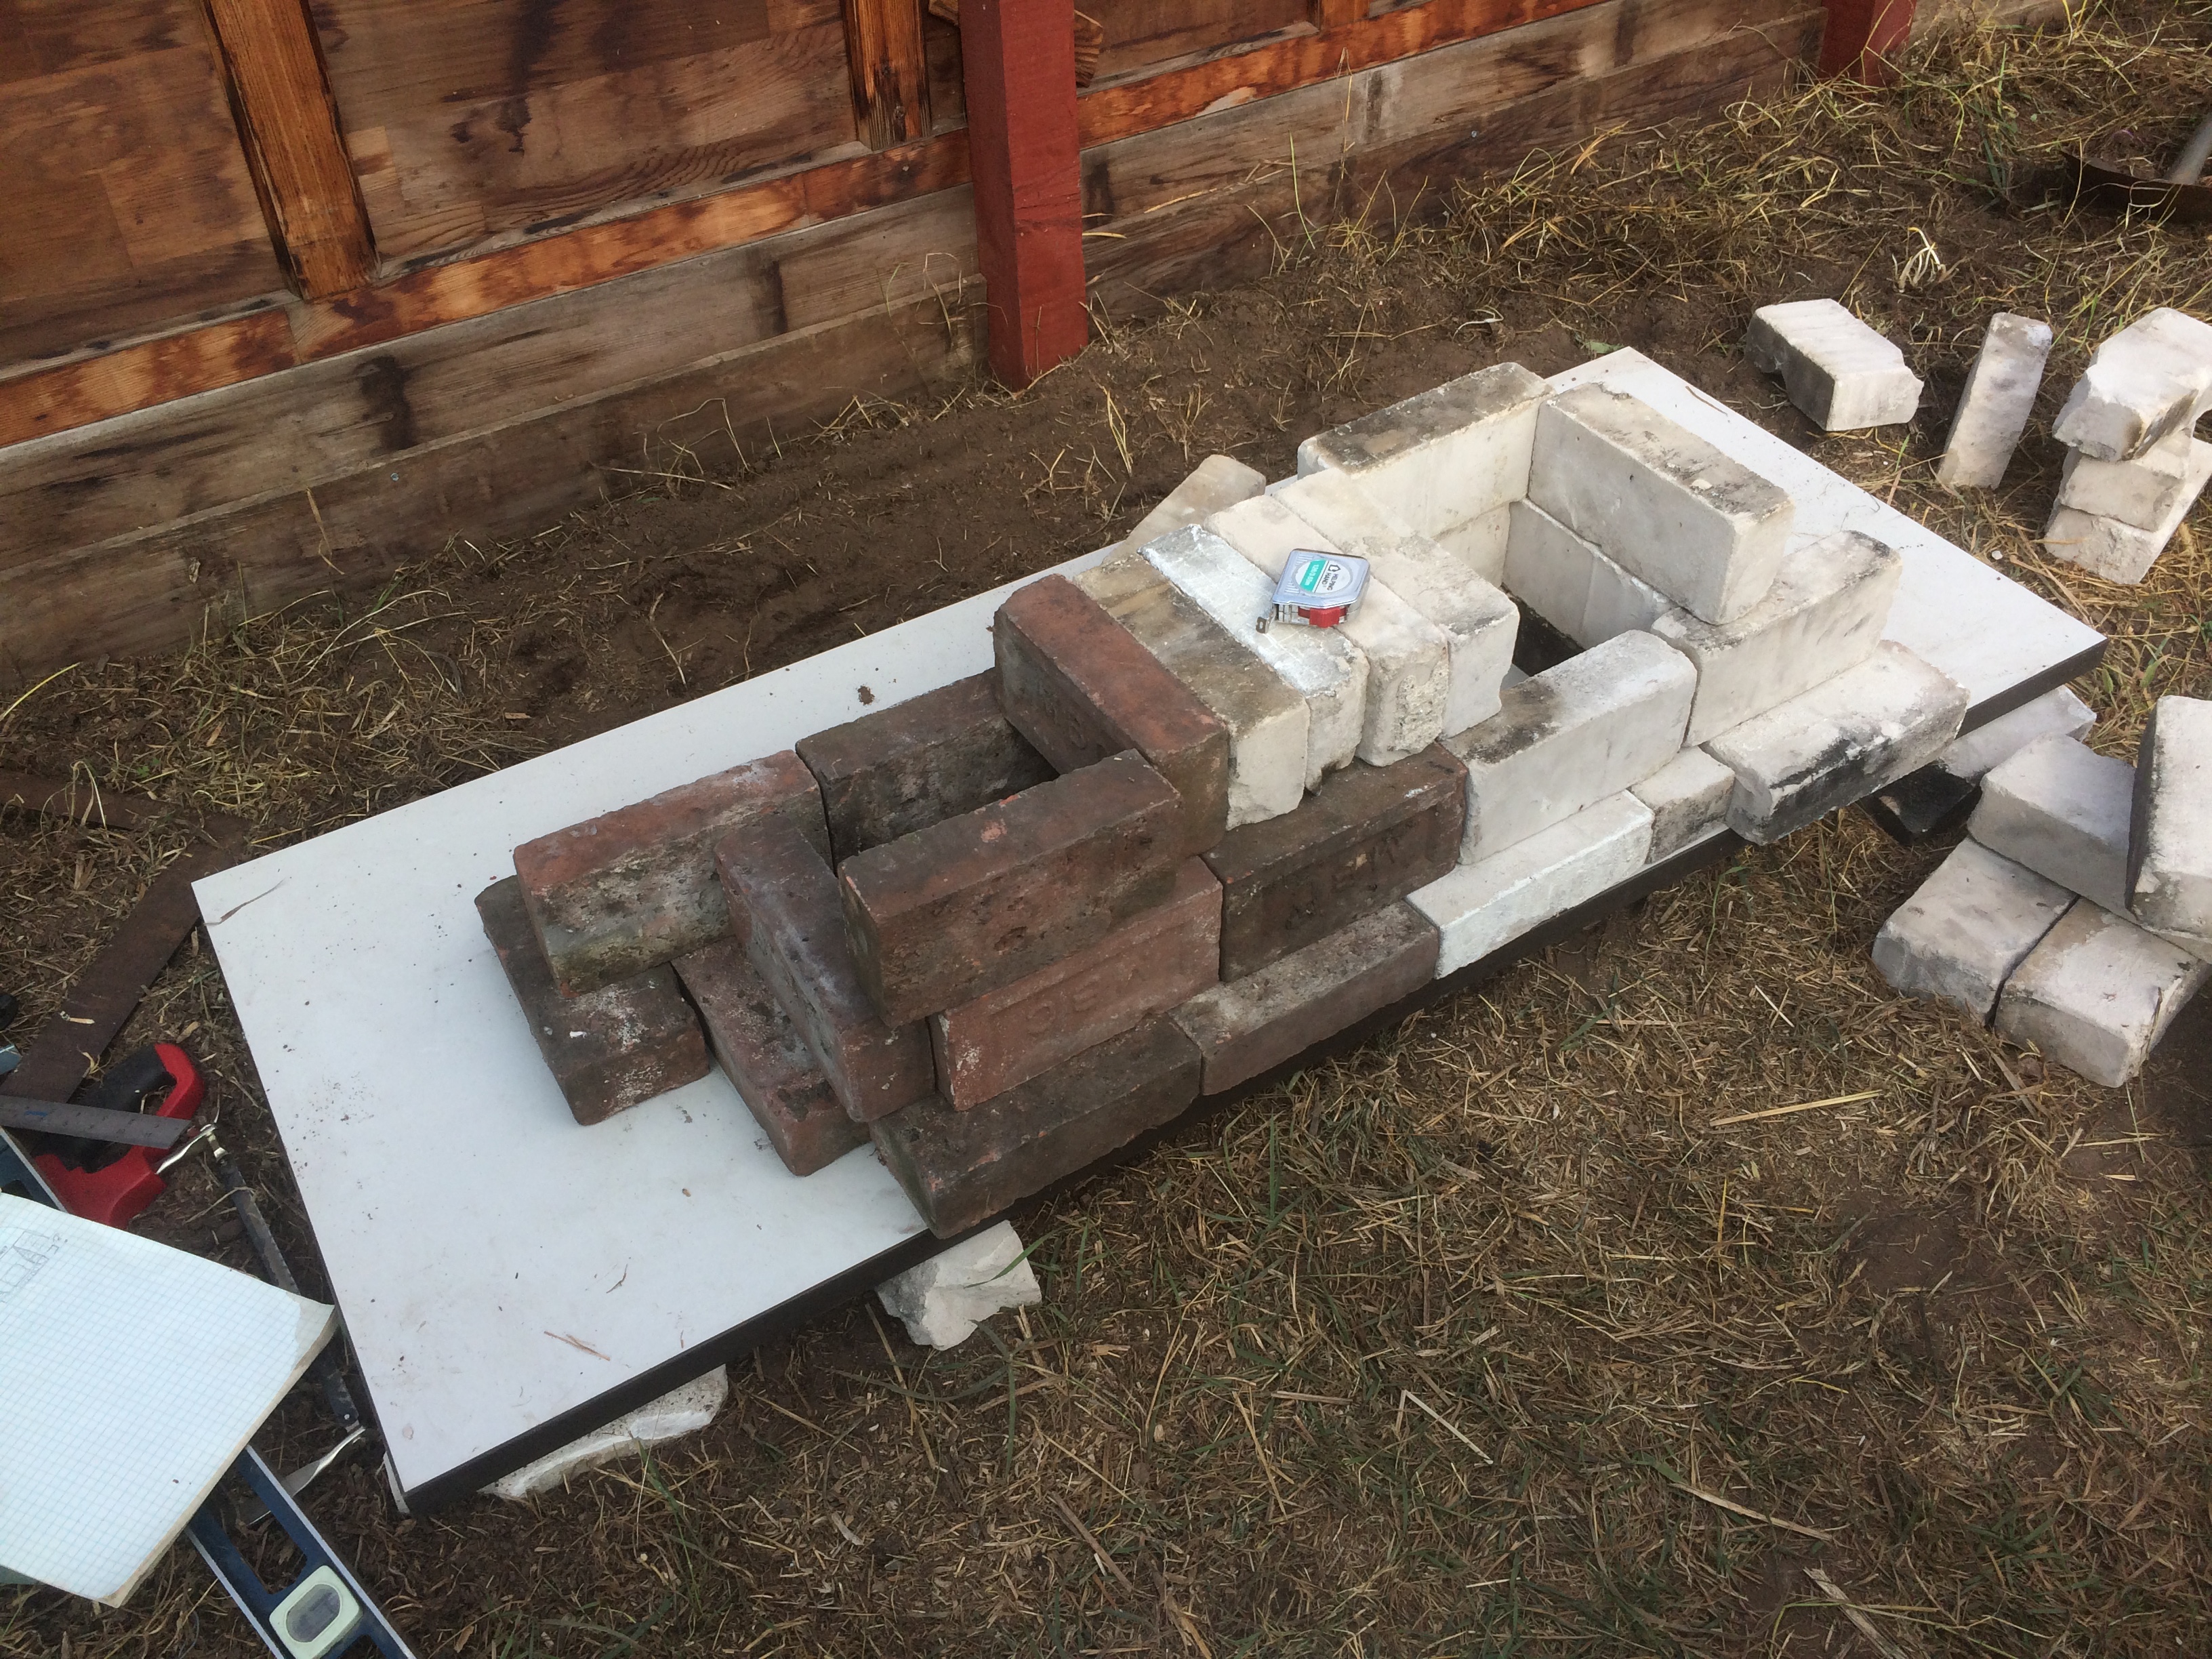
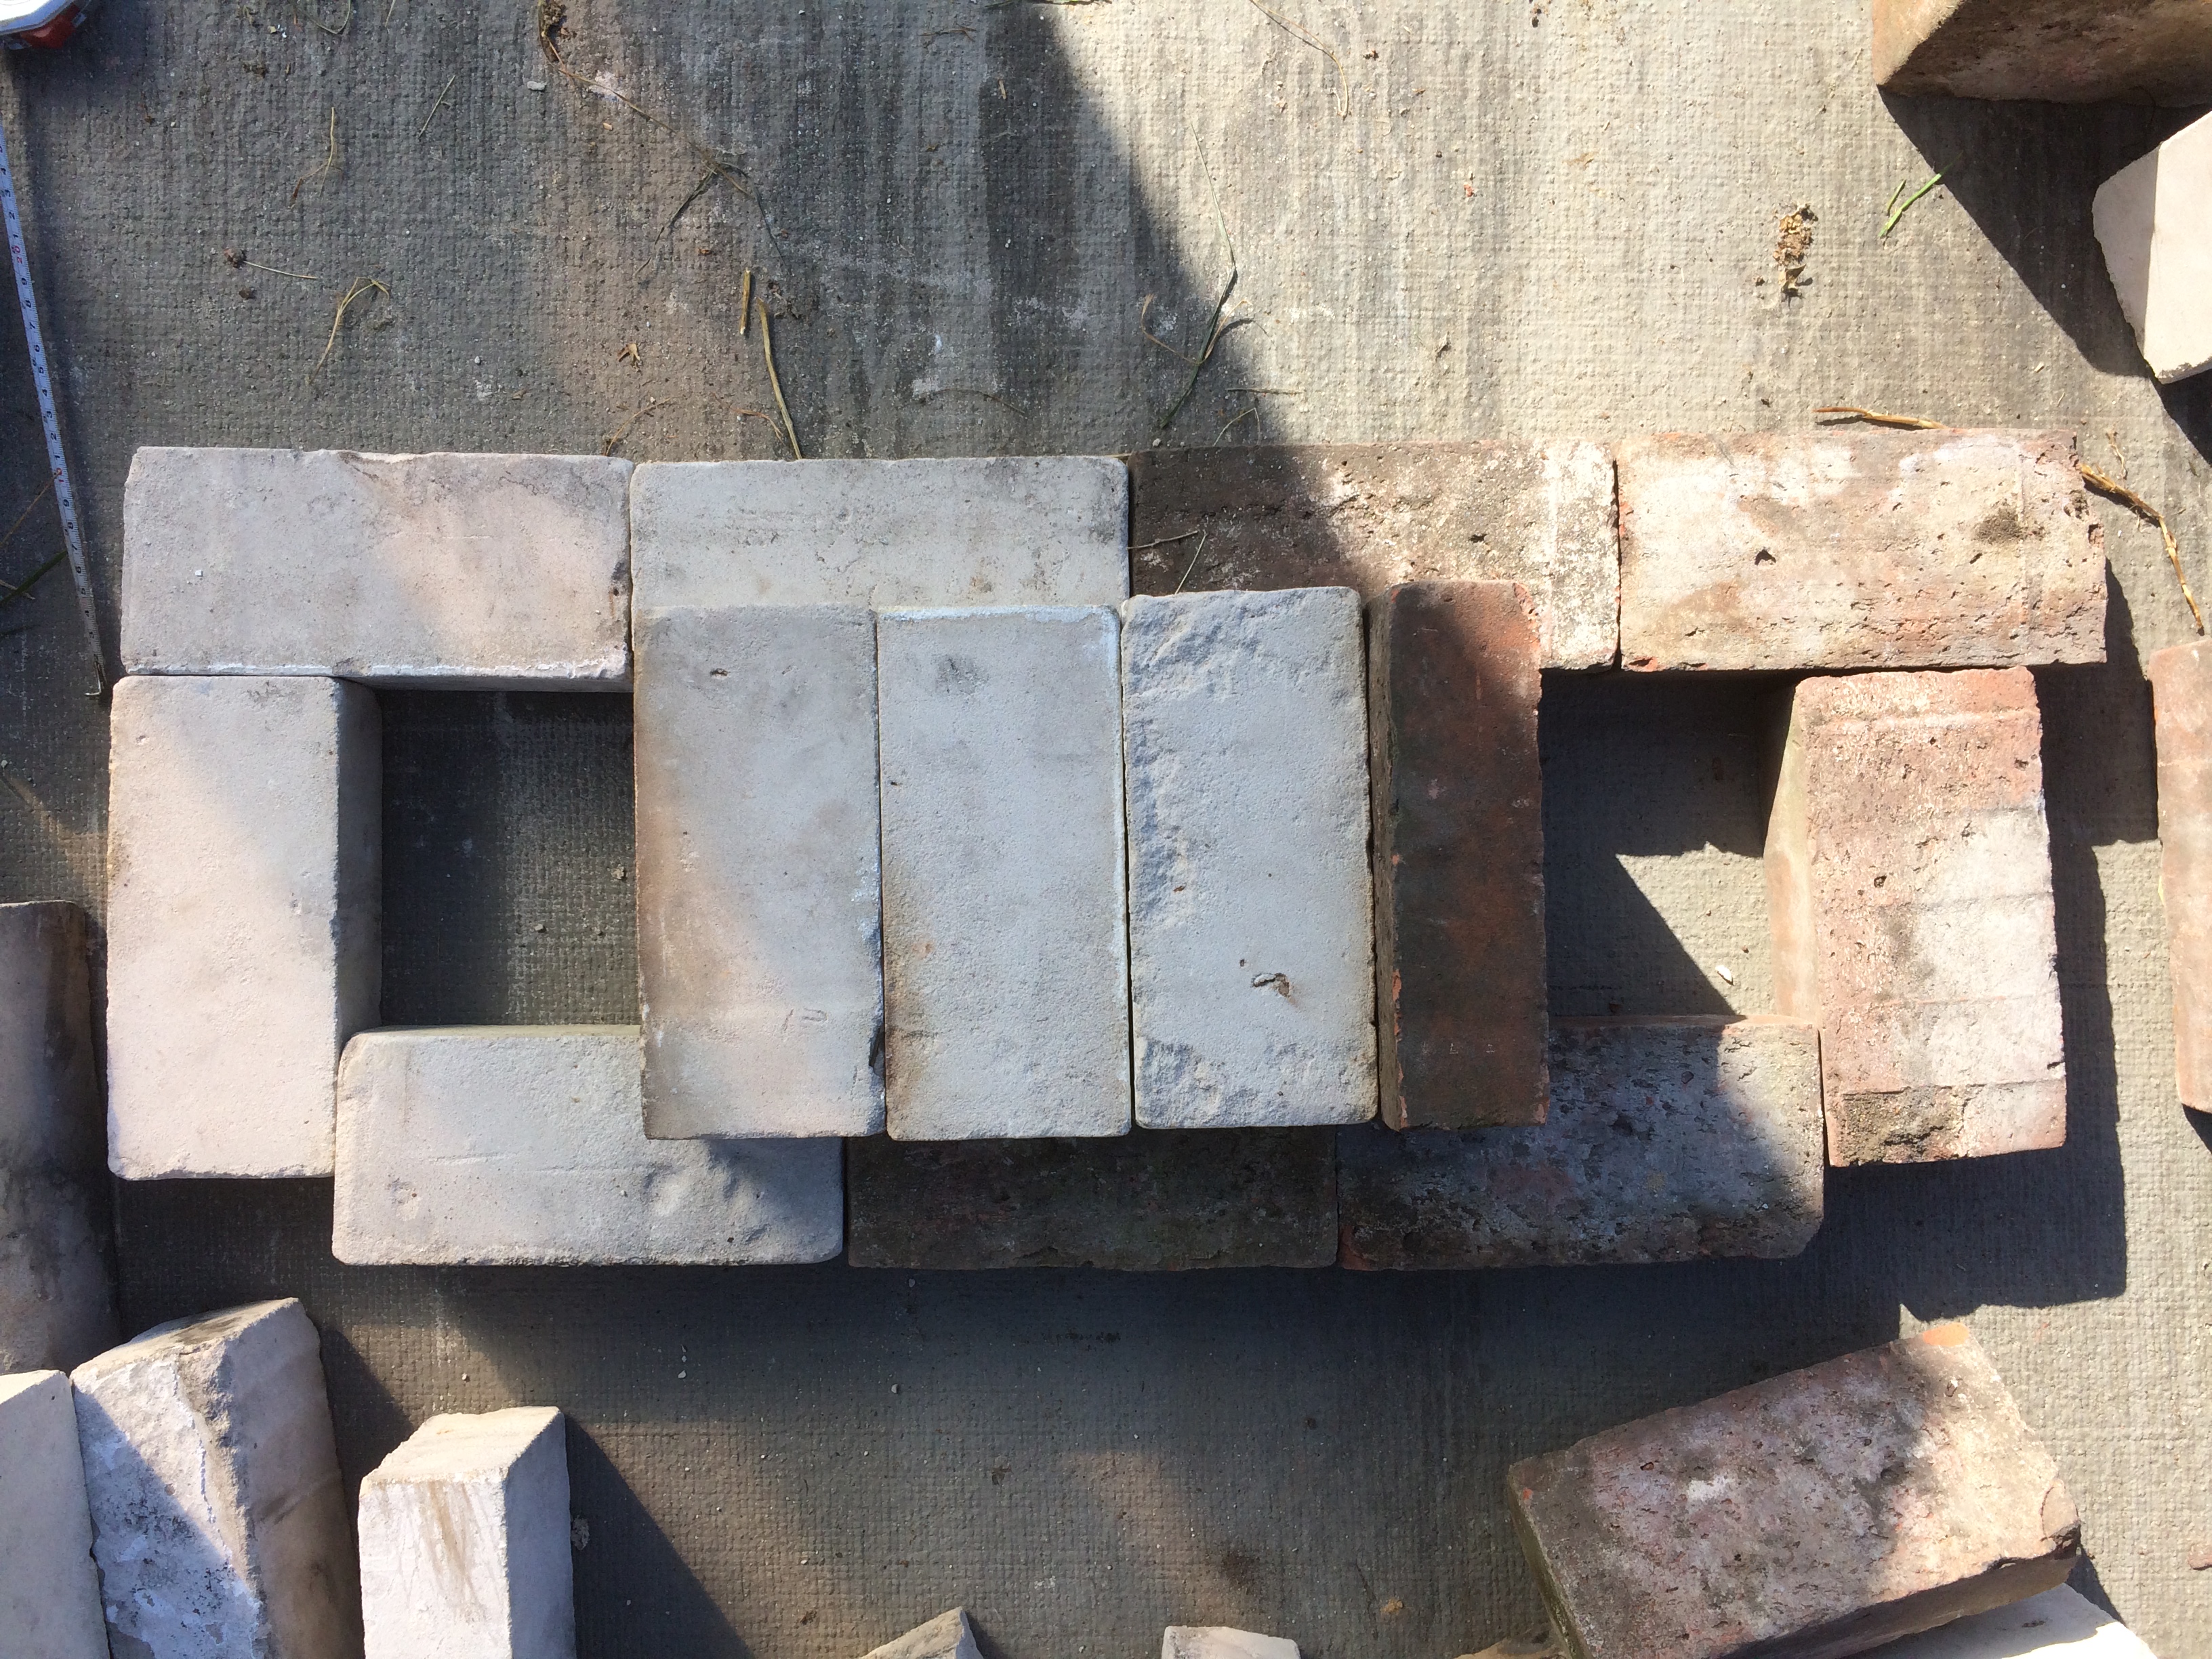
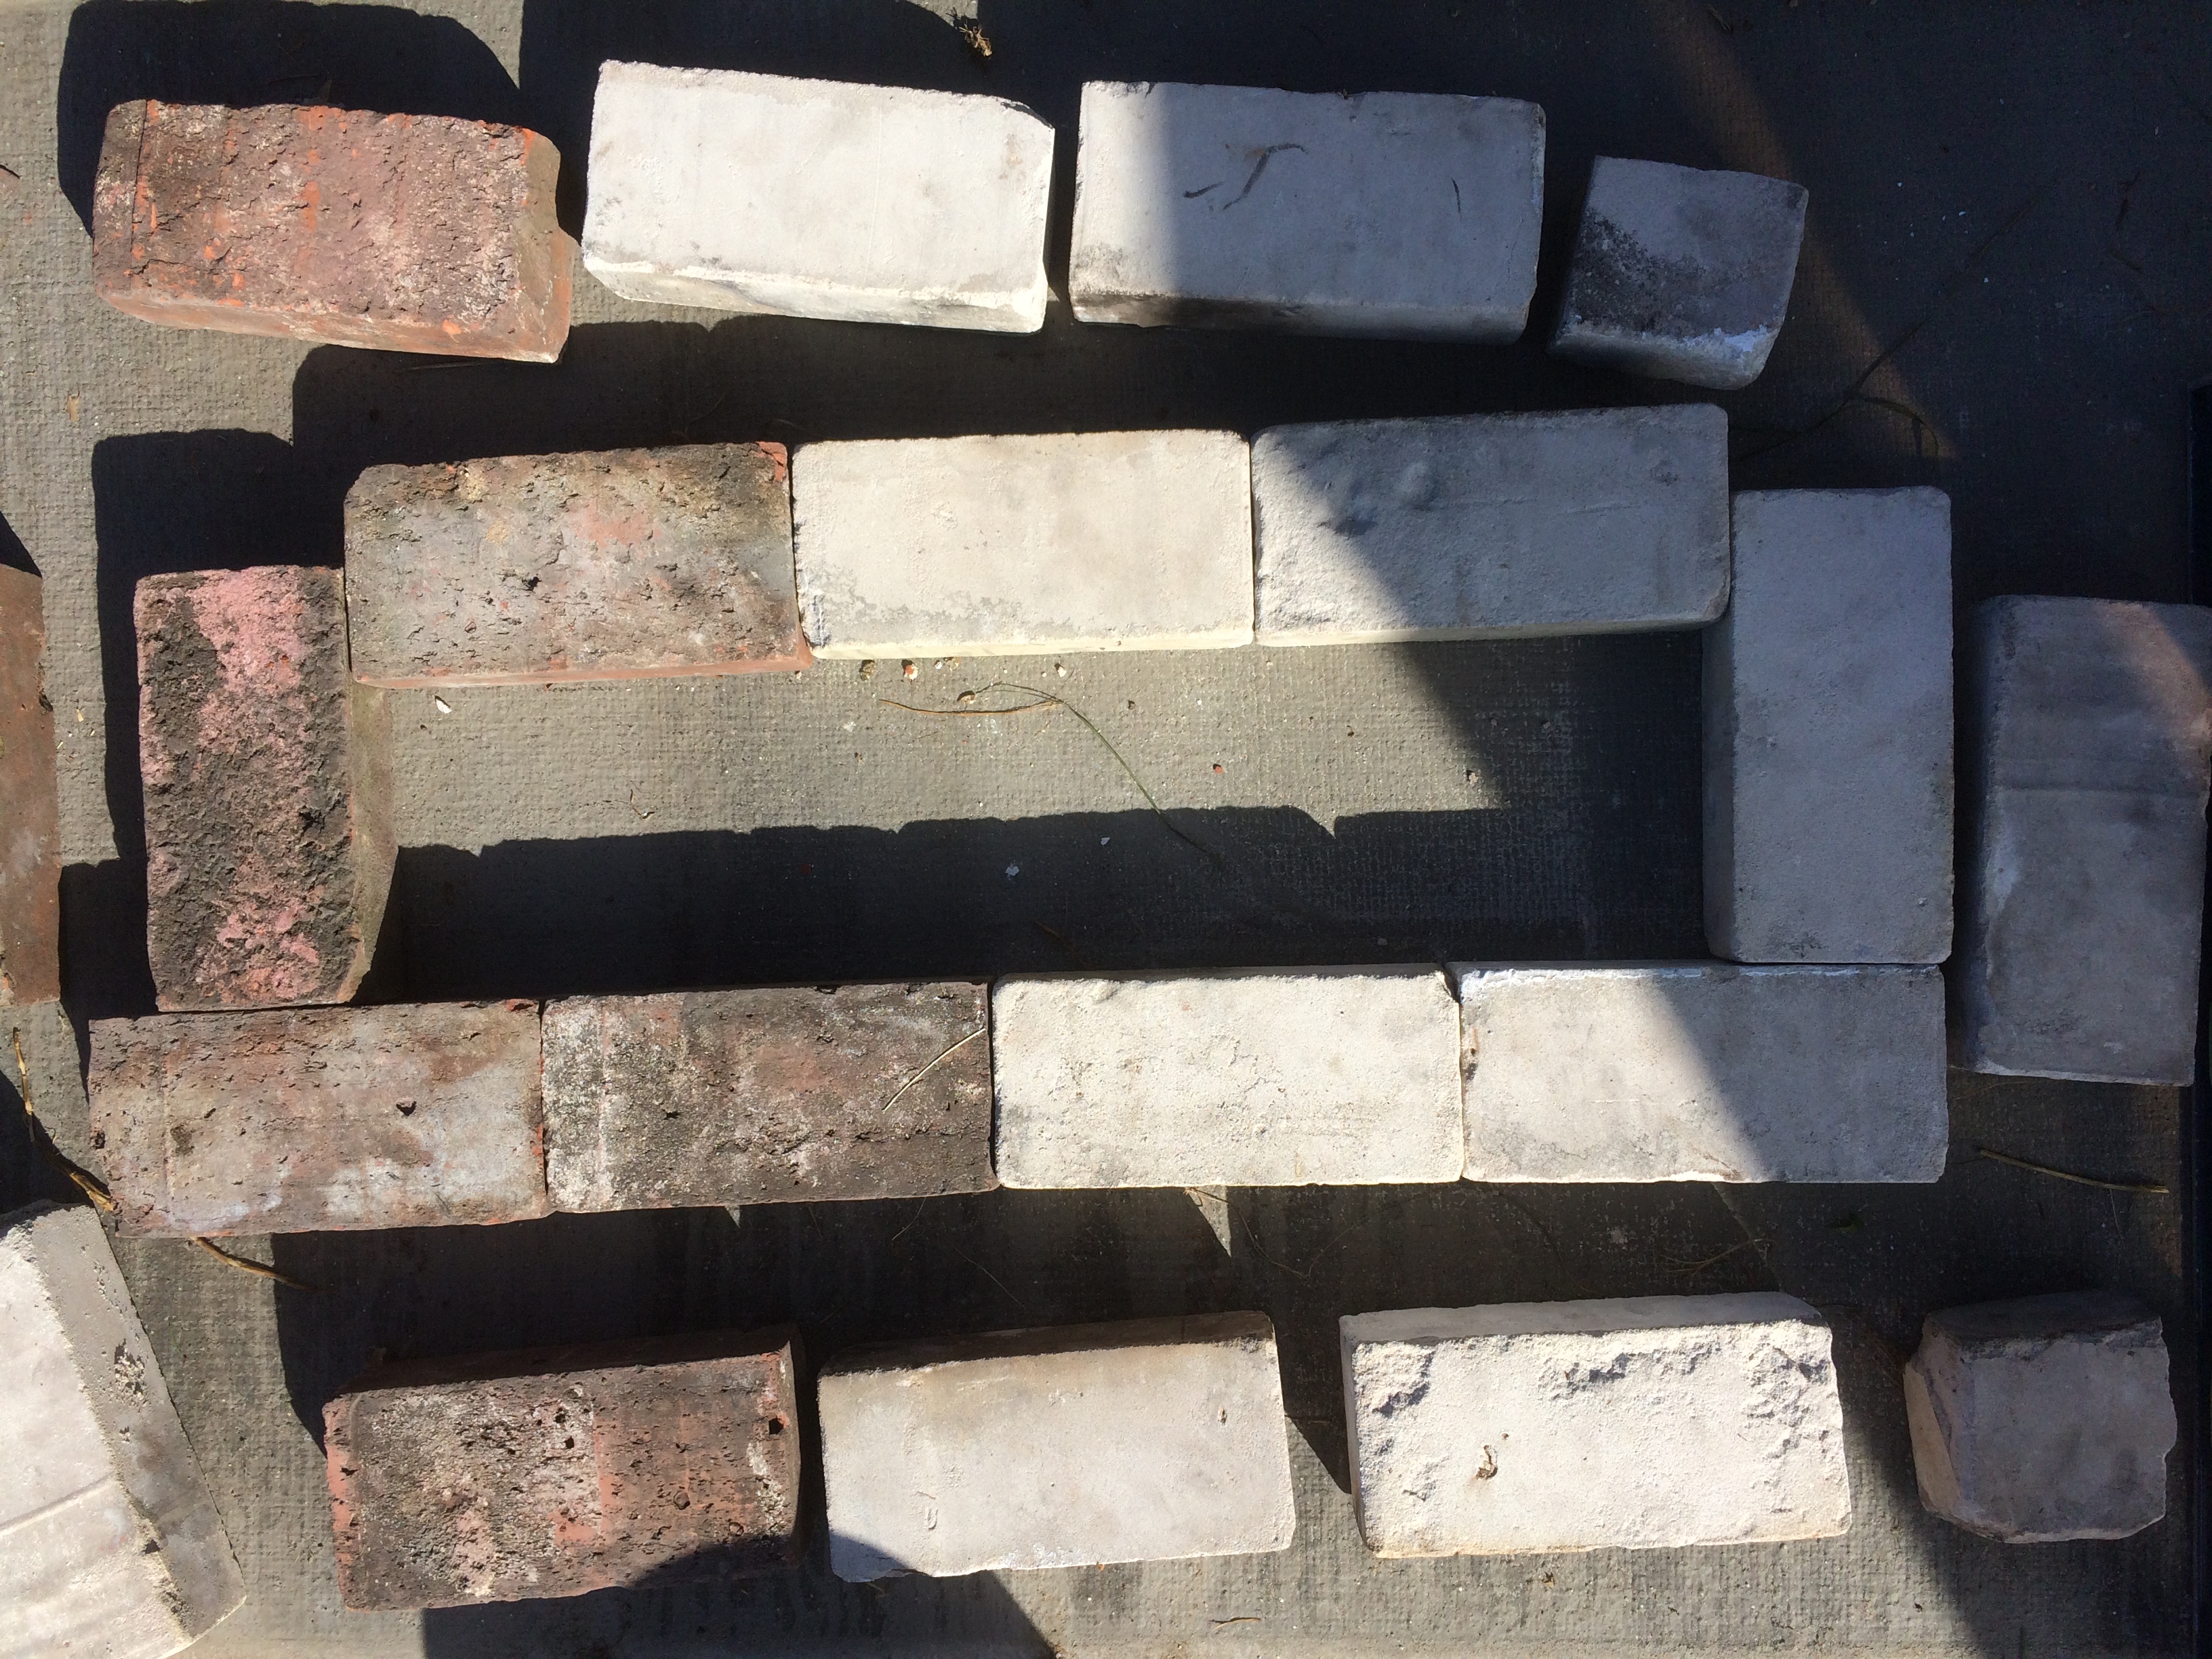
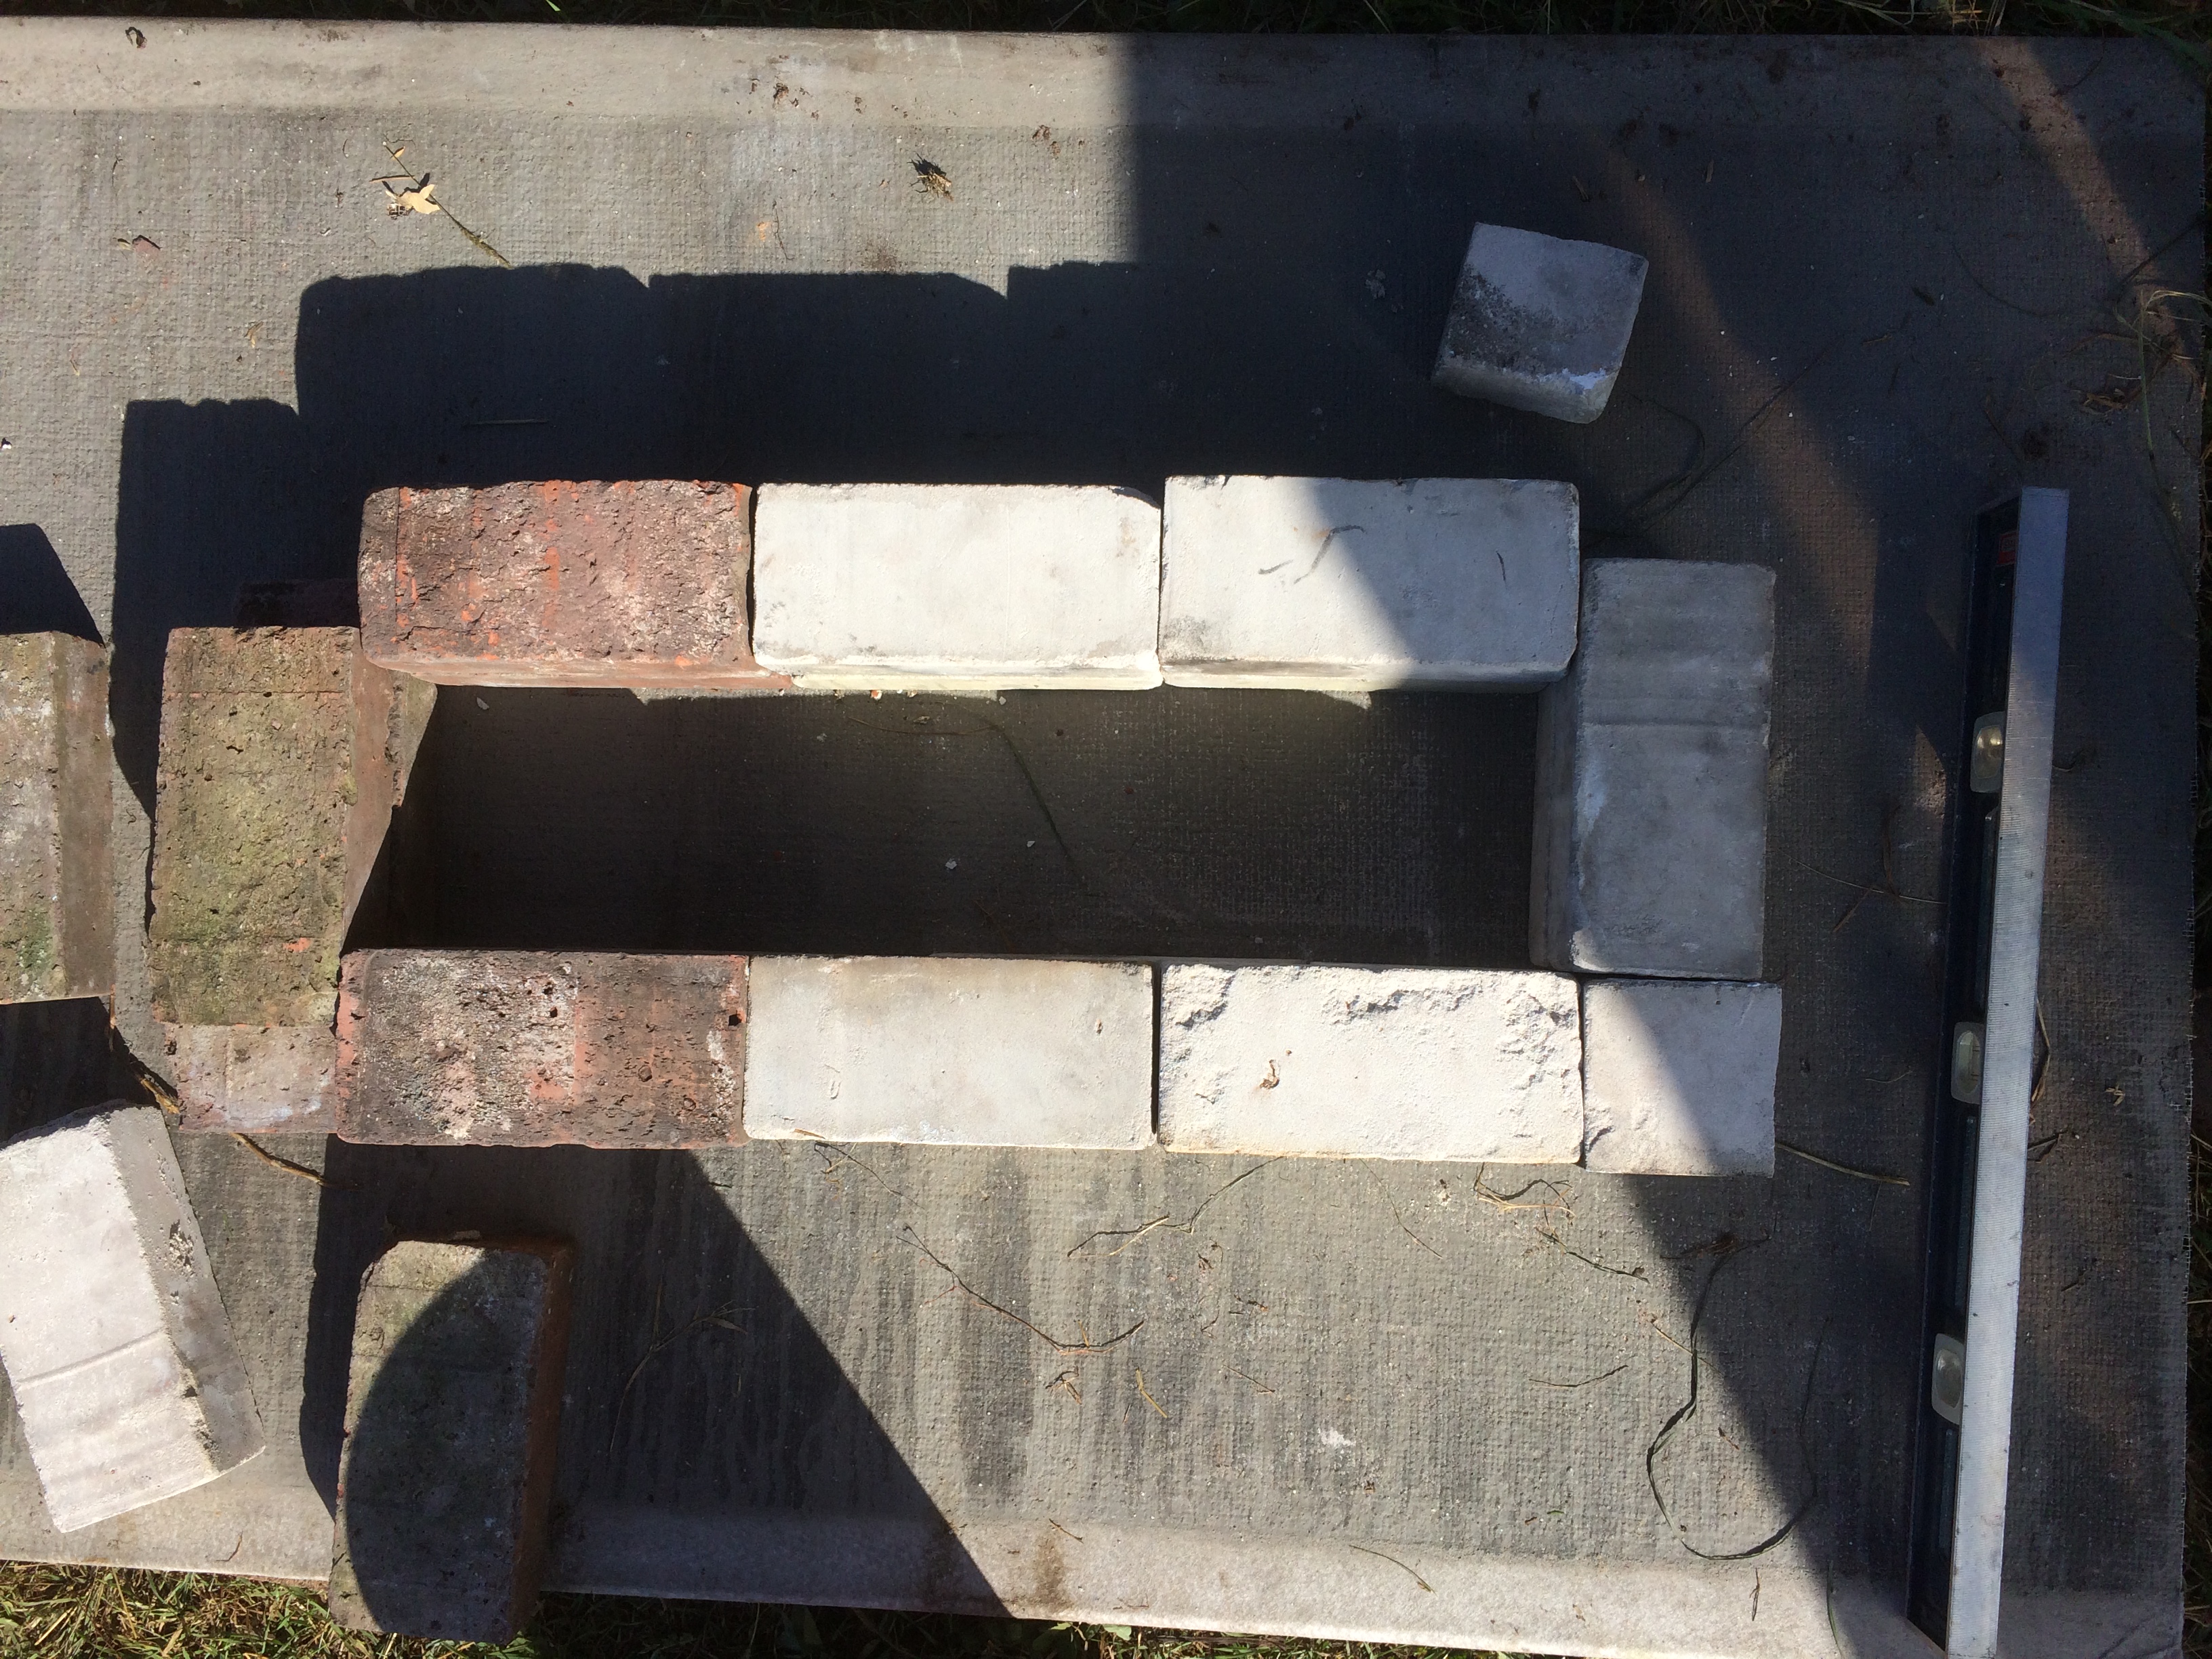
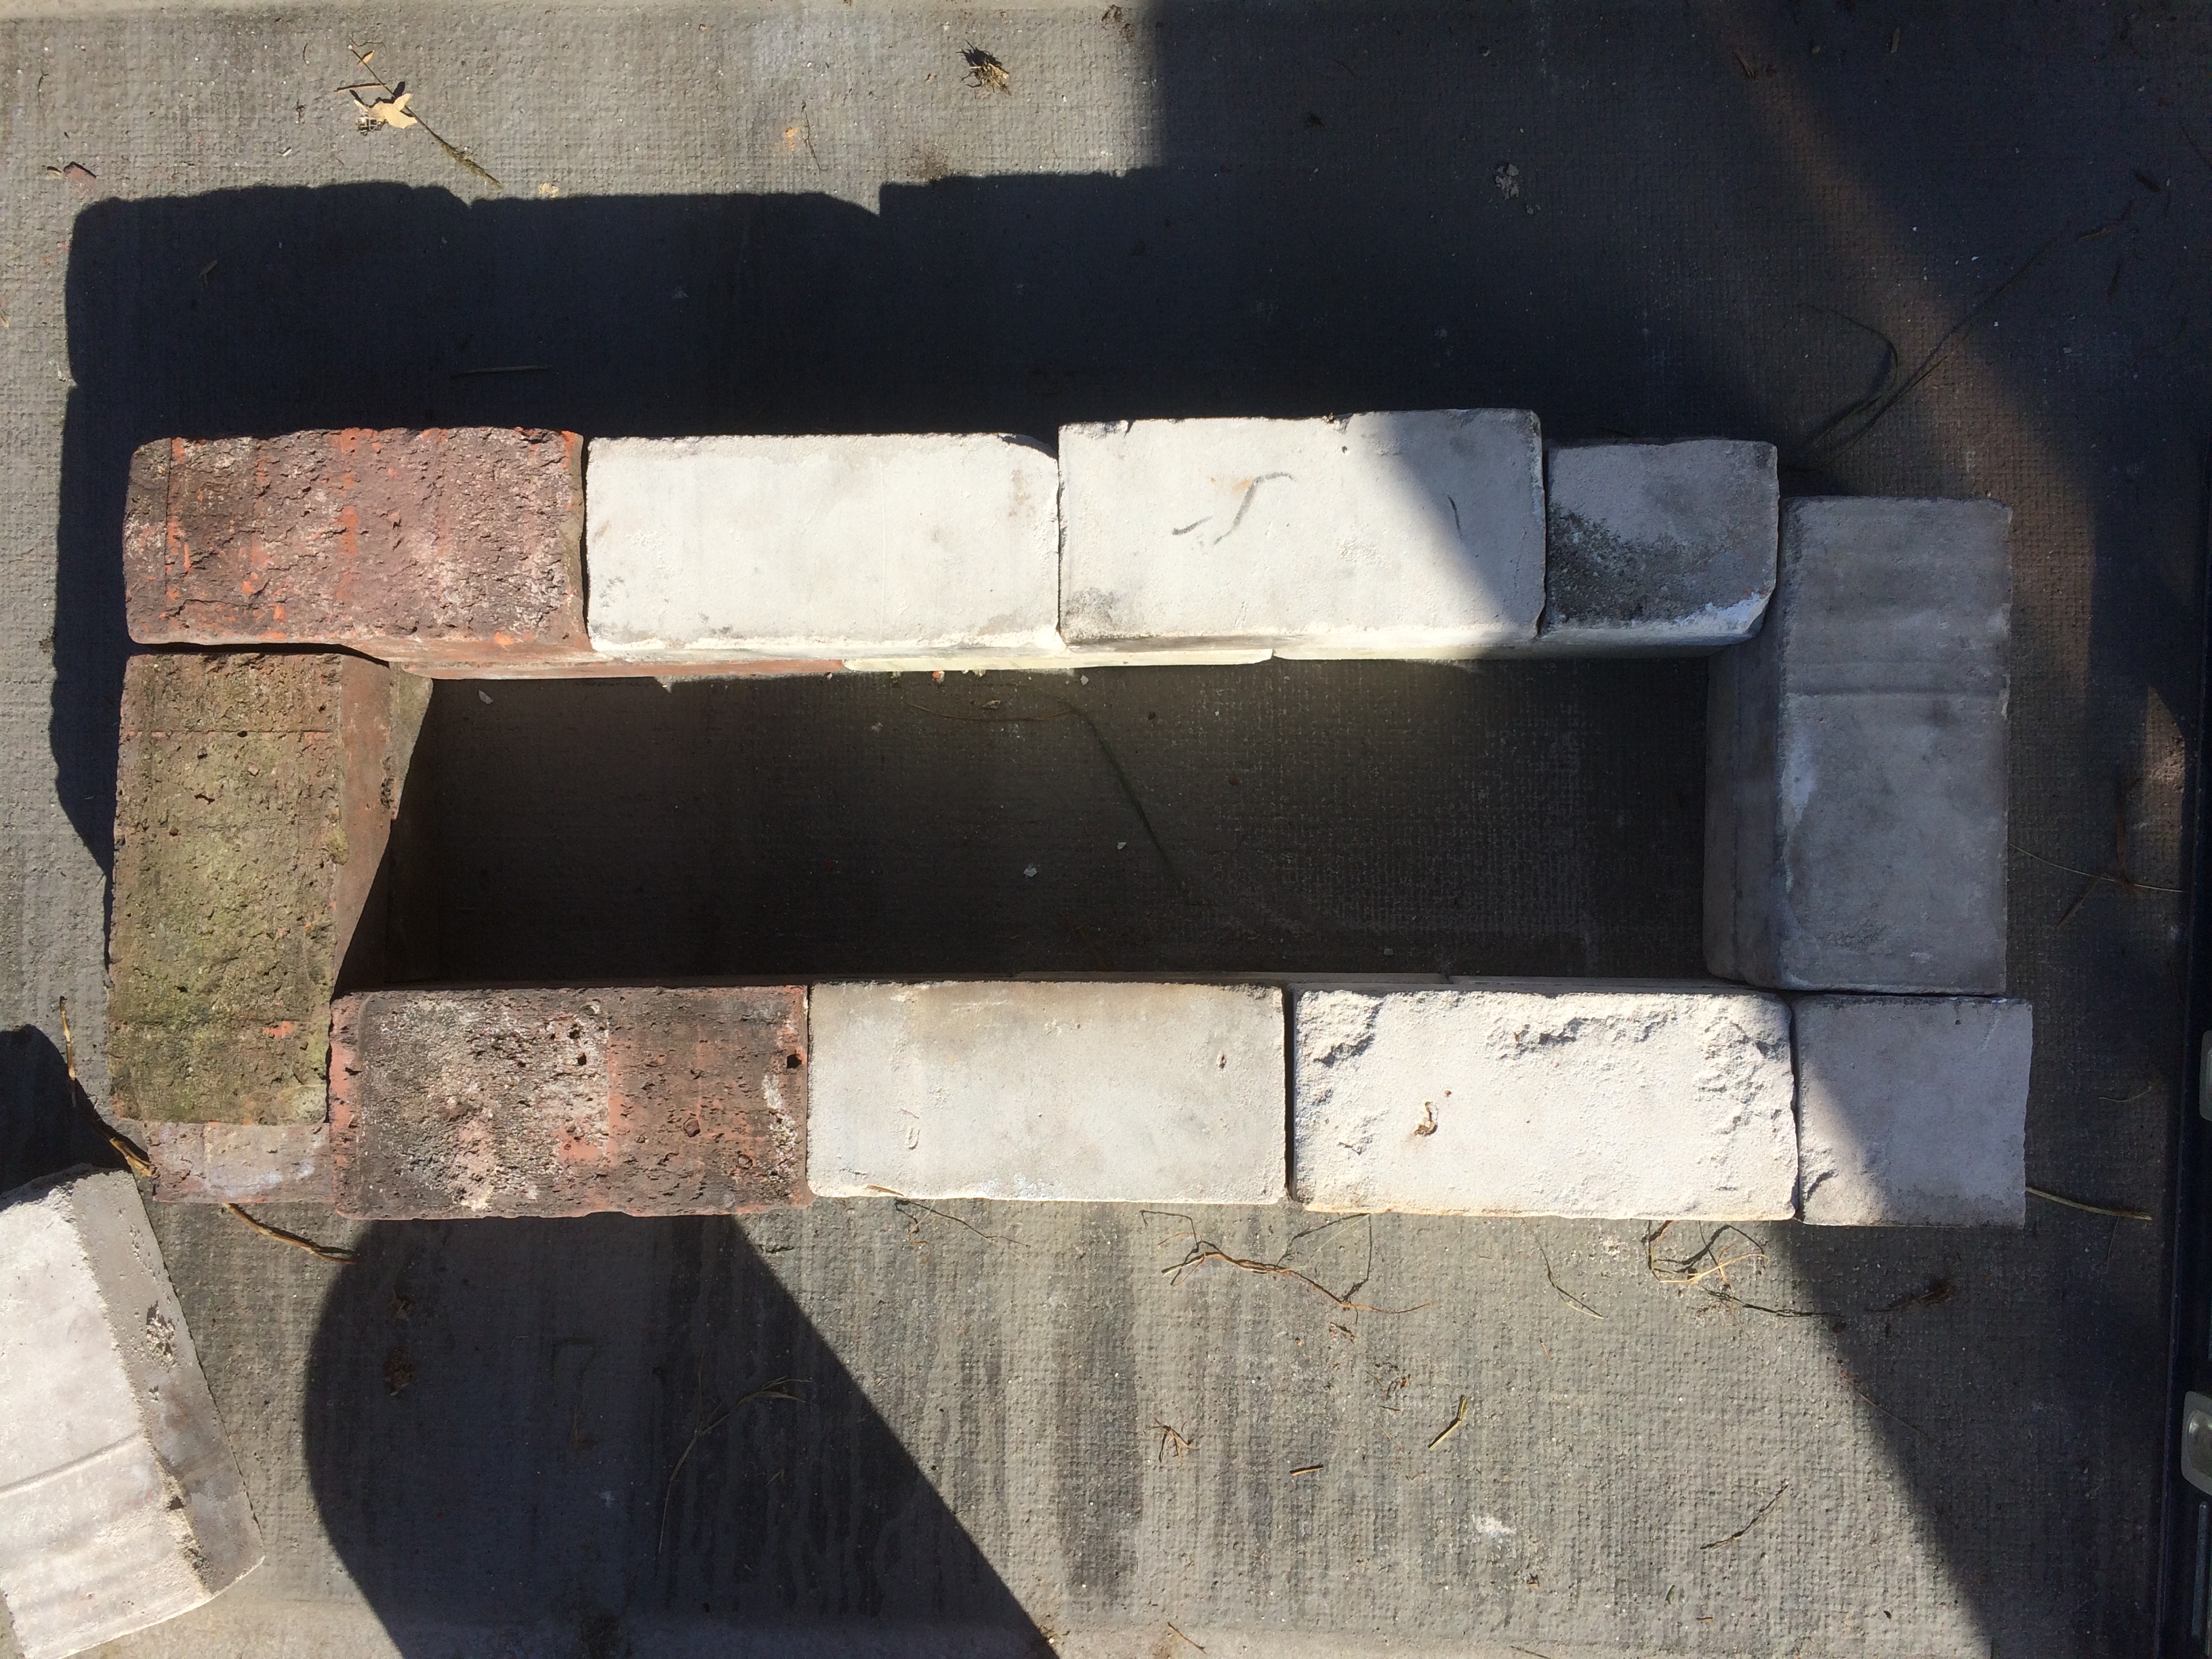
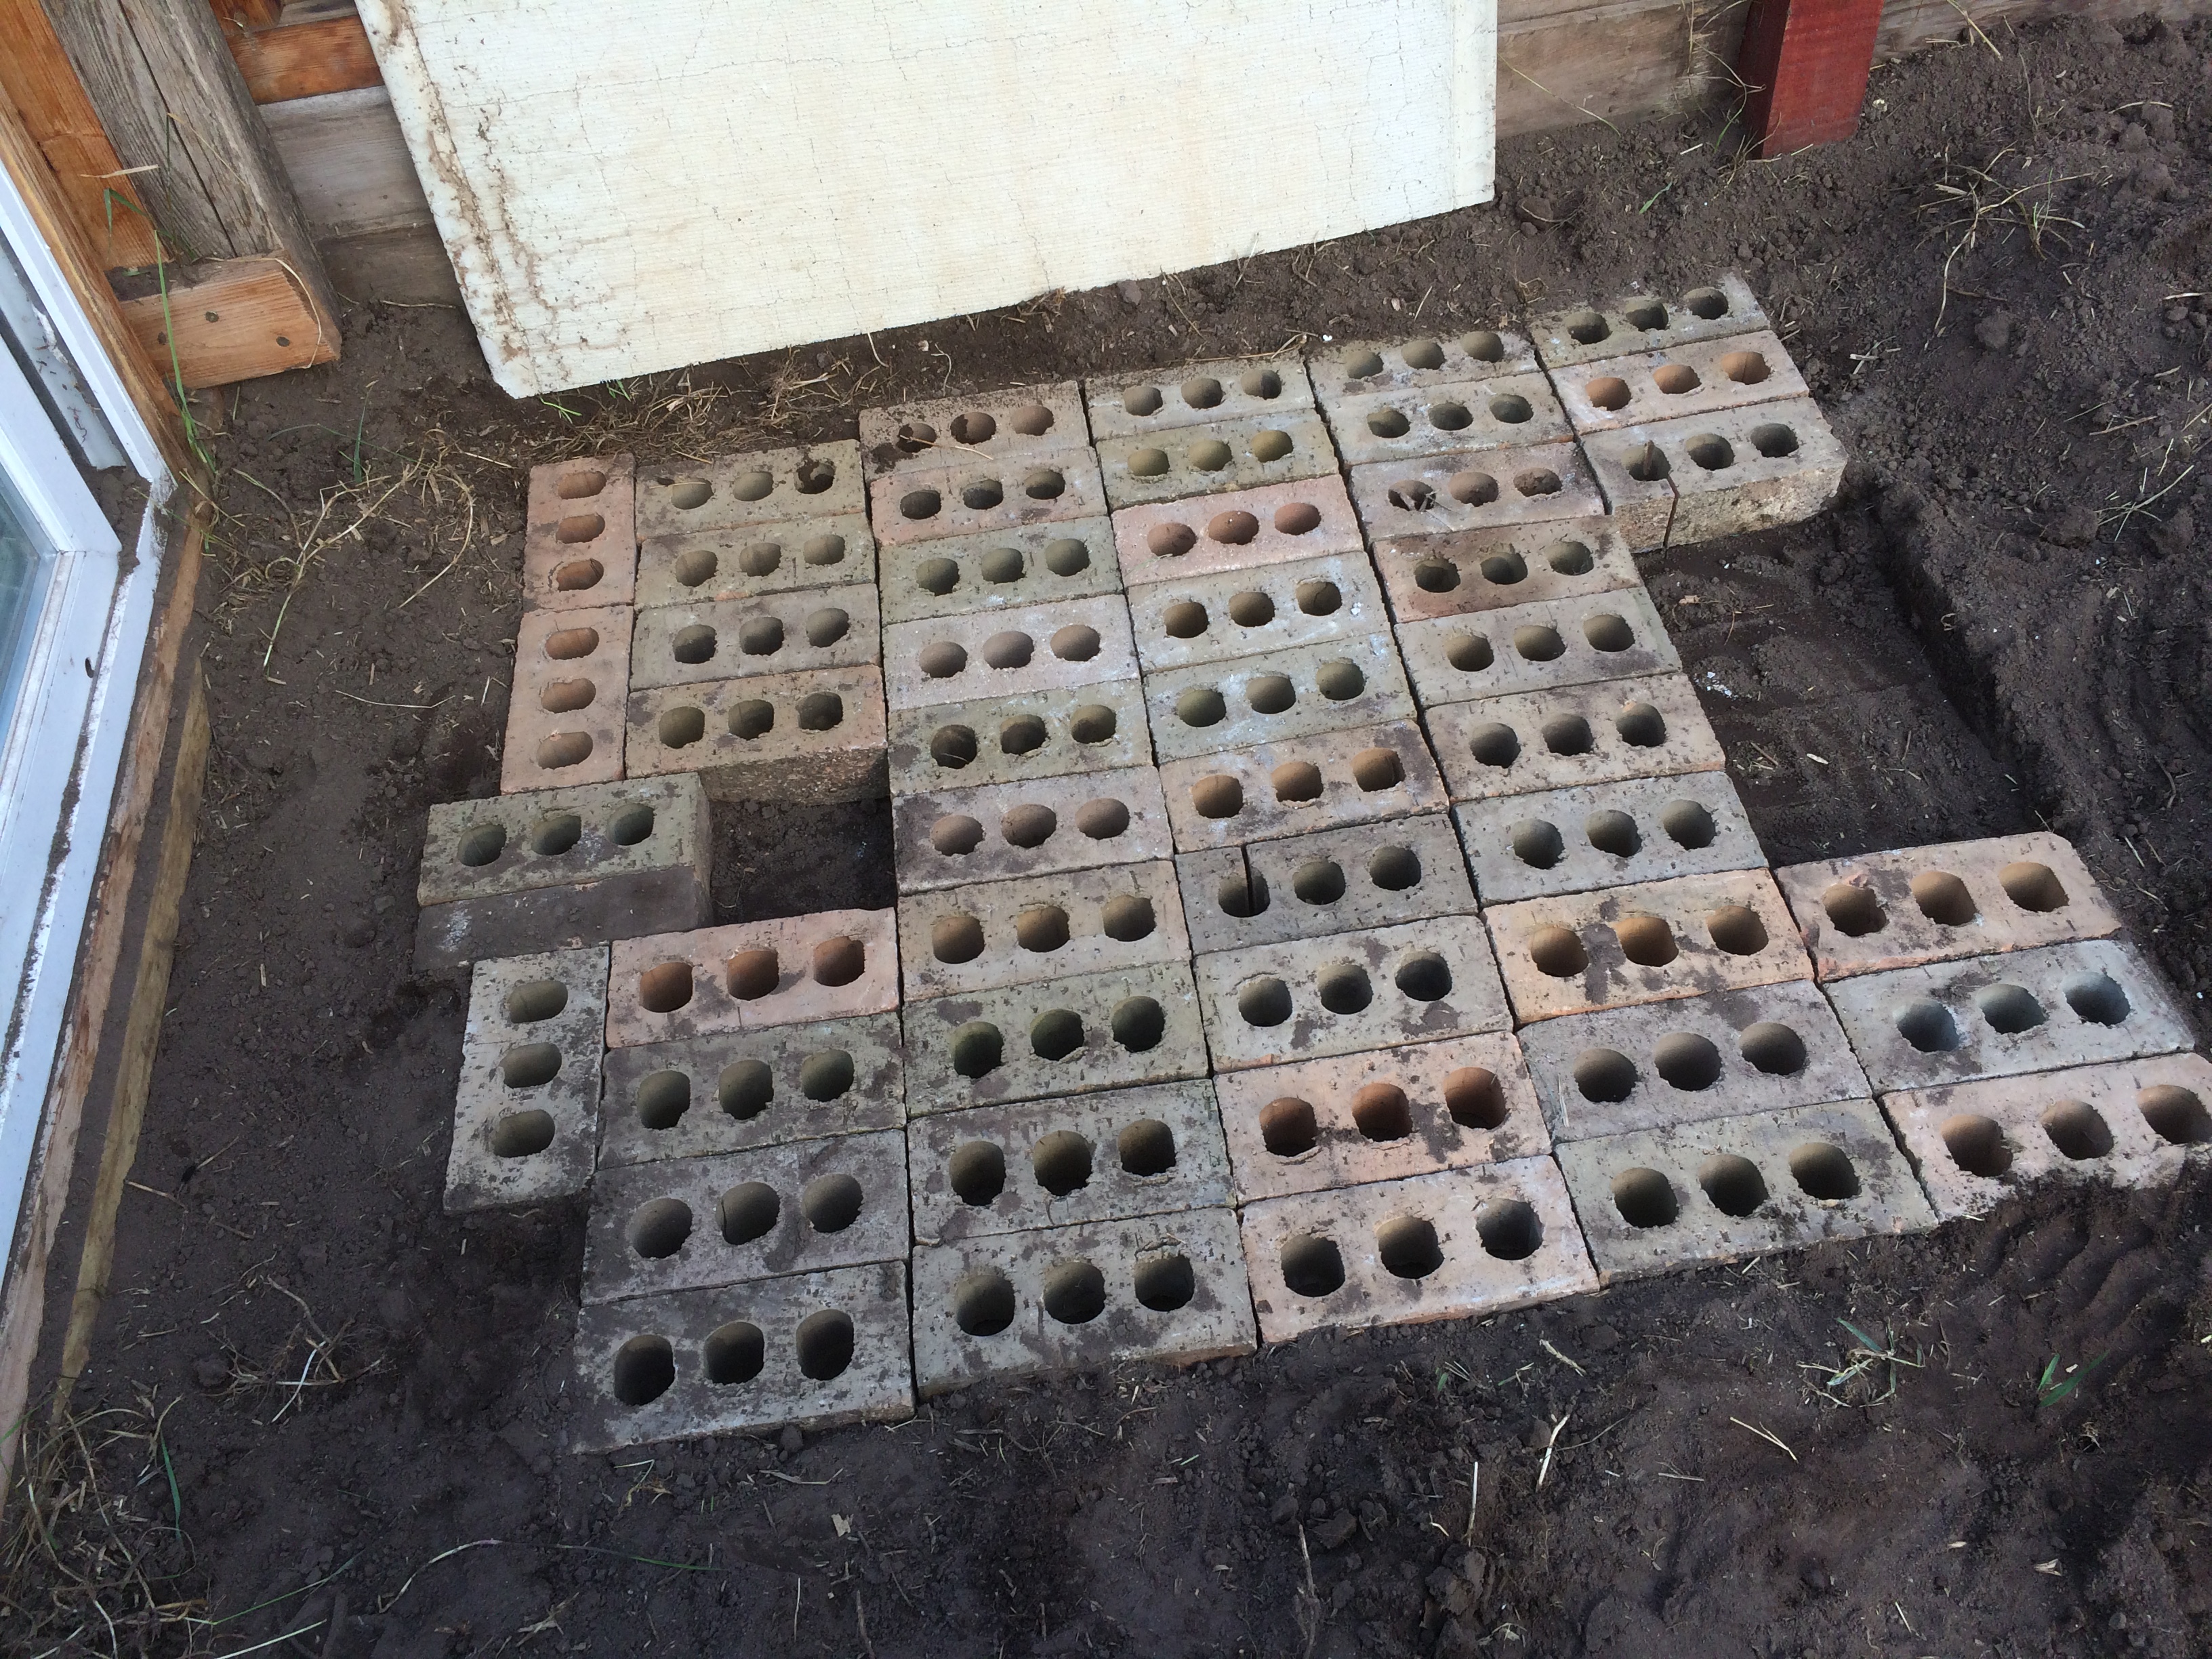
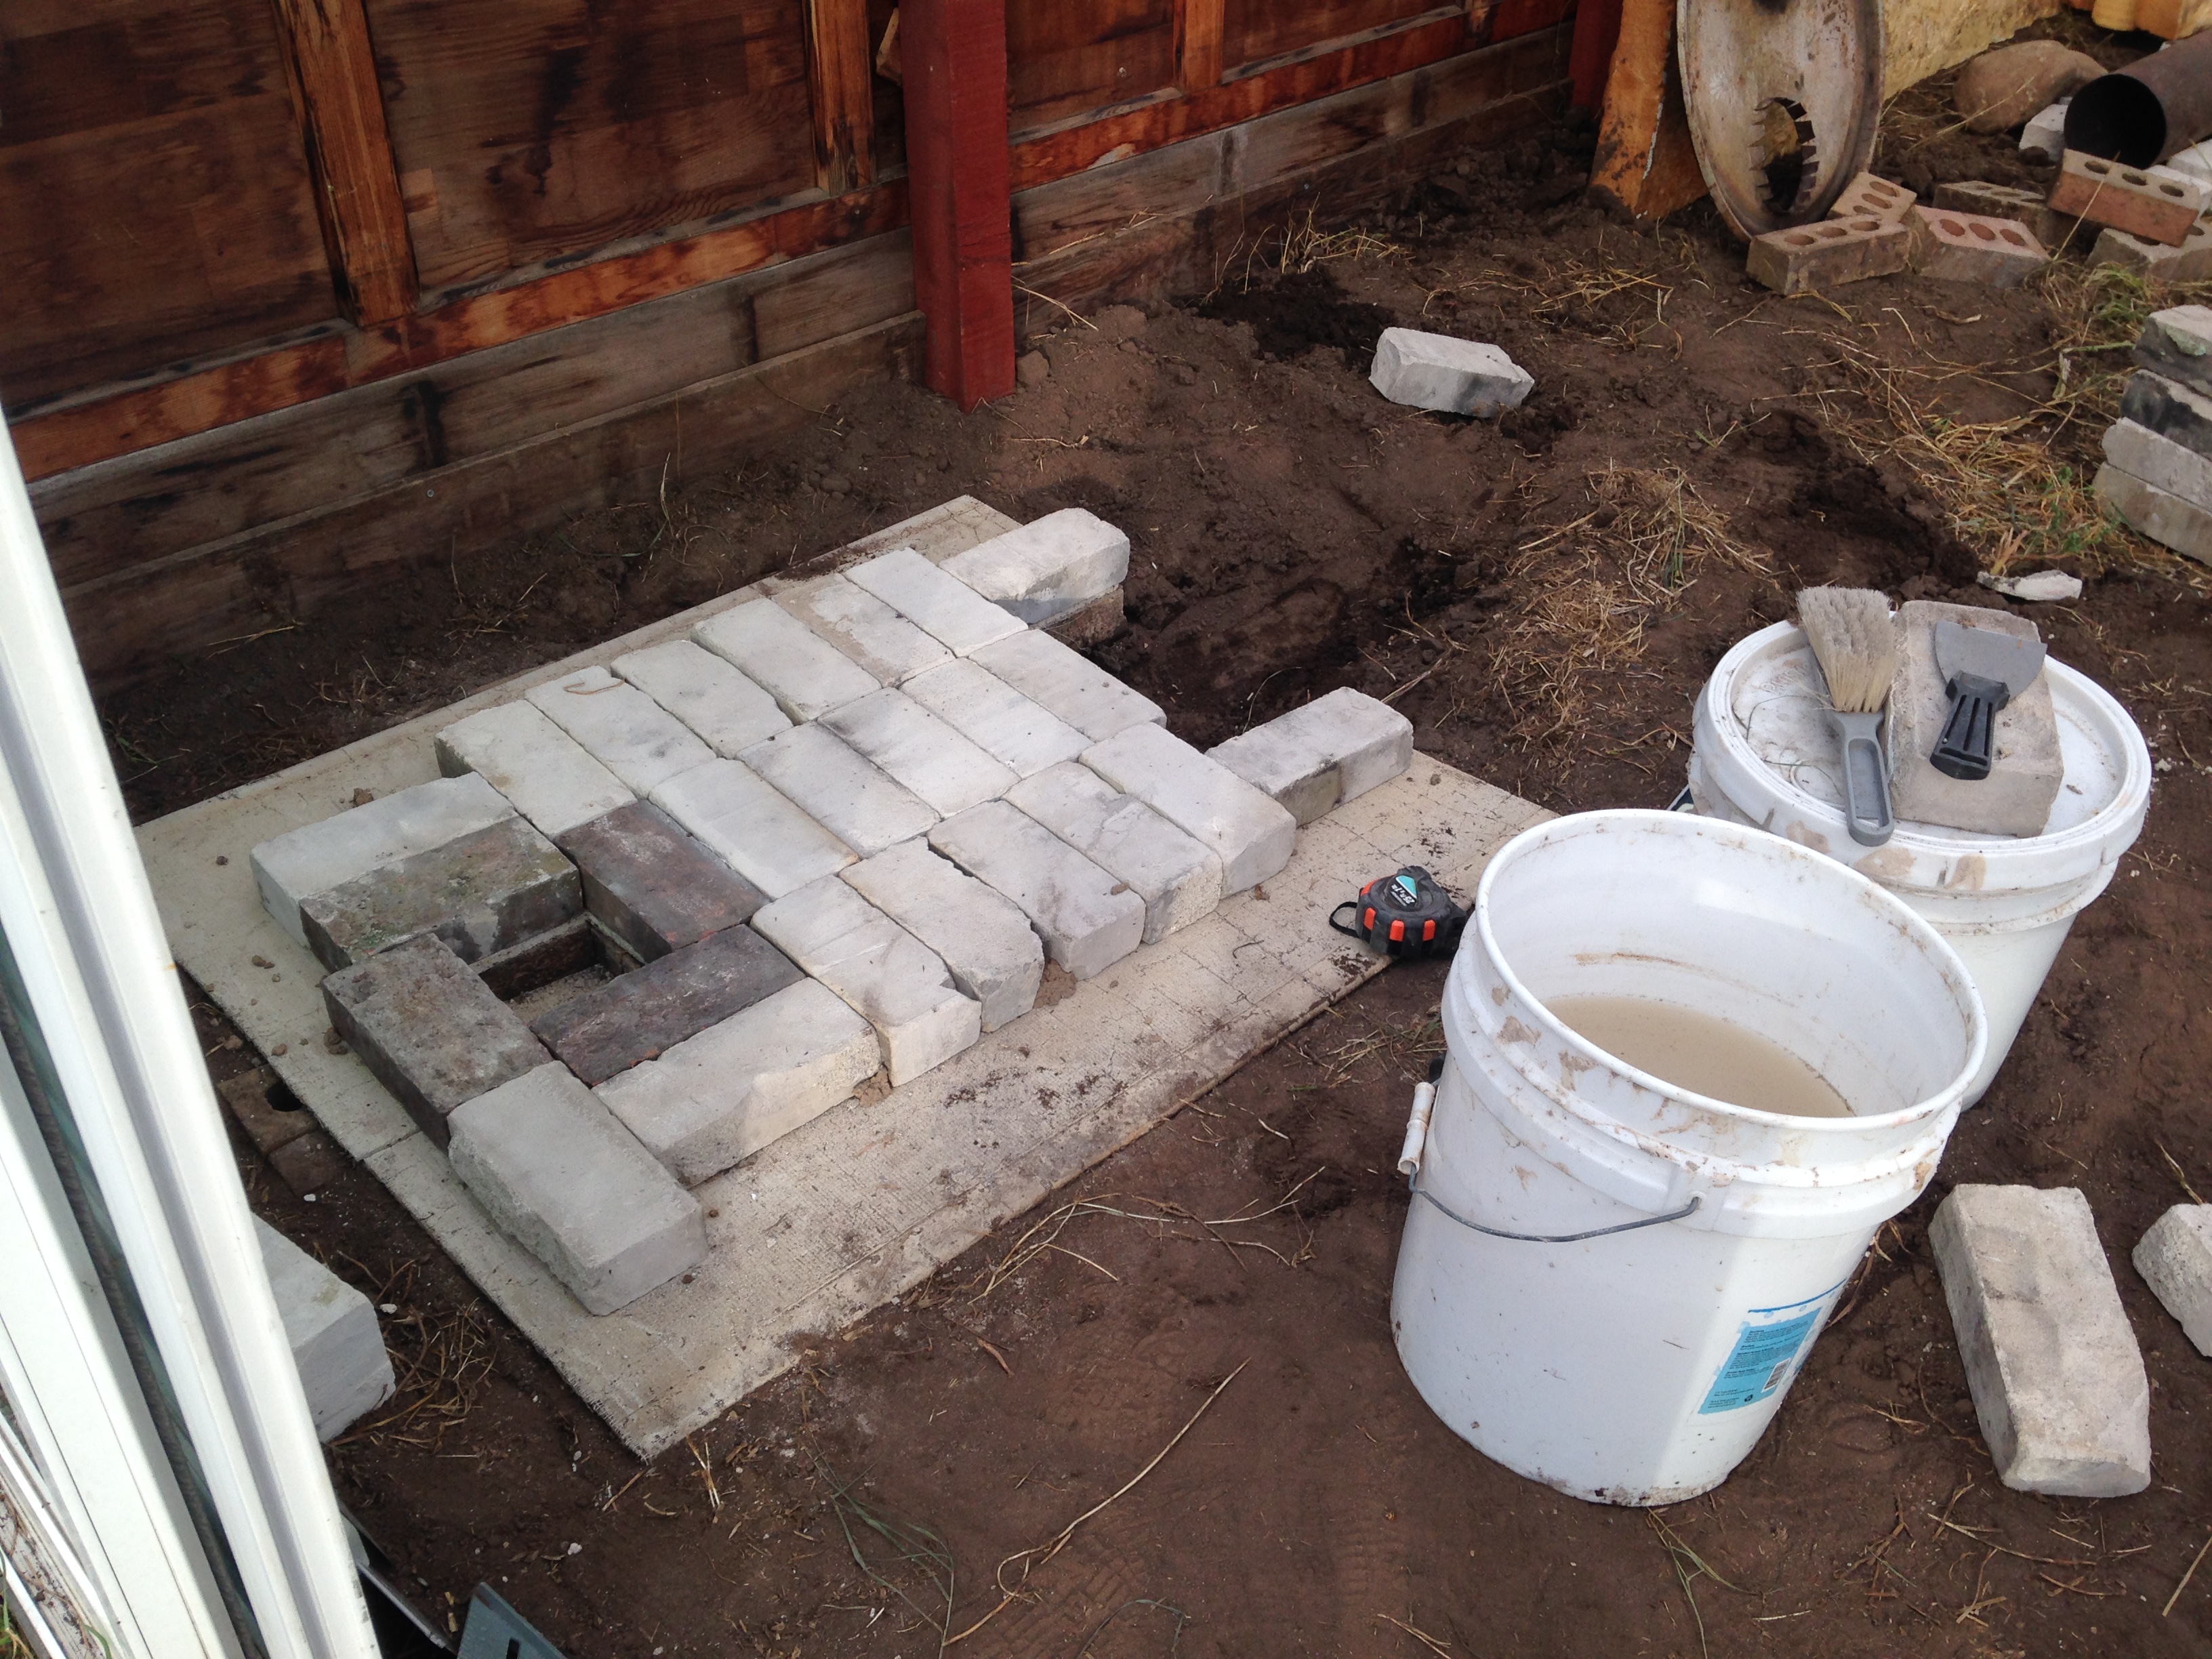
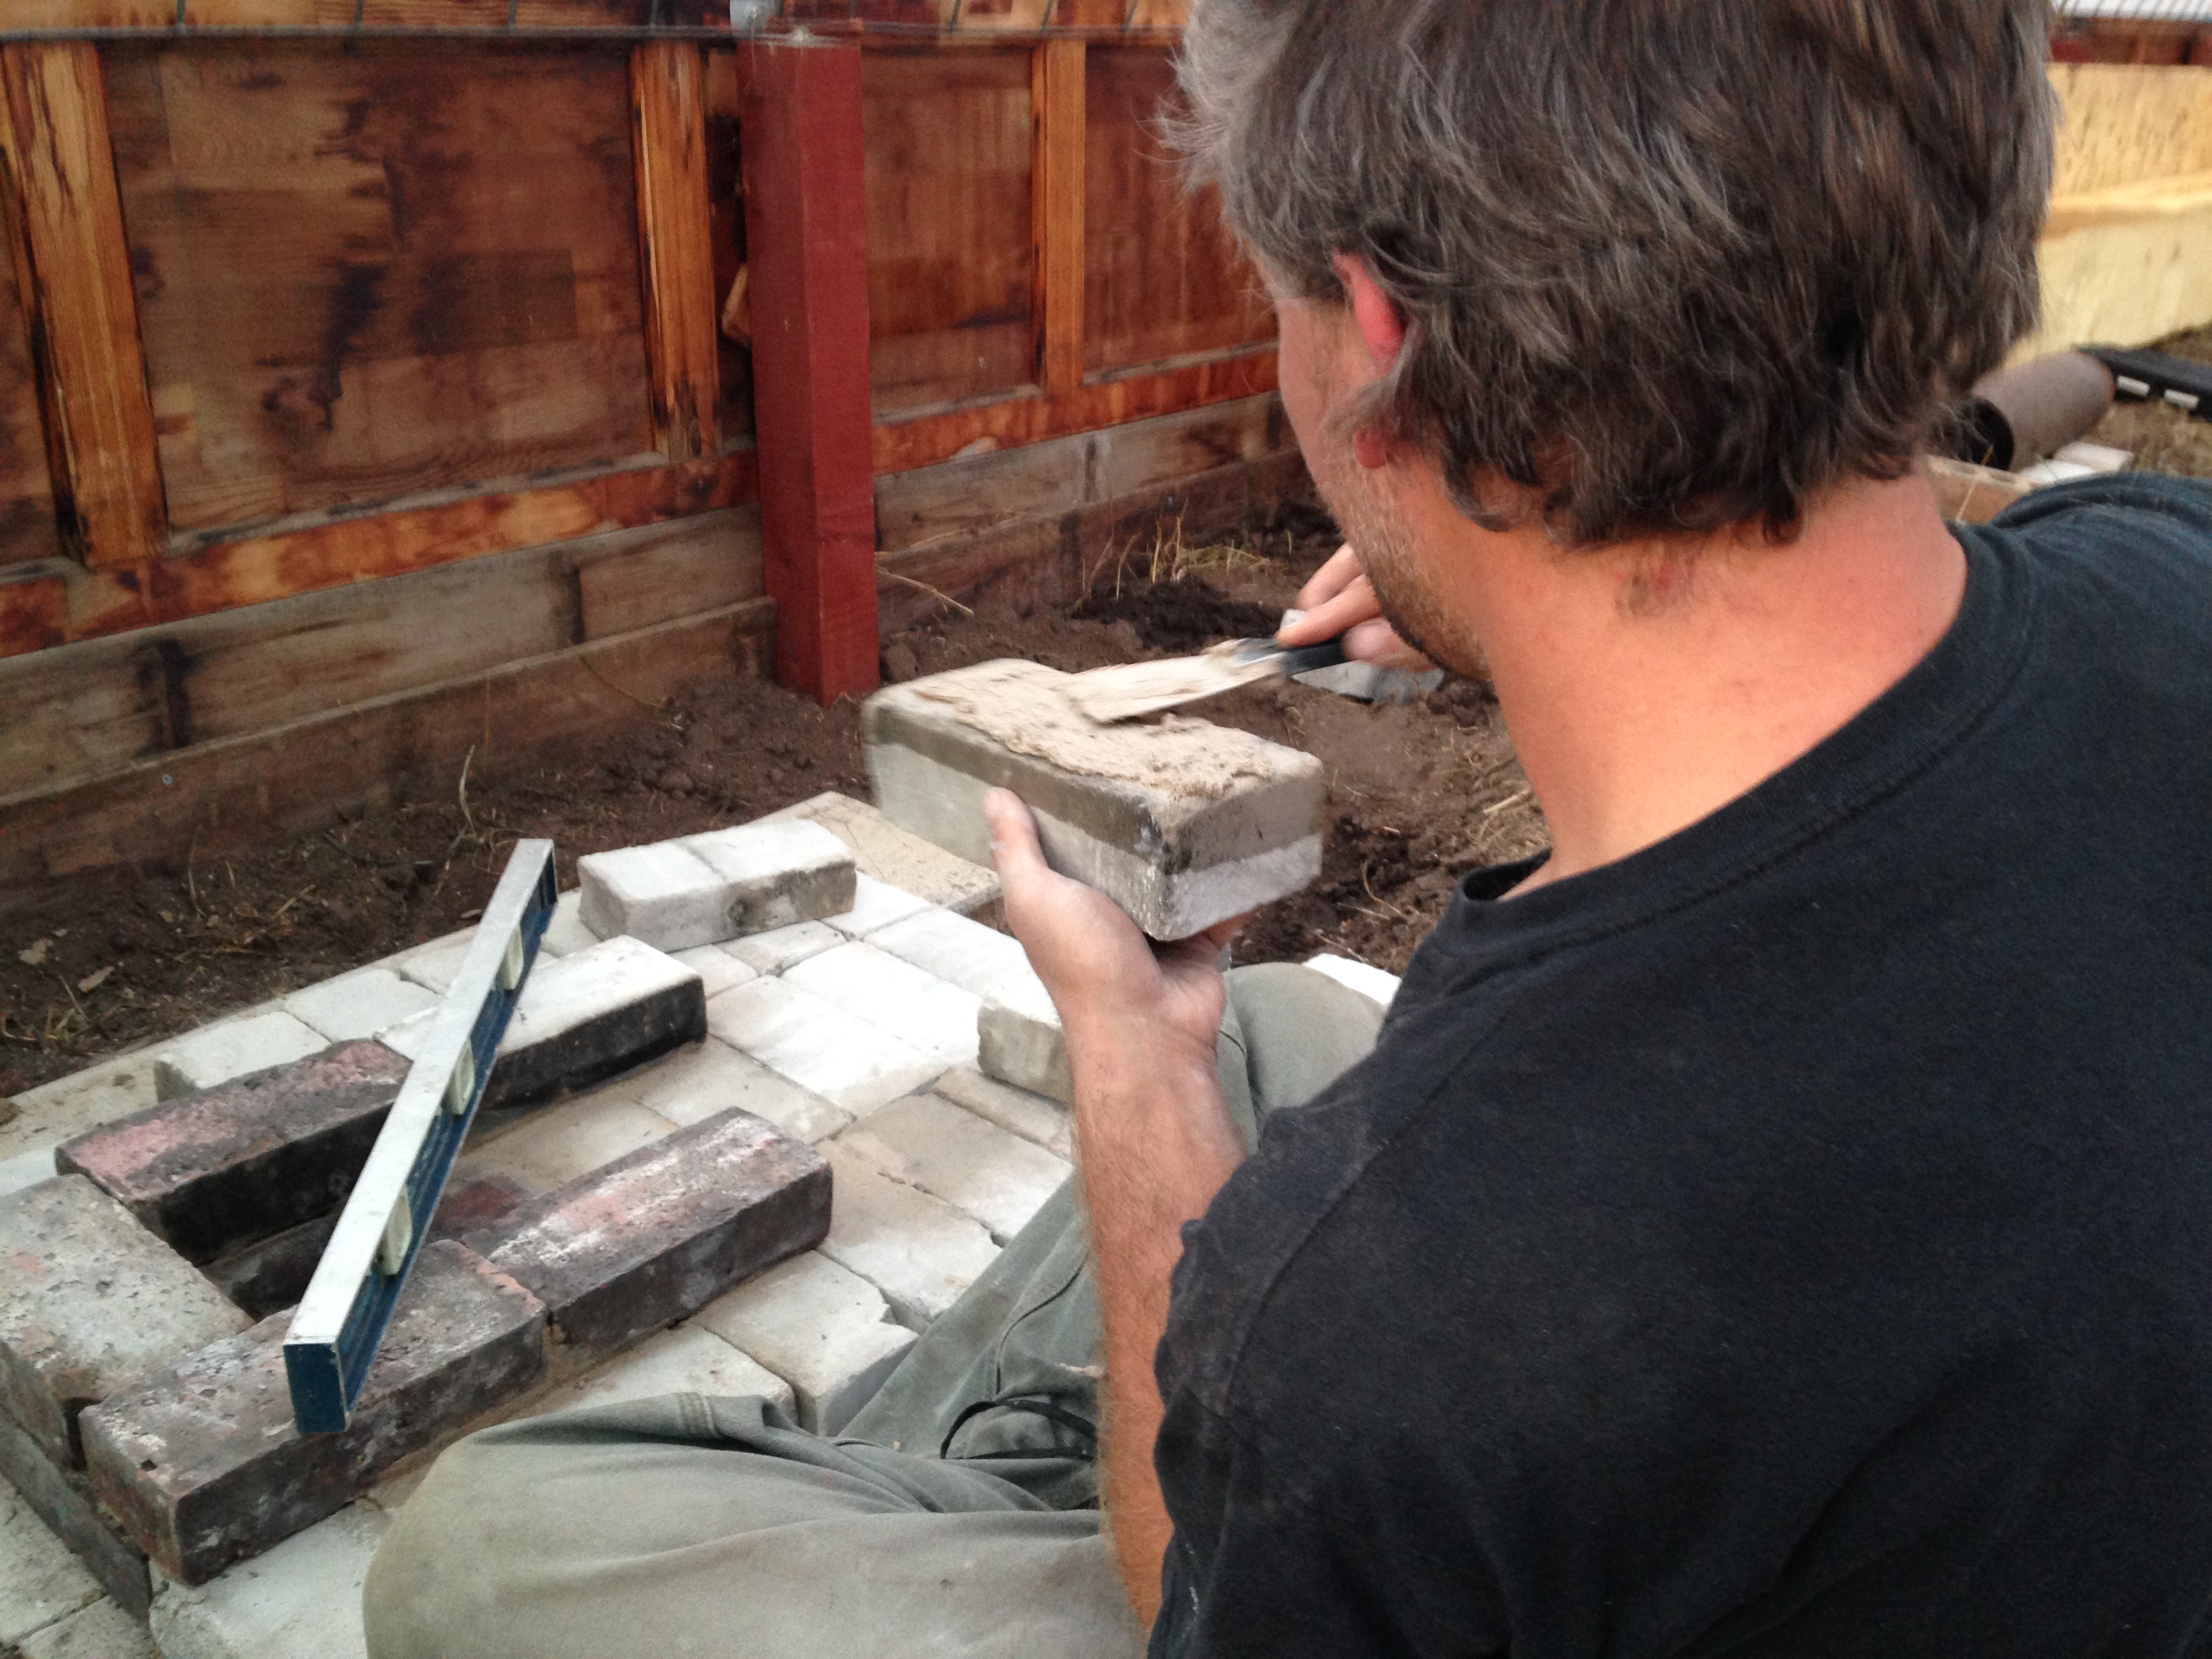
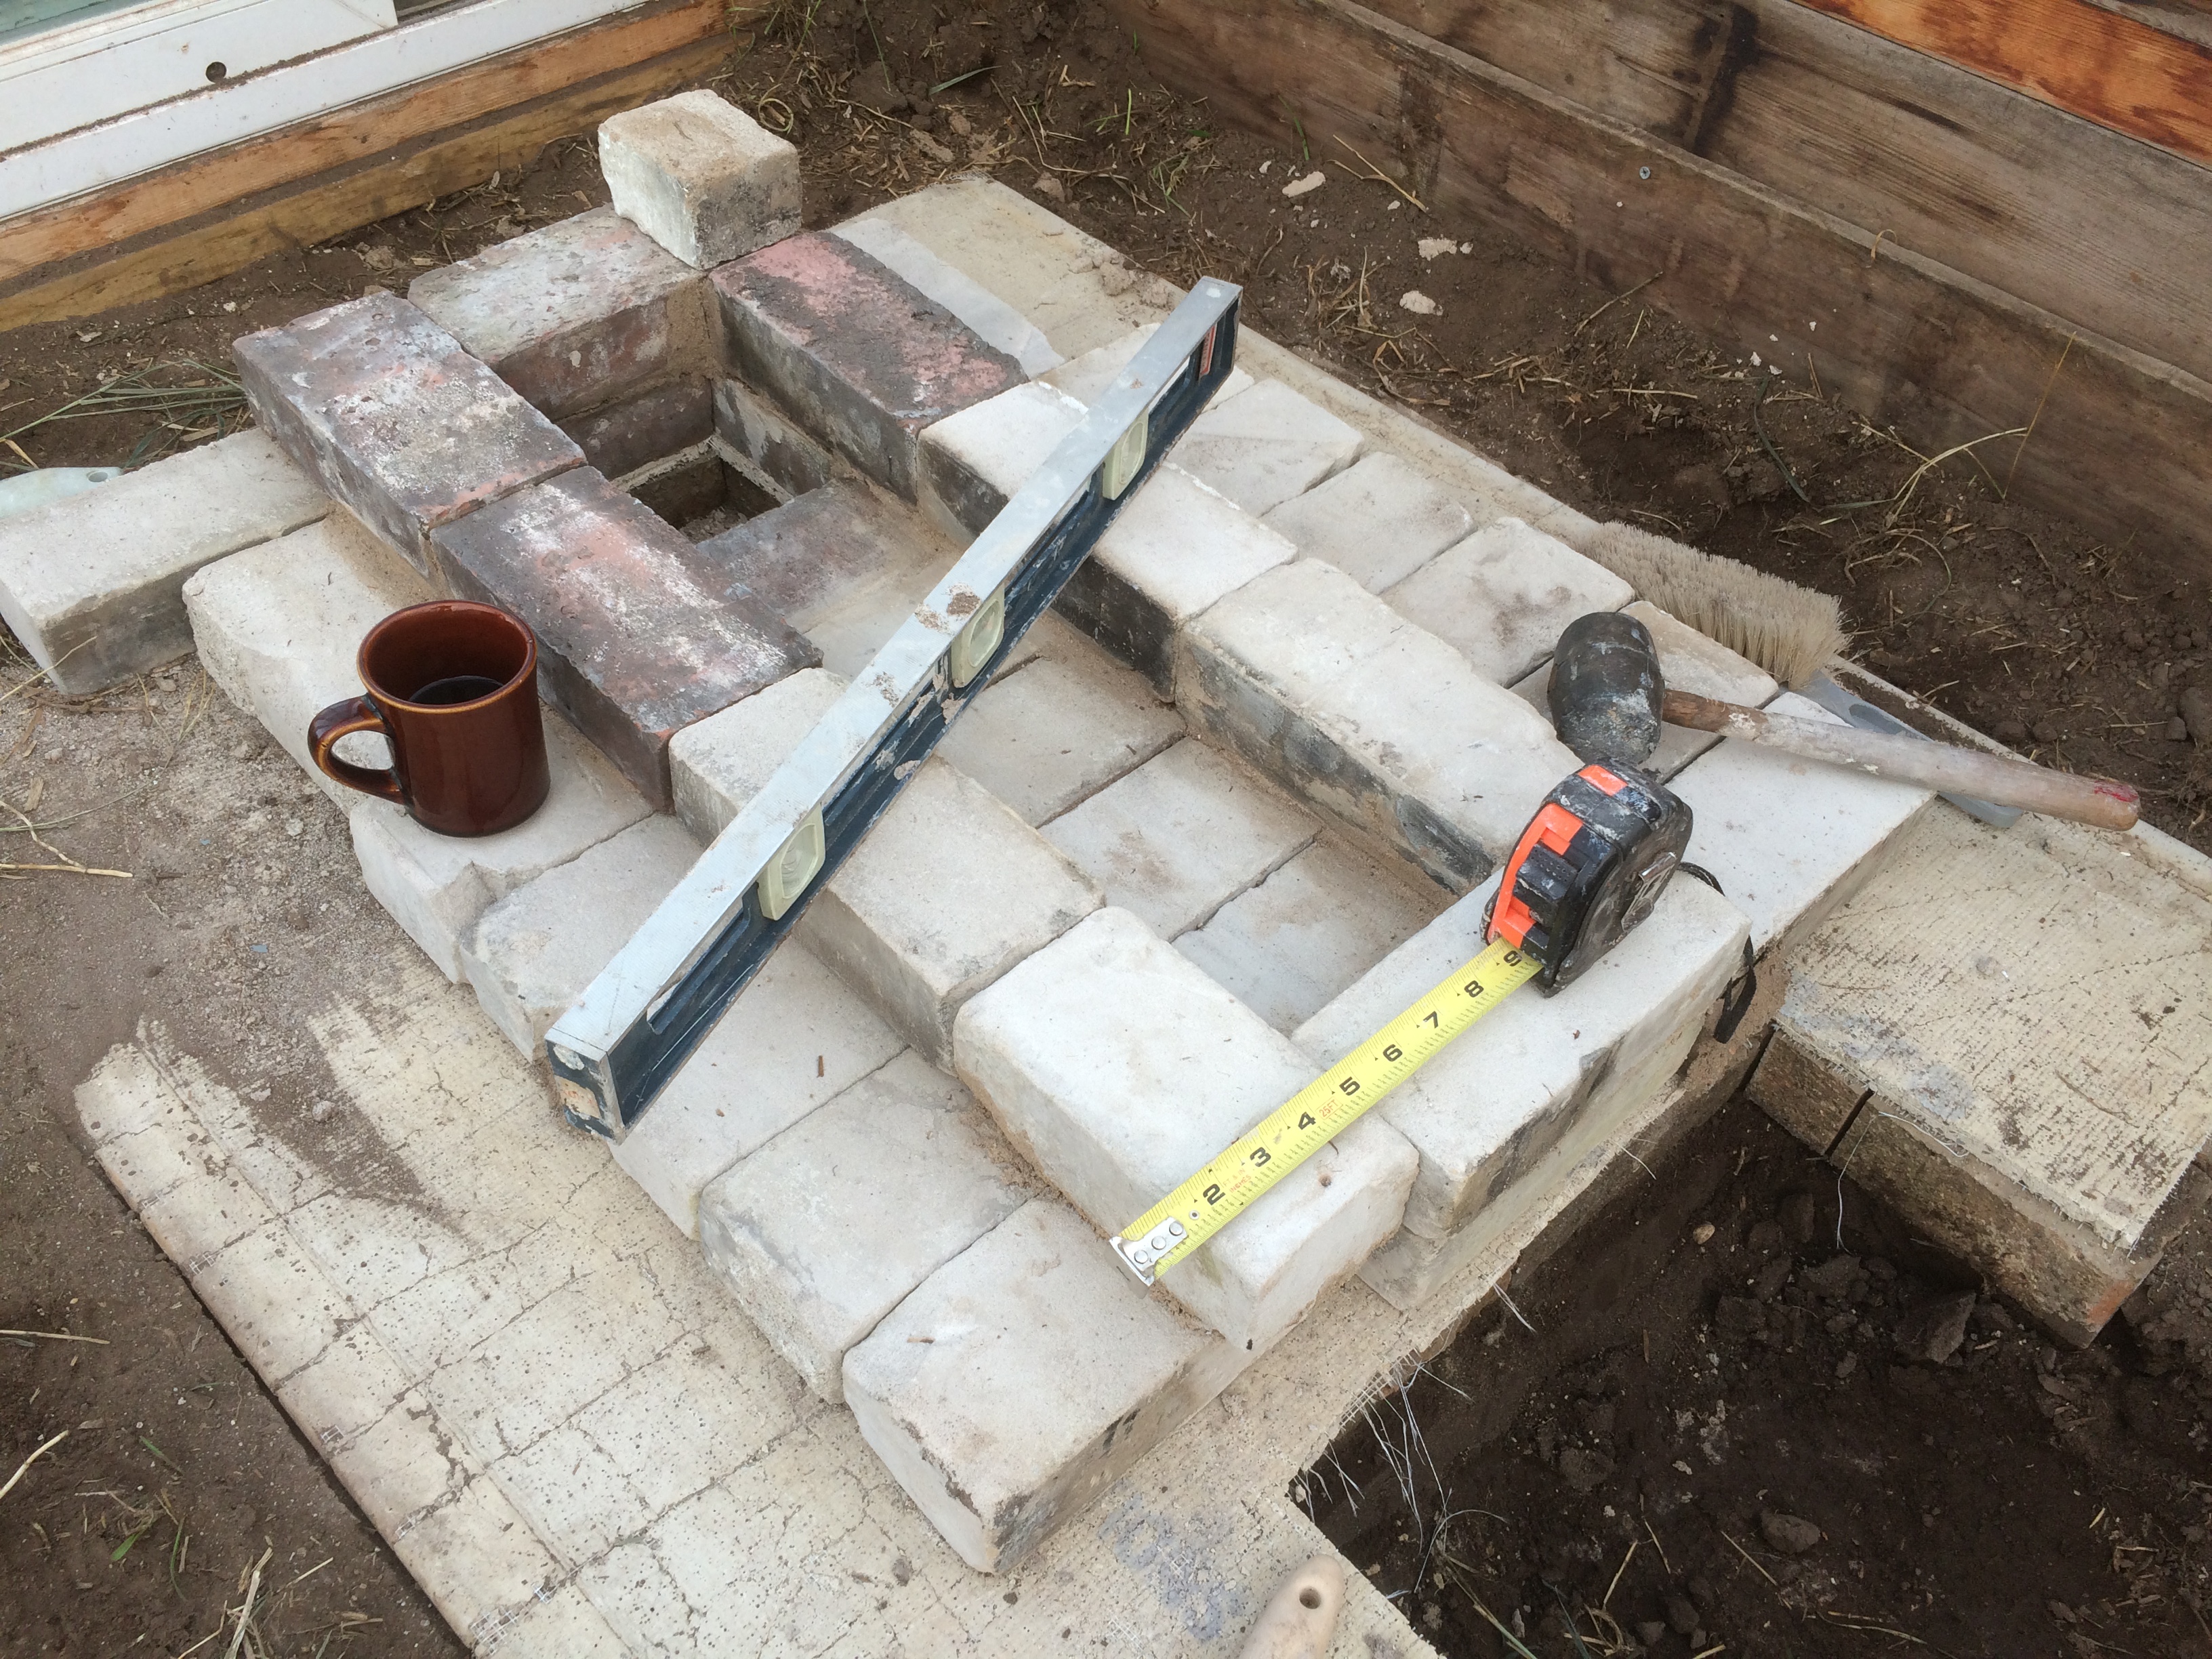
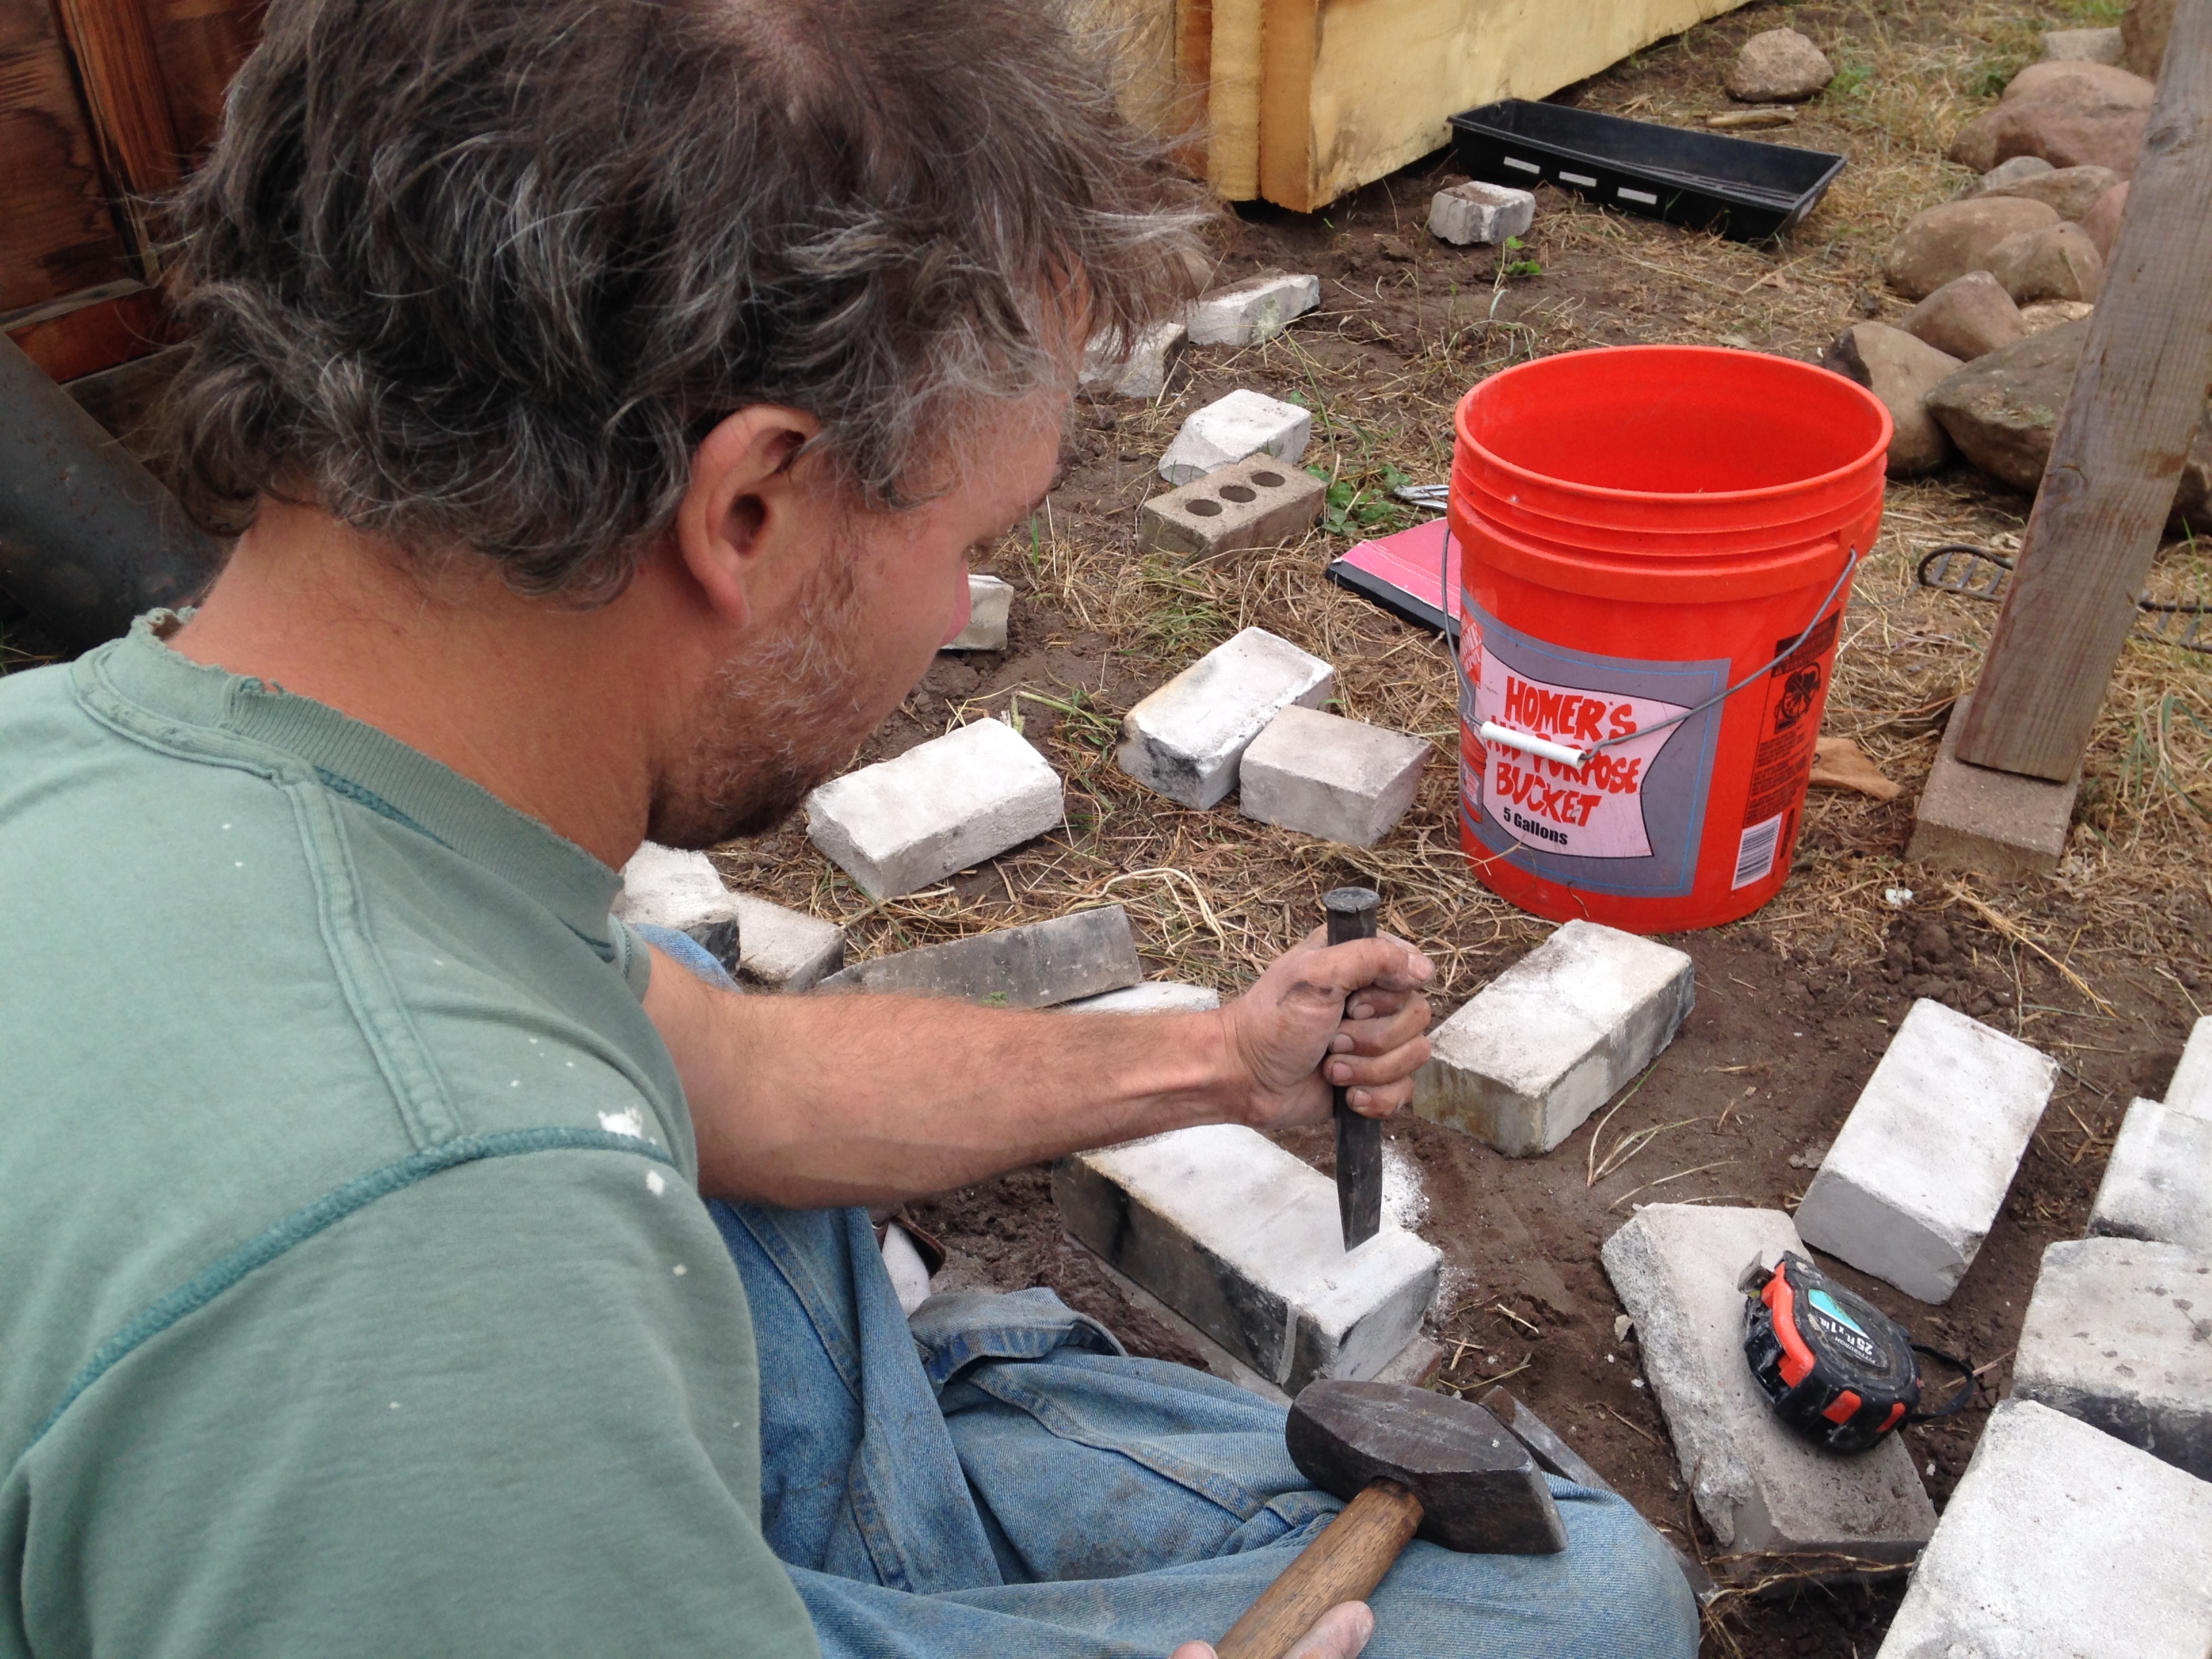
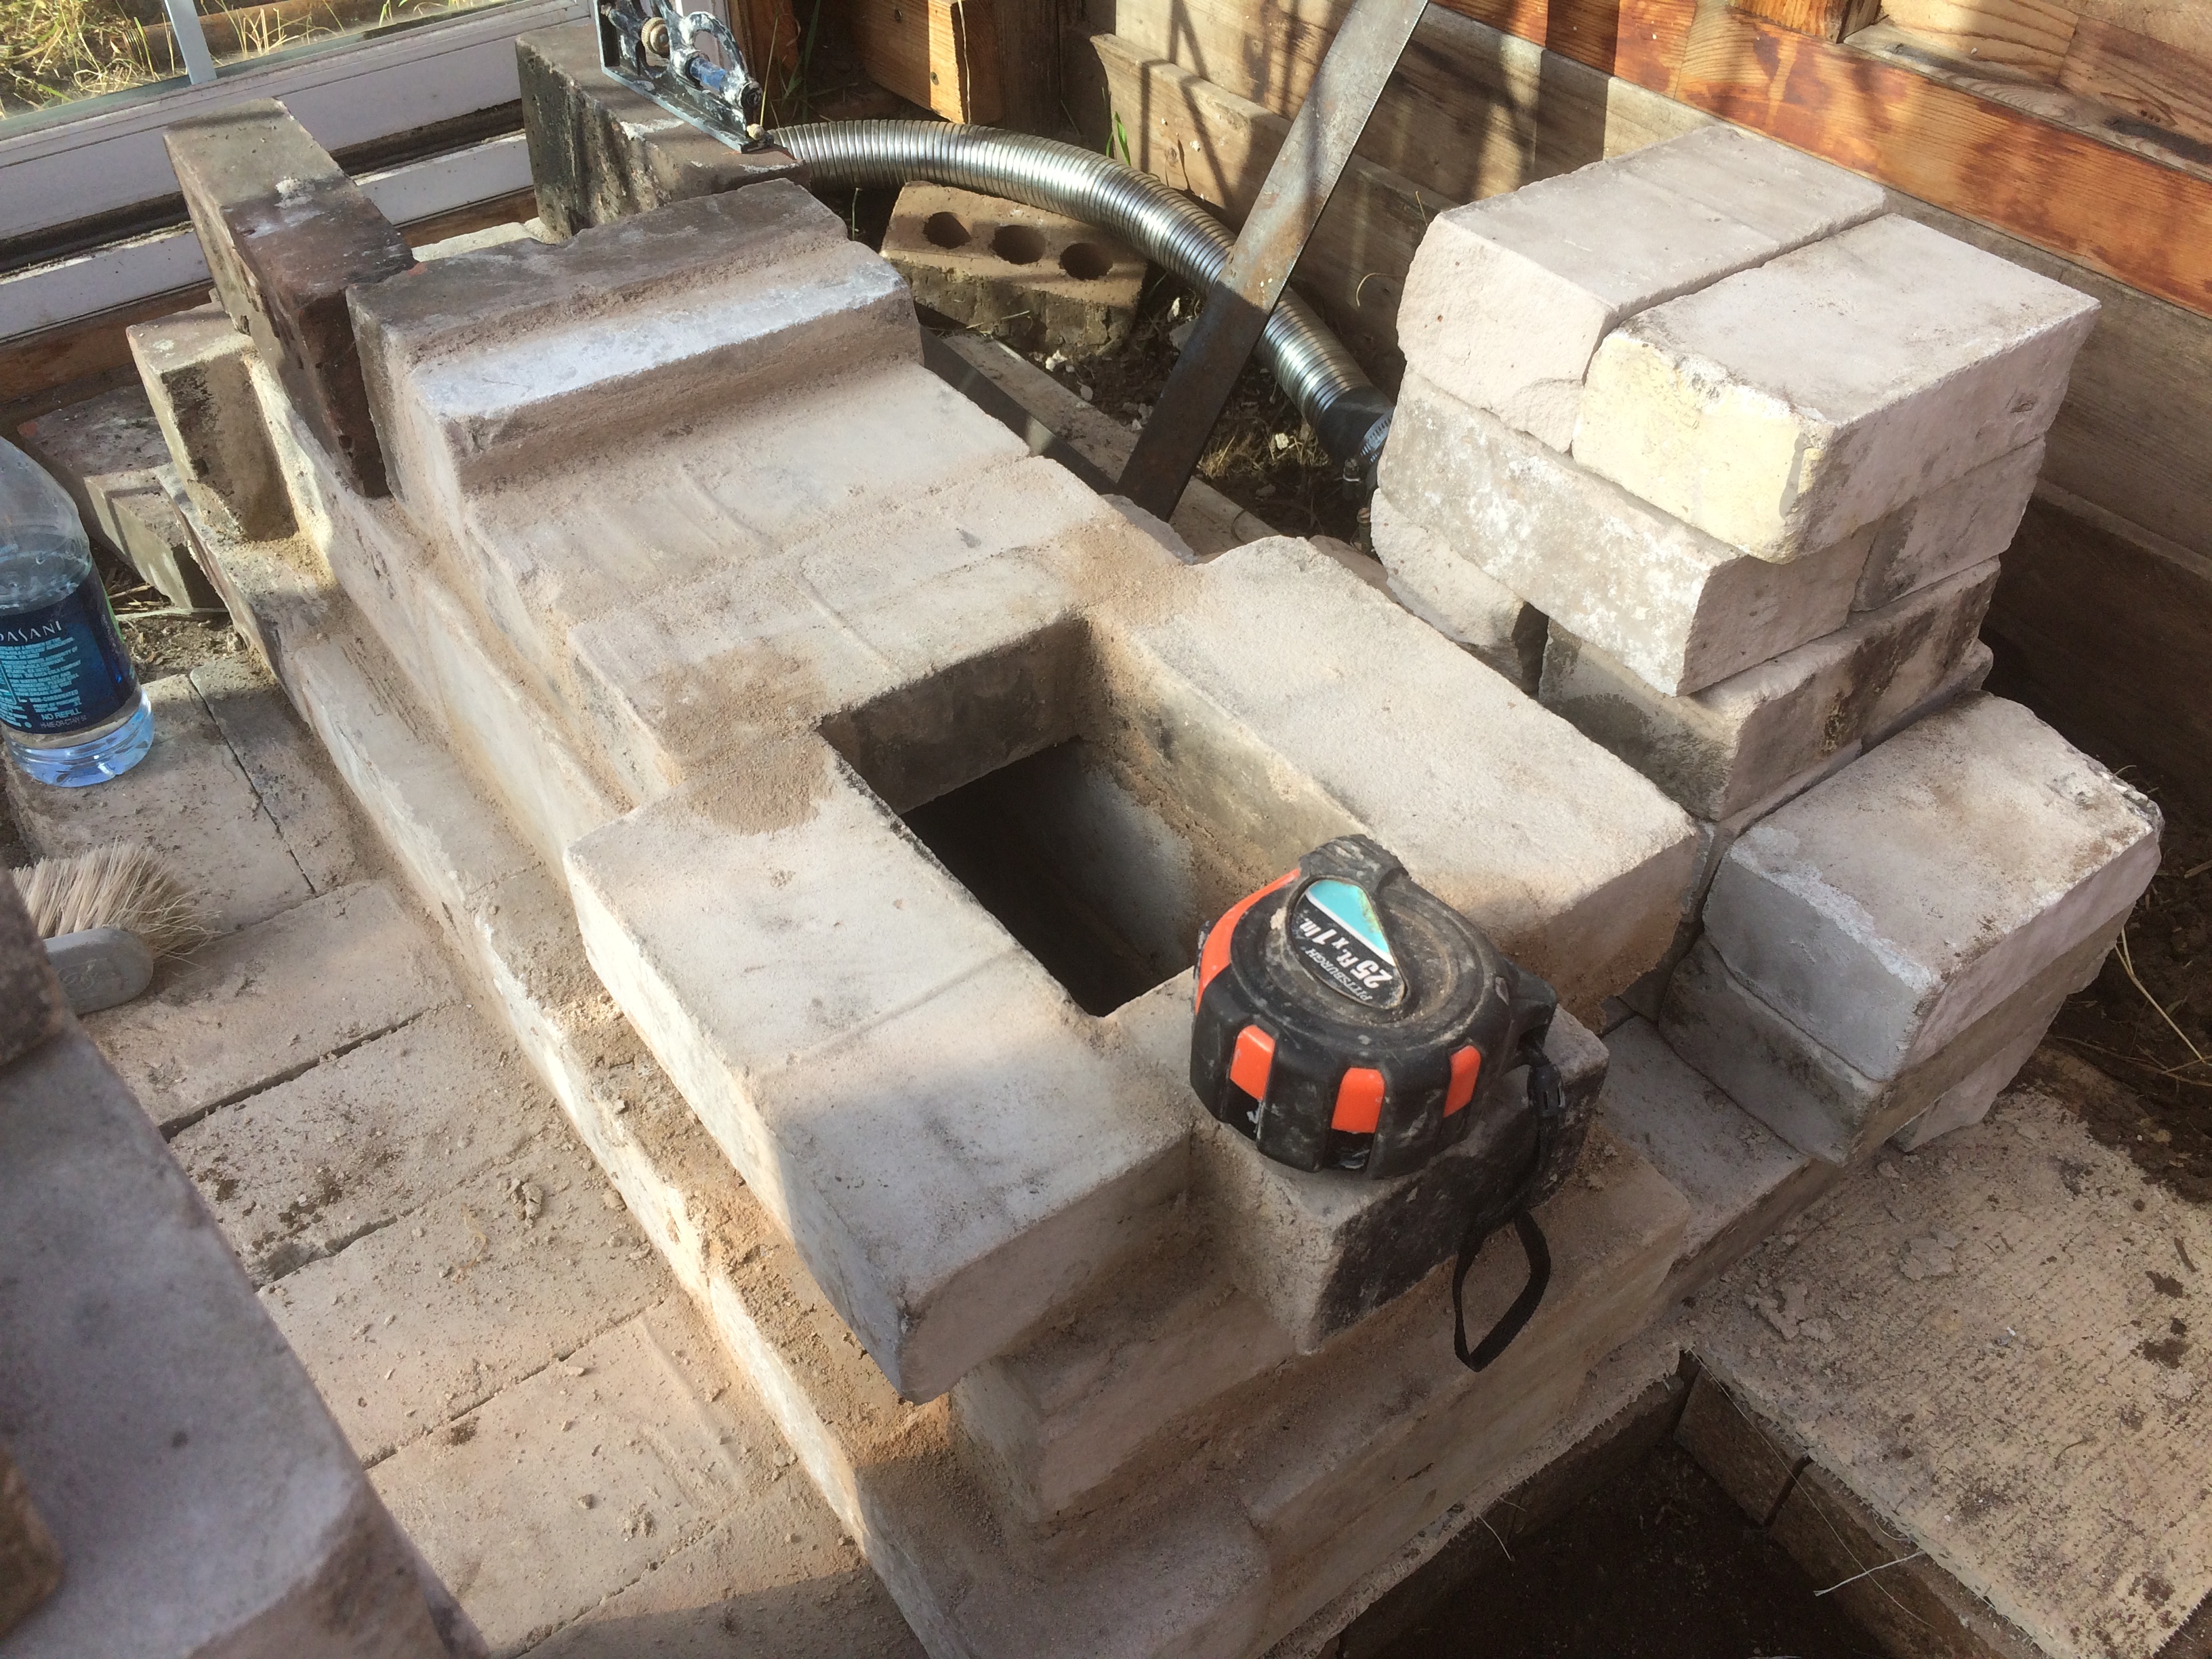
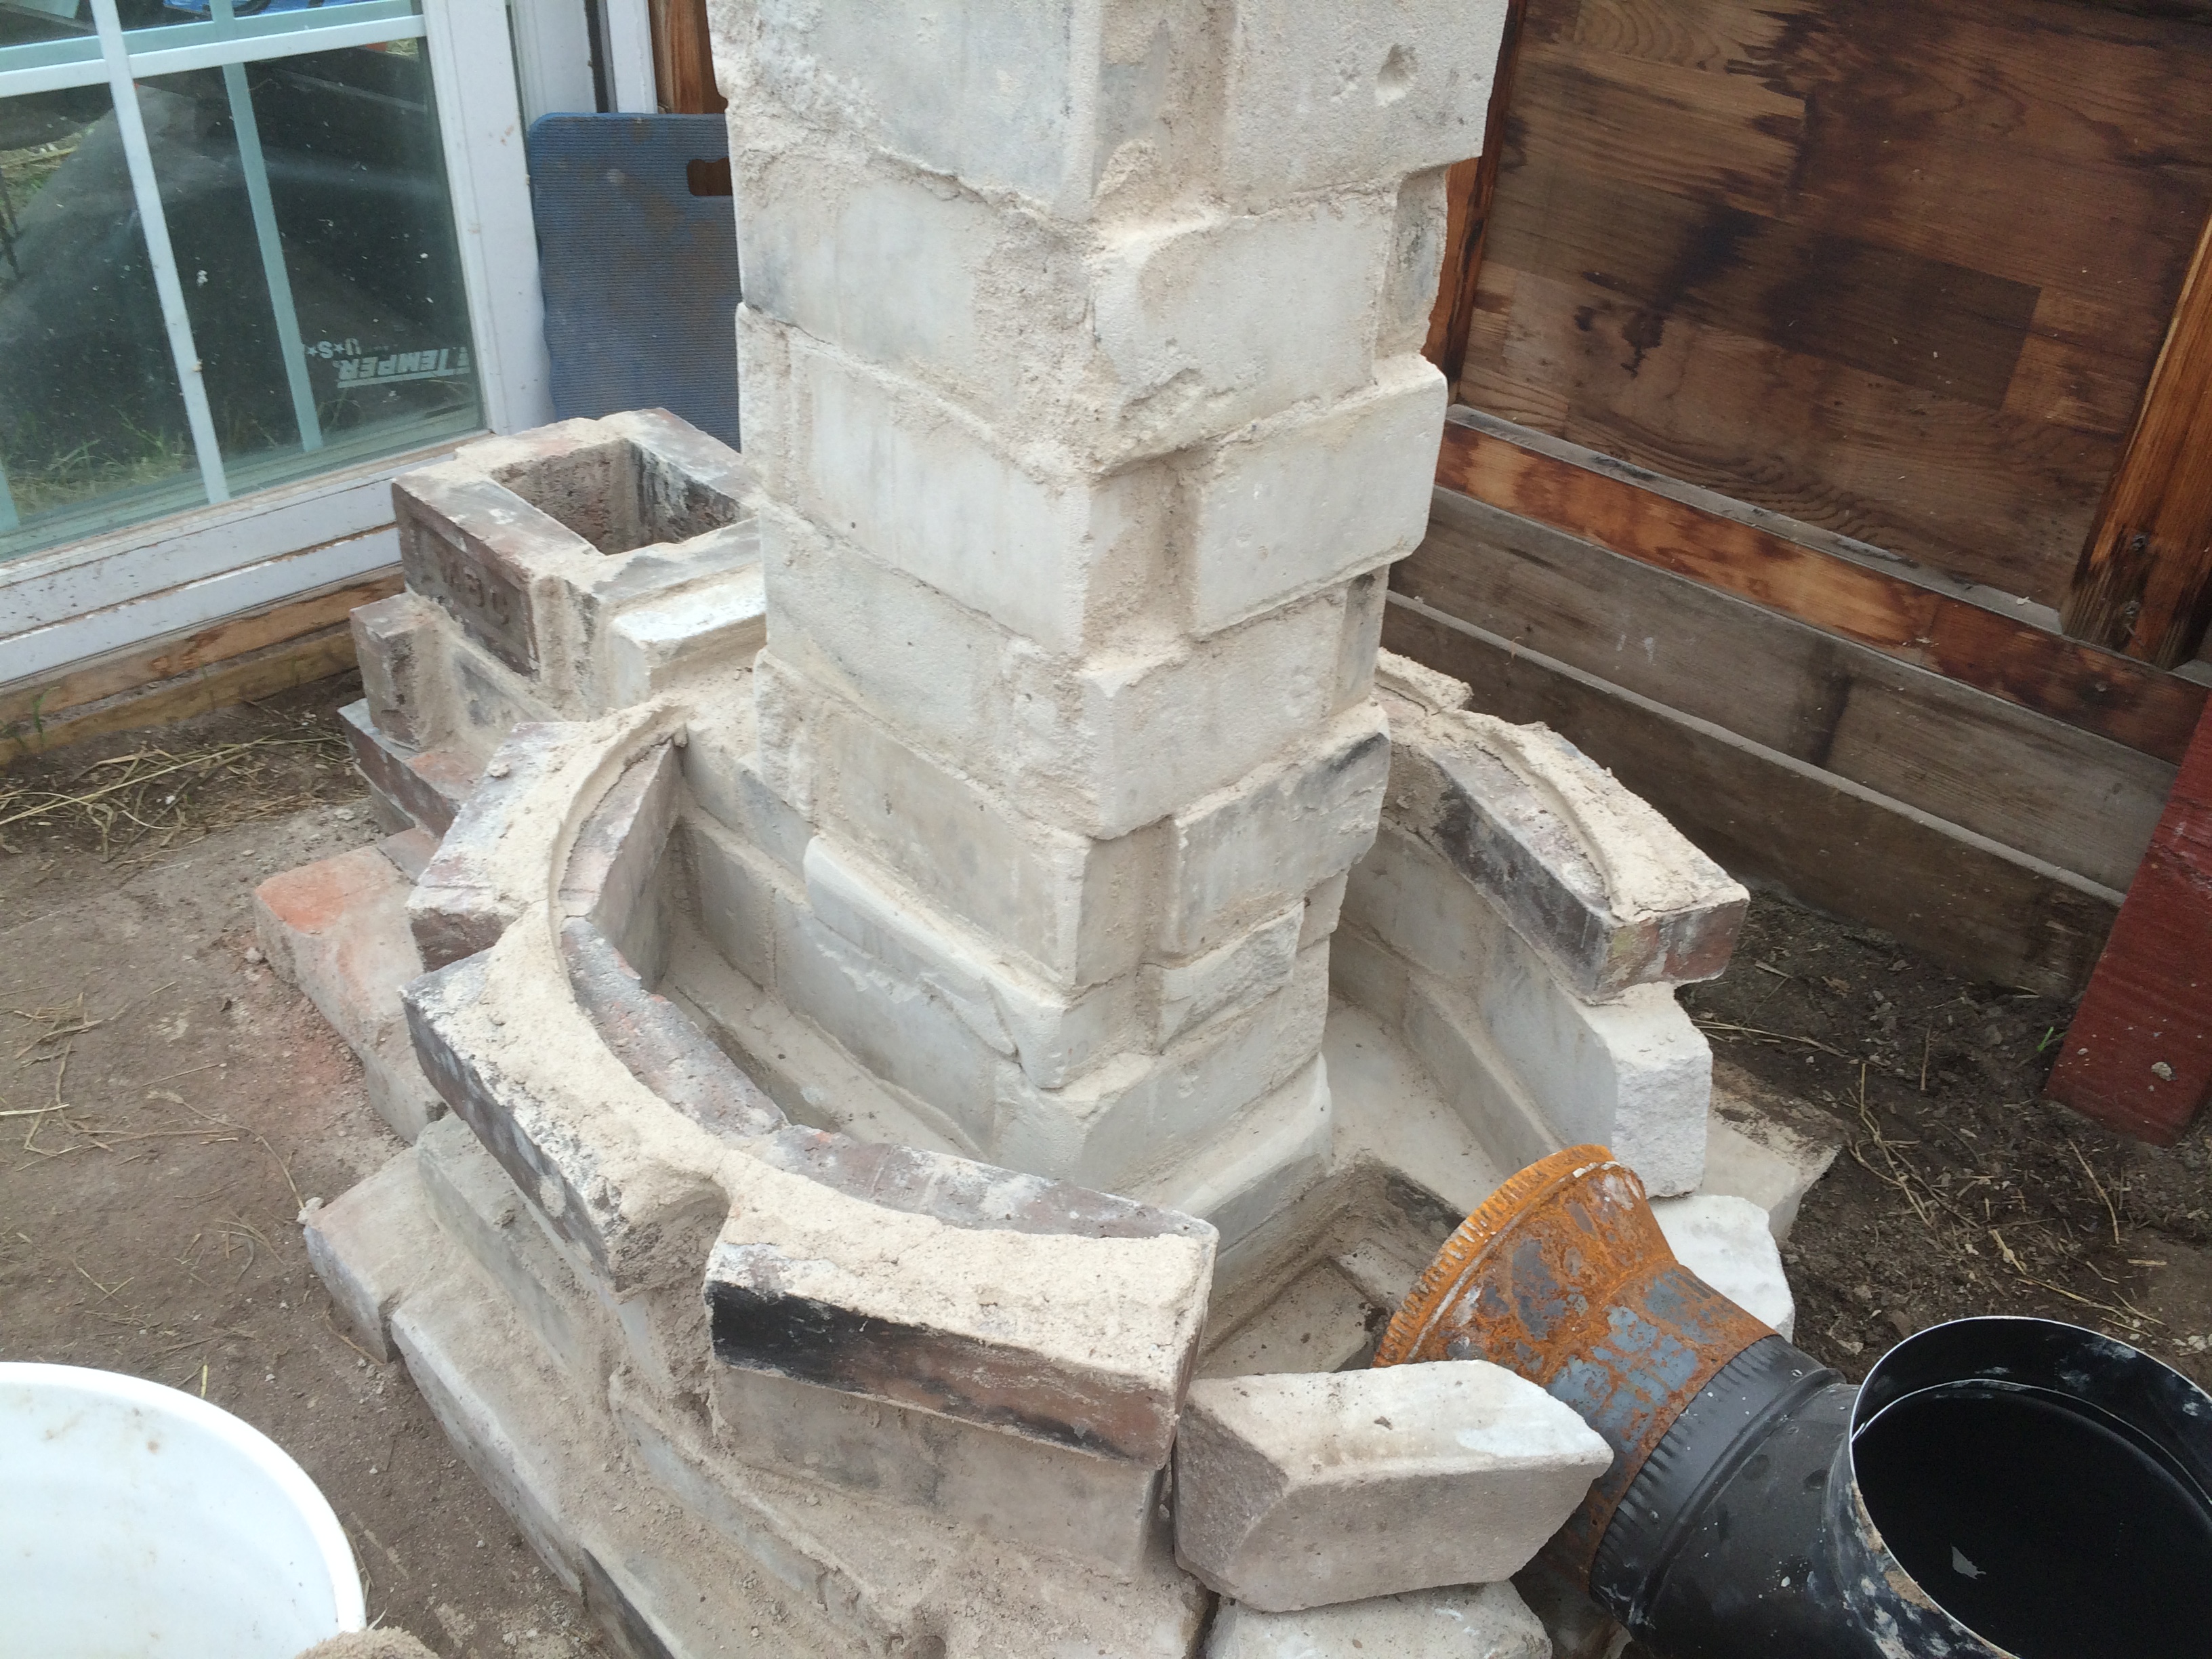
There was a long period of trying out different brick layouts – the proportions of the combustion chamber are crucial to get right – for the rest of the fall, “CSA” ceased to mean “Community Supported Agriculture,” and became ‘Cross Sectional Area” – the entire system had to maintain the same CSA throughout the system, from fuel feed to exhaust, from rectangular tunnels to round pipes. I won’t bore you with all of the proportional rules that had to be followed, but know there was a lot of subtle and annoying math at this stage.

an early mockup, seeing how tall the system would be - and how close we could put it to the curving north all of the greenhouse. (The original plan was for a 8" pipe system, although we switch to a 6" design before building)
an early mockup, seeing how tall the system would be – and how close we could put it to the curving north all of the greenhouse. (The original plan was for a 8″ pipe system, although we switched to a 6″ design before building)


creating a lid for a "pocket rocket" - a way to create intense fire that would burn the paint off the 55-gallon drum
creating a lid for a “pocket rocket” – a way to create intense fire that would burn the paint off the 55-gallon drum
burning the paint off of the 55 gallon drum - so it wouldn't create toxic fumes in the greenhouse later
burning the paint off of the 55 gallon drum – so it wouldn’t create toxic fumes in the greenhouse later
early layout with the larger pipes - determining how many rocks we'd want, how wide it should be for the seed trays, and how deep we'd want to make it,
early layout with the larger pipes – determining how many rocks we’d want, how wide it should be for the seed trays, and how deep we’d want to make it,
The WWOOFers joked about me playing with my blocks - I had bricks in the trailer that I'd use to try out different configurations for the heat riser ... on edge? flat? how much space inside? It was a lot more complex than I'd thought it would be ...
The WWOOFers joked about me playing with my blocks – I had bricks in the trailer that I’d use to try out different configurations for the heat riser … on edge? flat? how much space inside? It was a lot more complex than I’d thought it would be …
even in bed it was rocket heater worktime


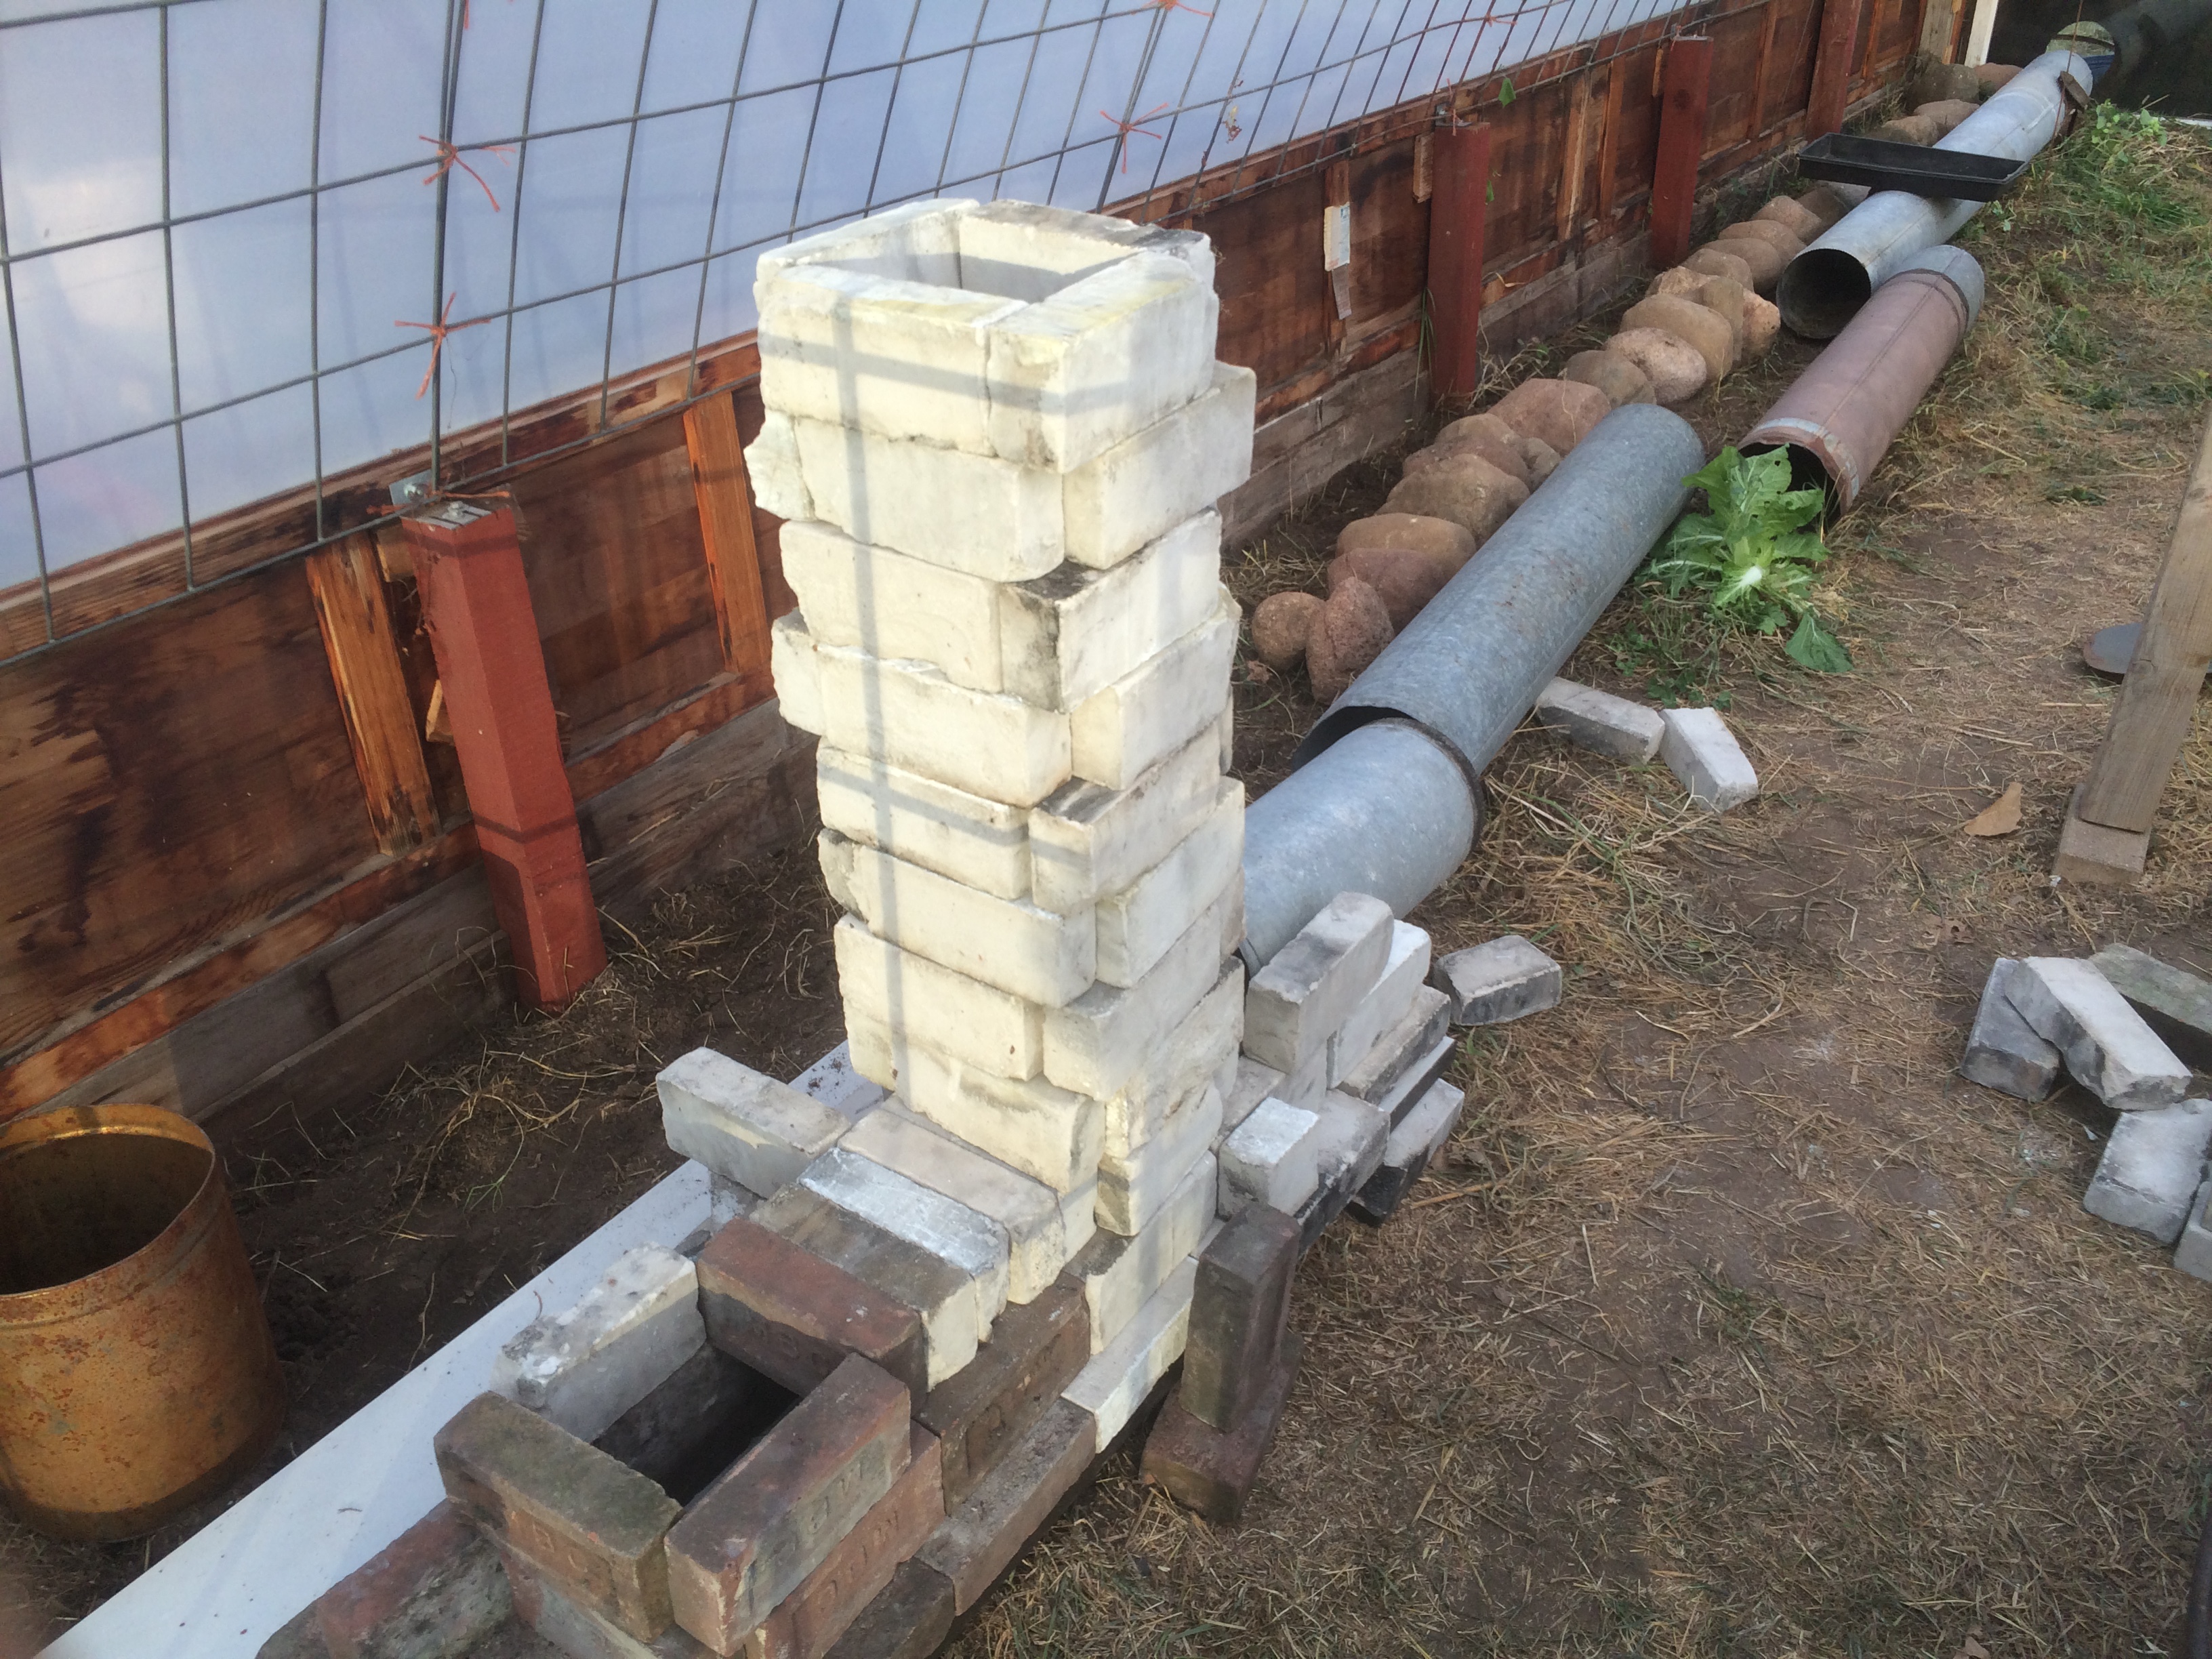
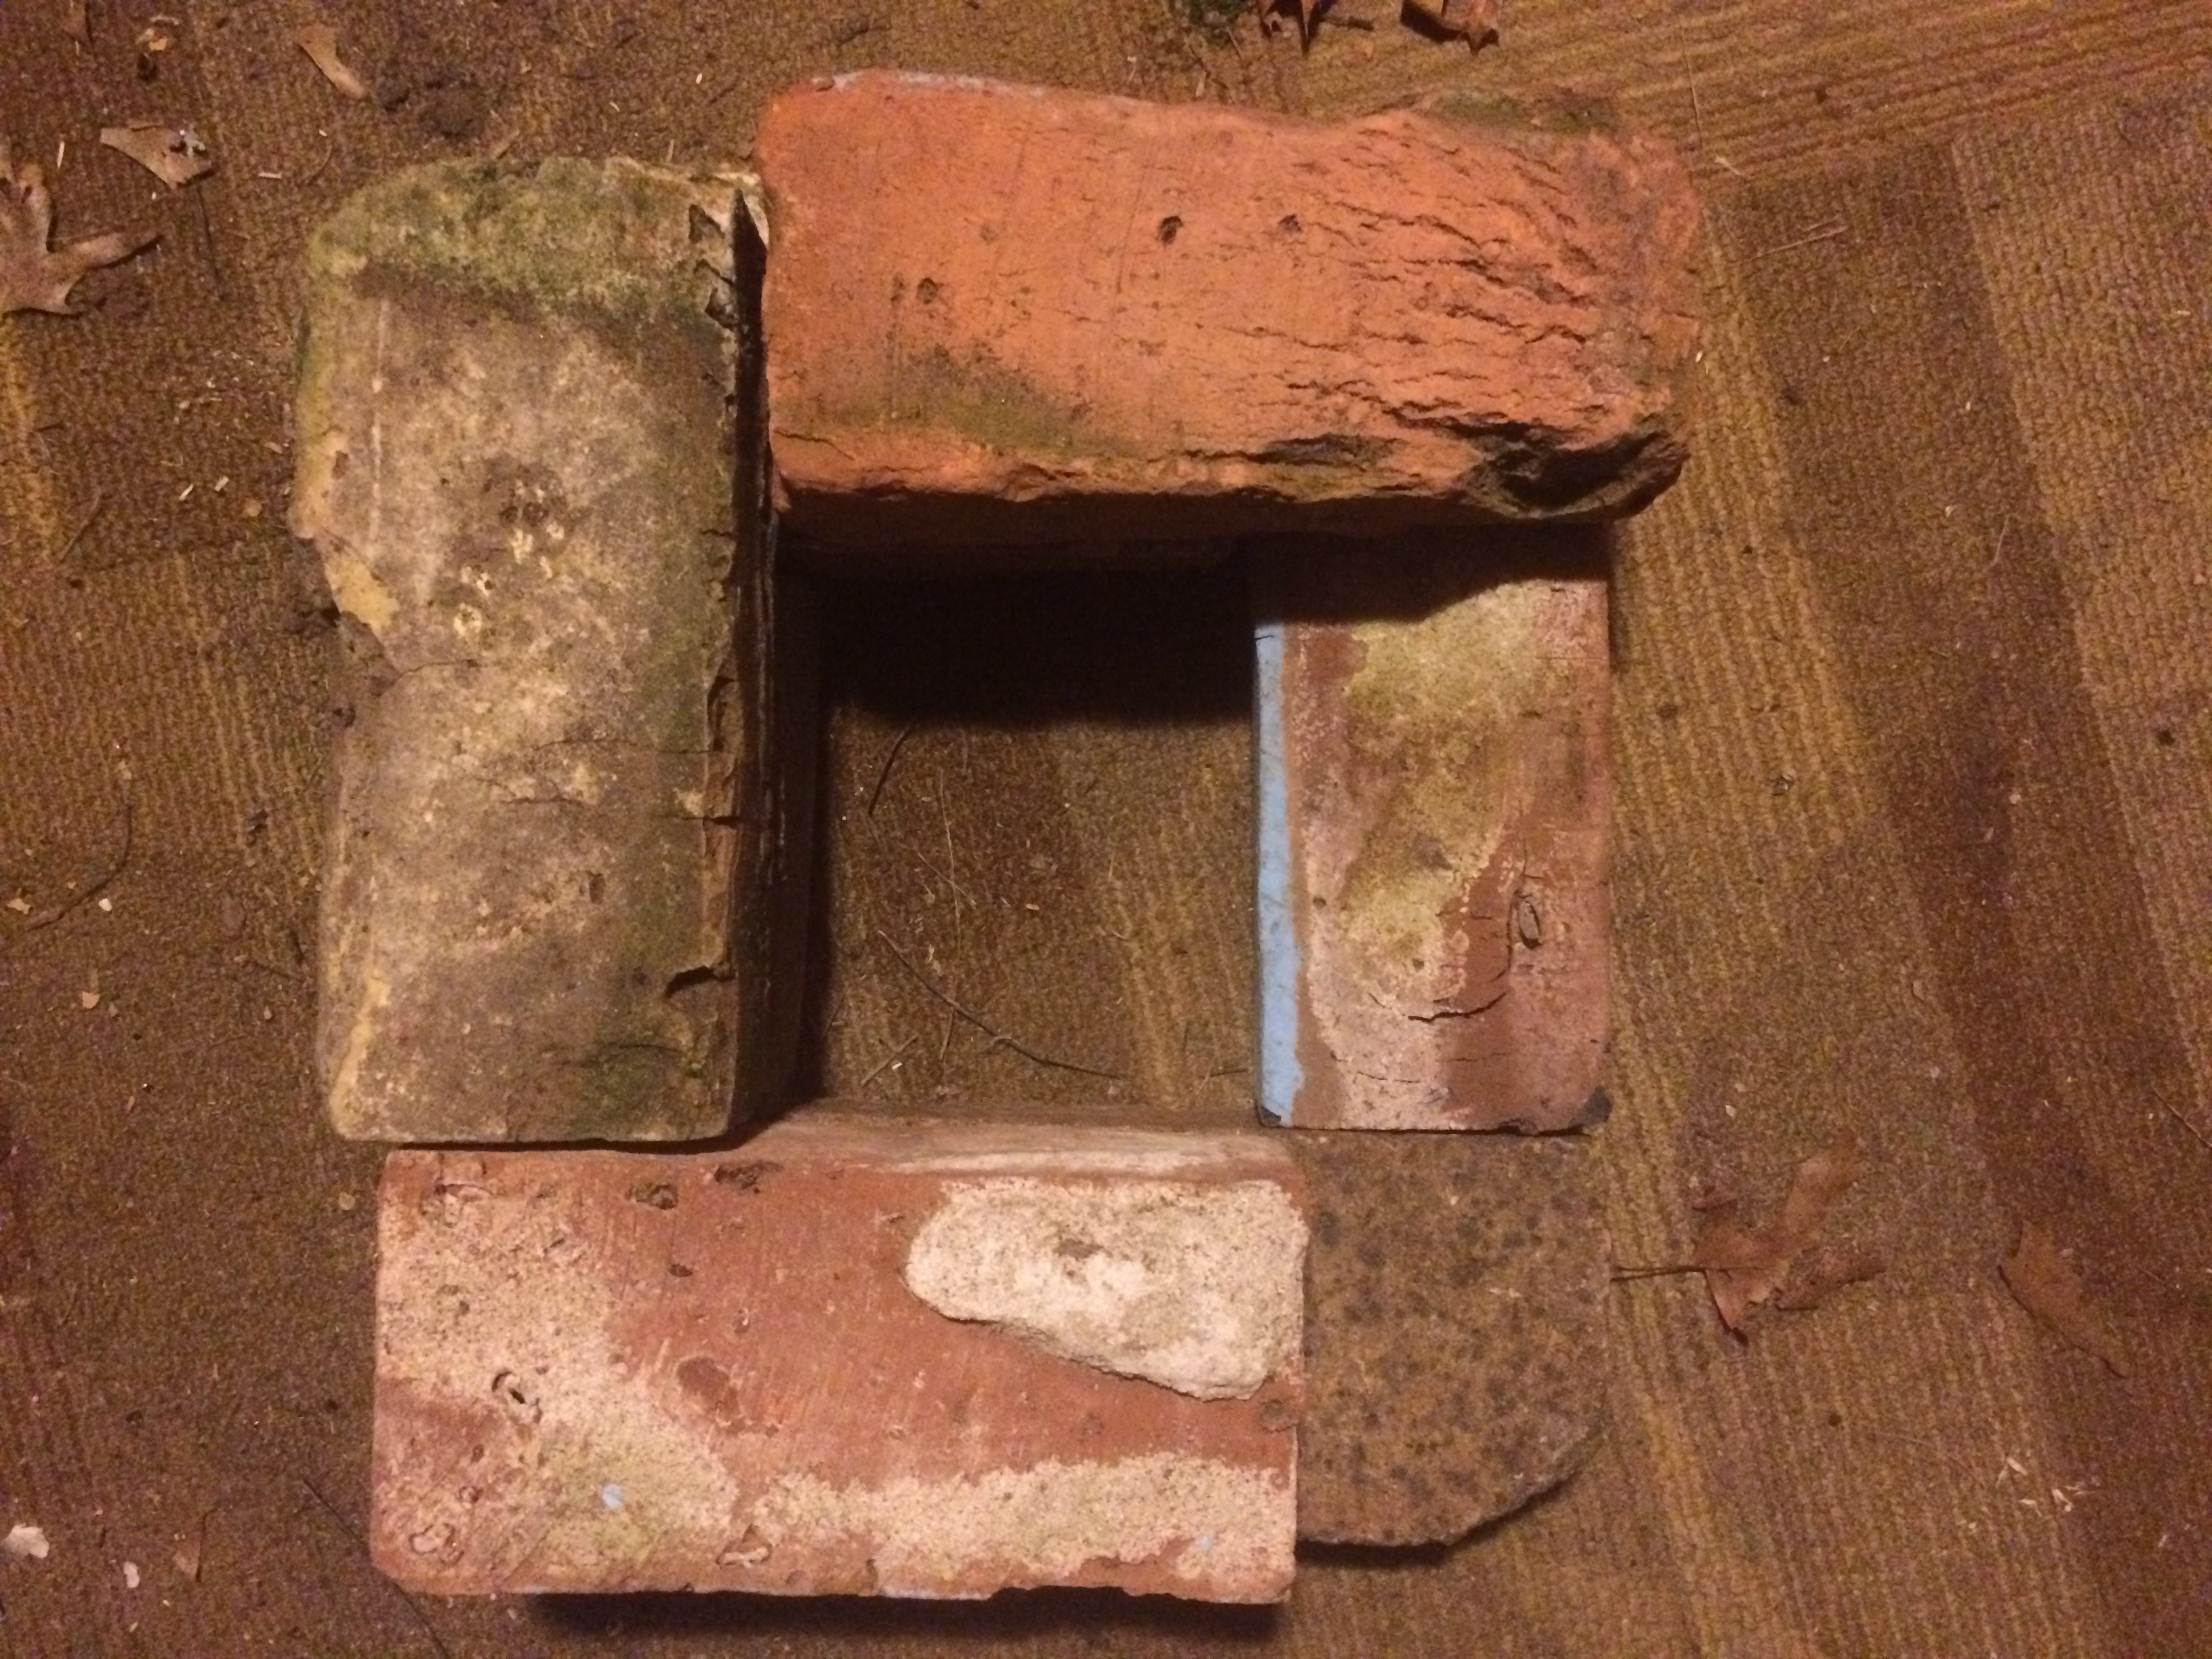
Many variations were tried out and discarded in the design process. The red bricks are used in the fuel feed for their durability, while the softer insulative bricks were used throughout the rest of the combustion system.

IMG_1152 IMG_1153 IMG_1155 IMG_1154

determining bench dimensions. (for awhile we thought we'd use foam insulation but wound up not doing so)
determining bench dimensions. (for awhile we thought we’d use foam insulation but wound up not doing so)


creating the subsurface foundation for the combustion chamber - the air spaces in the bricks add insulation to keep heat where it's wanted - not absorbing into the ground
creating the subsurface foundation for the combustion chamber – the air spaces in the bricks add insulation to keep heat where it’s wanted – not absorbing into the ground


IMG_1178

laying the base layer, with pits for ash cleanouts. White bricks insulate against heat loss, keeping temperatures high for the heat riser, where even the smoke will burn up


IMG_2424

constant vigilance was required to ensure that proper dimensions were maintained in all directions

IMG_1218 IMG_2456

had to learn how to score and split bricks with a chisel to make some of the puzzle fit together

IMG_1230 IMG_2460 IMG_2462

heat riser is Widget-approved

IMG_1239

fitting the barrel
fitting the barrel


exhaust manifold - where falling gases inside the barrel are channeled into the bench exhaust pipe run
exhaust manifold – where falling gases inside the barrel are channeled into the bench pipe run
although the heat riser was made of insulative fire brick, I realized it would be even better with more insulation - so I cut apart an old water heater and added it - later filling the space between it and the riser with perlite insulation mixed with clay slip.
although the heat riser was made of insulative fire brick, I realized it would be even better with more insulation – so I cut apart an old water heater and added it – later filling the space between it and the riser with perlite insulation mixed with clay slip.


heat riser insulation finished and capped off with clay

IMG_1591

trench for thermal mass foundation/insulation layer
insulative firebricks and perlite to separate the thermal mass from the infinite heat sink of the earth
Forms for the thermal mass (they wound up bowing outward some between the internal supports, but not too badly and I like the organic wavy lines that resulted)

IMG_1755

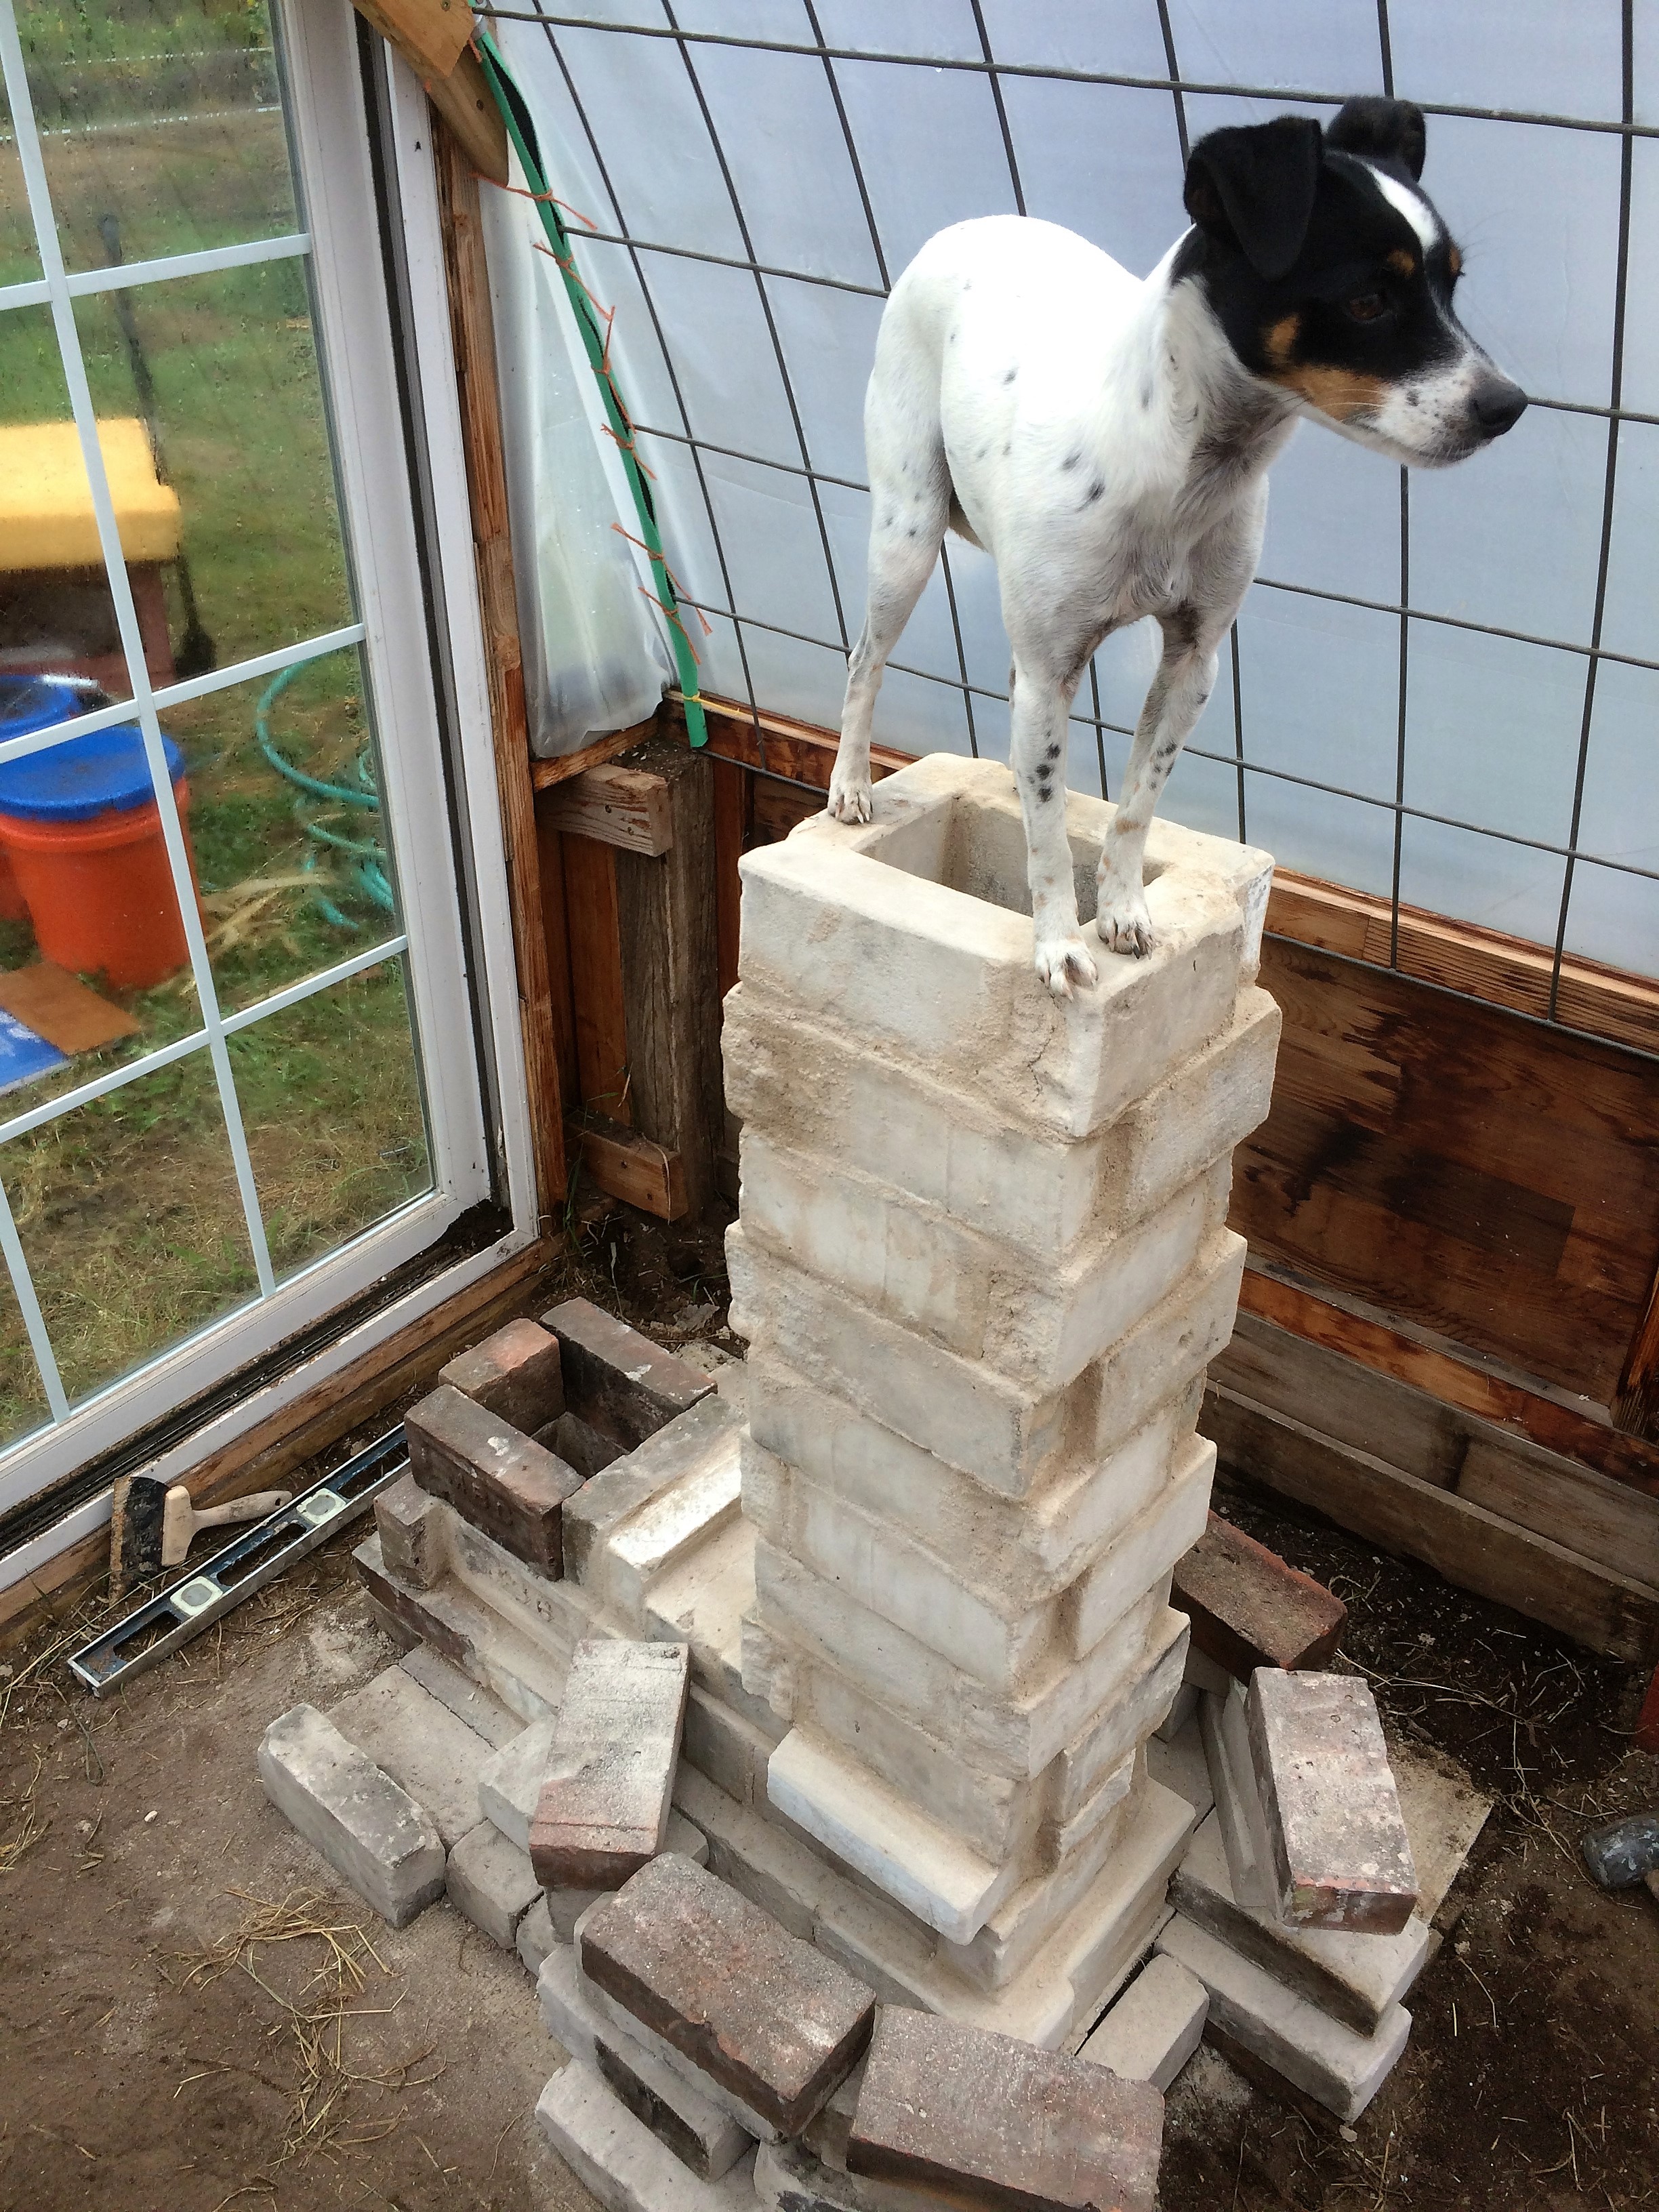
And then winter came, and we hit the road, leaving the wet clay of the combustion chamber to slowly dry out over the wintertime.

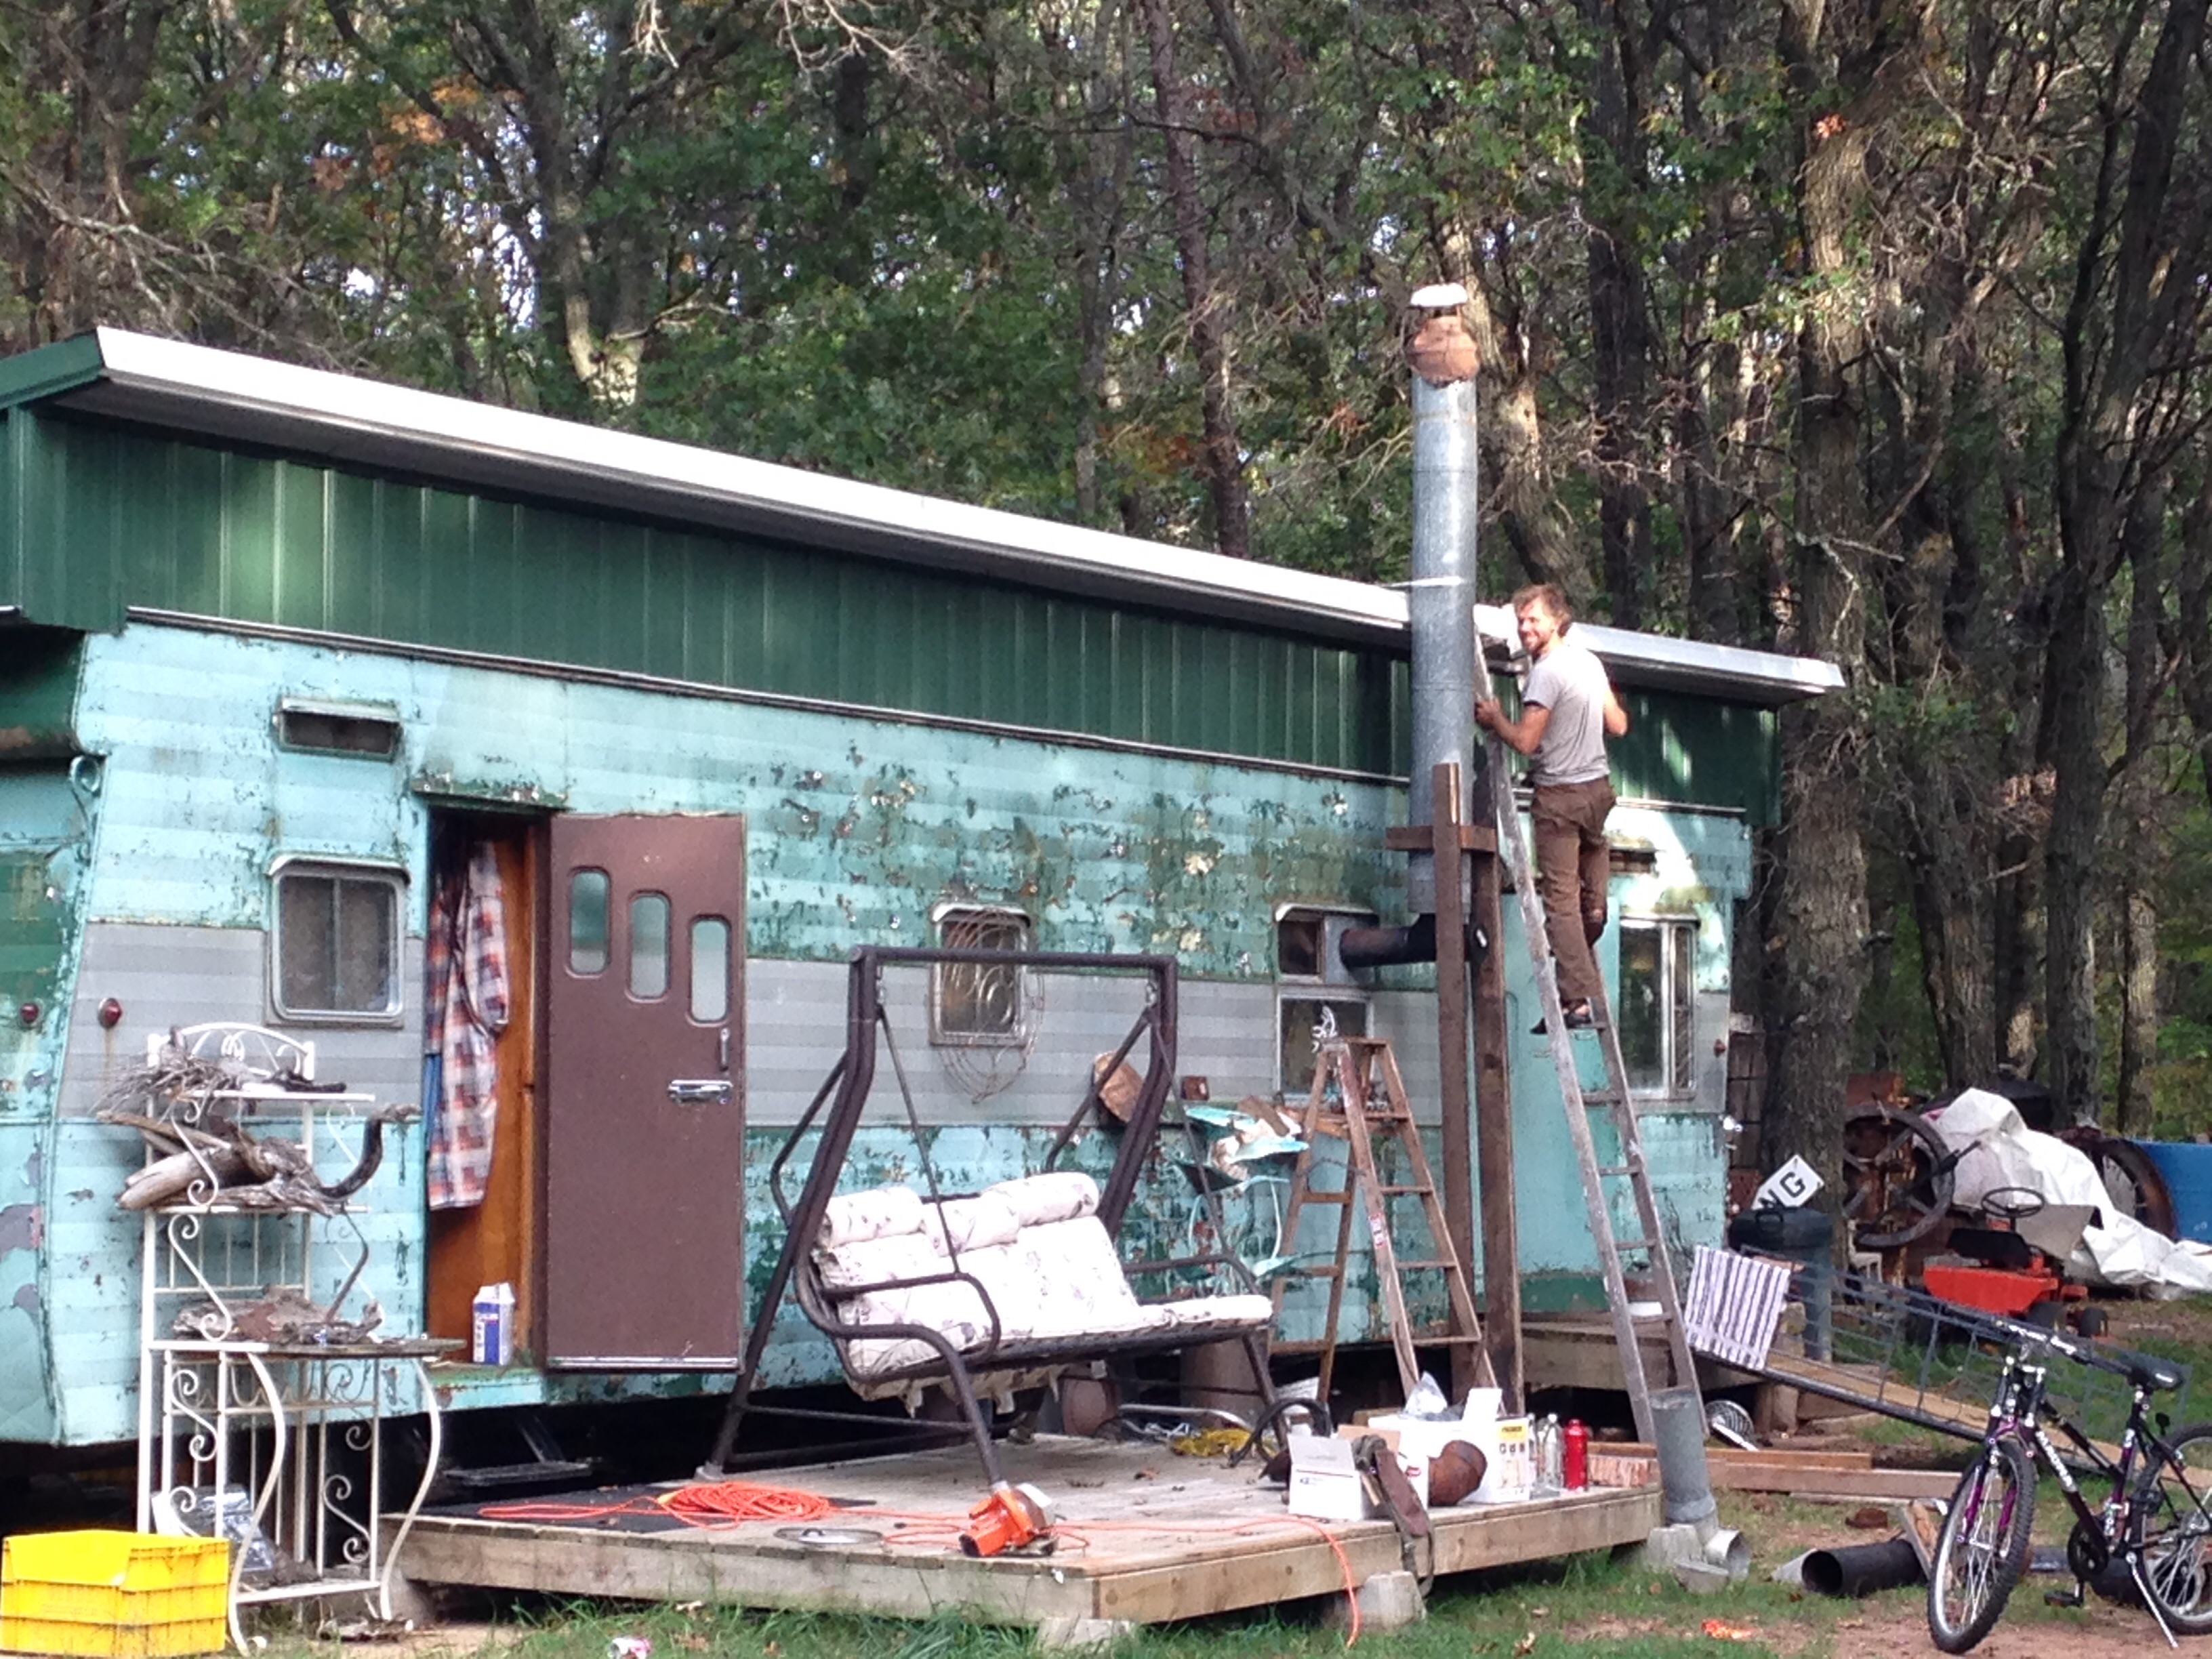
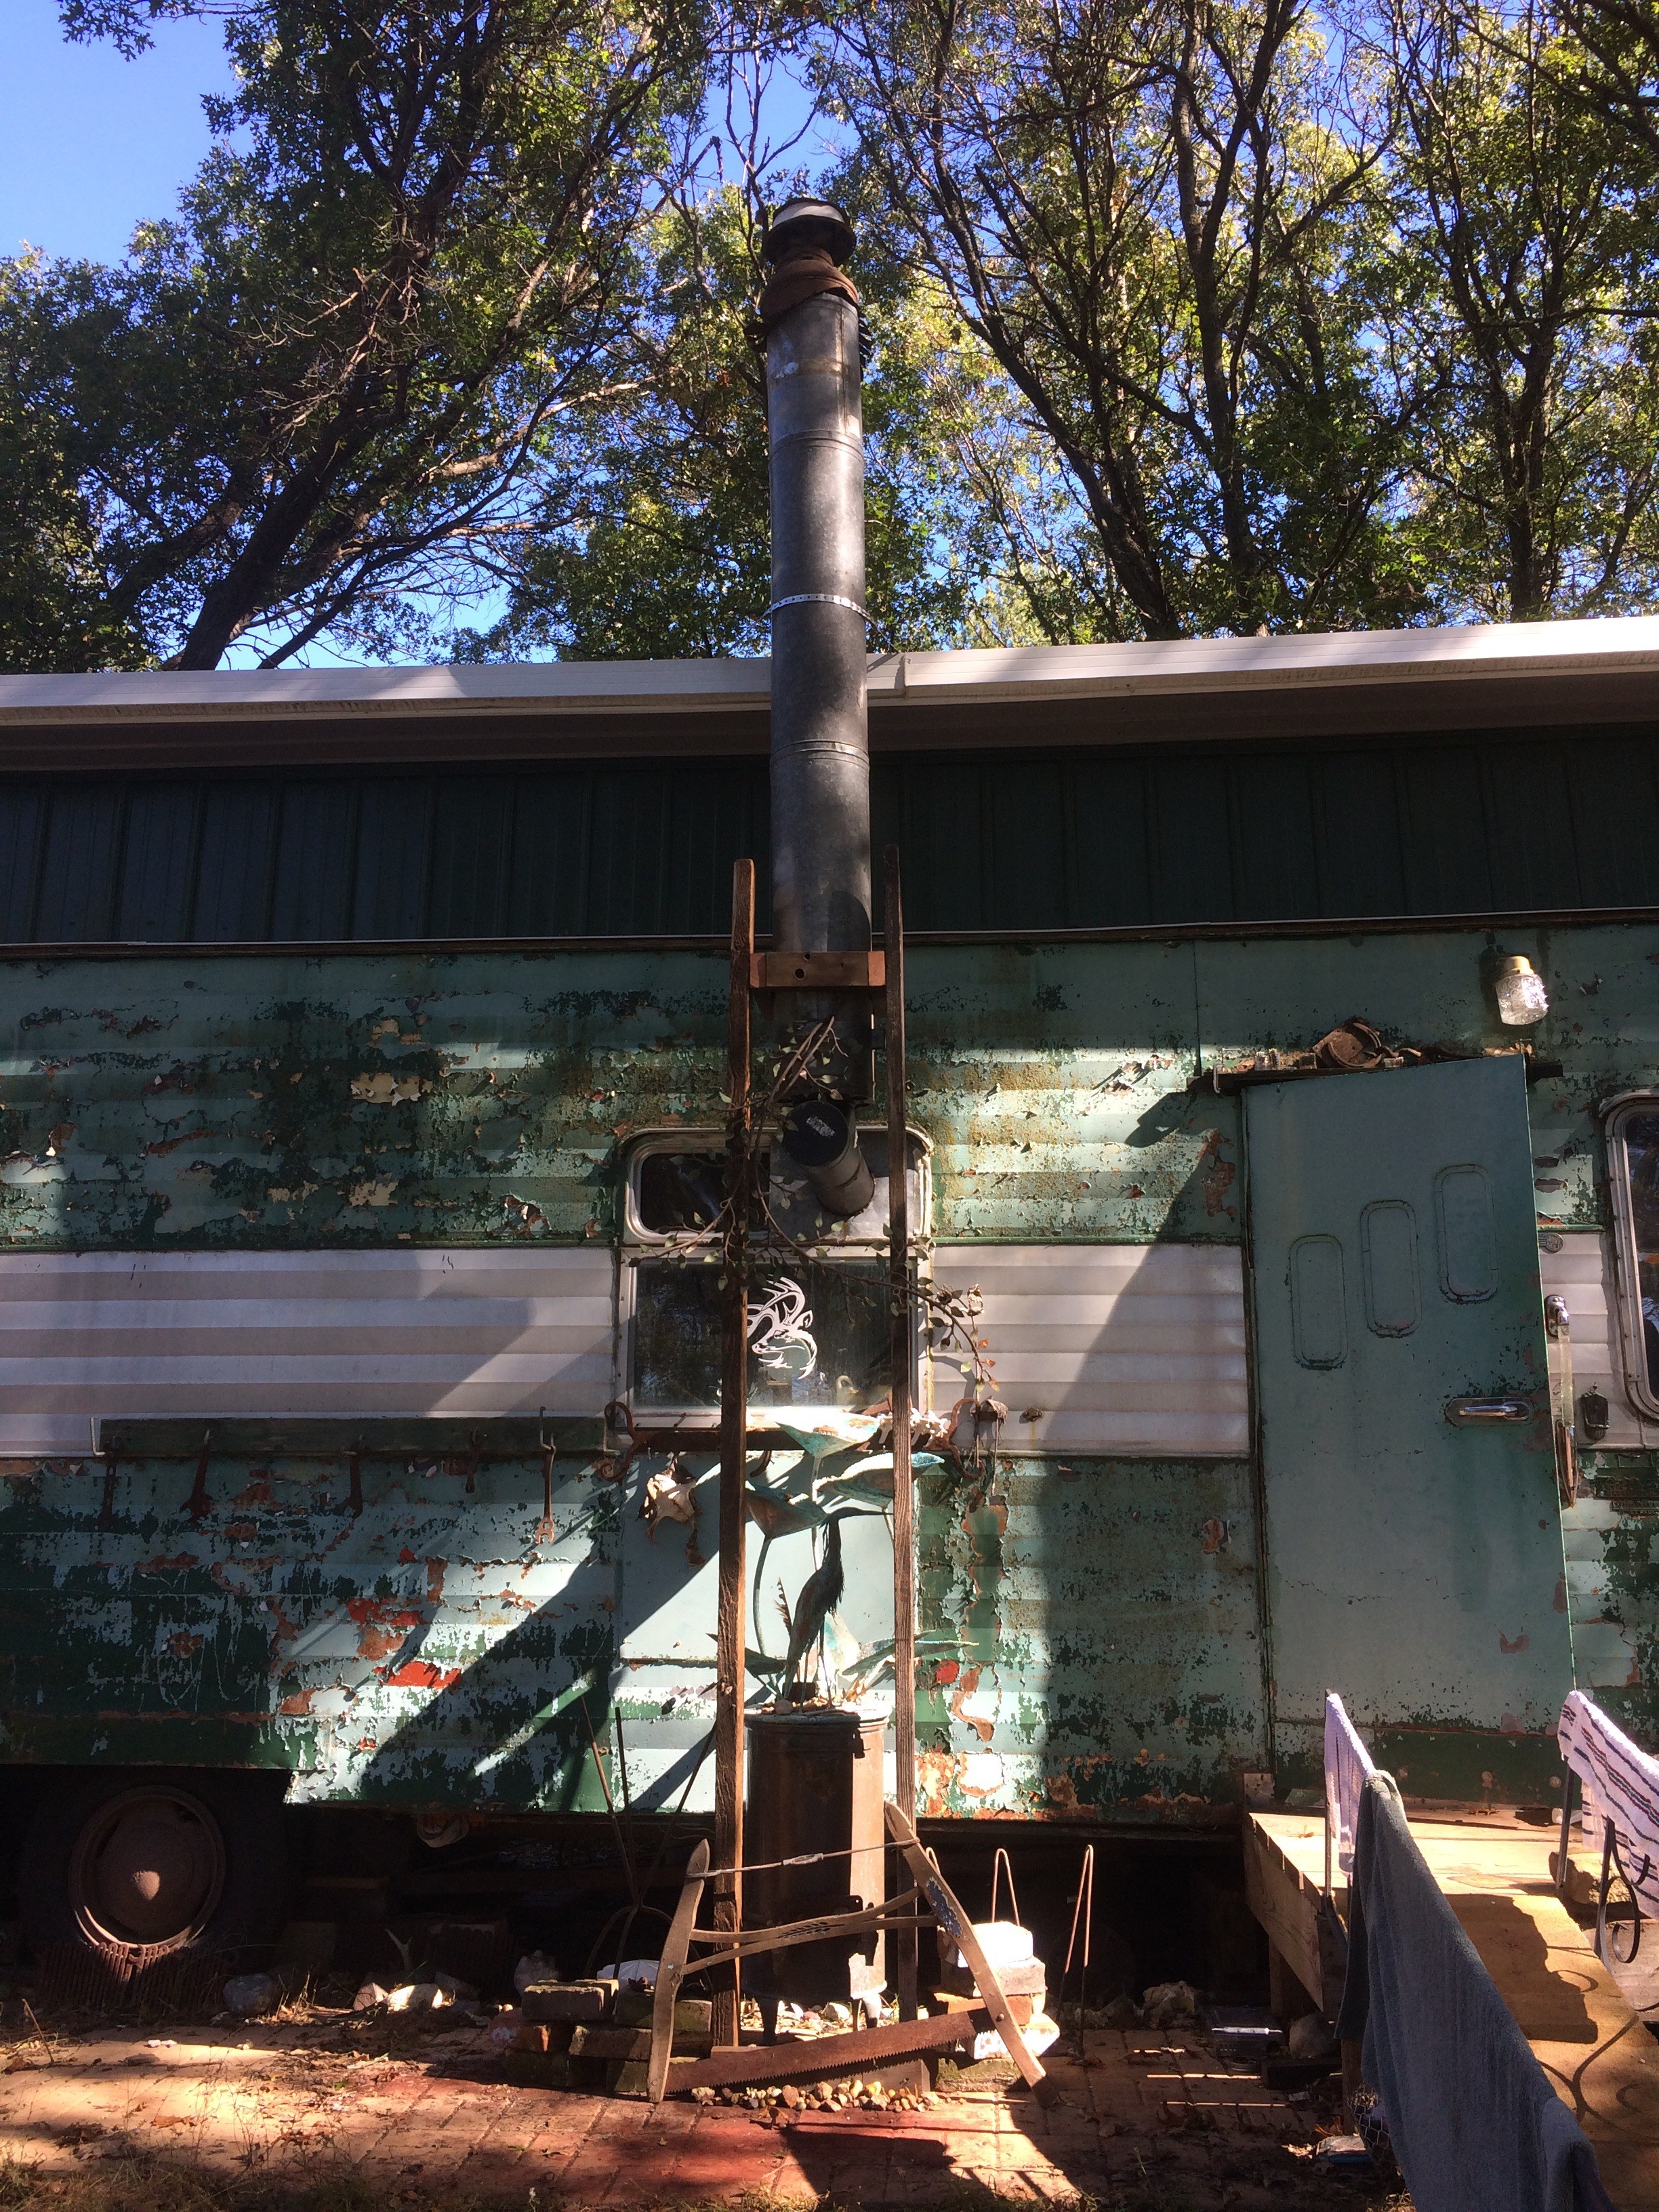
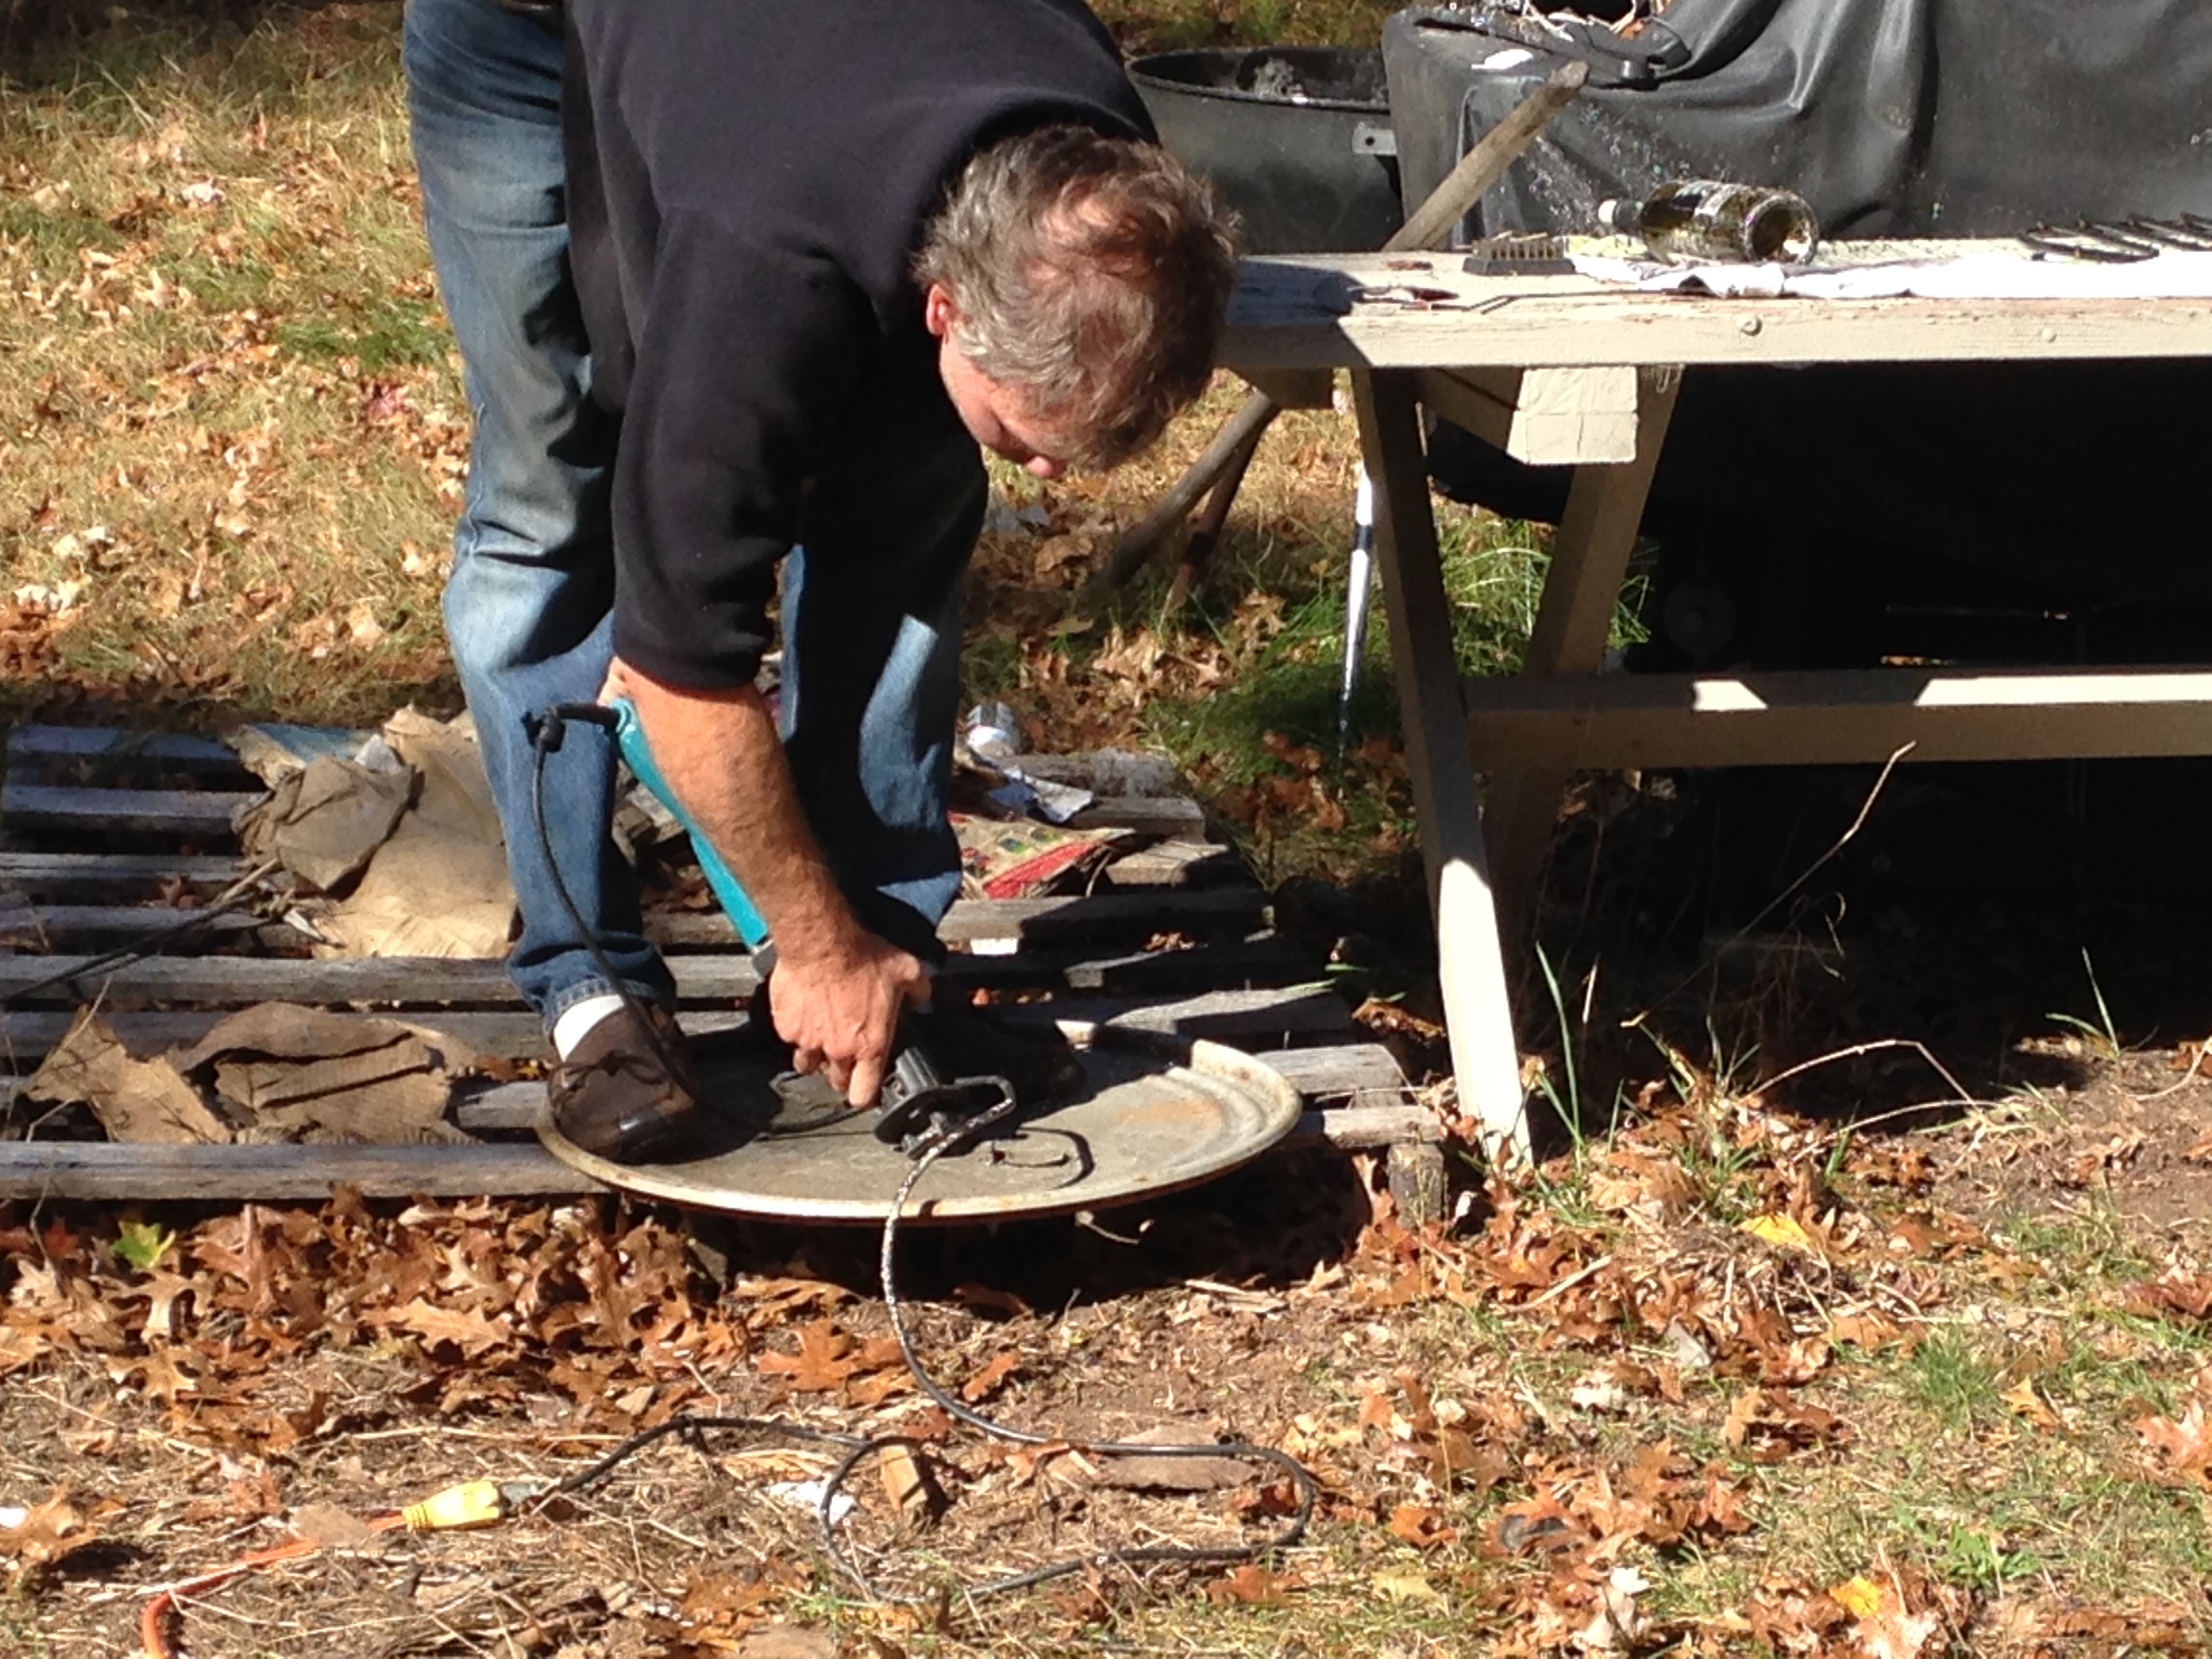
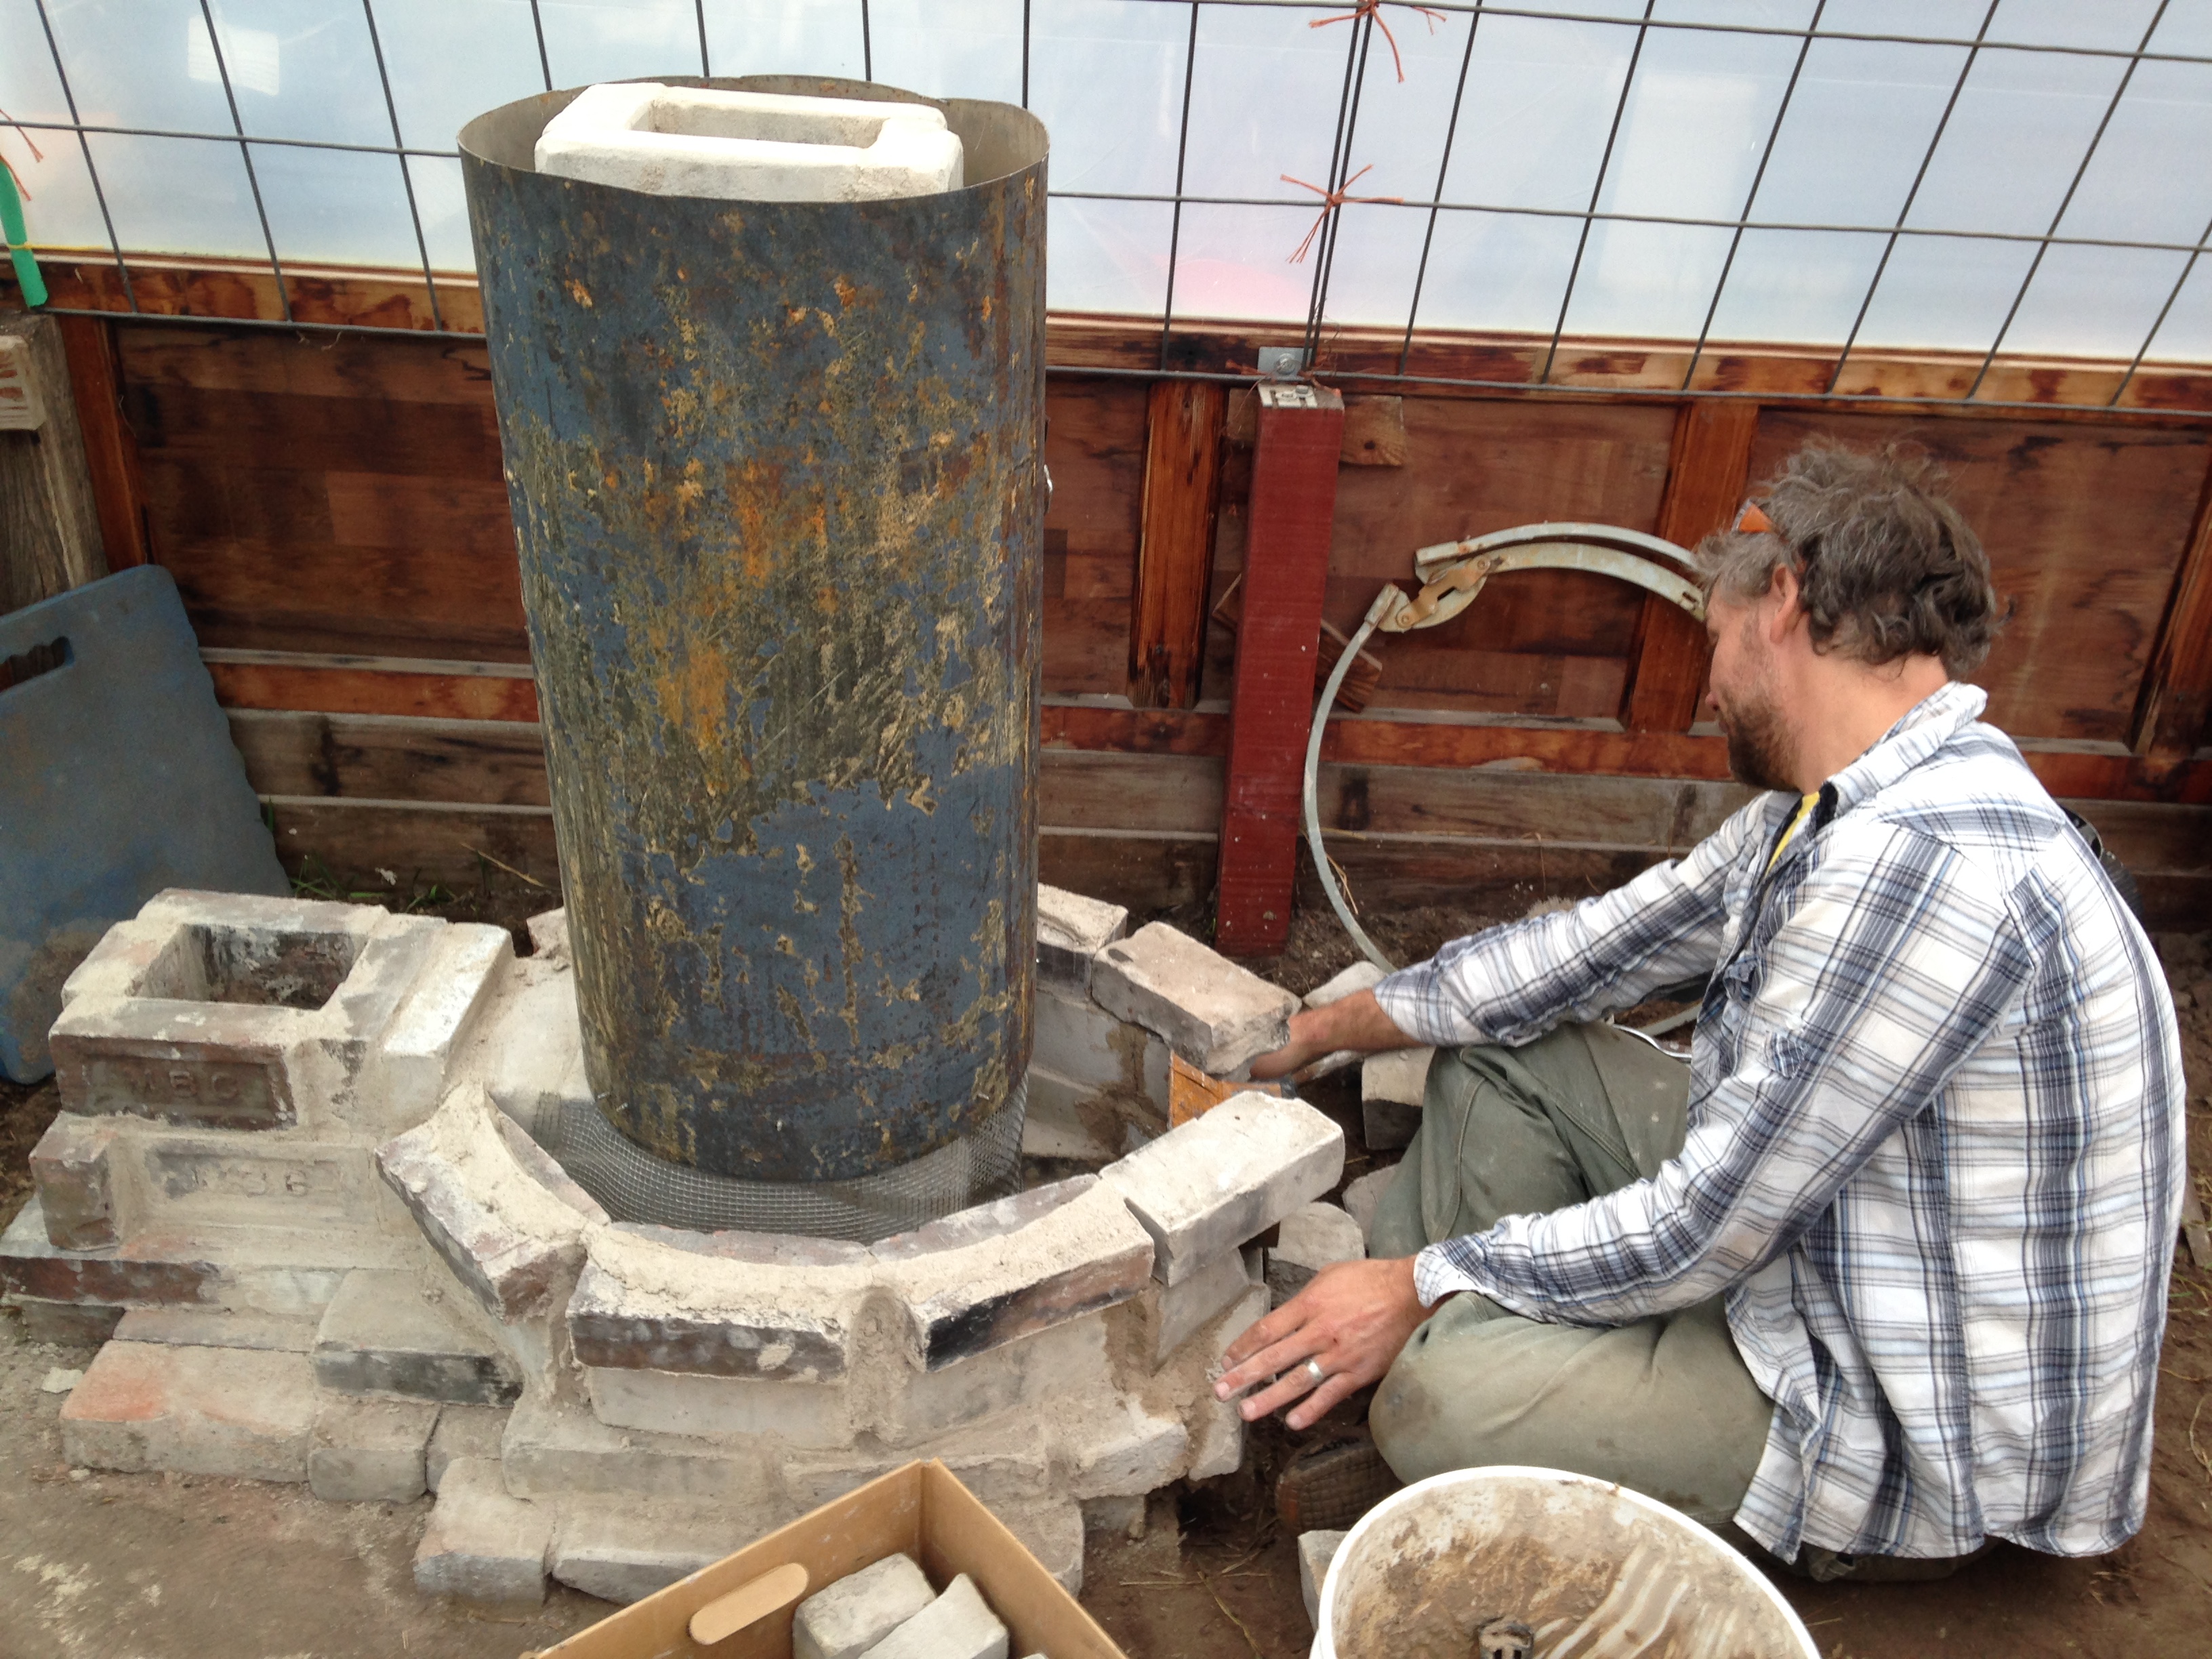
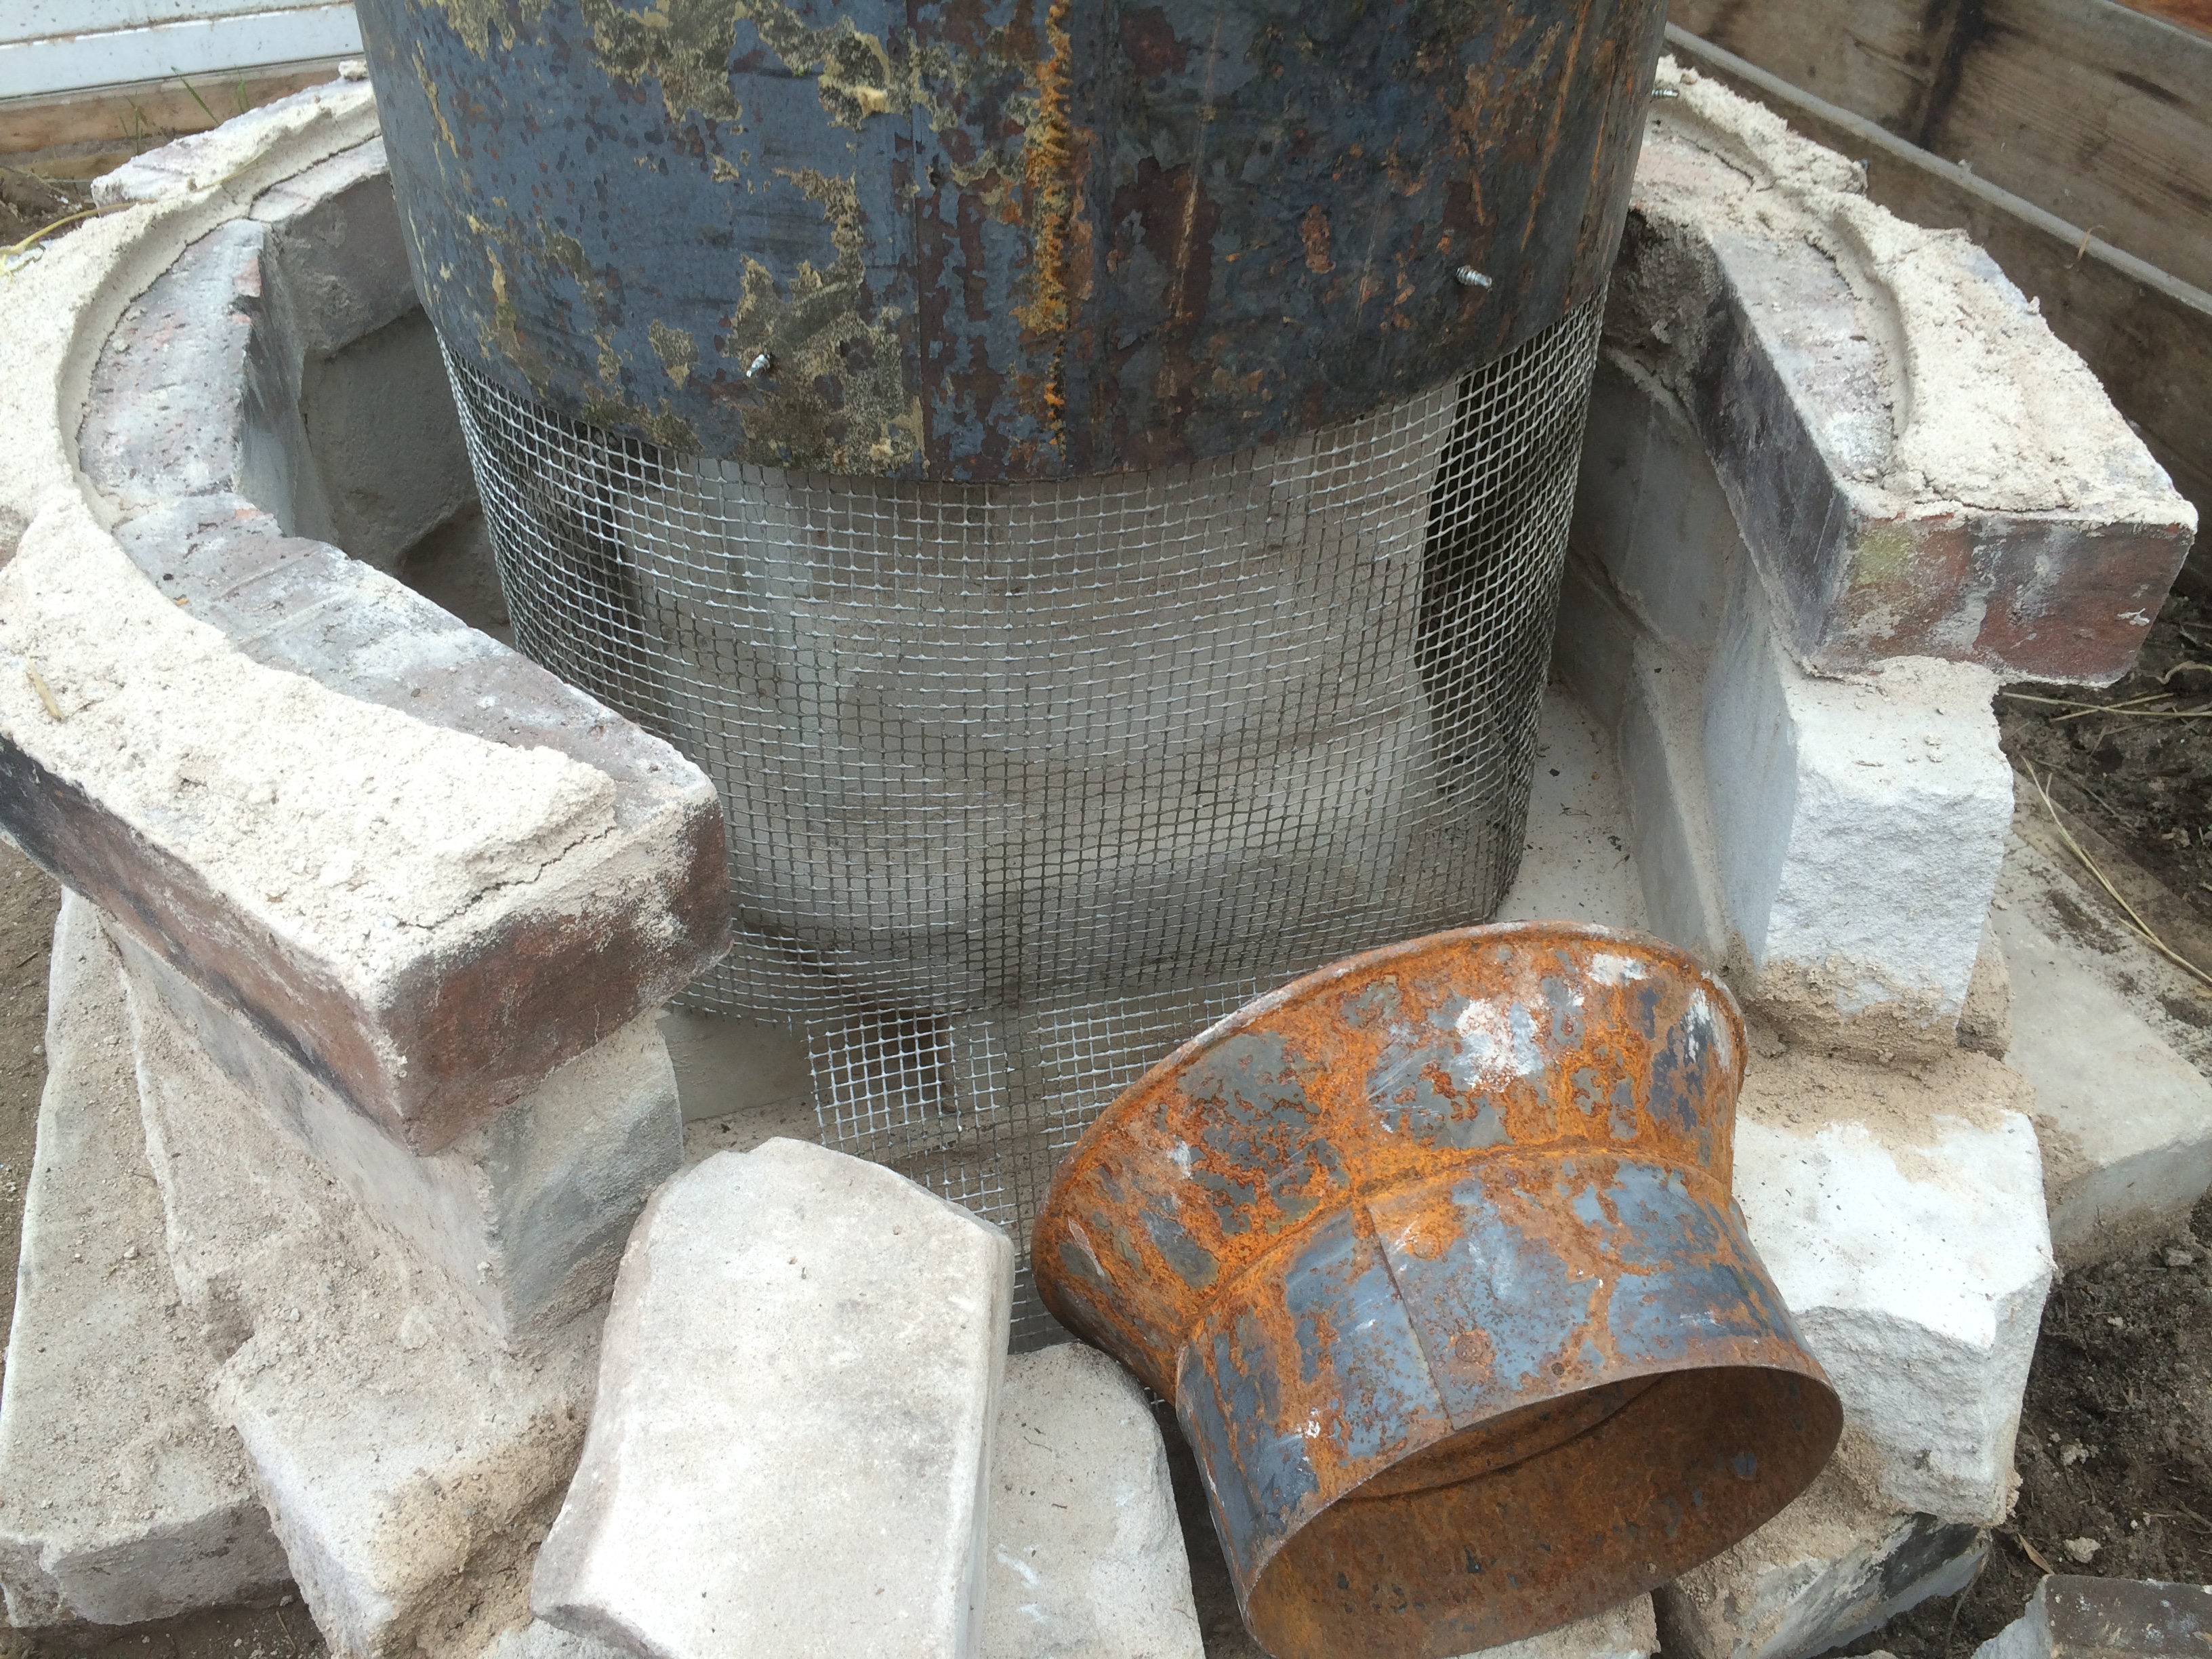
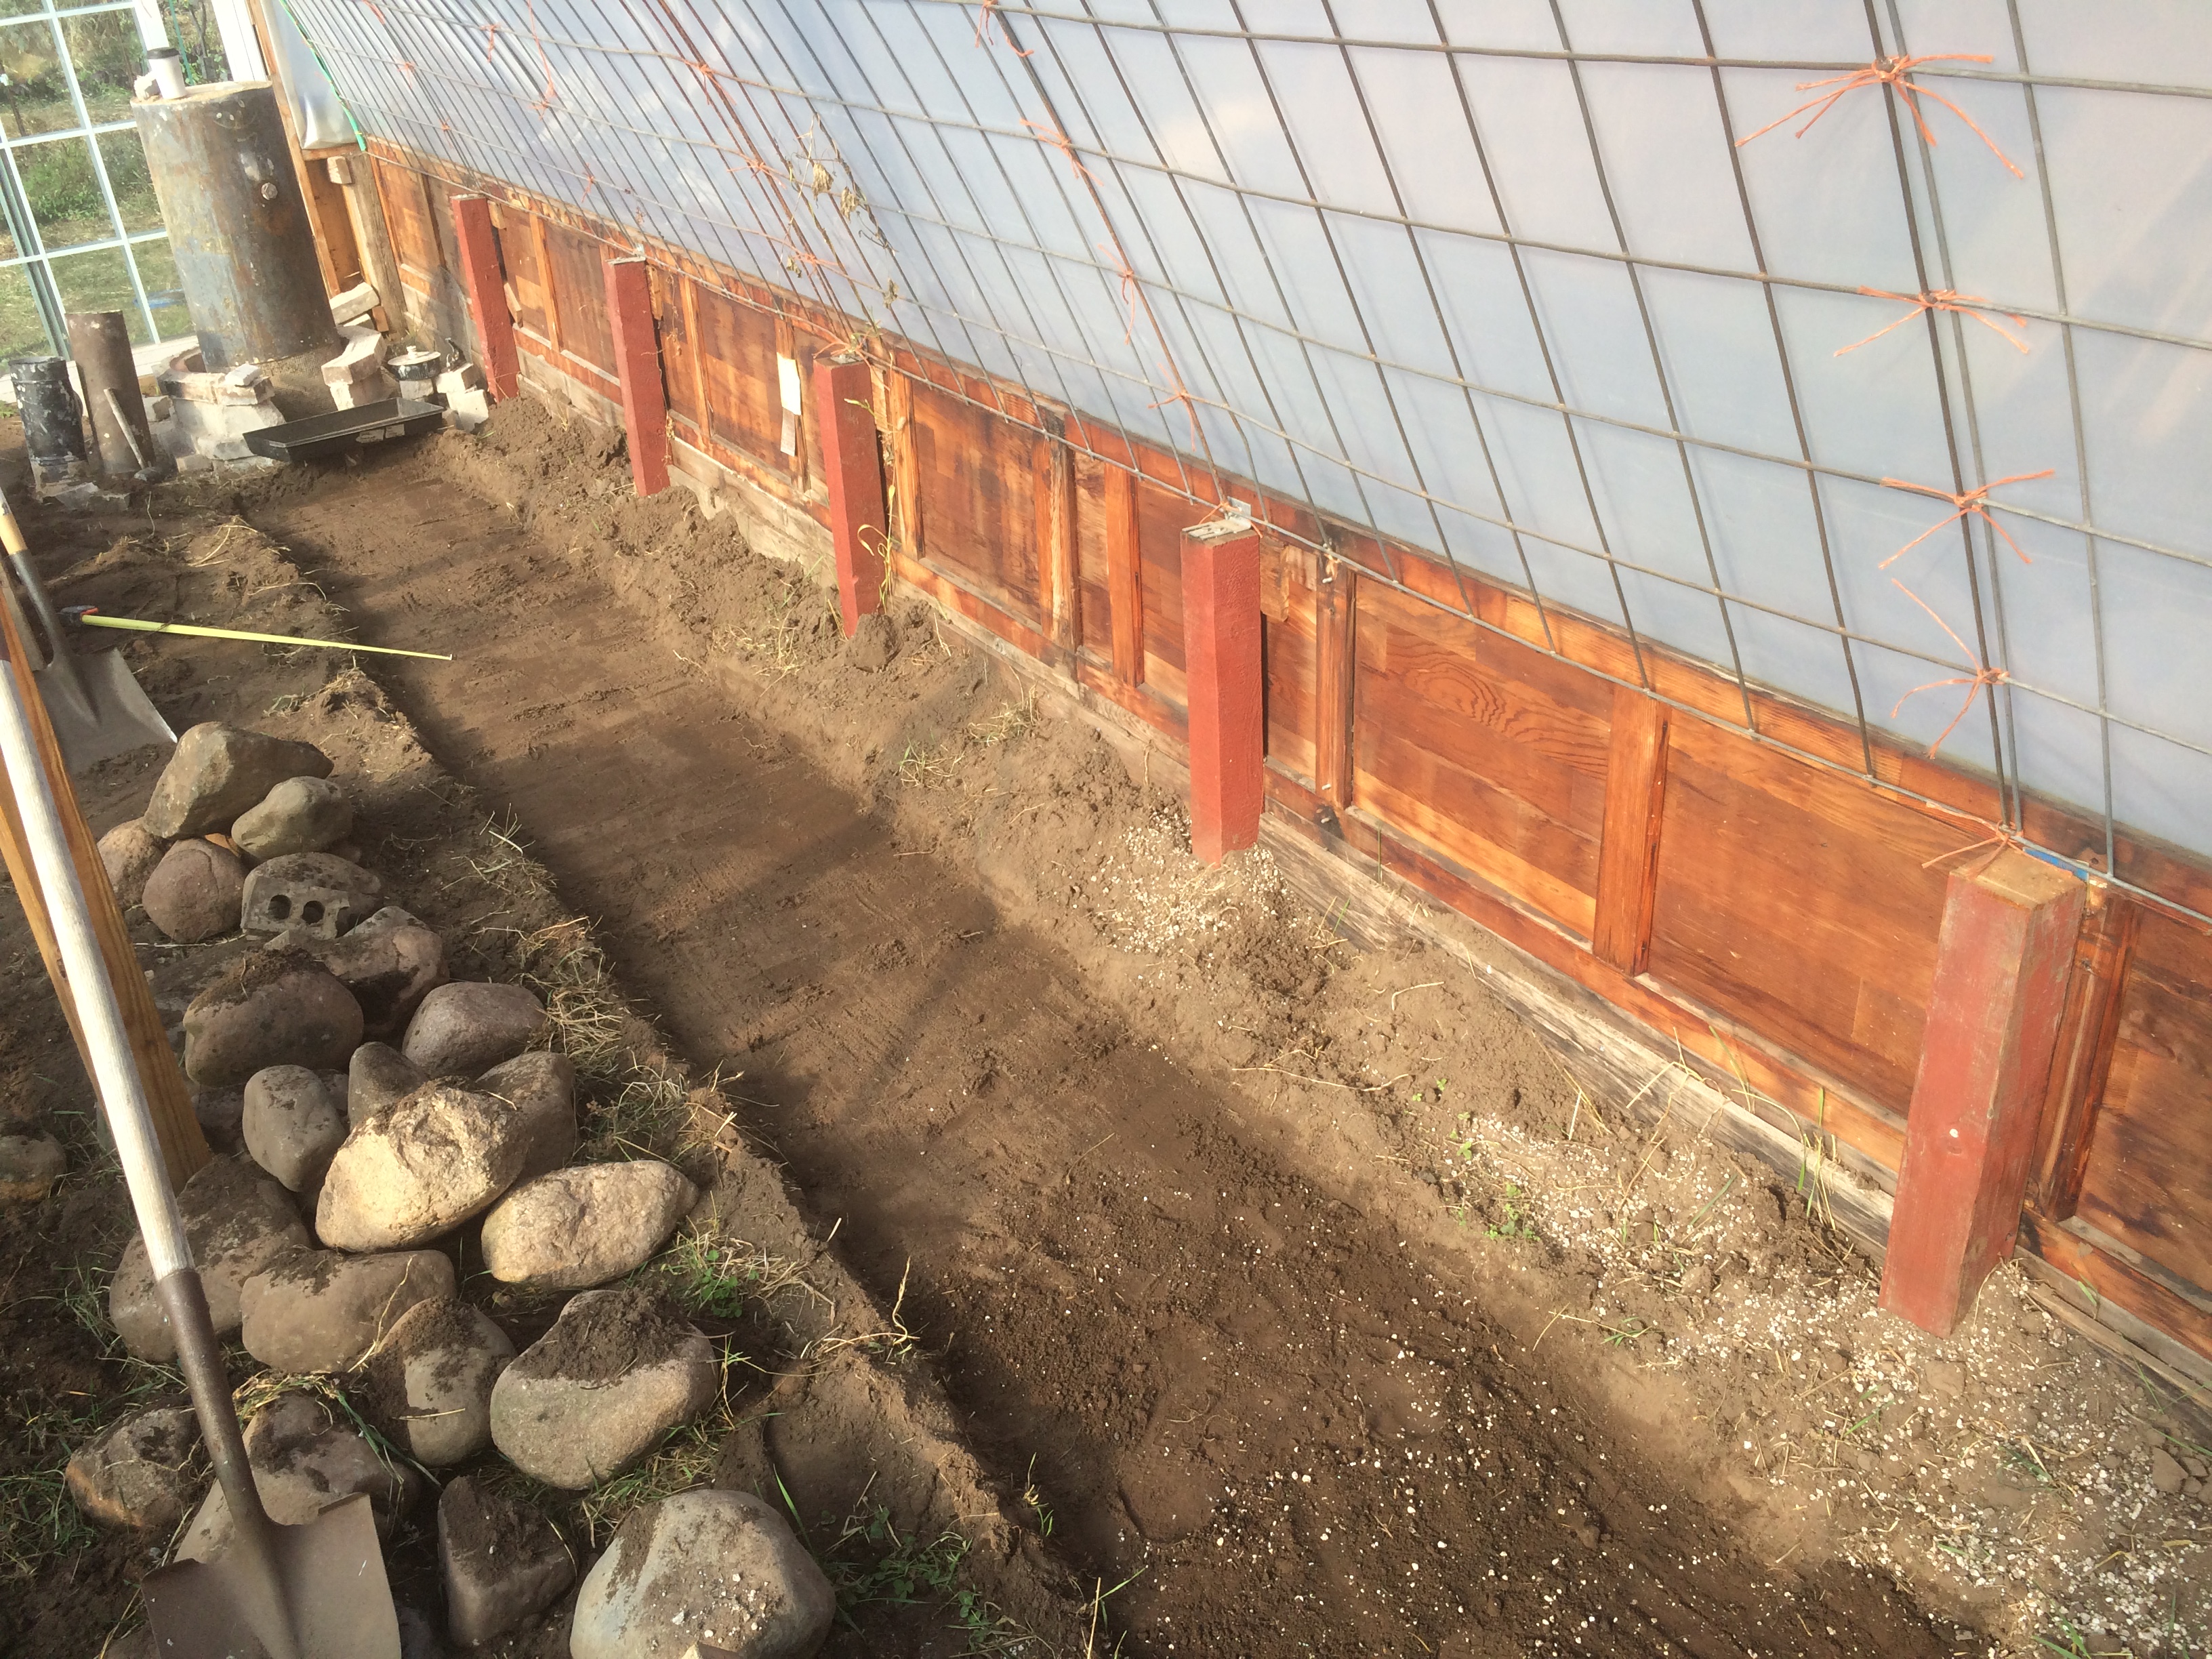
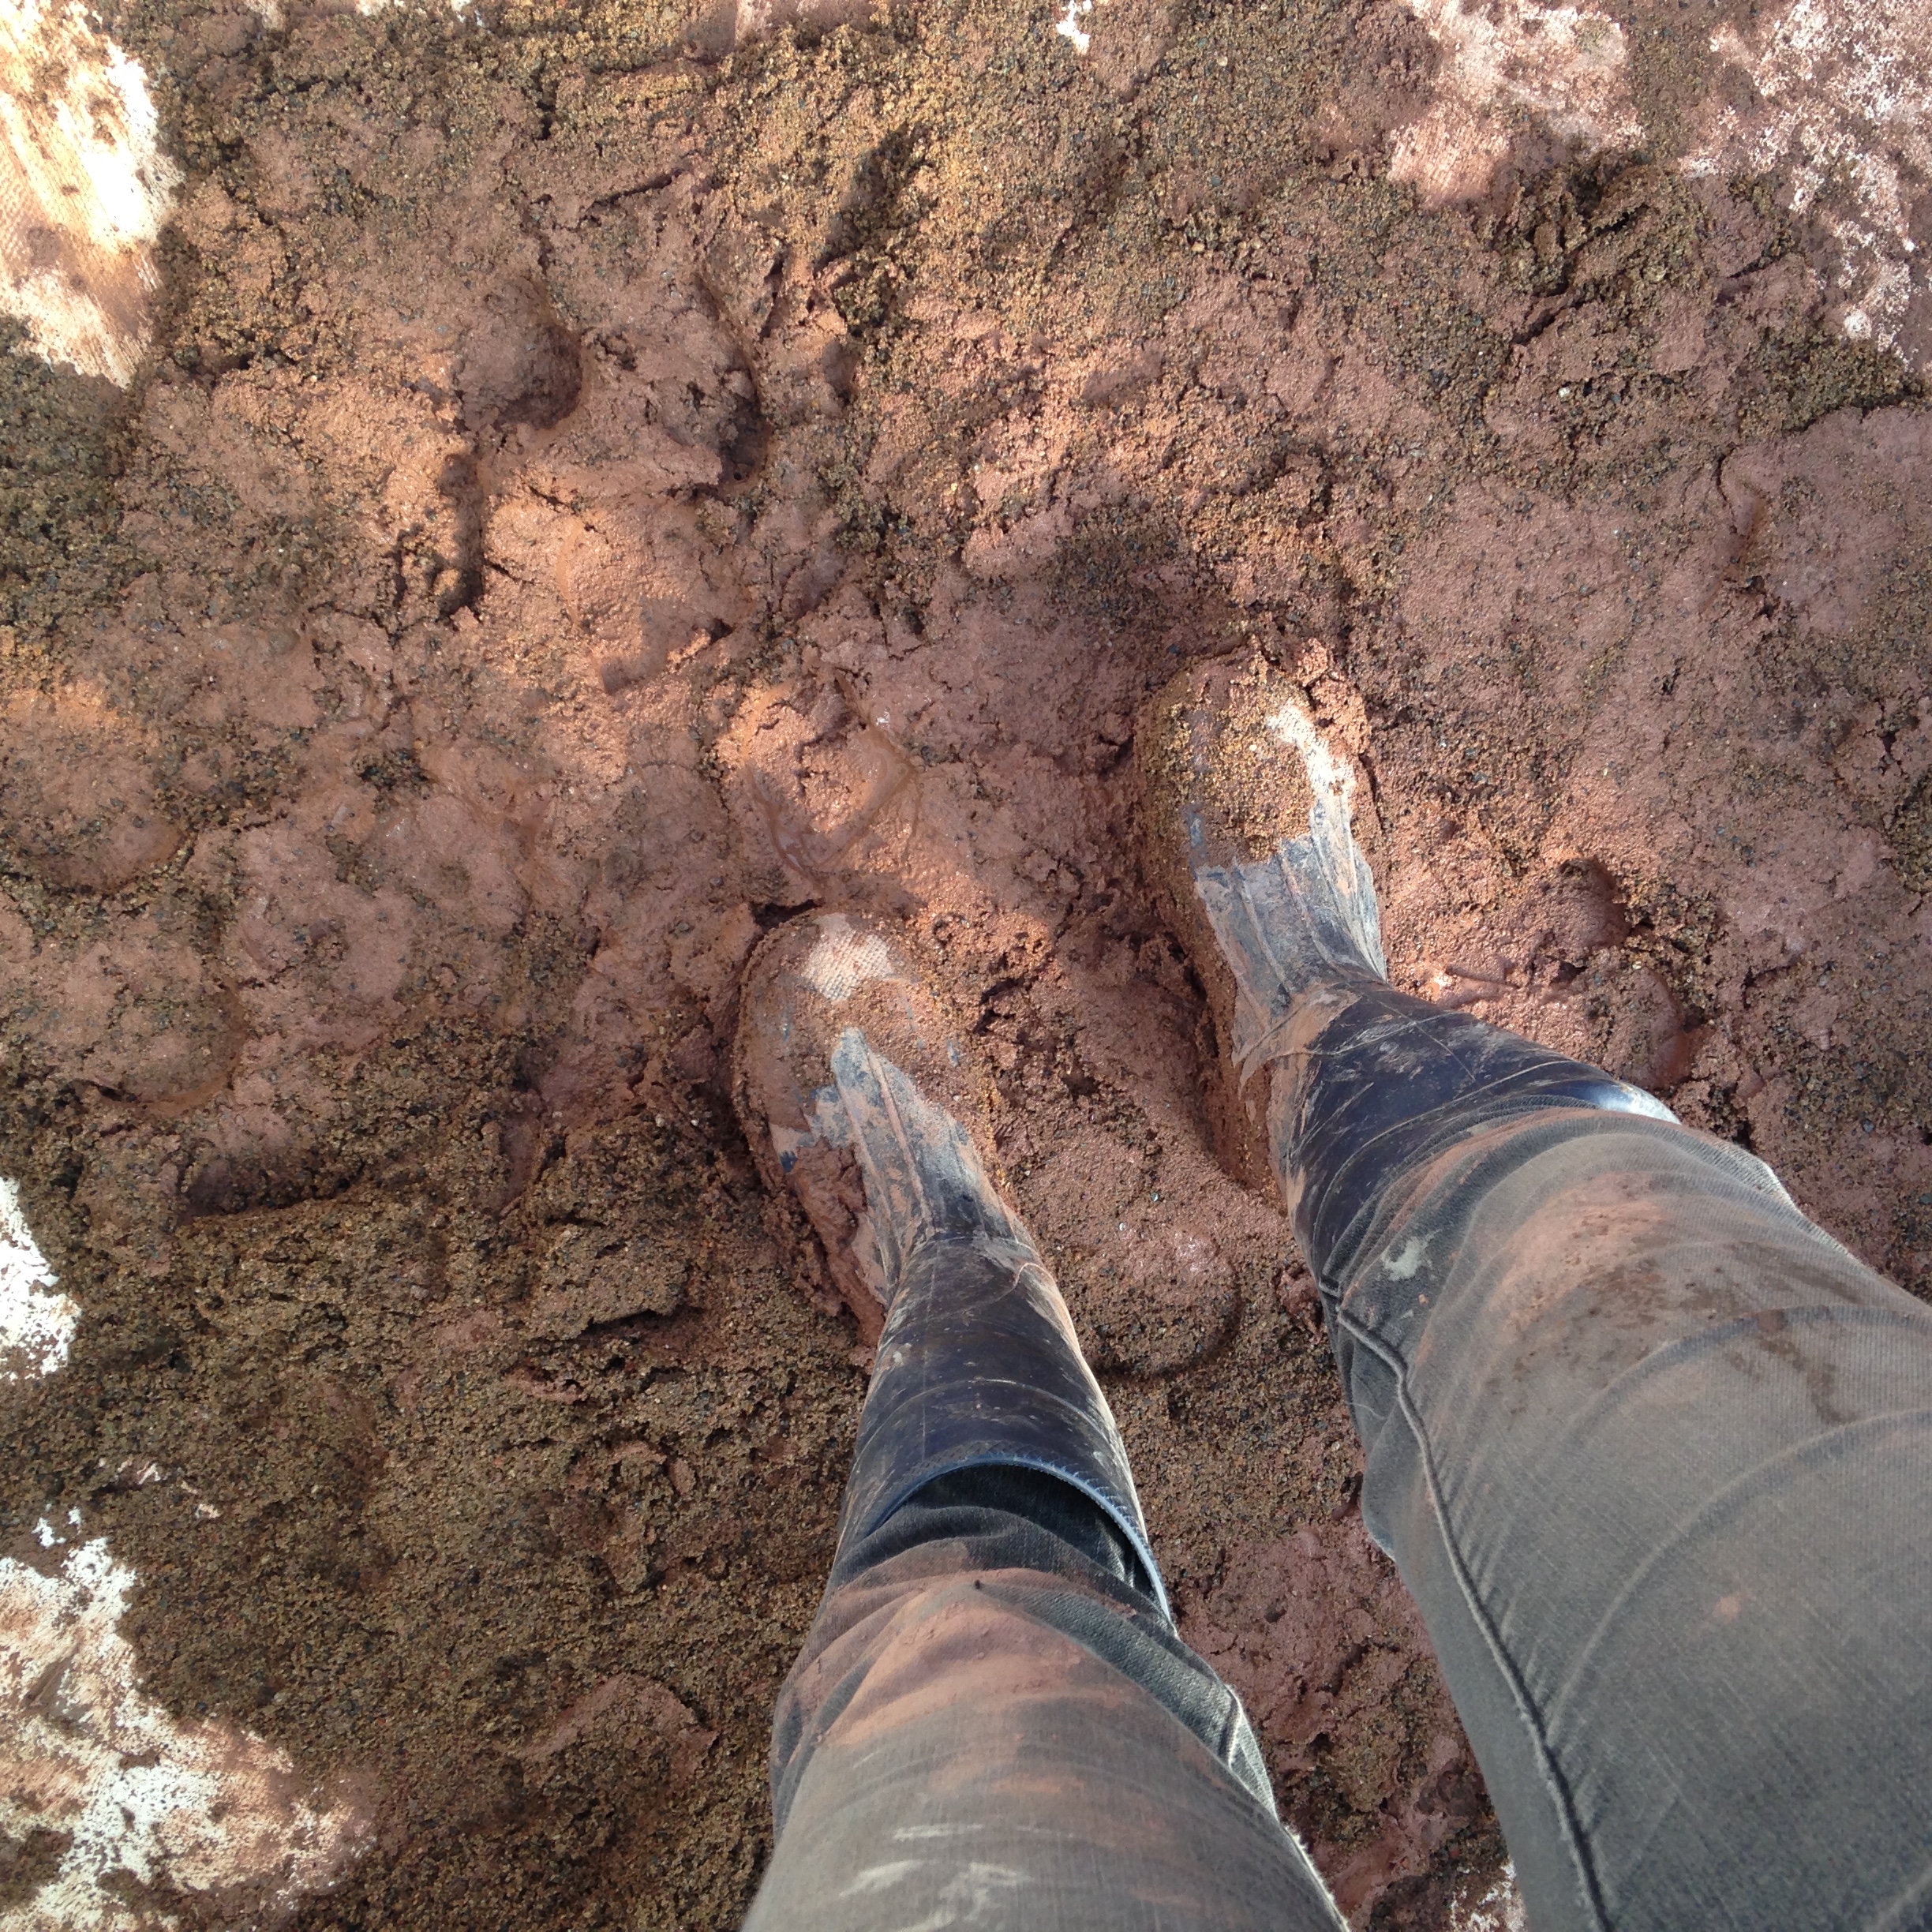
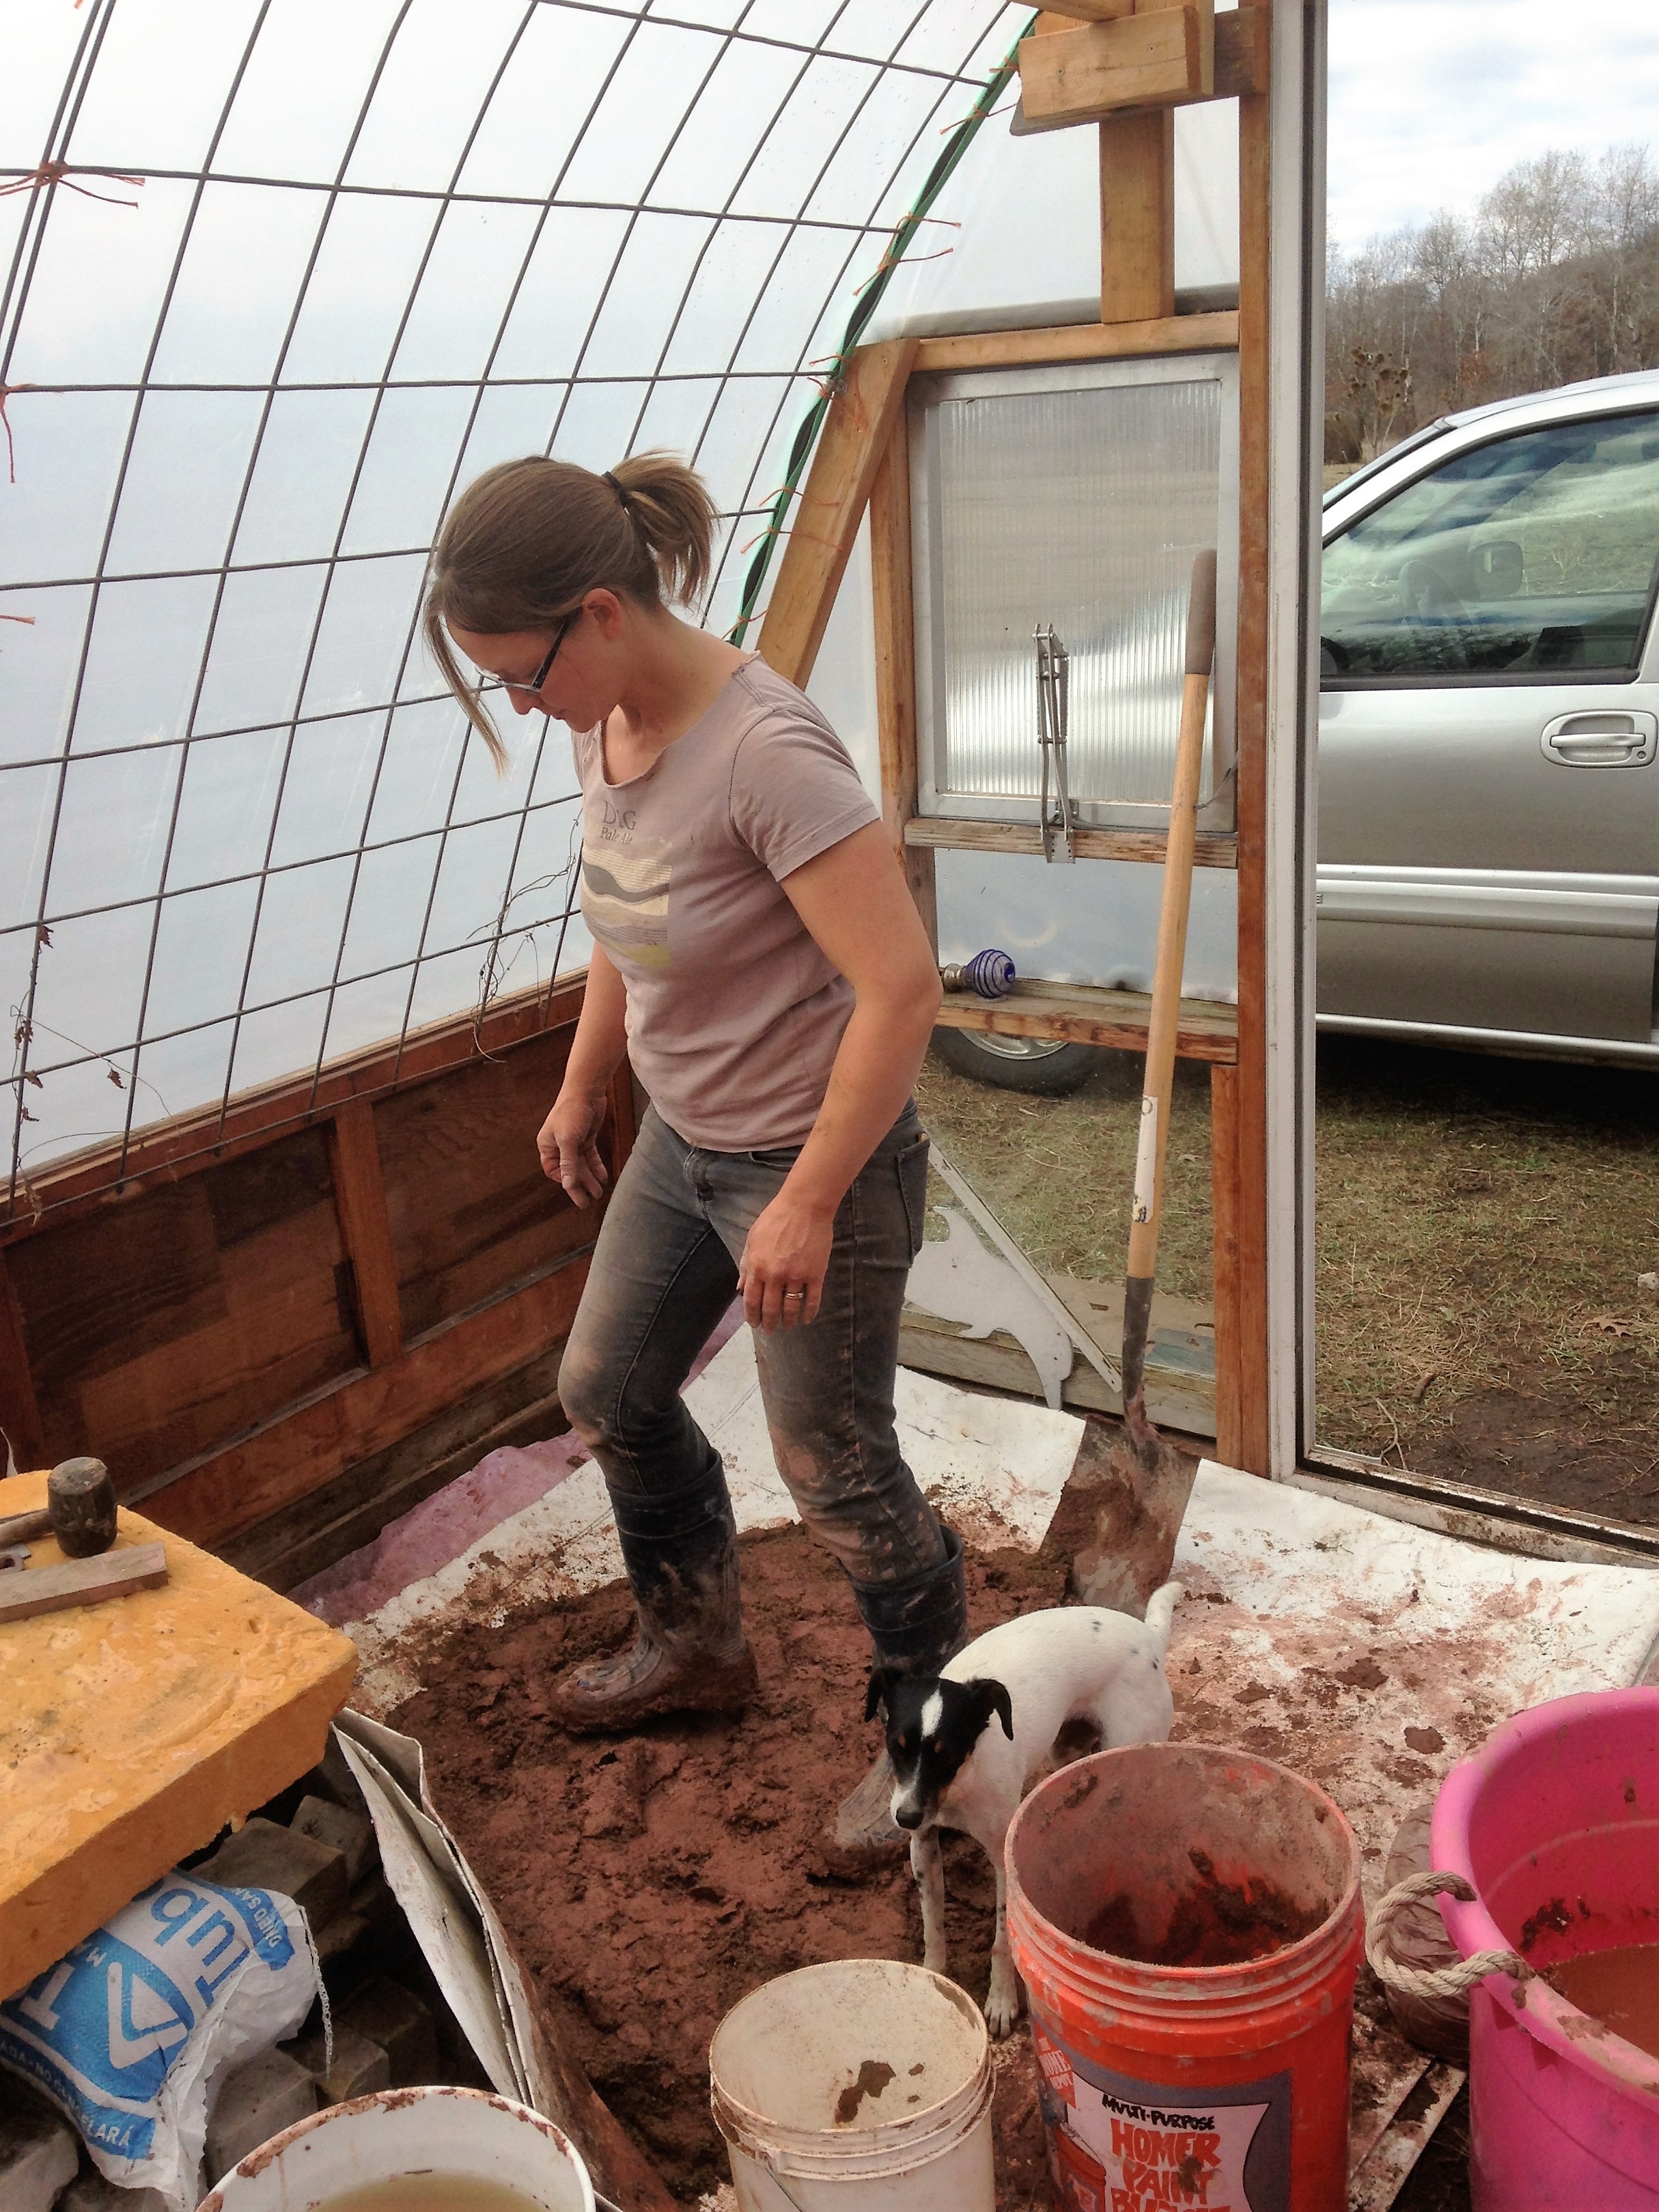
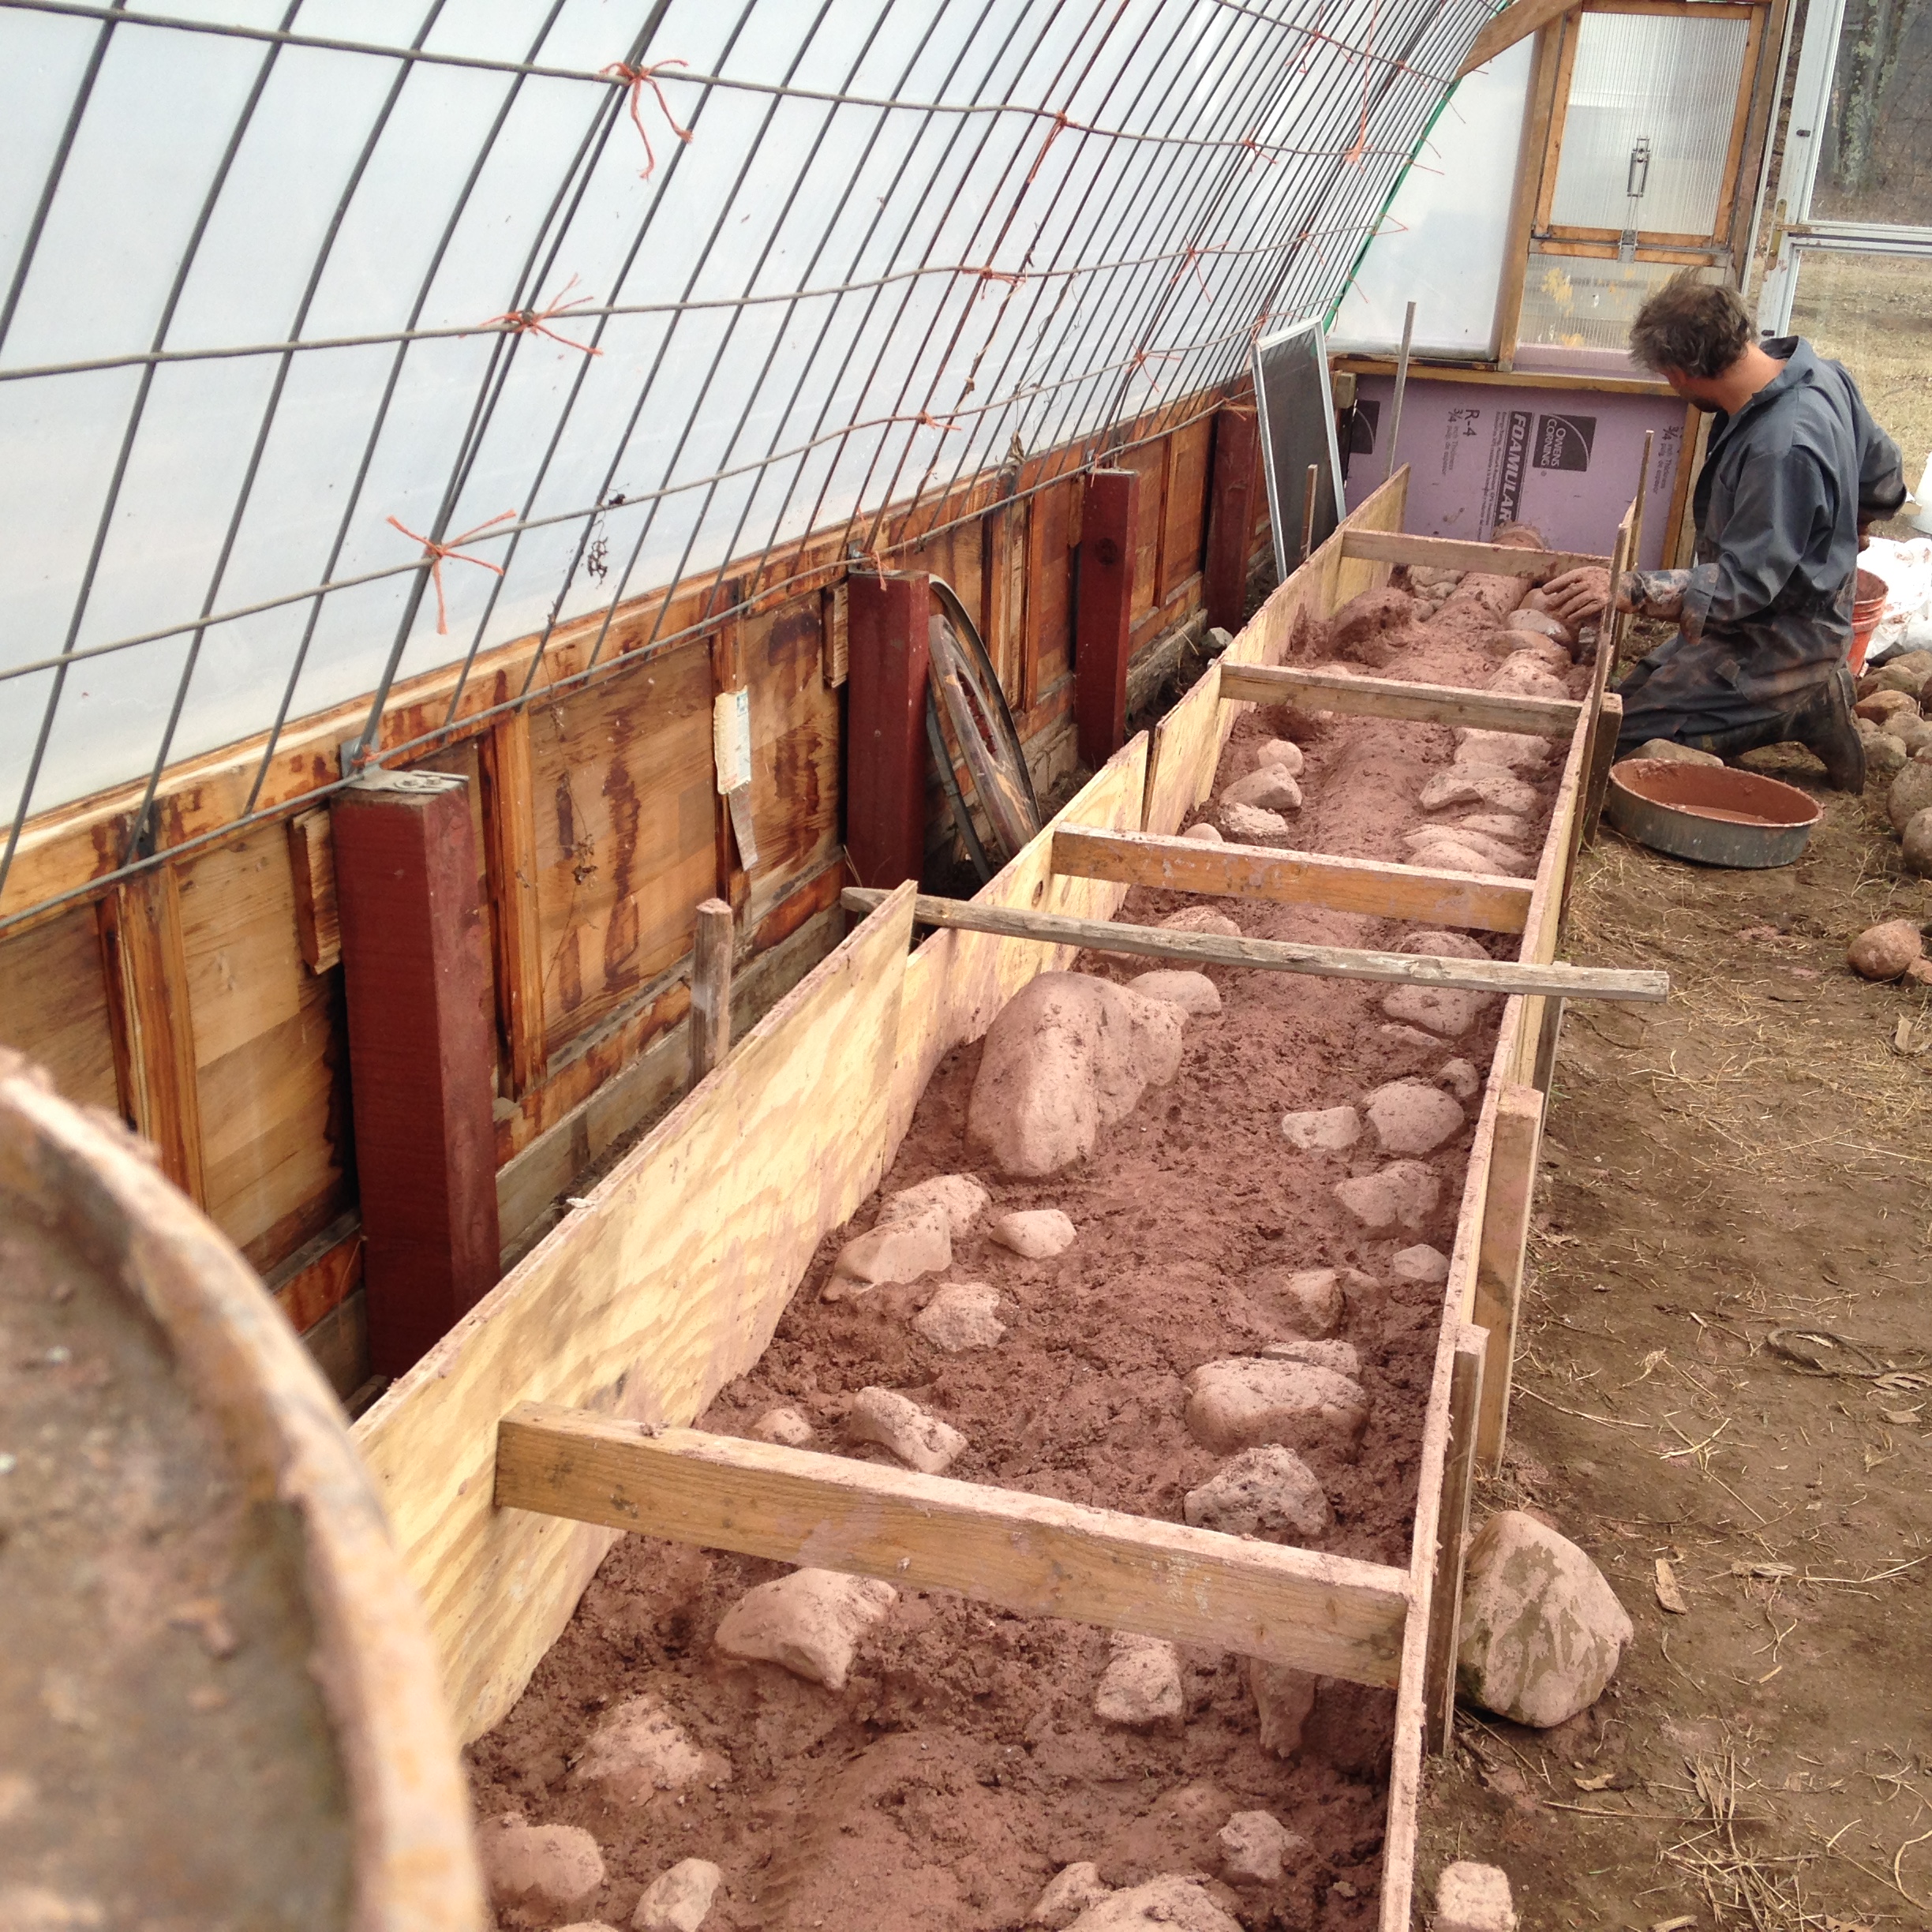
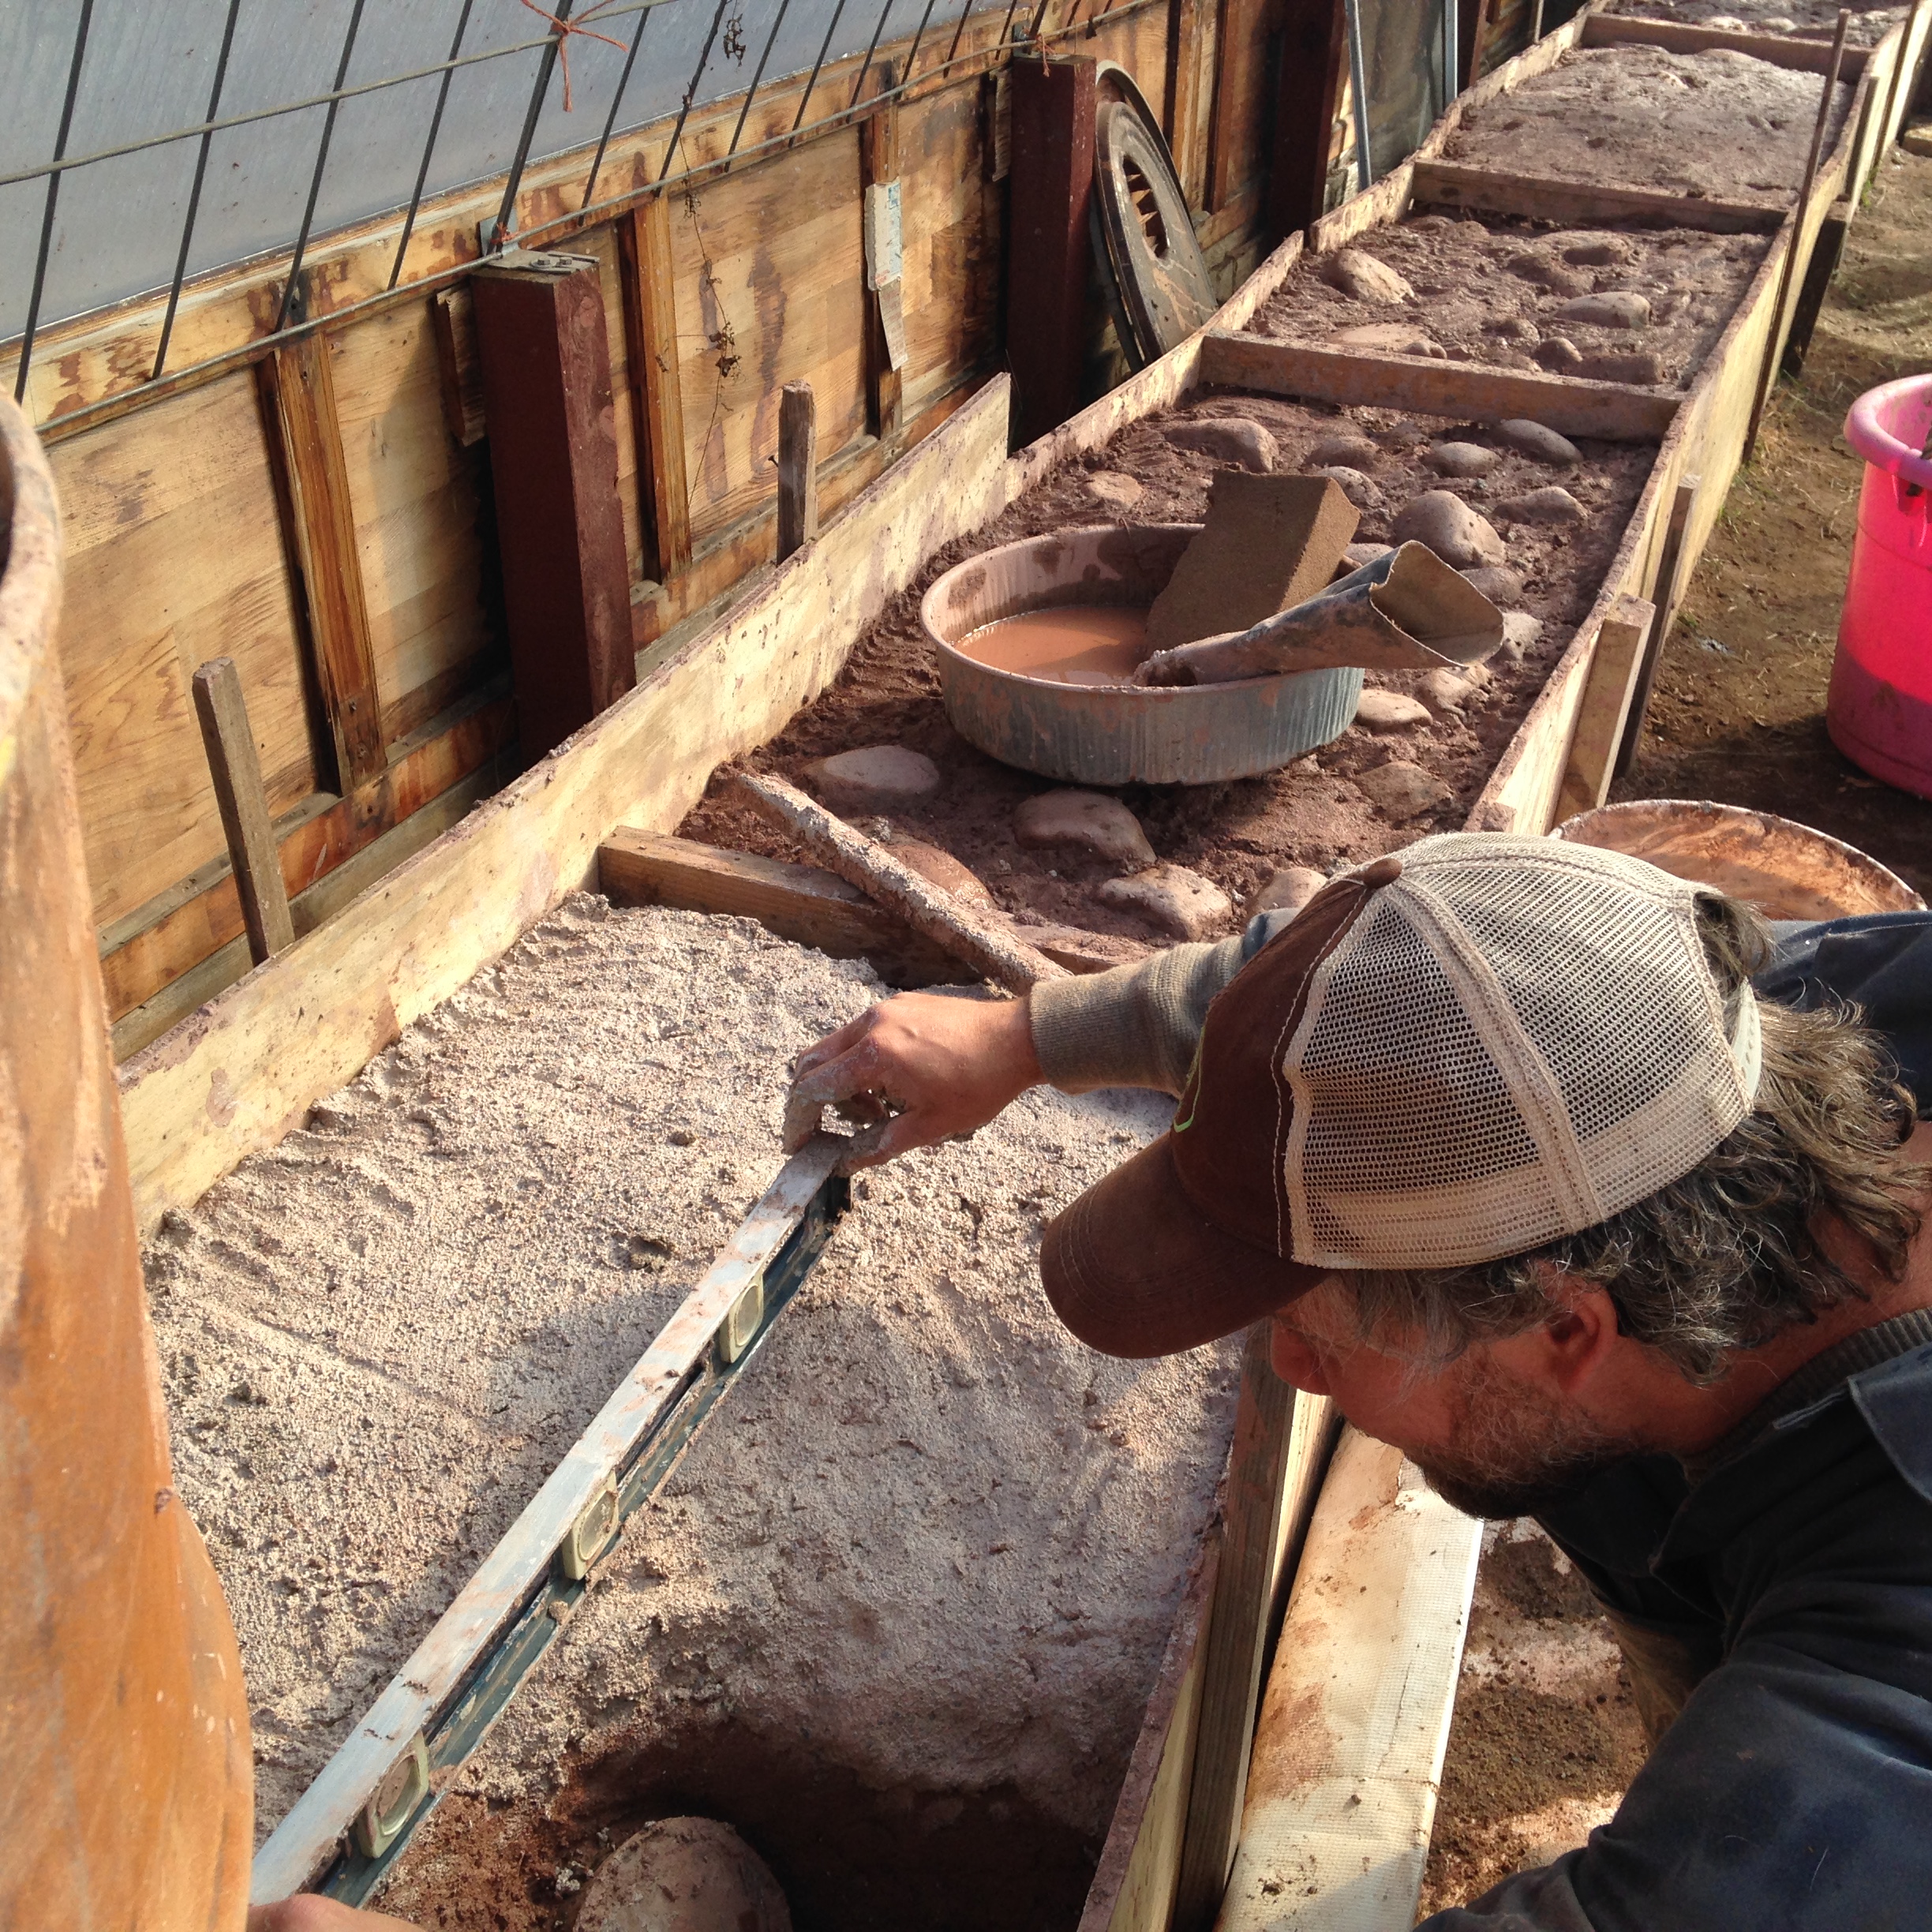
When we returned in March, we got to work on the thermal mass bench … which turned out to be a lot more work than we’d bargained for.

laying out the exhaust ducting, and taping all the joints.


Kristin did all the mixing. ALL of it. We mixed 2 parts sand for every 1 part of clay. We went through at least a full yard of sand (two trailer loads) and almost all of the free clay we'd scored. It took us several solid days to get it all mixed and added to the bench ... Kristin's feet and my hands looked like they'd been to war by the end.
Kristin did all the mixing. ALL of it. We mixed 2 parts sand for every 1 part of clay. We went through at least a full yard of sand (two trailer loads) and almost all of the free clay we’d scored. It took us several solid days to get it all mixed and added to the bench … Kristin’s feet and my hands looked like they’d been to war by the end.


Exhaust duct was coated in clay slip for maximum heat transference. We tried to use as much river rock as we could to save on clay and sand, but it still took an incredible amount to fill the bench (23' long, 14" high, and 24" wide - wider where the forms bowed out)
Exhaust duct was coated in clay slip for maximum heat transference. We tried to use as much river rock as we could to save on clay and sand, but it still took an incredible amount to fill the bench (23′ long, 14″ high, and 24″ wide – wider where the forms bowed out)
first test fire! It went .. OK. We decided to wait until we had more completed before really testing her out.
feeling the heat at the top of the riser

IMG_4014

slowly filling the forms with clay/sand mix and rocks. Kristin down at her mixing station.
ha ... so it got too hot for pants in the sunny greenhouse
ha … so it got too hot for pants in the sunny greenhouse

IMG_4024

Music was a required tool to help maintain spirits during the tedious mixing process.

IMG_4029

Kristin developed a technique of slicing off slabs of clay and spreading them out on the sand, then topping that with more sand, before starting to stomp and twist.

IMG_4628 IMG_4042

Finally getting to the top layer! The last foot or so seemed to take forever to fill in. (This is still sand/clay mix - but some of the clay was a white instead of red.)
Finally getting to the top layer! The last foot or so seemed to take forever to fill in. (This is still sand/clay mix – but some of the clay was a white instead of red.)
end of the bench before the exit to the chimney - was insulated with perlite/clay mix end cap
end of the bench before the exit to the chimney – was insulated with perlite/clay mix end cap

IMG_4671

Bench completed!! Now to start drying out several tons of wet clay ...
Bench almost completed .. just had to let it set up before removing thos internal braces, and filling in the gaps they left behind. Then it was time to start drying out several tons of wet clay …

IMG_4722

Chimney V1 - uninsulated and rather short. Initial burns couldnt even drive smoke up the pipe - it just pooped out onto the ground through the open cleanout hole at the bottom, because all the heat had ben leached out by the wet, cold clay bench.
Chimney V1 – uninsulated and rather short. Initial burns couldnt even drive smoke up the pipe – it just pooped out onto the ground through the open cleanout hole at the bottom, because all the heat had ben leached out by the wet, cold clay bench.
added some thermal mass to the barrel to limit amount of heat lost to radiation off the metal. Using the heat at the top for a wood drying rack. Artichokes enjoying the radiant heat.
Chimney V2 - taller. (I don.t
Chimney V2 – taller. (There doesn’t seem to be a photo of Chimney V3 aka “Paul Baxter” – with insulation and a wind cap courtesy of a nameless donor.)


IMG_4820

Booster fire! This proved crucial during the bench-drying phase for a fast drafting system with hot, oxygen rich flame - the little fire would be pulled up the chimnet, creating suction on the rest of the system, pulling air through the fire in the combustion chamber. (Now that it is dried out, we only use this to start the system up, to avoid cold air plugging up the system)
Booster fire! This proved crucial during the bench-drying phase for a fast drafting system with hot, oxygen rich flame – the little fire would be pulled up the chimney, creating suction on the rest of the system, pulling air through the fire in the combustion chamber. (Now that it is dried out, we only use this to start the system up,  avoiding a cold air plug)


the wickets that support the row cover fabric are visible here (yard sign posts we scavenged)


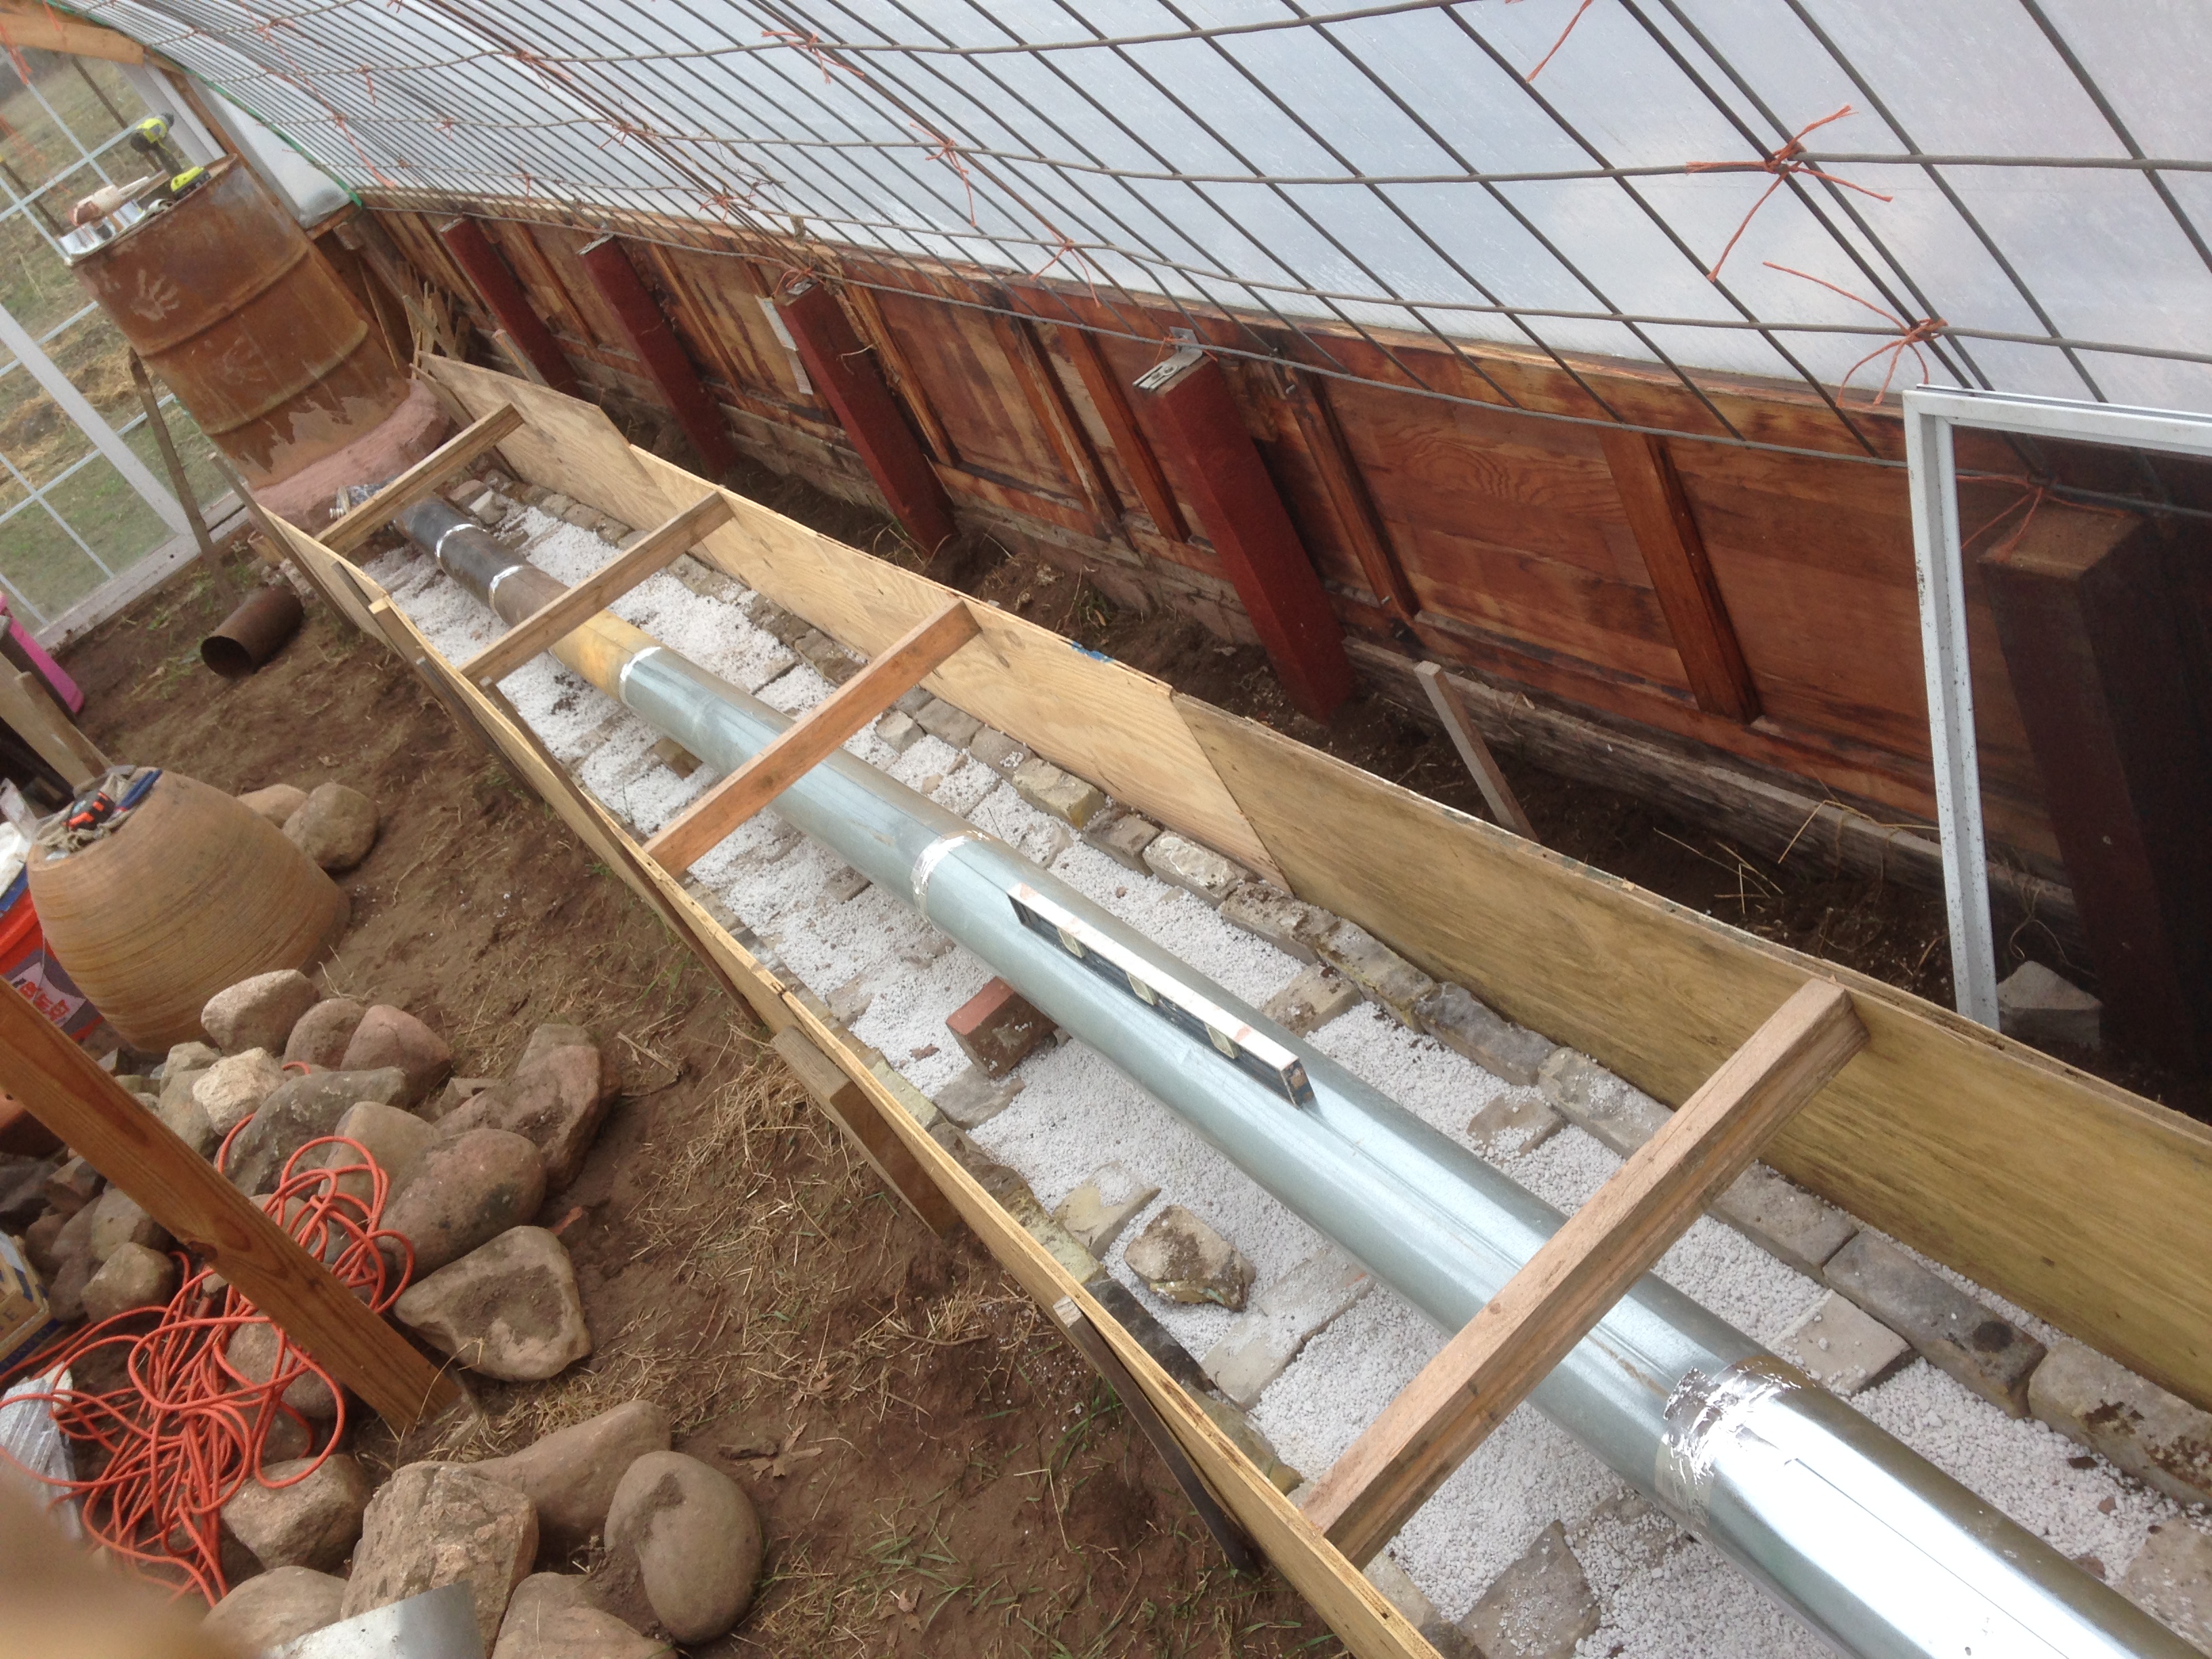
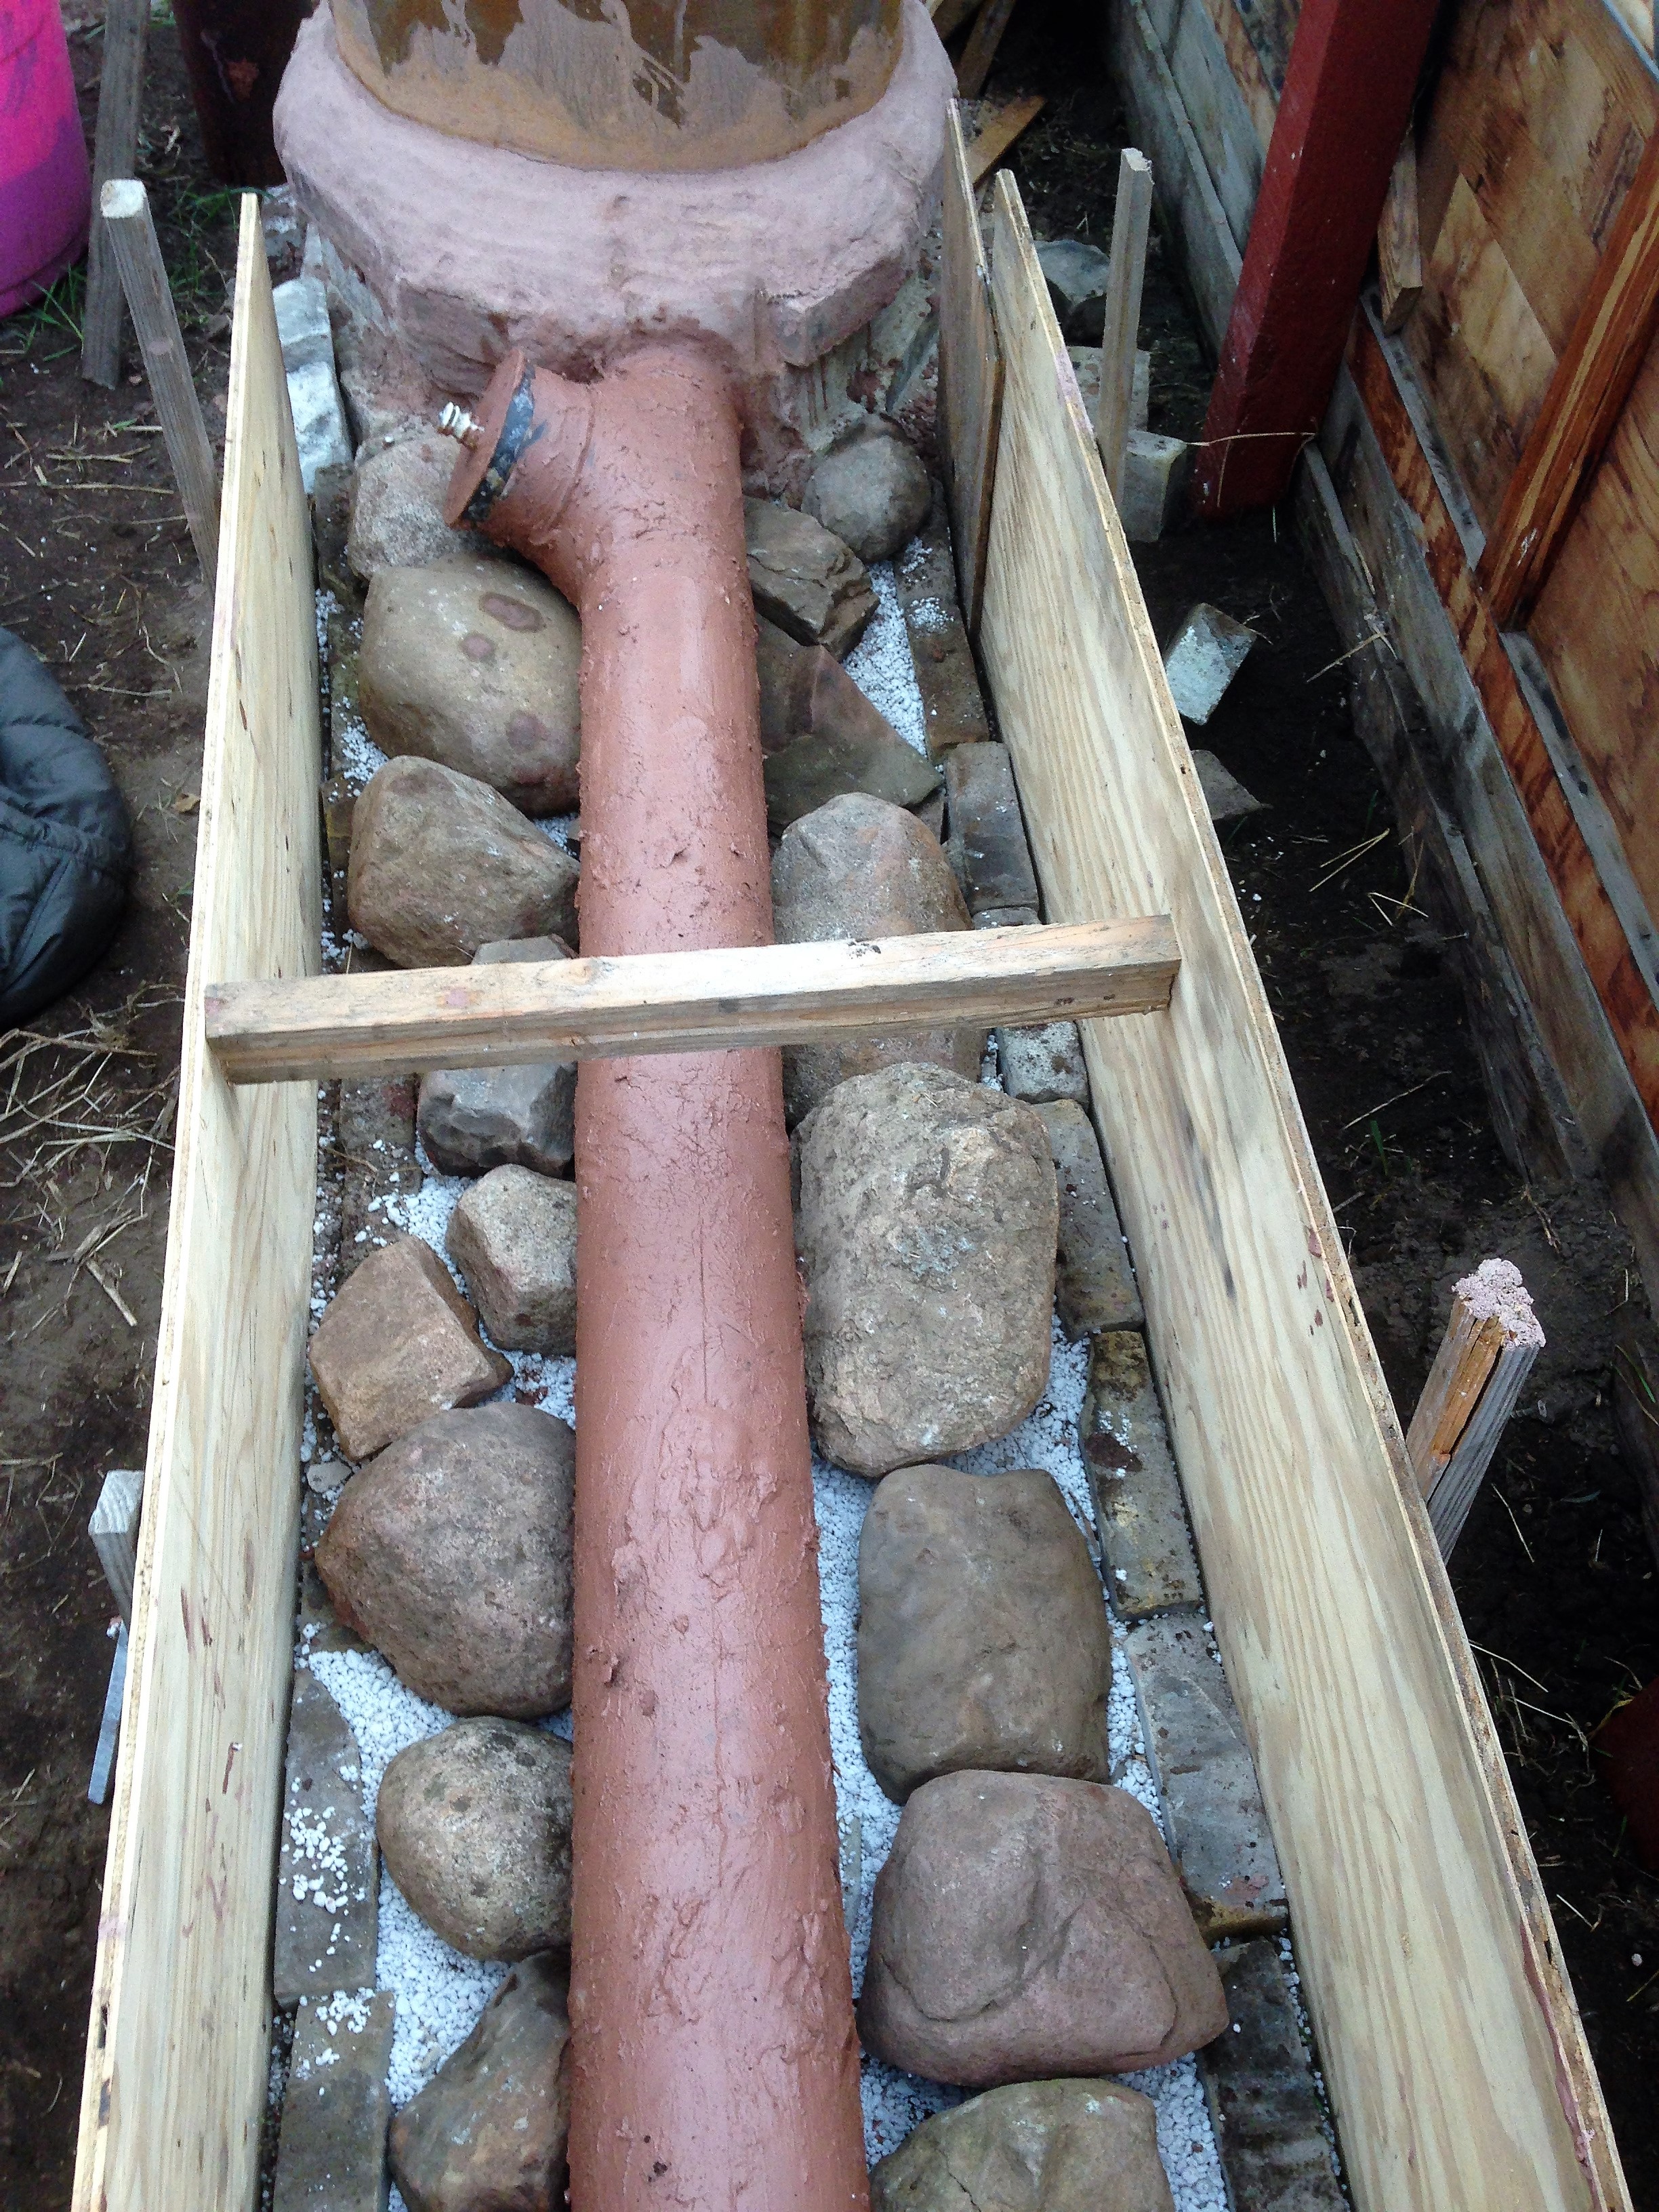
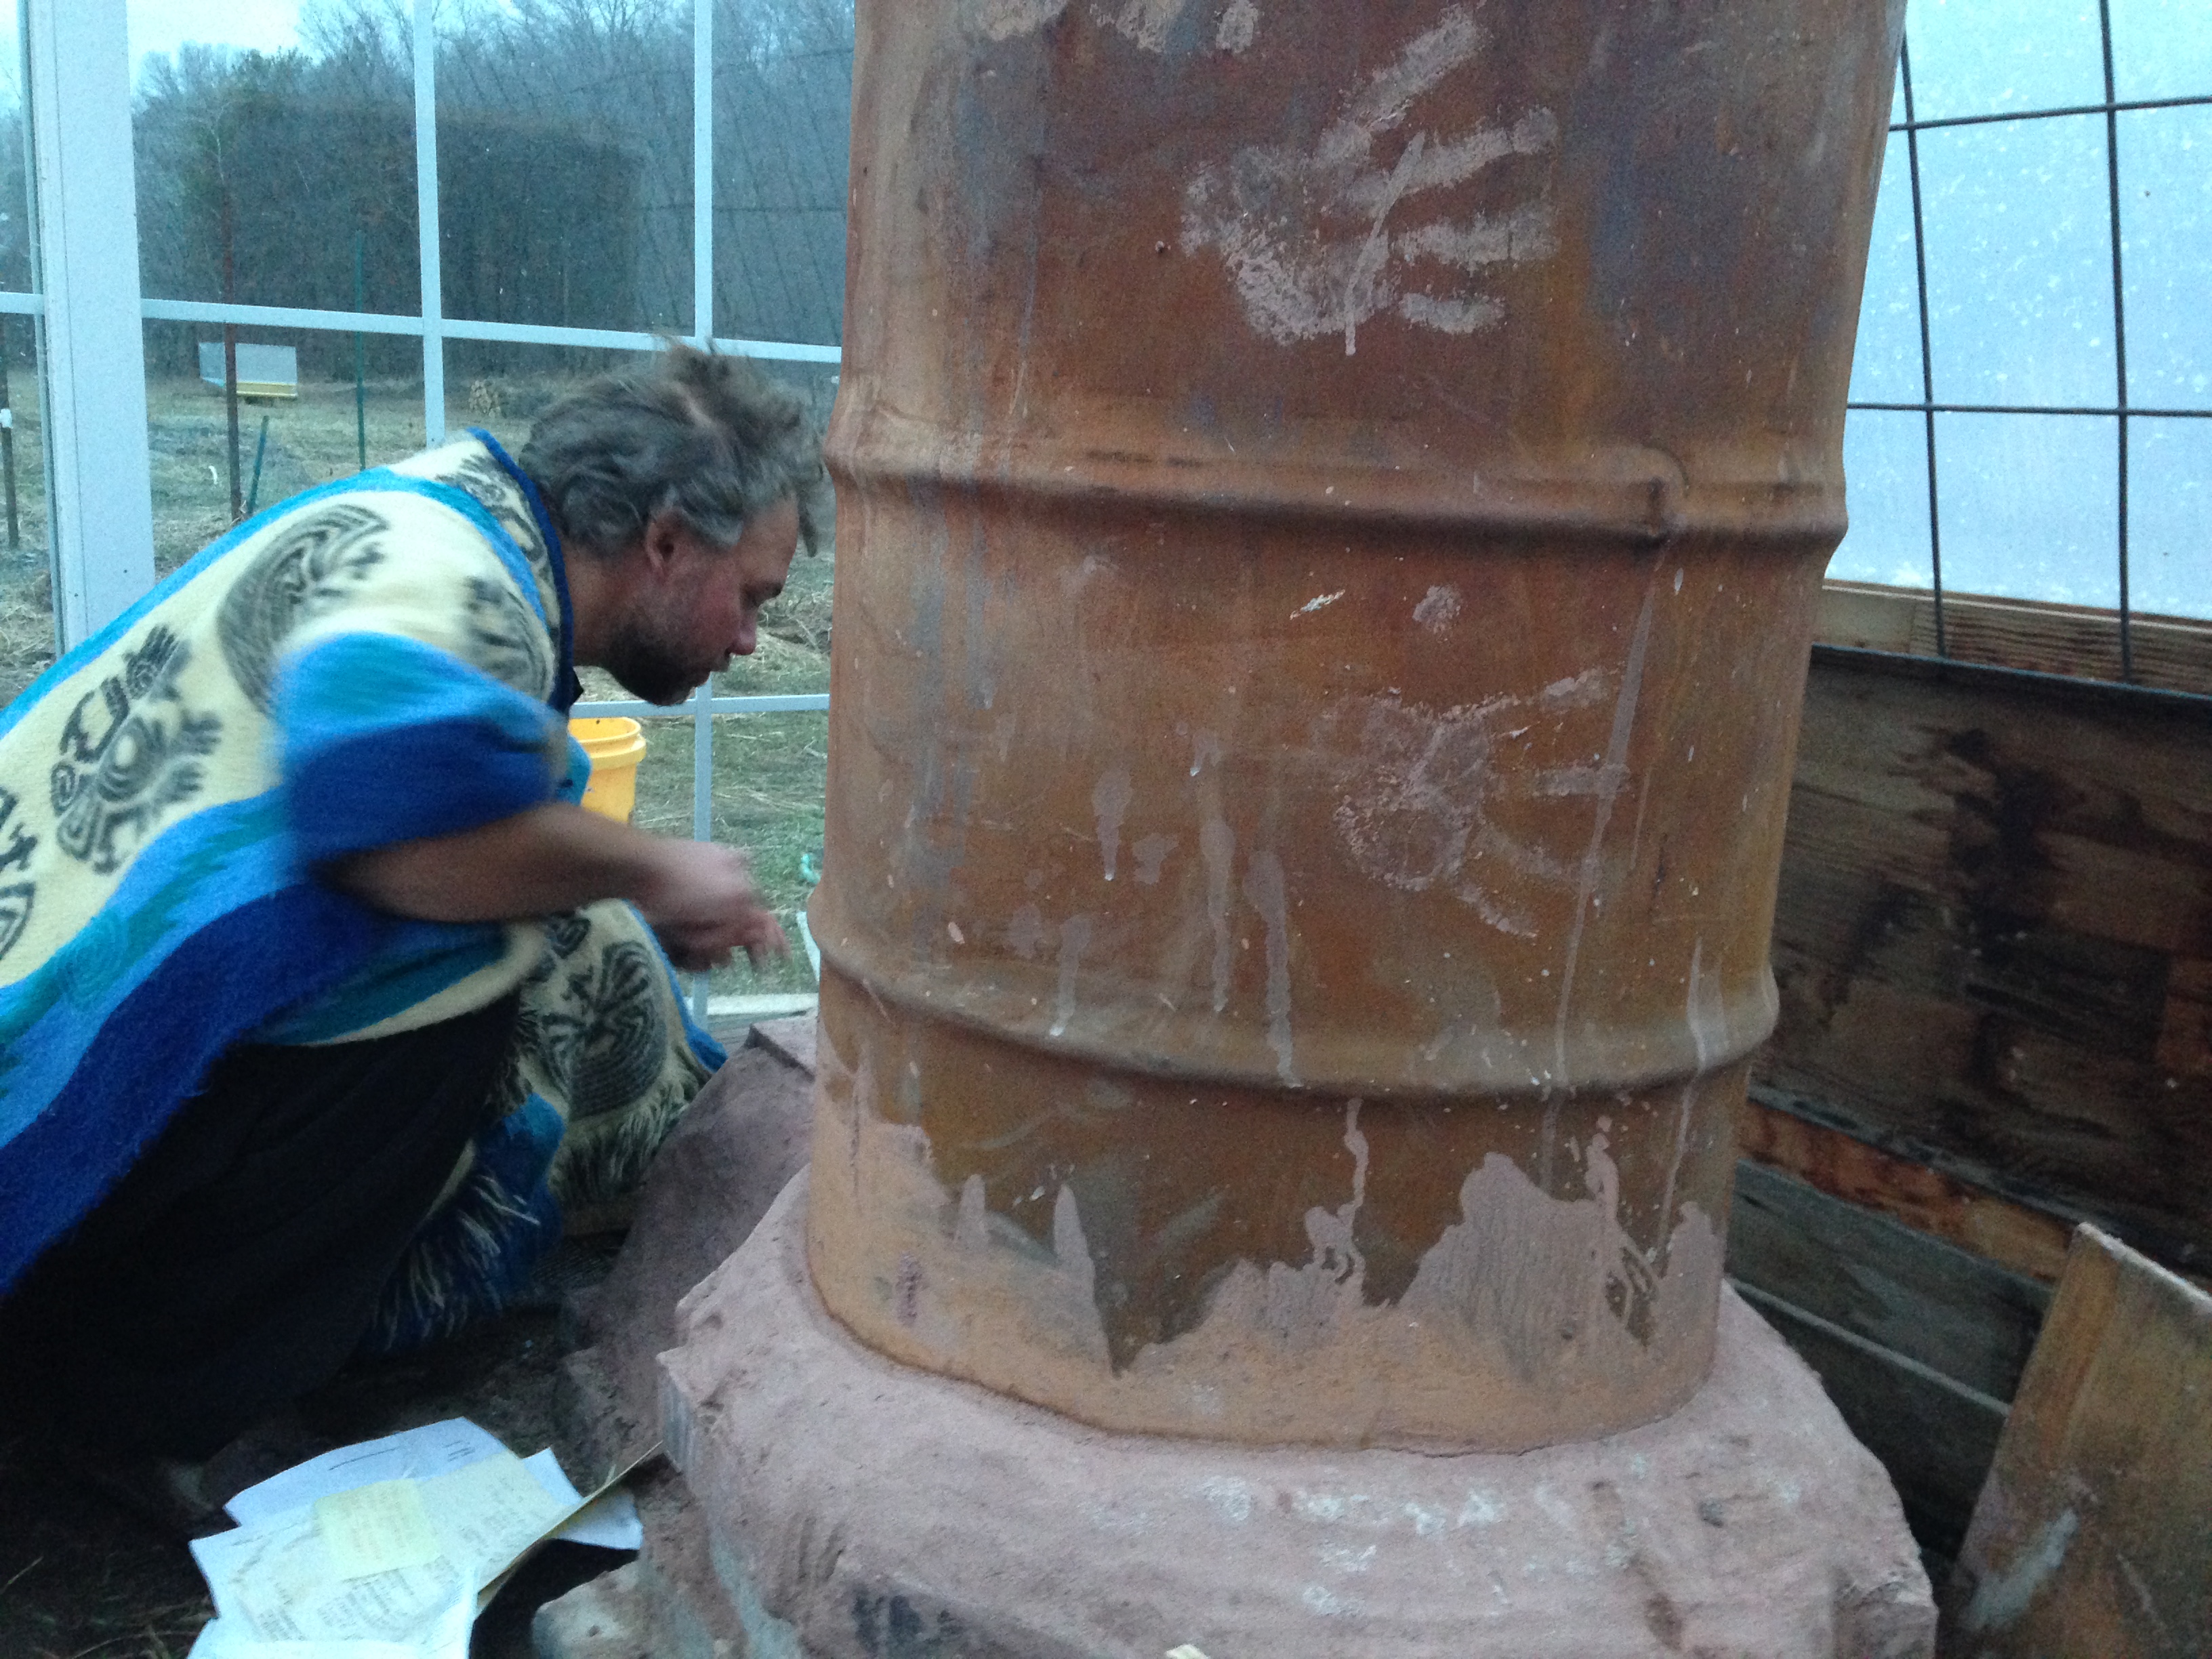
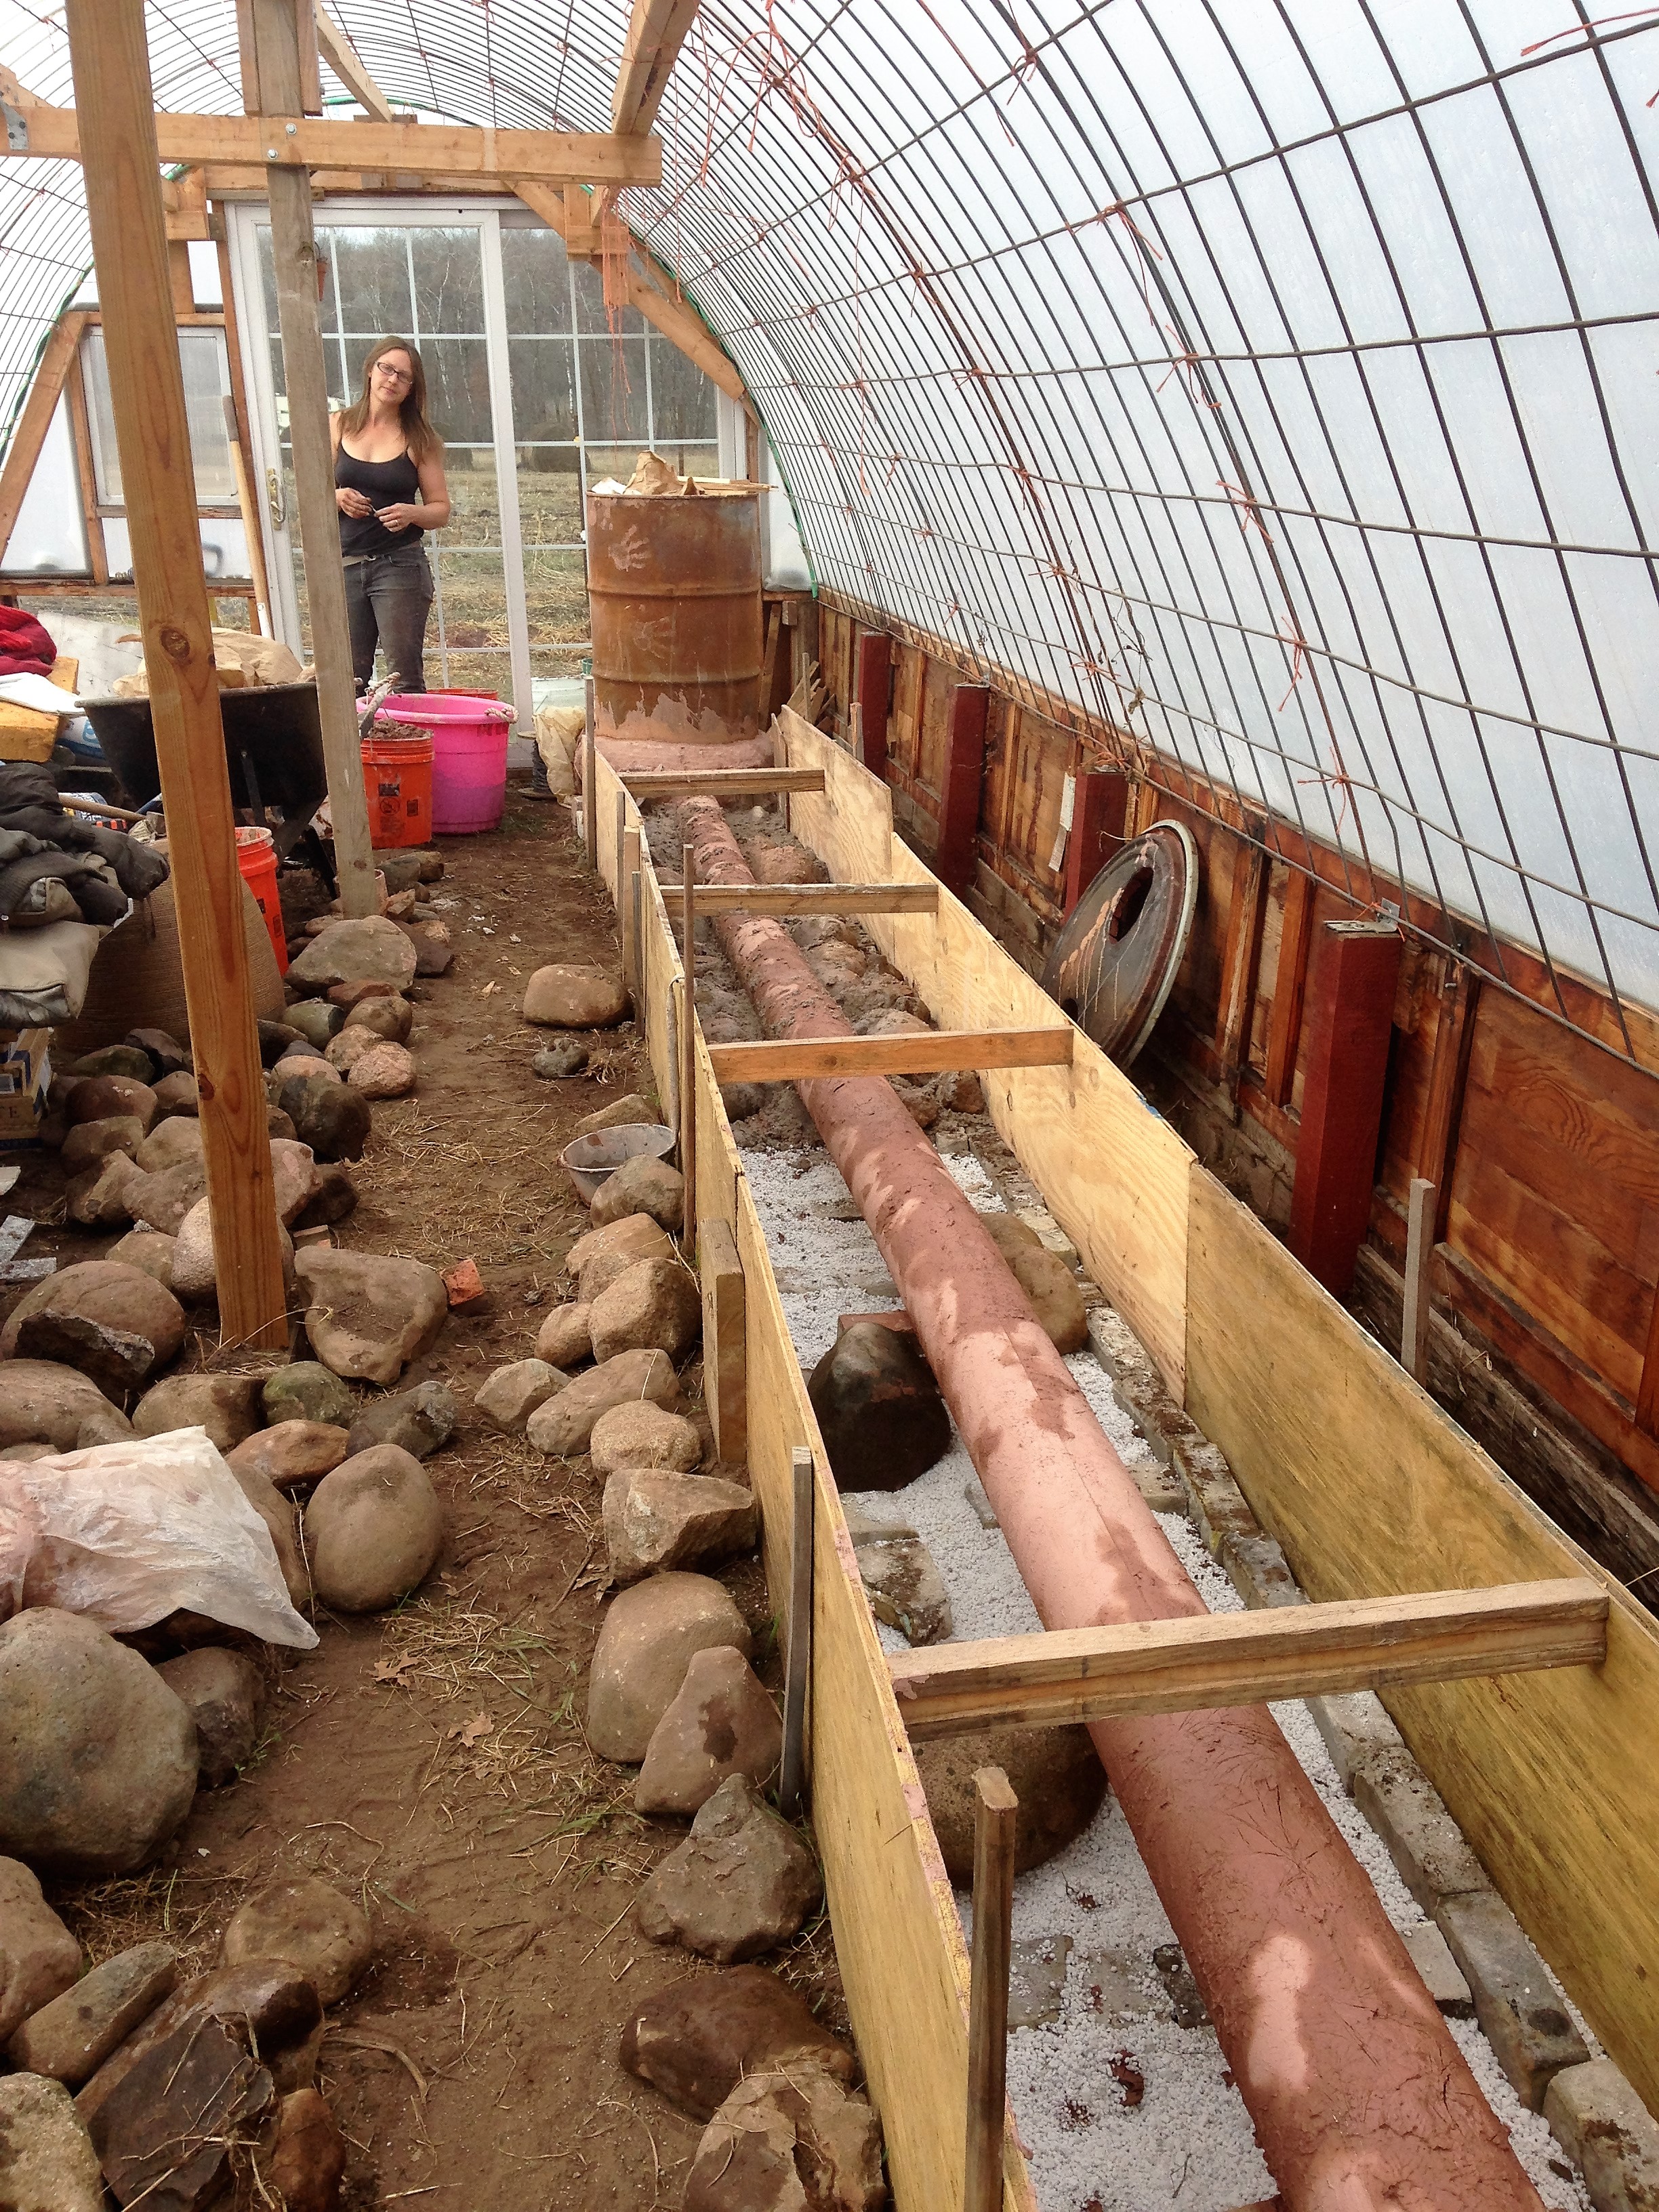
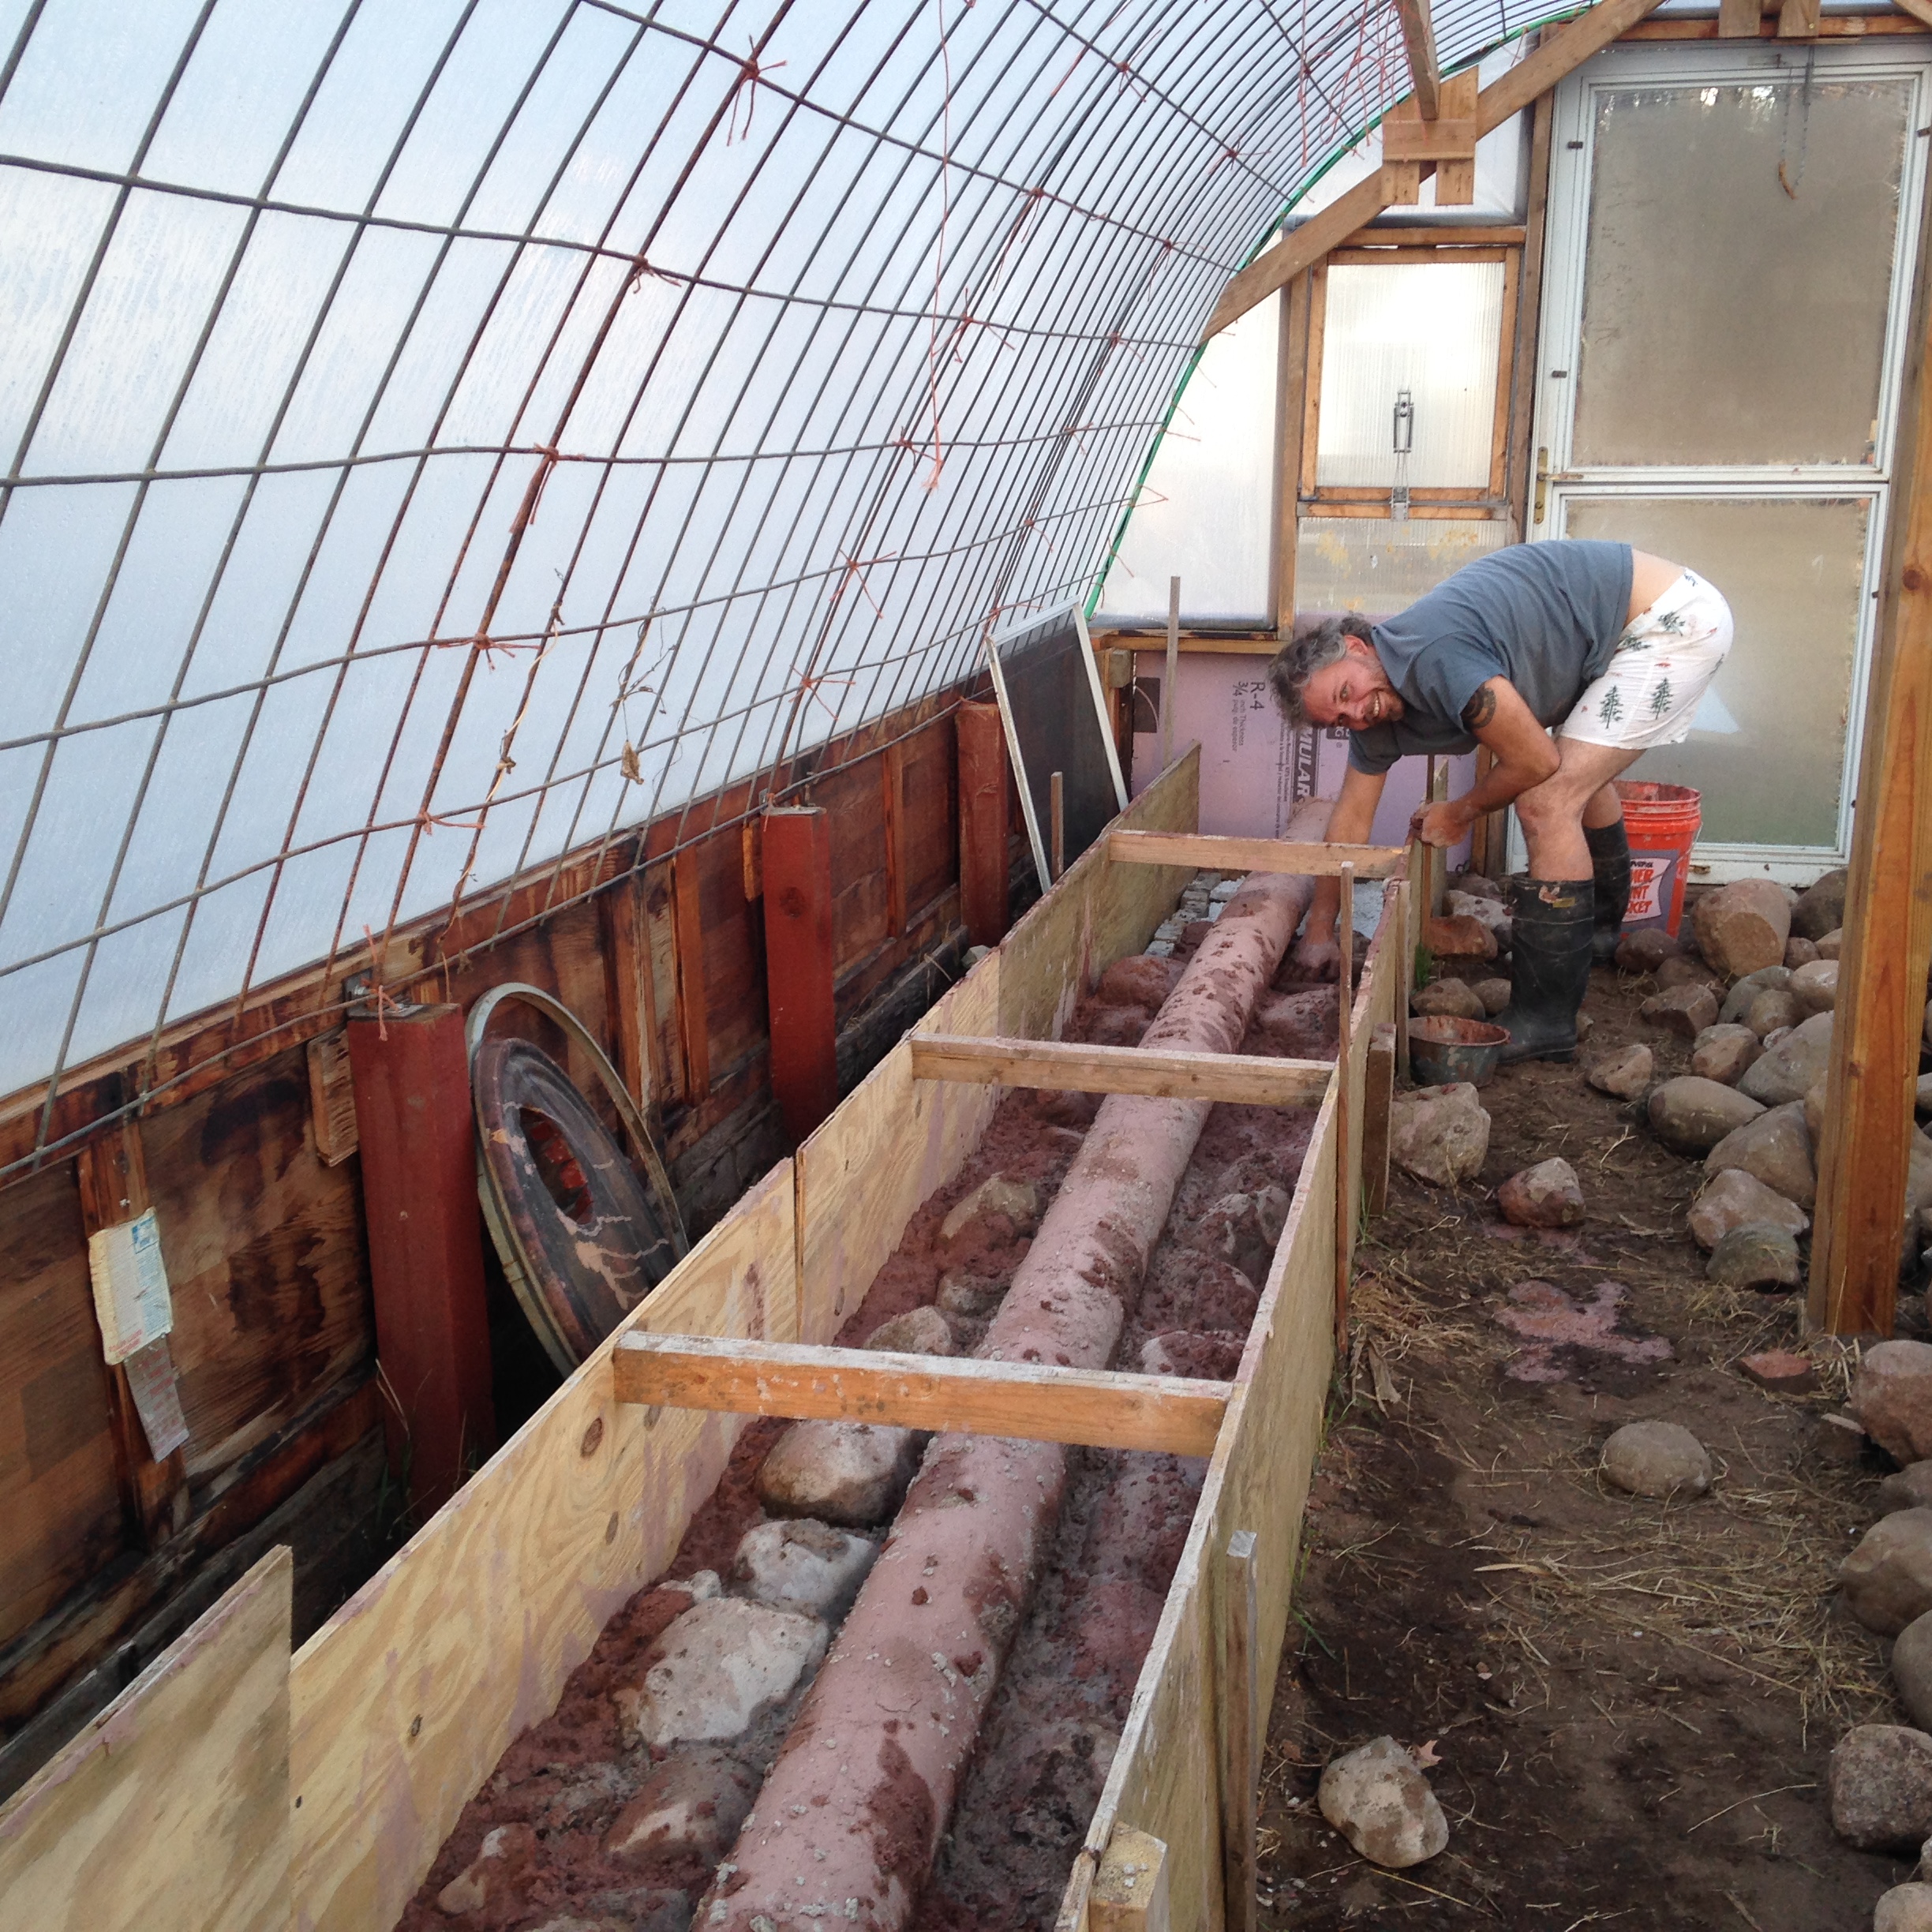
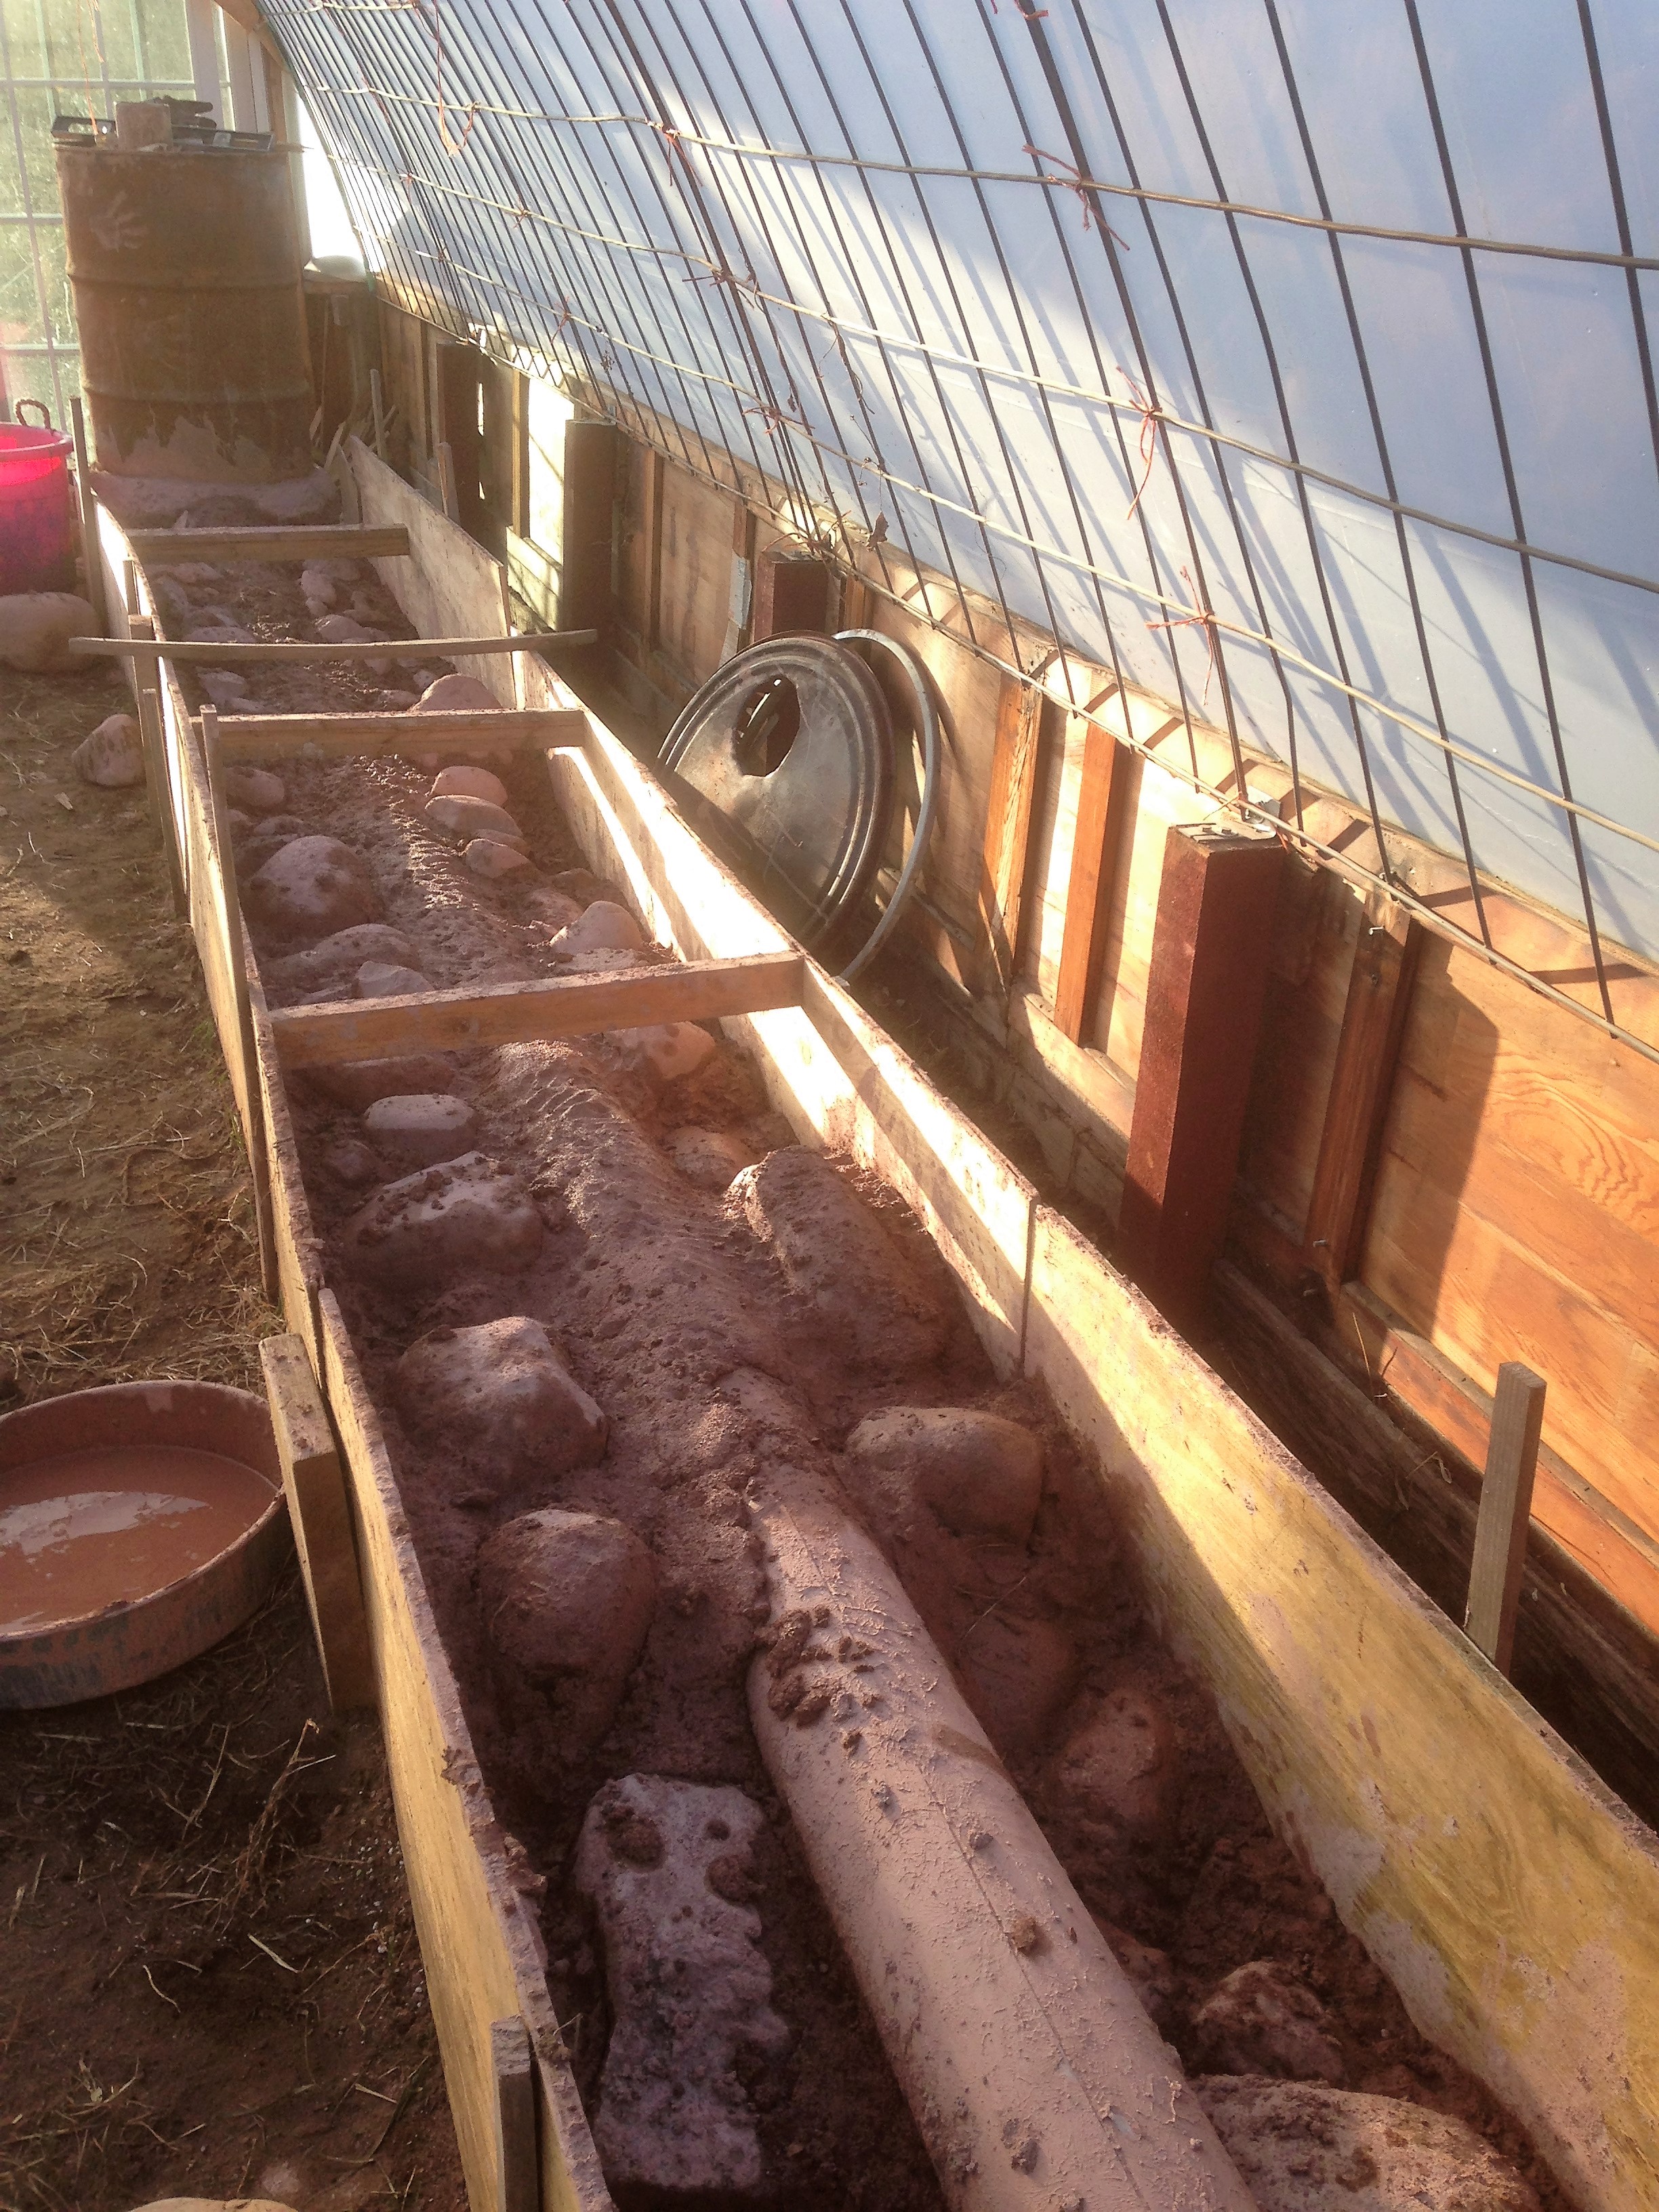
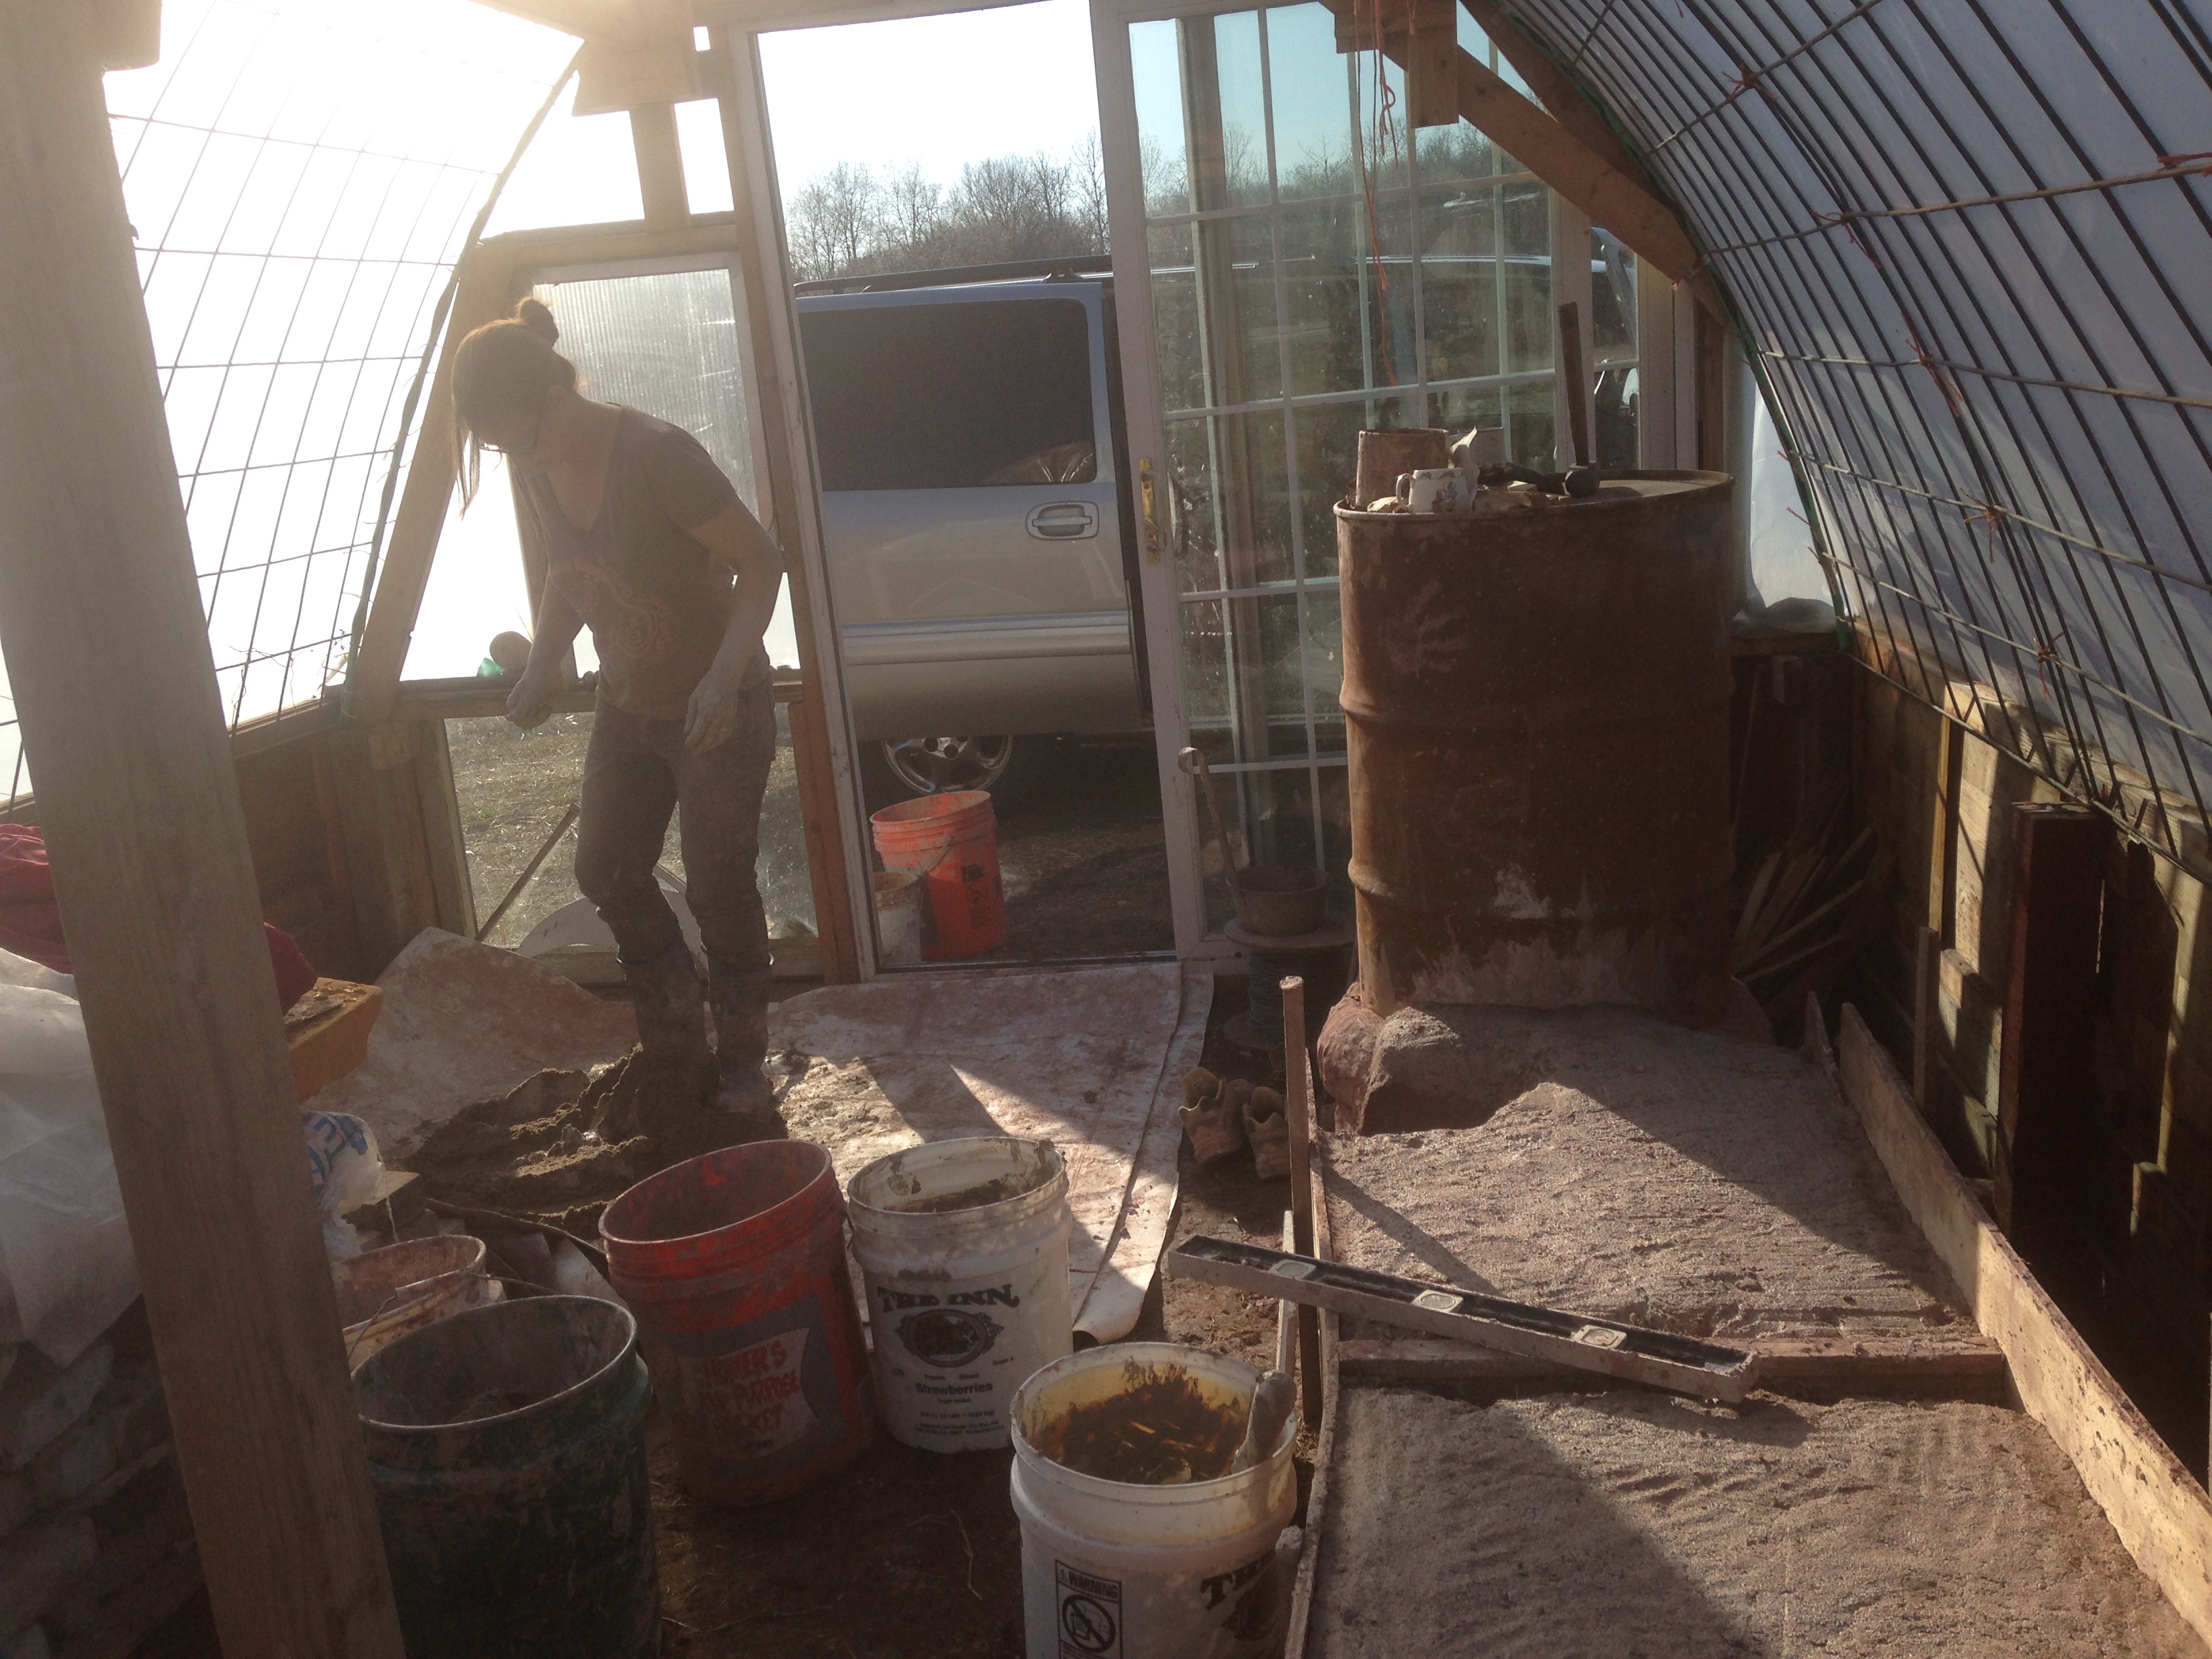
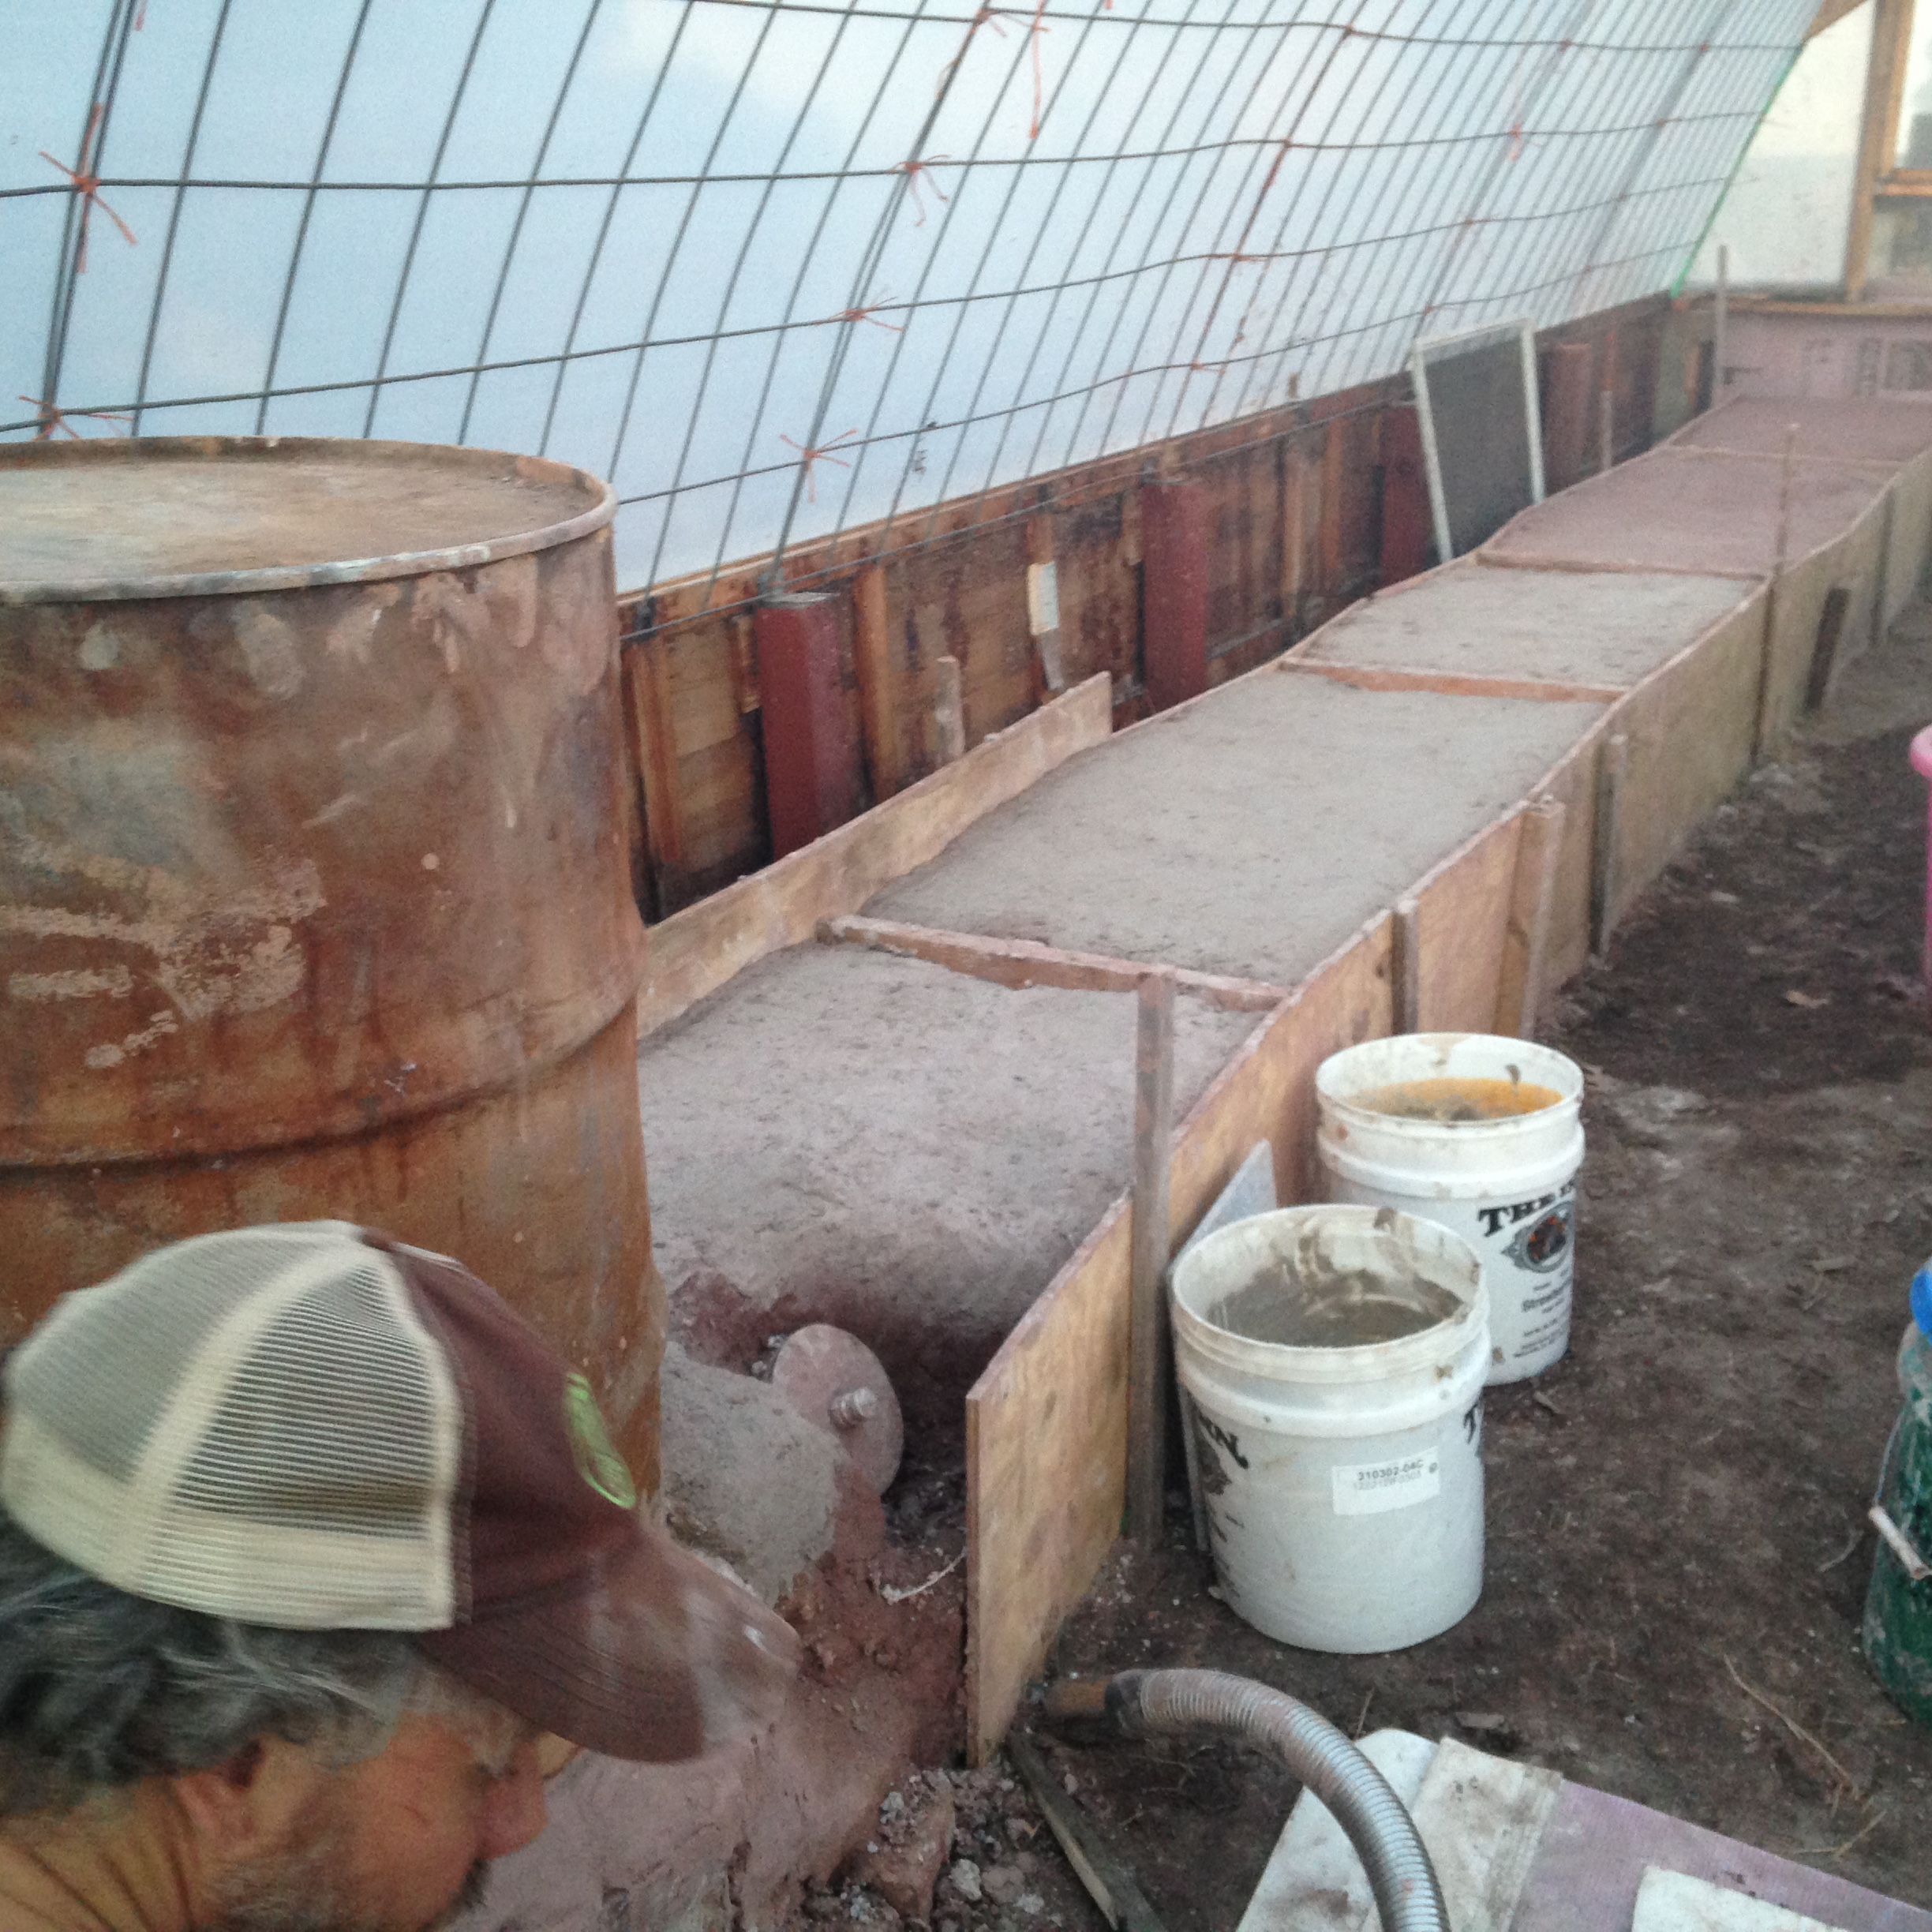
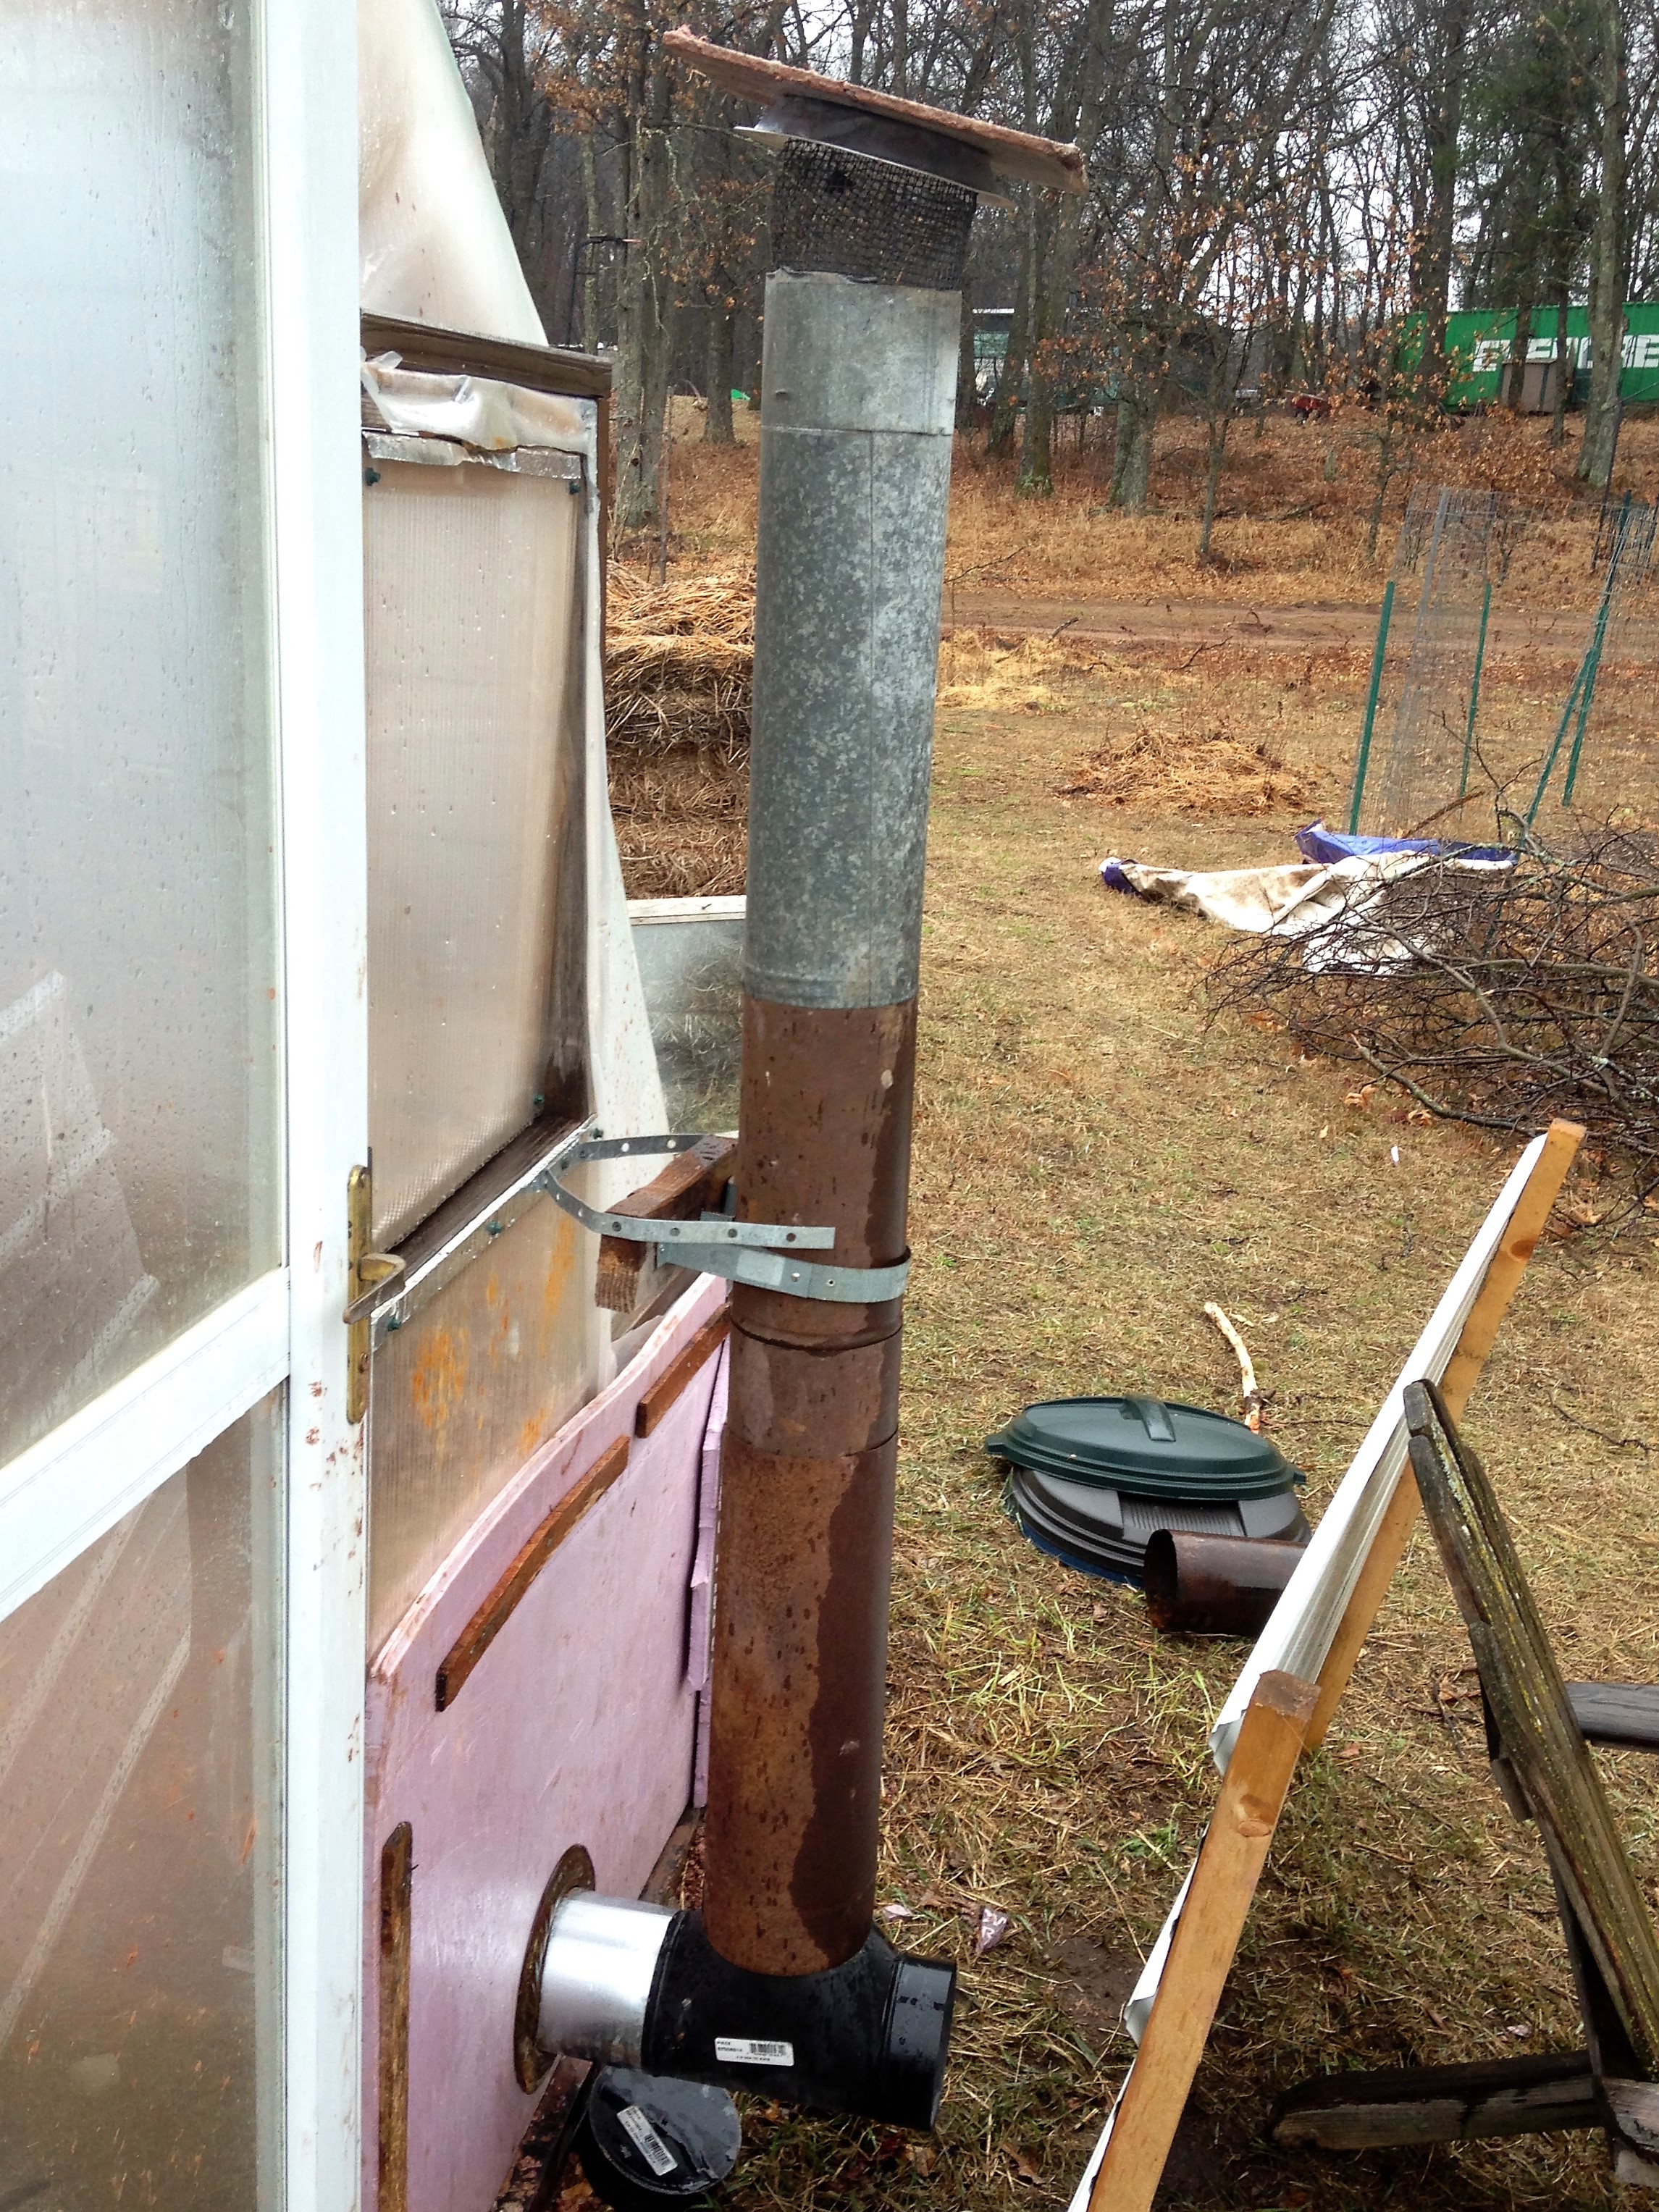
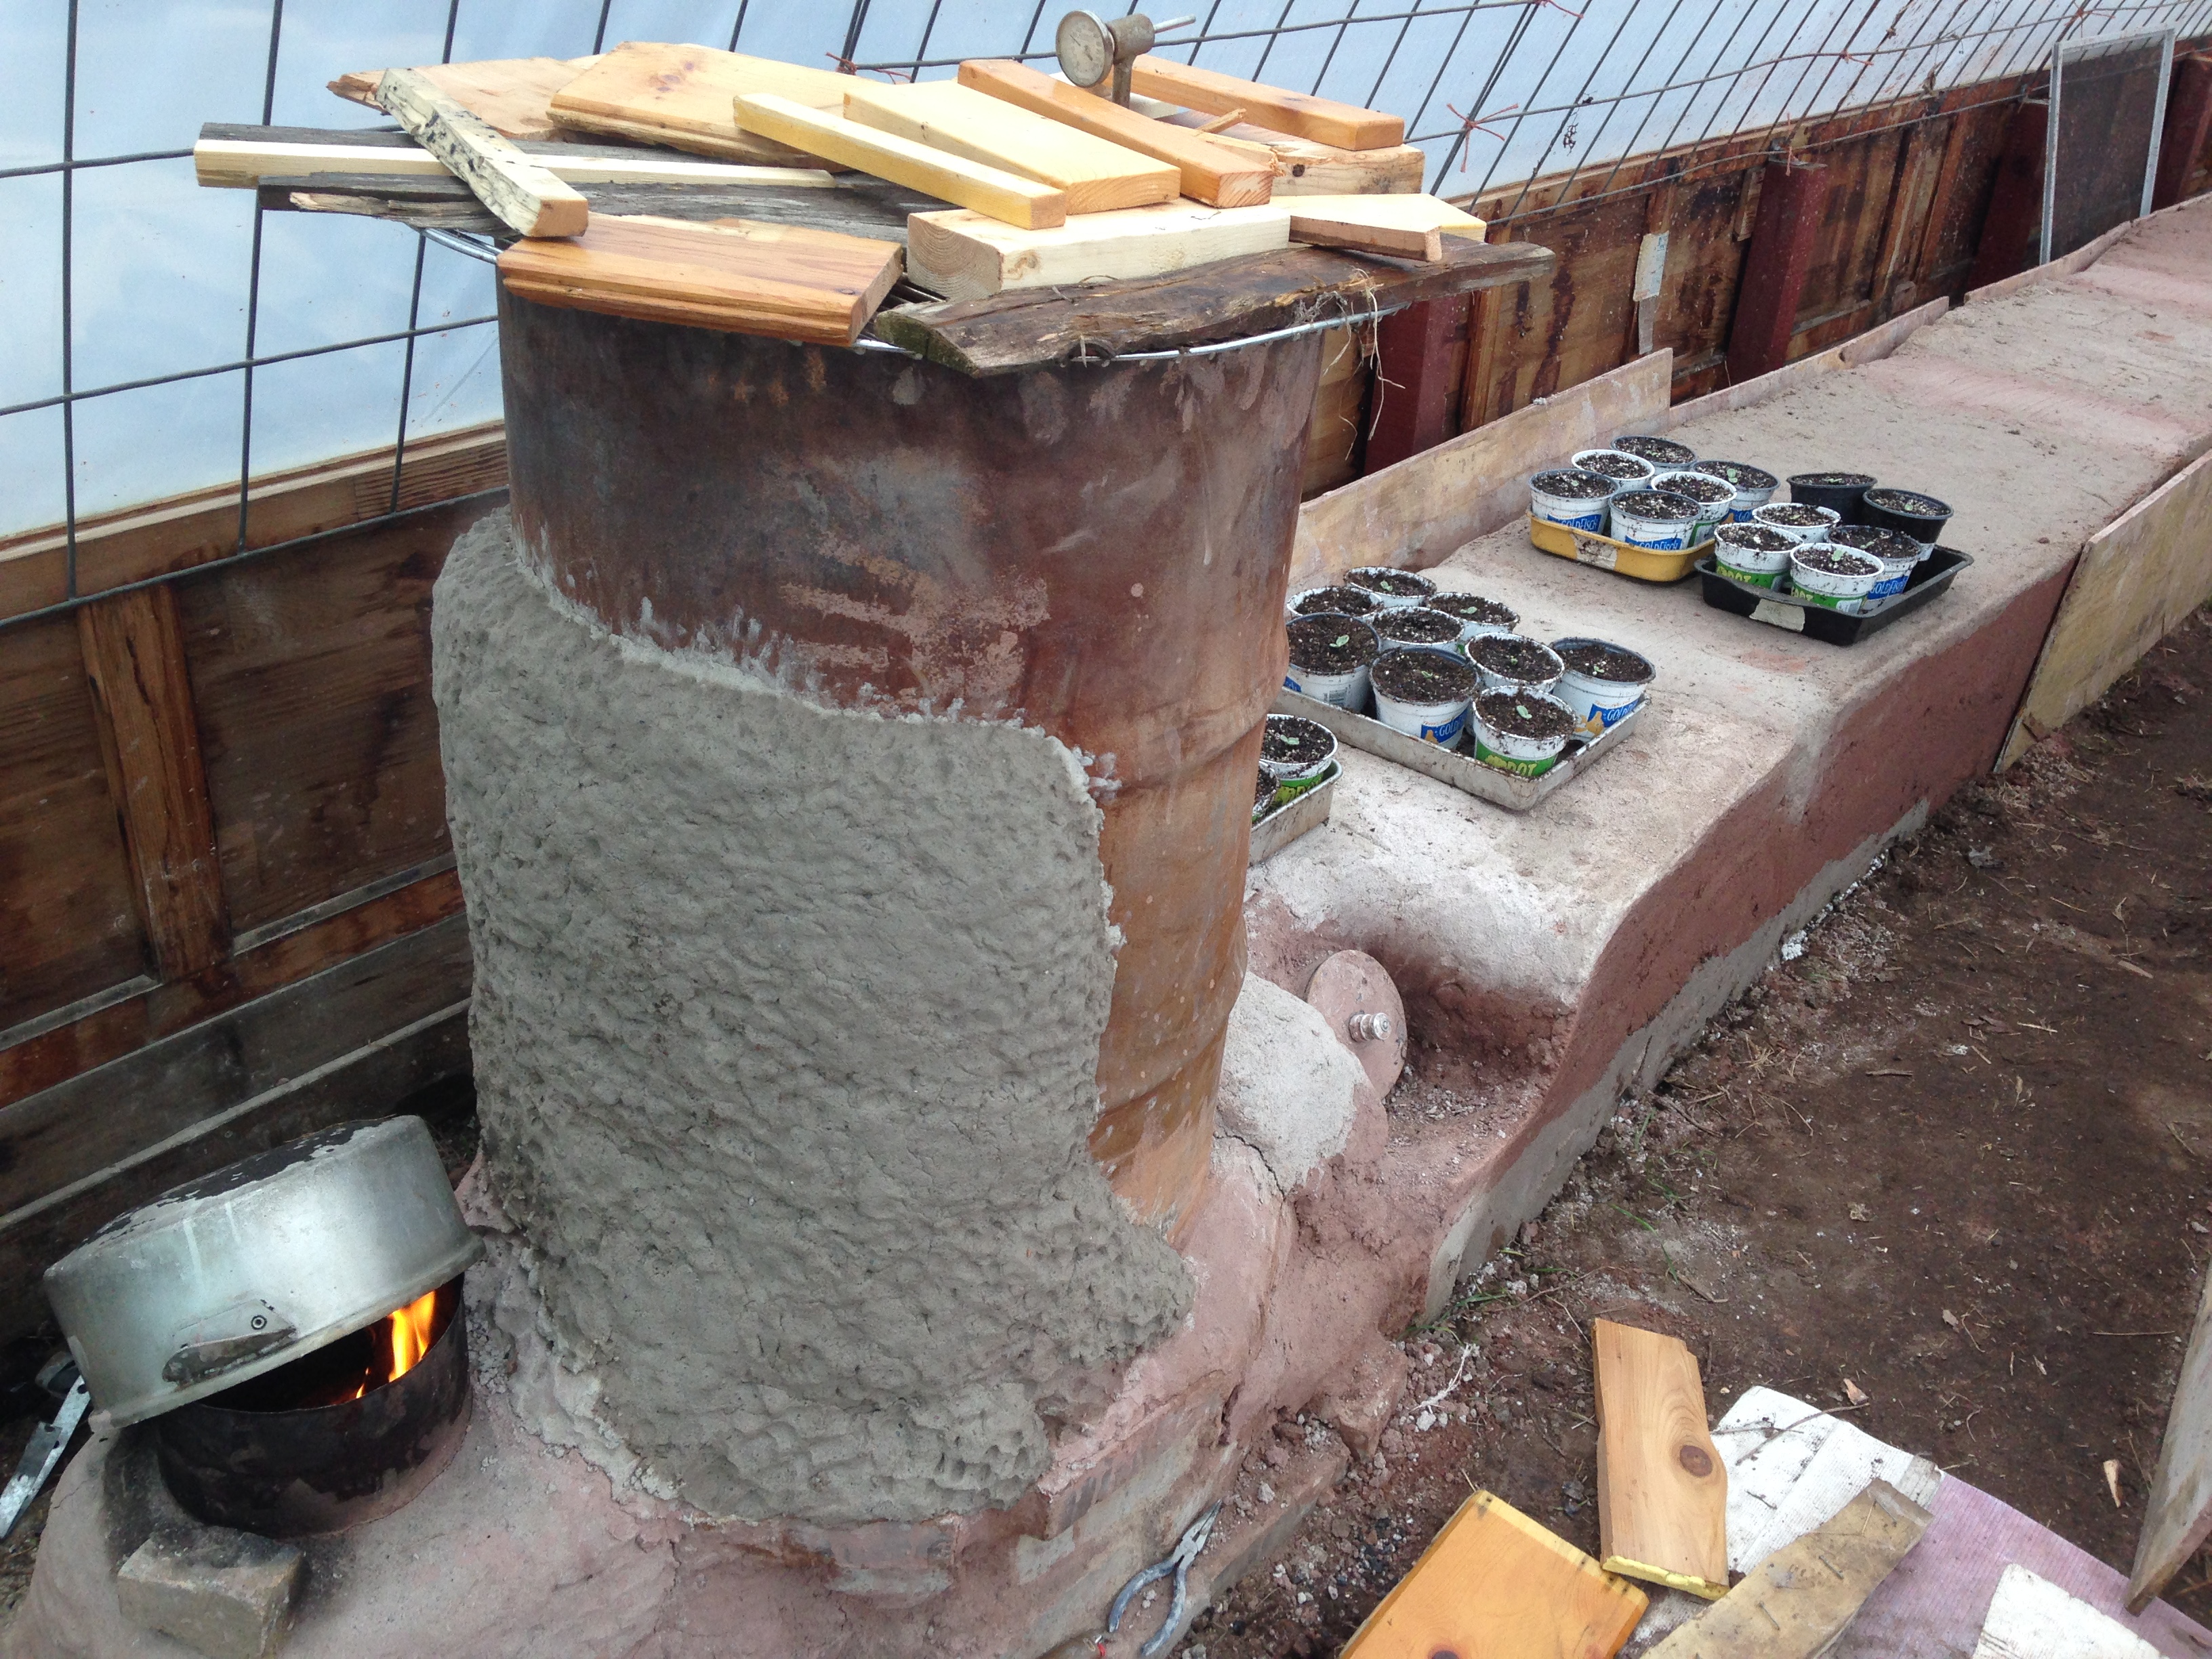
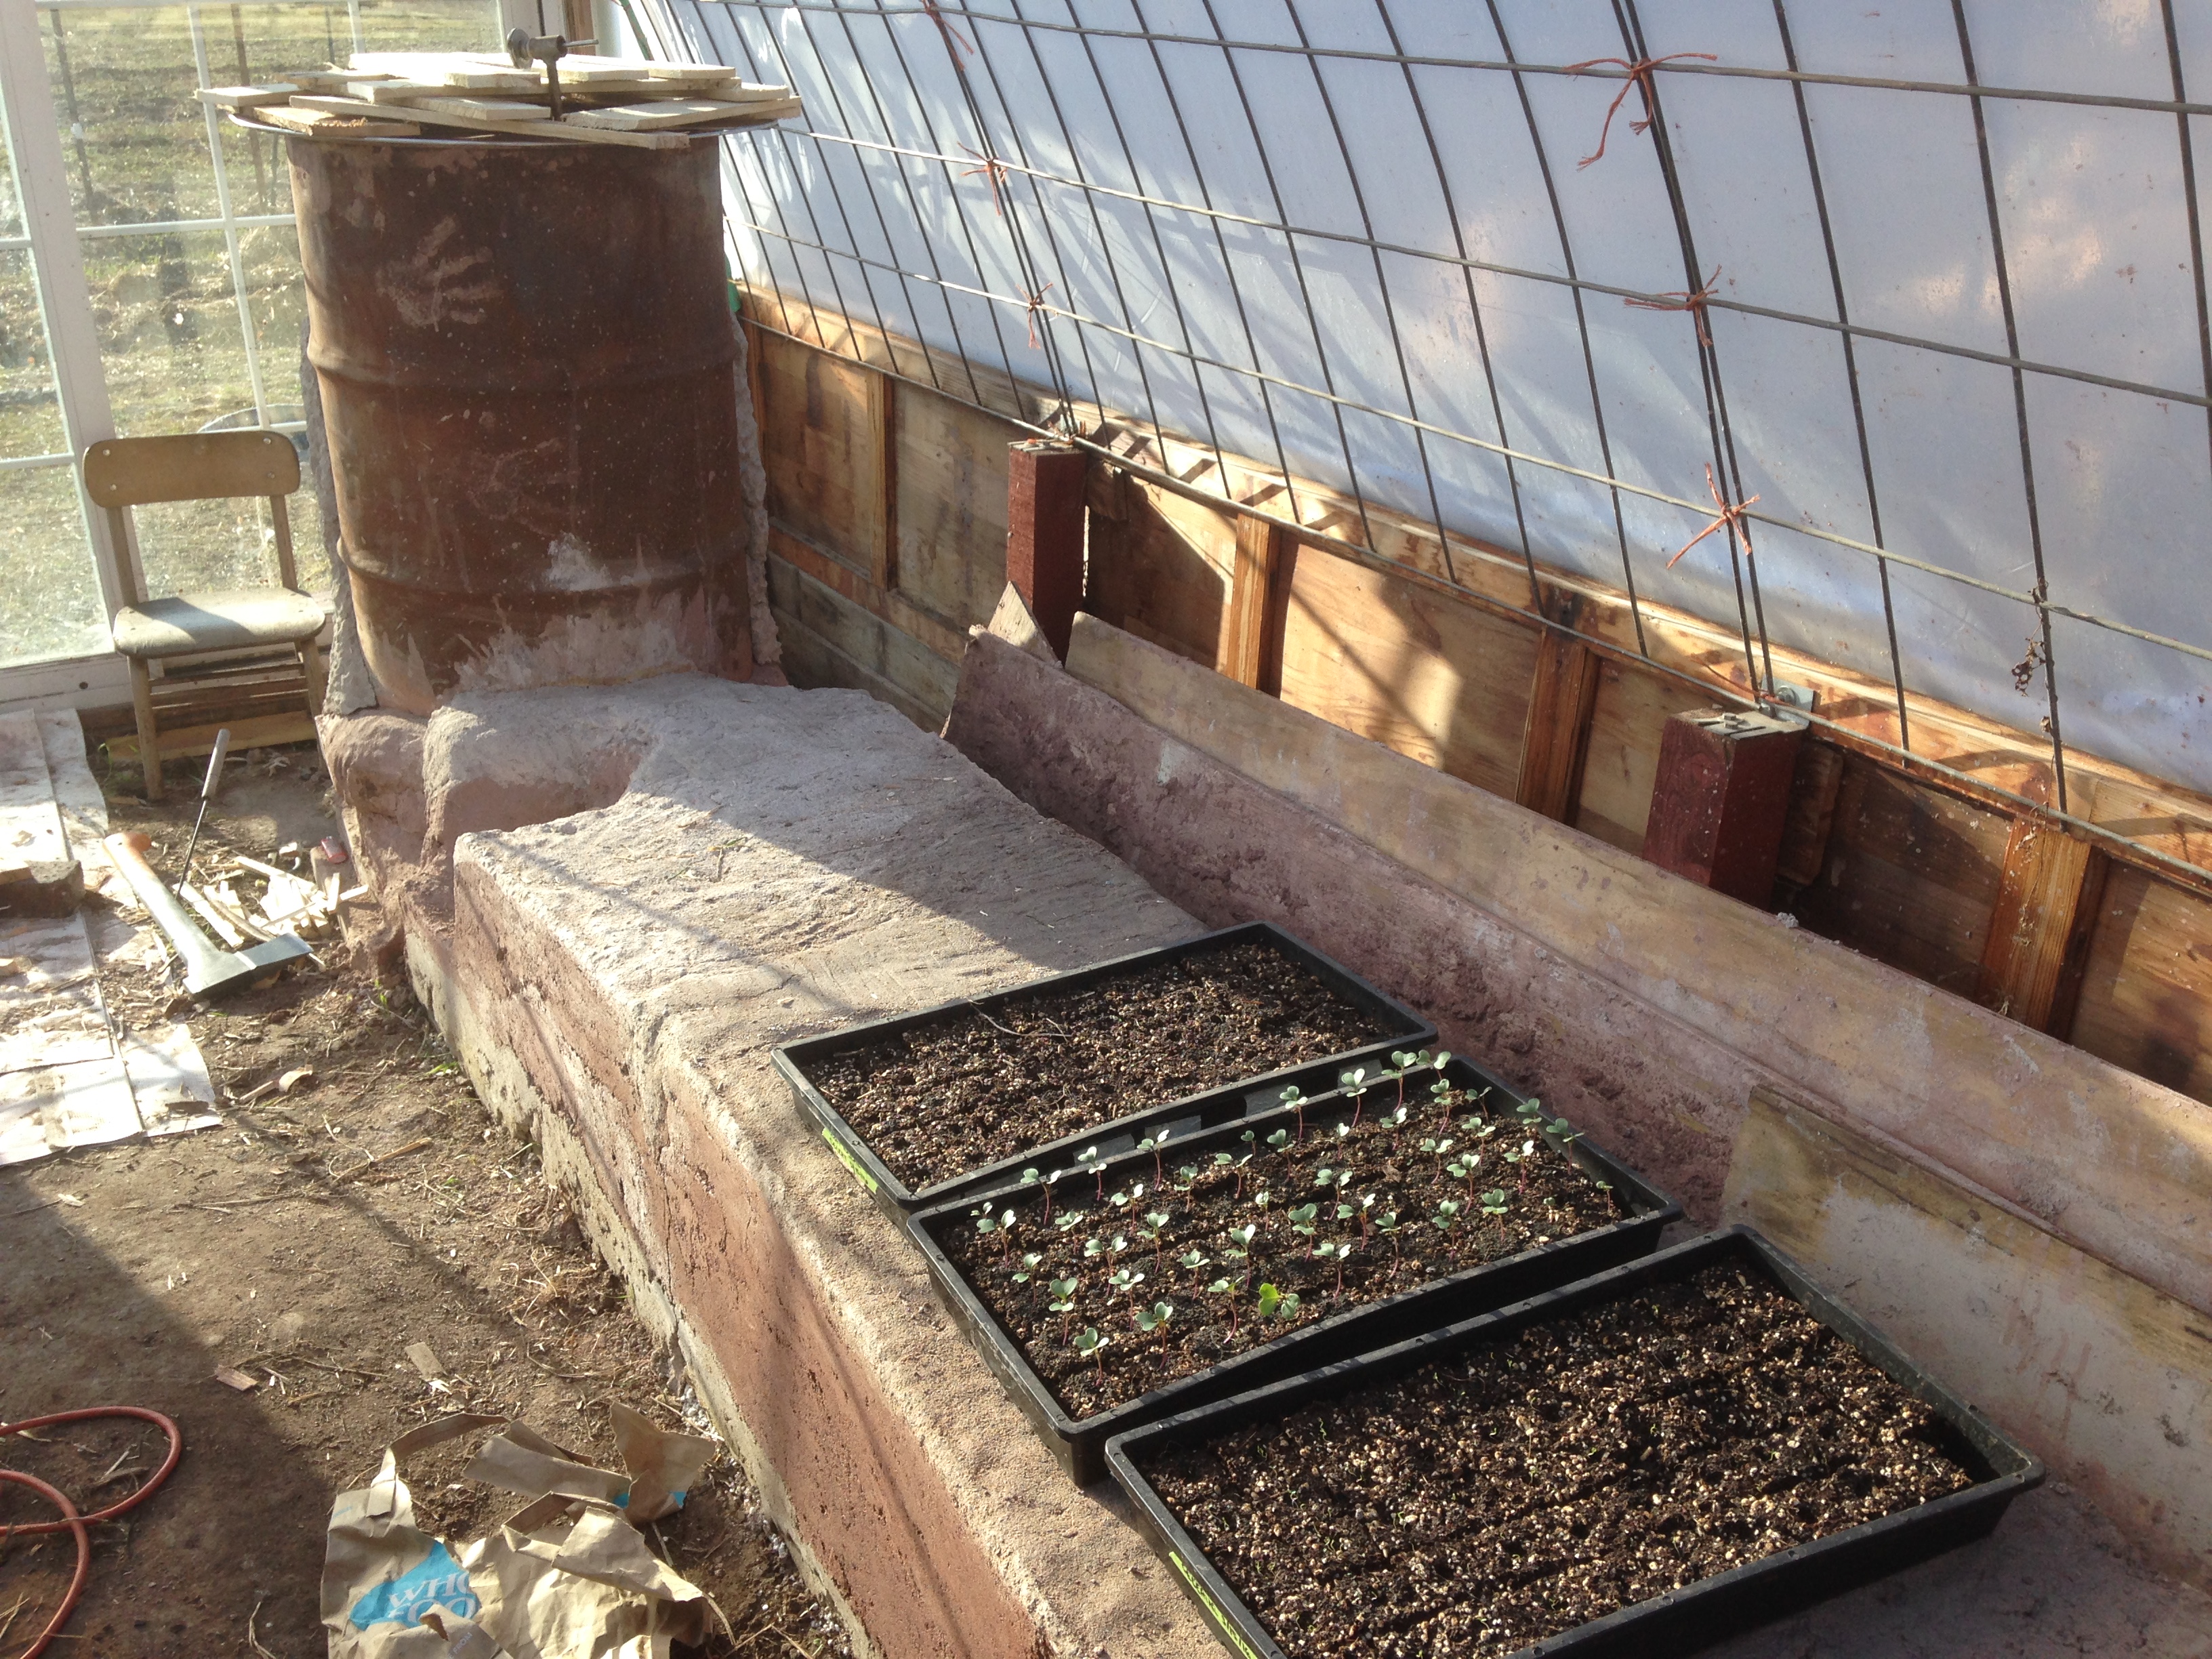
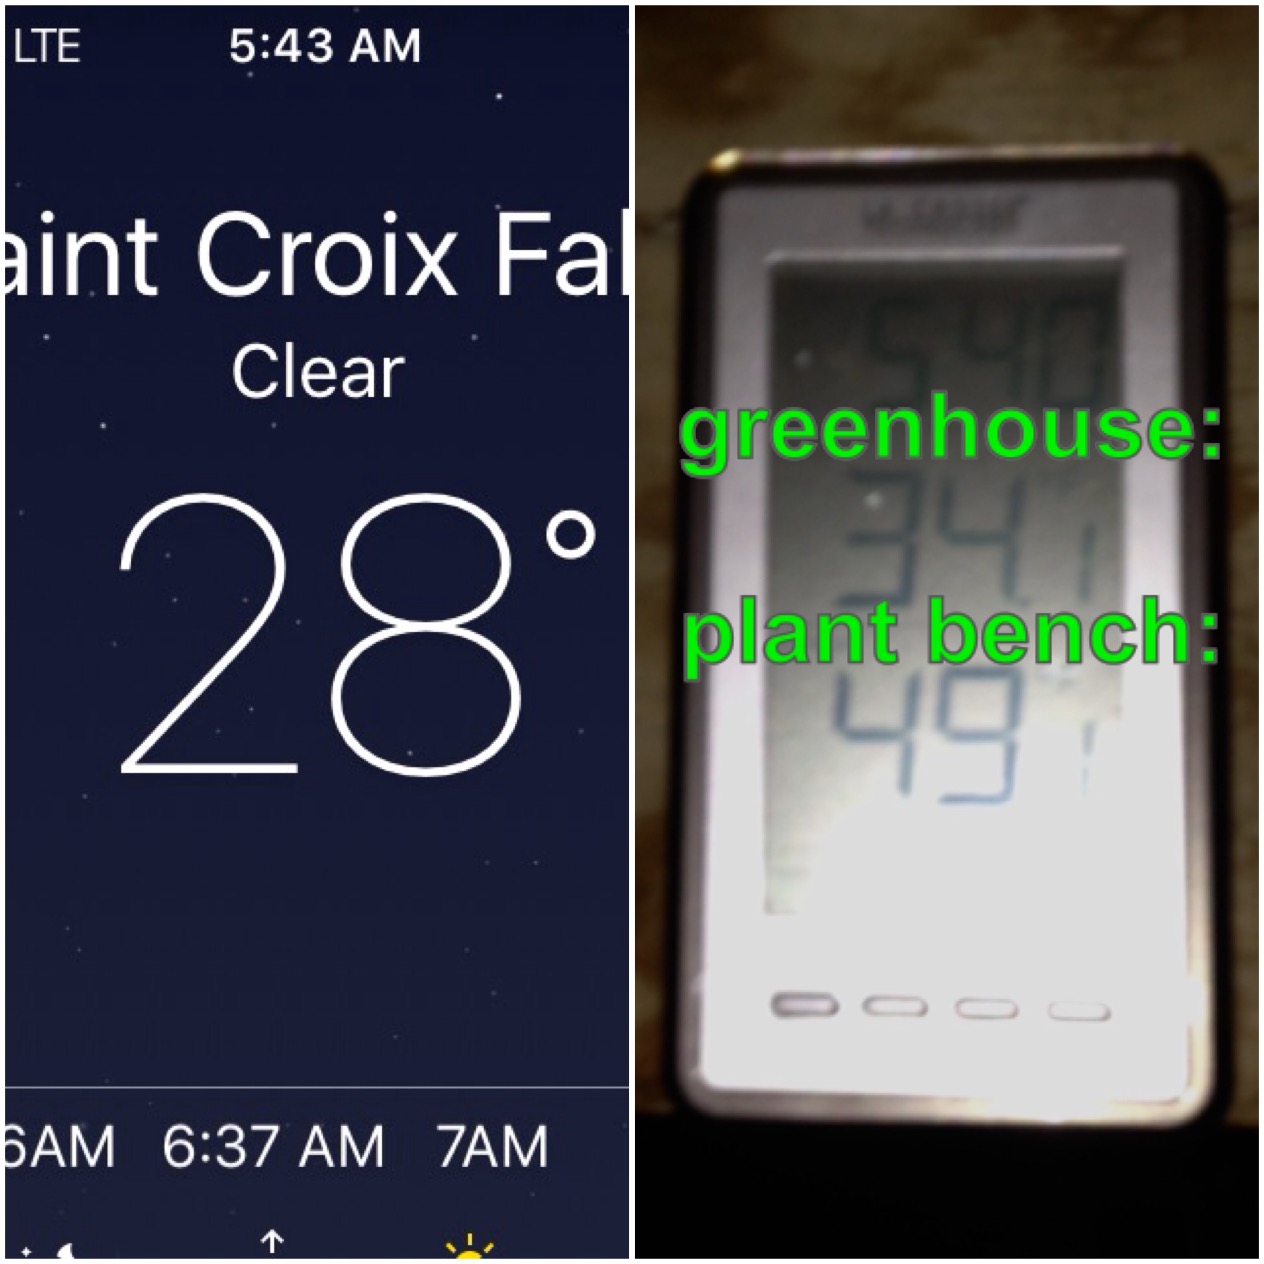
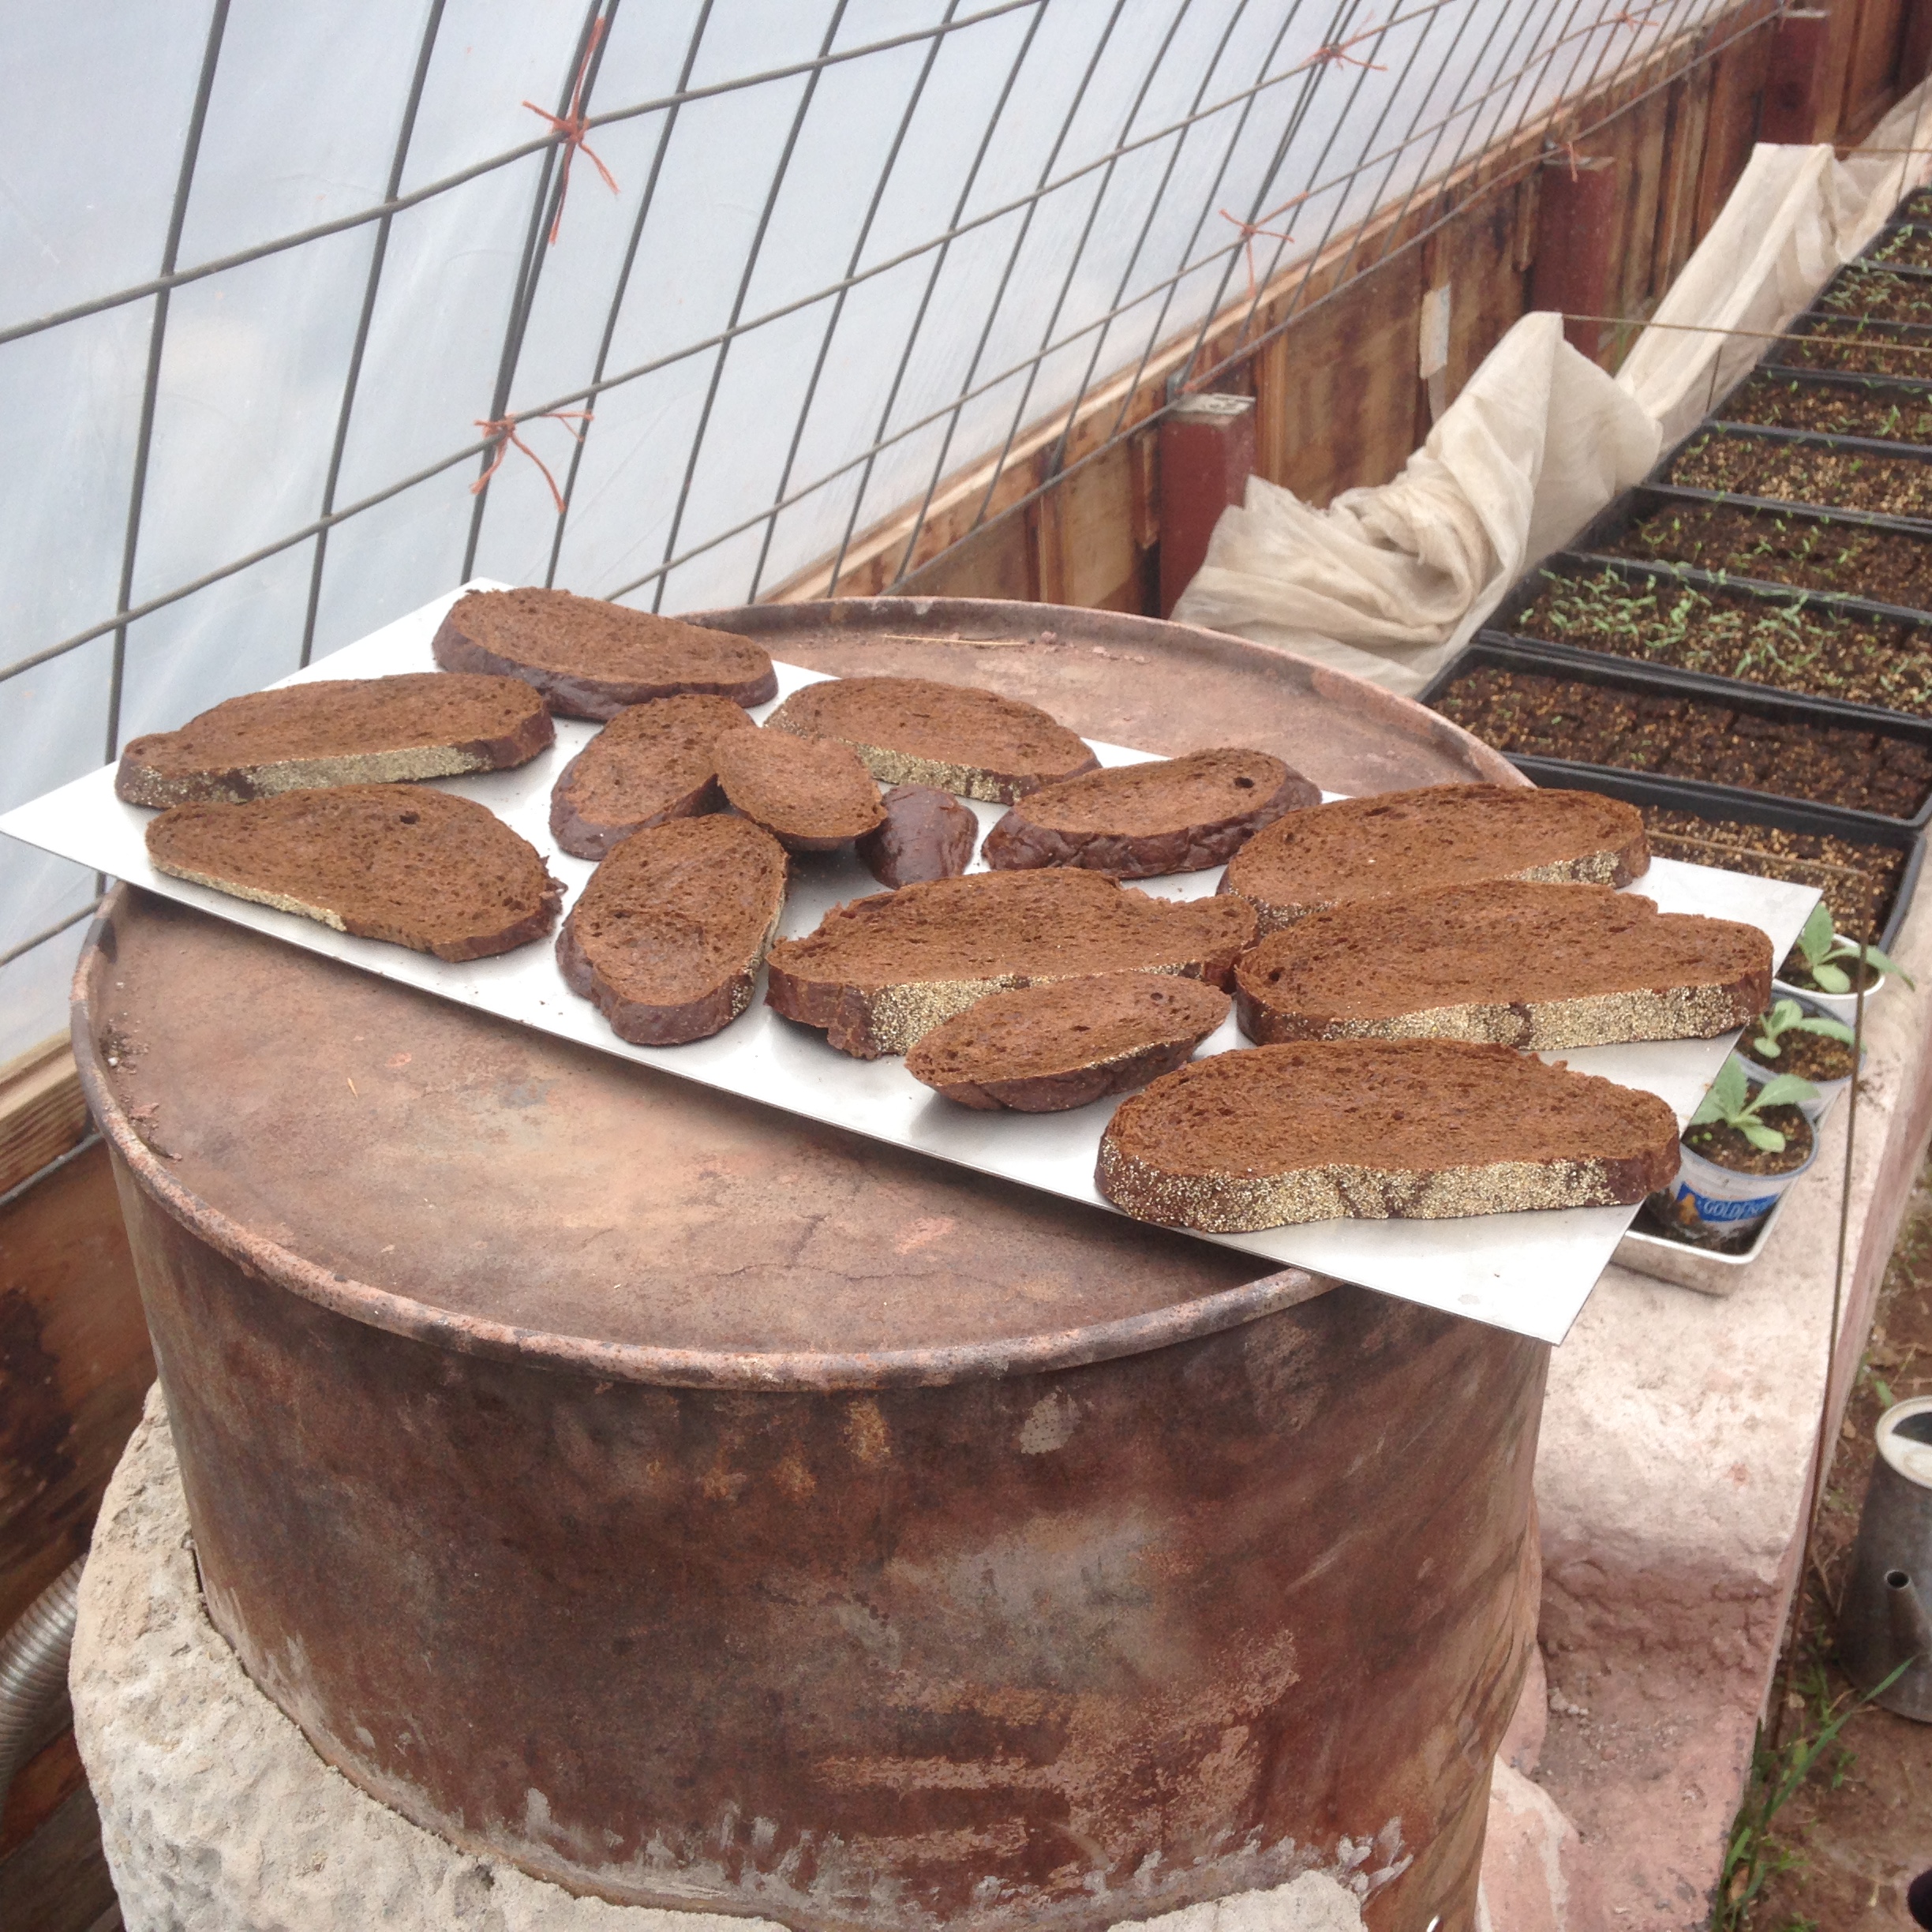
Before the chimney was upgraded further and before the thermal mass was fully dry – it was already working! Temperatures on the plant try bench stayed over 20 degrees warmer than outside, night after night – with no need to tend the fire after bedtime, and zero risk of the heat going out in the night – you can’t stop a warm giant rock from radiating! Plus it was warming the soil itself, and not just the air around the plants – great for happy, healthy root development.

IMG_4941 IMG_4828

IMG_5170
toasting bread for an experiment in making kvass

IMG_5166

reheating and crisping leftover pizza while firing the mass for the night
added a blast furnace window to the aluminum pot I use as a lid (saved from a now demolished Ford assembly plant)

IMG_4932 IMG_4936

It’s been a success. In recent nights just below 40 degrees, it kept the hot weather plants happily over 60 all night – maintaining the same 20+ degree heat increase seen at lower temps. It feels great to have it finally done, and really working wonderfully for our needs. It was a lot of work, but it was absolutely worth it. Plus, now we have experience in mass heater construction, so a mass heater in a future home is definitely a possibility …


CSA 2015 in Review – 2016’s Coming

Wow, what a ride 2015 has been. It started off hard, to be honest – as I recall the first CSA newsletter was titled “Farming is War,” and it didn’t feel like any exaggeration to say so. Our early plantings were devoured by cutworms and voles so thoroughly that I sometimes wondered if our field had somehow been rendered infertile. The weeds were ferocious, and nothing seemed to work out as planned … we rolled with the punches and practiced the zen of saying – and really meaning – “que sera, sera (what will be, will be),” and finding the beauty in our efforts and the absurd humor in our struggles.

Then summer came on, and things got better – and stayed that way right up through the end. The weather was gorgeous, rain was generous, tomatoes and squash did better than ever before. The high tunnel rose up, our WWOOFers were wonderful, and today we’re brewing our first batch of beer with the hops we grew.

IMG_1119

Best of all, we had our first event at the Farm – the potluck – and it was a truly lovely finale to the season – capping off the long lingering summer with an amazing last hurrah of 80 degree sunshine, perfectly timed for the celebration of all that was grown and accomplished throughout the year.

(Only downsides to the insanely warm October Sunday weather being swarming lady beetles and tourist traffic … que sera sera.)

I can hardly believe it’s time to start tearing down the field and preparing to head south – where we’ll be planning next year’s field, ordering seeds, and getting ready for another year of growing … hope you can join us again!

Stay tuned to the Facebook page and this website for updates from the field over the final weeks here, and from the road throughout the winter!

IMG_6912 IMG_6916 IMG_6924

IMG_2194 IMG_6914 IMG_6926   IMG_2200  IMG_2223 IMG_6900IMG_2204IMG_6909

2015’s Final CSA Box Newsletter, yo

The first frost at the end of last week was followed by several more of the same.

farmer's market prep when mornings are frosty includes getting a pot of water heated on the woodstove overnight - this can be added to a big bucket of icy well water (for cleaning veggies) to bring the temp to merely "cool" from "painfully freezing"
farmer’s market prep when mornings are frosty includes getting a pot of water heated on the woodstove overnight – this can be added to a big bucket of icy well water (for cleaning veggies) to bring the temp to merely “cool” from “painfully freezing”

image

We gave up on the pepper-plant-covering regimen and just harvested them all instead. There were a lot more than we thought, late bloomers that somehow correctly predicted the long summer that made their ripening possible, Indiana-Jones-eeking-beneath-a-closing-stone-door style.

It was a surprise treat for me, after being irked all summer by the lush plants’ stubborn refusal to flower when I thought they should do so.

image

We had buckets of peppers, little market demand for them, and a pepper-saturated CSA membership – so our tiny kitchen transformed into a pepper preservation laboratory.

While the rest of us worked in the field and on the high tunnel, Kristin transformed pails of peppers into Singapore Chili Sauce, Habanero Gold, Jalepeno Jelly, Jalepeno Pepper Salsa, and Tomatillo Salsa with a bunch of peppers, while teaching Nora how to can (Ground Cherry preserves).

image

The WWOOFers took a hillbilly hottub bath while we were away from the farm,  which was less relaxing than it should have been because I’d forgot to  include the use of protective plywood “butt boards” in my rushed tutorial before we headed on an unexpected trip into the Cities. (They mistook the buttboard for a shelf – useful, not not nearly as necessary …)

(Since I'd also zapped the hell out of B when he was helping me carry a long metal piece of fencing out of the field and over the electric fence, barefoot and in the rain, they started to suspect something sinister and kept the brush hook (aka "Machete Axe") that Shareholder Paul and gifted us close to hand in the Albatross at night.)
(Since I’d also zapped the hell out of B when he was helping me carry a long metal piece of fencing out of the field and over the electric fence, barefoot and in the rain, they started to suspect something sinister and kept the brush hook (aka “Machete Axe”) that Shareholder Paul and gifted us close to hand in the Albatross at night.)

Bucket the Cat warmed up to us, and the early adopters of the fall colors trend began to show themselves. And so did the lady beetles, unfortunately – hundreds of thousands of lady beetles (not nice lady bugs, but their jerk look-alikes), imported from Asian to munch the aphids that flourish in monocultural conventional soybean fields had been rendered aimless and adrift by the mechanized harvest of soybean fields somewhere nearby.

image

This afternoon, the swarms reached Que Sehra Farm as we worked to box up your shares – it’s likely that most of you have a lady beetle or three in your box, as a living commemorative keepsake. Wooo!

image

We made big progress on the High Tunnel project, with help from friends and family of the farm – everything is done now except the main roof plastic and the anchor cables … so if we get a day without wind between now and Sunday, it will be completed in time for the potluck!

imageimage

Hopefully there will also be time to get ready for it … lots to do and little time … but it’s an interesting, exciting kind of busy. Transformation is in the air, with the weekly CSA harvests ending, and our southern migration on the horizon.

image

B & Jim prepare to attach the anchor cables

And the first annual potluck is coming … the weather’s predicted to be beautiful (70-something and sunny!), and it looks like many good people will be coming together to celebrate the completion of a wonderful season.

image

We’re truly excited to see you there!


Box 18 – 2015’s Last Hurrah

delivery!
delivery!


Kristin says:

Popcorn
The secret to popcorn popping is the moisture content of the kernels. The white popcorn is drier and will be ready for popping sooner (I think in a couple weeks) than the yellow variety. You can test if it’s ready by heating a pot with a lid and adding a few kernels to the pot. Cover and wait to see if it pops. Sometimes it just splits open and becomes crunchy which is actually pretty awesome. If you want to enjoy your popcorn now, you can “oven-dry your shelled popcorn, just preheat the stove to 300 degrees Fahrenheit and put a large pan (a turkey roaster will do) of kernels on the rack. Then, turn the oven down to its lowest setting immediately, and dry the corn — stirring it occasionally — for five hours. After that time you can turn the heat off and leave the kernels in the oven to cool overnight.” – this according to Mother Earth News.

Spaghetti Squash

We have lots this year! It’s versatile – here’s some ideas if you’re feeling stumped:

http://www.foodandwine.com/blogs/2013/12/16/10-ways-to-use-spaghetti-squash

Butternut Squash
I love winter squash soup, butternut squash ravioli and lasagna, cubed and roasted squash, and squash in smoothies. So many options!

Acorn squash in big shares for variety sake.

Carrots
Good in soup and salads. We included some of the greens too, since they are great for making broth.

Celeriac
Grown for the root primarily instead of the stems. Unfortunately, our roots didn’t bulb up much probably because we were in Arizona when we should have been starting celeriac seeds. Eat the bulb and use the leaves for making vegetable broth. You can eat the stems too, but I recommend dicing it up so it’s not too fibrous.

Salad mix
Last CSA salad of the year! Lettuce, spinach, arugula, pea tips, mizuna, and tat soi.

Dill
Dried dill is an excellent popcorn topping. I like dill with eggs, potatoes, beets, and chopped up in mayonnaise.

Pumpkins
Connecticut Field and Rouge Vif D’Etampes are both edible and used for making pies and other winter squash dishes. I made pickles with the Connecticut Field pumpkins last year. Some say these varieties have a lot of liquid, so I recommend roasting them, scooping out the flesh and allowing it to drain before using. Check out these recipes:
http://whistlingtrainfarm.com/pumpkin-soups-from-simple-to-dramatic/

Decorative gourds
Should you eat these? No.

Random pics of the week:

the biggest pumpkin in the patch ....
the biggest pumpkin in the patch ….
... had a vole nest tunneled beneath it - where they'd lived safely beneath edible protection.
… had a vole nest tunneled beneath it – where they’d lived safely beneath edible protection.


tadpoles are still hatching
tadpoles are emerging

image  image imageimage image image


Week 17 – Autumn Arrives

image

The week began warmly, with the first official day of Fall reaching almost 80 degrees – and it ended frostily, with a freeze last night, after the CSA harvest.

full moon over the processing area


We haven’t been back to the Farm to take stock of the impact (and I’m sad we missed getting the traditional beautifully-melancholy photos of the first frost crystals on the field), but it sounds like we probably dropped down to at least 30 degrees, so many of the plants will be done for the year.


old Cleo can't get around easily at 15, but she still follows us around the outside of the field and keeps an eye on us - here, watching us cover up pepper plants
old Cleo can’t get around easily at 15, but she still follows us around the outside of the field and keeps an eye on us – here, watching us cover up pepper plants


Thankfully, the cold-sensitive tomatoes and basil were already kaput, we’d just harvested the last of the eggplant, and before we left to deliver boxes we covered up 400 feet of late-bloomer pepper plants with a gypsy assortment of bedsheets and used row cover material.

image

As the plants slowed down, the workload didn’t – although last week was a pleasantly relaxing lull as the seasonal gears shifted, this week brought the reality of new work crashing home.

All week I’ve awakened (usually around 4am, and then again when the sun came up) with anxious awareness of just how much work there is to do before we head south for Winter – and how little time there is before that happens …

image

The high tunnel project is moving along, but there is still much to do – and if it is not completed and inspected before we go, we lose the grant – and will have to spend ten thousand dollars. And I hope to design and build a rocket mass heater in the little greenhouse that will be ready to rock when we return in March, to keep next year’s seedling alive through the frigid nights of the winter/spring transition.

This week Kristin canned the last of the flawed tomatoes (so much BBQ sauce and ketchup!), and our intrepid musical WWOOFers B & Nora started tearing down and removing the tomato plants from the field.

In preparation for the oncoming cold, I decided to do a little chimey maintenance on the woodstove, thinking I’d replace the rusty external elbow pipe with a new clean-out “T” …

the exterior elbow was almost blocked with creosote flakes


… however, once I pulled it apart and saw just how much creosote had built up in there (no WONDER the draft had been so fickle and weak this spring!), the “quick fix” project became an all-day affair of replacing the old entire single-wall pipe we’d been fortunate to have as a short-term solution with scavenged and donated triple-wall insulated pipe.

imageimage

image

The new chimney will not only have a much more effective draft, but will have a lot less condensation and creosote build-up … and now I’m excited to start using it, my previous firewood-hoarding drive be damned.

all done - topped off with the amazing milk can chimney cap from the ruins of Old Henry's place (where we got the car panel siding to build the Rust Shack)
all done – topped off with the amazing milk can chimney cap from the ruins of Old Henry’s place (where we got the car panel siding to build the Rust Shack)

Just ONE more box left after this! Ahh! It has been a simply gorgeous season – the most perfect summer I can recall … we feel so lucky that we’ve been able to spend it outdoors growing food for ourselves and you.

image

Box 17

Kristin sez:

Acorn squash
These will store for about a month on your counter. They make cute edible serving dishes for soup or pilaf. Usually it’s best to roast them until they are just tender before filling. I love brown sugar or maple syrup with squash but savory preparations are great as well. This recipe for squash with kale and sausage caught my eye http://www.epicurious.com/recipes/food/views/acorn-squash-with-kale-and-sausage-51203850

Spaghetti squash
Wow. These did really well this year!

image

They will also store about a month on your counter. Fritters?

Red kuri squashlarge shares only
Our first time growing these and we didn’t get many. A dry crumbly texture. Quite delicious.

Potatoes
We didn’t wash them this time. They store better that way. (And the water was very cold today.)

Eggplant
Last ones! We decided to harvest them all and not try to save the plants from frost. I plan on roasting mine over fire and making my favorite eggplant dish: baba ganoush.

http://www.food.com/recipe/baba-ganoush-the-best-in-the-world-67570

Salad turnips
Sweet and not too turnip-y. Definitely a nice addition to salad but also good to just chomp down raw.

Salad mix (lettuce, spinach, pea tips, mizuna, arugula, tat soi)
I put leftover dressed salad in a food processor and blended it into a pesto-like concoction that I then tossed pasta in. Not bad!

Cilantro
Guacamole.

Parsley

image
Add to cream sauce.

Mustard greens
These are intensely peppery raw. I like it cut up as part of a salad. Cooking it may appeal to you more. You can prepare it as you would kale or collards. Sauté it with garlic, onions, soy sauce, chili flakes, and lime or lemon.


imageIMG_2284

Summer’s Slow, Sweet Farewell – CSA Week 16 Newsletter


Wanna talk about the weather?

We do that a lot these days. It’s not bad. It’s more meaningful than many popular conversational topics, I reckon.

IMG_2198

So. I love this weather. And I love this summer’s slow fade. After the intense spring season, this feels like a hammock in the sunny breeze.

IMG_2229 Sometimes, literally.

There is still so much work to do, and sure, we’ve been doing a lot of it. But it feels much more relaxed, less life-and-death. Pull a clump or two of tall grass seedheads out every trip out of the field, but not launch a project to weed out entire rows, or commit total weed genocide.

IMG_2225

The mellower temps make harvest less intense as well – things aren’t going to wilt in minutes if not cooled, and ice blocks survive for much longer in the unpowered old chest freezers. Waking with the sunrise now often means sleeping in by springtime standards, and the skies darken absurdly early. Is this really so surprising, year after year?

IMG_2224

So it is cooler, but still surprisingly and wonderfully warm. We’re past the average first frost date by a week now, and haven’t given in to firing up the woodstove yet. The WWOOFer musicians have been sleeping out in the starry breeze in The Clearing on The Hill. The literal snowbirds fly over our heads and make us contemplate our own coming migration … as we sit out comfortably in the t-shirt sundowns.

doing dishes at sunset

Hopefully it holds to some extent through the first couple weeks of October, because we’re going to have our first ever event on the farm –  a potluck for friends of the farm.  (If you’re reading this, that almost certainly includes you.)

After a month with us, WWOOFer Bryan is heading back to Chicago today – with plans to return for the potluck. I love the connections that WWOOFing forges; there is just something about living within a farm, maintaining the living system, together.  Here’s some of the things Bryan saw and captured over the last two weeks … followed by a haiku he left behind for us:

image4(2)IMG_0775IMG_0776

image1(4) image6(2) image4(3) image2(1) image2(2) image5(1) image1(3) image4(1) image2(3) image3(2)

Goodbye to tickling
black flies, friends fresh as summer
fruits of sun-washed love.

CSA Box 16

Harvest went smoothly today, even with the return of salad mix. We had a big crew that all know the ropes, and things are just simpler at this time of year – we can harvest some crops the evening before, and overall, the field is settling down. It was still a challenge to get everything in the boxes, even as Kristin started harvesting more stuff in case they were too empty …

  • September Salad Mix (lettuce, pea tips, spinach, arugula, tat soi, mizuna)
  • Green Tomatoes – it is time for Fried Green Tomatoes! Maybe? Or try one of these green tomato recipes.
  • Tomatoes – the last of the season!
  • Ground Cherries – I like opening up several at a time and munching them all at once, to blend the varied flavors.
  • Kale – Put a little in everything. Or get creative, and try one of these recipes that have been deemed creative.
  • Butternut Squash – easy to peel if you want to cube it up and sautee it. Or halve it and roast the whole thing.
  • Pepper Party – Those late bloomers are finally starting to produce! If they are orange, they are hot, but other than that you get to play Pepper Roulette, same as I do (today’s lesson for me was that yes unripe green cayenne peppers are just as hot as ripe ones are).
  • Broccoli – This has been the best year yet for broccoli on our farm – perhaps due to the regular rains and/or our improving soil and composting … hopefully having a little broccoli regularly is something you enjoy as much as we do.
  • Beets (mostly Chiogga variety)

Shareholders Paul & Elizabeth sent in these pics:

“Elizabeth cooked up a gem!! QSF halved squash baked at 350 with  sausage. At 45 minutes 90% of previously diced QSF eggplant, three kinds of diced QSF tomatoes, diced QSF onion (all mixed with olive oil and a bit of vinegar). At 1 hour the last 10% of the diced veggies and some of the mozzarella we made for five more minutes.”

image(2) image(3)
YUM.


More pics from this week:


prints in the muck - they lowered the Croix by 8 feet upstream of the dam for repairs, so we went to check it out with Kristin's folks
prints in the muck – they lowered the Croix by 8 feet upstream of the dam for repairs, so we went to check it out with Kristin’s folks


this snake may have bitten off more than it can swallow

IMG_2188 IMG_2242 IMG_2237  image image

stacking the free insulative firebricks we scored for the greenhouse rocket mass heater (TBD)
holy basil hillbilly hottub bath remnants